
Procedural Scaffolding Generator


My goal was to develop a real-time, efficient, and flexible scaffolding tool that could be used to construct large-scale environments with ease and interact with the environment. I wanted to enable users to effortlessly modify meshes, materials, and overall aesthetics, all within the Unreal Engine environment.
Procedural Scaffolding Generator
# This post is divided into 2 parts: Tool Demo || Tool Breakdown
Scaffolding Tool Demo:
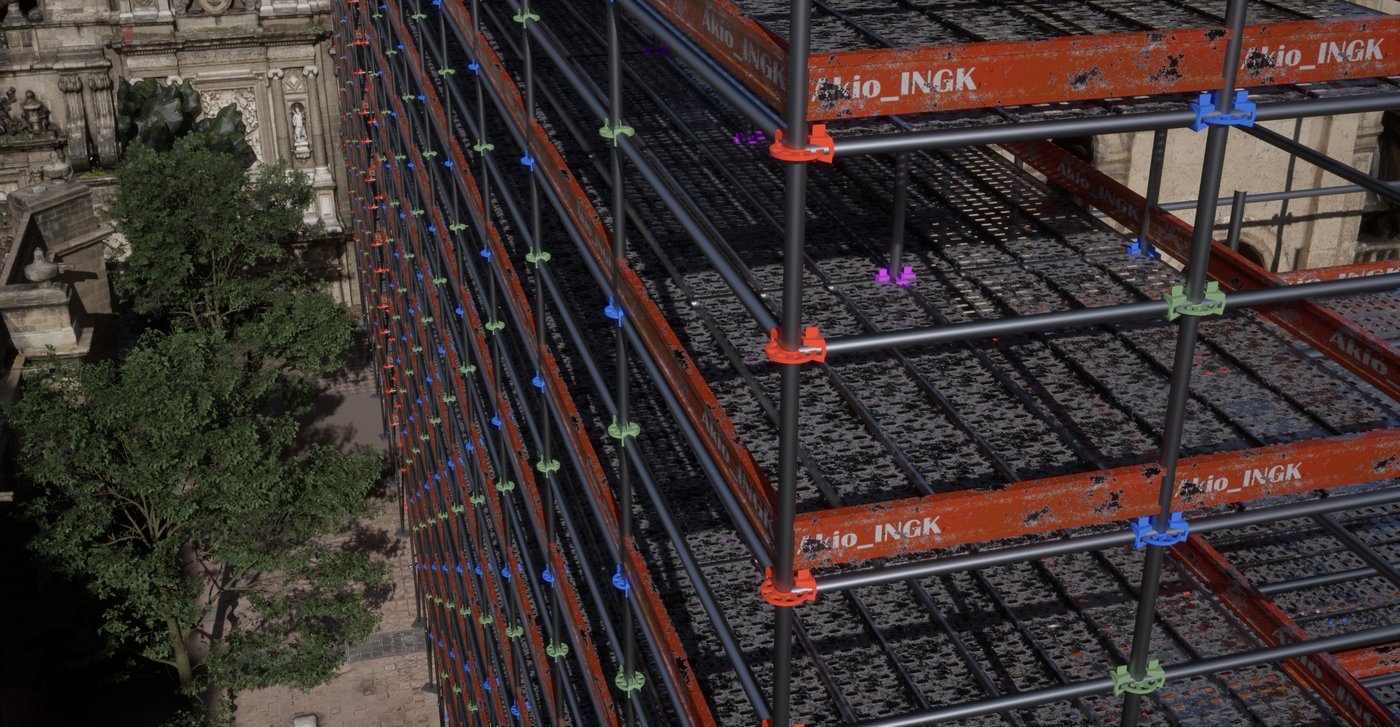
Cathedral Scene Breakdown:
The inspiration for the scaffolding generator came from the awe-inspiring Titan Project demo created by SideFx, showcasing the benefits of a procedural workflow. Intrigued by the scaffolding tool featured in the demo, I searched for tutorials or resources to understand its construction but found none. Determined to create my own version, I embarked on the project.
My goal was to develop a real-time, efficient, and flexible scaffolding tool that could be used to construct large-scale environments with ease and interact with the environment. I wanted to enable users to effortlessly modify meshes, materials, and overall aesthetics, all within the Unreal Engine environment.
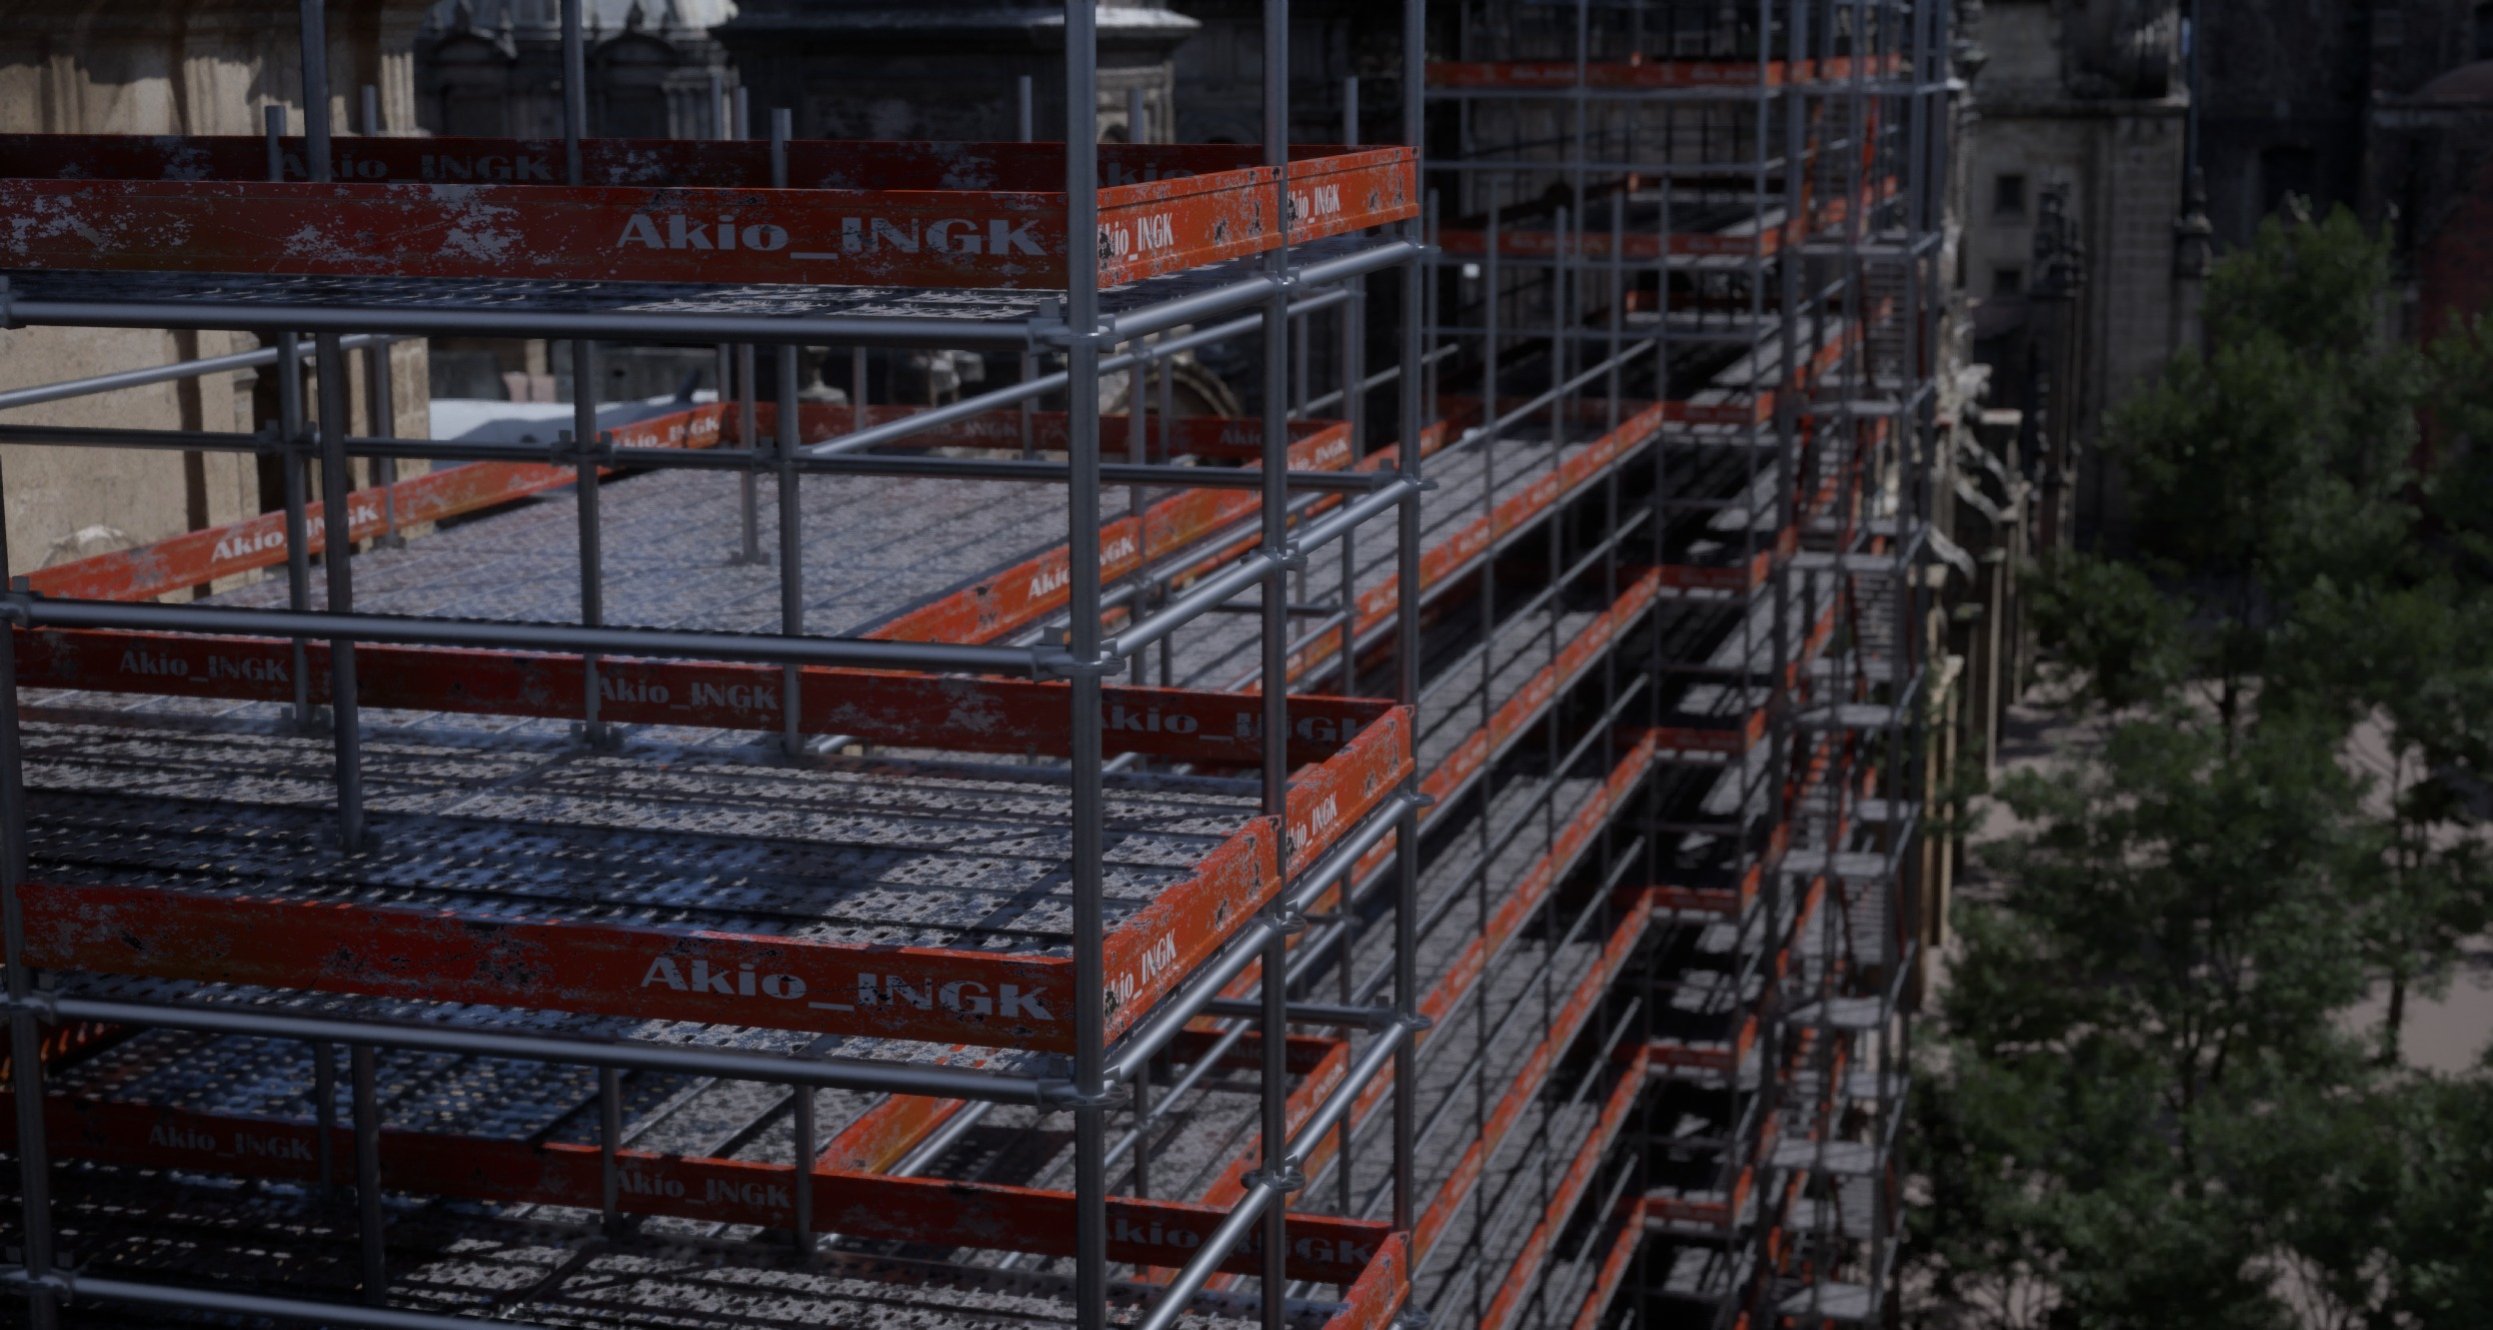
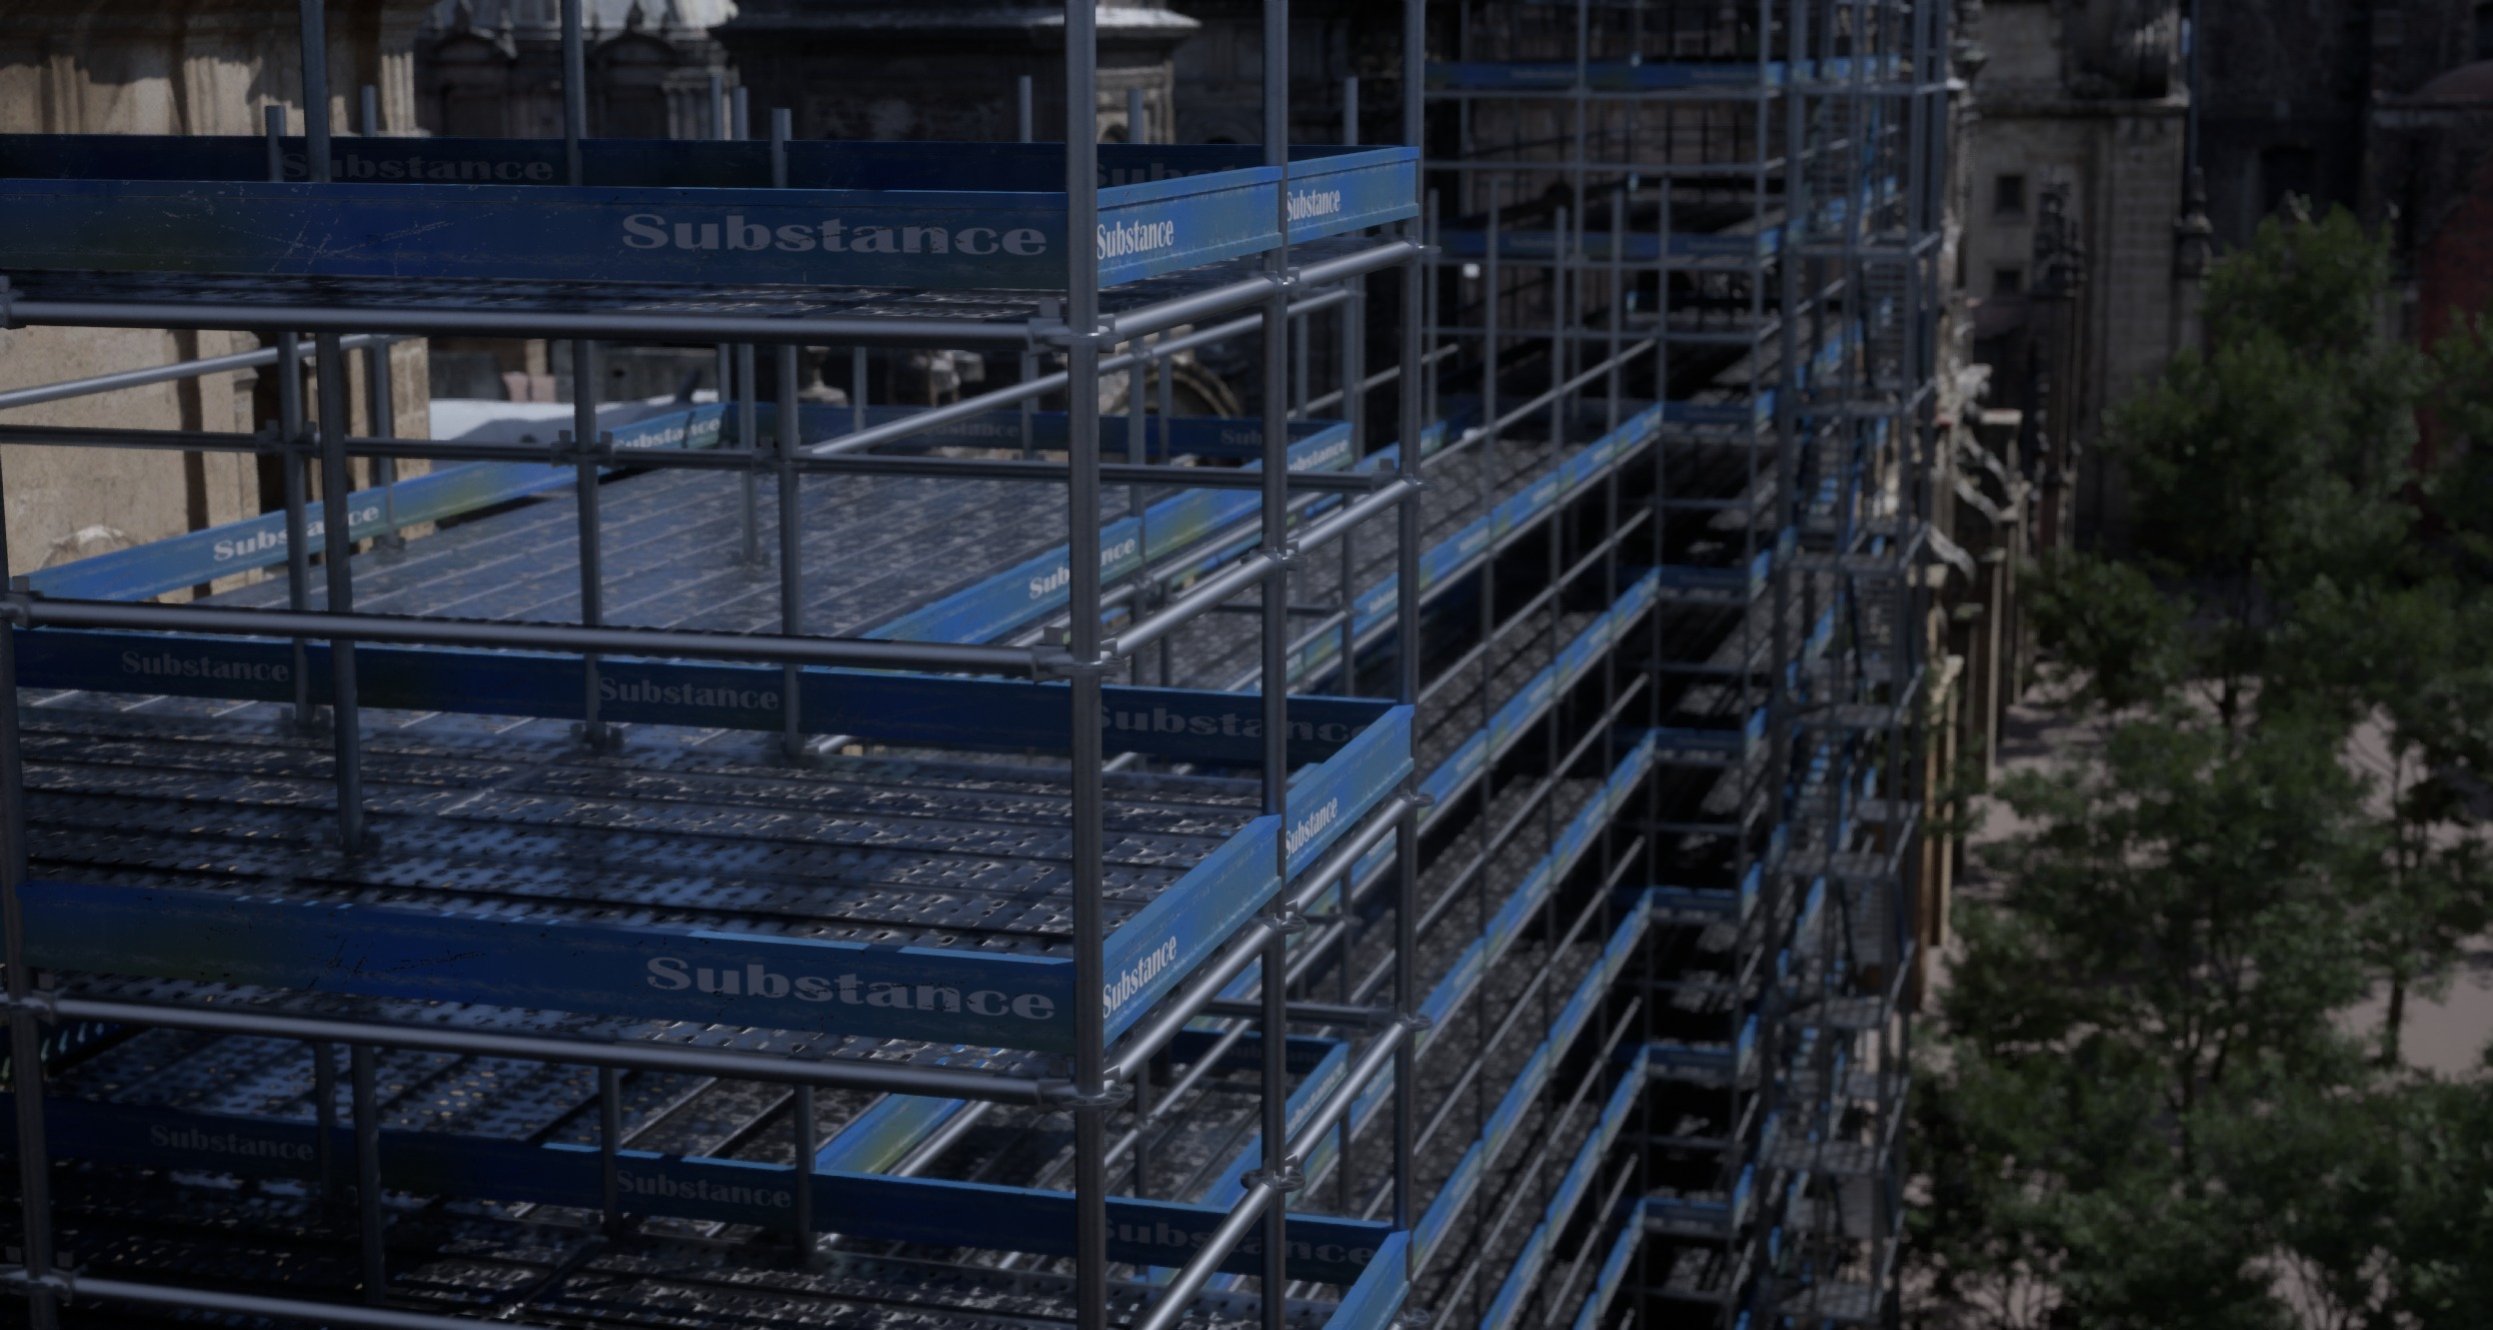
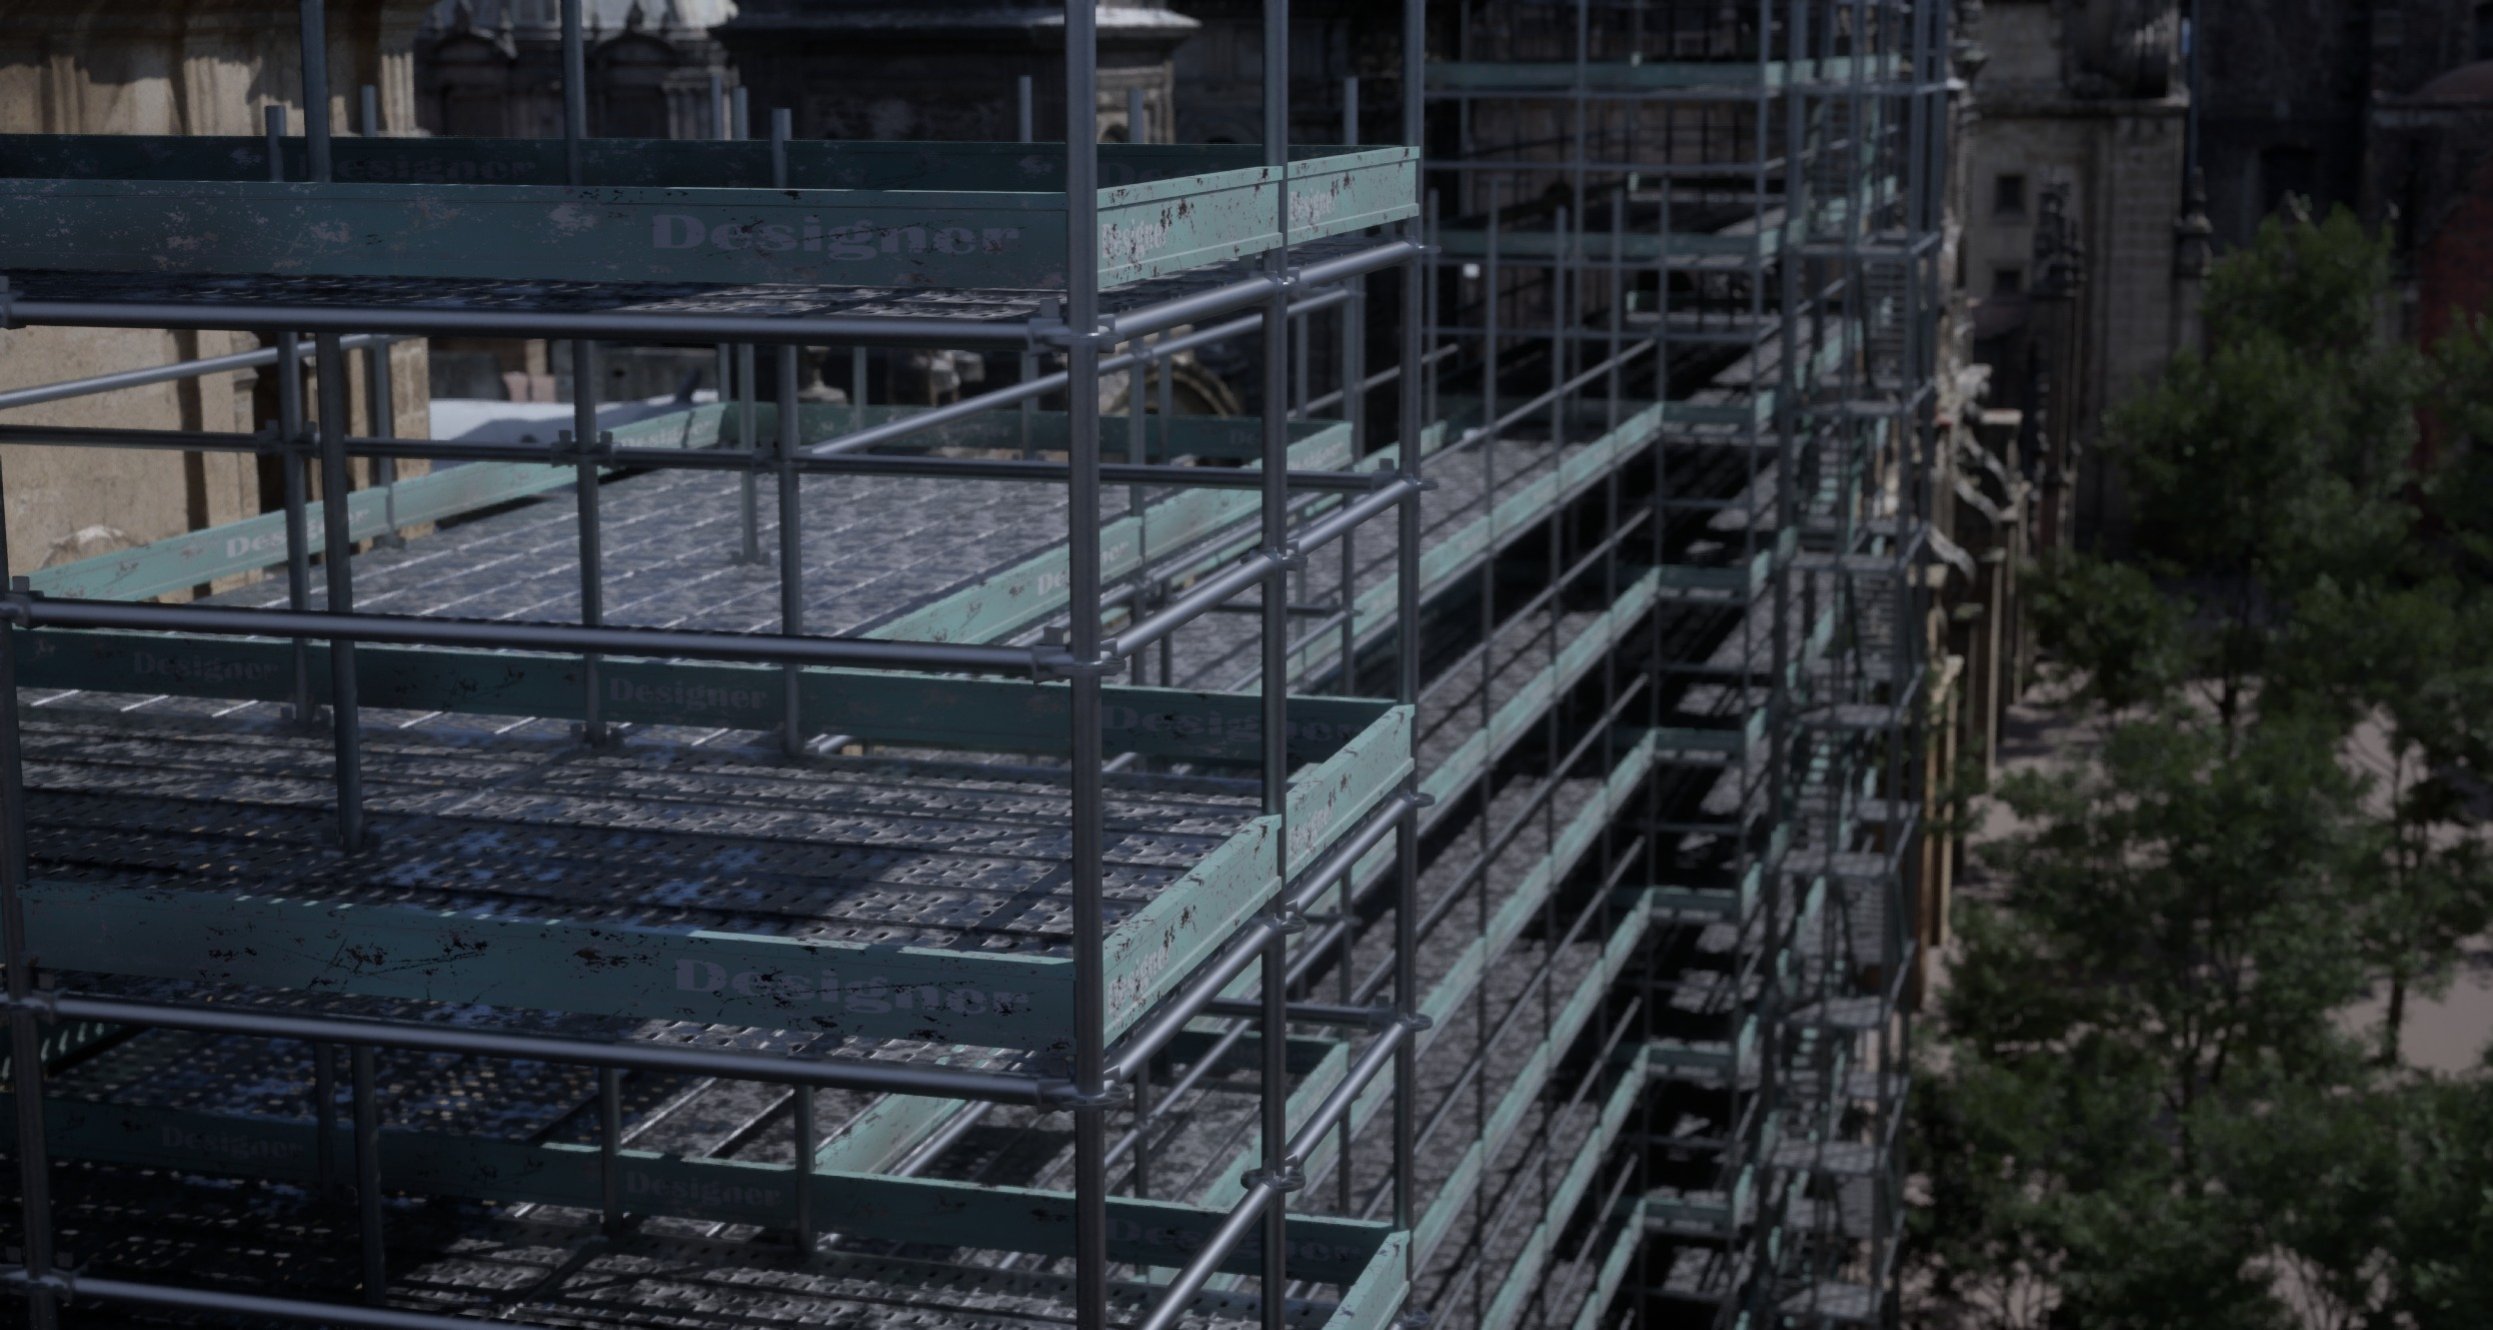
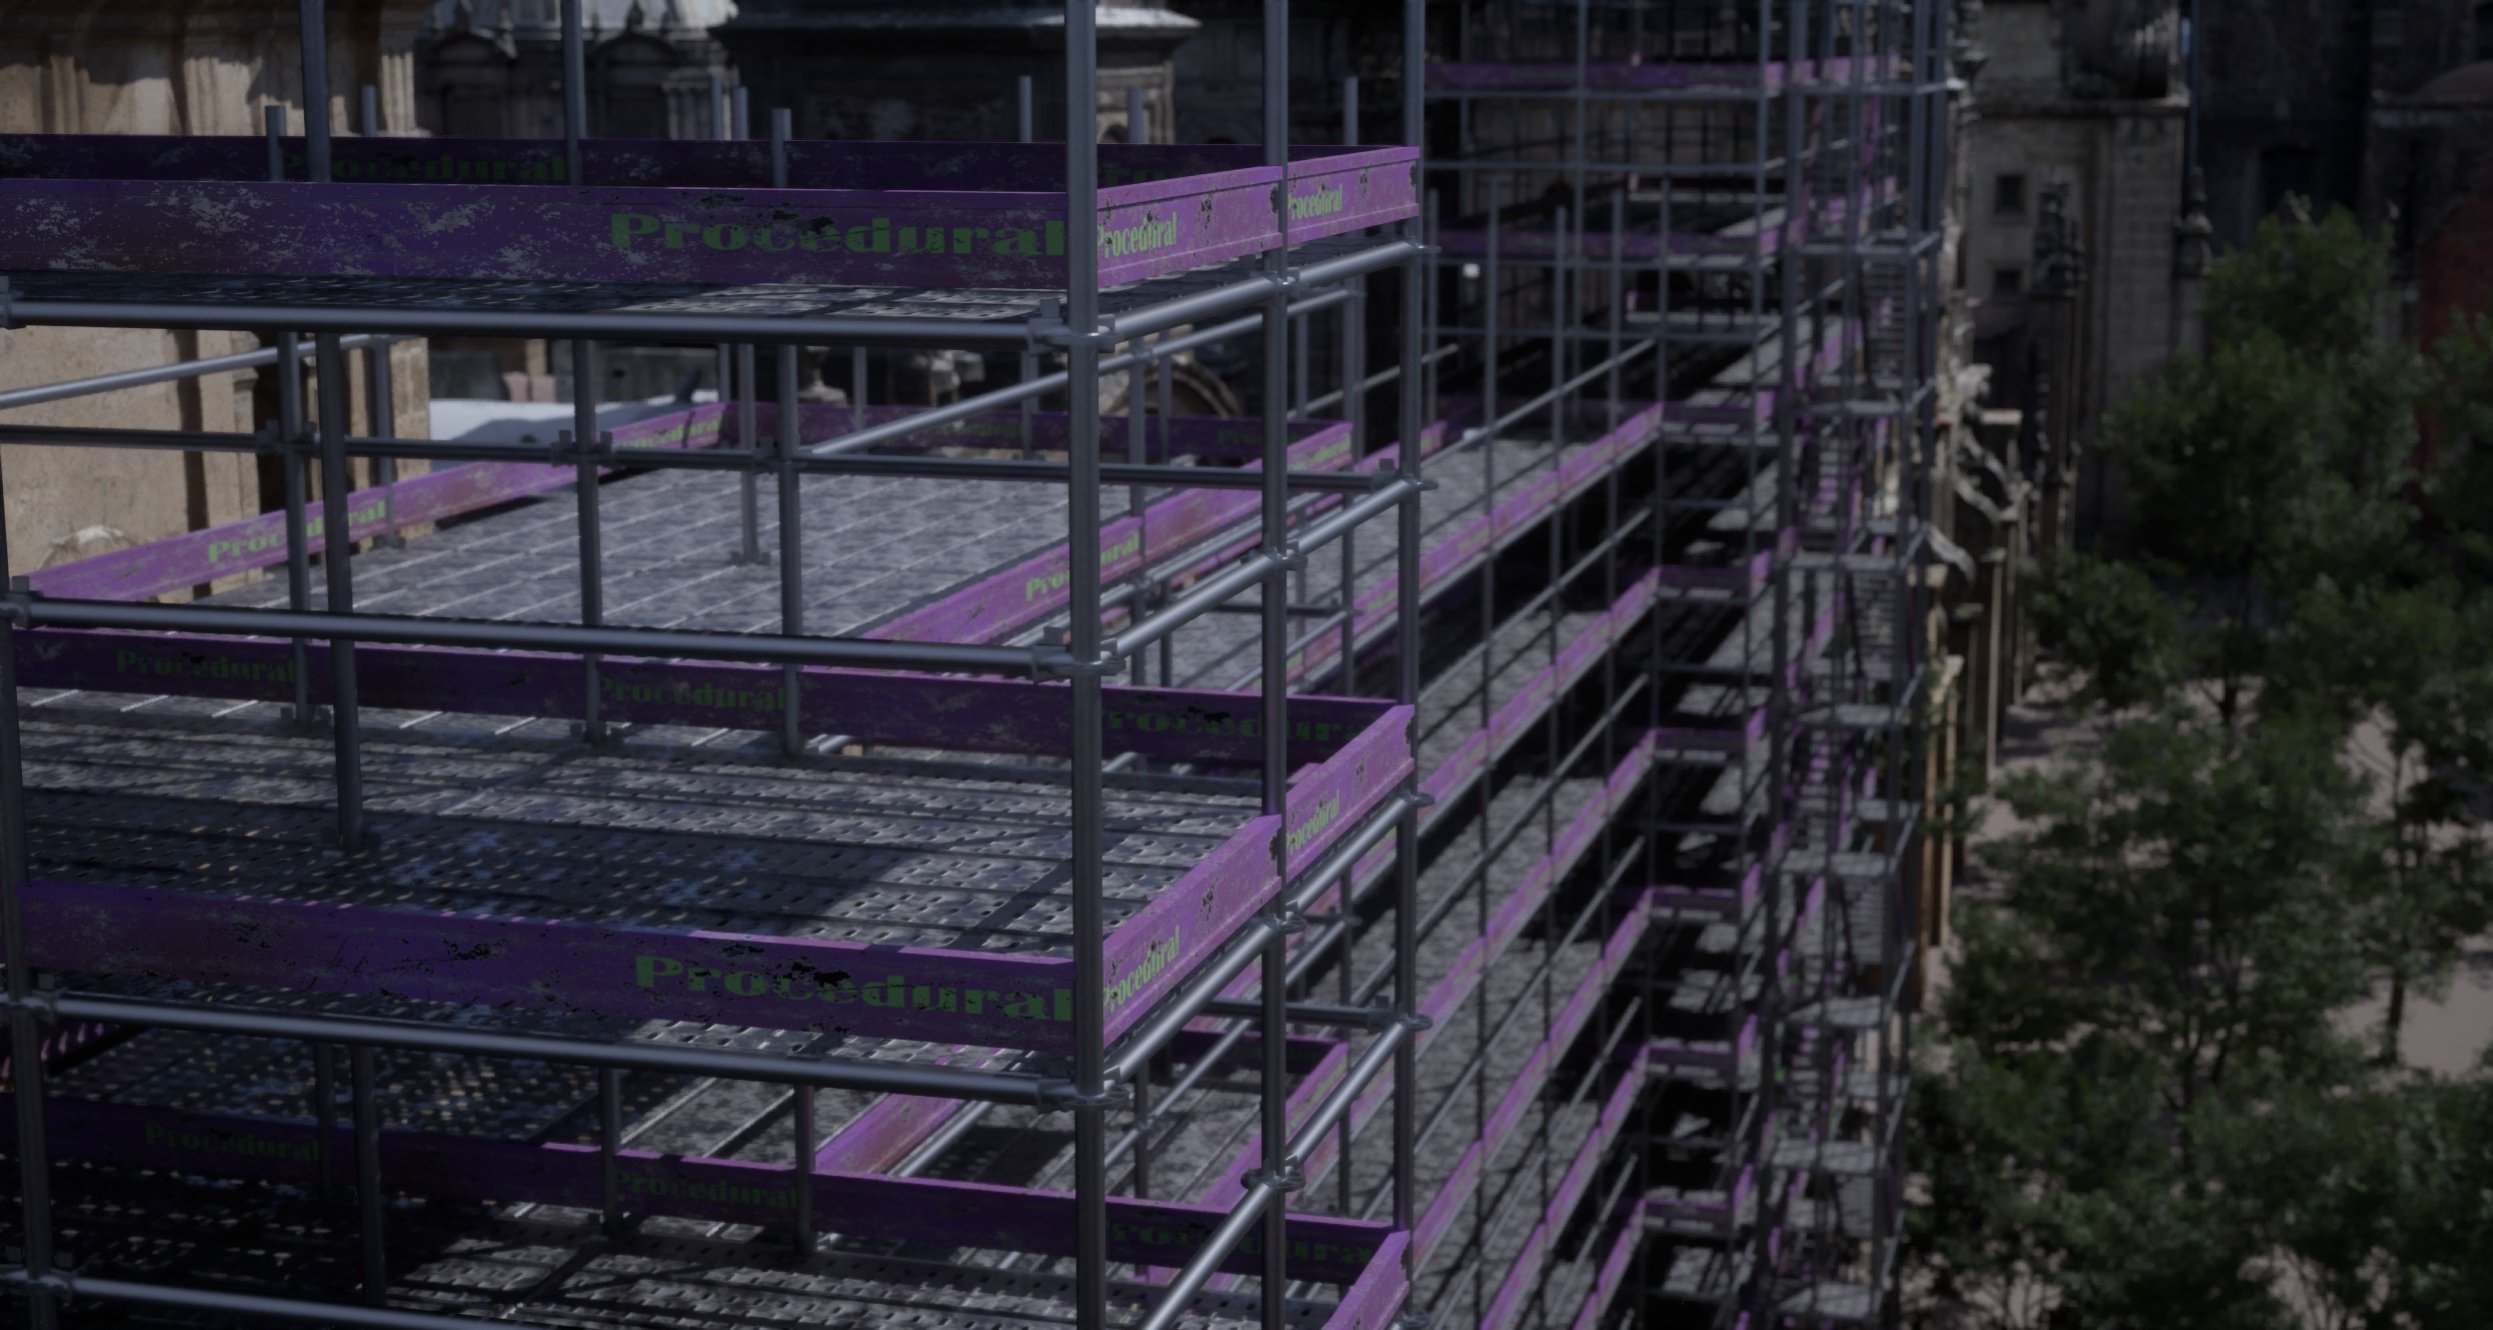
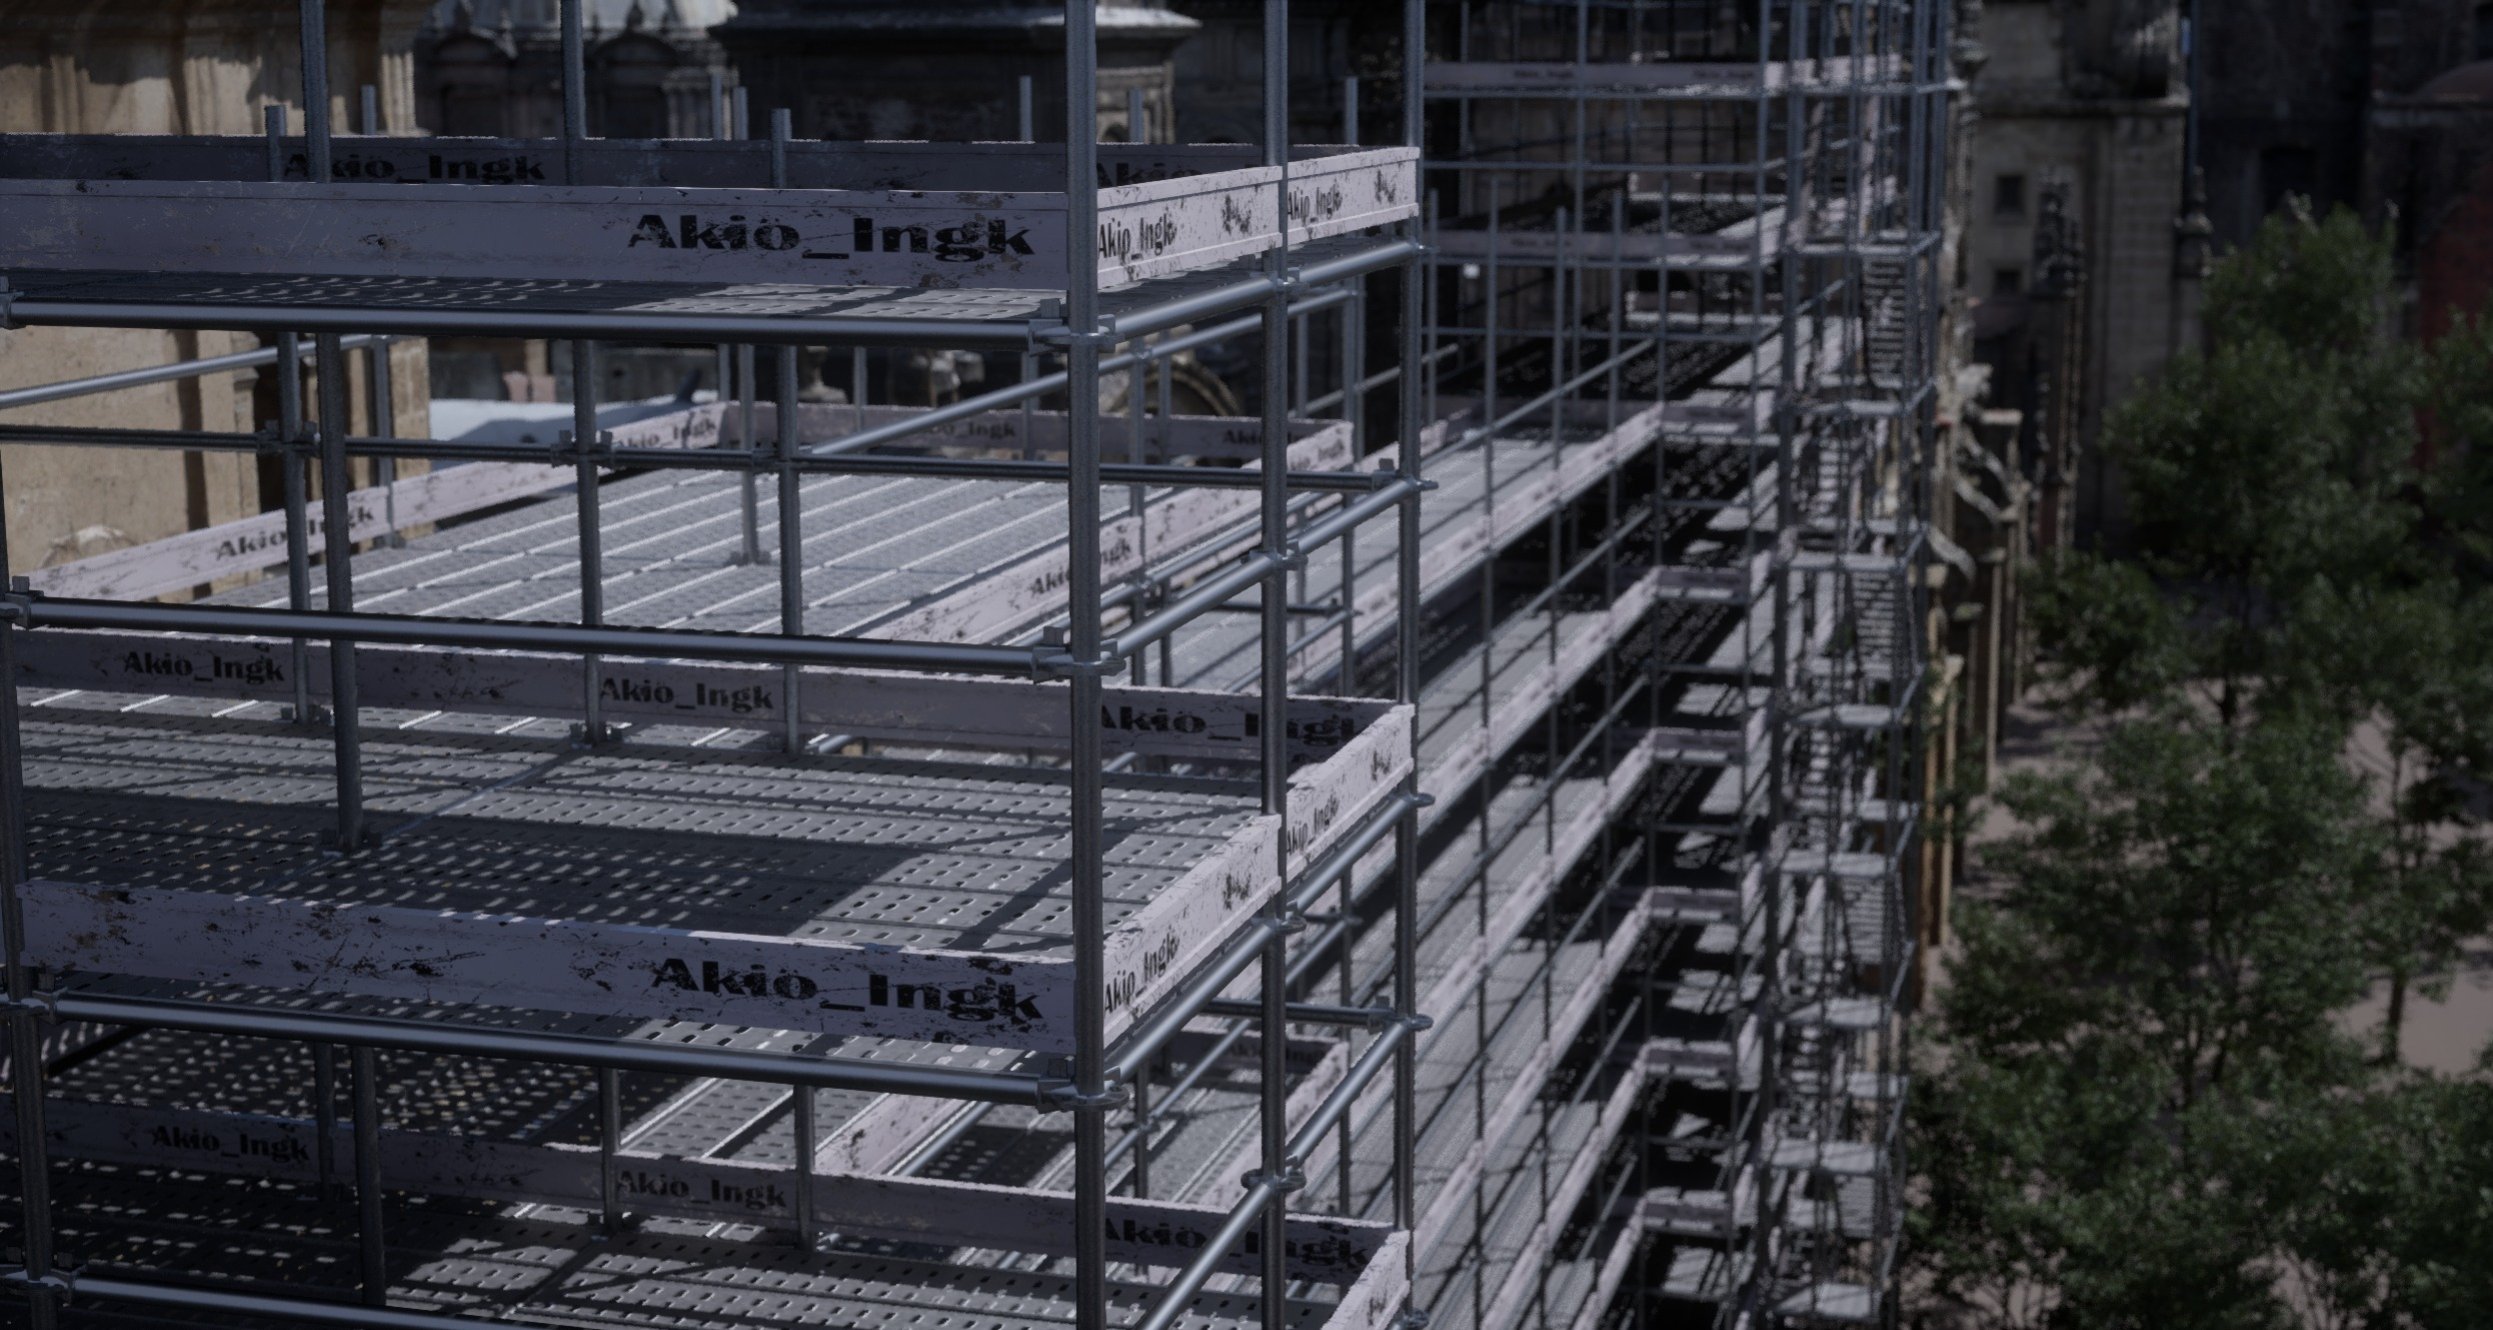
To provide users with flexibility in material customization, I integrated procedural materials created in Substance Designer. These materials were designed with exposed parameters, allowing users to tweak and experiment with different variations and styles.
You could, for example, change the name written on the kickboard, the condition of the scaffolding, the colors or you could just swap the default meshes with your custom-made assets to match your desired aesthetic.

Tool Breakdown:
Houdini's instancing capabilities played a crucial role in the success of the scaffolding generator. As one of my primary goals was real-time performance and scalability, object instancing alone was insufficient. To address this, I utilized point instancing within Houdini.
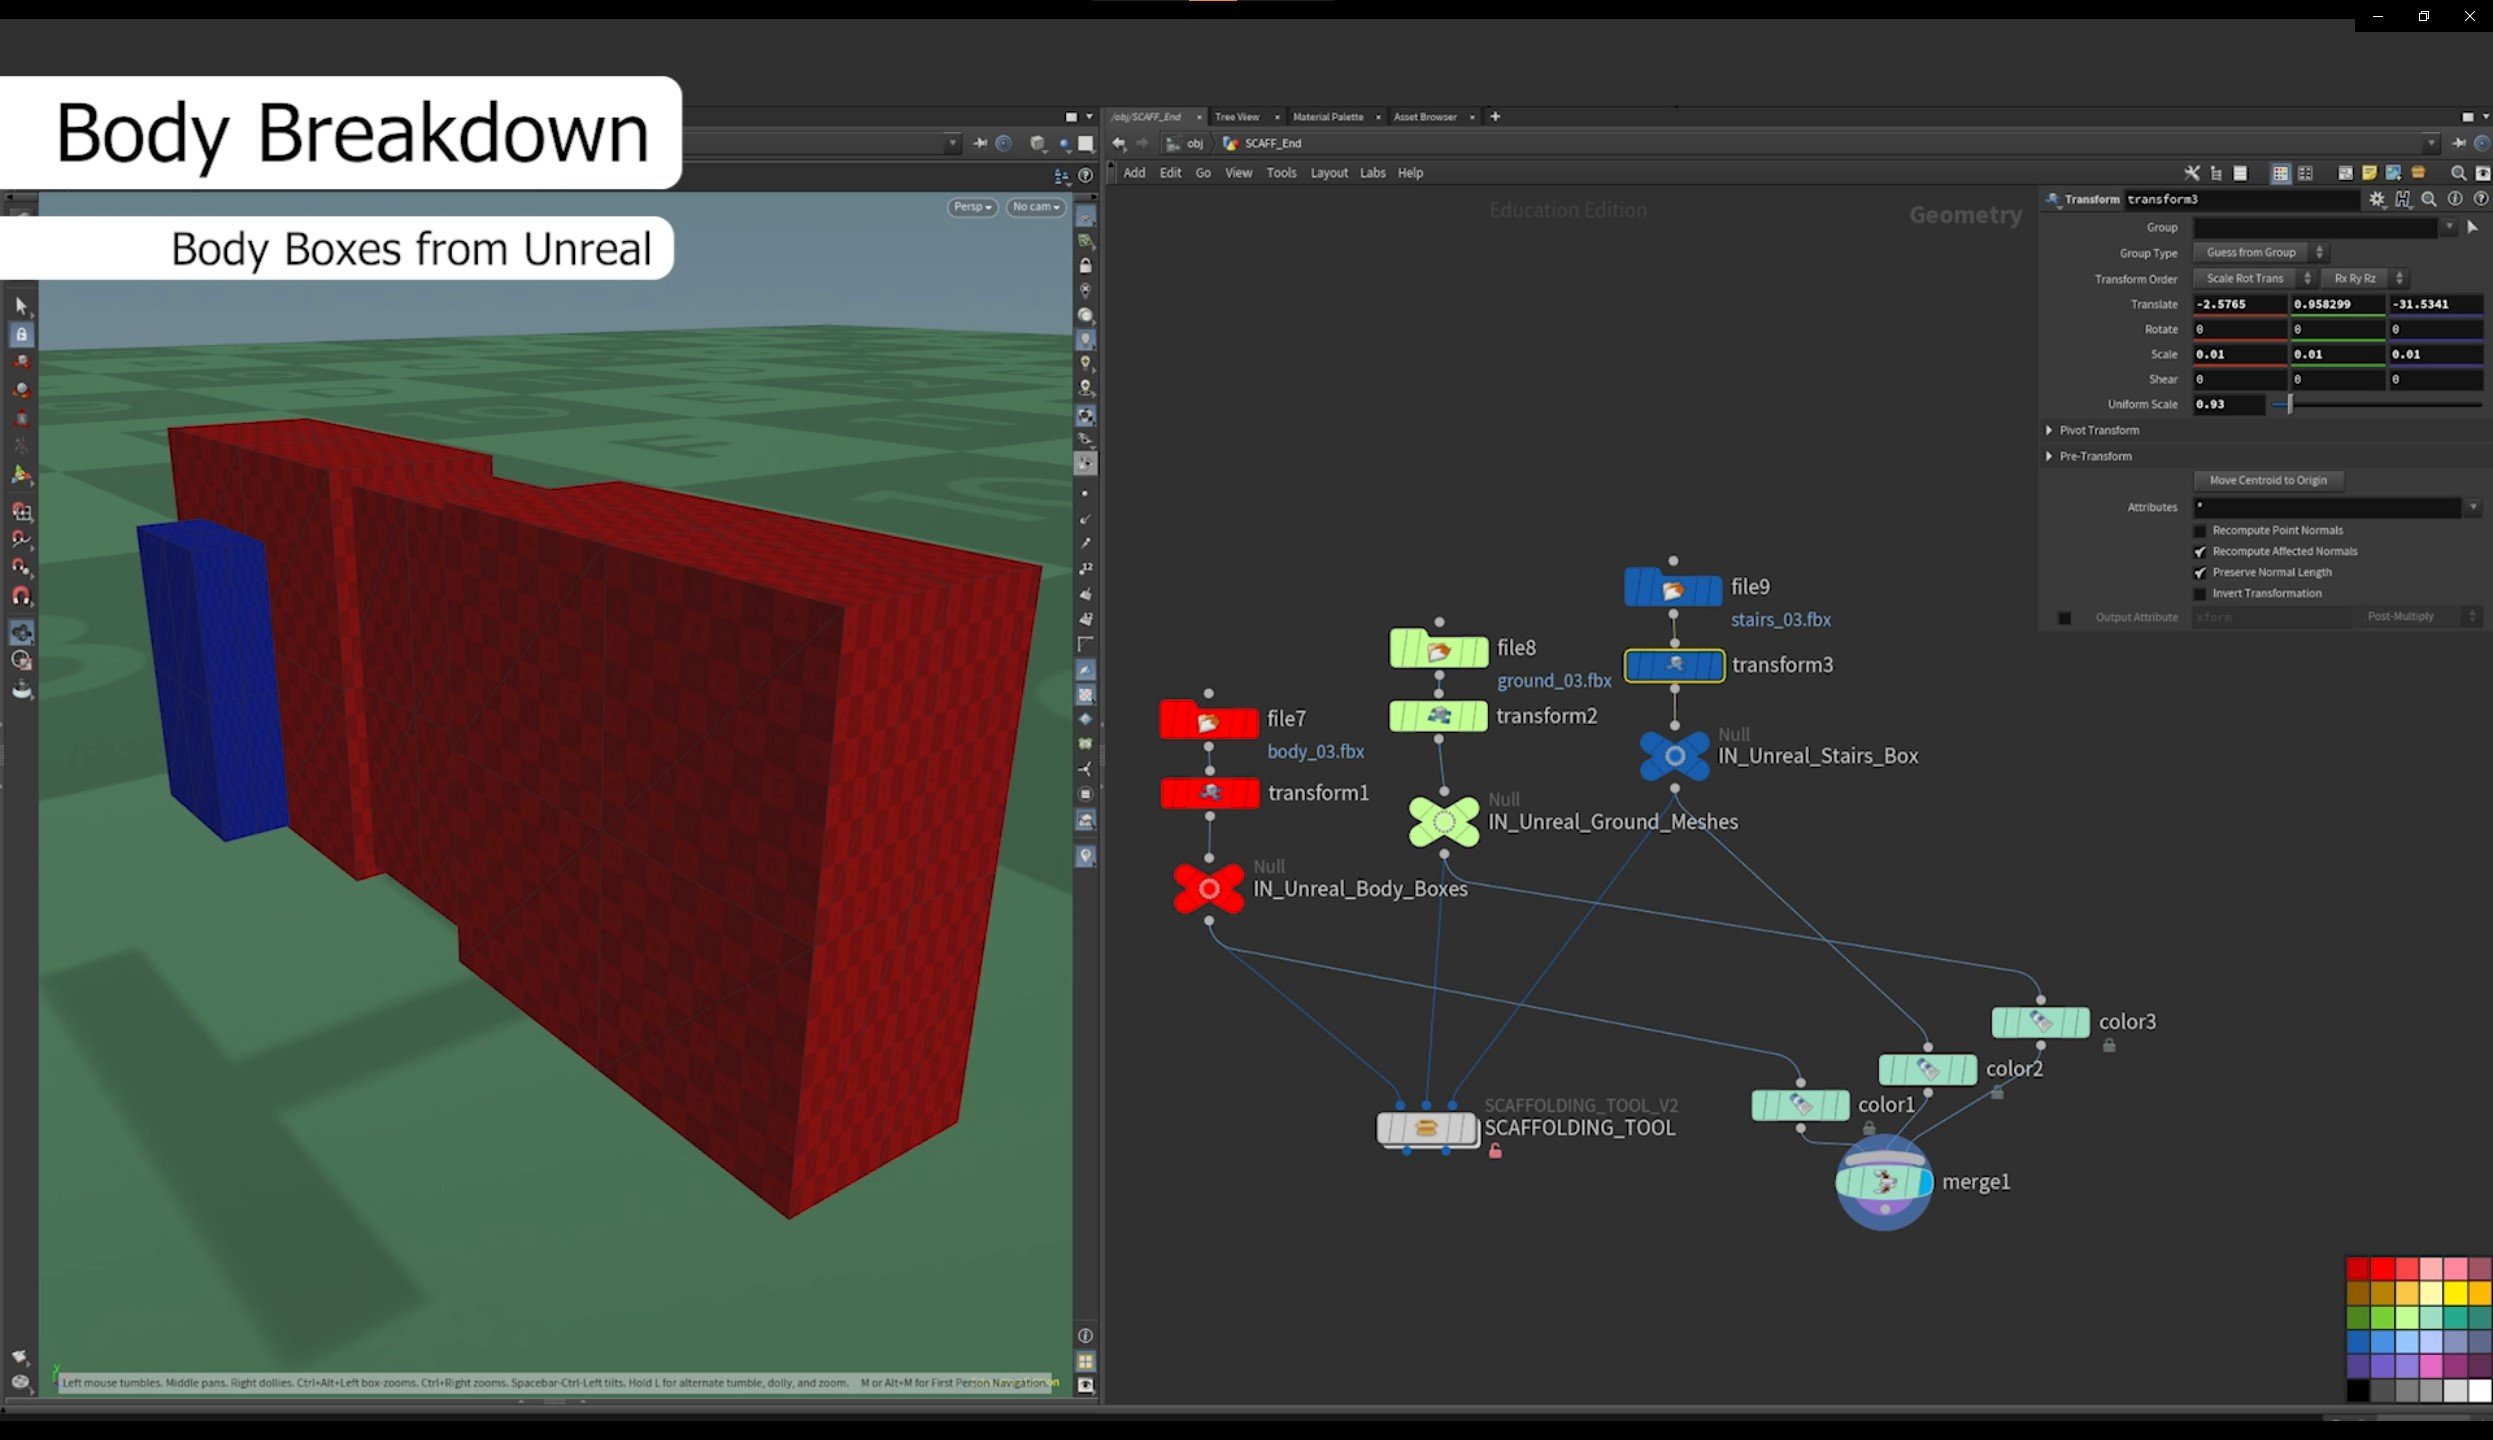
Main Structure/Body Breakdown:
- Cleaning up the meshes: Initially, I had to clean up the meshes provided by Unreal Engine to ensure optimal geometry for further processing.
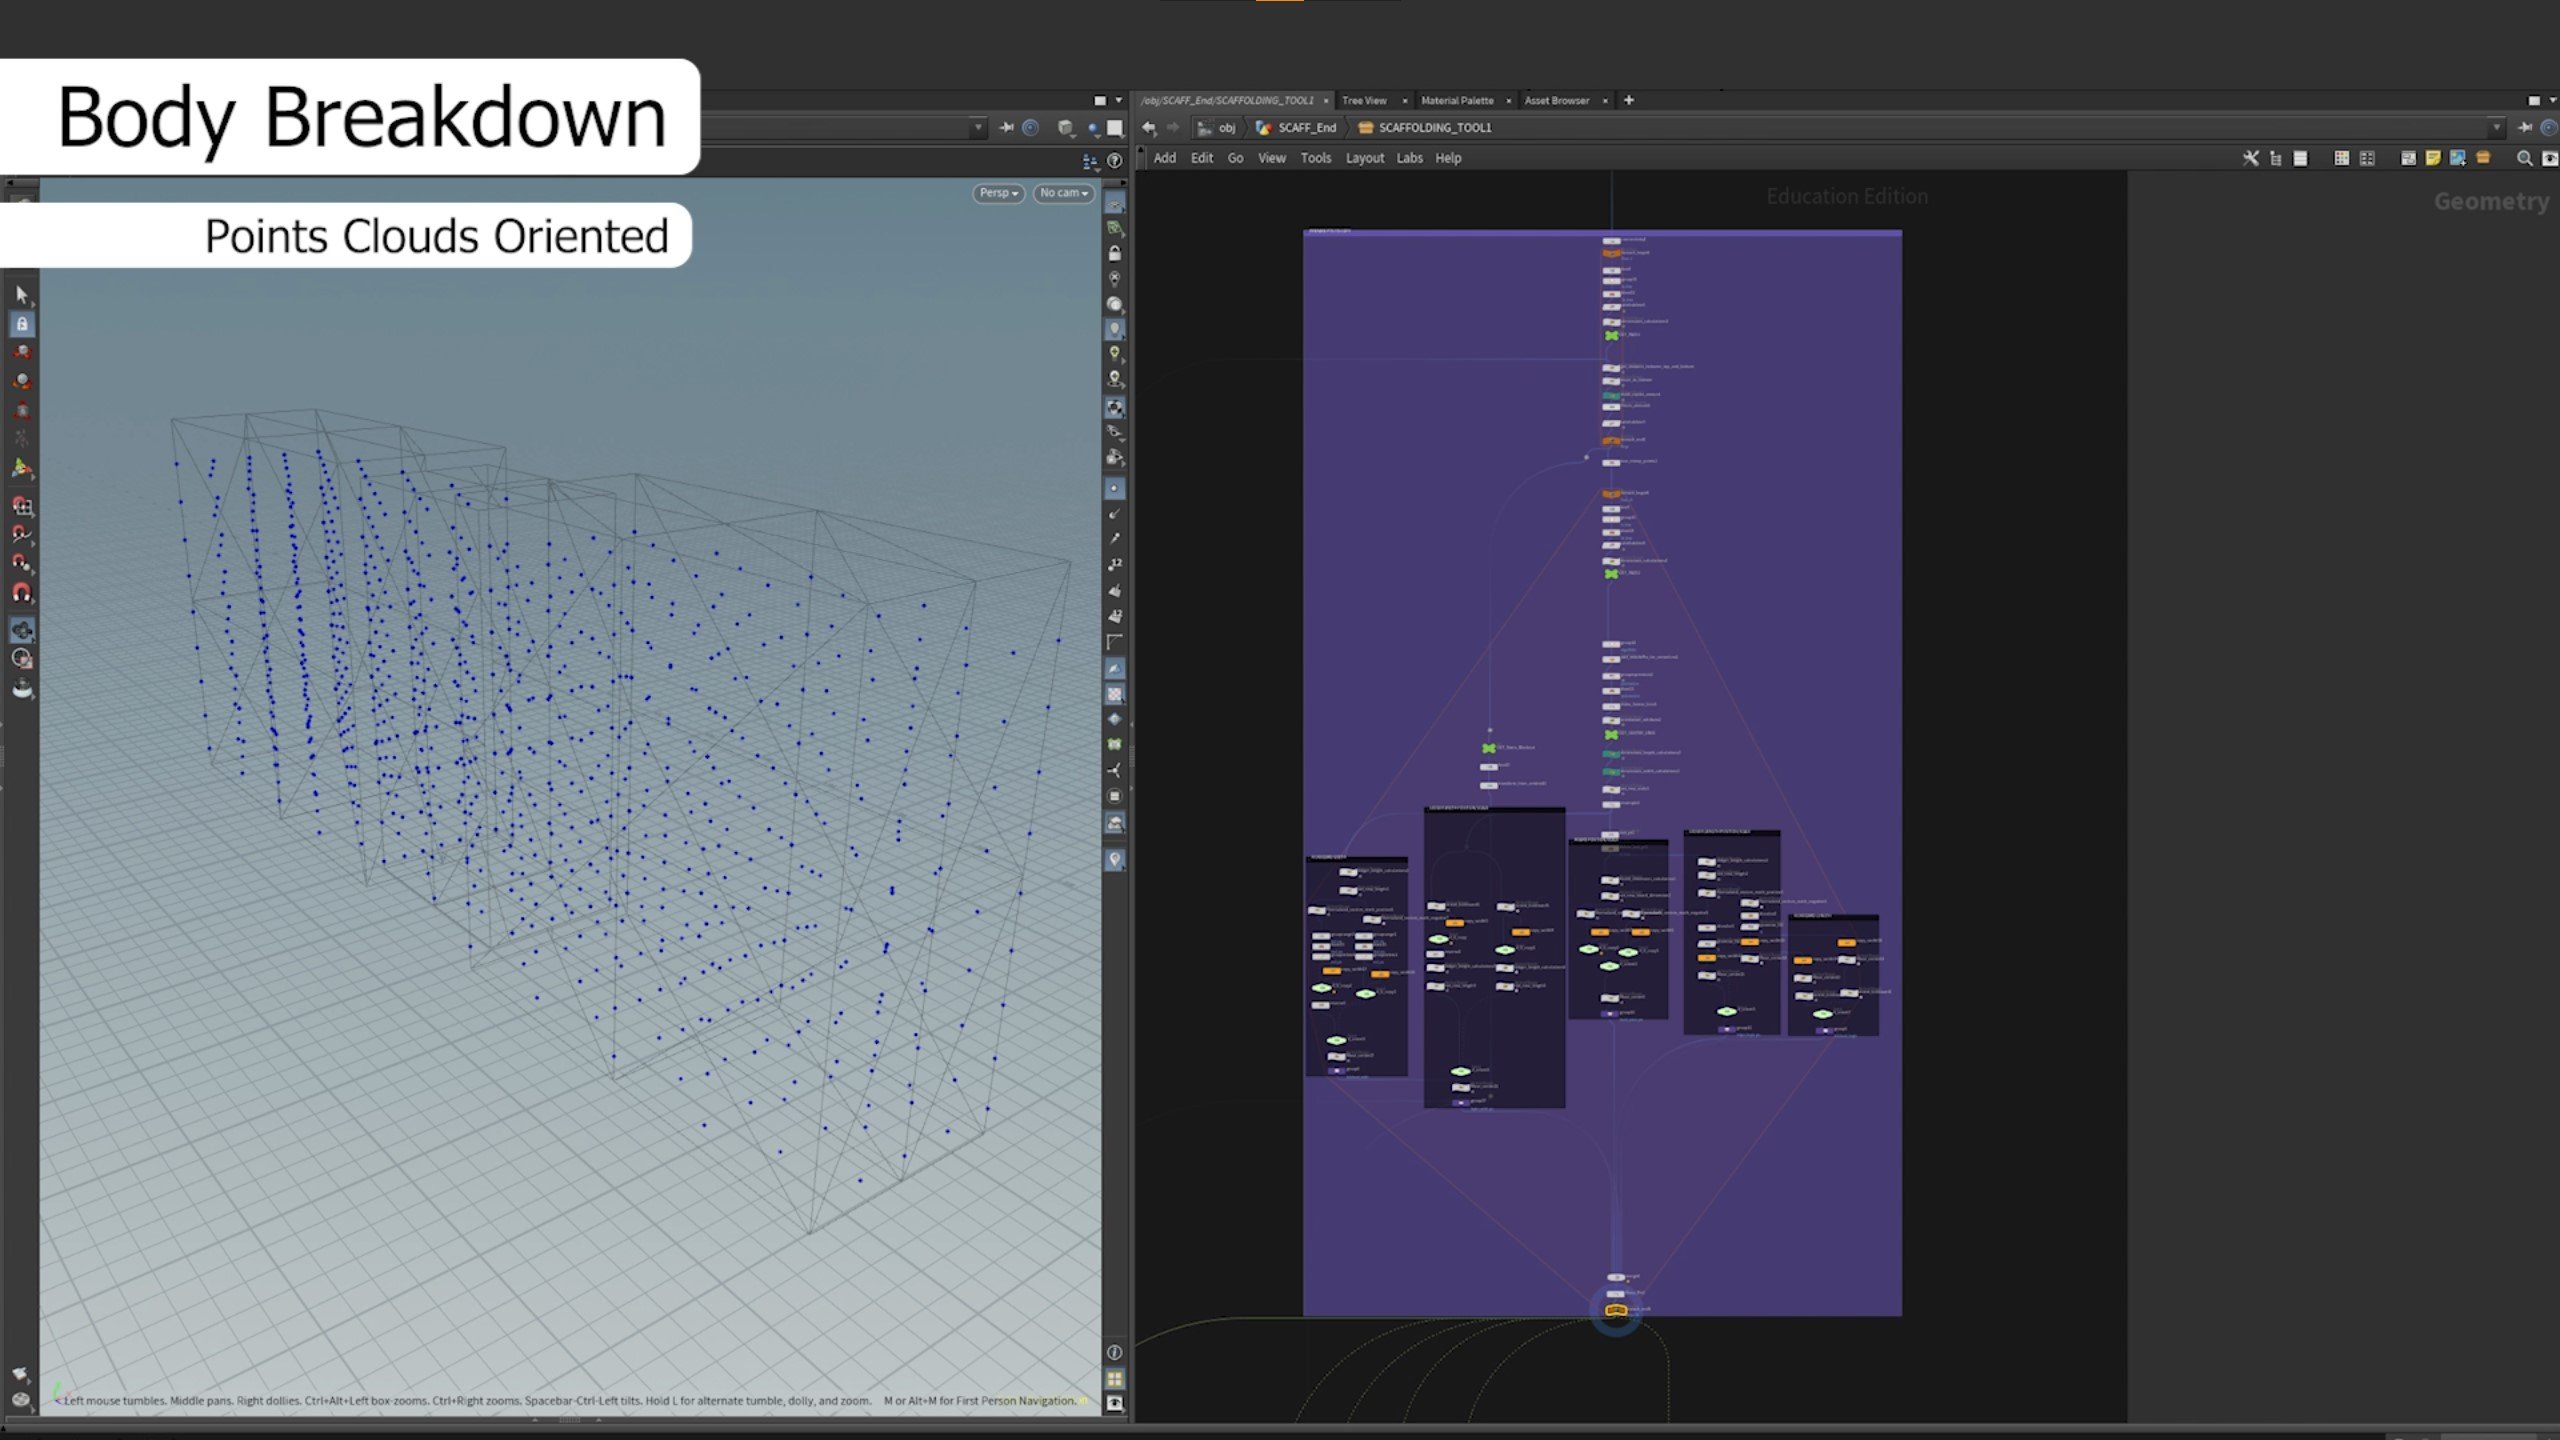
- Adding points to top primitives: I used the top primitives of the meshes to add points, which would later serve as the basis for creating the vertical ledges and the foot of the scaffolding.
- Projecting points to the ground: Since I wanted the tool to interact with the ground, I projected the newly created points onto the ground mesh. This ensured that the scaffolding maintained a realistic connection to the environment.
- Calculating height parameters: By calculating the distance between a top point and its projected point, I could determine the number of floors that could fit within the scaffolding. Additionally, this calculation provided essential information such as the offset distance for the first floor and the height of each floor parcel.
- Creating floors: Armed with the precise floor parameters, I proceeded to generate a correctly oriented points cloud representing one floor. Using this floor as a template, I duplicated and adjusted the points cloud by the number of floors required, taking into account their individual heights.


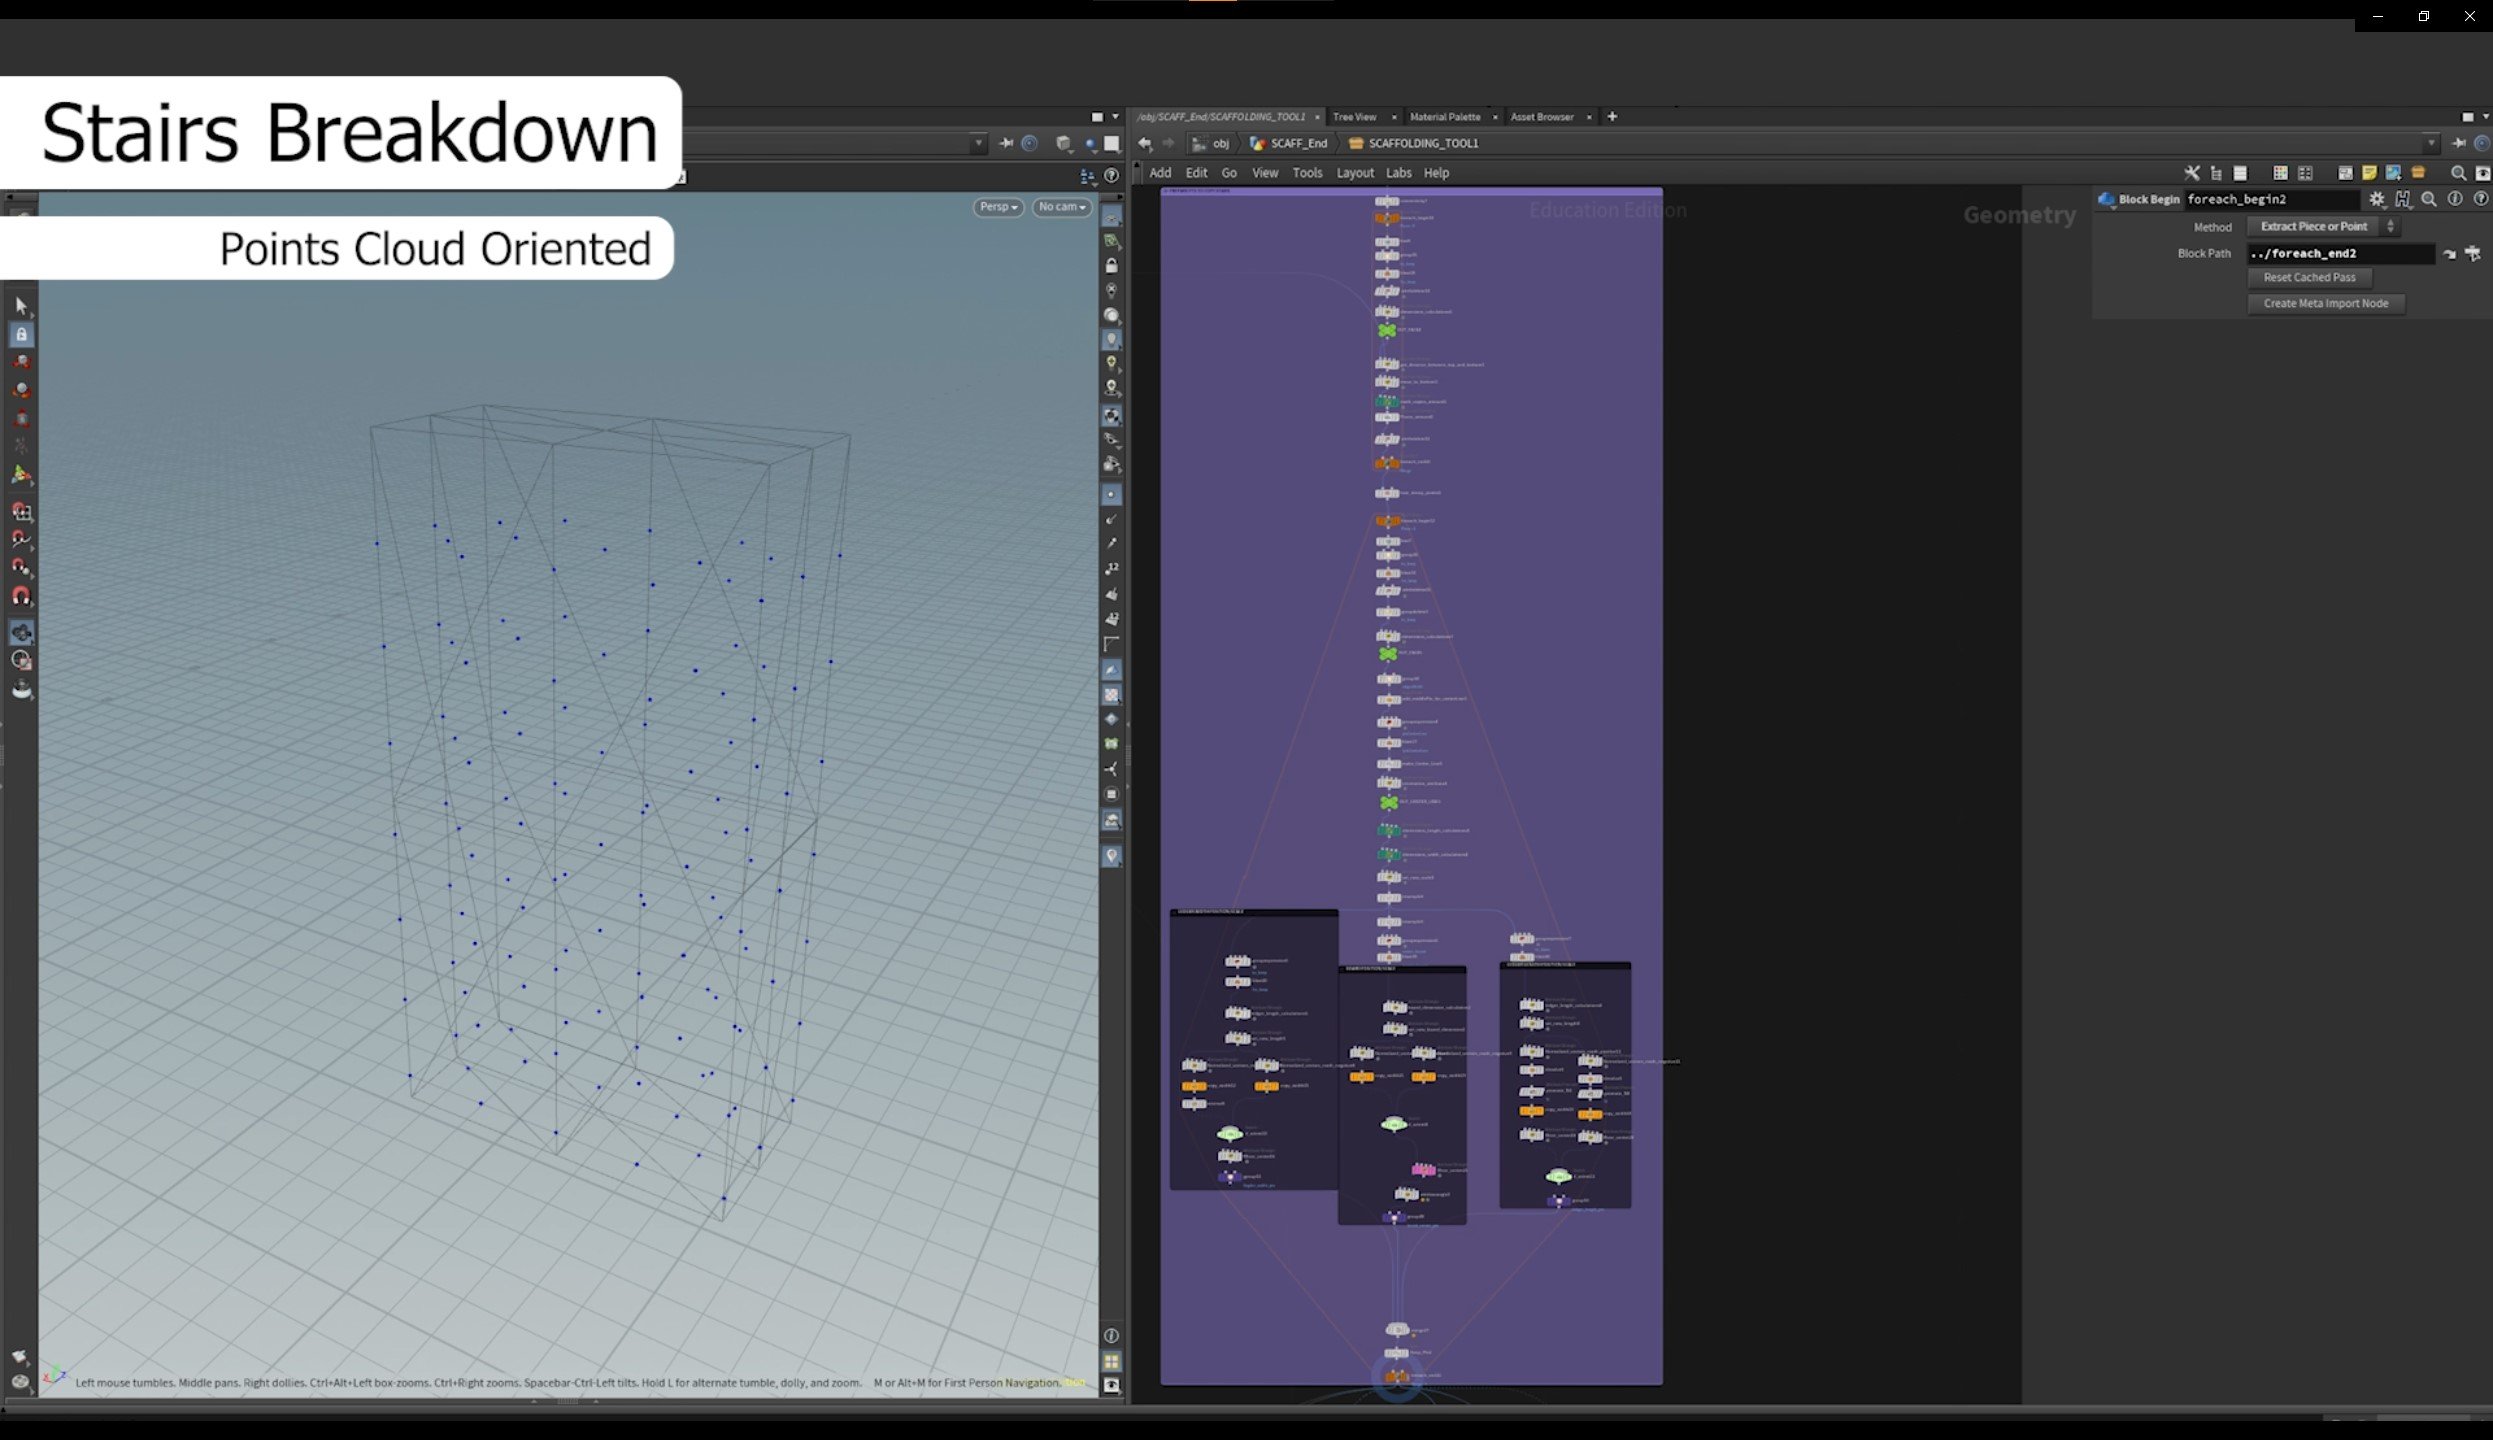
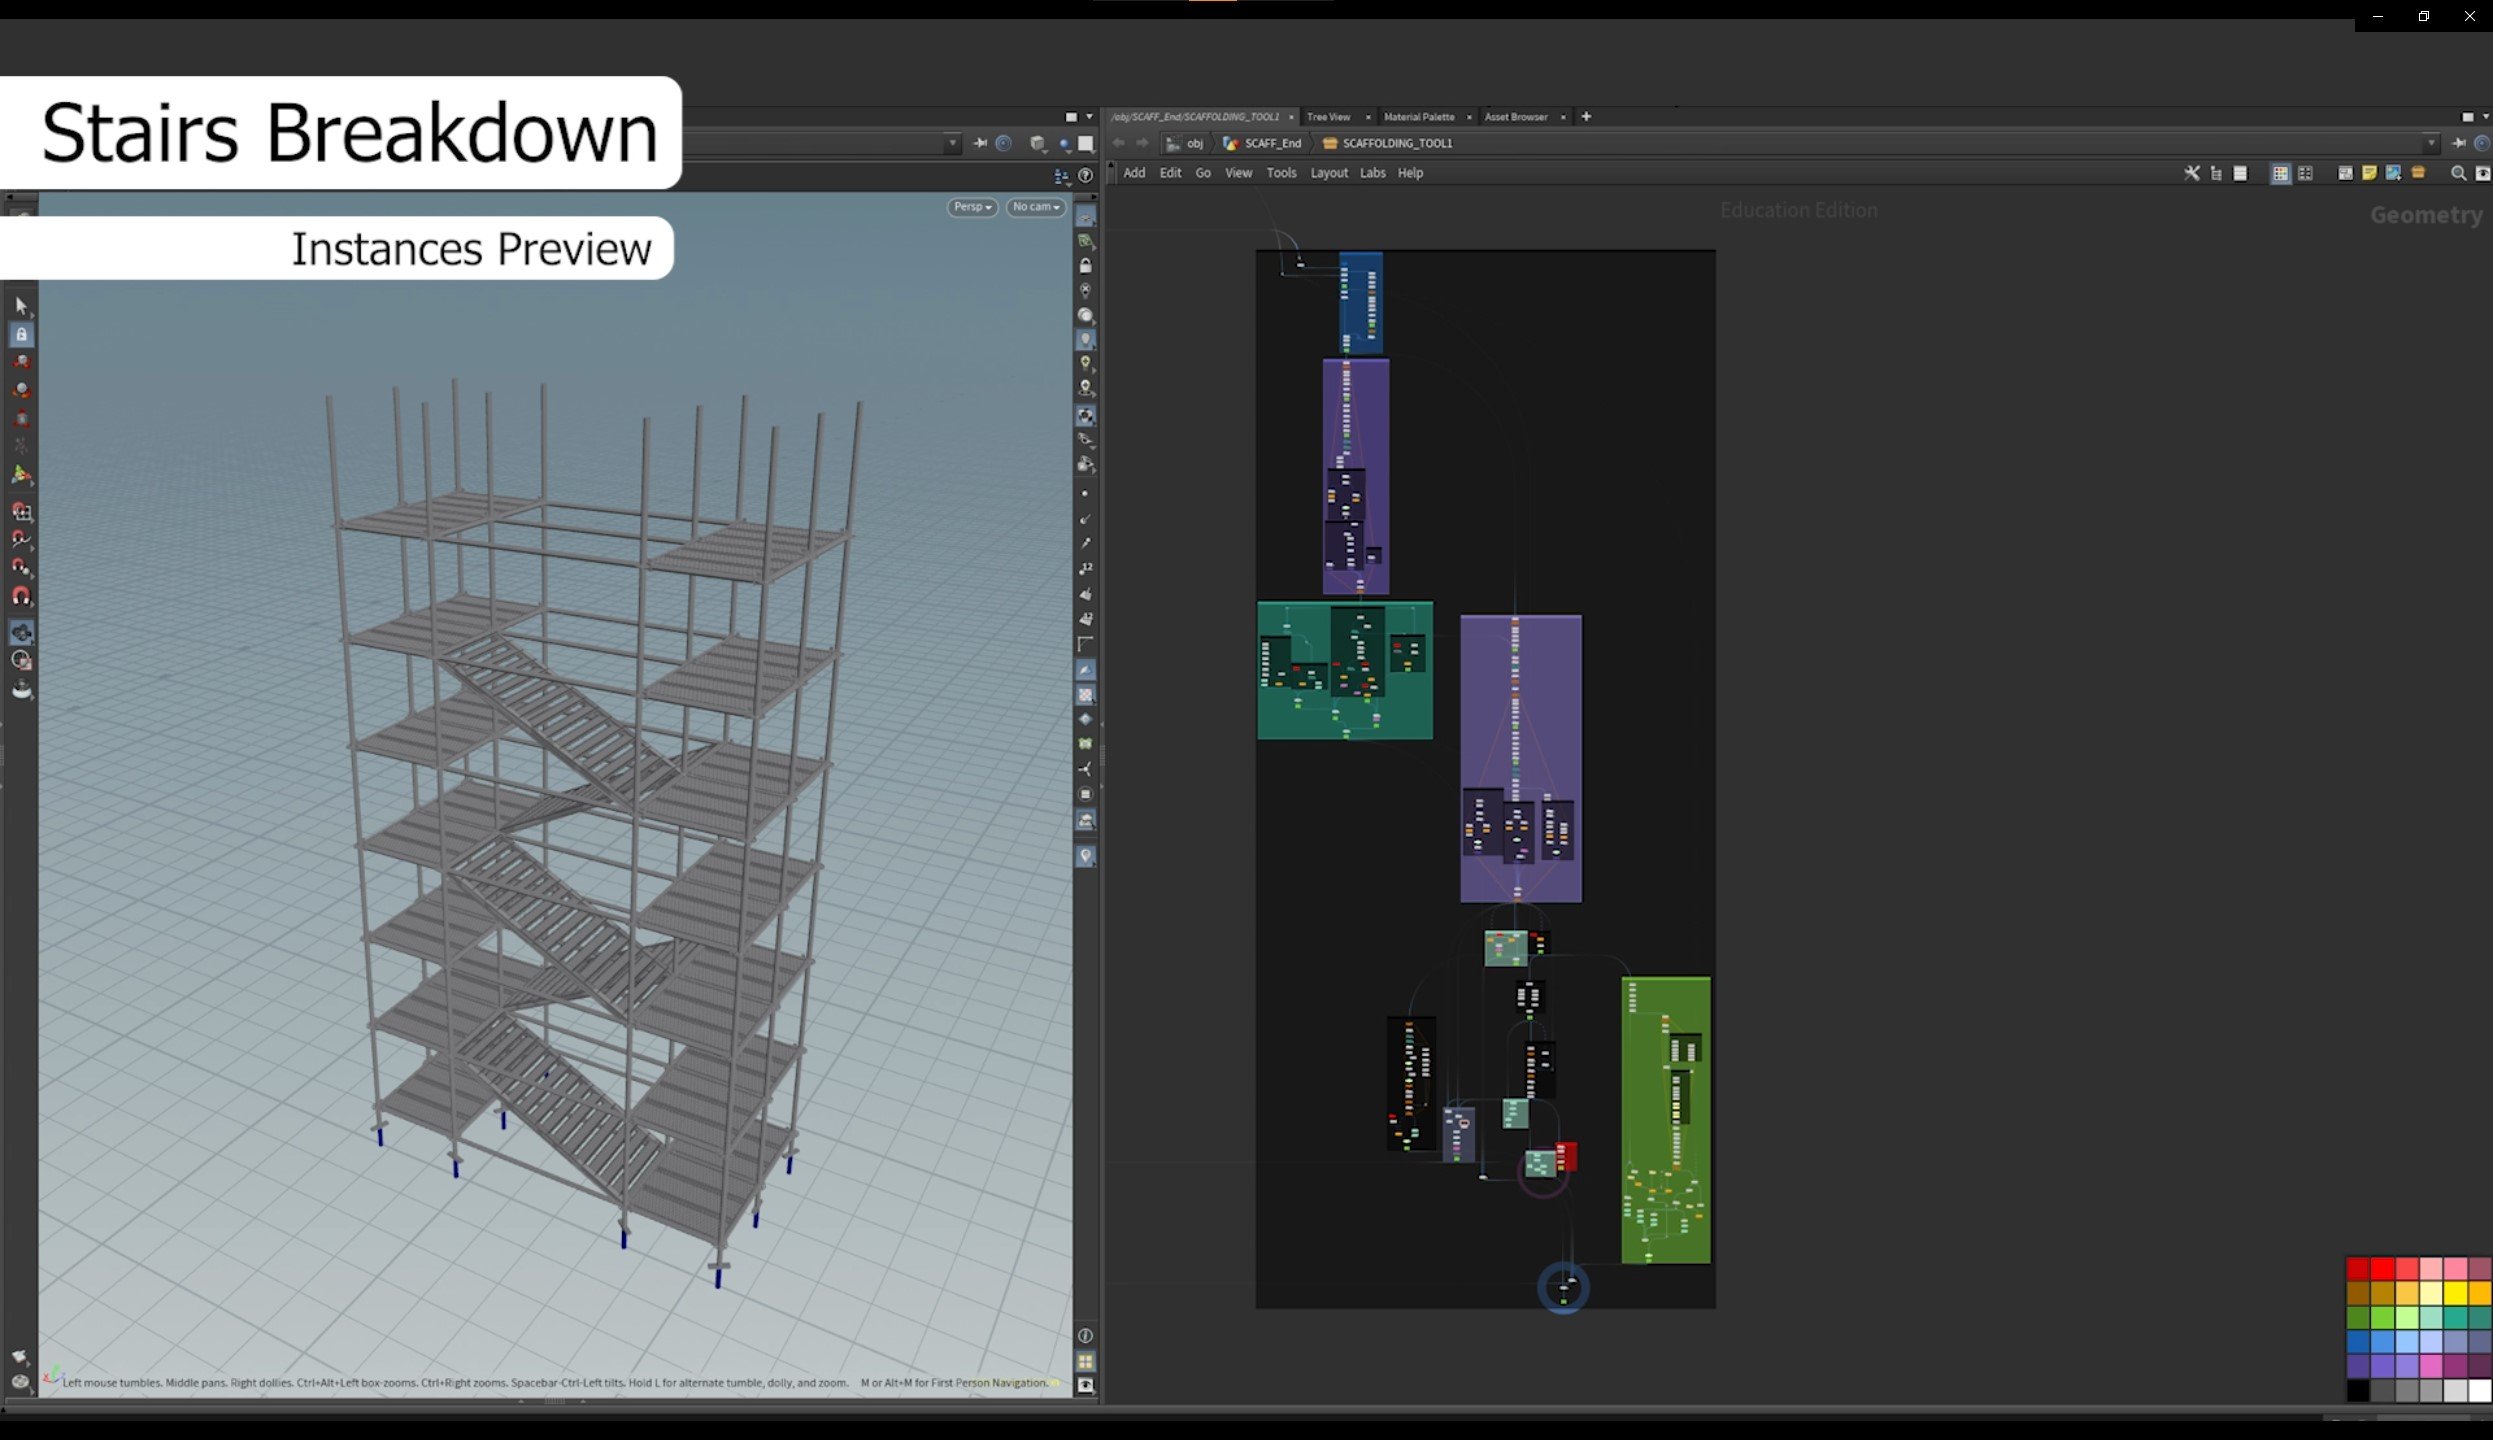
Stairs Breakdown:
- Reusing network elements: To streamline the workflow, I leveraged parts of the existing network used to create the points cloud for the vertical ledges and the feet of the scaffolding. This allowed for efficient reuse of resources and a cohesive overall structure.
- Creating stair platforms: The stairs required alternating platforms on each floor. To achieve this, I utilized the base floors, which were initially created as planes. By removing unnecessary primitives using the Blast SOP and a Group by Range node, I obtained the desired platforms.
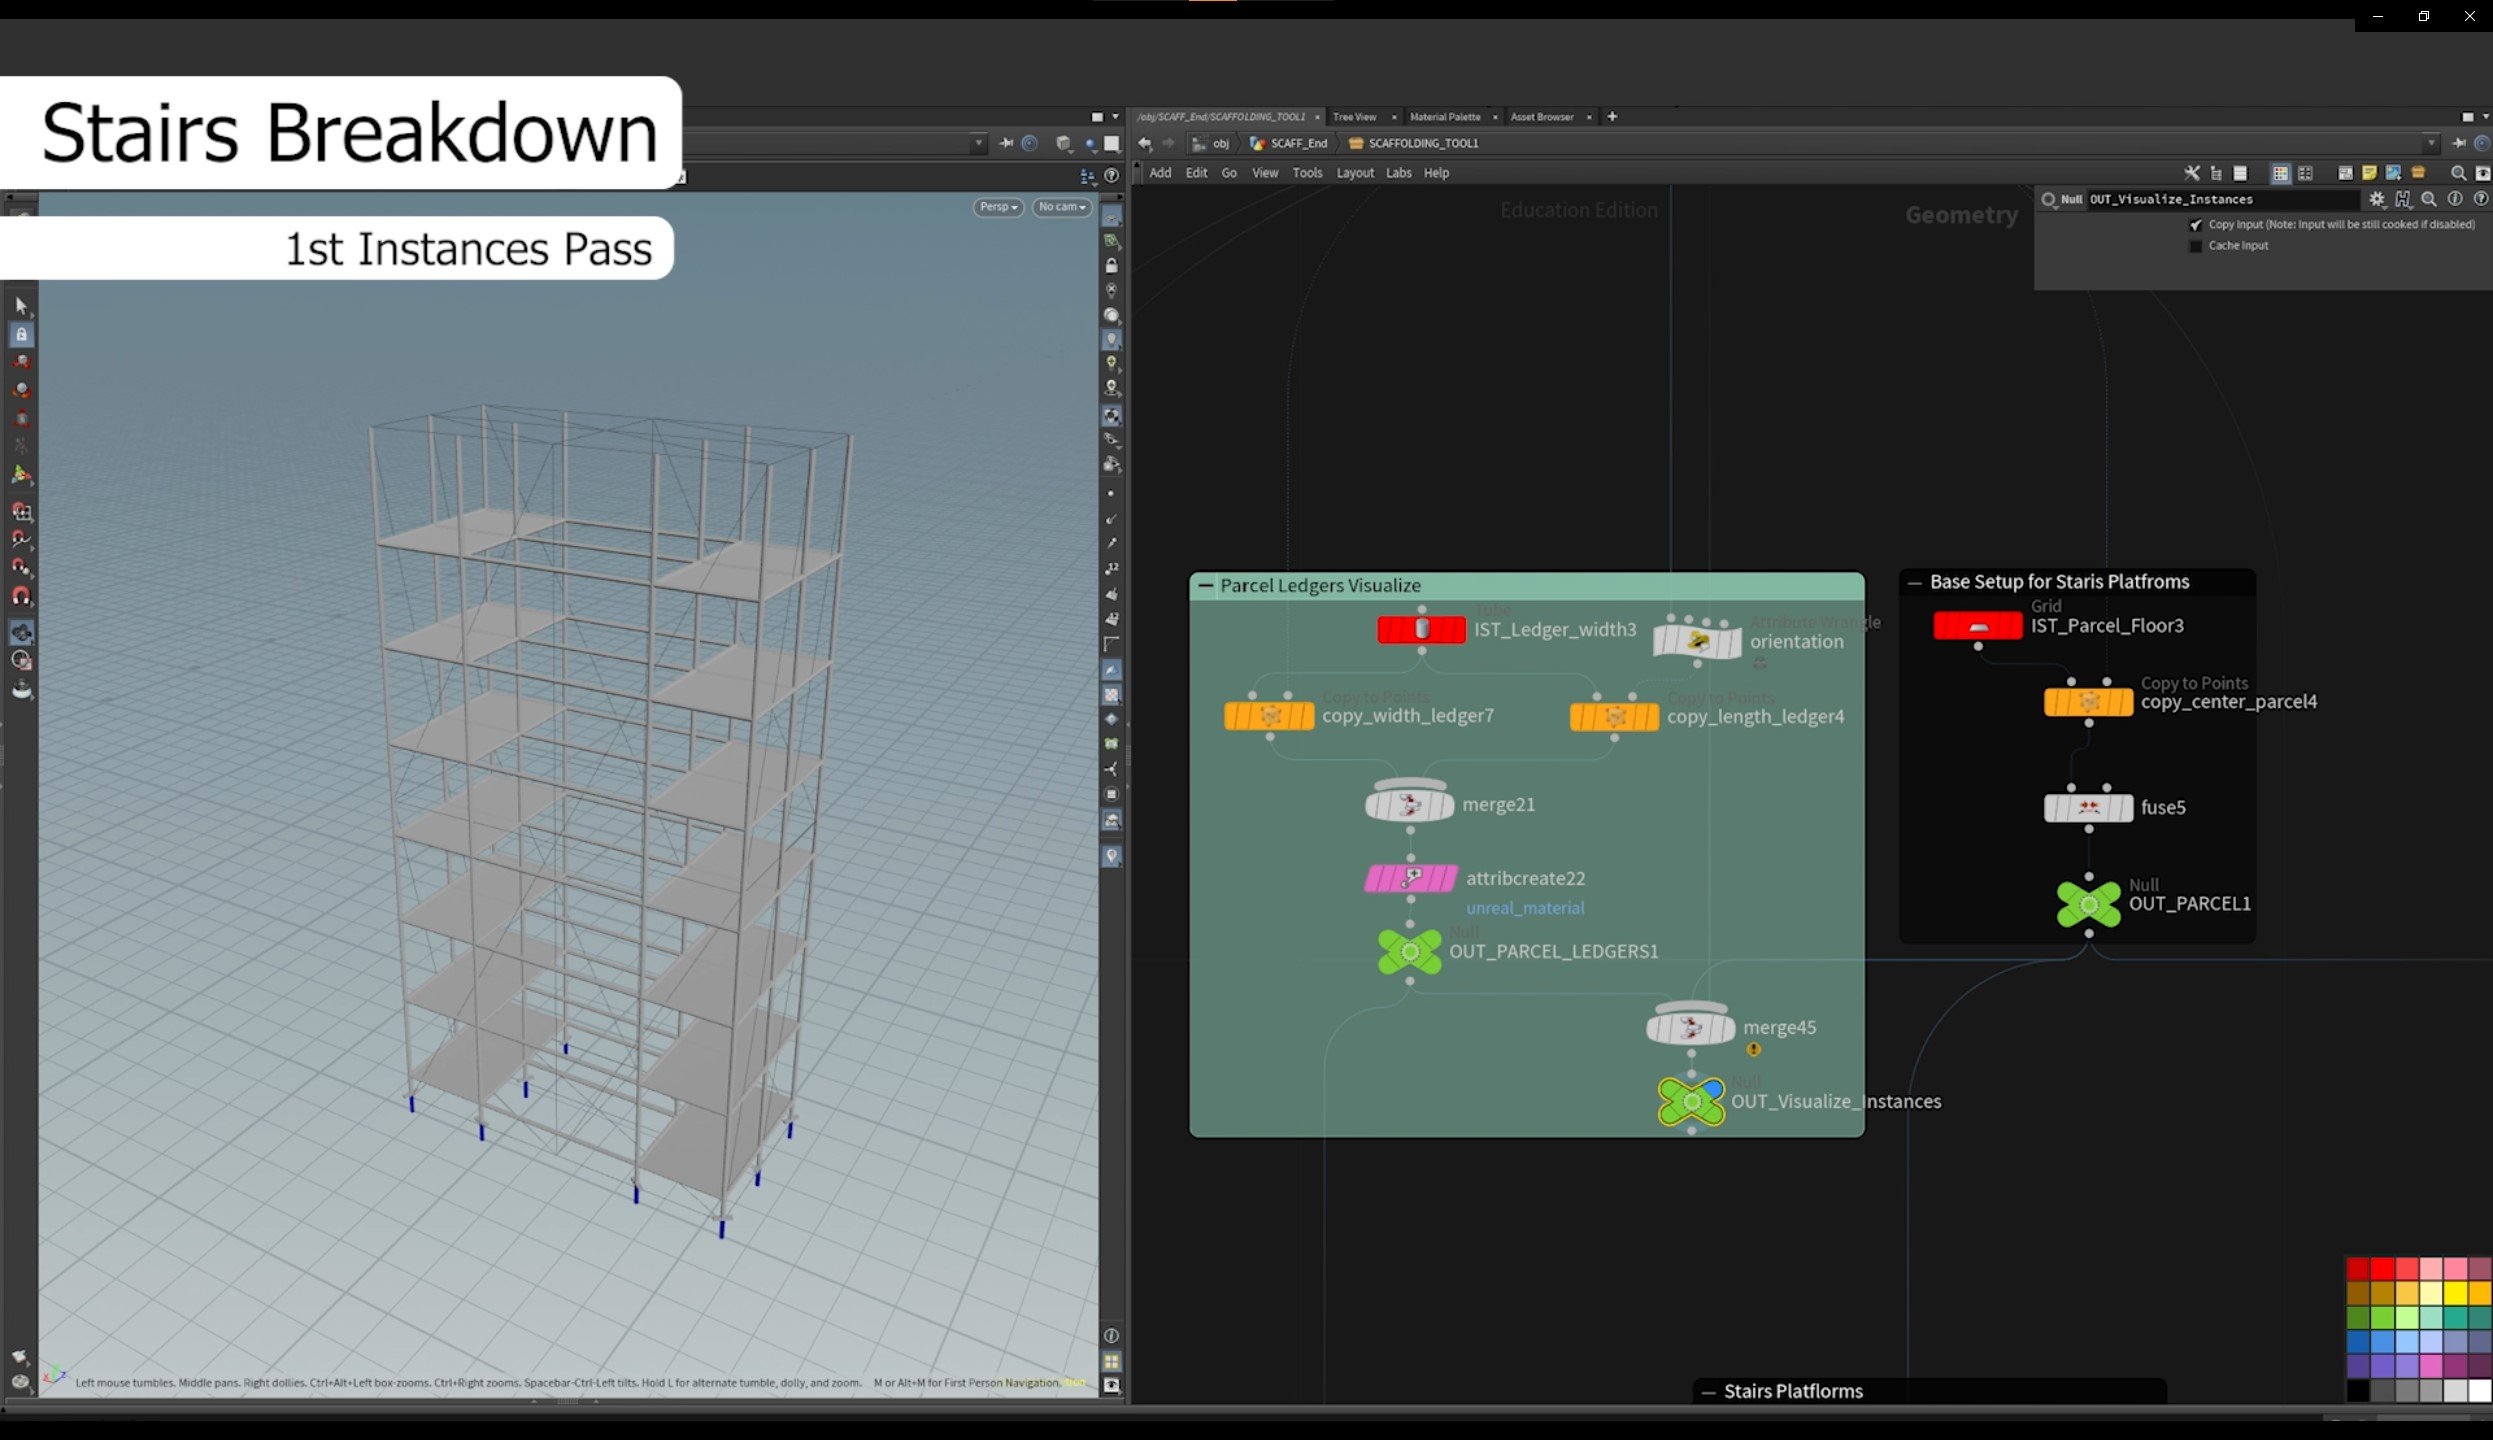
- Establishing connections between platforms: The challenge arose when connecting the platforms with lines, where only one line was permitted per floor, and the lines needed to alternate sides. As the Add SOP couldn't be relied upon due to point order constraints, I resorted to writing custom VEX script. This script enabled me to create connections between specific points (e.g., 0-2, 3-5, 4-6, 7-9, etc.) within the platforms.
- Resampling and orienting points: With the polylines representing the connections established, the next step involved resampling the lines and orienting the points appropriately. This preparation ensured that the points were ready for instancing the stairs' steps.
- Creating the stairs support: The final step in the process entailed constructing the stairs support. Using a sweep node and a custom curve, I followed the polylines to generate the mesh. This approach allowed users to easily manipulate the shape of the stairs support, providing greater customization options.


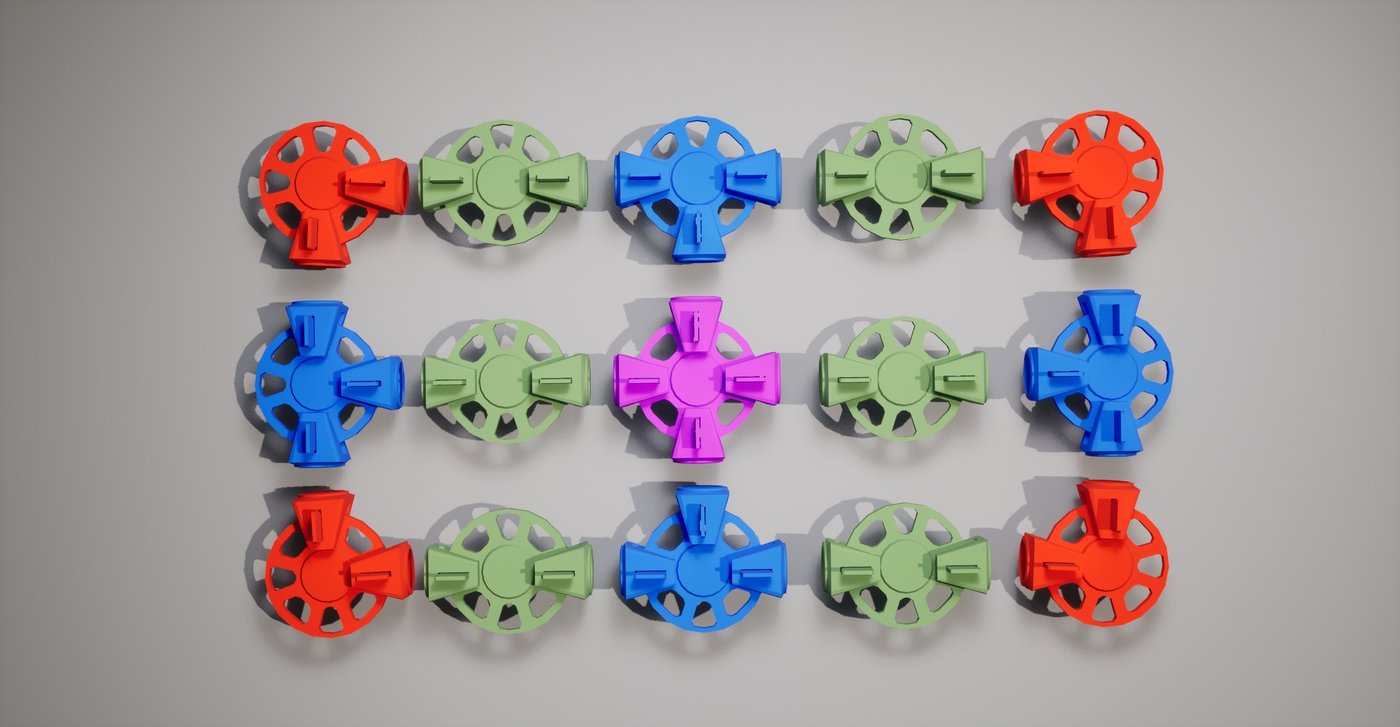
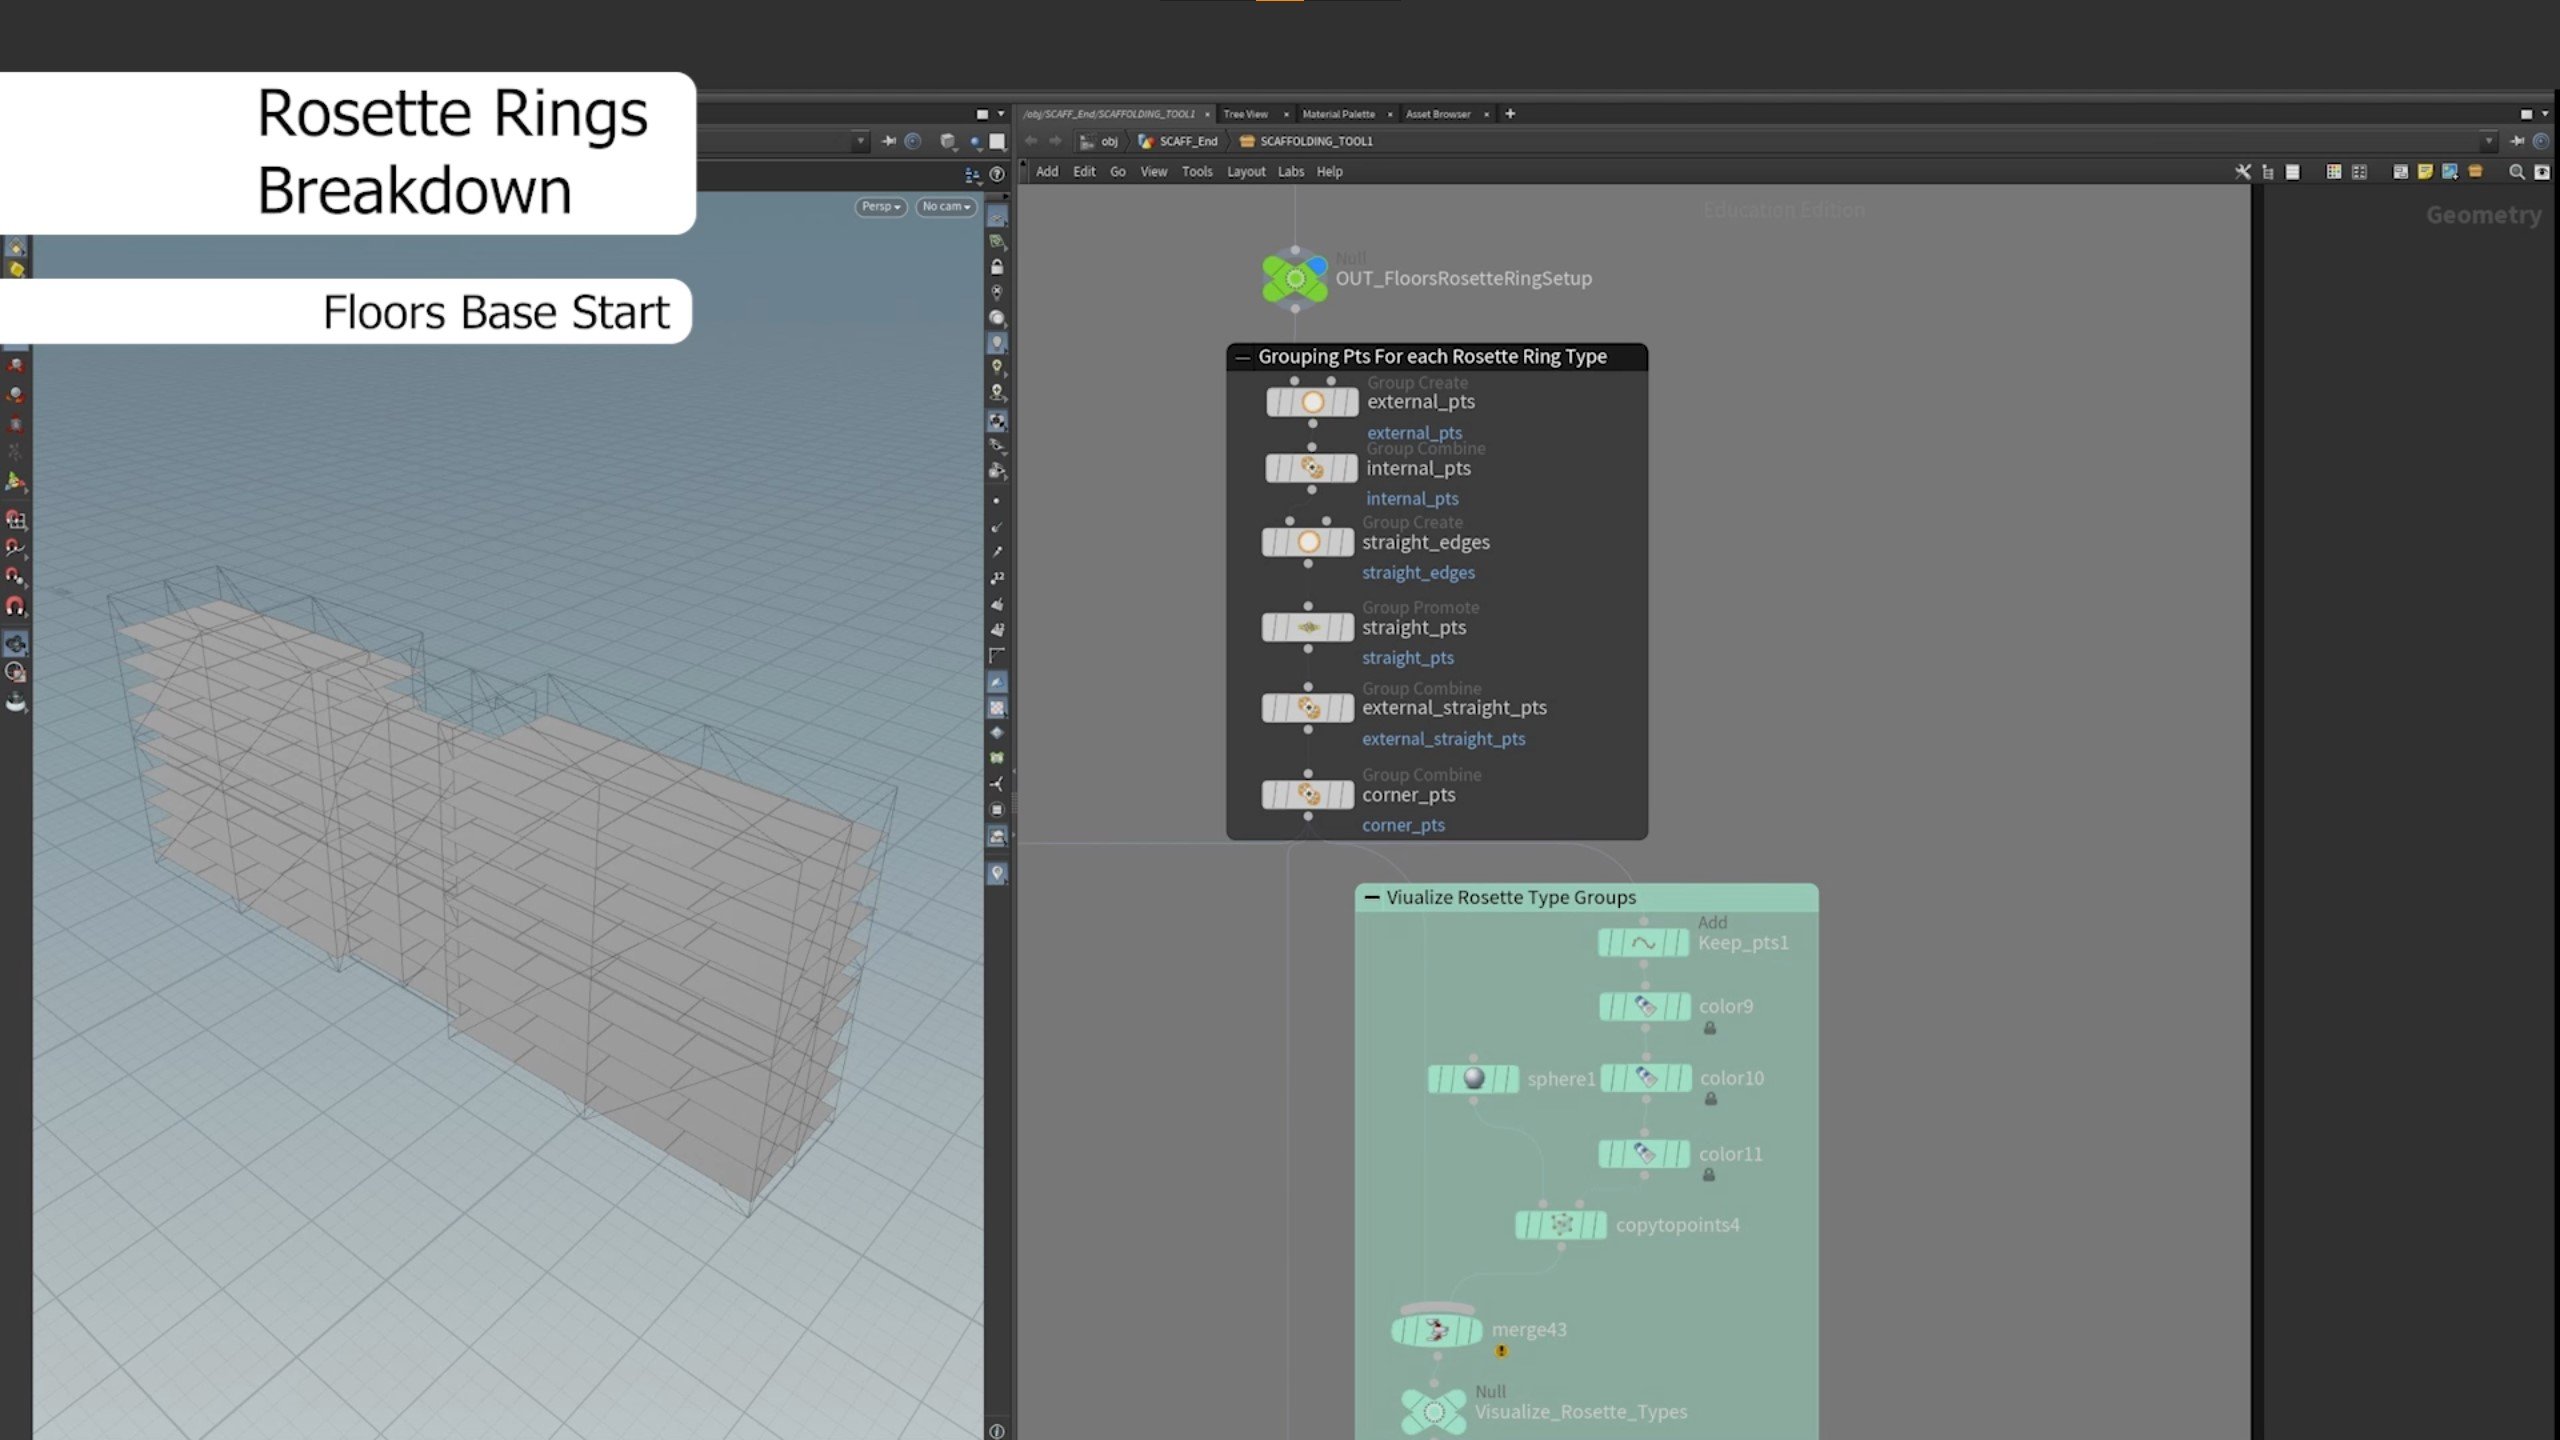
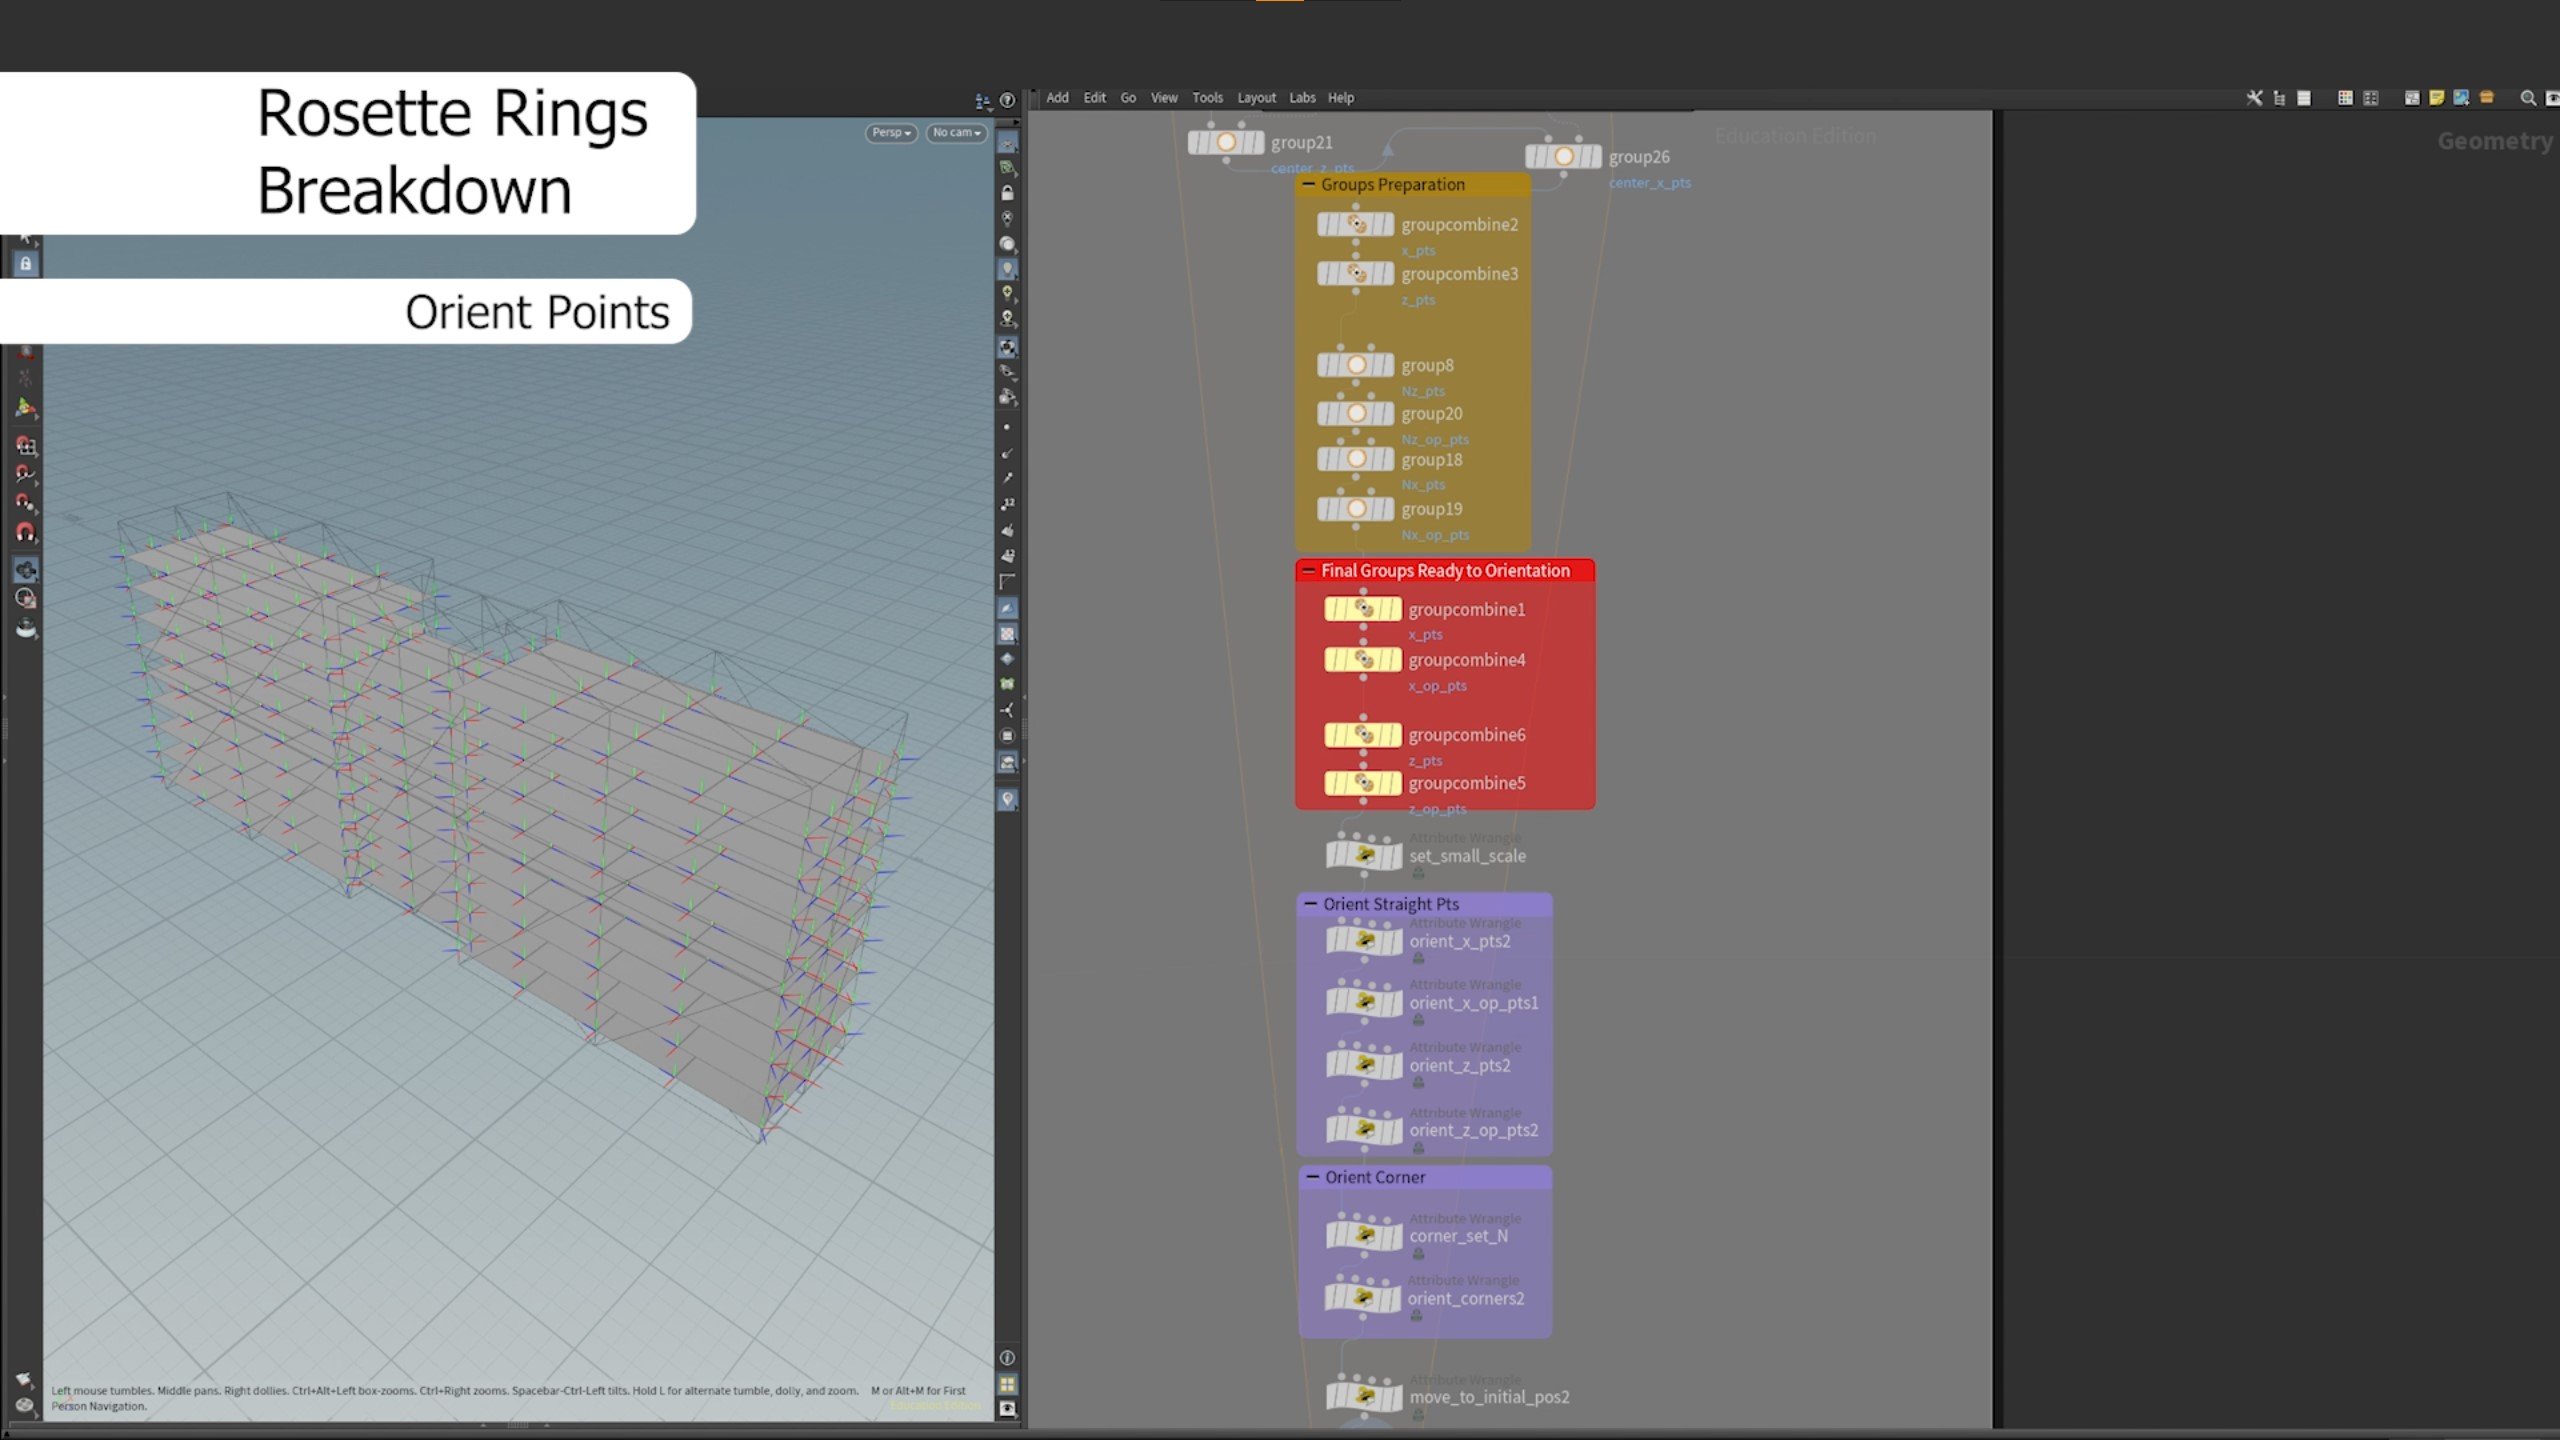
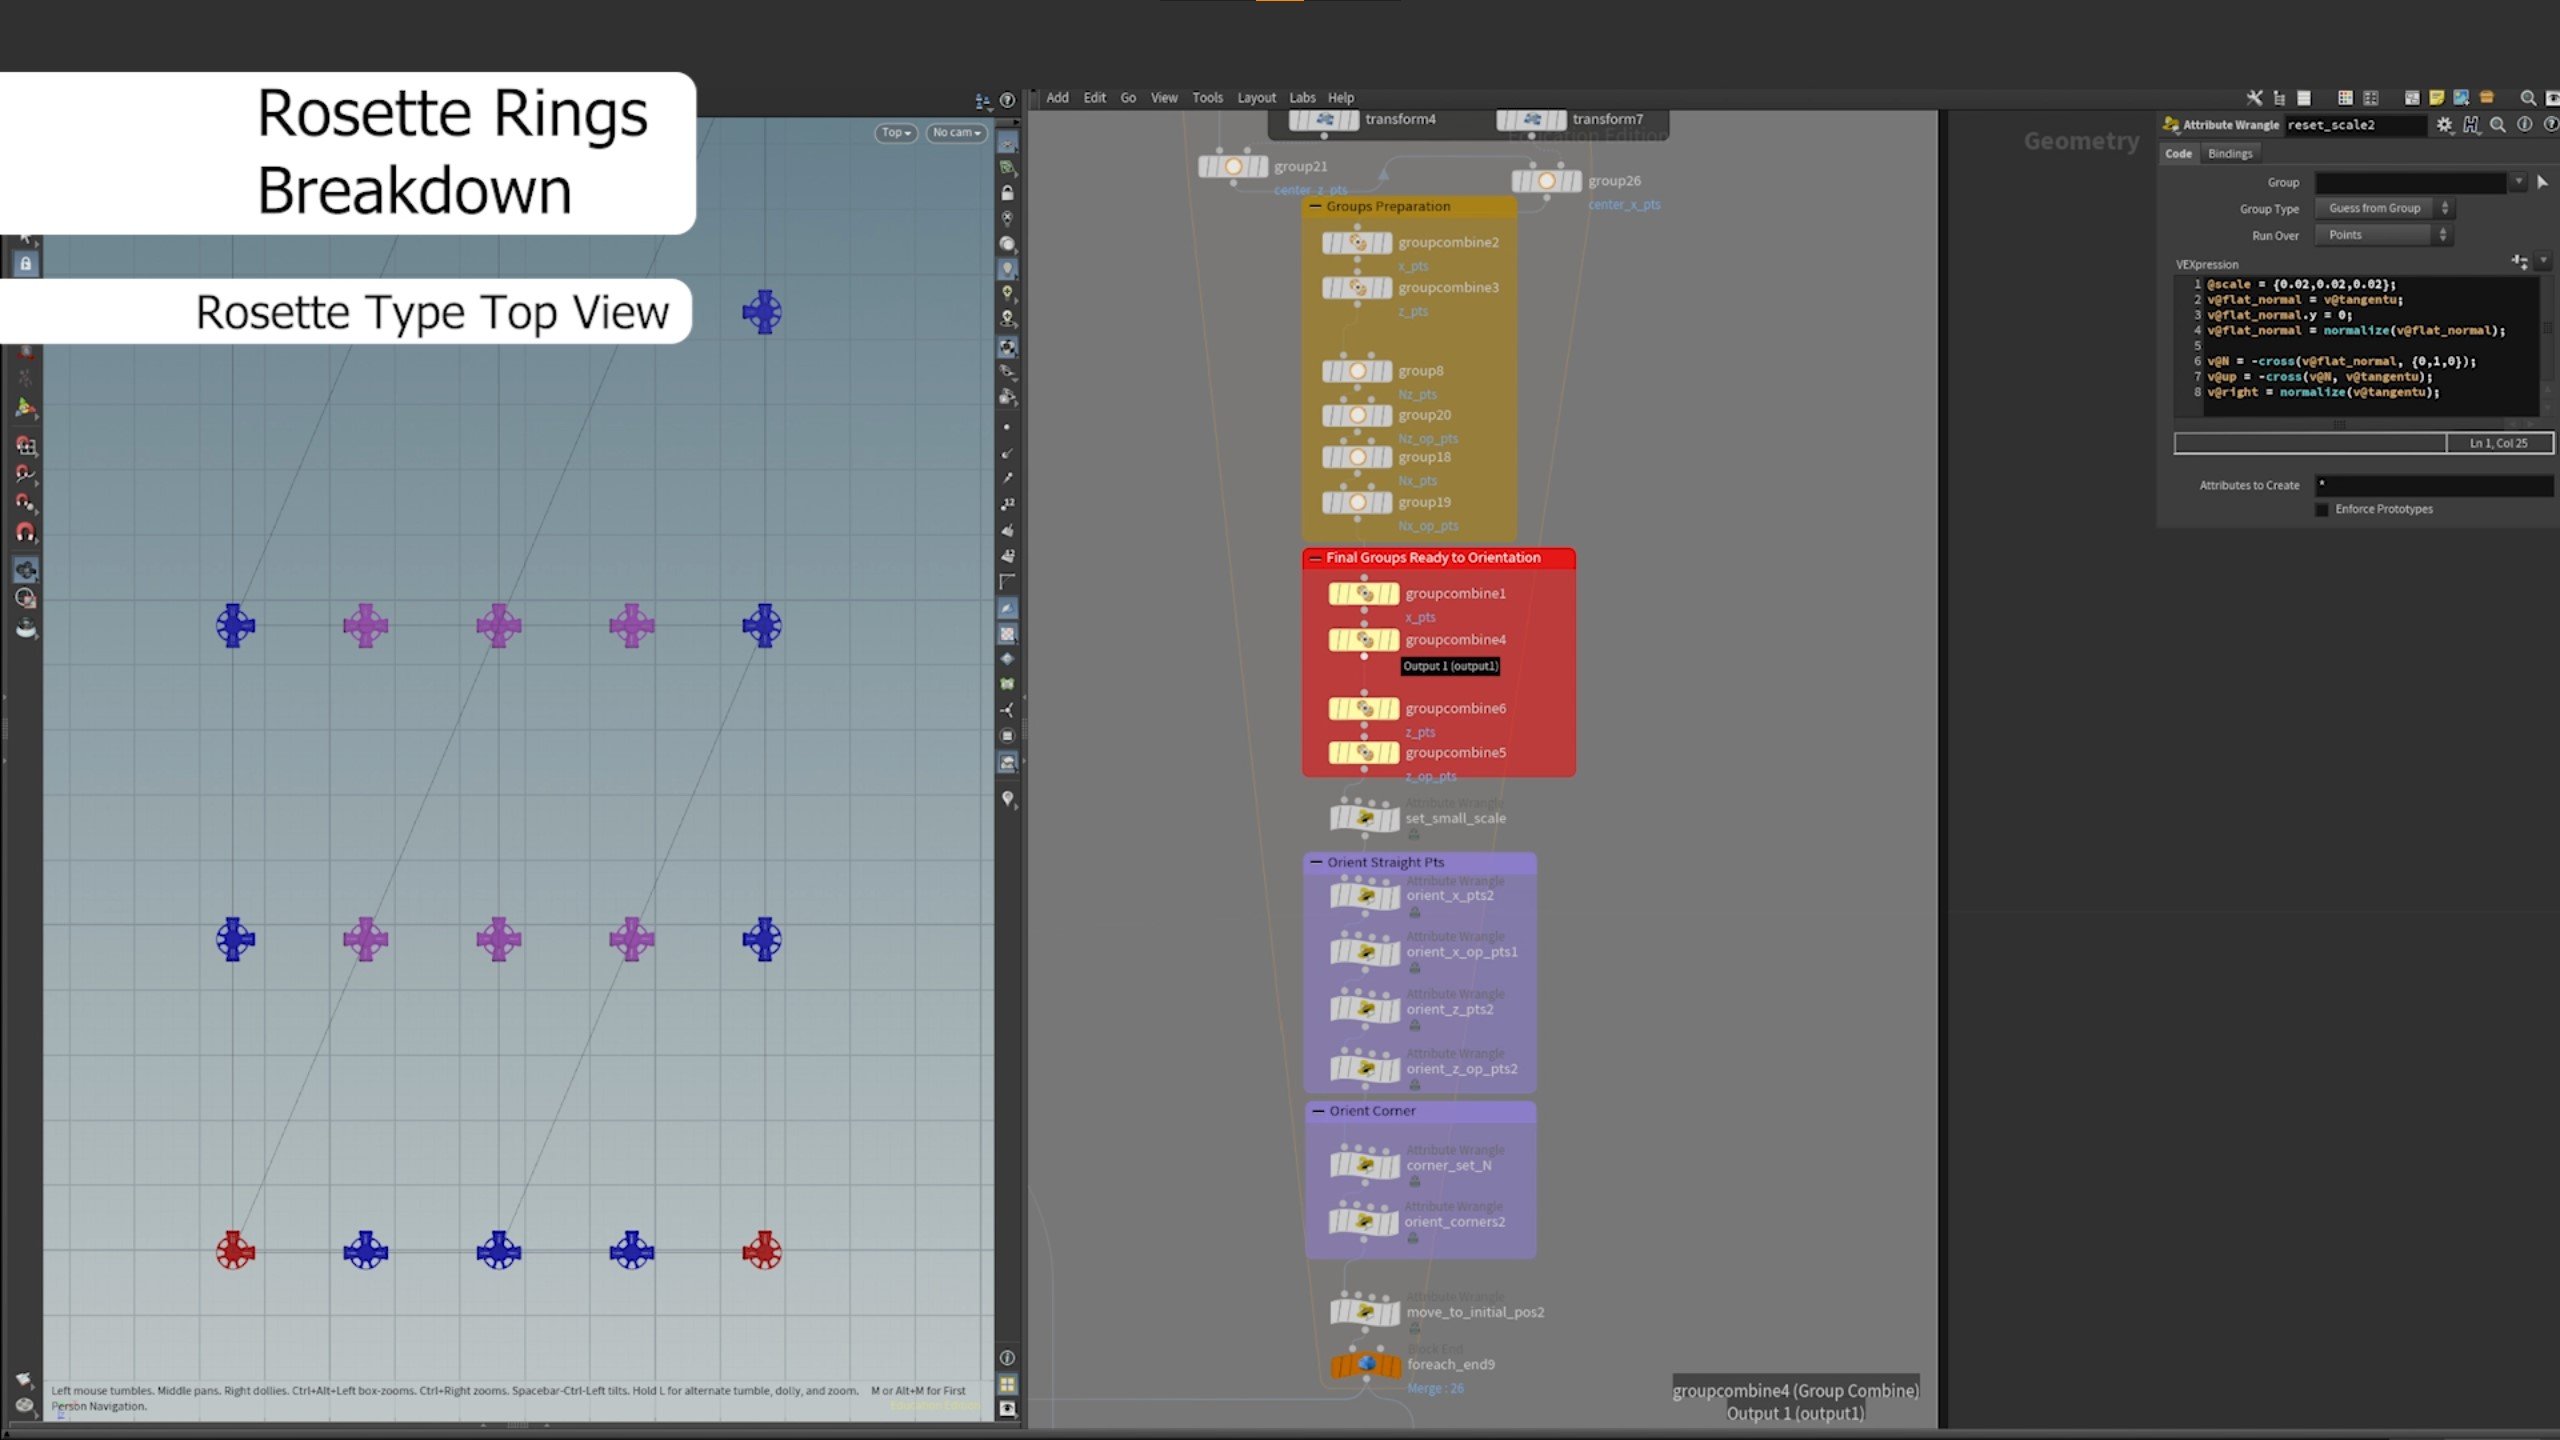
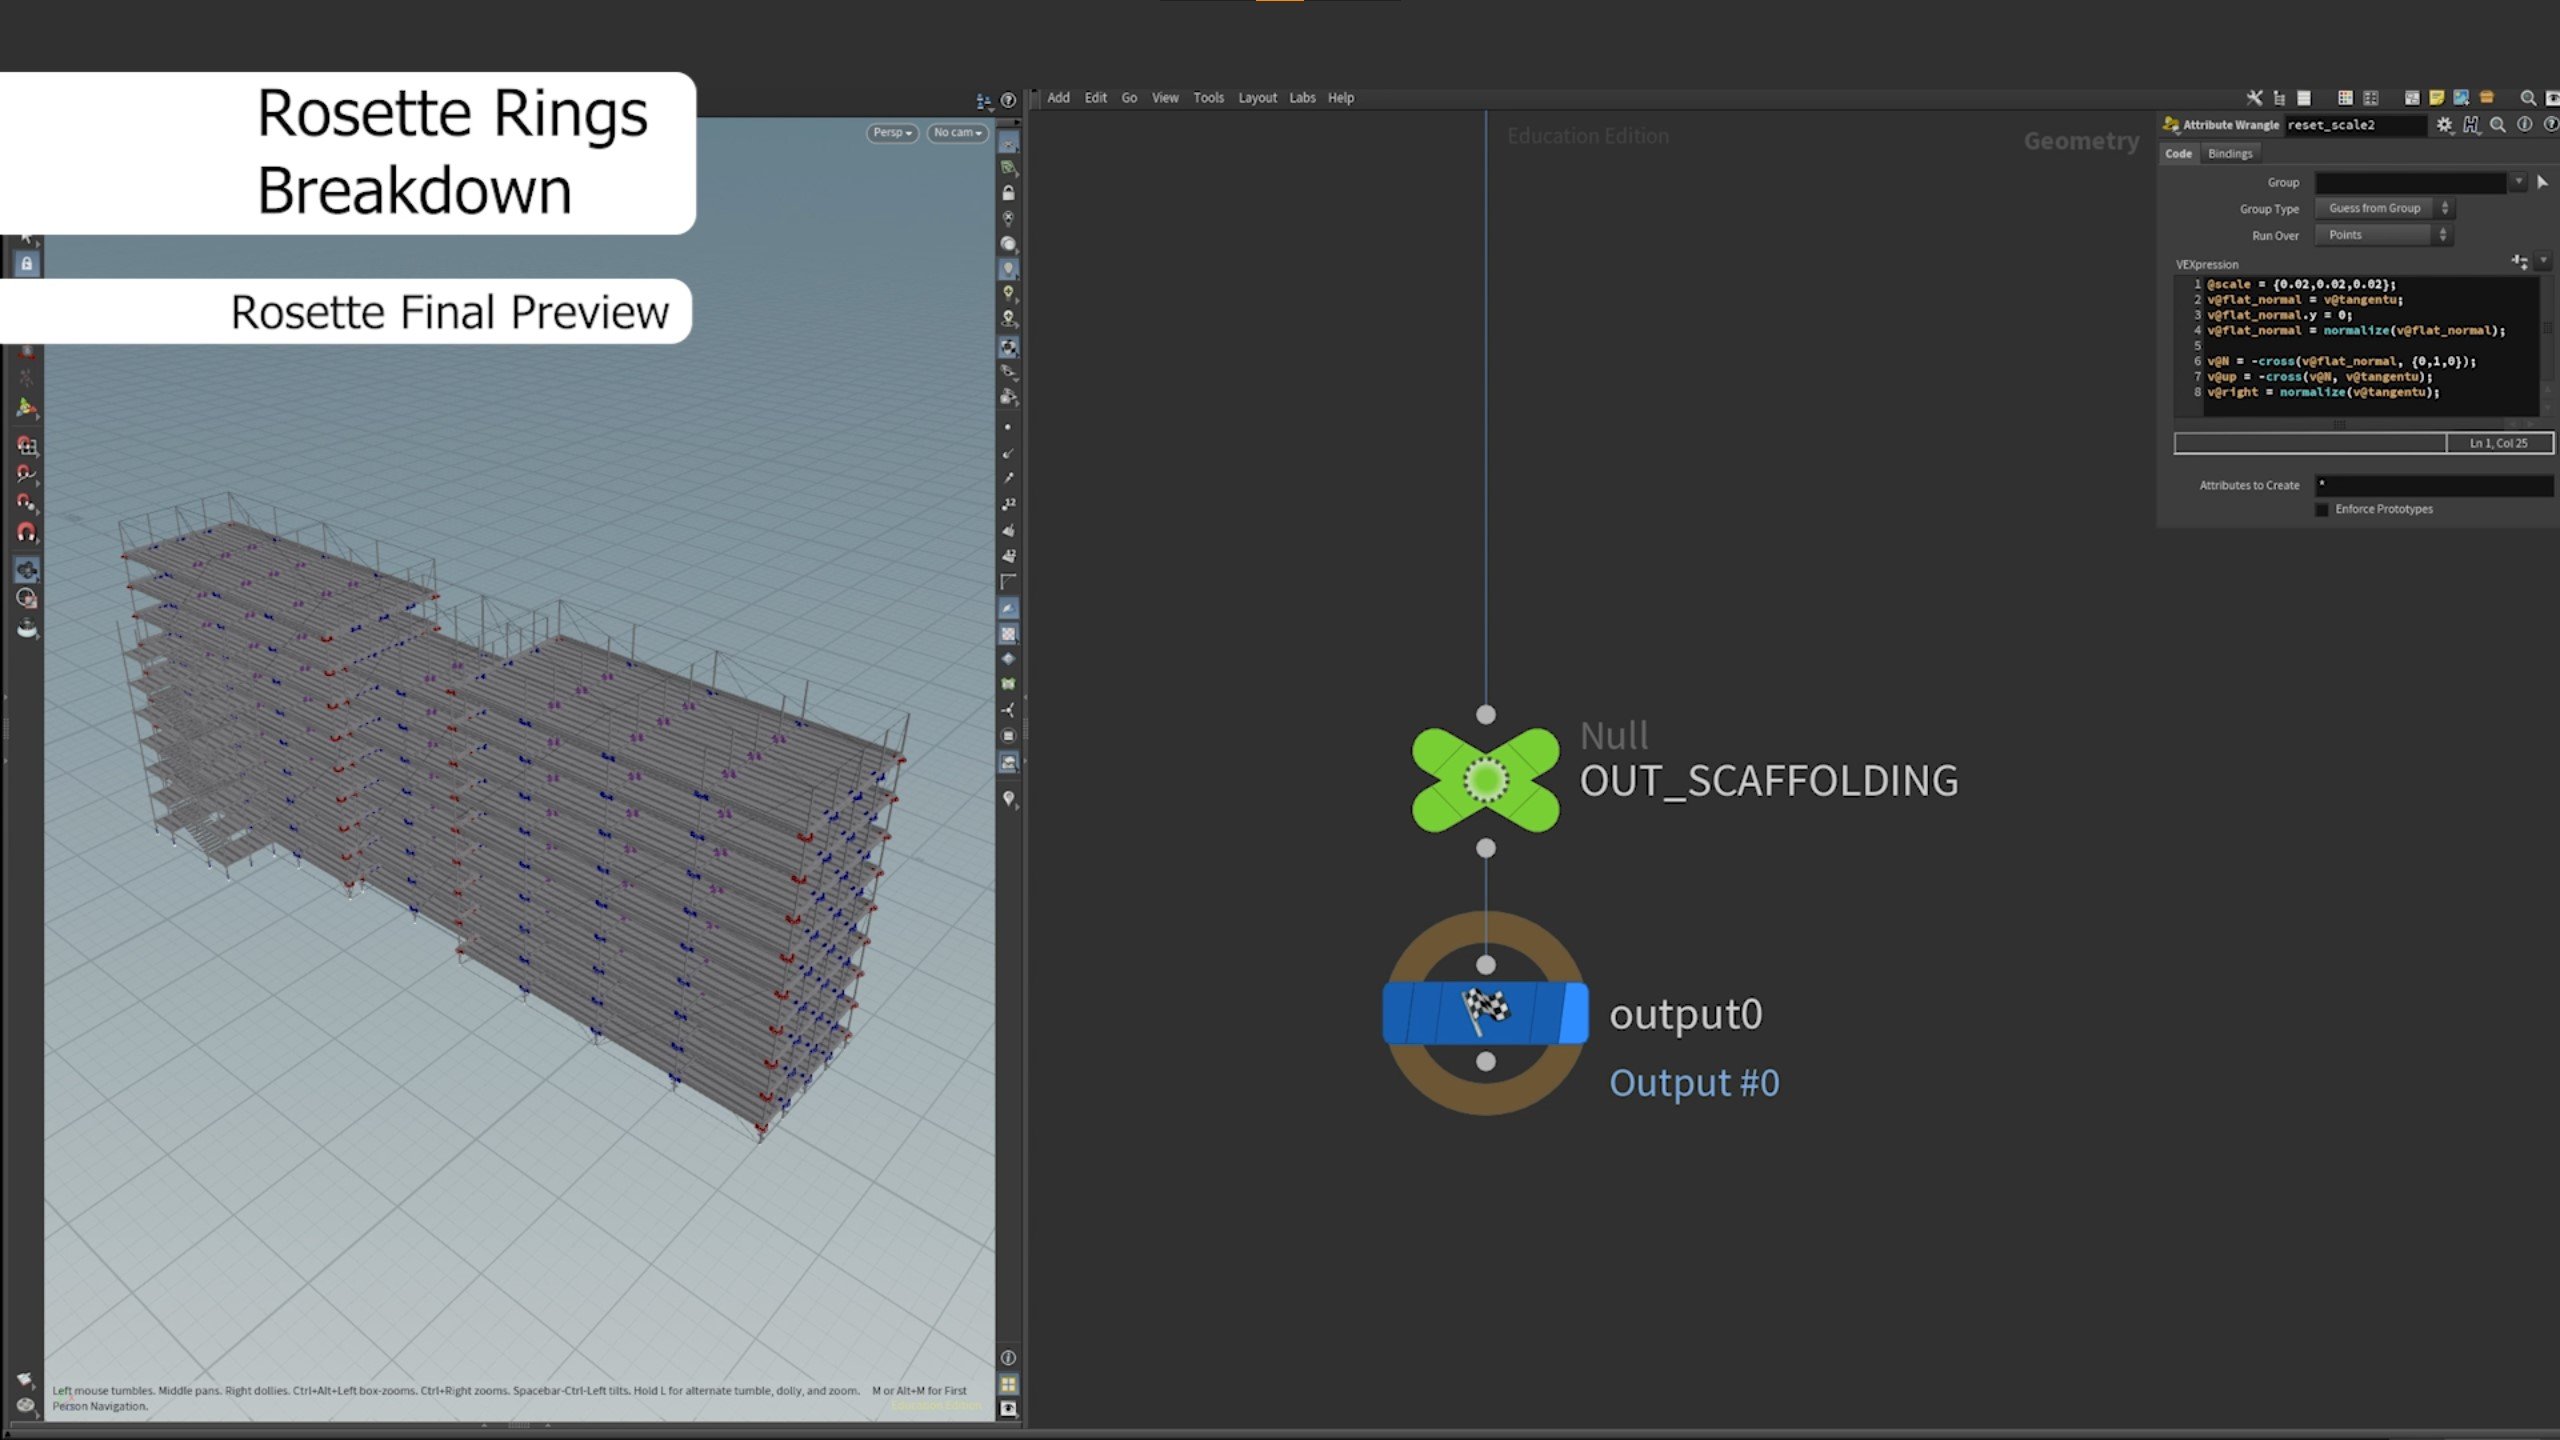
Rosette Rings Breakdown:
(= circular component that connects different parts of a scaffolding structure together)
- Modeling the Rosette Rings: I created four distinct Rosette Rings to be instanced in Unreal Engine. These included a corner Rosette Ring, a straight Rosette Ring, a 3-intersections Rosette Ring, and a 4-intersections Rosette Ring.
- Determining point assignments: The first step in the setup involved determining which points would need to instance each specific type of Rosette Ring. To achieve this, I utilized groups, group promotions, and group combines. These tools allowed me to categorize and combine points based on their intended Rosette Ring type.
- Orienting the Rosette Rings: The most challenging aspect of this process was correctly orienting all the Rosette Rings. To accomplish this, I employed a technique where I looped over the floor primitives and temporarily moved them to the center of the scene. This centralization step enabled me to assign the points to the appropriate orientation based on their world positions. Once the orientations were determined, the points were moved back to their initial positions.
- Applying instancing: The final step involved adding instancing to the assigned points, effectively placing and replicating the corresponding Rosette Rings throughout the scaffolding. This instancing feature provided efficiency and allowed for consistent placement and distribution of the Rosette Rings.

Cinematic Shots:
Thank you for investing your time in reading my breakdown. I sincerely hope that you have found the information valuable and gained some intriguing tips from it. If there are any additional questions or if you would like to delve deeper into any specific aspects, please do not hesitate to reach out or read the 80 Level article!
Assets: Cathedral


Comments (4)