
Establishing Shots


I am a Matte Painter and 3D Generalist. This is a collection of some of the work I've done over the past year at Gnomon School of Visual Effects.
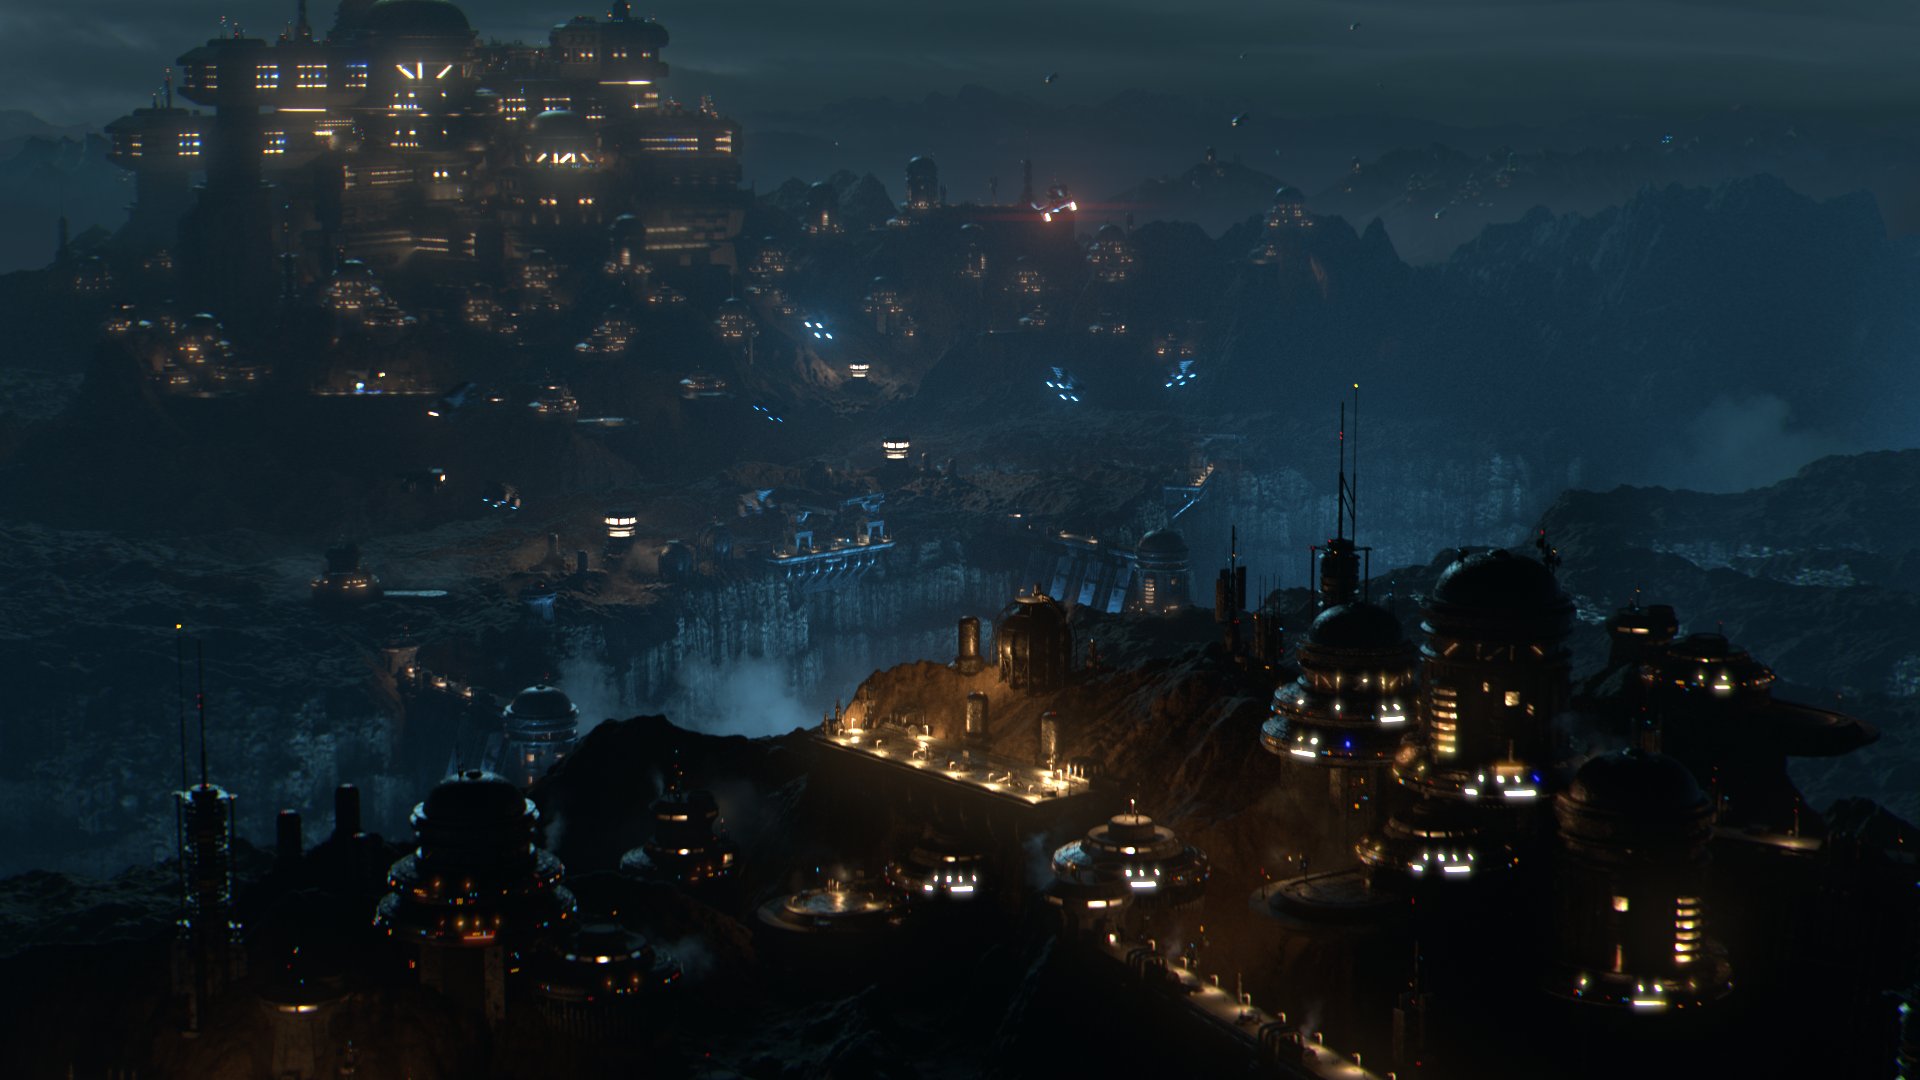
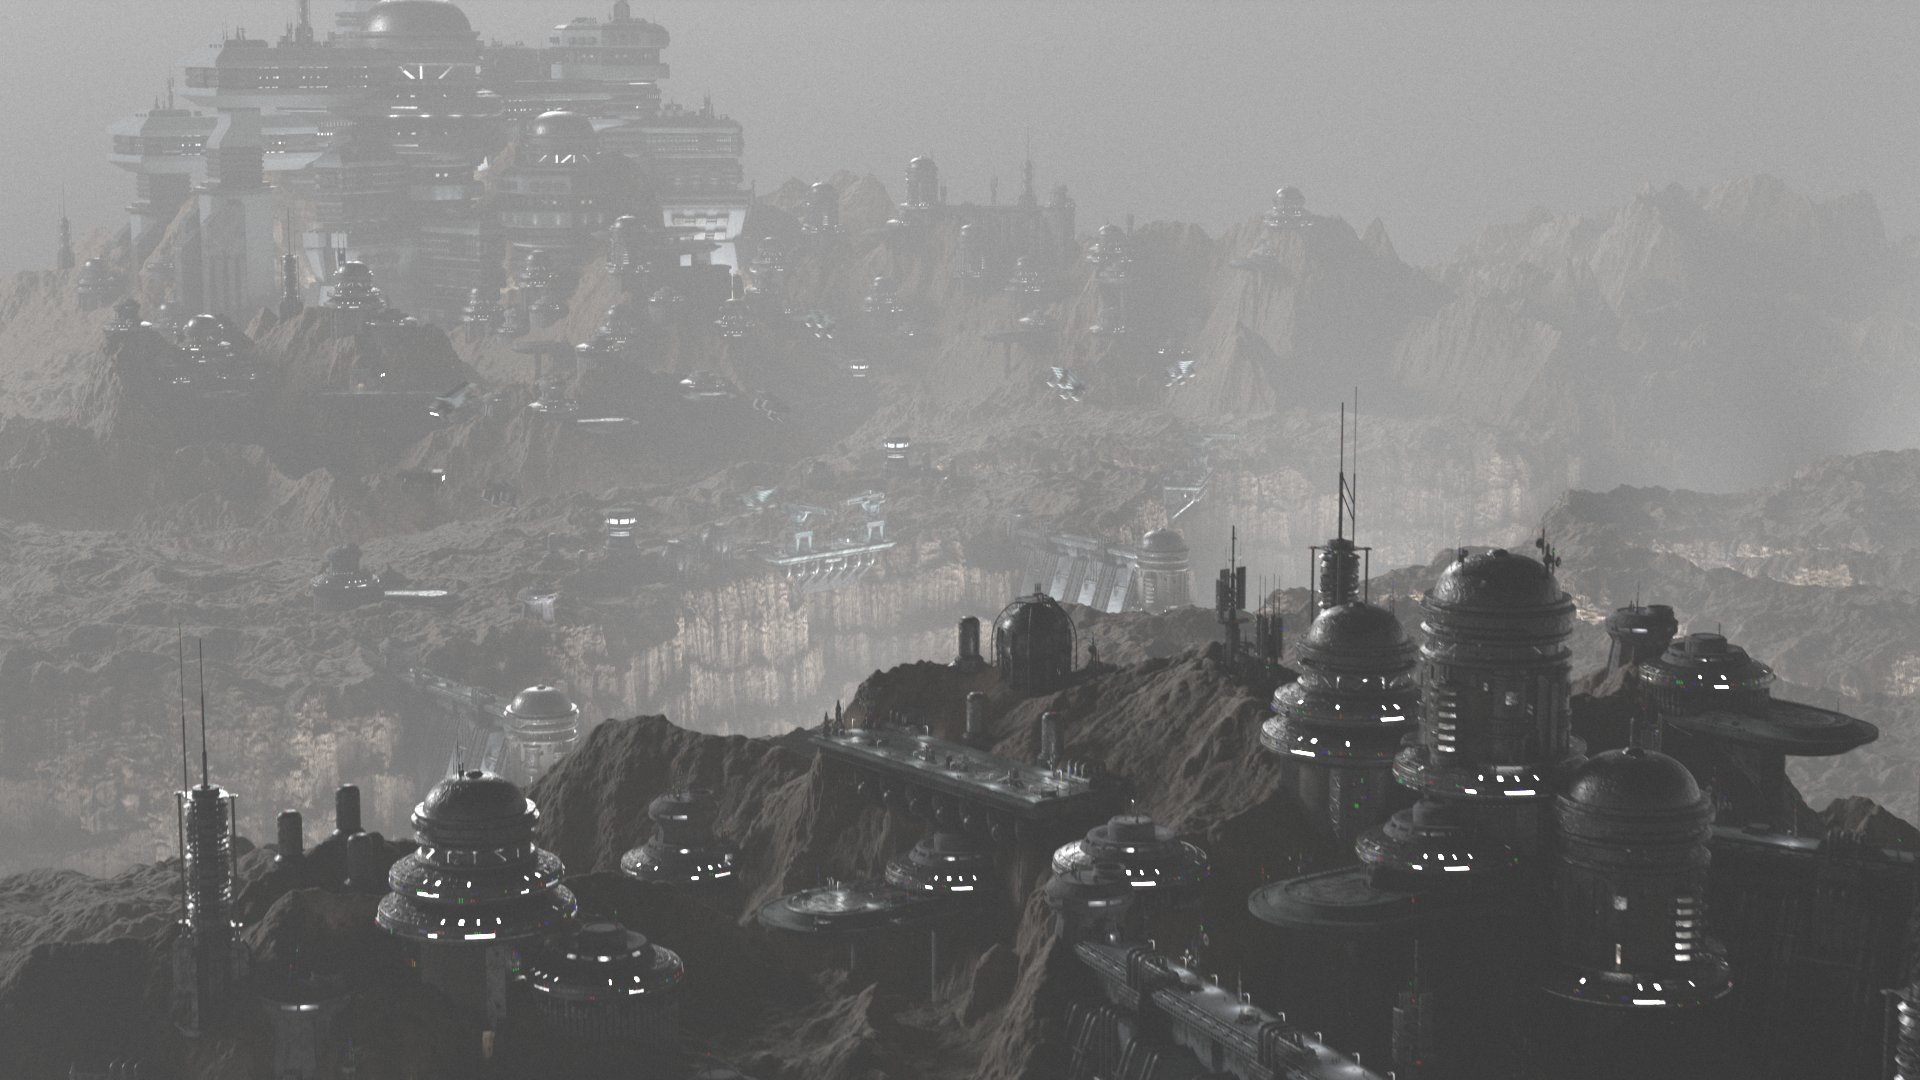
Trade Envoy's Approach
The idea behind this project was that I wanted to do a primarily 3D establishing shot. Up until this point, all of the establishing shots that I had done were mostly painted. Here, I strayed away from that, to show off a broader 3D generalist skillset. The shot is inspired by the classic approach scenes often seen in Star Wars media. On the process end, it was inspired by the work done by the generalist teams at ILM, who use a wide range of skills to produce grand, awe-inspiring environments.
Original concept, responsible for all aspects.

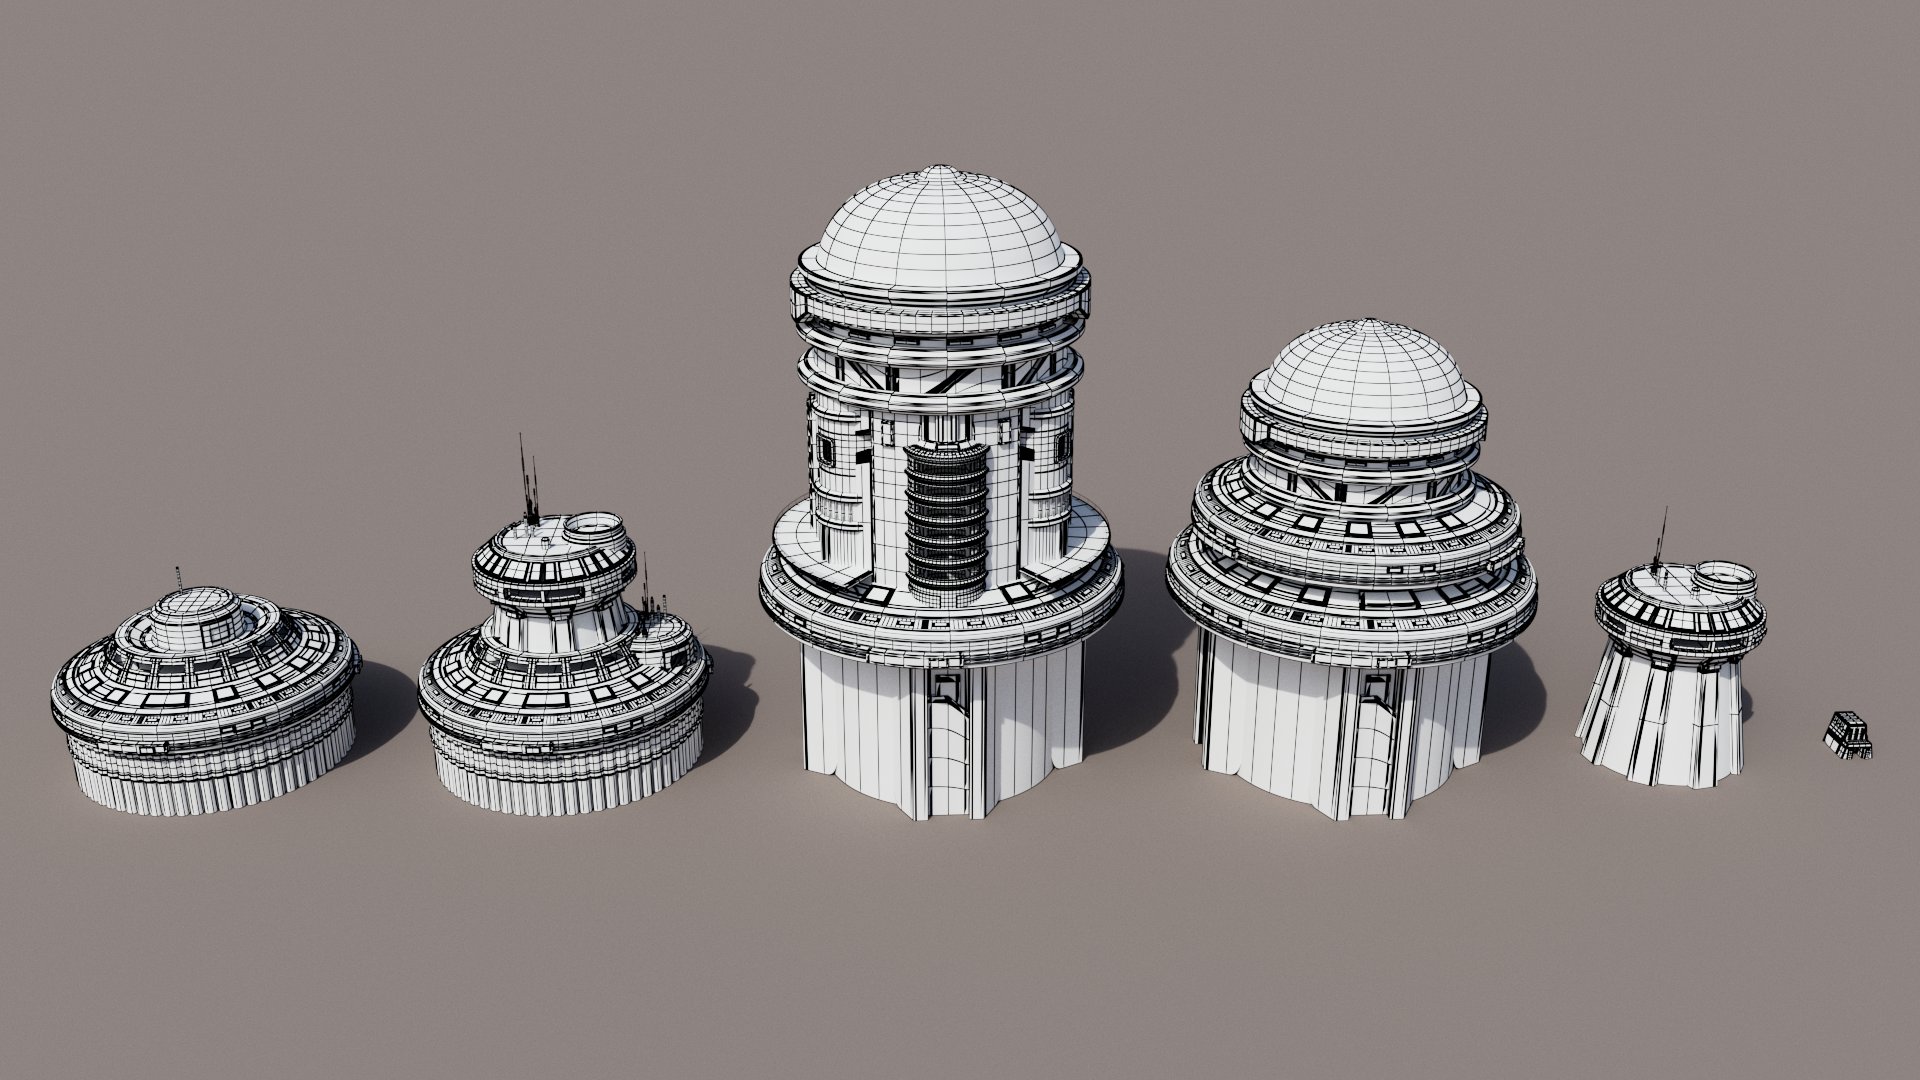
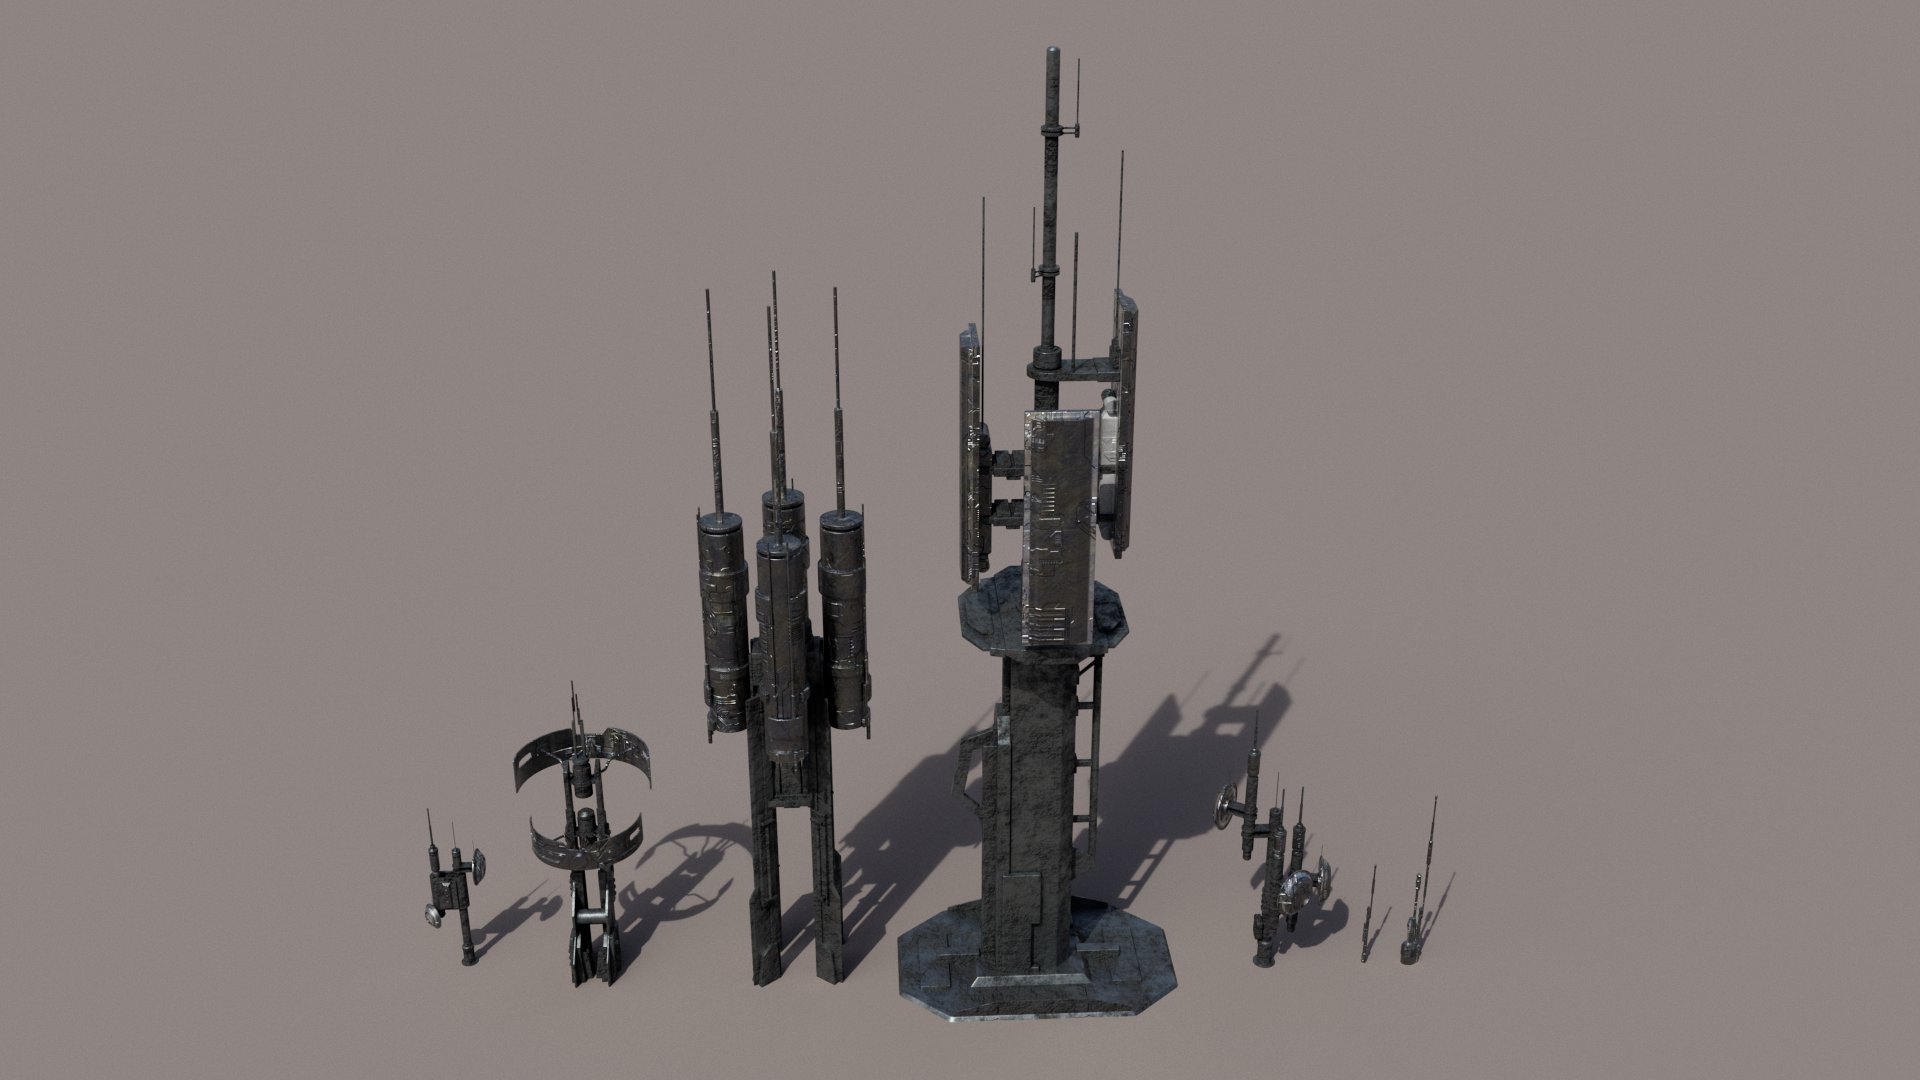
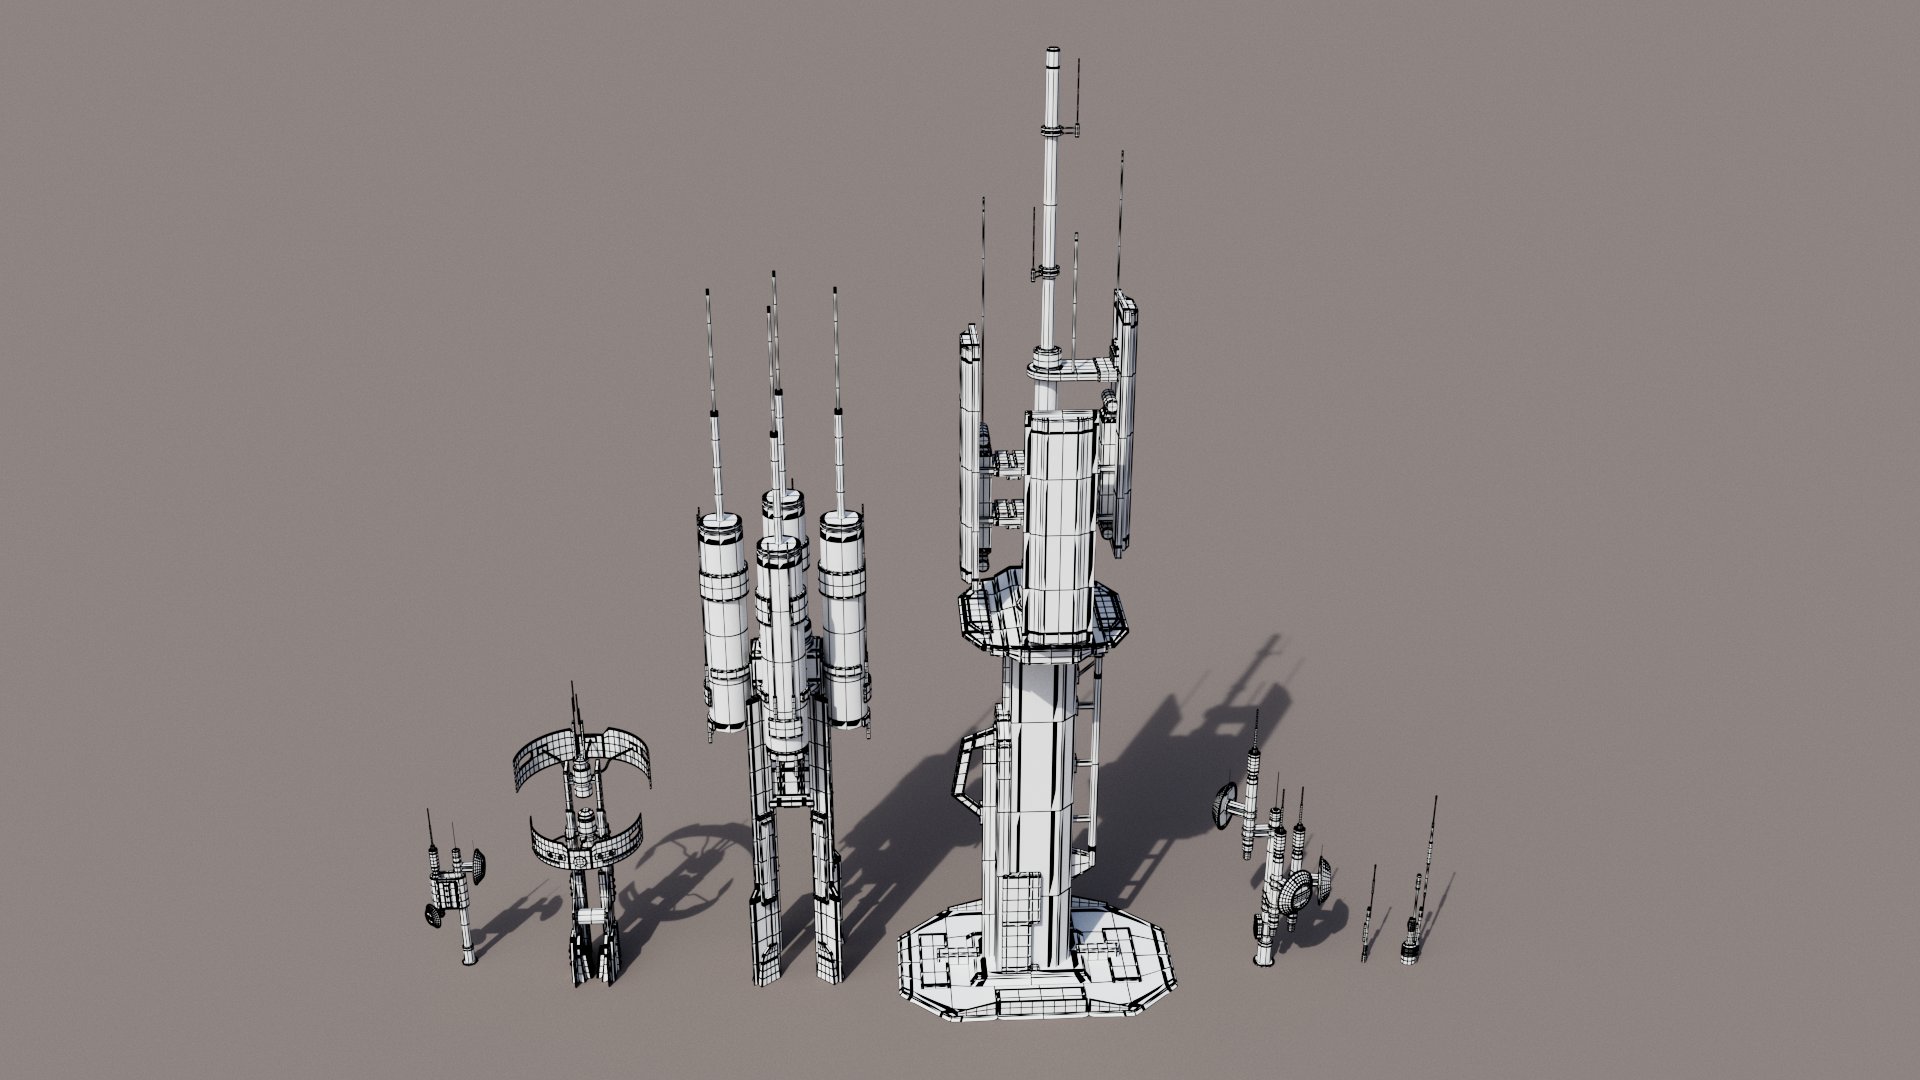
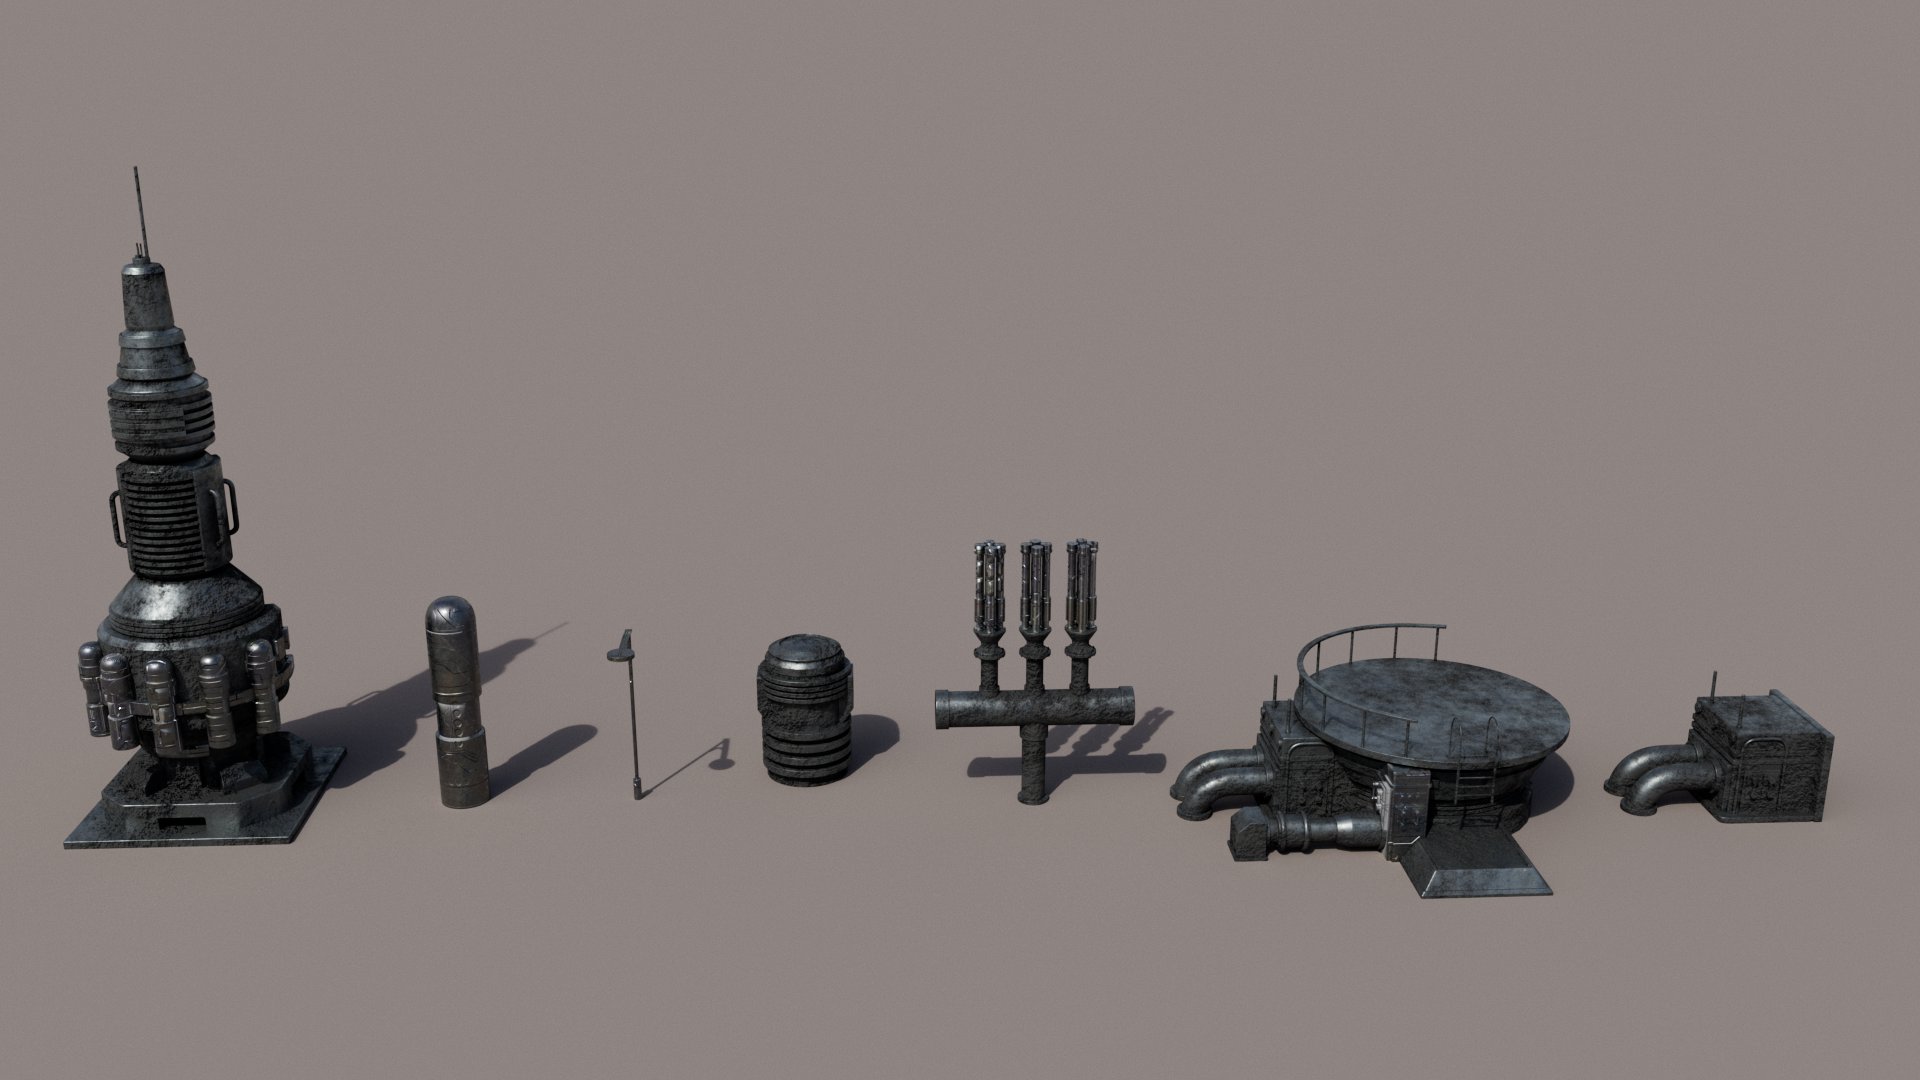
I started by creating the terrain using height fields in Houdini. The rest of the assets were modeled in Maya. I essentially created my own kitbash for this project by modeling about 40 different individual assets of varying types. I then duplicated them around and laid them out into the composition in the Maya scene. A selection of the assets can be seen below.


Due to the large amount of assets, and to their largely varying scale, UVing everything would've been a massive pain, so I decided to procedurally shade all of the assets in the Maya hypershade. I used a lot of blend materials, triplanar projections, and 3D masks to achieve an acceptable amount of complexity in each shader. This allowed me to apply one shader to many assets without having to UV anything, and have them still hold up from the view of the camera. Below is an image of one of the shading networks I created.

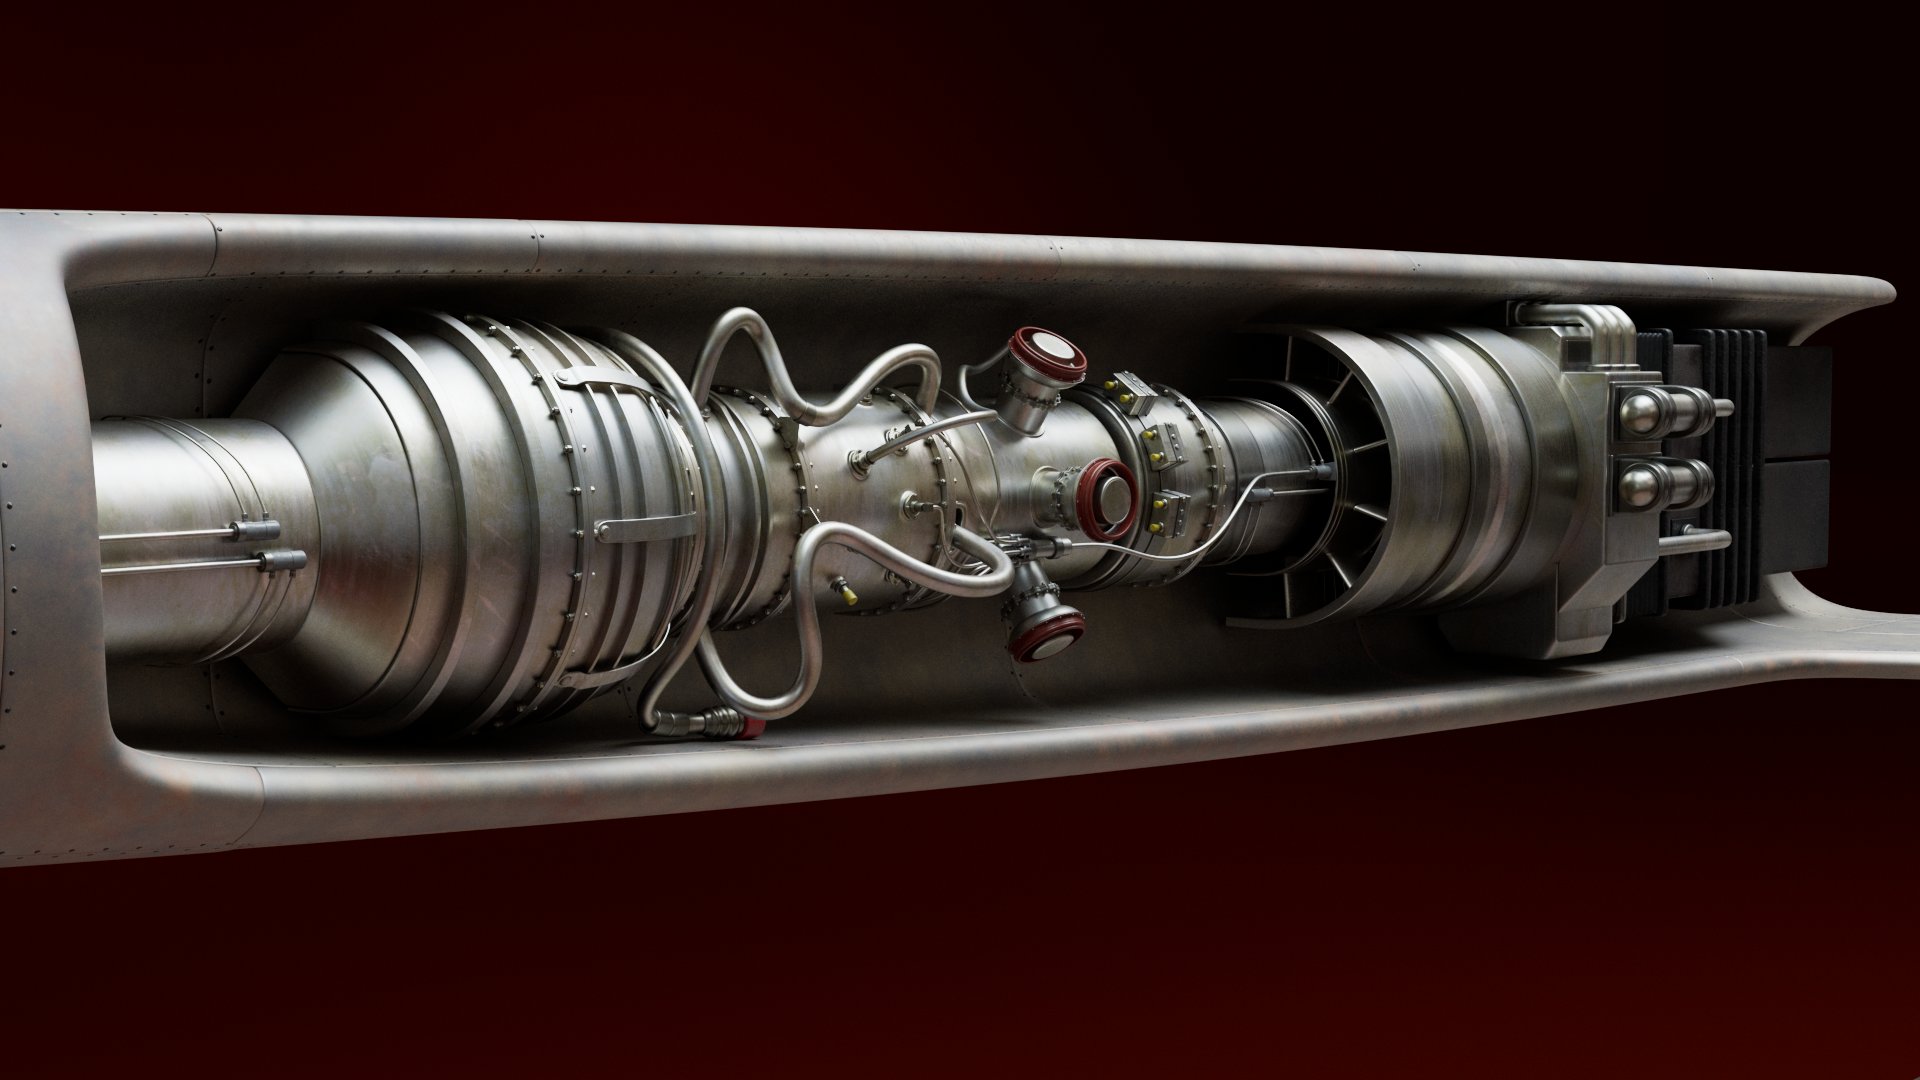
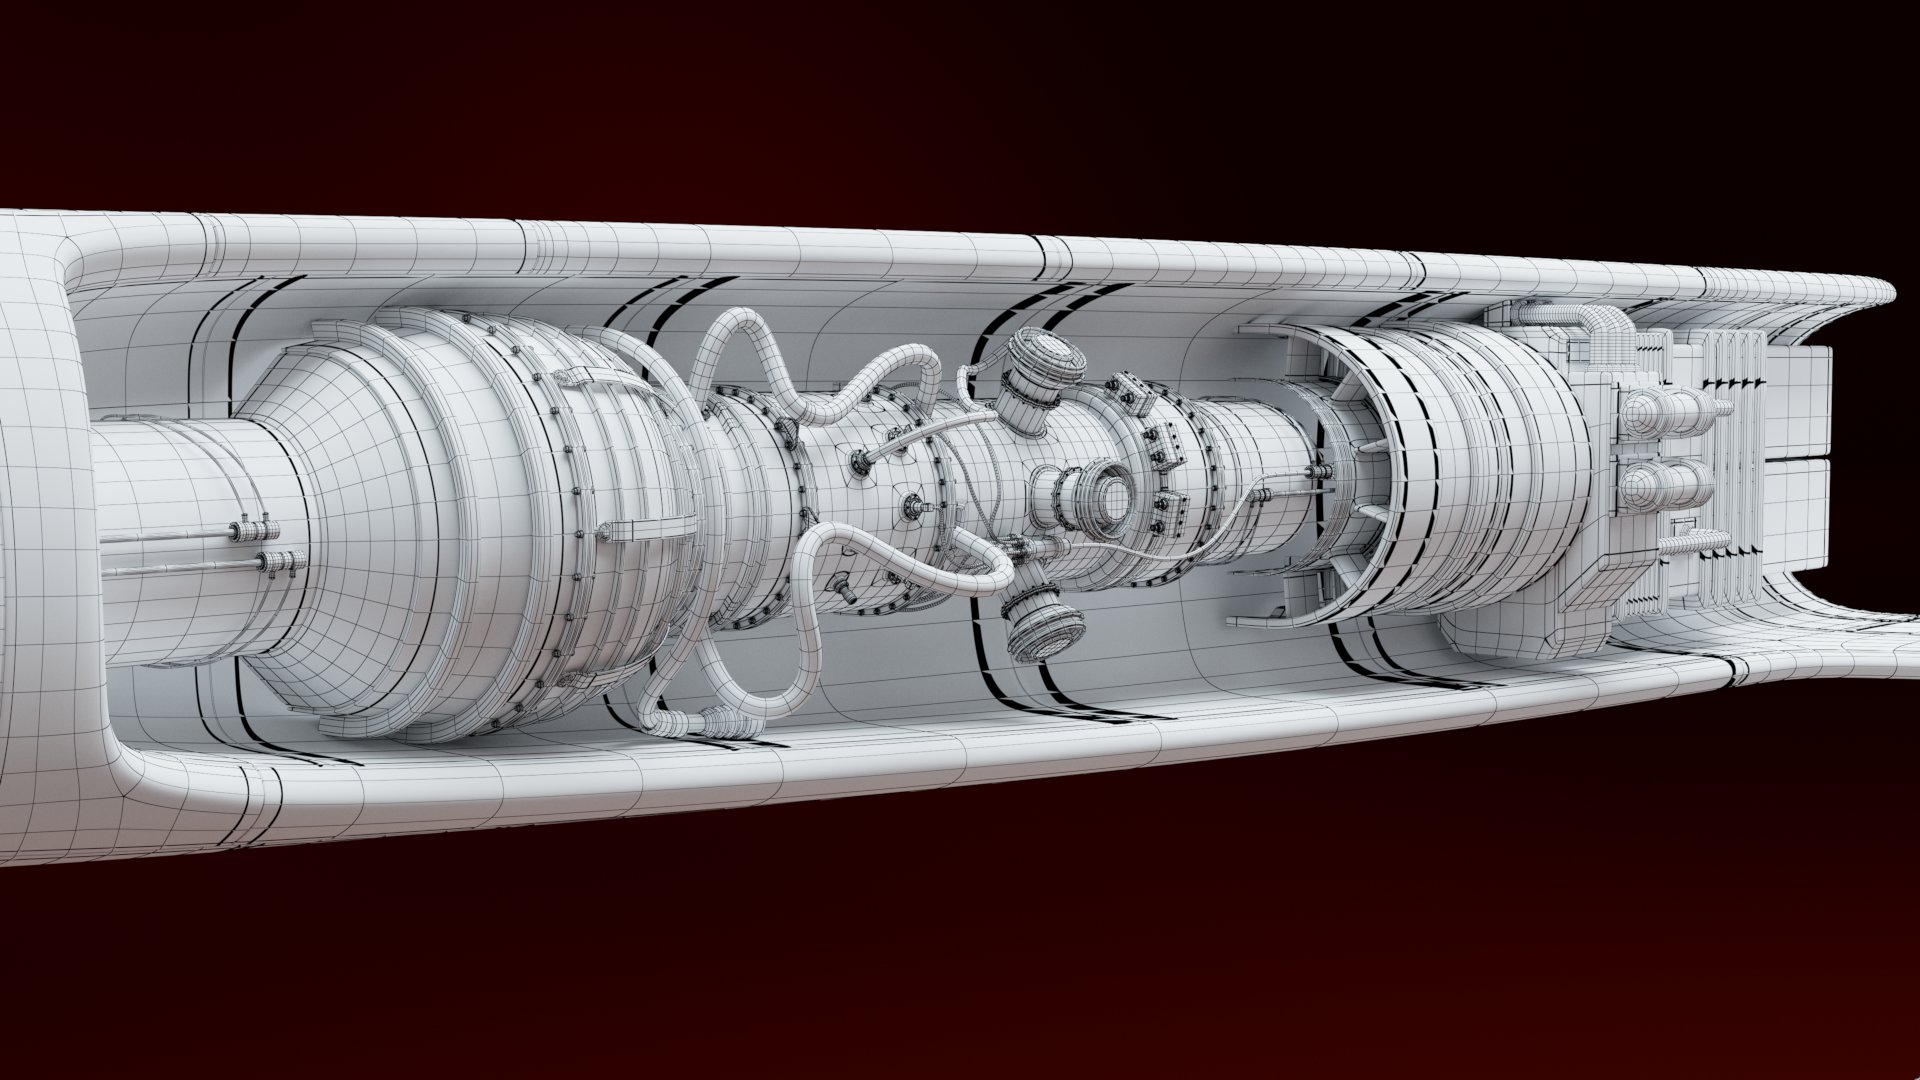
The main spaceship that flies across the camera is based on a concept by John Frye, with some design additions made by myself to fill in some gaps not seen in the concept, and to help it translate better into 3D. I modeled and UV'd it in Maya, and textured it in Substance Painter. In the scene, it is animated along a motion path.


Despite the goal being to use mostly 3D on this project, I still wanted to do a painting as well. All of the environment past the midground mountain range was painted in Photoshop. Because the part of the environment that is painted is very far from the camera, I simply projected the entire painting onto a sphere in Nuke, as opposed to doing a multi-layer projection setup.


I always enjoy being able to take the things I prepared in the render and adjust them in compositing to develop an overall look. It's also nice to bring further life to the project by comping in animated elements, or animating existing static elements.
I opted to rebuild the beauty using V-Ray light selects, because there were just so many lights in the scene, and I wanted to be able to adjust the color or intensity of any light, whenever I wanted. Organizing the lights in Maya for the purpose of having control of them in Nuke was one of the challenges of this project. I like to render all lights as white so that how I grade them in Nuke will match more closely to if I were to have changed their color or intensity in the render.


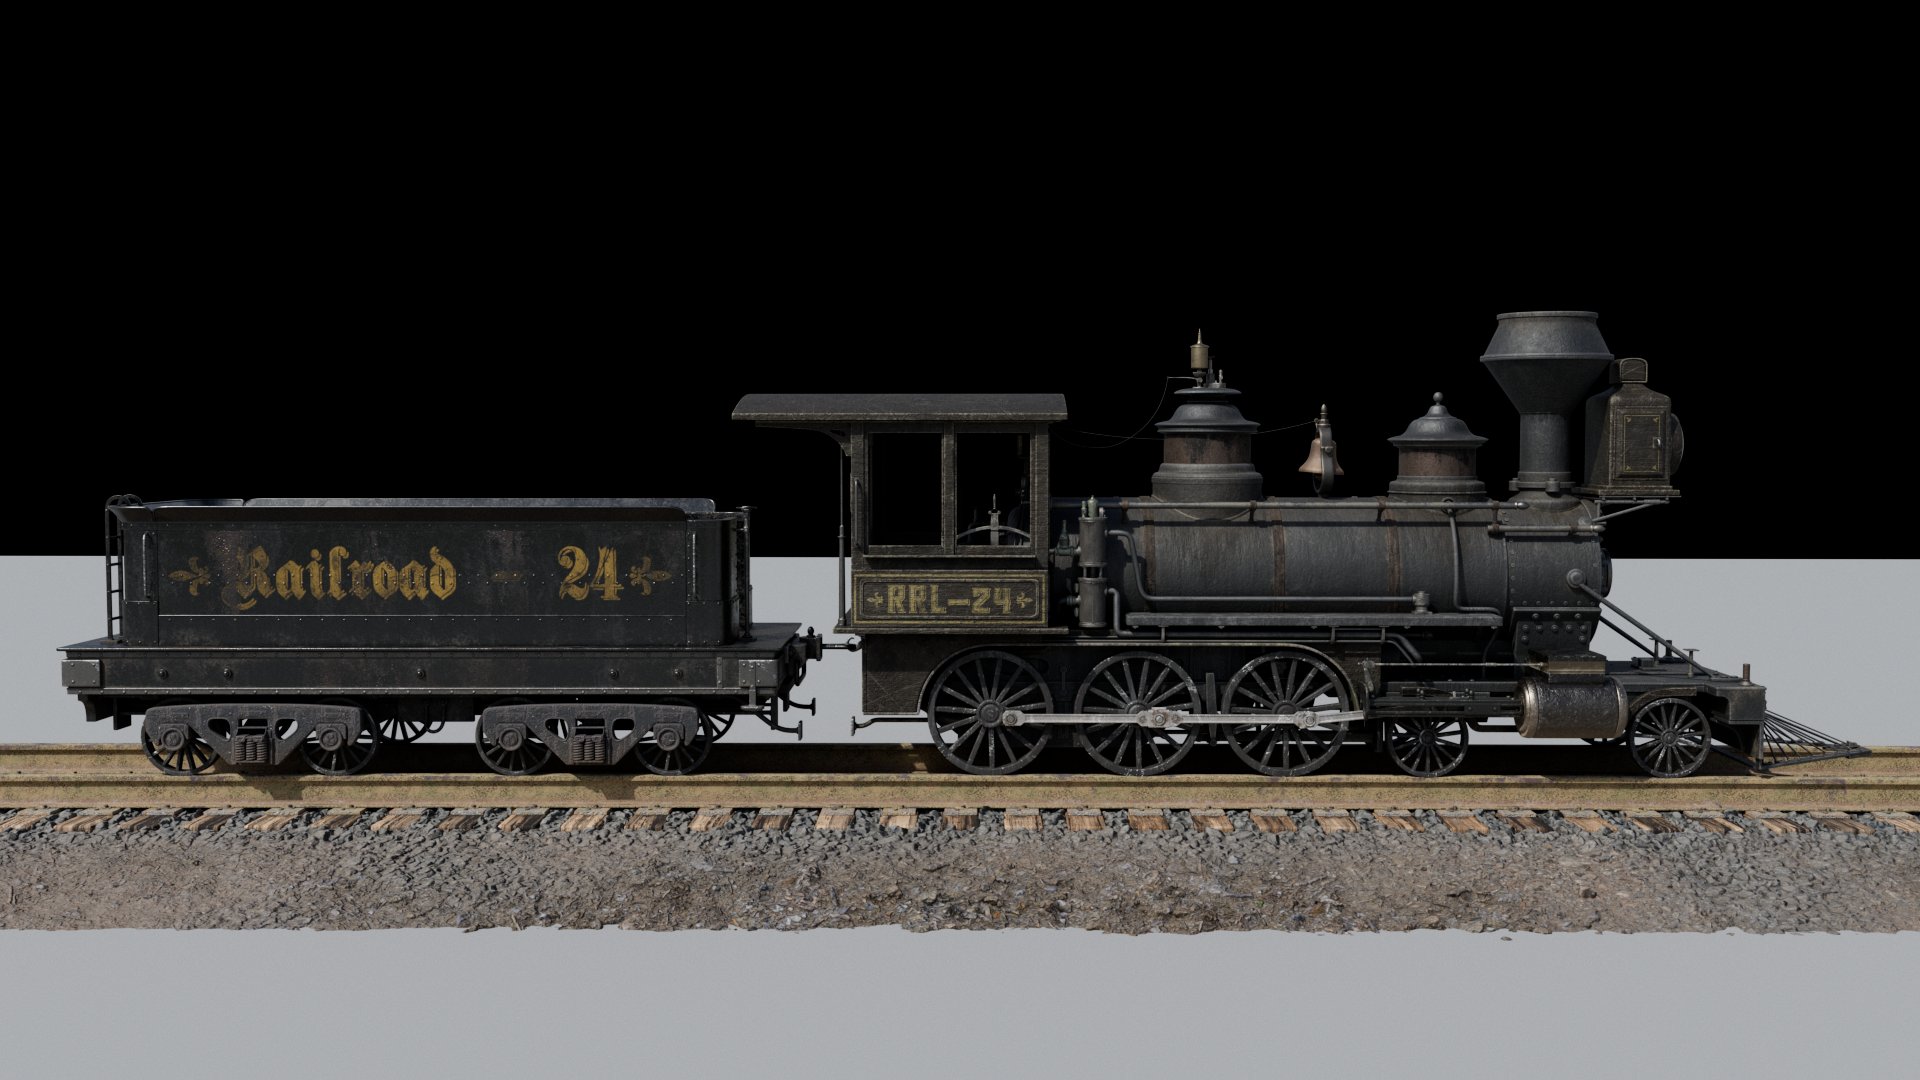
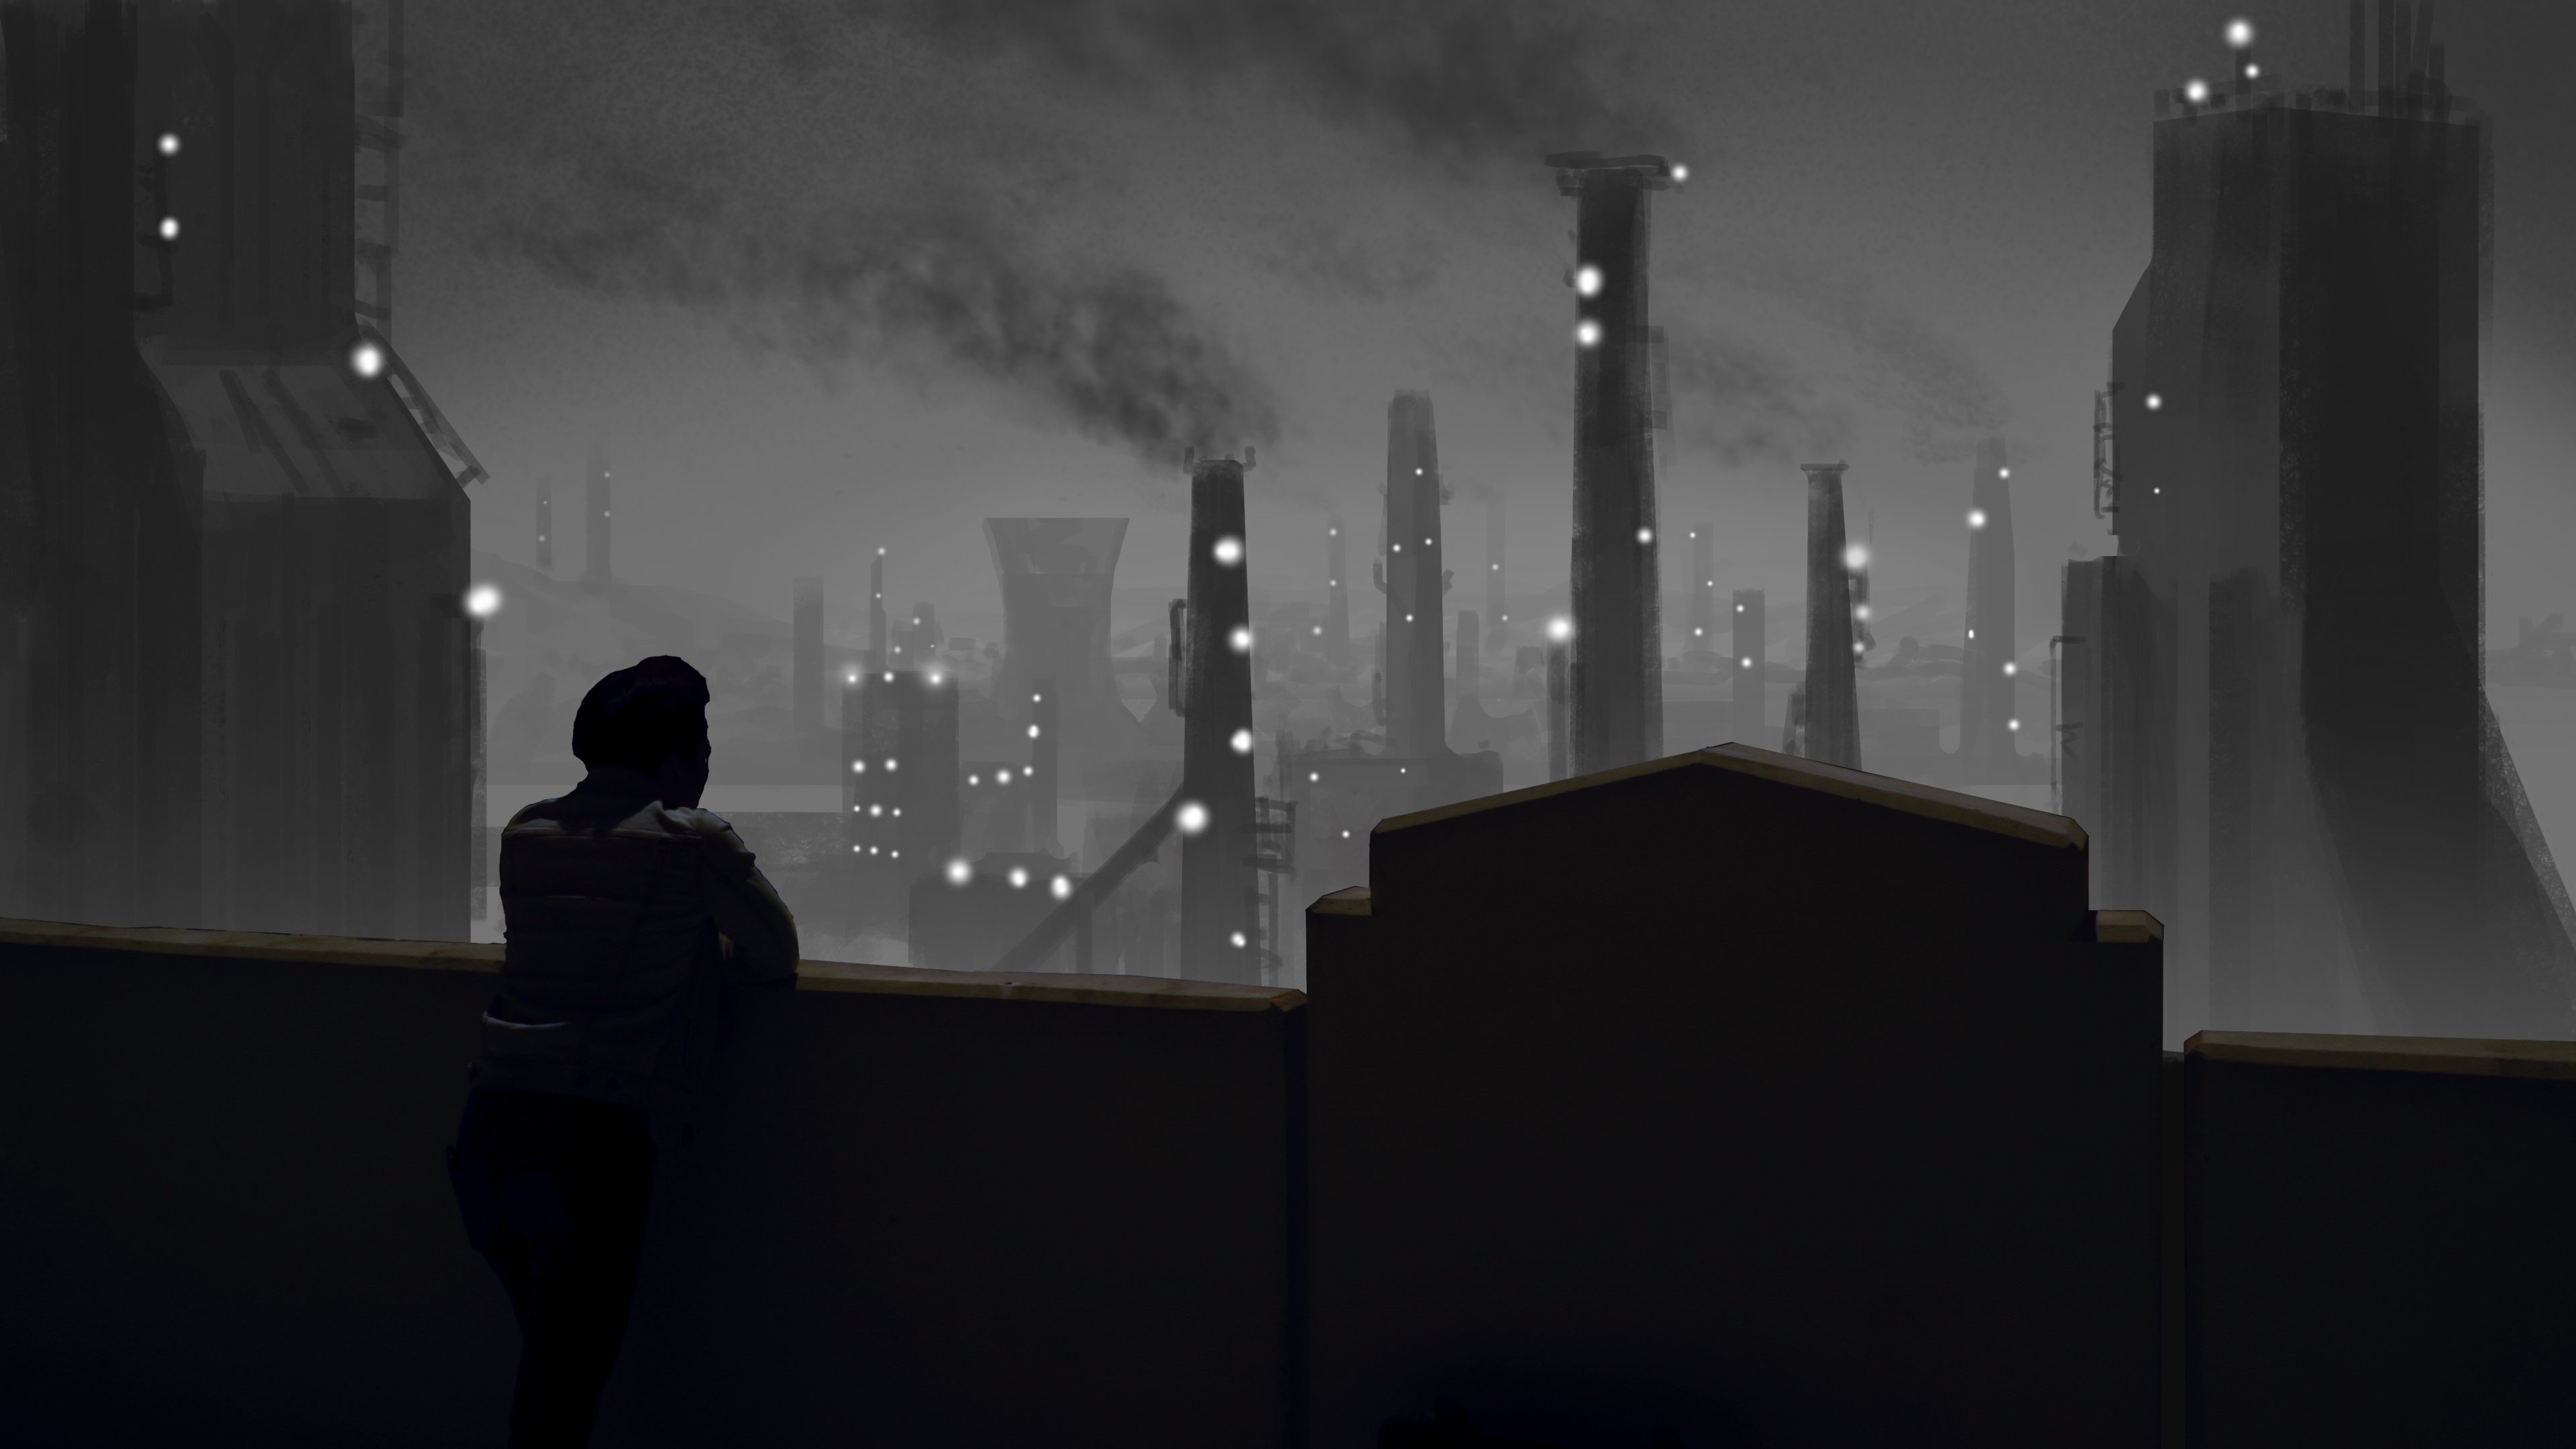
Steam in the Mountains
This project began with recalling how a friend and I used to dream of building our own steam locomotive back when we were in middle school.
Original concept, responsible for all aspects.
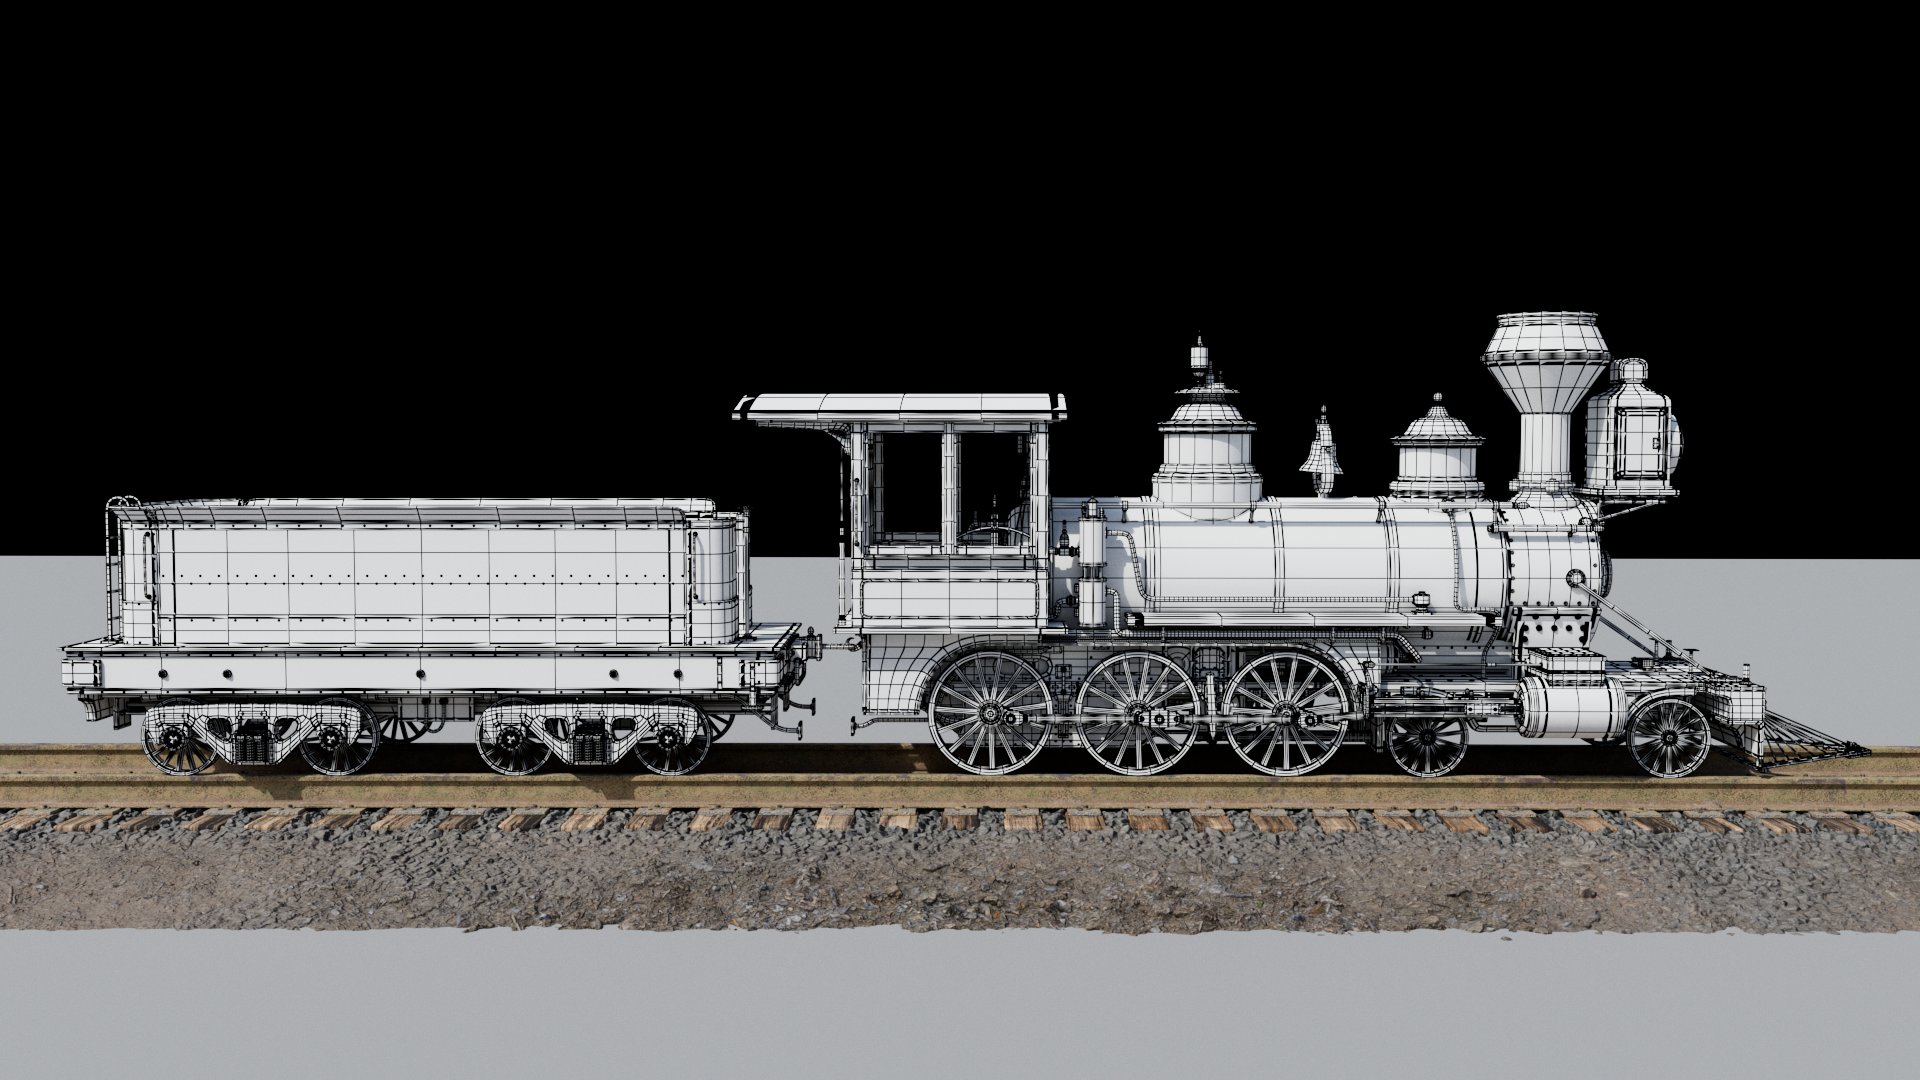
I started this project by modeling and UVing the train in Maya, and then texturing it in Substance Painter.
After building the train, I animated its movement along a motion path, but I wanted to do a little bit more to bring it to life. After looking at videos of real trains, it became very clear that they undergo much more movement than just translation along a track. For one, there is often a back-and-forth swaying motion you see in trains. To achieve this, I wrote a simple trigonometric expression on one of the rotation axes for several parts of the train, such as the bell, the main body, and the tender (rear cart).
Additionally, I wanted to automate the motion of the driving wheel/coupling rod mechanism as the train moves along the motion path. To start, I set up a system where the motion path drives the rotation of one wheel, and then that wheel drives the rotation of all the other wheels.

After that, to get the coupling rods to follow the movement of the wheels, I created a system of constraints.

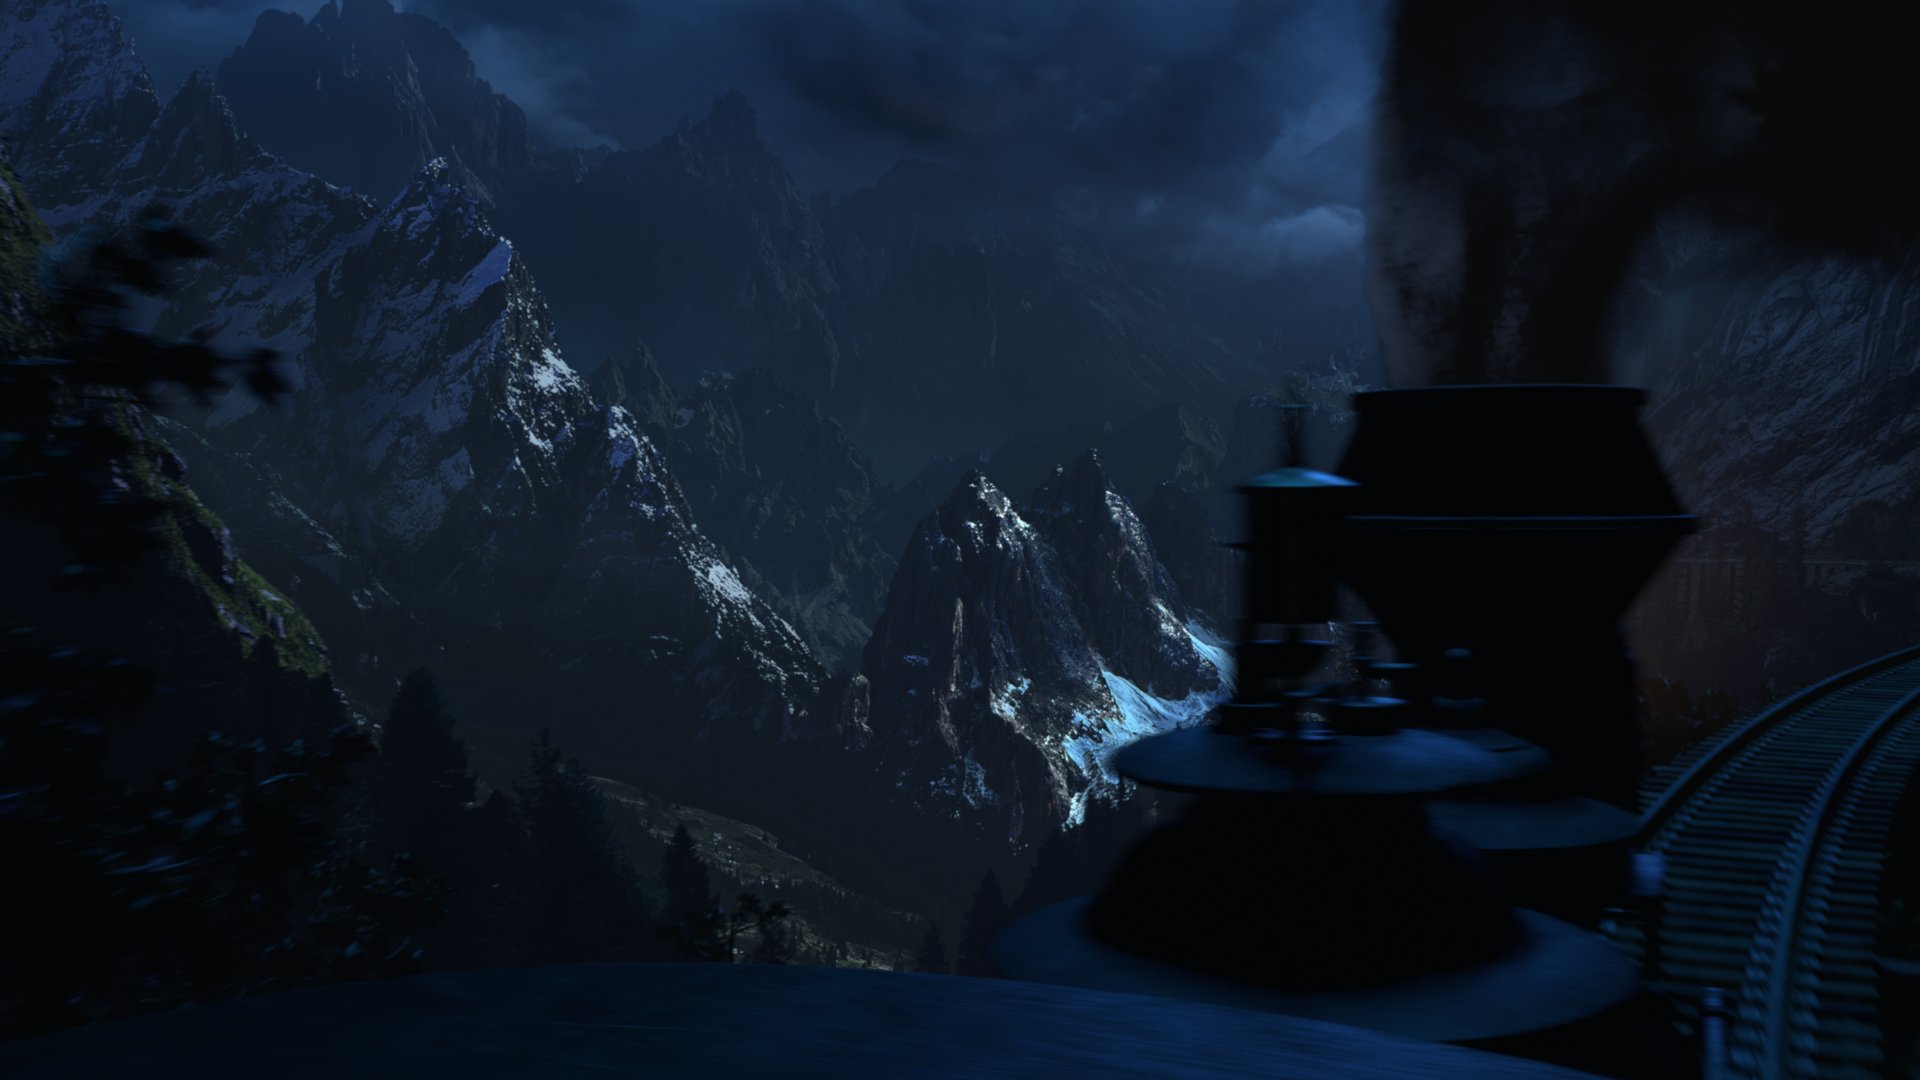
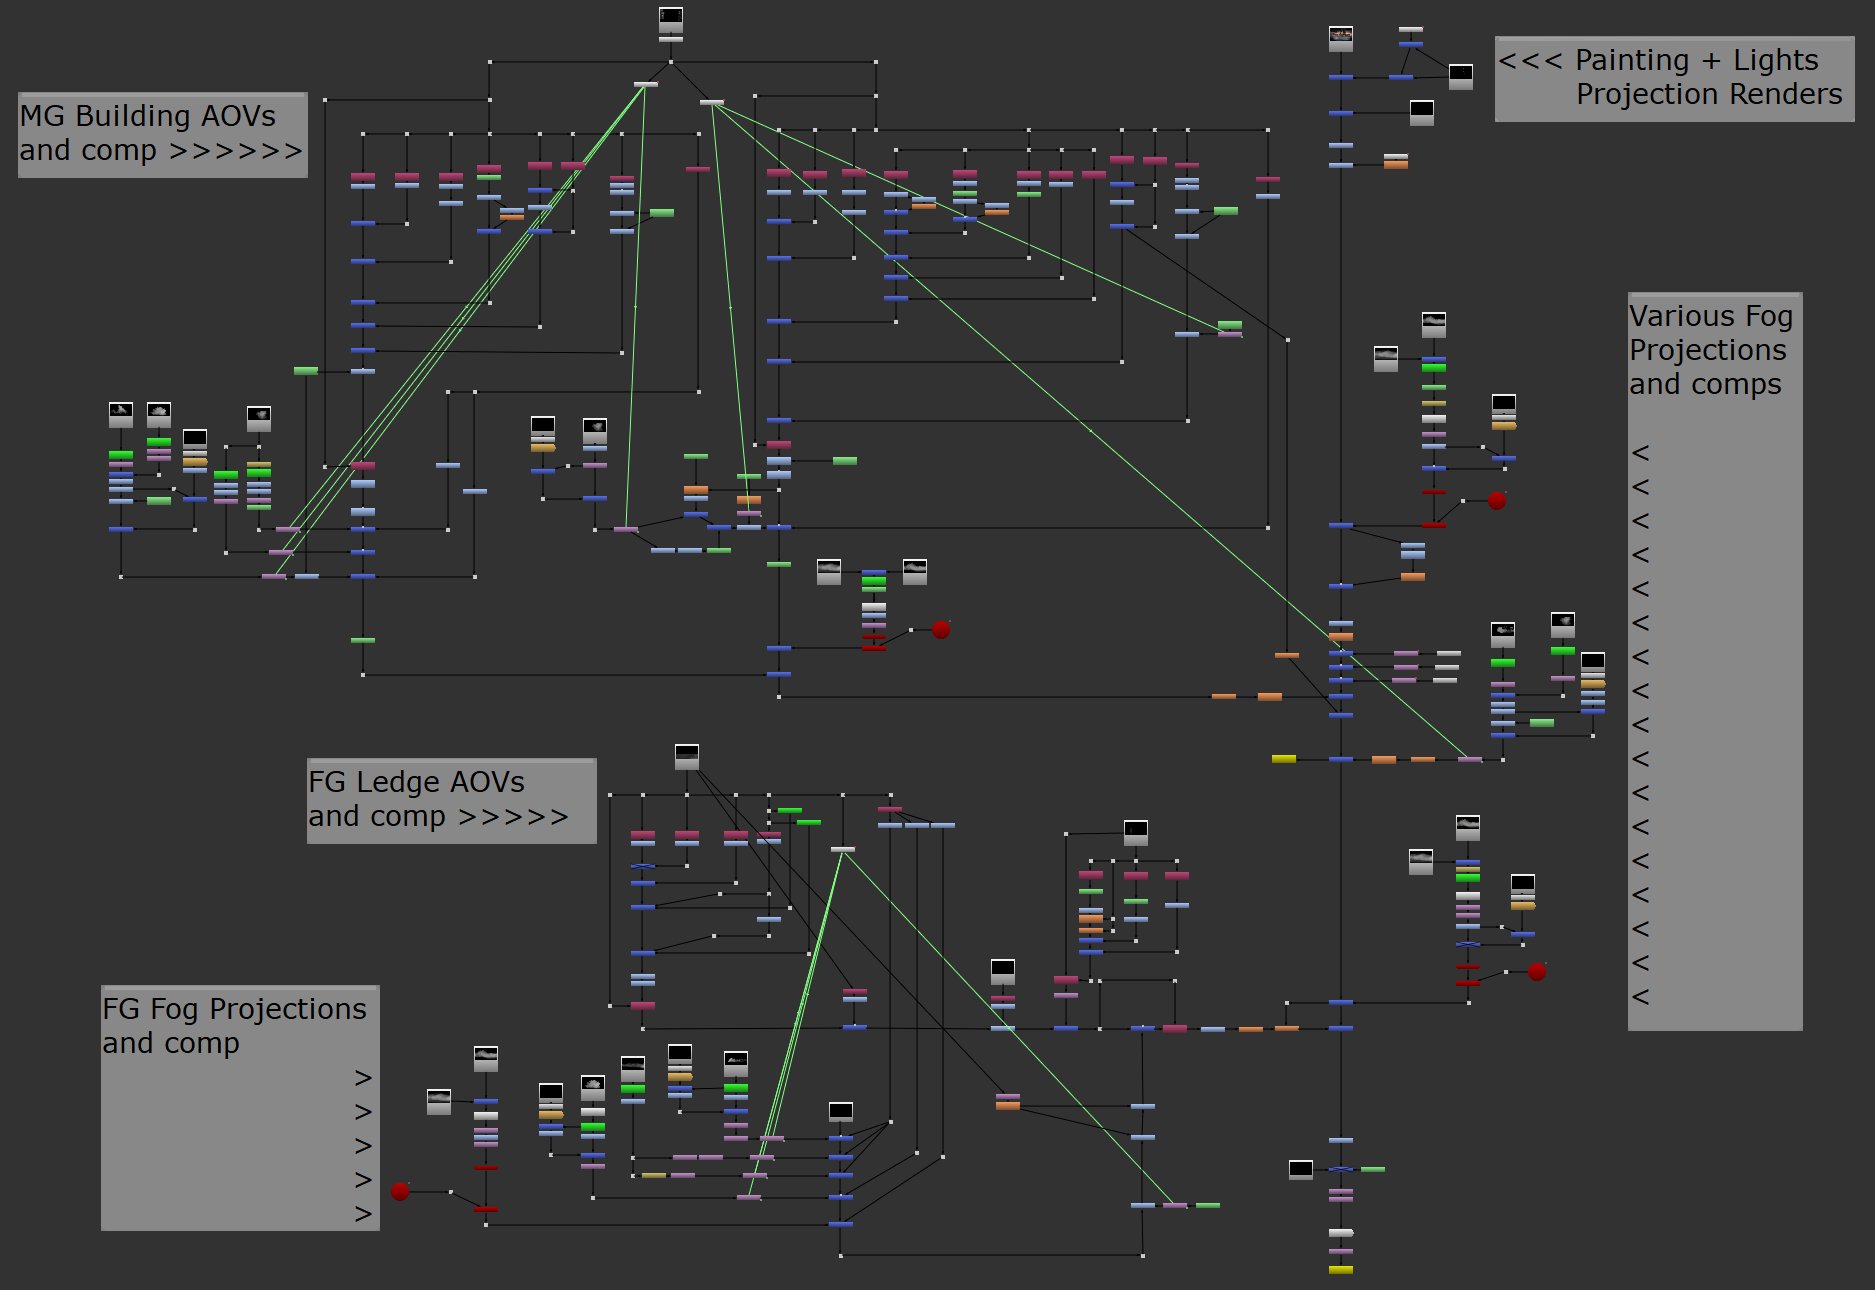
Most of the terrain was created using point VOPs on rough geometry in Houdini. I then imported the terrain into Substance Painter to texture it. I also painted a mask to define where I would scatter the trees from SpeedTree onto the terrain. The trees were first converted into proxies, and then scattered using MASH in the Maya scene. The railroad tracks were modeled and UV'd in Maya, and textured in Substance Painter. The chimney smoke was simulated using Phoenix FD.

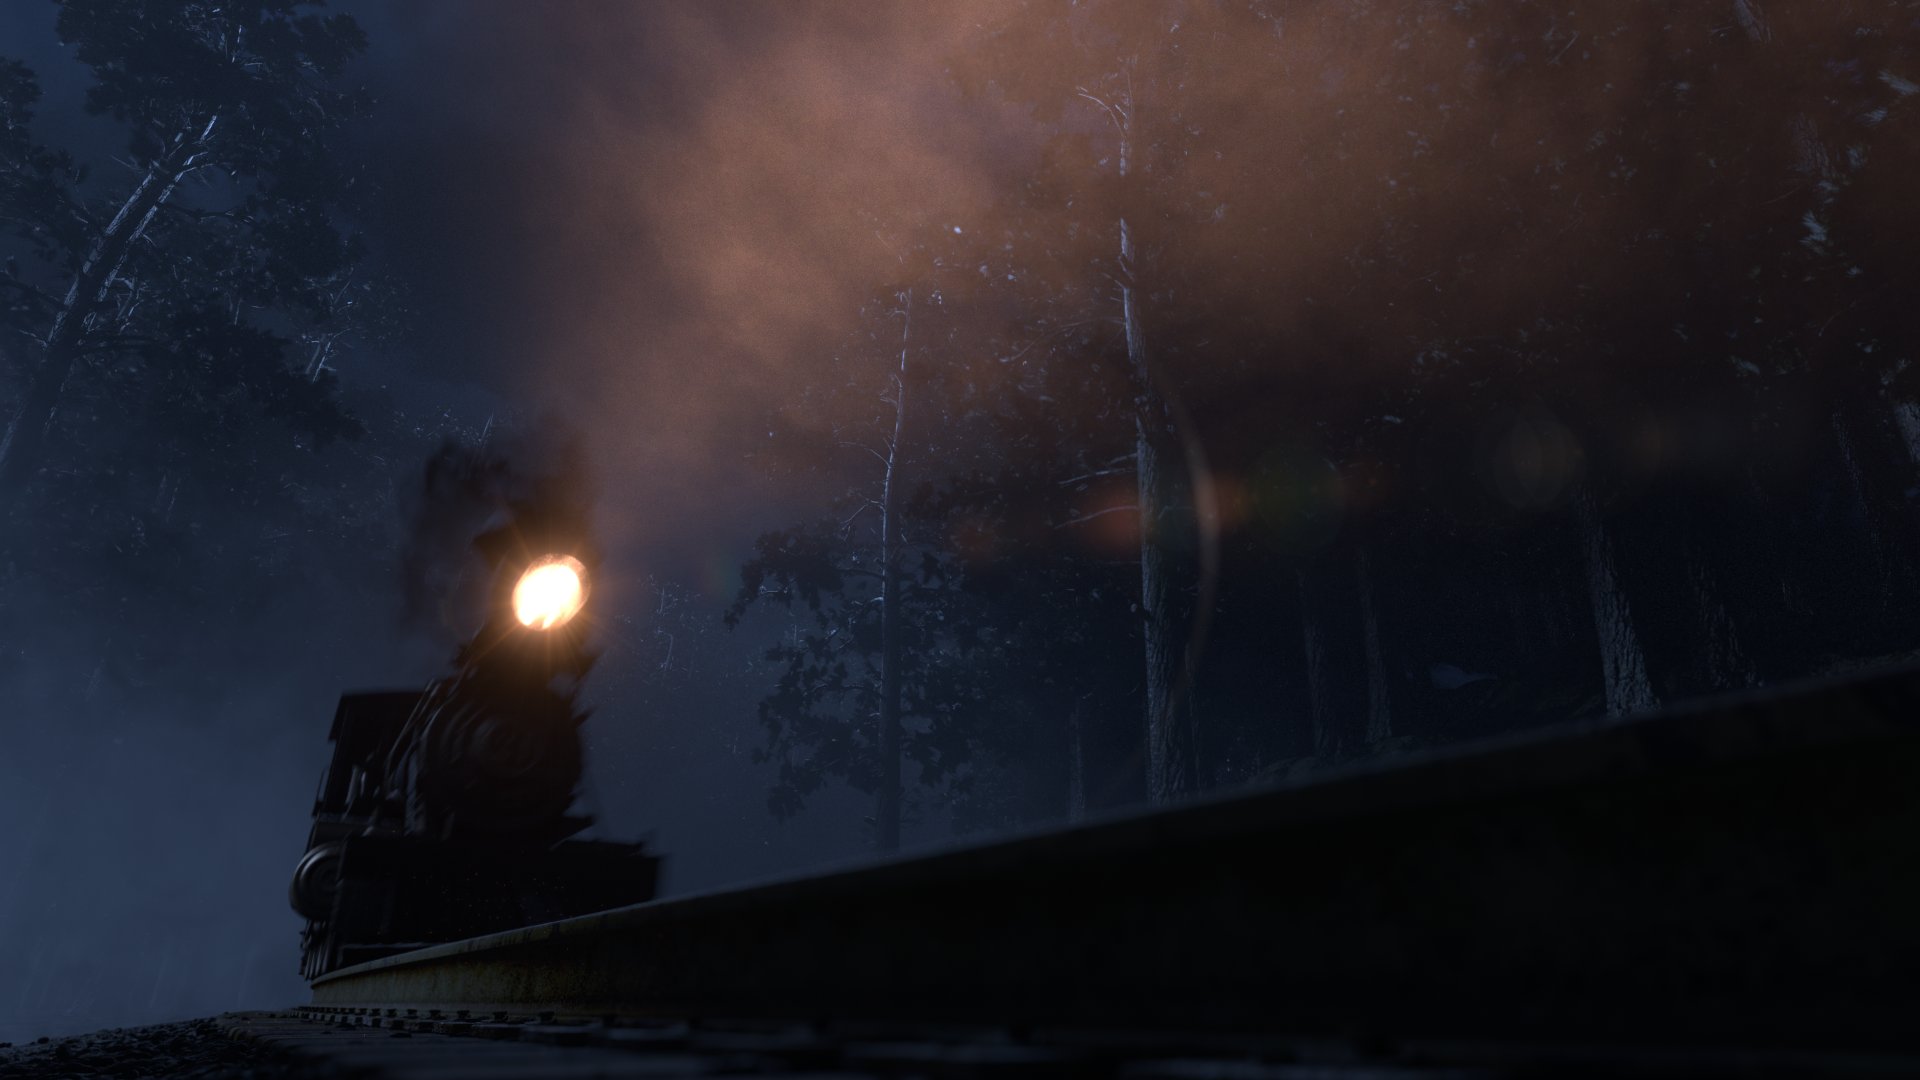
The compositing process for the 3D parts of the project were all fairly similar across each shot. I rebuilt the beauty with V-Ray light selects, graded everything how I wanted, comped in fog where I felt it would benefit the composition, comped in the smoke simulations, and added camera shake, amongst other things. Each frame was rendered with 10% overscan, to account for camera shake.


The painting was done in photoshop, with each layer to be projected onto a different piece of basic geometry. The projection geometry was modeled in Maya.


Salvation
This project is part one of a two-part series, wherein I wanted to depict two environments that are essentially polar opposites of each other, in terms of their subject matter and the moods they invoke. This one is meant to invoke feelings of warmth and hopefulness. It was also my first venture into incorporating effects simulations into my work.
Original concept, responsible for all aspects.

Since this project is mostly 2D, the majority of the time I spent on it was either doing the painting in Photoshop or doing the compositing in Nuke. The only time I spent in Maya was for modeling rough projection geo and for doing the waterfall simulations.
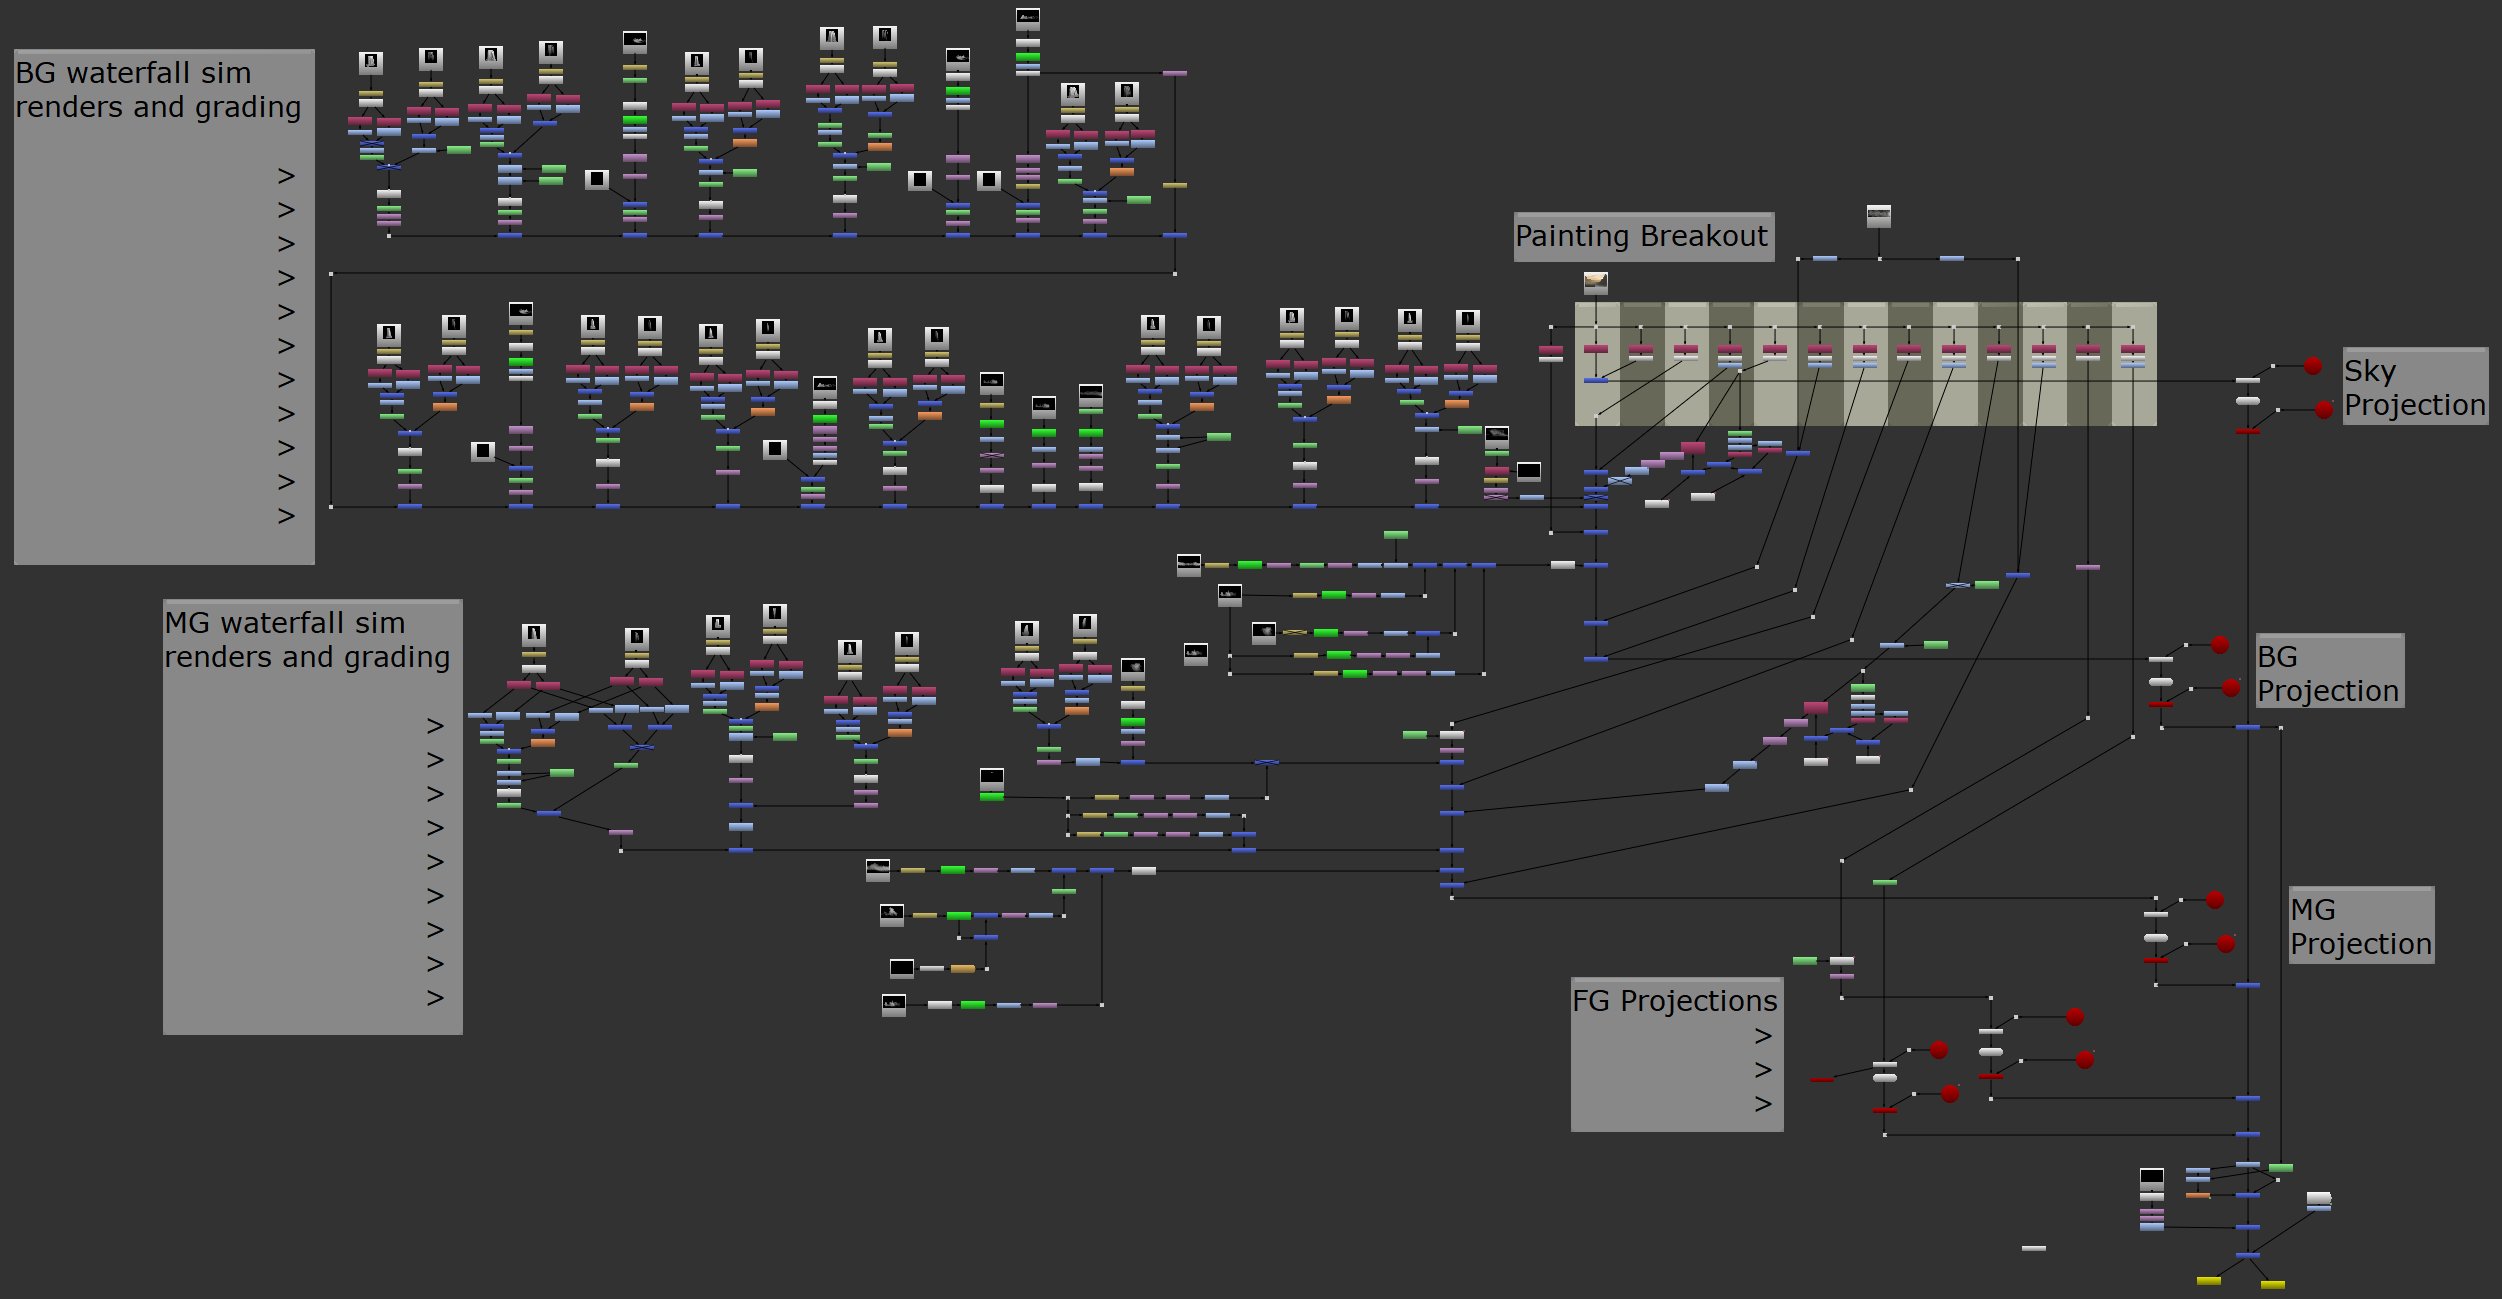
Since the waterfalls were going to be far away from the camera, I could get away with having very simple simulations, and still have them hold up in the scene. From looking at videos of large waterfalls, I discovered that near the top of the waterfall, you can still see the rushing water. However, as you go further down the waterfall, you begin seeing less rushing water and more mist and foam. For this reason, I decided to split the simulation into two parts: a particle simulation and a fluid simulation. Each was rendered on a separate render layer, so that I could blend between the two in Nuke.
The particle simulation was simply Maya particles spilling over a roughly modeled ledge, and rendered with motion blur. Some uniform fields were used to shape the particles how I wanted. I used this pass to get the look of the rushing water.
The fluid simulation was a standard Maya fluid, with the fluid set to be emitting from the particles themselves. I used this pass to get the look of the foam and mist.
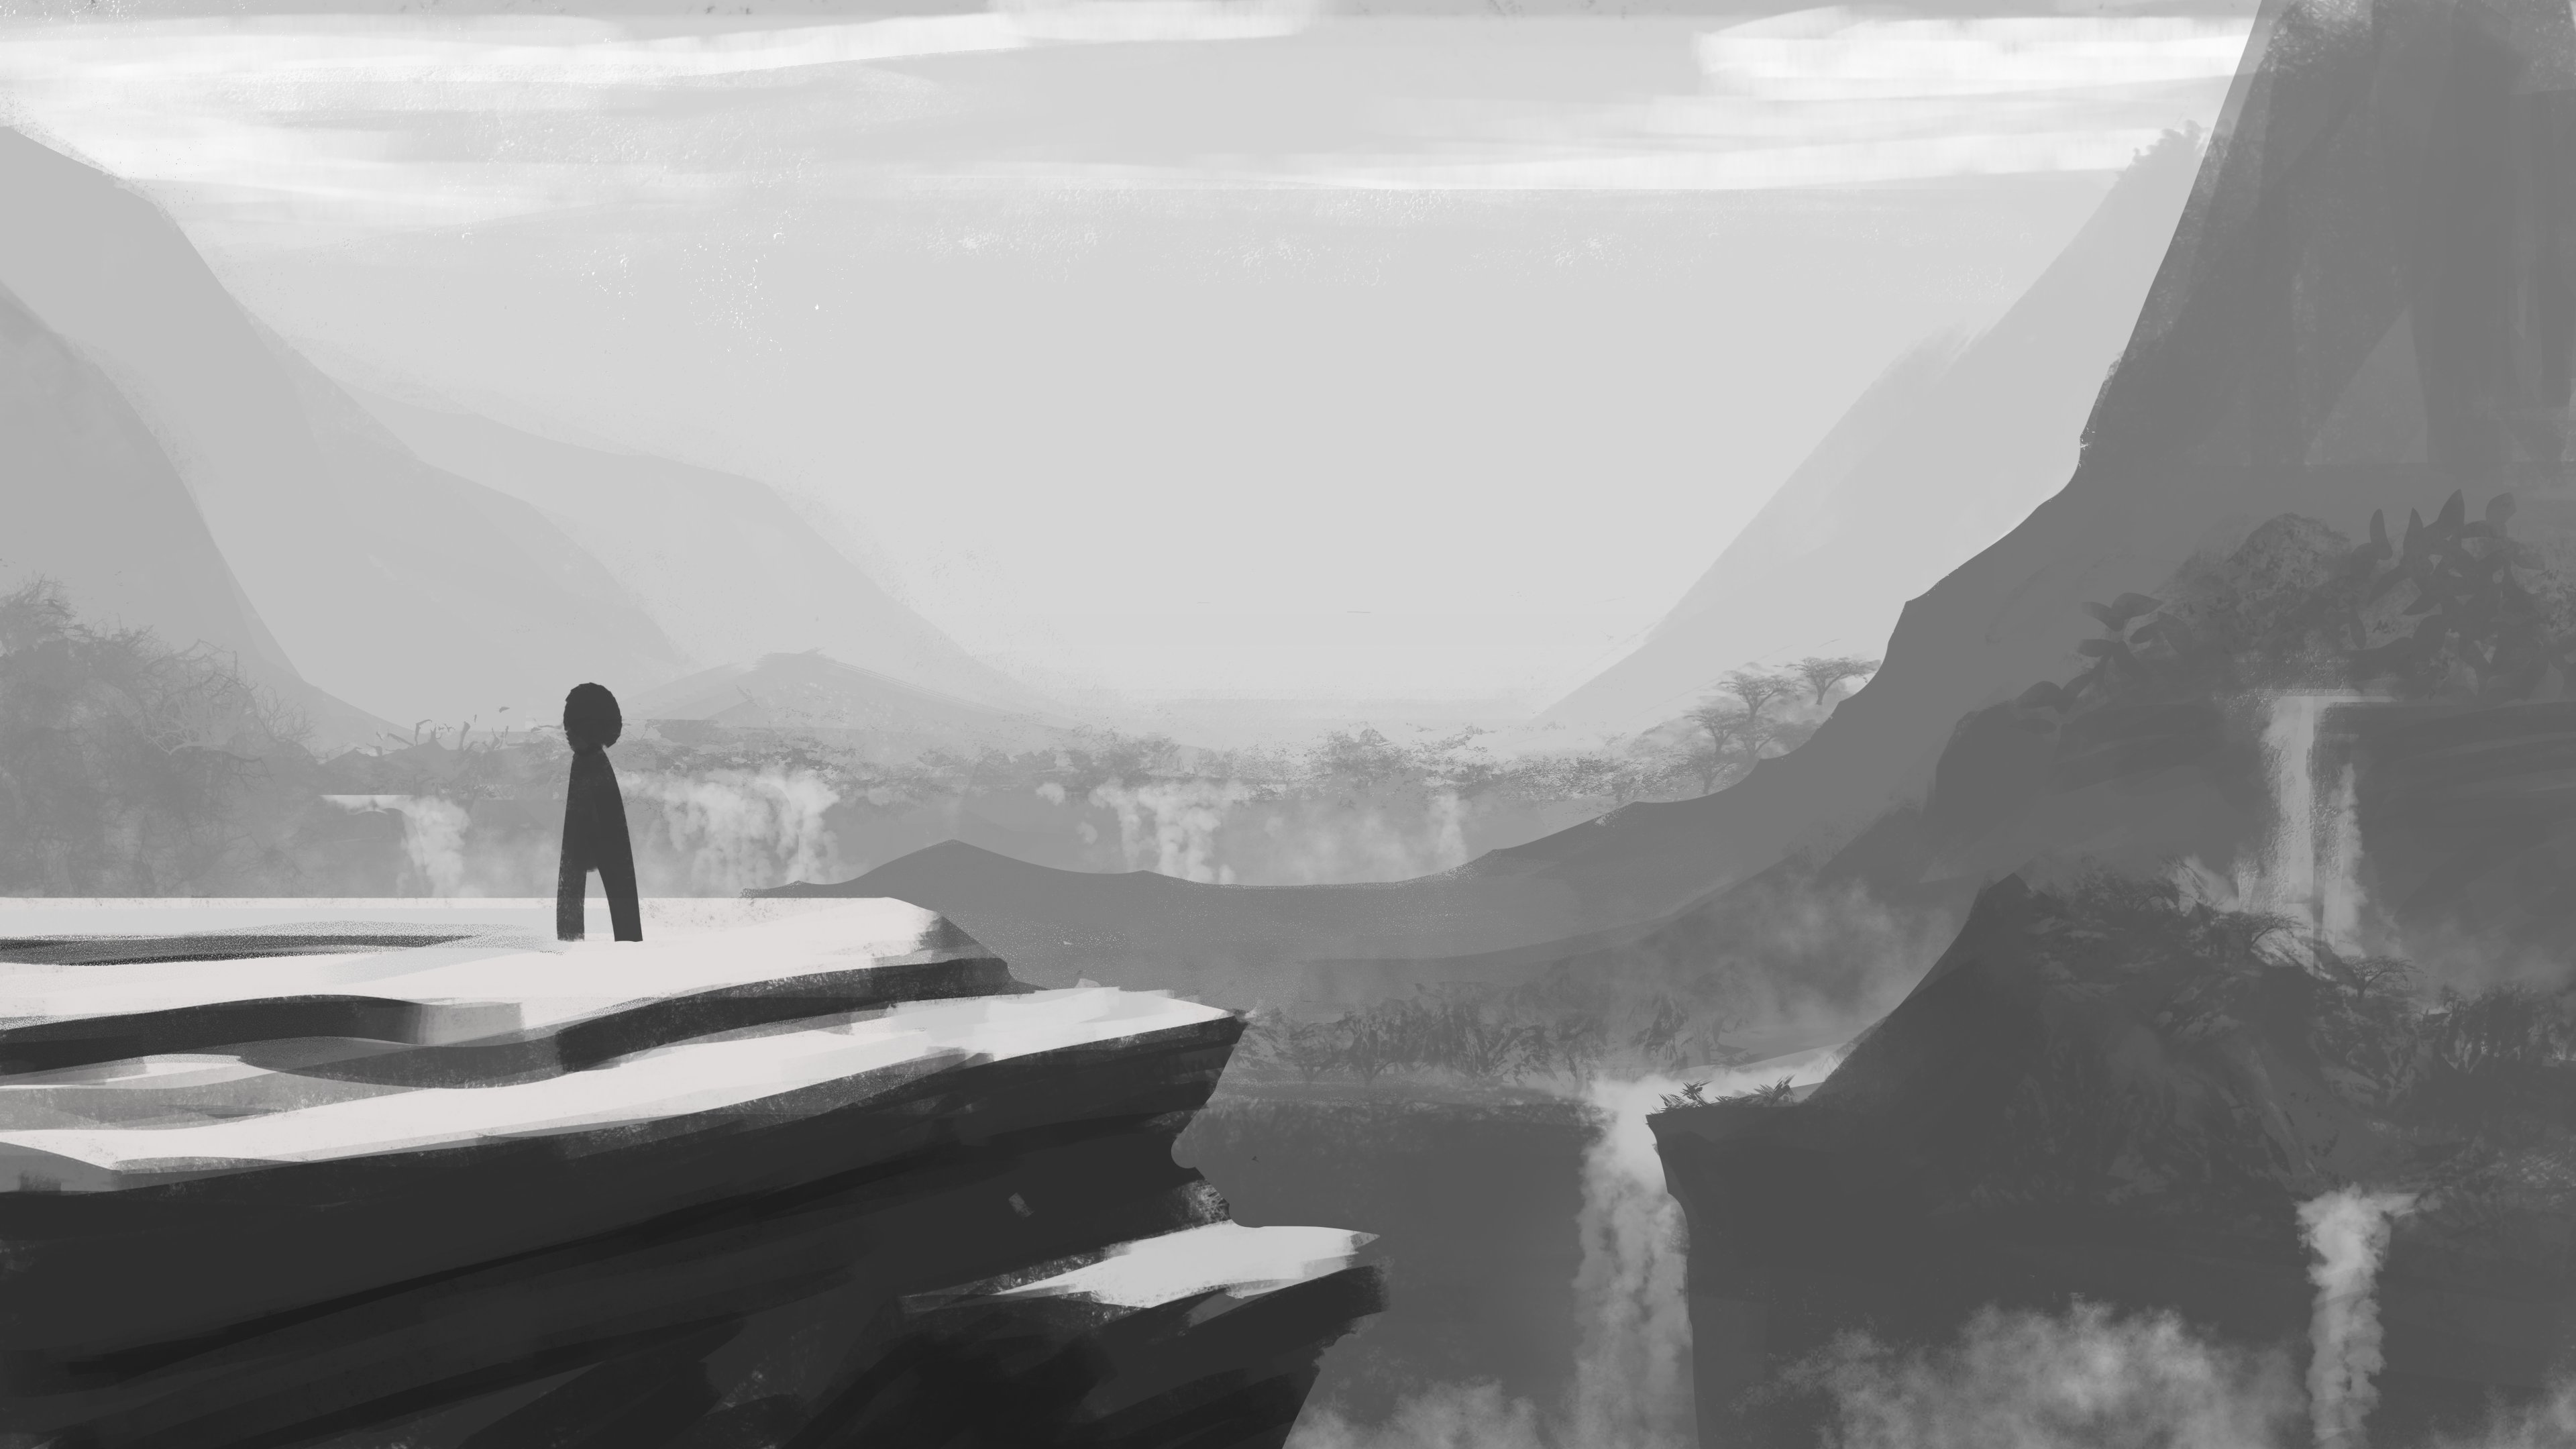
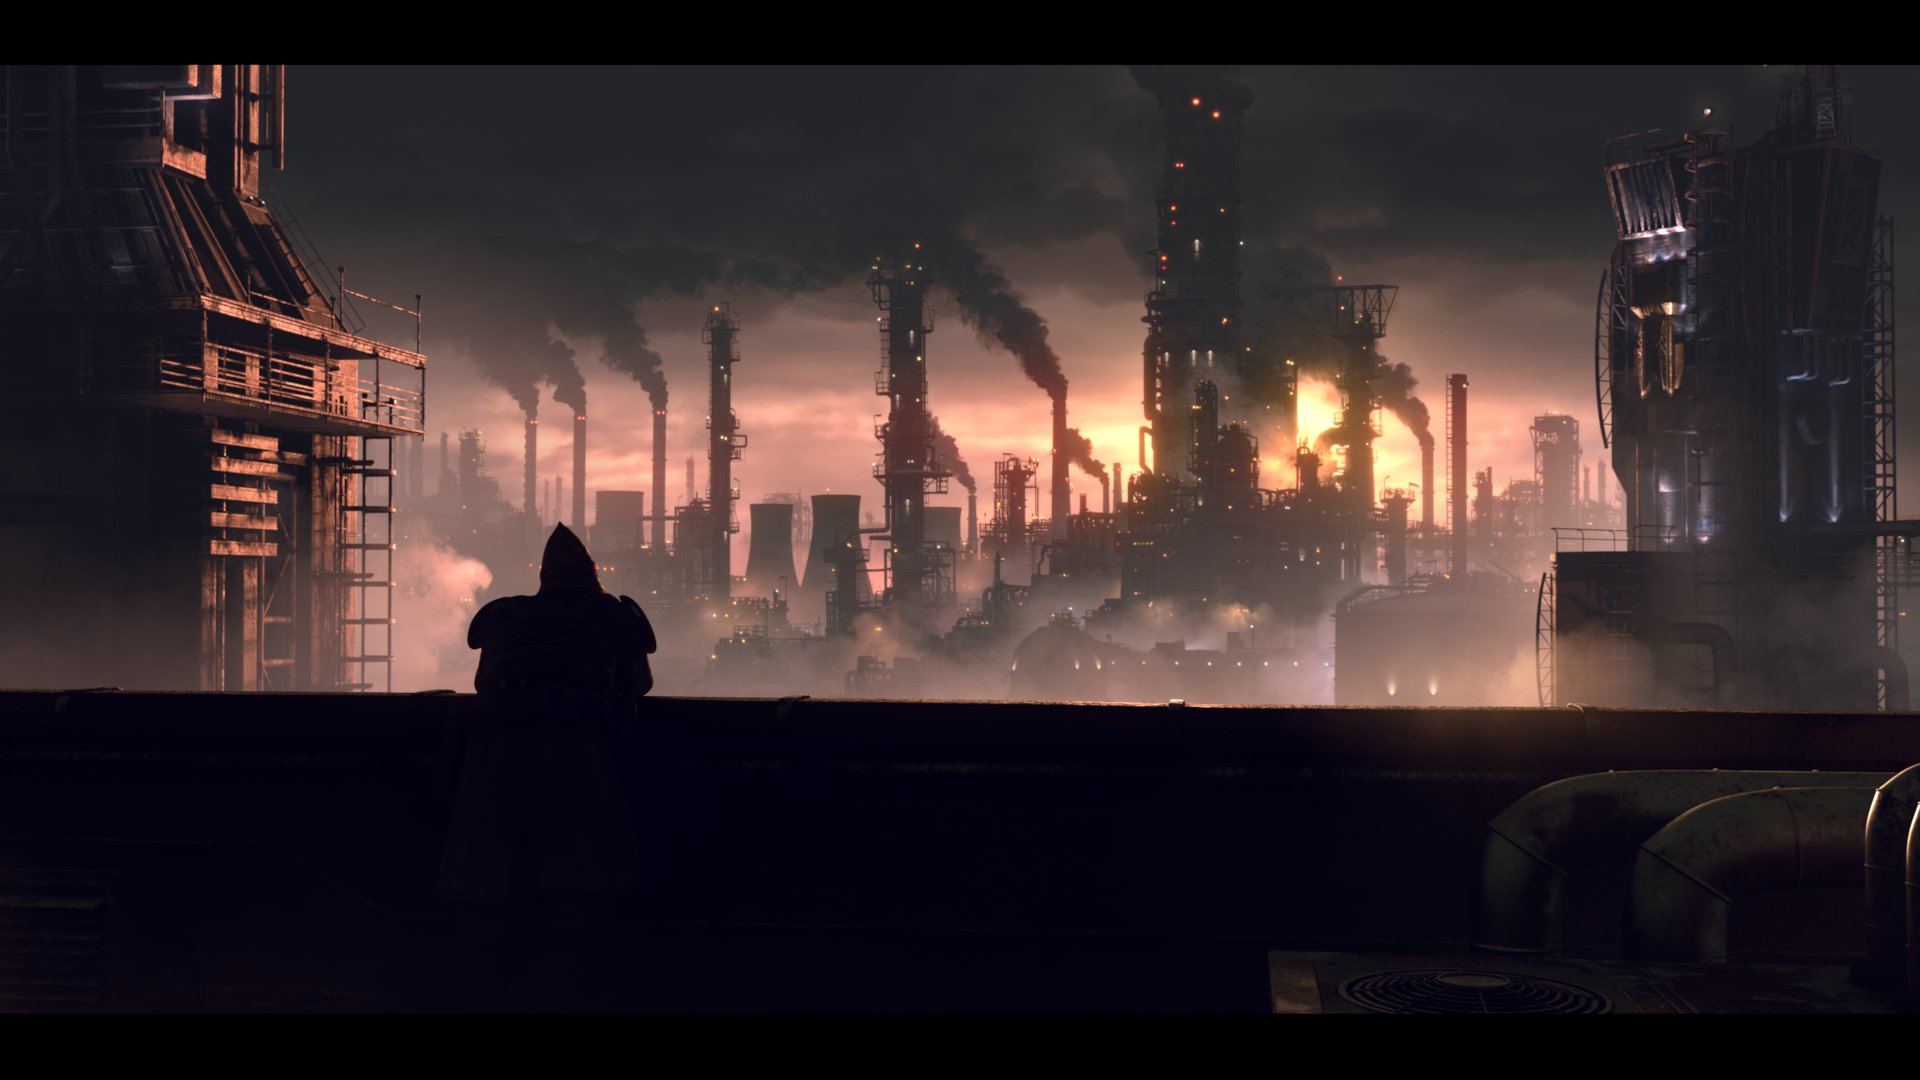
Desolation
This project is part two of the two-part series. In contrast to the previous project, this one is meant to invoke feelings of gloom and depression.
Original concept, responsible for all aspects except Mixamo character.

The painting for this project had many layers, with many more fog and smoke elements being comped in on top of it. The comp began to get very heavy, so I split it into two separate comps. One comp just for the painting, and the other comp for extra fog cards, 3D rendered elements, and final grading.

The 3D elements were modeled in Maya and textured in Substance Painter.


Thank you for viewing
Feel free to connect with me on LinkedIn or check out my portfolio website.


Comments (18)