
No home left to love - The Rookies entry 2023


In this post, I am showing the key steps in creating my piece 'No home left to love' based on the concept "Kira (The Crow)" by Jude Smith.
No home left to love - The Rookies entry 2023
This character was rendered in Real Time and was prepared during my mentorship at Think Tank Training Centre online. It was based on the concept "Kira (The Crow)" by Jude Smith (https://www.artstation.com/artwork/k480Al).
I want to thank my mentors Kestutis Rinkevicius and Karam Chahal, TTO students and staff, and my family for their support and guidance throughout the process.
In this post, I am going to show the main steps in creating this character. You can also check out this article where I explain each step in much more detail. https://discover.therookies.co/2022/10/01/recreating-sci-fi-character-concept-3d-real-time-pipeline/


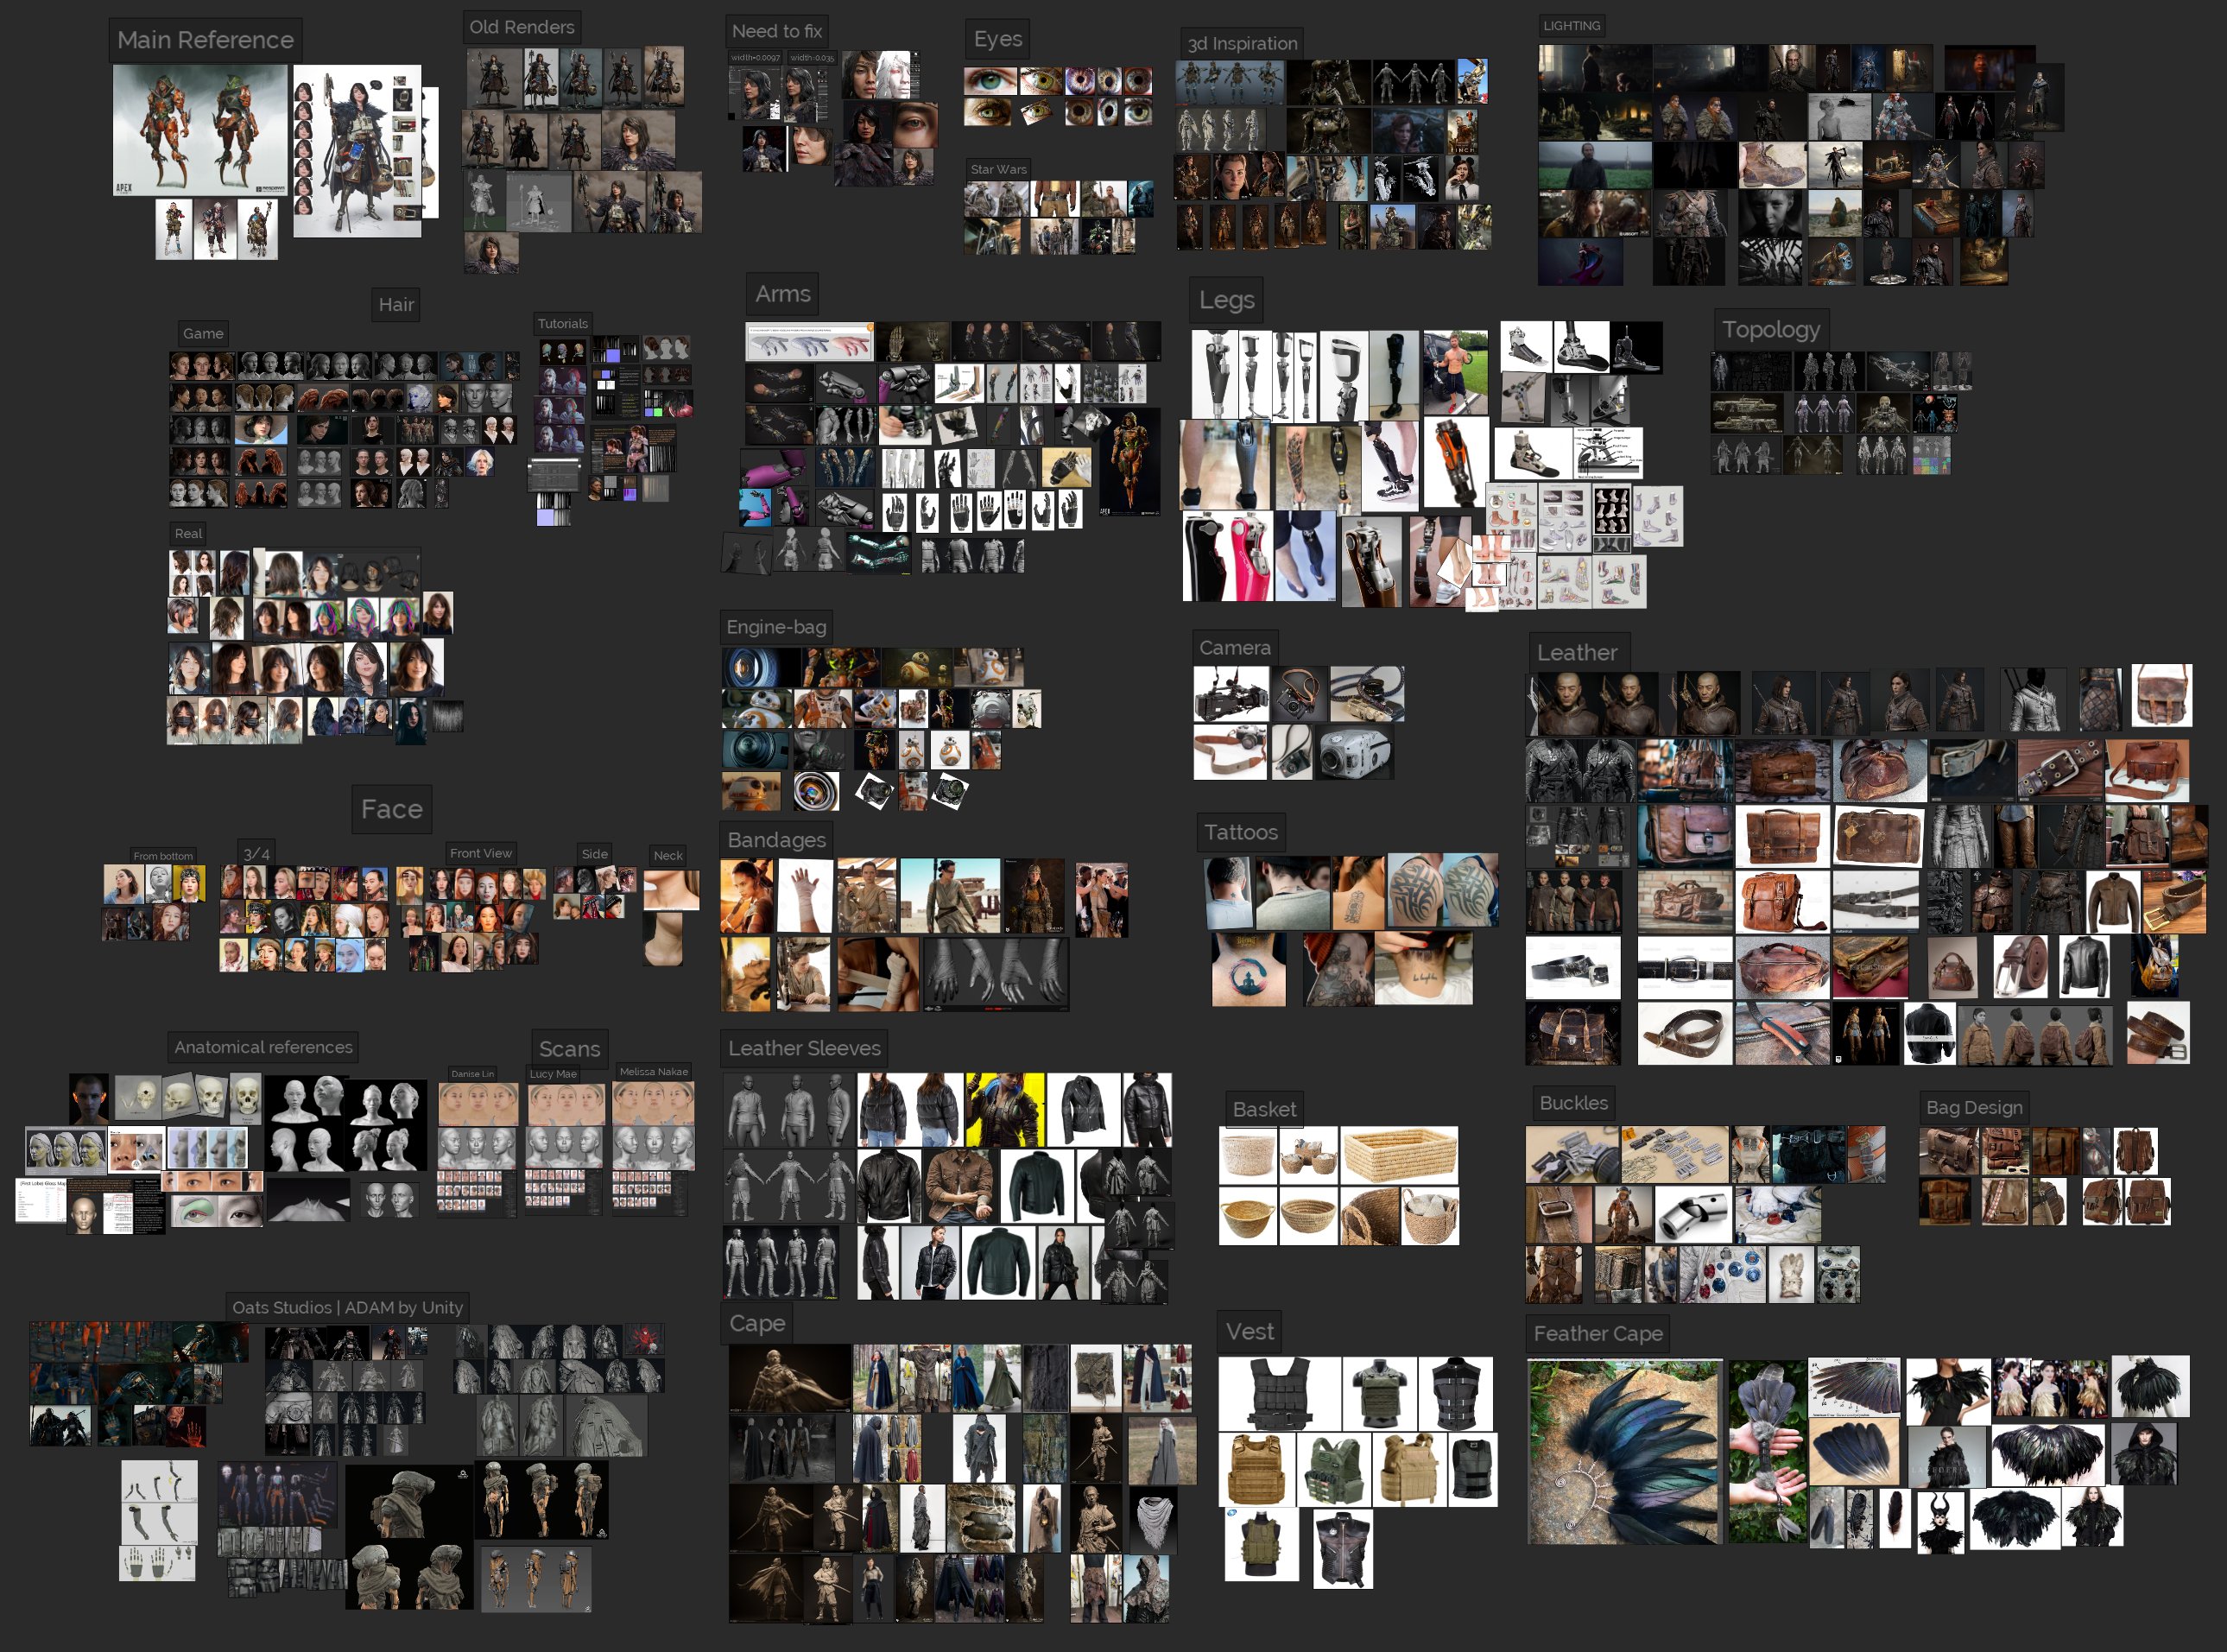
My Reference board. I used a lot of real life references to capture different outfit details. I also used 3D references for inspiration and to set the quality bar.
I sculpted almost the entire character in Zbrush. However, sometimes, I created the block out of hard surface objects like the spear in Maya. I always started with big simple shapes and then added more details.


I sculpted the face in Zbrush. I started with a sphere and added the primary and secondary shapes while increasing the sculpt definition with Dymanemsh. When I was happy with the overall shapes, I used the R3DS Wrap tool to apply the head mesh from the 3D Scan Store.


I created the shirt and the bag block out in Marvelous Designer. I exported them back to Zbrush to emphasize the folds, refine the silhouette, and add wear and tear.


I used Dynamesh, Boolean, and default brushes to refine the shapes of hard surface objects, cloth, and leather. You can see the examples of my approach below.


I created the character's hair using hair cards. I placed hair cards layer by layer in Maya to create the needed volume. I tried to add as many flyaways as possible to hide the hair card feel and to create a bit messy hair look.


I textured the character in Substance Painter. I used a combination of procedural tools and brush painting. Below, you can see how I approached some of the outfit details and character's face.


I rendered the character in Marmoset Toolbag 4. Ray Tracing feature helped to bring out the best quality renders. I experimented with different settings and lighting until I got the desired result.


You can see more breakdown images below.


Topology and UV sets.

Rendering Passes


Closeup images.


Thank you for watching!


Comments (10)