
Reach: Part 1


REACH - Part 1: is a full CG teaser I made during my studies at Think Tank Training Centre with the guidance of Scott Thompson and my amazing Houdini mentor, Albert Szostkiewicz. I developed this idea for the main purpose of challenging myself as much as I can, as well as stepping into the Houdini and Nuke arena
Reach: Part 1

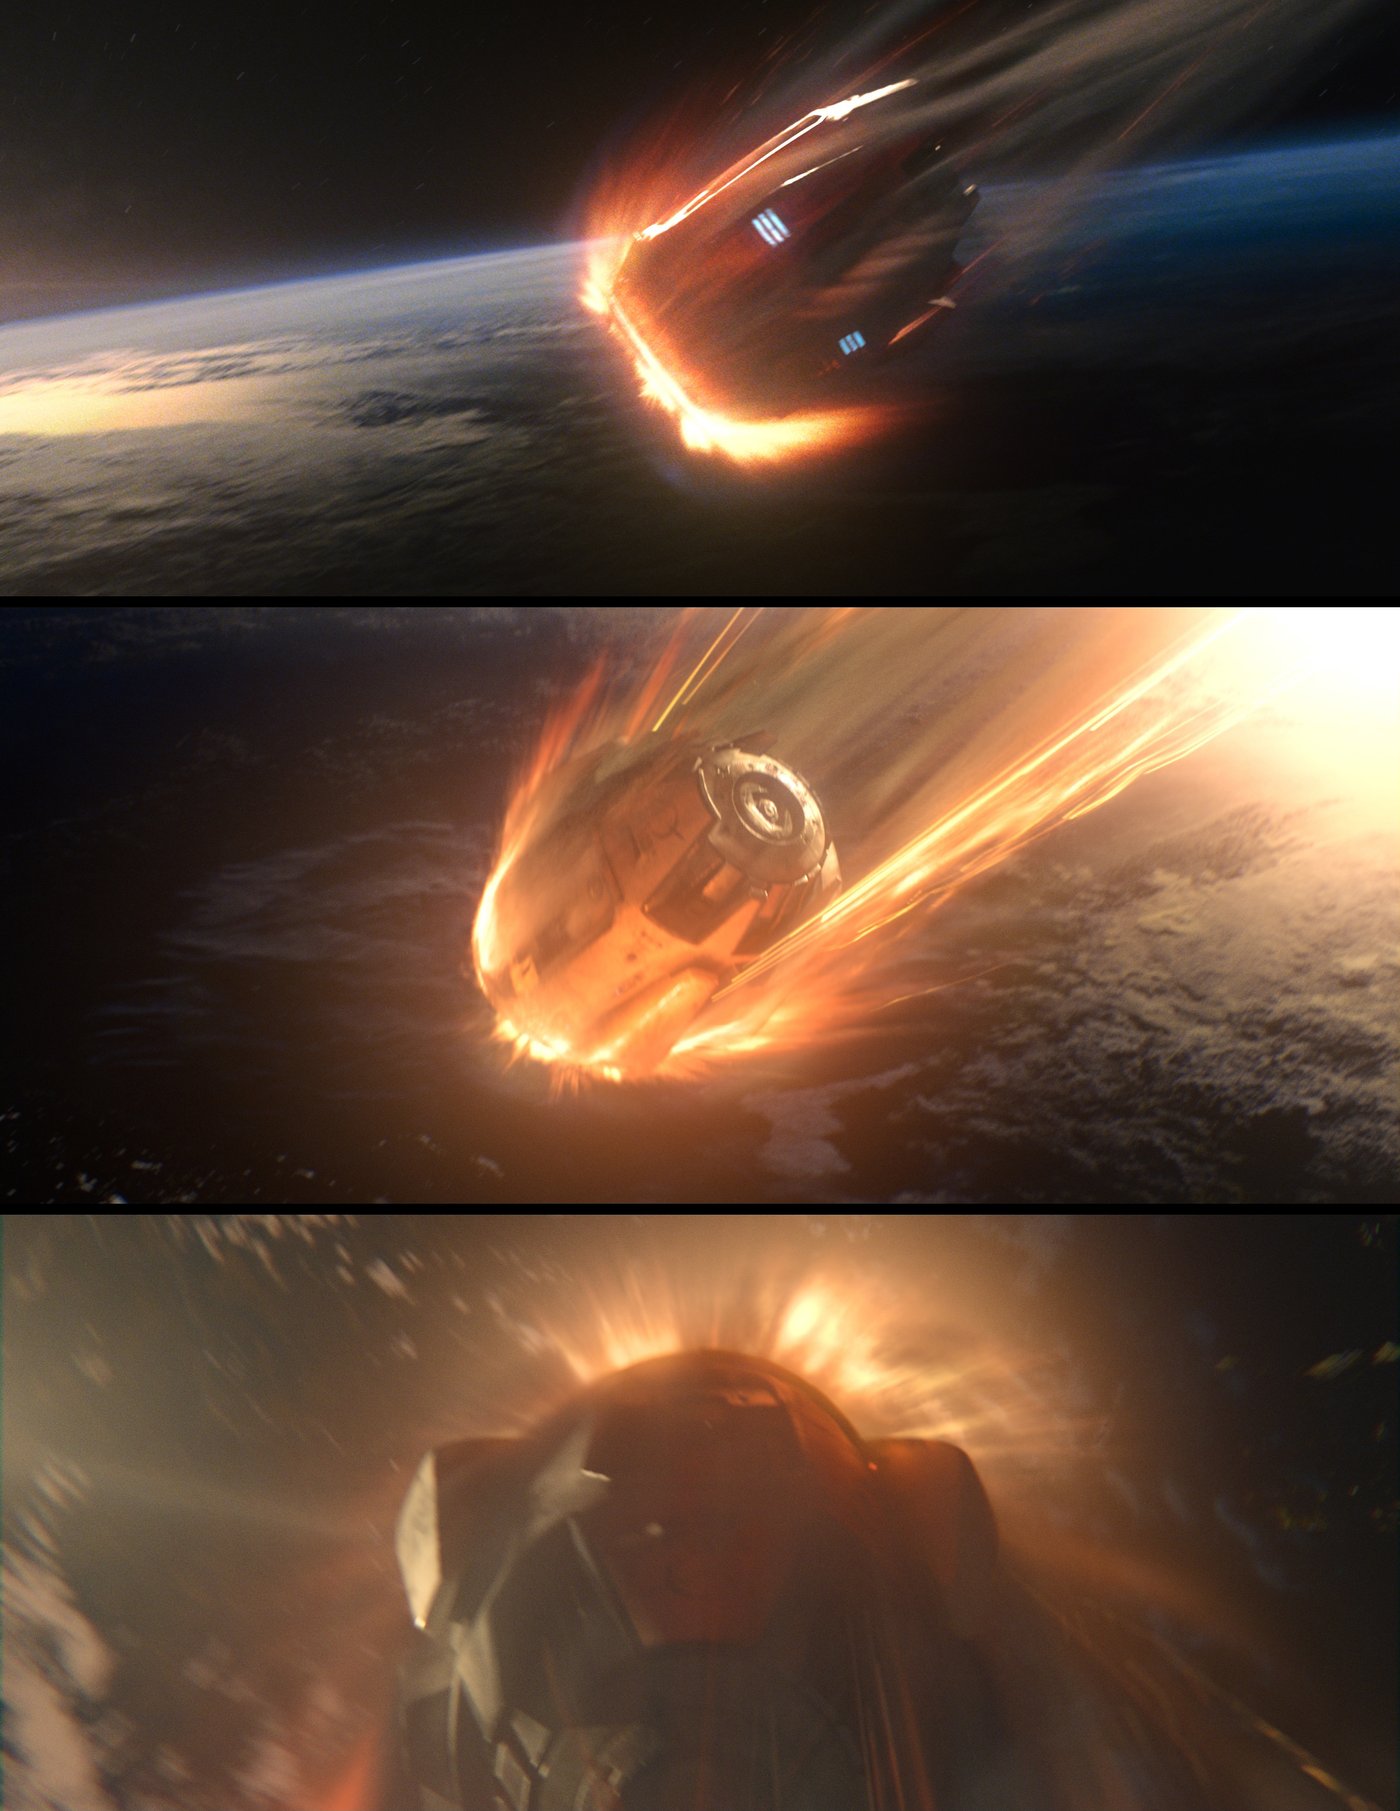
During the reference gathering phase, I found myself taking a lot of inspiration from RSP's amazing work on "Gravity", mainly the reentry sequence. Additional inspiration was taken from "Man of Steel" and "Life" as well.
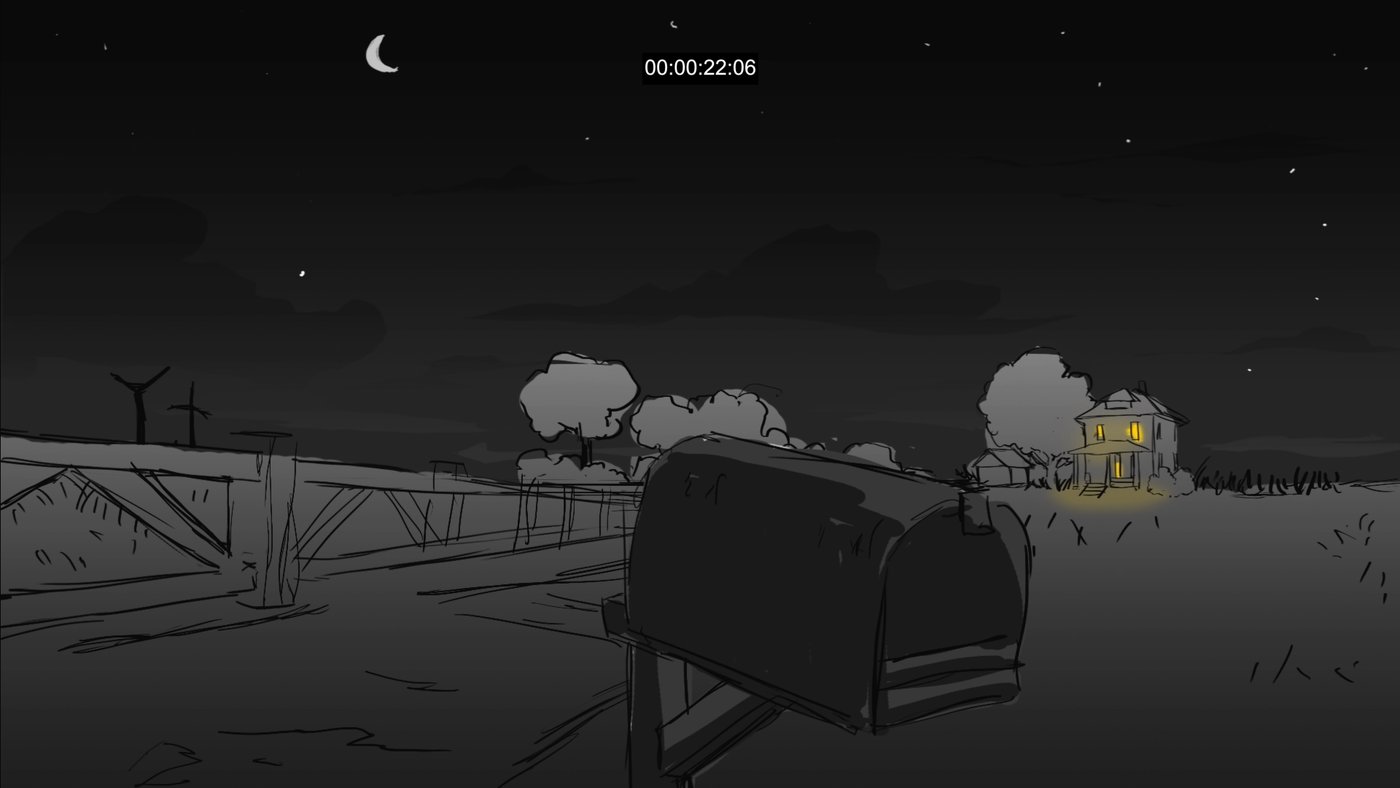
I began sketching a bunch of frame ideas for shots I thought would look cool, and tried to feel it out in editing to see what works well. Soon after, along with some very basic sound editing, I came up with the following storyboard animatic. It gave me a great tone to start with!
At this point, a lot of people told me that it's quite a ridiculous amount of work and that it might be too much for me. Being a realist, I considered it and decided to divide the storyboard into 3 major sections. Each serving me in different ways, professionally, but the goal was to nail everything up to the point of the pod's crash into earth.
Soon after I started prevising and locking a layout for the first part. Tightened the shots together to create a more intense feel, due to the sequence being shorter now.
Once that was done and alembics were ready, I took my very first steps into Houdini!

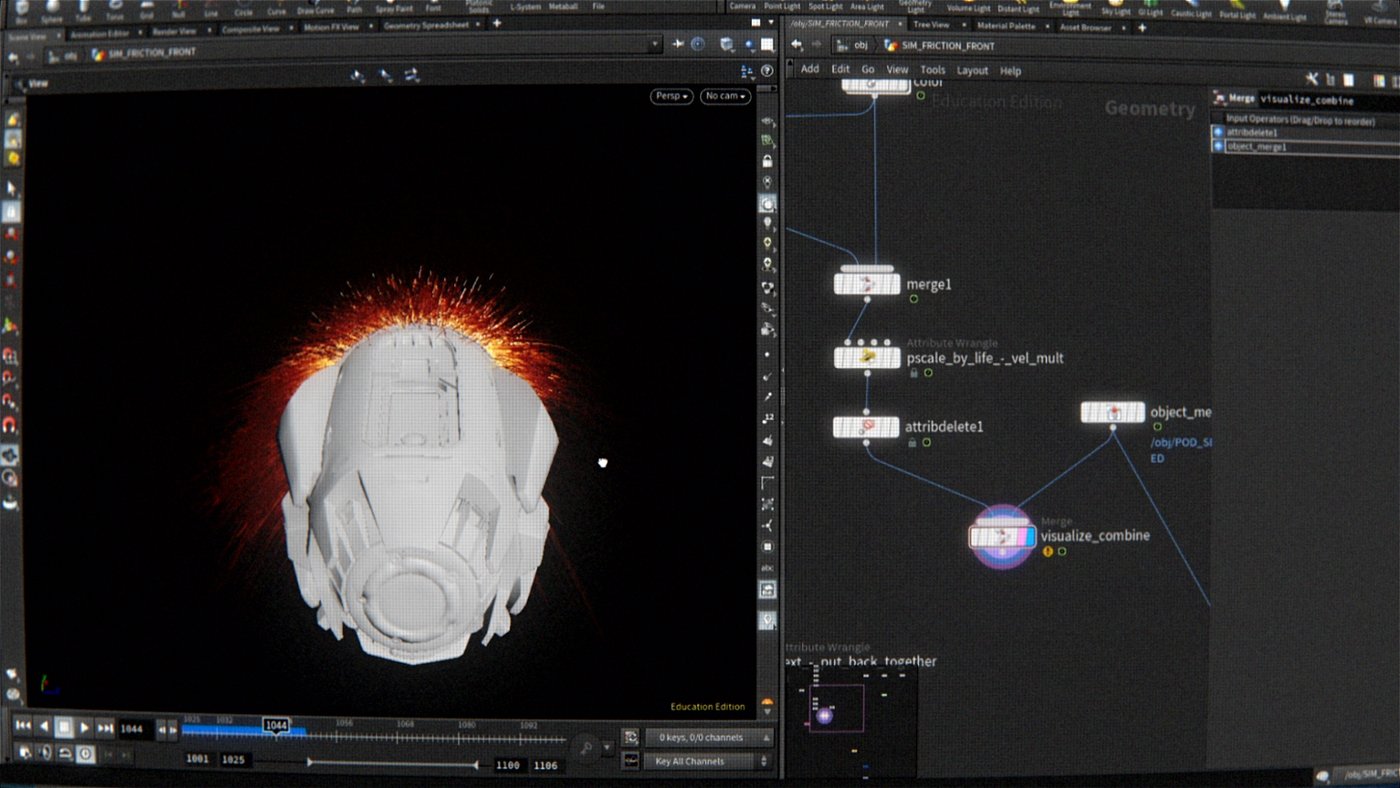
The reentry setup had a TON of challenges.
Many films depict the friction as a fire, as seen in "Life", but fire can't really sustain itself in the harsh environment of space. I learned what basically happens is, millions of tiny sparks forming due to the high velocity friction, creating the shape of what may LOOK like a fire, but behaves very differently.
Another debate I encountered was how to properly simulate an object moving at extremely high speeds, while keeping it natural, physically accurate, aesthetic and most importantly, efficient!
With the help of Albert, I learned I can use an inverse matrix via VEX to reorient the object in question. By later adding back its original velocity, the result was an object localized to the 0 0 0 world space while retaining its animation behavior as well as velocity data.
Using that velocity data I calculated friction points coming from the opposite direction vector. Using VOPs and DOPs I began creating a wind tunnel vector field.
A POP advection setup was then used to simulate millions of particles colliding with a proxy geo to create the following results.


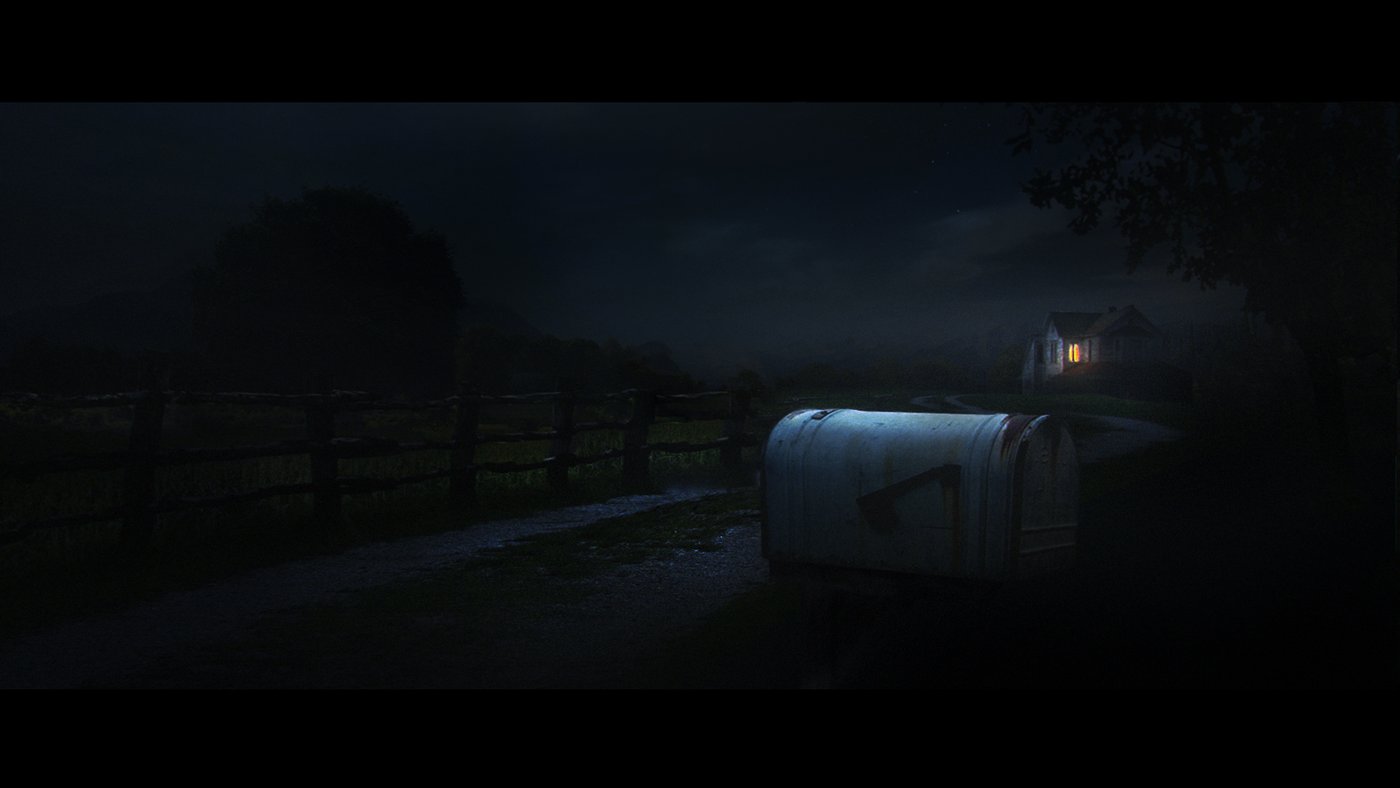
Treating the outdoors environment was a challenge, as I never attempted to create a full CGI environment before. I wanted to treat every aspect and every detail, and thus used Zbrush and Substance Painter to form the environment step by step.
Using Speedtree and Quixel Megascans, I managed to populate my environment rather quickly.


I used Premiere as a tool to assemble the project neatly and also maintain good versioning flow per shot for each department.
It made the whole process a breeze and I will definitely work on improving this system for my next project!


Comments (2)