
African woman
Hey, my name is Vivien, I recently graduated from PixlVisn with focus on modeling and texturing. I am excited to share my first Demo Reel Project with you.
African Woman
Hey all,
I want to present to you my first Demo Reel Project, which I made during my Education at PixlVisn. It started with the lovely Concept Art from Michael Faers on Artstation. Since it was my first human, I would sculpt, texture, groom, shader and render I decided to go only for a portrait.
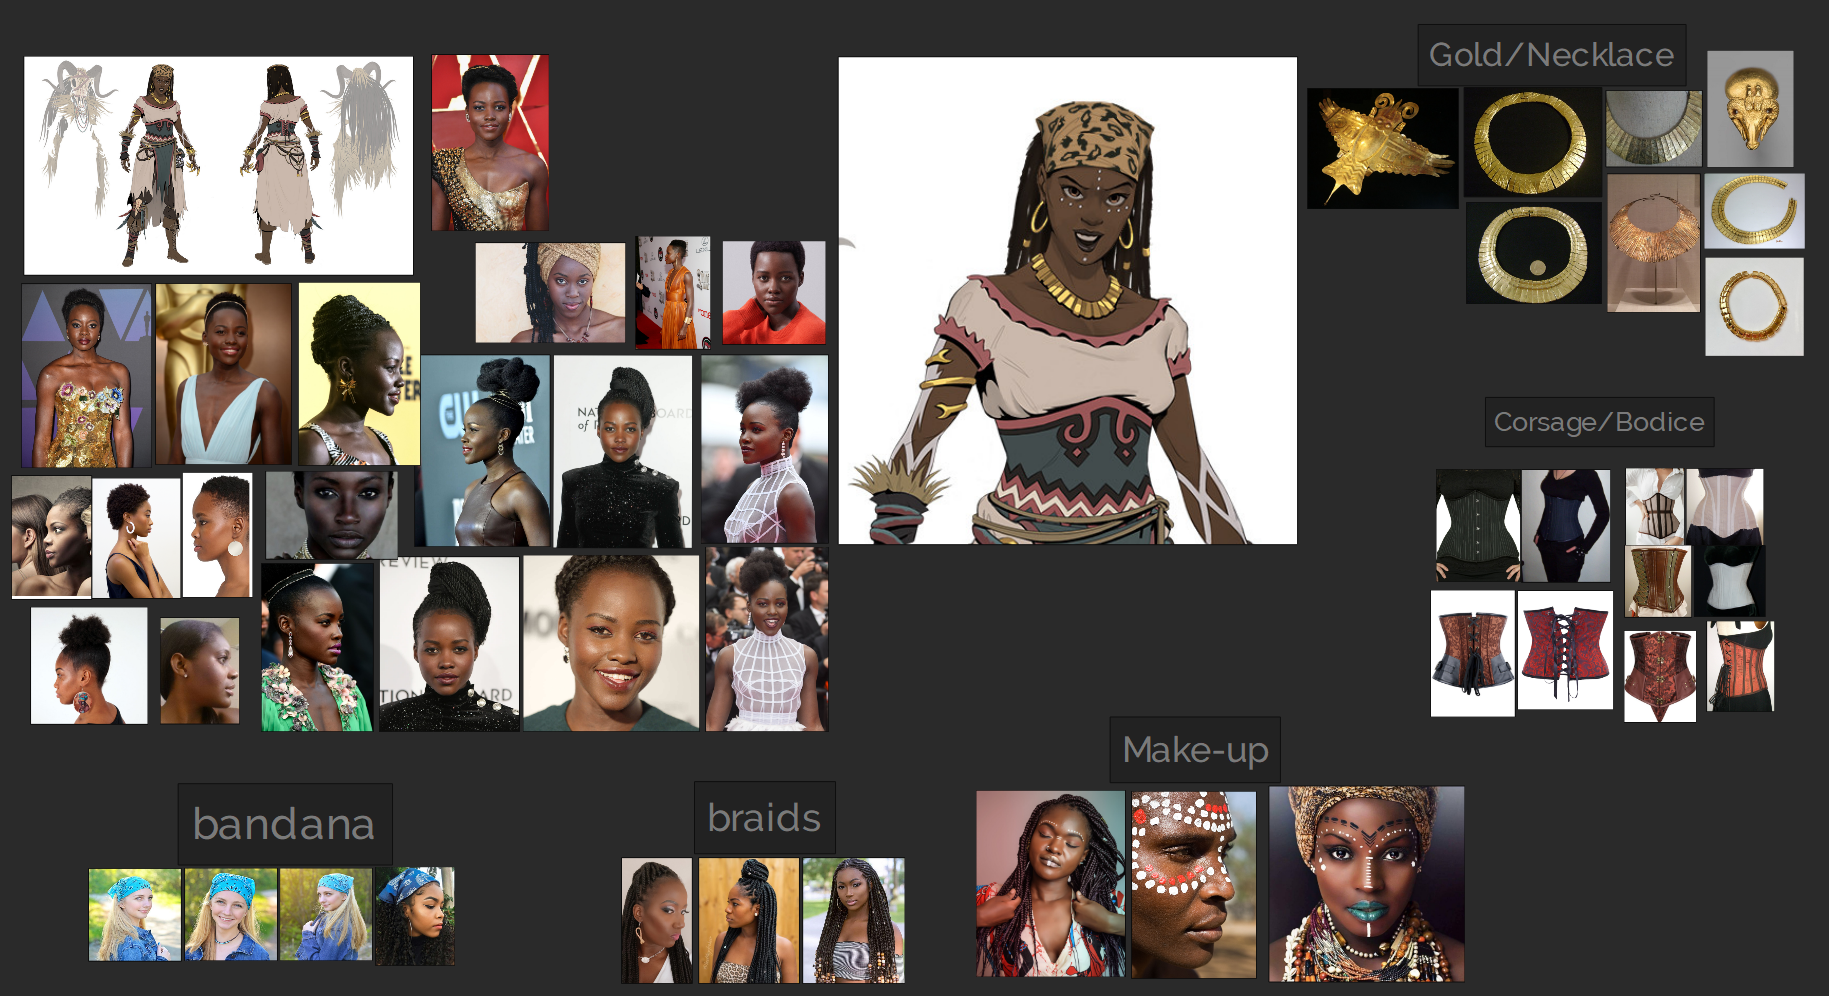
Before I start modeling I spend some time to collect references, to get a good idea where to go. Here is a small collection of my used references:
Modeling
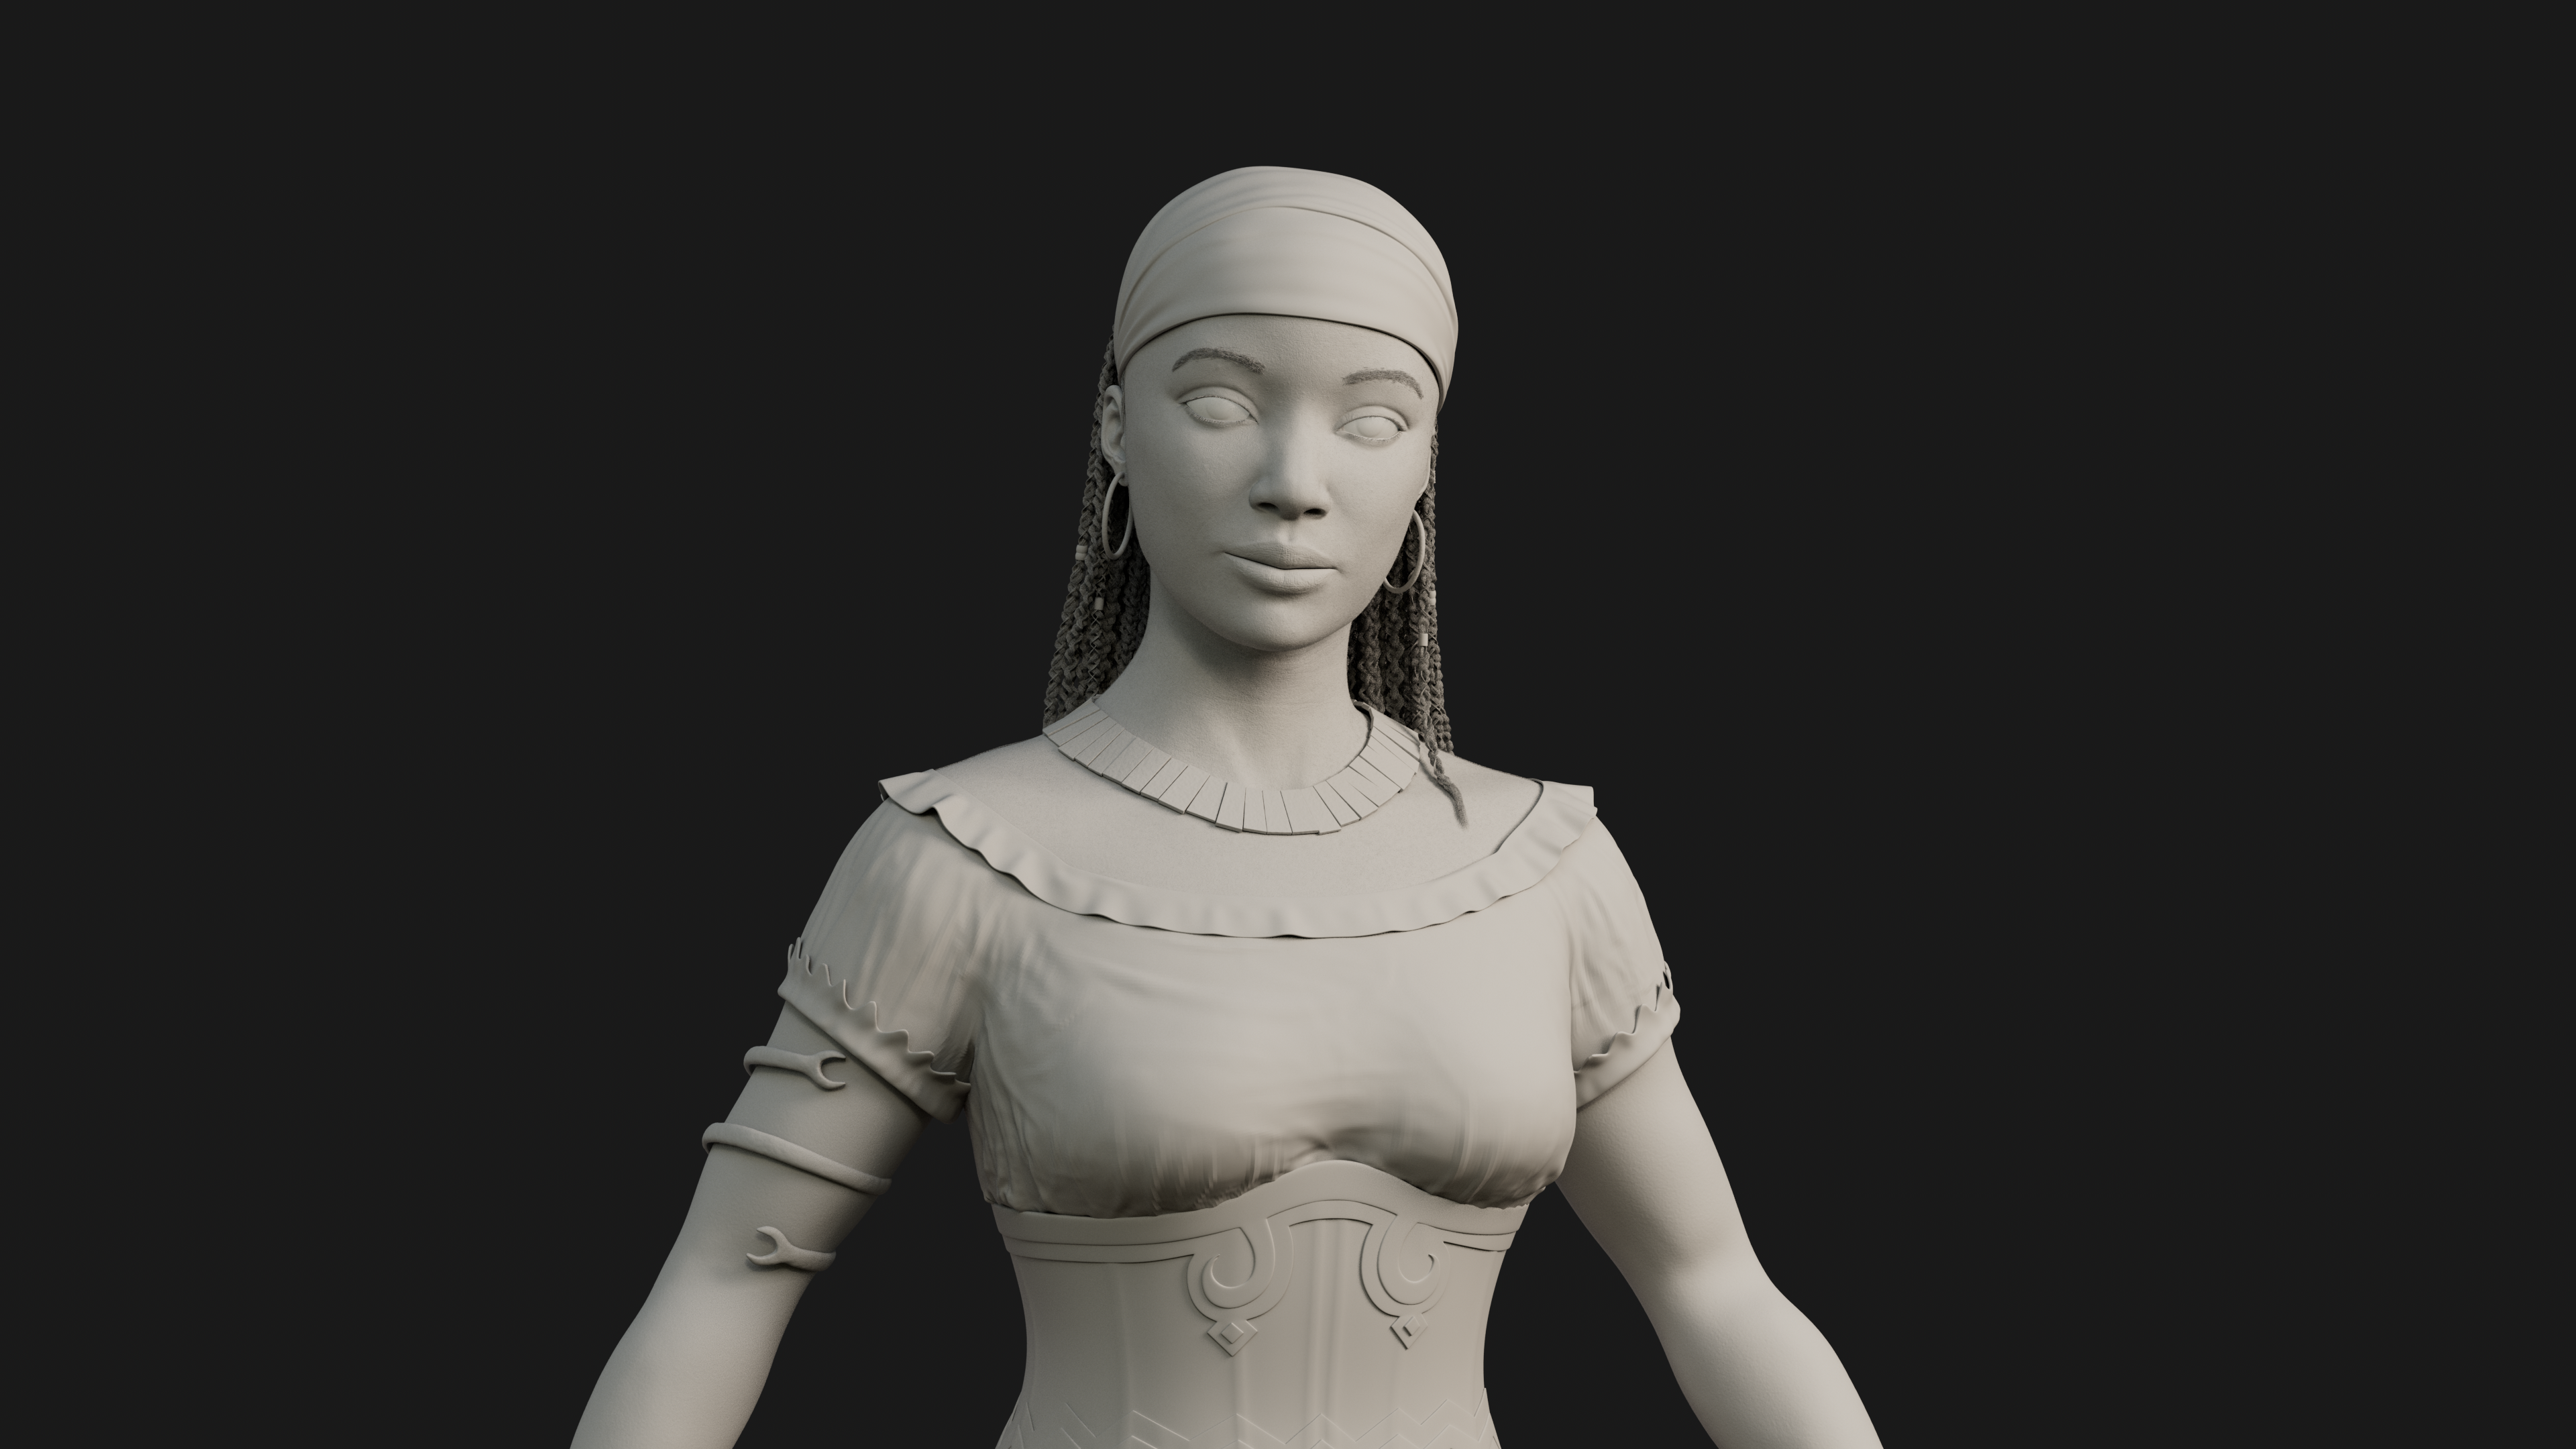
I made the sculpting of her body in ZBrush. To learn the whole sculpting process, I started from spheres, or better said from ZSpheres. After the first blockout from the concept art, I moved her in A-Pose for sculpting. First I focused on the big shapes and get more and more into details. As I was satisfied with the sculpt, I switched to Maya for retopology and UVs.
For her corsage and jewelery I stayed Maya, starting with live surface on her skin geo. Getting the right shape with the Quaddraw tool, extrude this and in case of the corsage give it a bit space to the skin. For the corsage I also give every different colored piece a own geo, because a costume designer would also have different pieces of fabric.
For her blouse I wanted to try Marvelous Designer to get nice natural folds. I started with patterns to get the right form. But at the end, it was hard to get the blouse sitting in a way that satisfied me, because she has no lower body and the corsage sitting such close at the body. Therefore I decided to refine the result in ZBrush.


Grooming
Houdini is the program of my choise for grooming. For each group of hairs (eyebrows, eyelashes, the braids, etc.), I made a separate set of guides and groom. I also added vellus hair to archive a softer look of the skin. After I was satisfied with the groom I exported it as geo to Maya.
UVs
It was important for me to have proper UVs and a clear UV layout, to make it as easy as possible in texturing.


Texturing
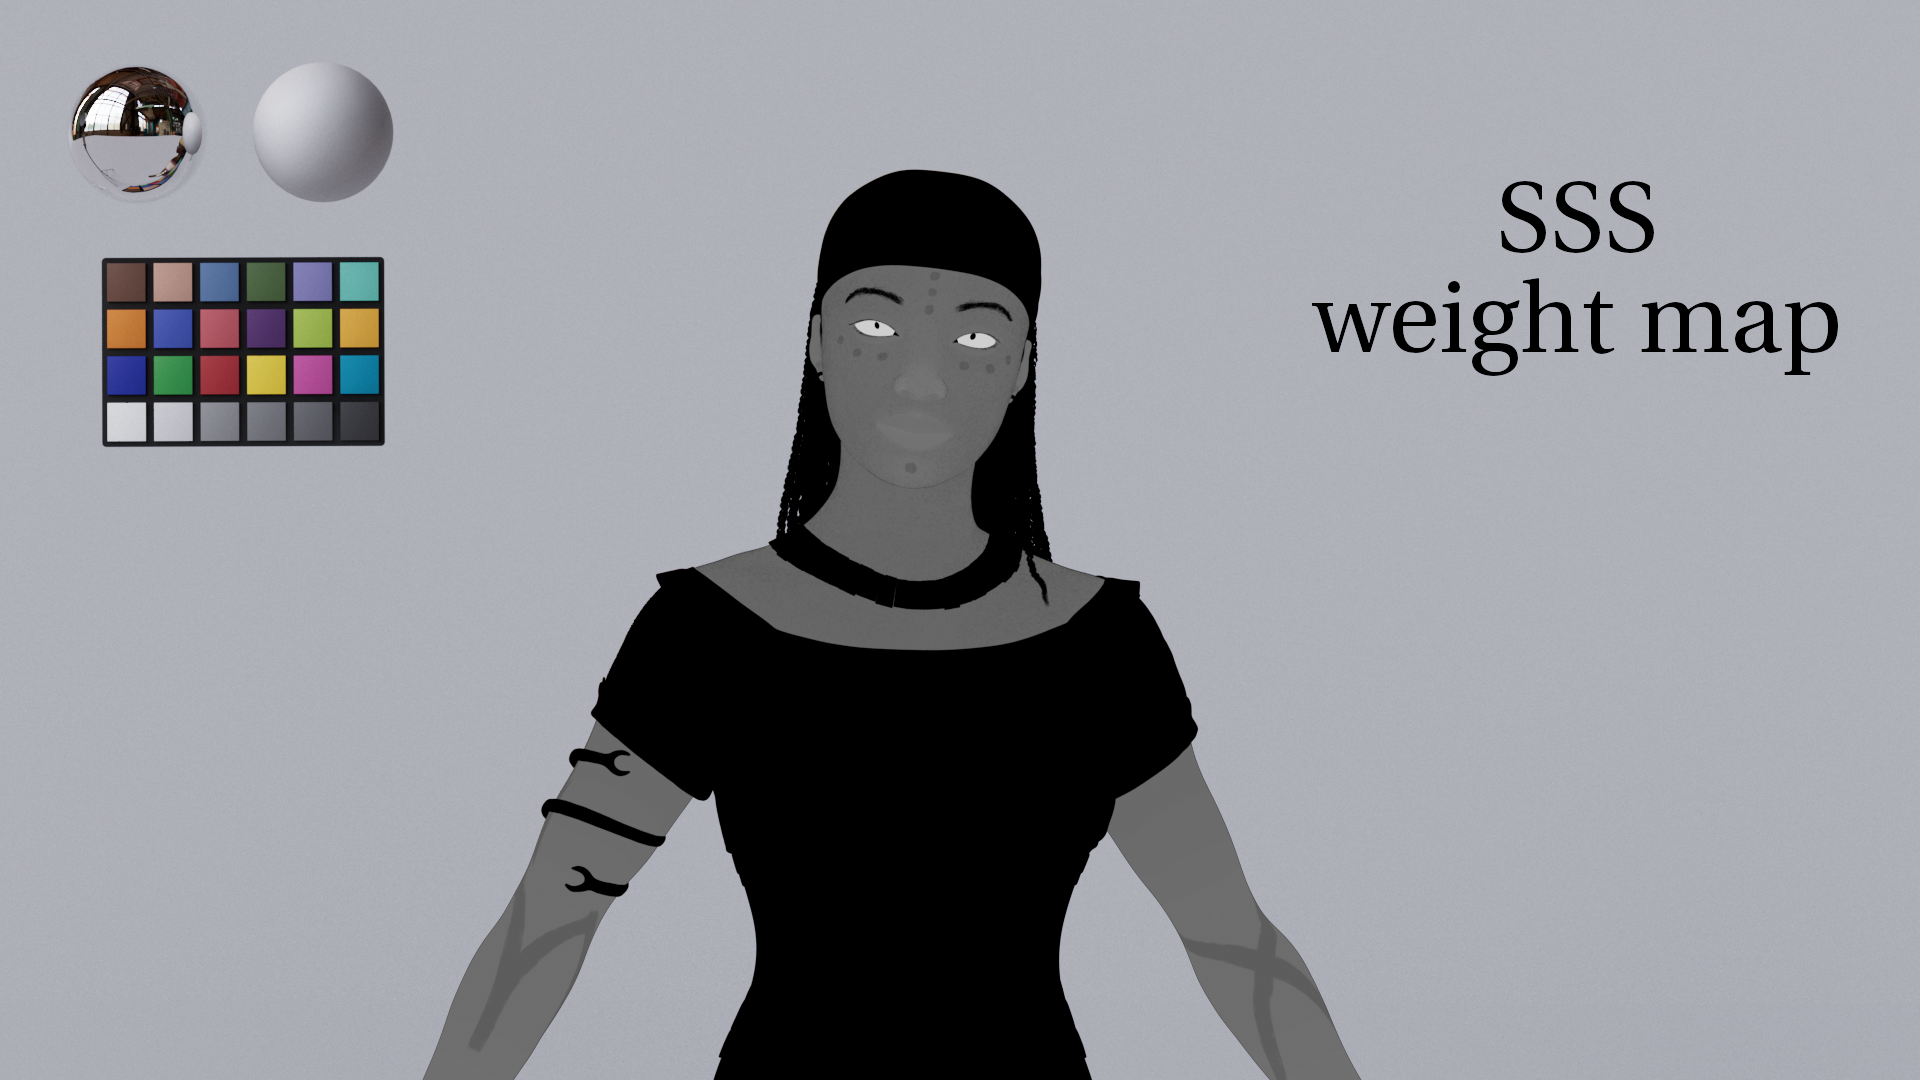
For the texturing I imported my complete Model into Mari. There I started with creating Isolation masks for every different material, because I reuse them whereever needed. After creating the masks I did the base color. For the skin texturing I choose to use a Texturing XYZ map as start for the basecolor and also for the micro displacement. Following the Basecolor I created Roughness, Bump, Coat and SSS weight maps in Mari.


Lighting
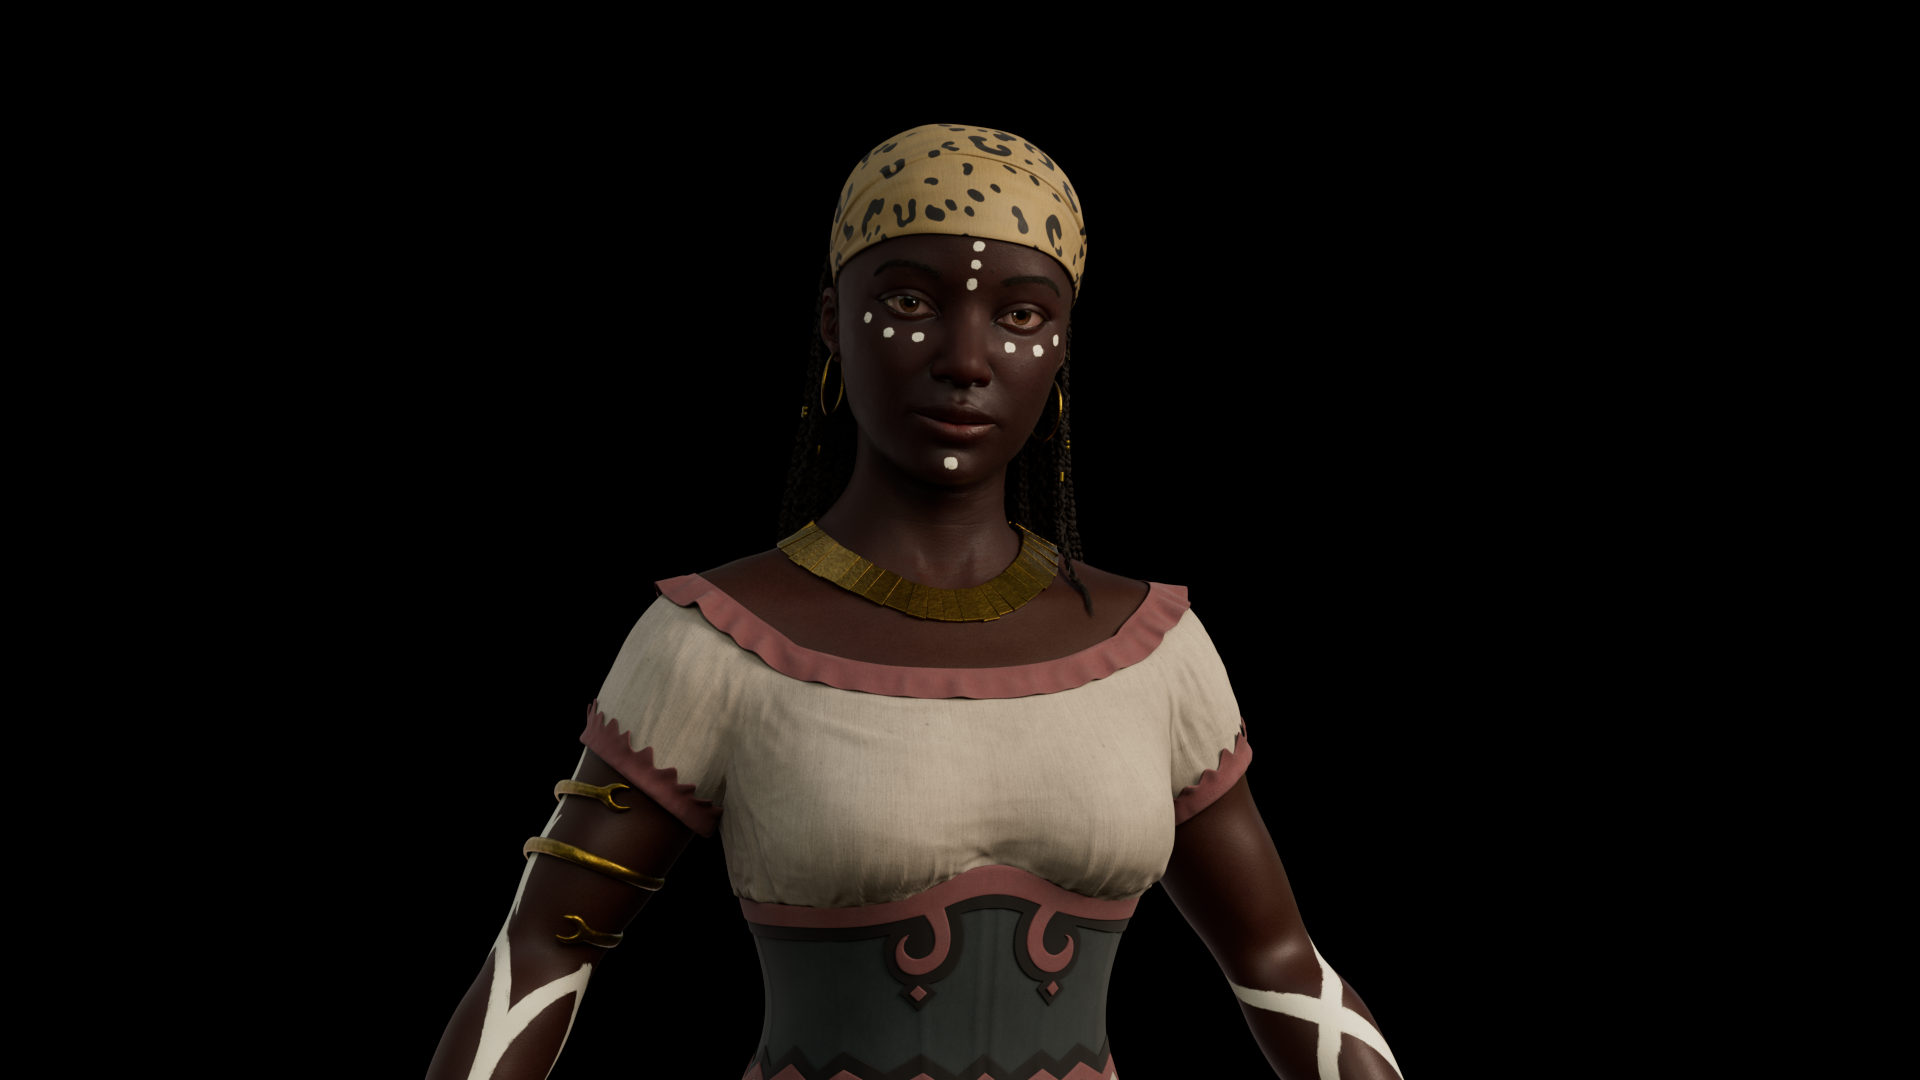
For lighting I chosed to use a HDR in combination with a three point light set up. Additional I added a point light just for the eyes to get a nice Highlight in the reflection.


Compositing
In Nuke I started with a beauty reconstruction and some small adjustments on the render (mainly in the specular layer). I gave her a simple background and added then lens effects (Bloom, Chromatic Aberration, Lens Distortion, Z-defocus, a Vignette and some grain) for a more natural look.

Used software

Credits
Credits goes to Michael Faers for his lovely concept art and polyhaven for the used HDRs (main scene & turntable scene)


Comments (0)
This project doesn't have any comments yet.