
Cargo - CG Short Film


I’m excited to share the project I was working on for the last couple of months at Think Tank. This is a short film I created to showcase Lighting and Lookdev. I also want to thank my mentor, Gianni Vardanega, that helped me through this journey. In addition, I'm sharing some side projects I have also been working on.
Cargo - CG Short Film

Cargo - CG Short Film
I’m excited to share the project I was working on for the last couple of months at Think Tank. This is a short film I created to showcase Lighting and Lookdev. I also want to thank my mentor, Gianni Vardanega, that helped me through this journey.
In addition, I'm sharing some side projects I have also been working on.
Concept
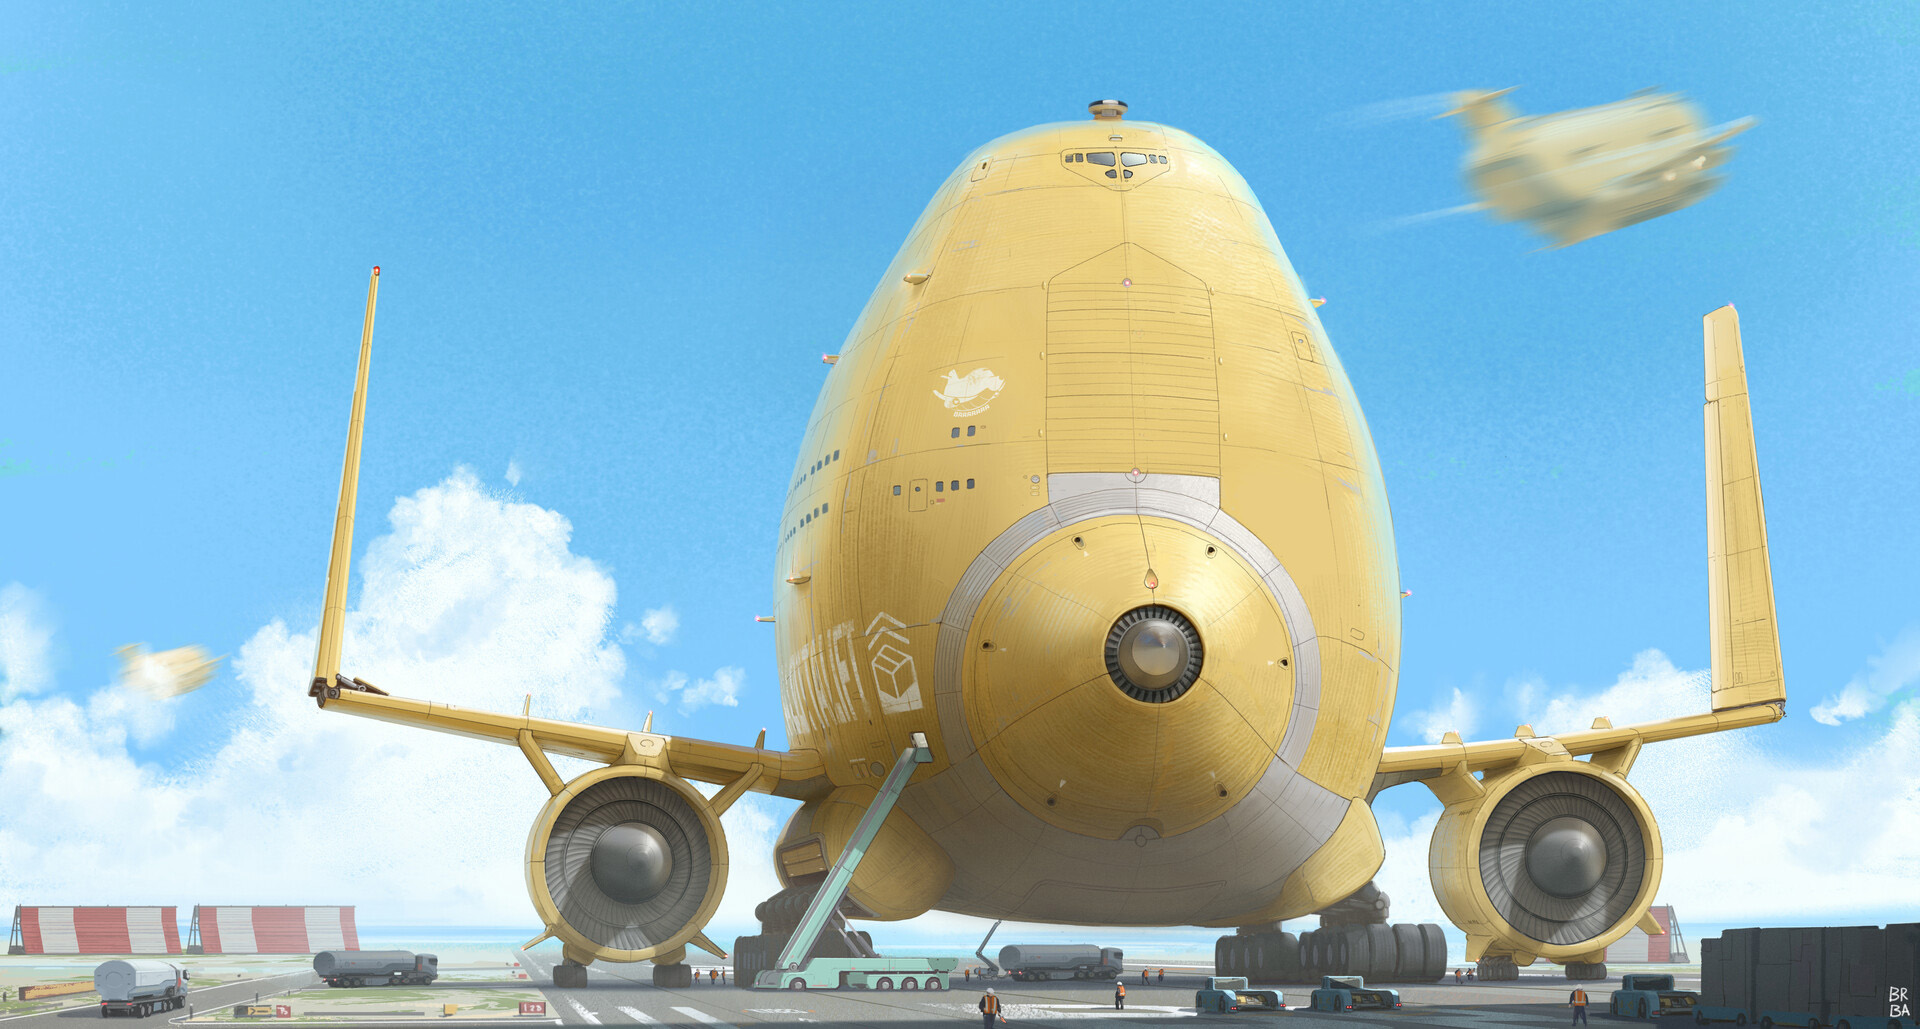
Braydan Barrett's concept ignited my imagination with various story ideas. Its style perfectly matched what I was seeking, and it had the potential to tell a story that would feature the passage of time and diverse lighting conditions.
Project Management
While PureRef served as a visual guide, Notion acted as an information hub, storing the schedule, work hours, shot render times, feedback, and general notes.
I always kept Notion open while working, and at the end of each day, I tracked the hours spent on each task. This enabled me to monitor how long certain tasks were taking and whether I was on schedule or needed to make adjustments. This approach was implemented throughout the project, and by making difficult decisions to cut certain elements and seek more efficient methods, I was able to successfully deliver the final product.

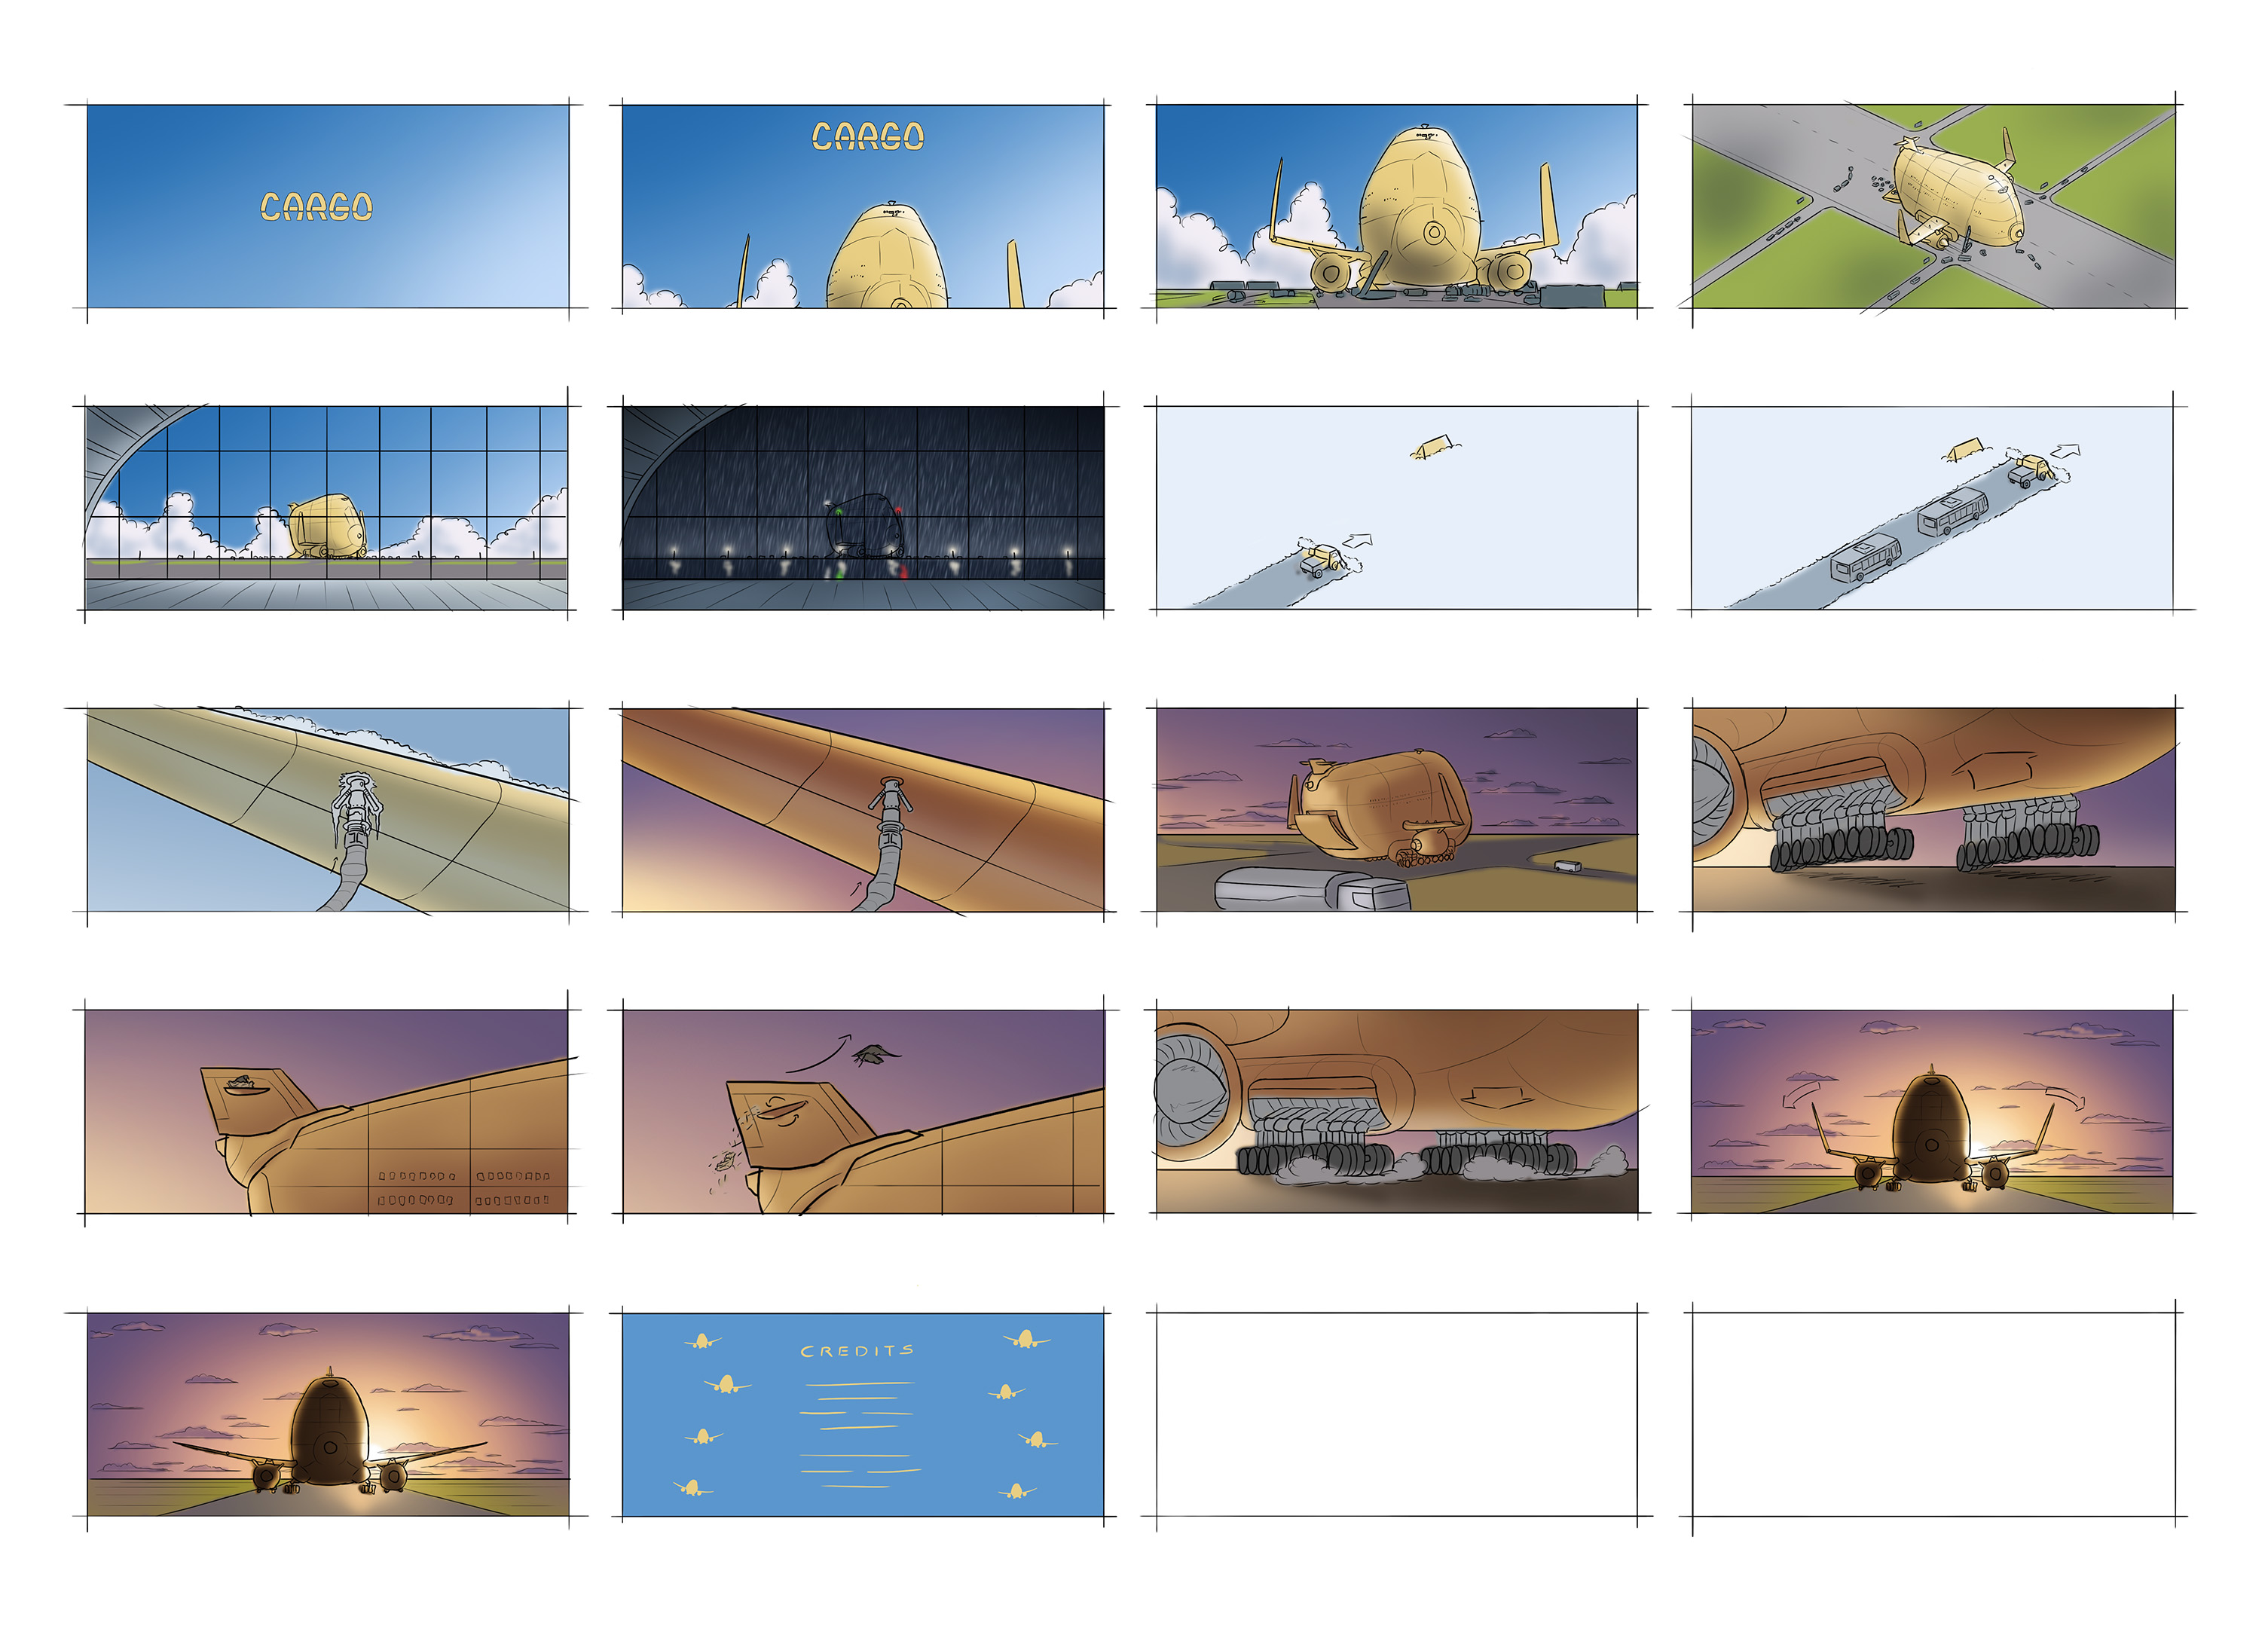
Storyboard
Storyboarding offers the advantage of having the freedom and flexibility to experiment with various ideas. During the initial pass, the focus was on developing the narrative and visual storytelling. Once a solid foundation was established, I proceeded to a second pass, refining the lines and colors, which played a vital role in enhancing the storytelling.
Having the storyboard completed, I could assess the workload for animation, assets, and rendering time. This stage presents a crucial opportunity to determine which story elements are essential and which ones can be cut to save time.
Animatic and Schedule
Upon completion of the animatic, I gained a better understanding of the amount of time required for each task. To manage my workflow efficiently, I created a rough schedule that defined specific deliverables for each week, with a few flexible spaces to allow for adjustments to the workflow. It is always wise to anticipate unforeseen events. Unexpected things can occur, and having some flexibility can prevent them from becoming a problem.
Modeling
Since the concept only provided a single view, I created a blueprint in Photoshop for the other angles to aid in the modeling process.

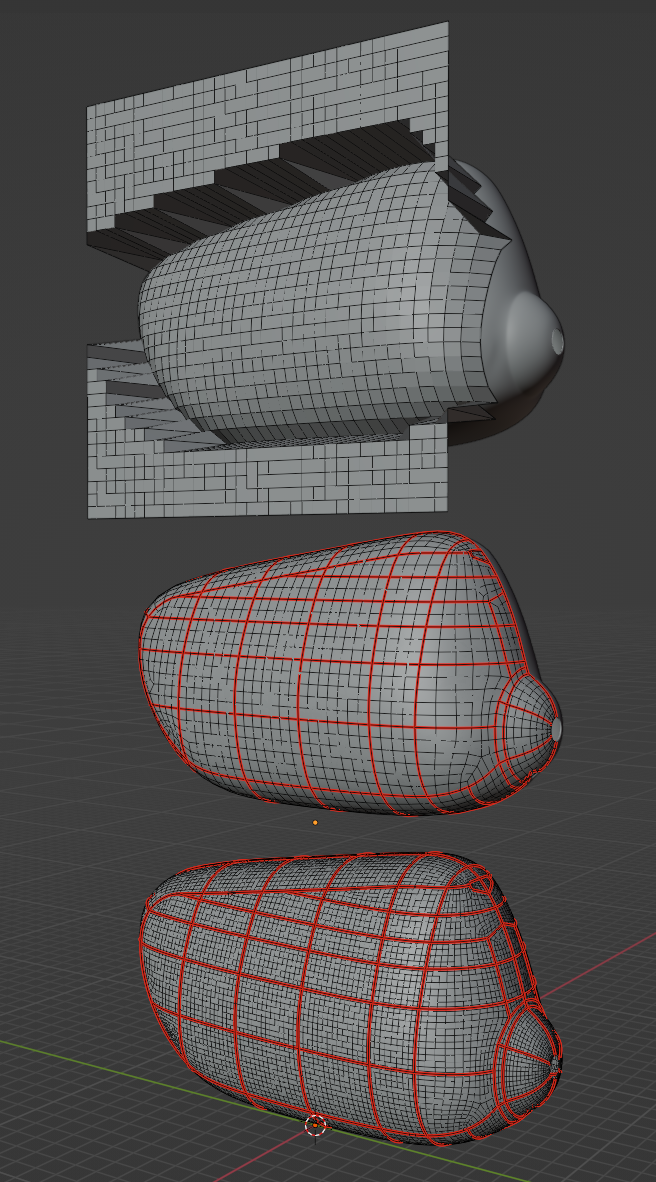
The most significant challenge in modeling was achieving the desired paneling effect on the airplane. To create a more realistic appearance, I modeled the gaps in the mesh instead of having them in the textures.
To begin, I utilized a sphere as a foundation for the shape, which served as the base mesh for the new topology. I then performed retopology using a grid that projected to all sides and determined where the panels would be cut and connected the rest, always conforming to the base mesh. Once I had completed the main body of the airplane, I established a workflow for the paneling edges and depth to ensure consistency throughout the model.
It was essential to start with the main airplane model as a base for detailing the smaller assets, as the complexity of the shapes and details decreased with the size of the object.


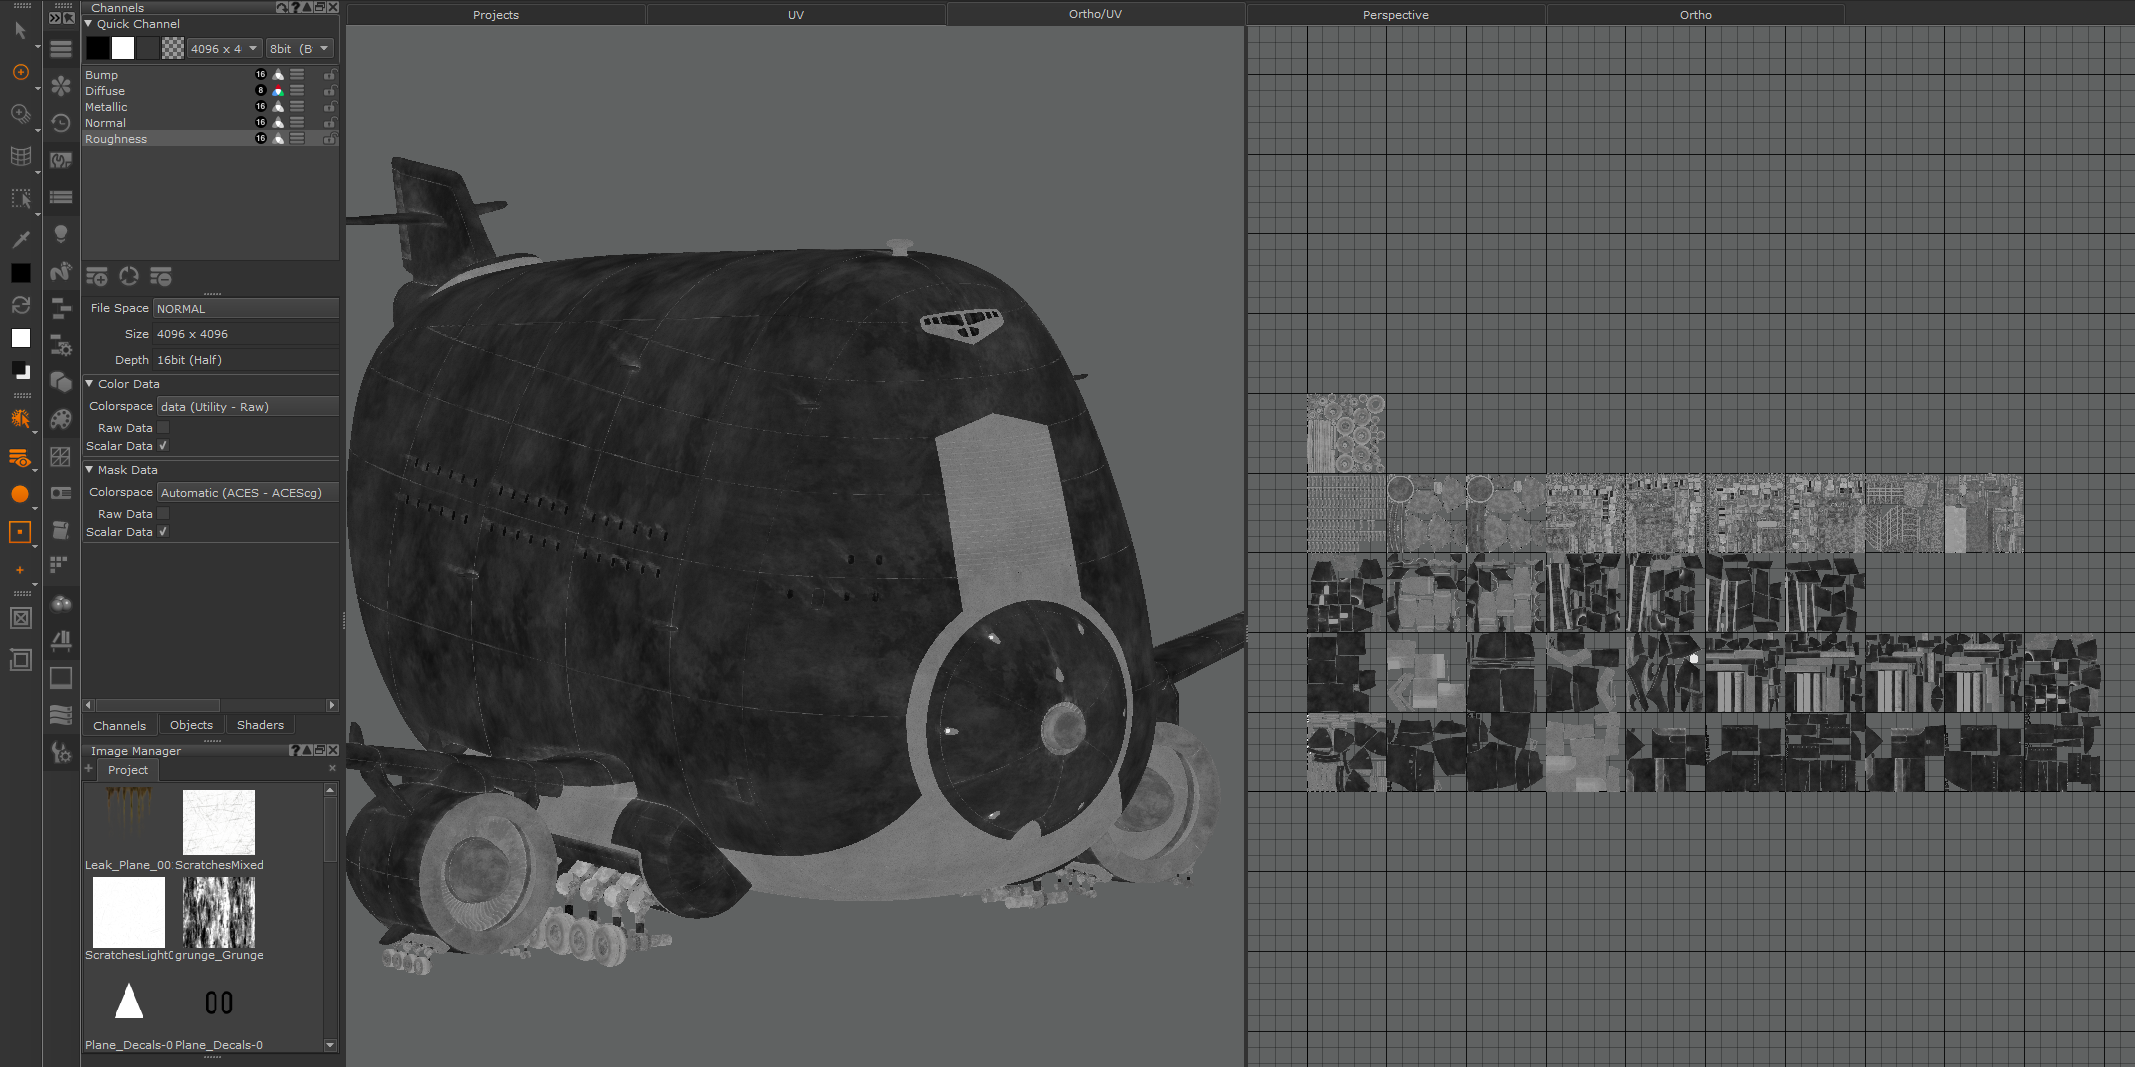
Texturing
Due to the Tex Density required for the closest camera shot, the main airplane had 37 UDIMs, which led me to choose Mari for texturing because it has a better performance with heavy assets. While most of the main texturing was done in Mari, I utilized Substance Painter to create some procedural maps.
In contrast, the smaller assets were all textured using Substance Painter, as it provided greater efficiency and reusability for created materials.
Lookdev
In order to ensure that I was working with accurate shaders and textures, I created a Lookdev scene which included multiple HDRIs, a color chart, and grayscale balls. This allowed me to test any changes made to the textures in a consistent and standardized environment.

HDRIs
Because of the stylized nature of the concept, I opted to create the HDRIs from scratch. This allowed me to have more control over the position, intensity, and softness of the sun, as well as the ability to paint the clouds. To ensure that my work was properly exposed, I compared it to well-exposed HDRIs.

Environment
Right from the start, I realized that choosing an airport scene would assist me in speeding up this phase. Creating environments is a time-consuming process, and I needed to be productive to complete the project within the deadline.
Although the airstrip is large, it doesn't necessitate excessive modeling, and procedural texturing can be employed in part. I began by shaping the airstrip based on a satellite photo of a real airport.
The foundation was created procedurally in VRay utilizing tileable maps. Then, I utilized Substance Painter to texture the primary characteristics such as lines, changes in asphalt type, and signs. This approach enabled me to have details when viewed up close and variations when seen from afar.

Animation
My skills in animation are limited. With this in mind, I tried to minimize the weight of the animation and tried to focus on the camera movements and visual storytelling.
Lighting
Refining the HDRIs proved to be beneficial during the lighting stage as it sped up the process. While the main focus of this stage was to fine-tune the HDRI to cater to all cameras, I also made orientation changes for each shot and incorporated additional lights to enhance aspects like bounce and rim lighting.

To start, I chose a key shot for each scene and once those were composited and approved by my mentor, I worked on the other shots to match the same look. I aimed to minimize the need for comp adjustments by maximizing the quality of the renders.
All shots included volumetric atmosphere, however, since only the night scene had the of lights interacting with it, I was able to save render time and have more control by compositing the volumetrics with ZDepth.
References played a crucial role throughout the entire process. They provided a clear target and allowed me to draw inspiration from outside the project, which was important to maintain a fresh perspective. I relied heavily on references from animated films and photography, keeping them nearby at all times. Even with a calibrated monitor, comparing colors and exposure with high-quality references was unmatched.

Comp
In Nuke, I was able to achieve the final 10% of the desired output and ensure consistency across all shots. I removed any residual noise from the renders and added film grain to enhance the final look. Moreover, I incorporated some special effects including lens flares, heat distortion, atmospheric effects, and dust. Finally, the complete project was exported in DaVinci along with the audio and rec.709 conversion.
Still Life
In contrast with my main project. This one was all about matching to real life.
Softwares: Maya, Vray, Nuke, Substance Painter, ZBrush, Blender and Photoshop.

Using the glass's reflection as a guide, I was able to position the key light to match with the reference. Although Vray did an admirable job in getting close to the reference, I added small lights to enhance specific areas and achieve a more faithful representation of the photograph.


Portrait Lighting Study
In this study my goal was to match the lighting from movie frames and photographs.
Softwares: Blender Cycles.


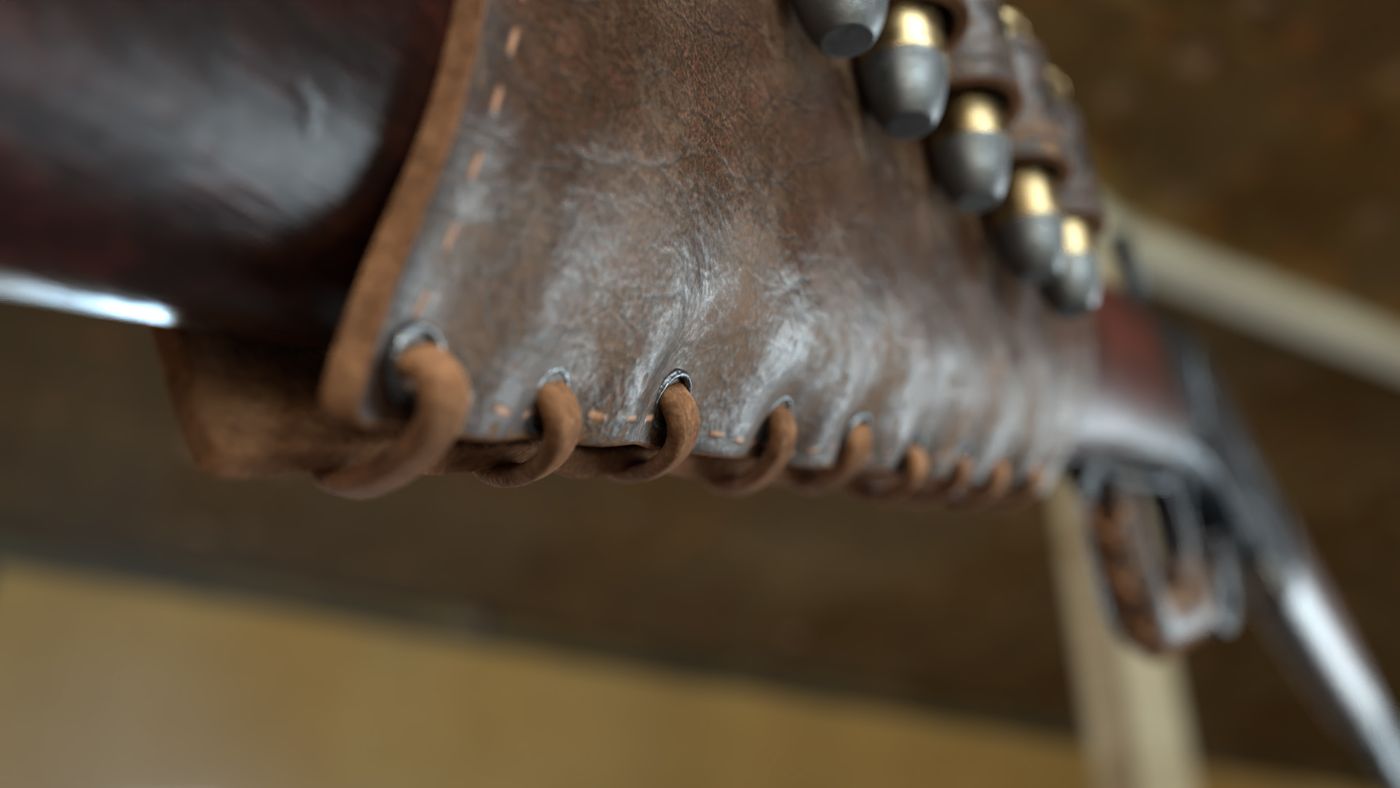
Winchester 1873
The last piece I have to show is an asset for film.
Softwares: Blender, Cycles, Substance Painter, Illustrator, Photoshop and Premiere.


Comments (1)