
Kuna Nuka


Hey! My name is Zoé and currently, I'm a student at Think Tank Training Centre on a Character for Games path. I've always considered art to be an important part of life. I really like portraits, and one day I realized that creating characters is what I like best.
Kuna Nuka
I am a Germany-based Character Artist and a student at Think Tank Training Centre. I have been studying at Think Tank Online since February 2022, where I chose to focus on 3D Characters and Creatures for Games. I am currently in my Mentorship term.
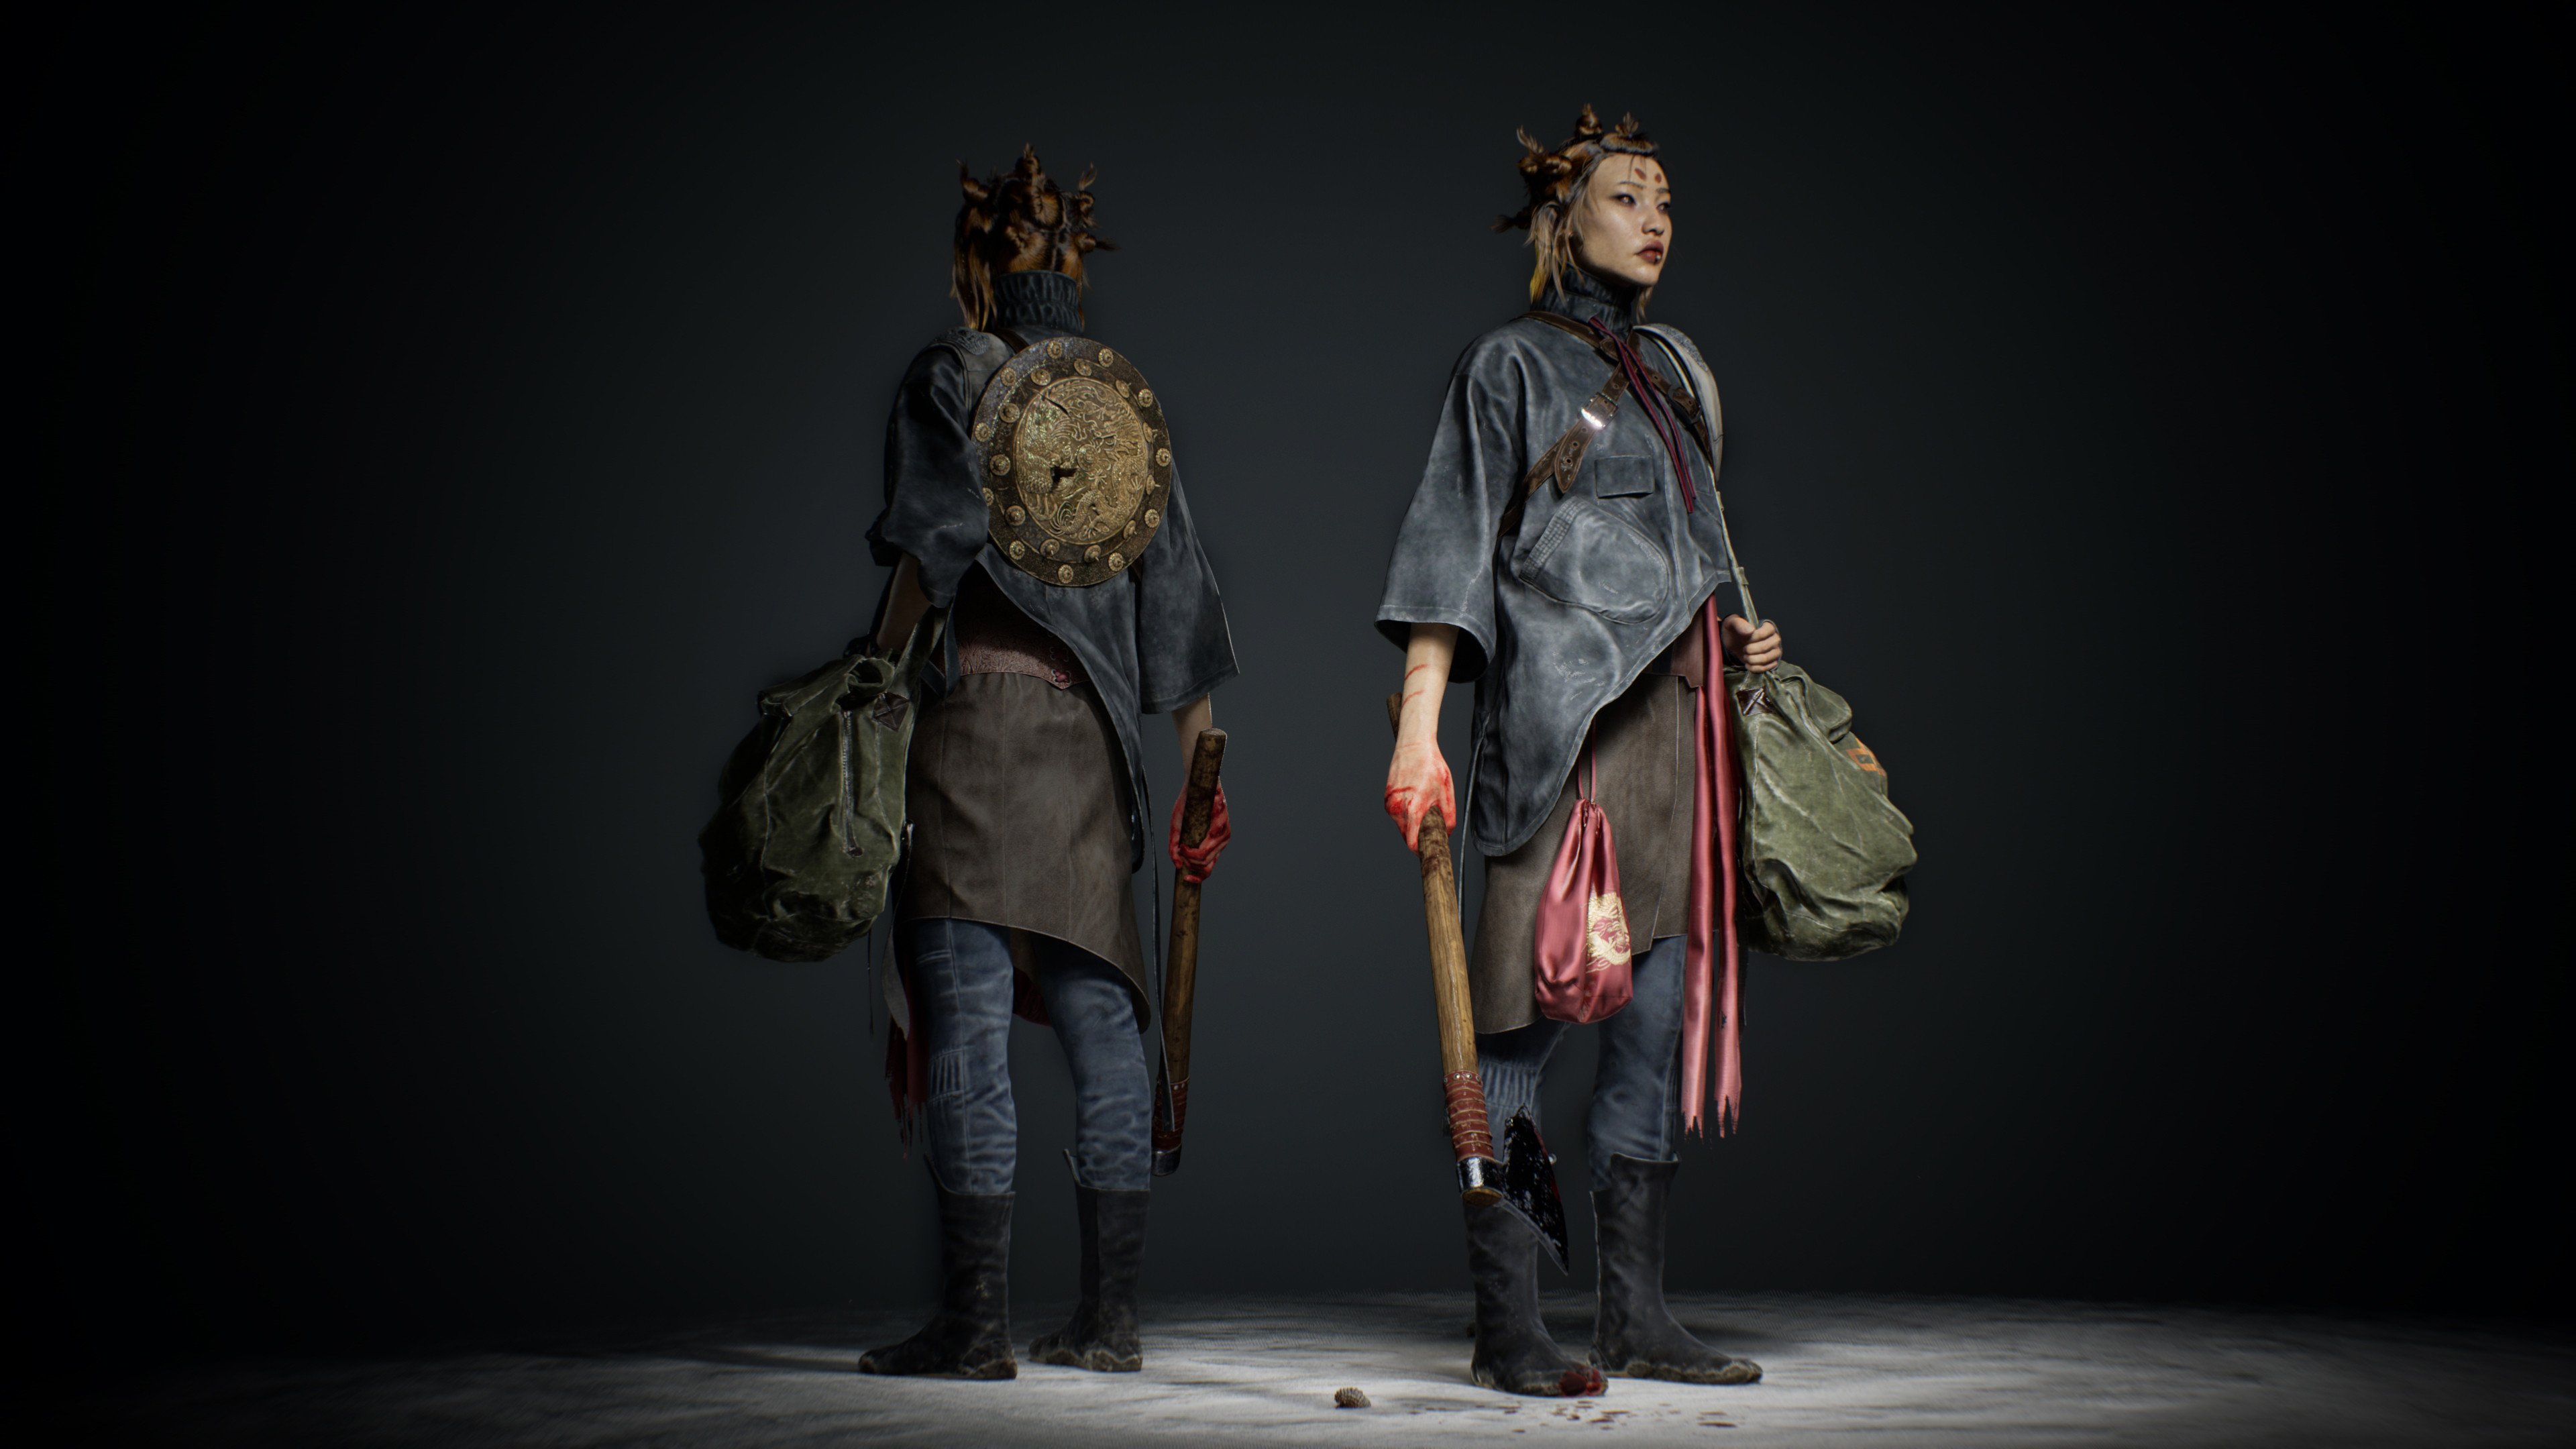
Presenting my Real-time Character from Advanced Term at Think Tank Online.
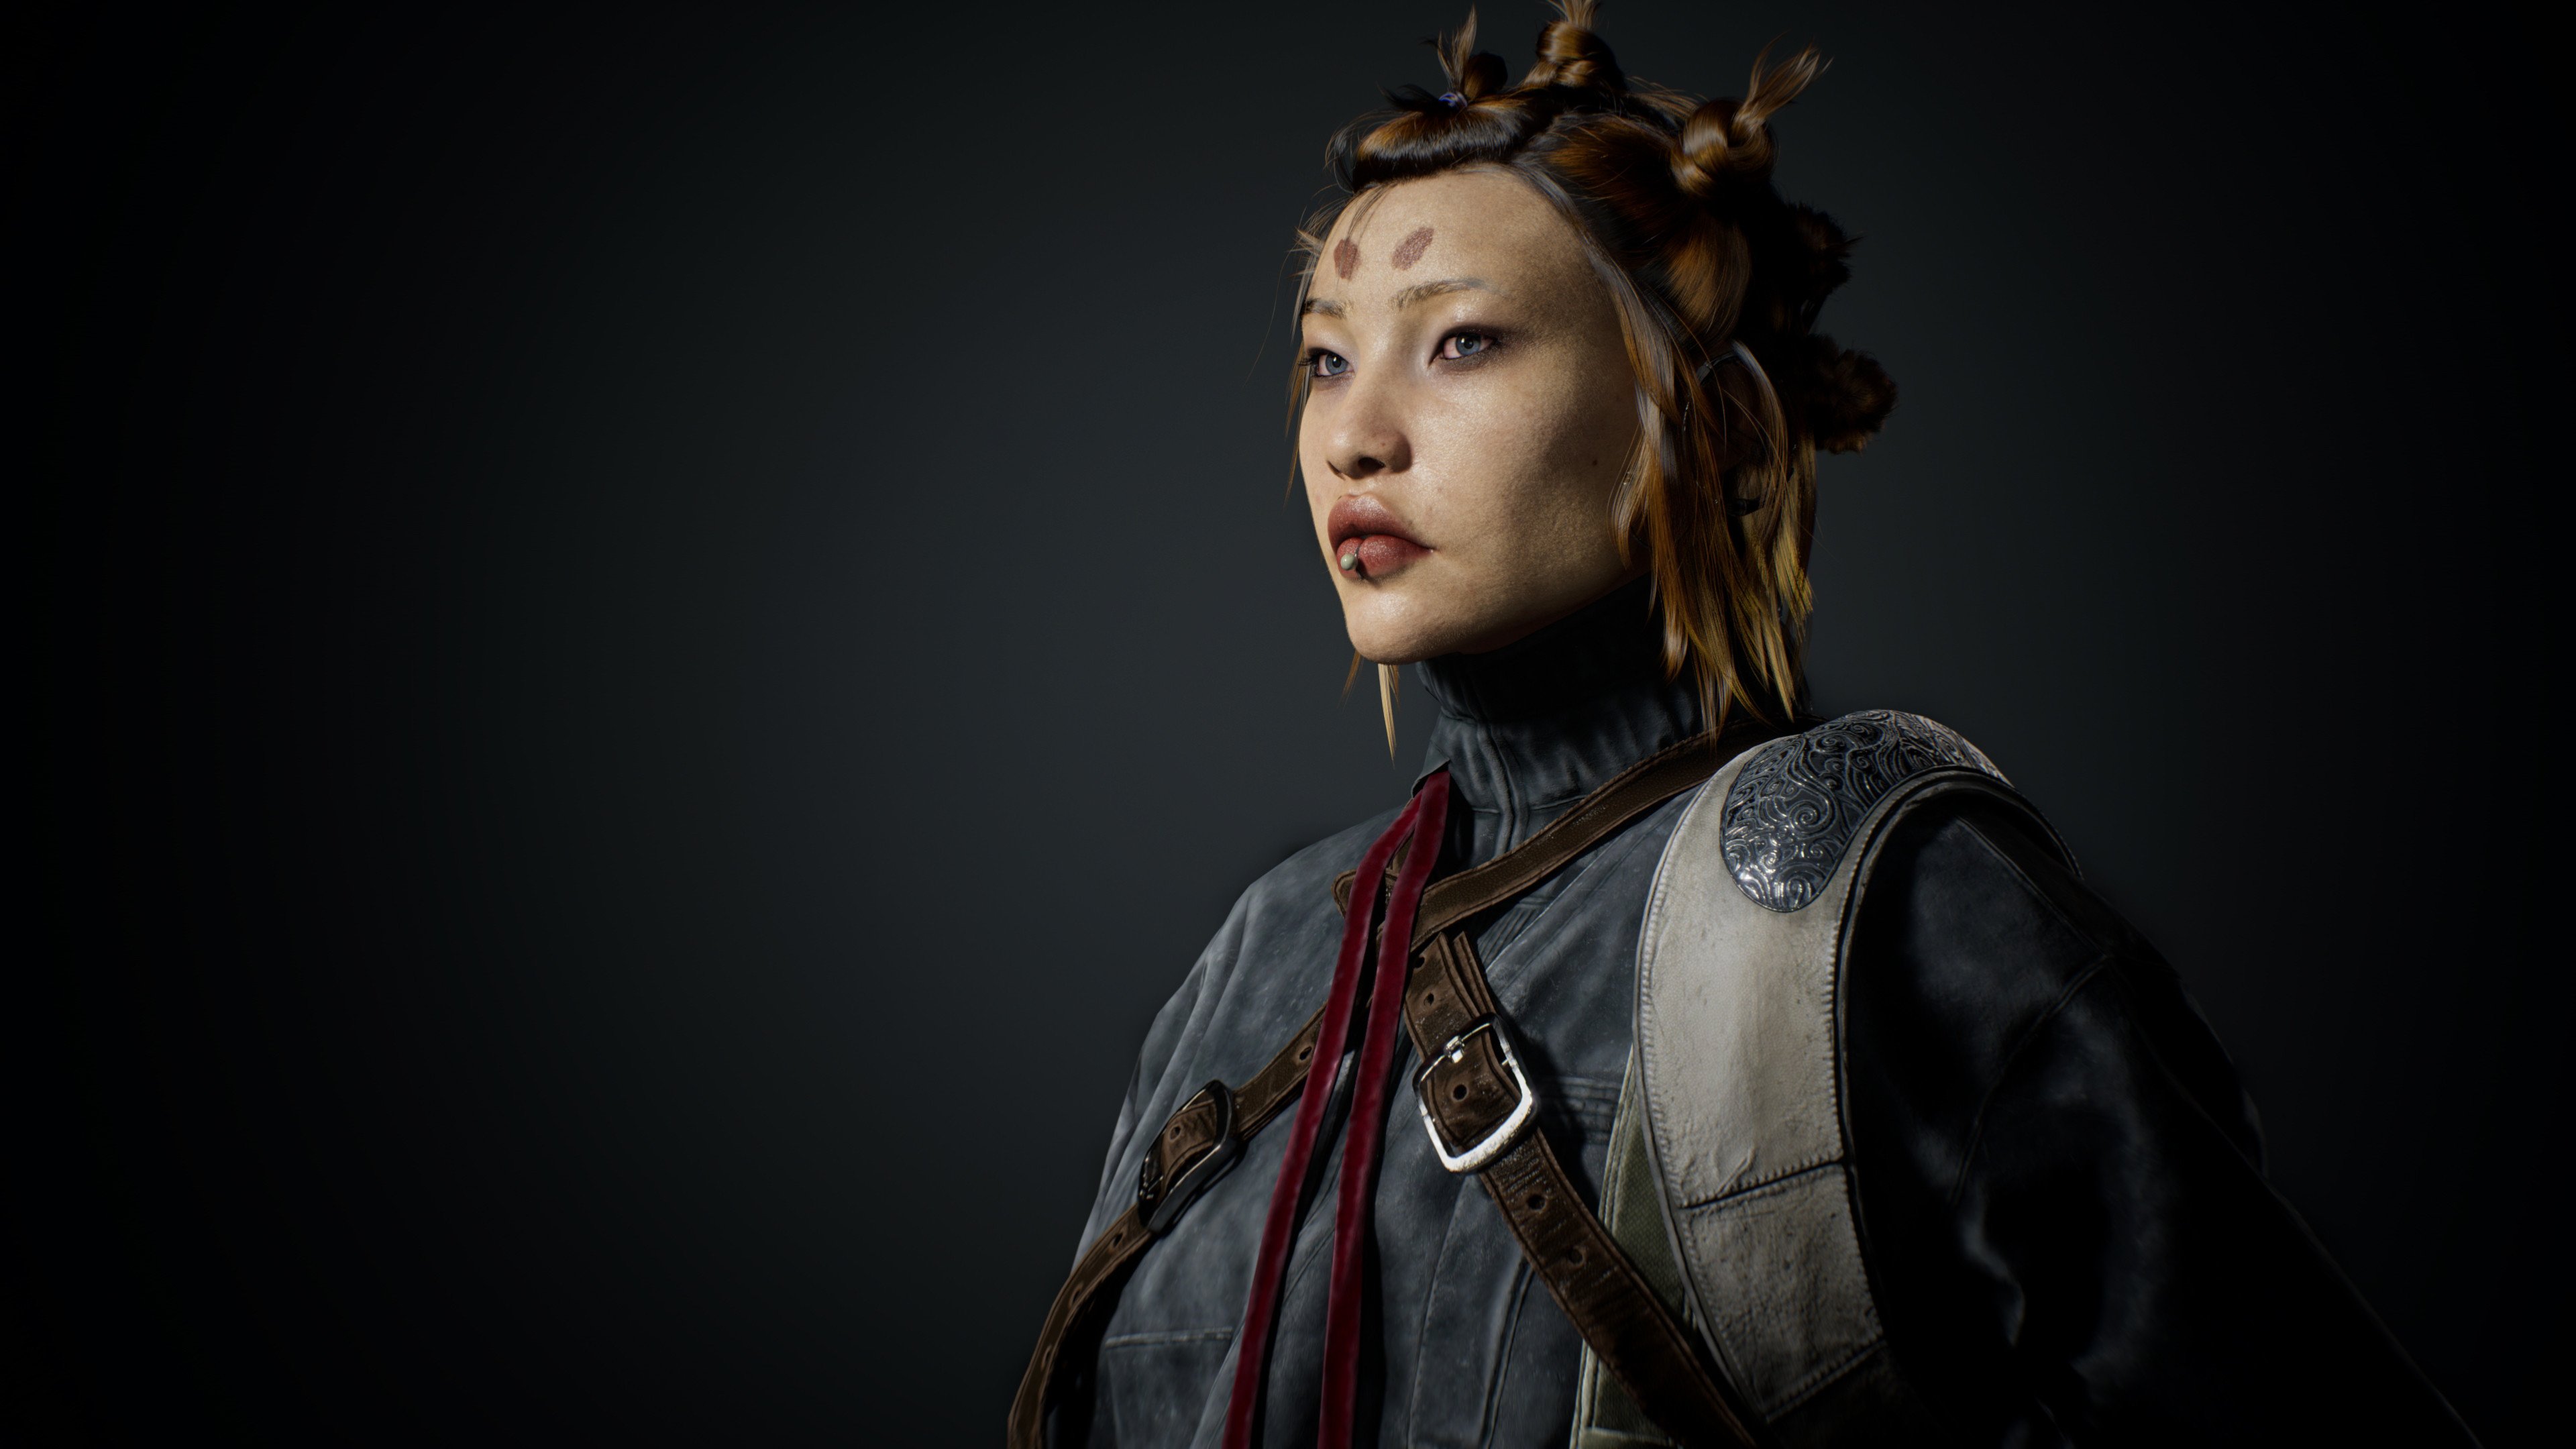
This is my most recent project using Unreal Engine 5. My main goal was to improve XGen skills, try to create a realistic skin material, and render the character in Unreal Engine. While searching for concepts, I came across a concept by David Benzal and immediately knew I wanted to work on it because it met all my needs.

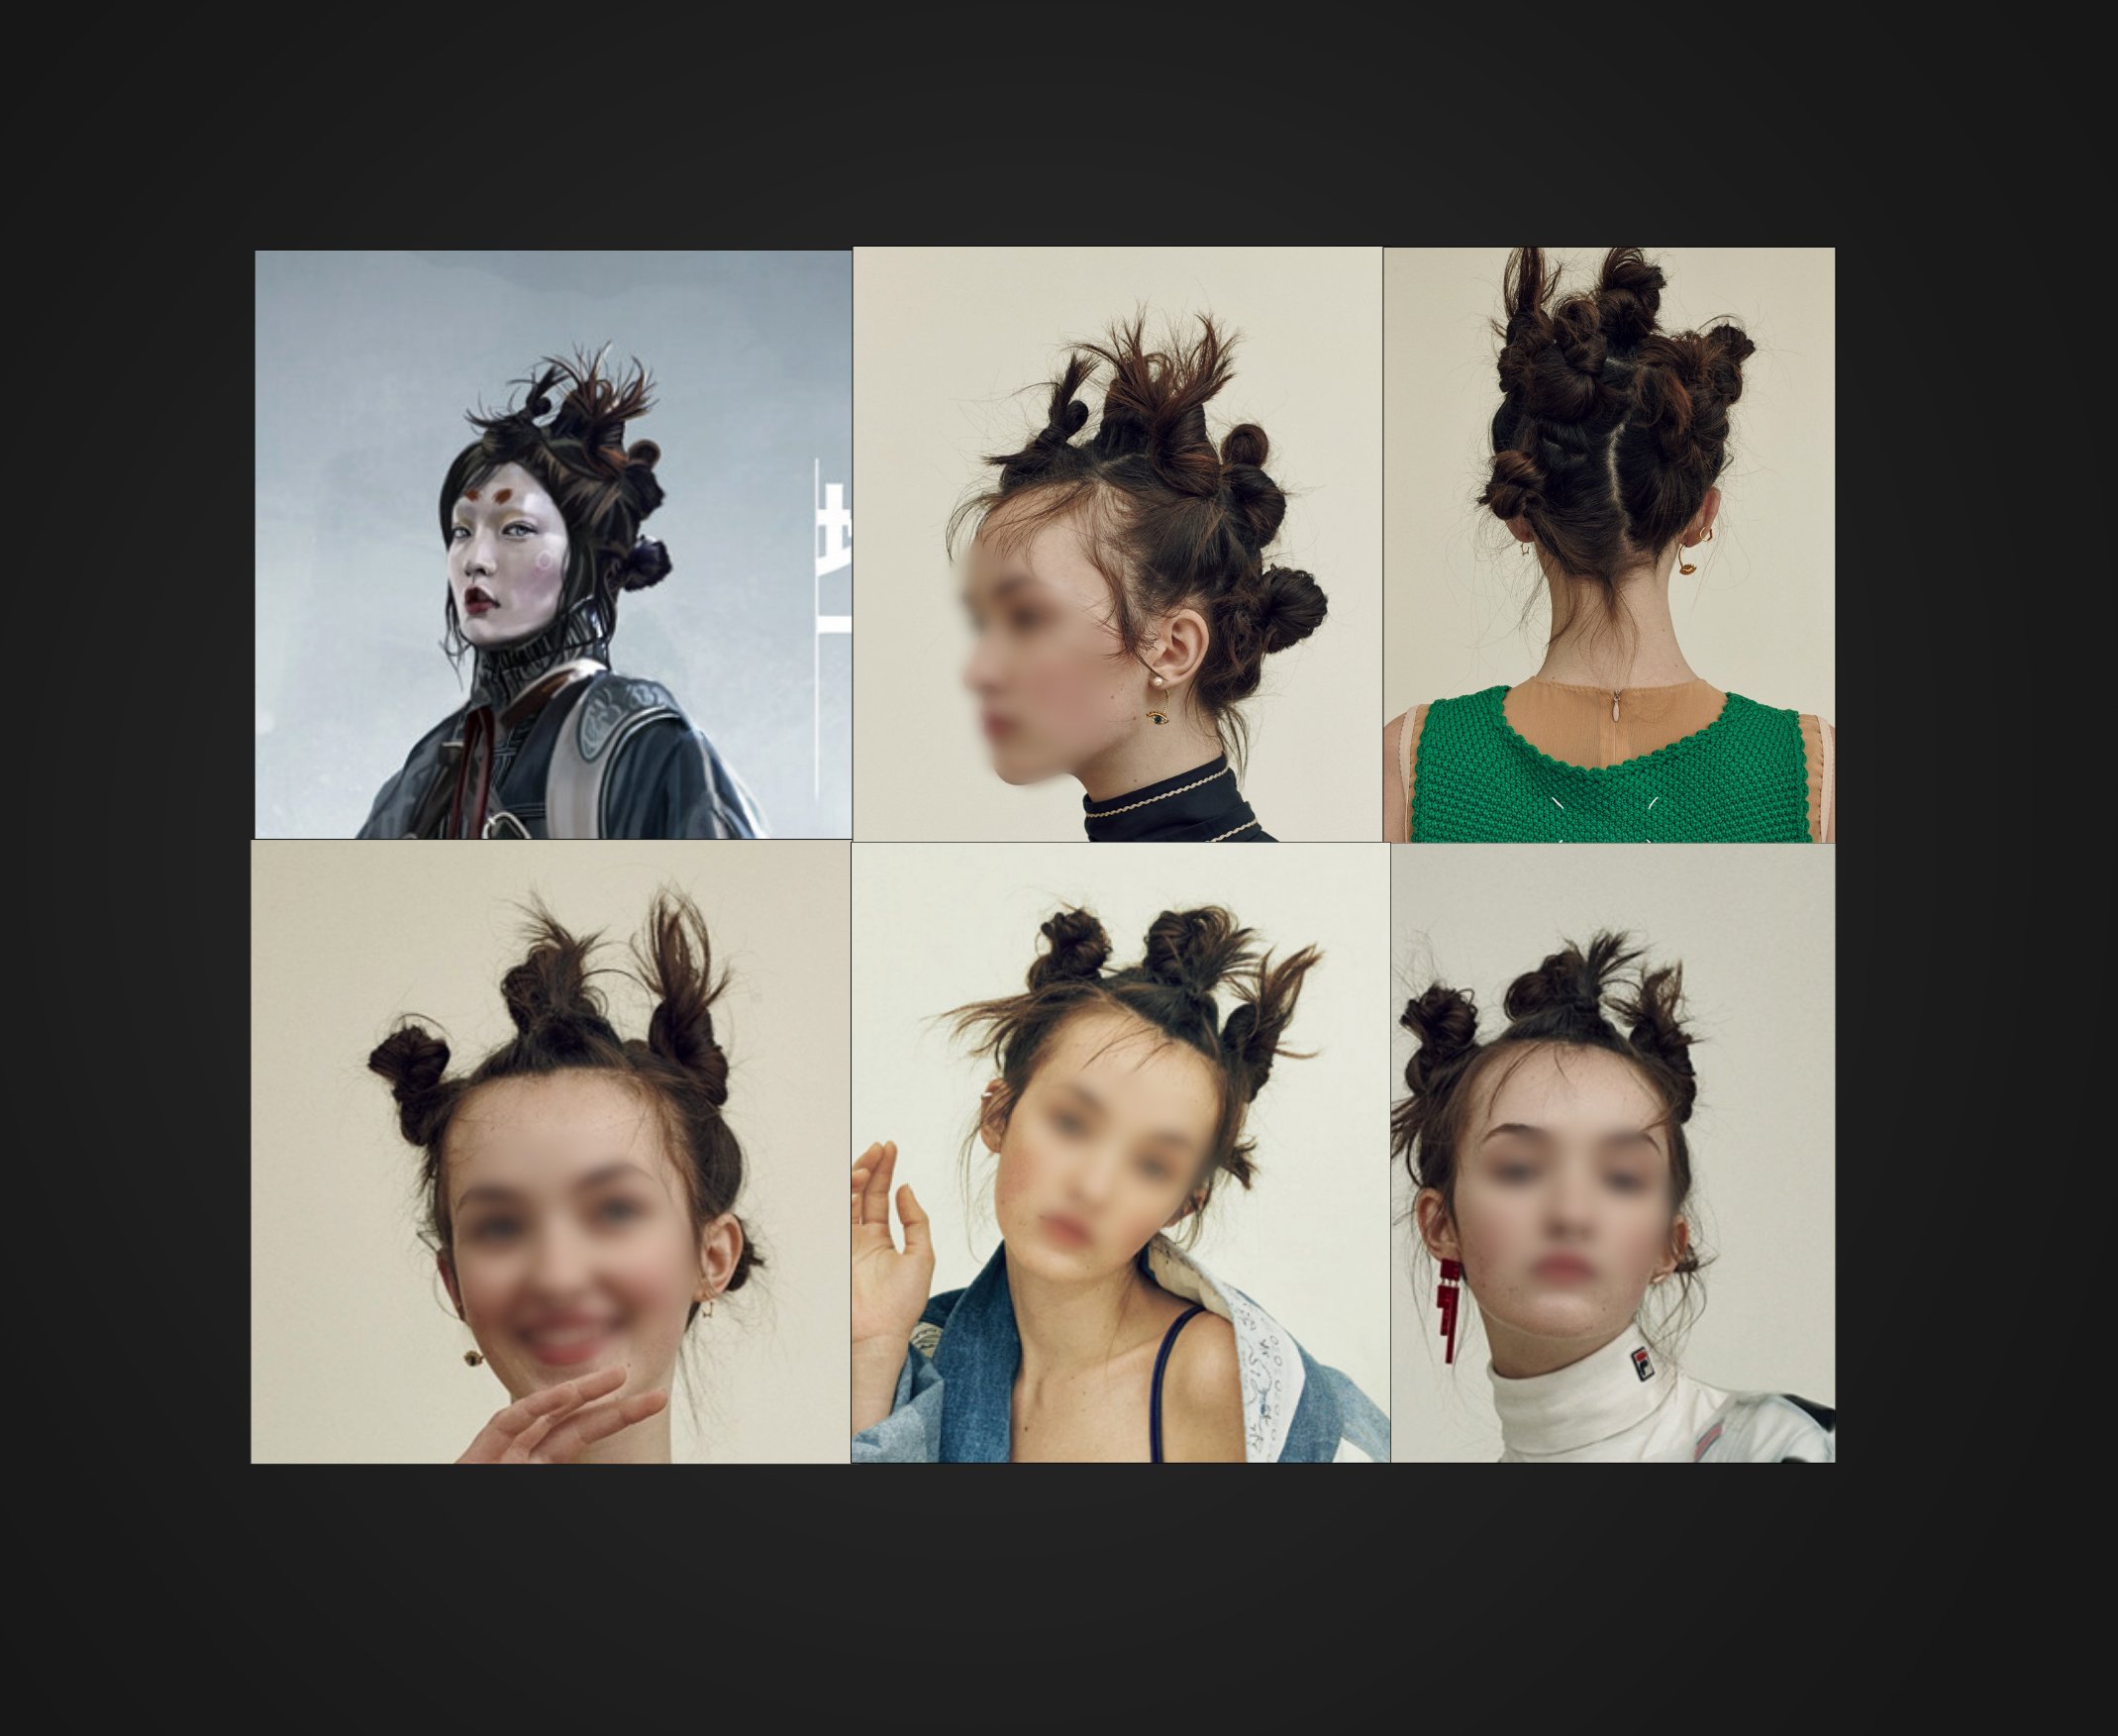
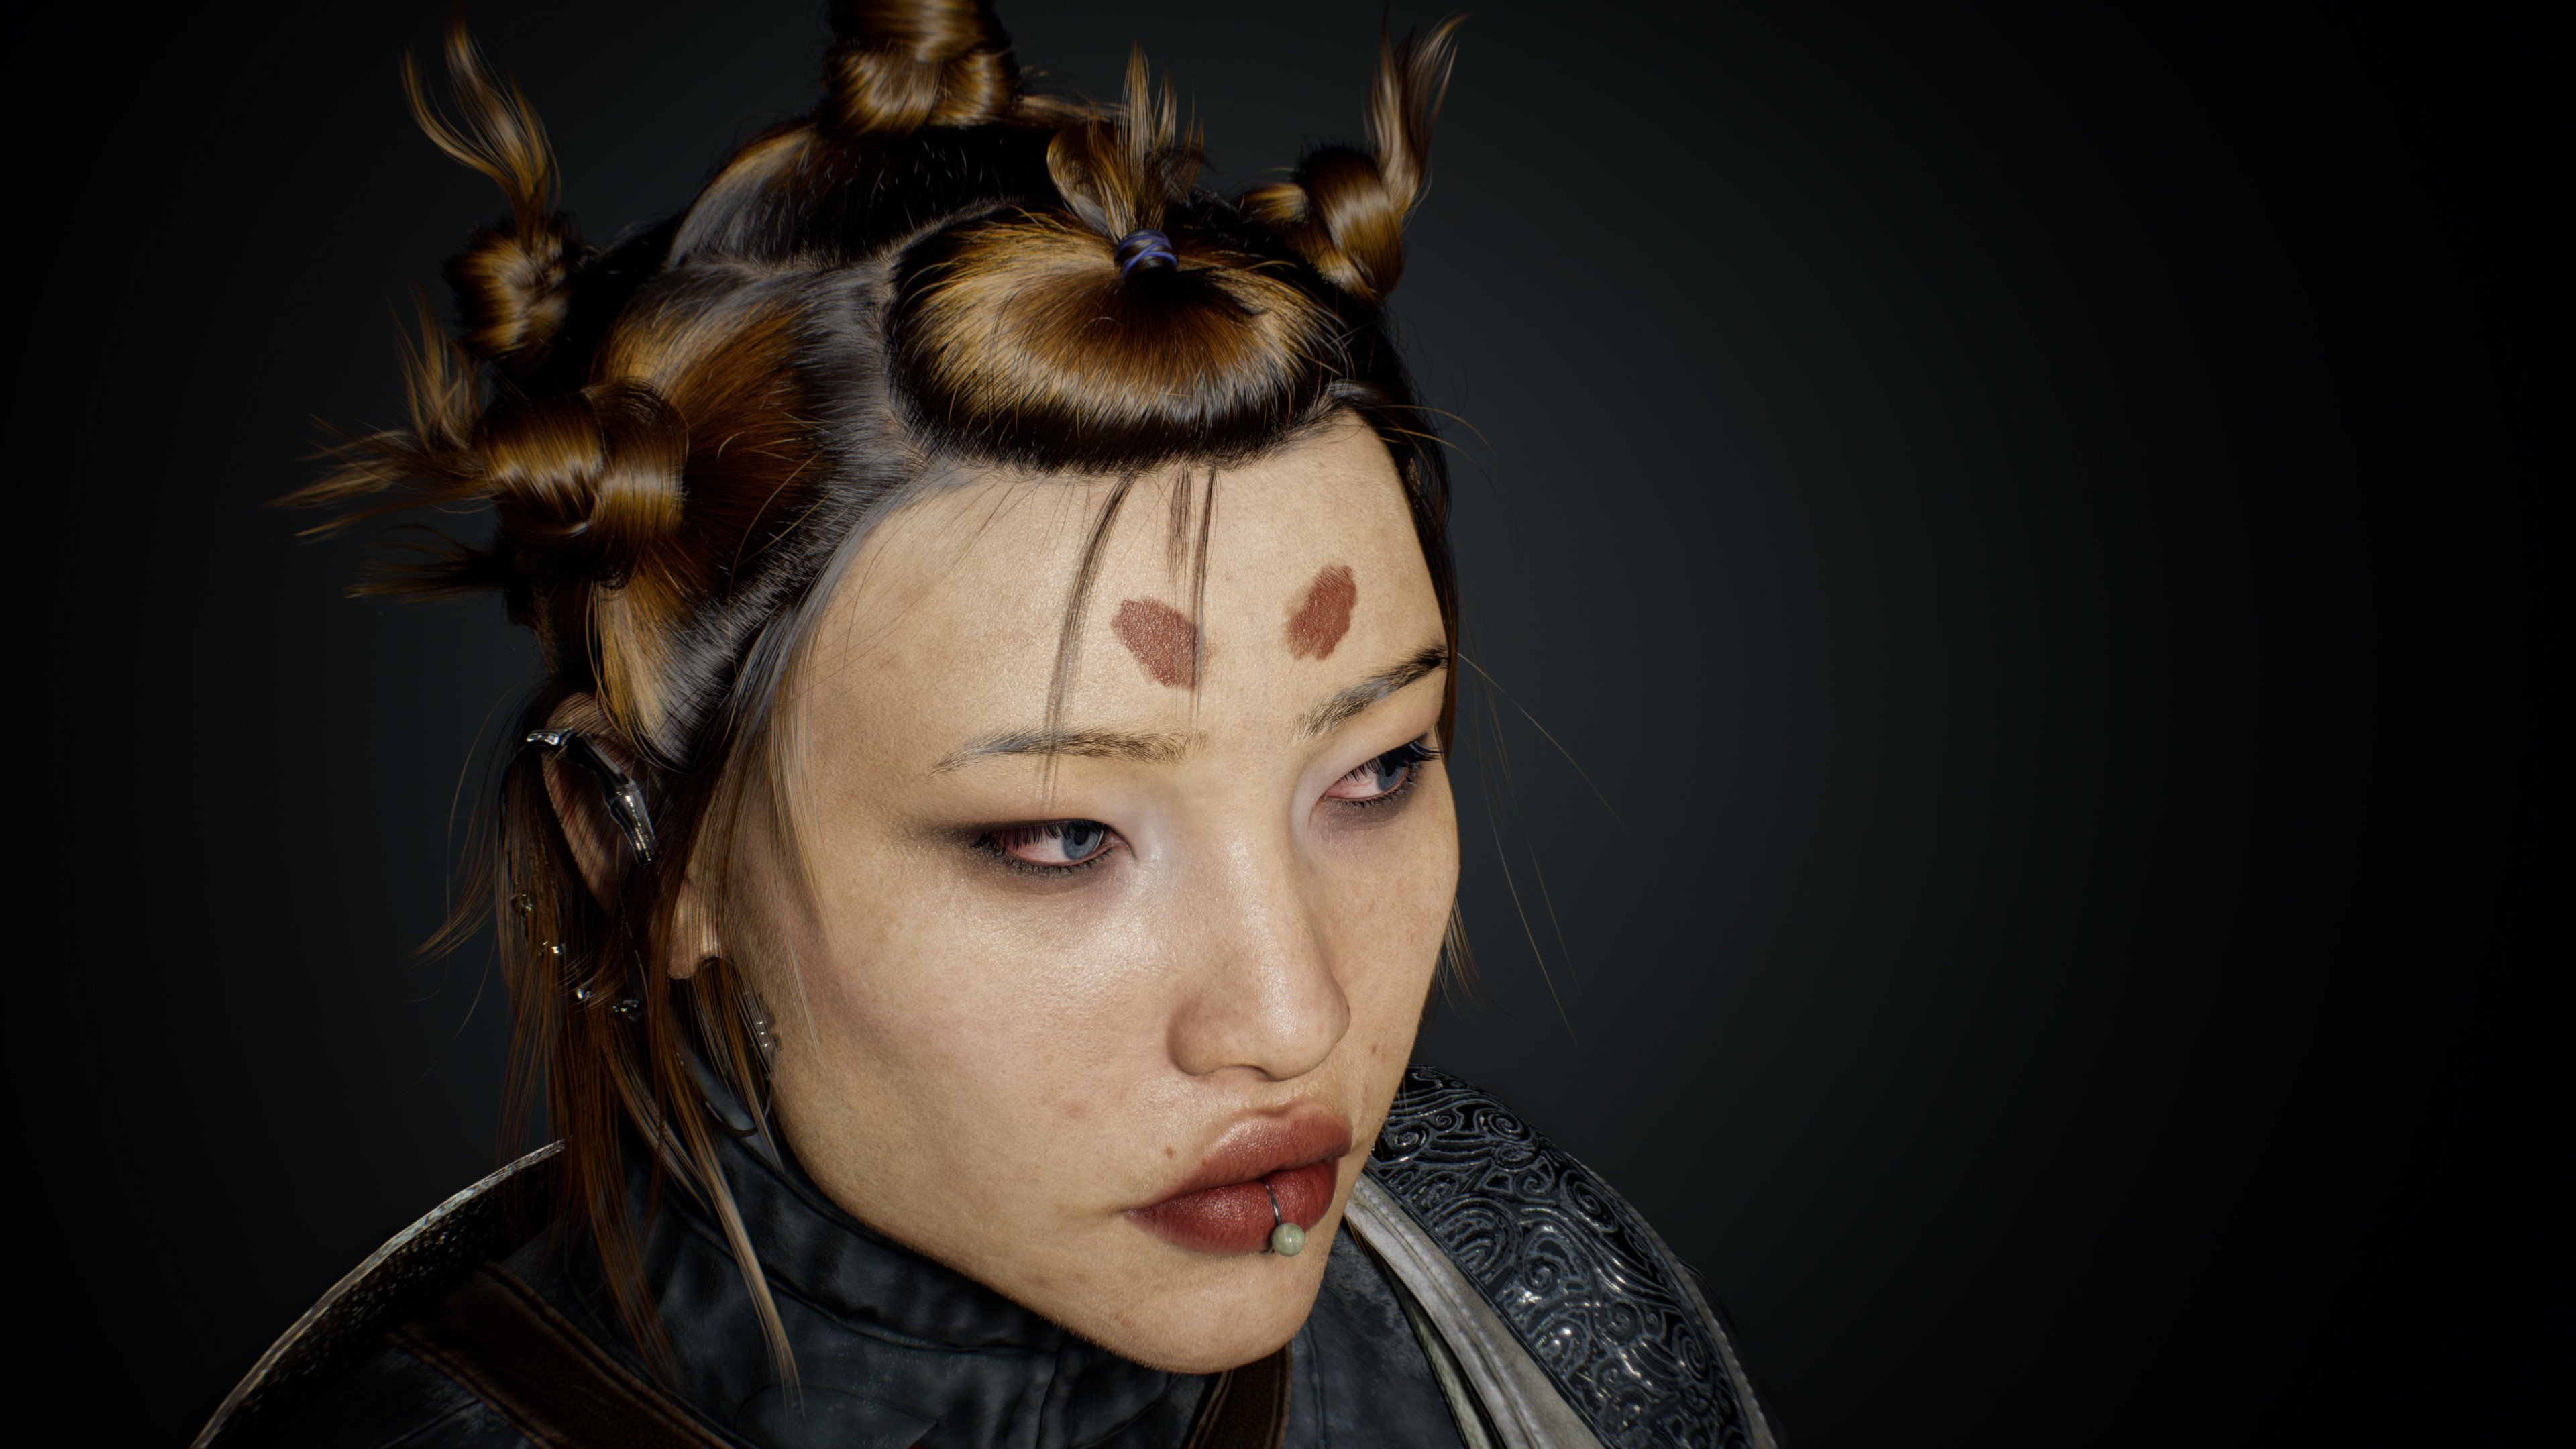
Before getting into ZBrush and starting sculpting, I always look for inspiration and gather references. I came across Tsunaina, a model with unique beauty. She became my main inspiration for the project. And I was also lucky enough to find a model with exactly the same hairstyle as in the concept. So I gathered references and started working on the main forms.
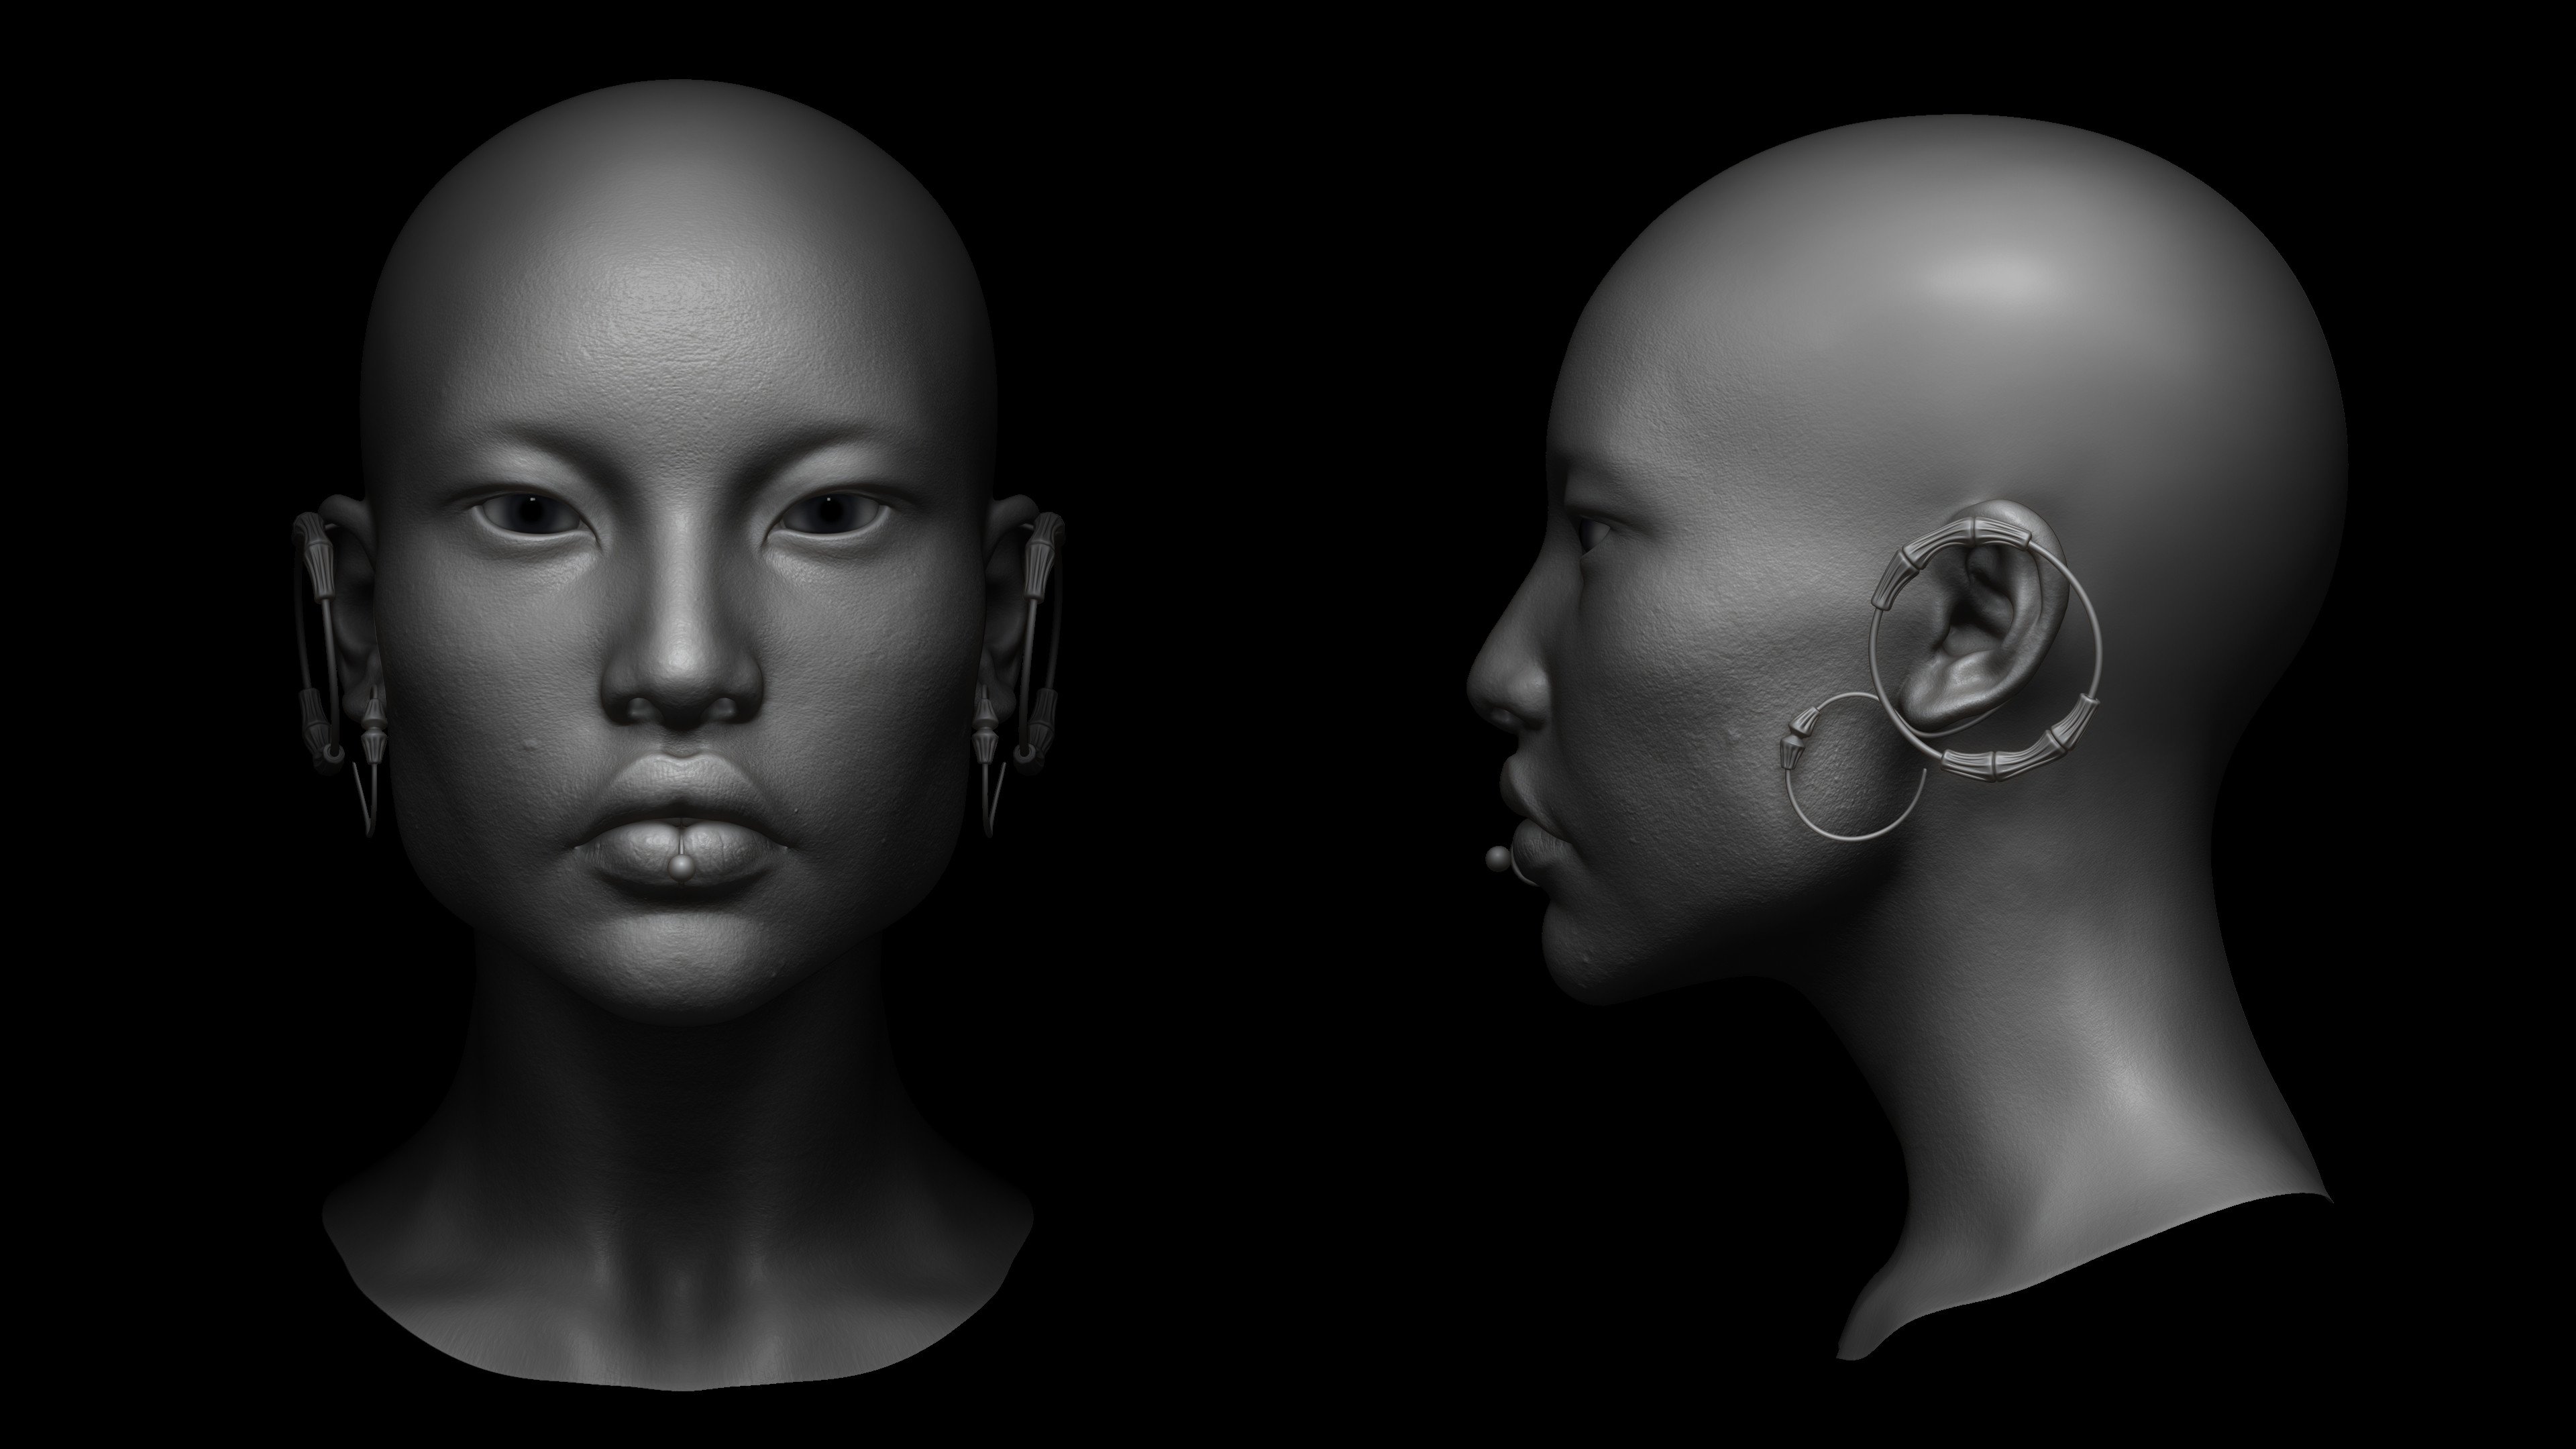
At the blockout stage, I did the largest forms first and looked at the silhouette to make sure I was still matching the concept. I checked the proportions and worked from large to small. Everything can be very rough at this stage. But already here I was trying to get the feeling I wanted to reach in the shapes and the silhouette. I relied on the reference I had gathered and thought about the story of a character.

As for facial anatomy, my approach is based on the feeling of shapes and my knowledge of anatomy gained in Scott Eaton's courses and during my training at Think Tank.
Usually, I also create a very basic hair blockout, because hair makes a big difference in the perception of the face.

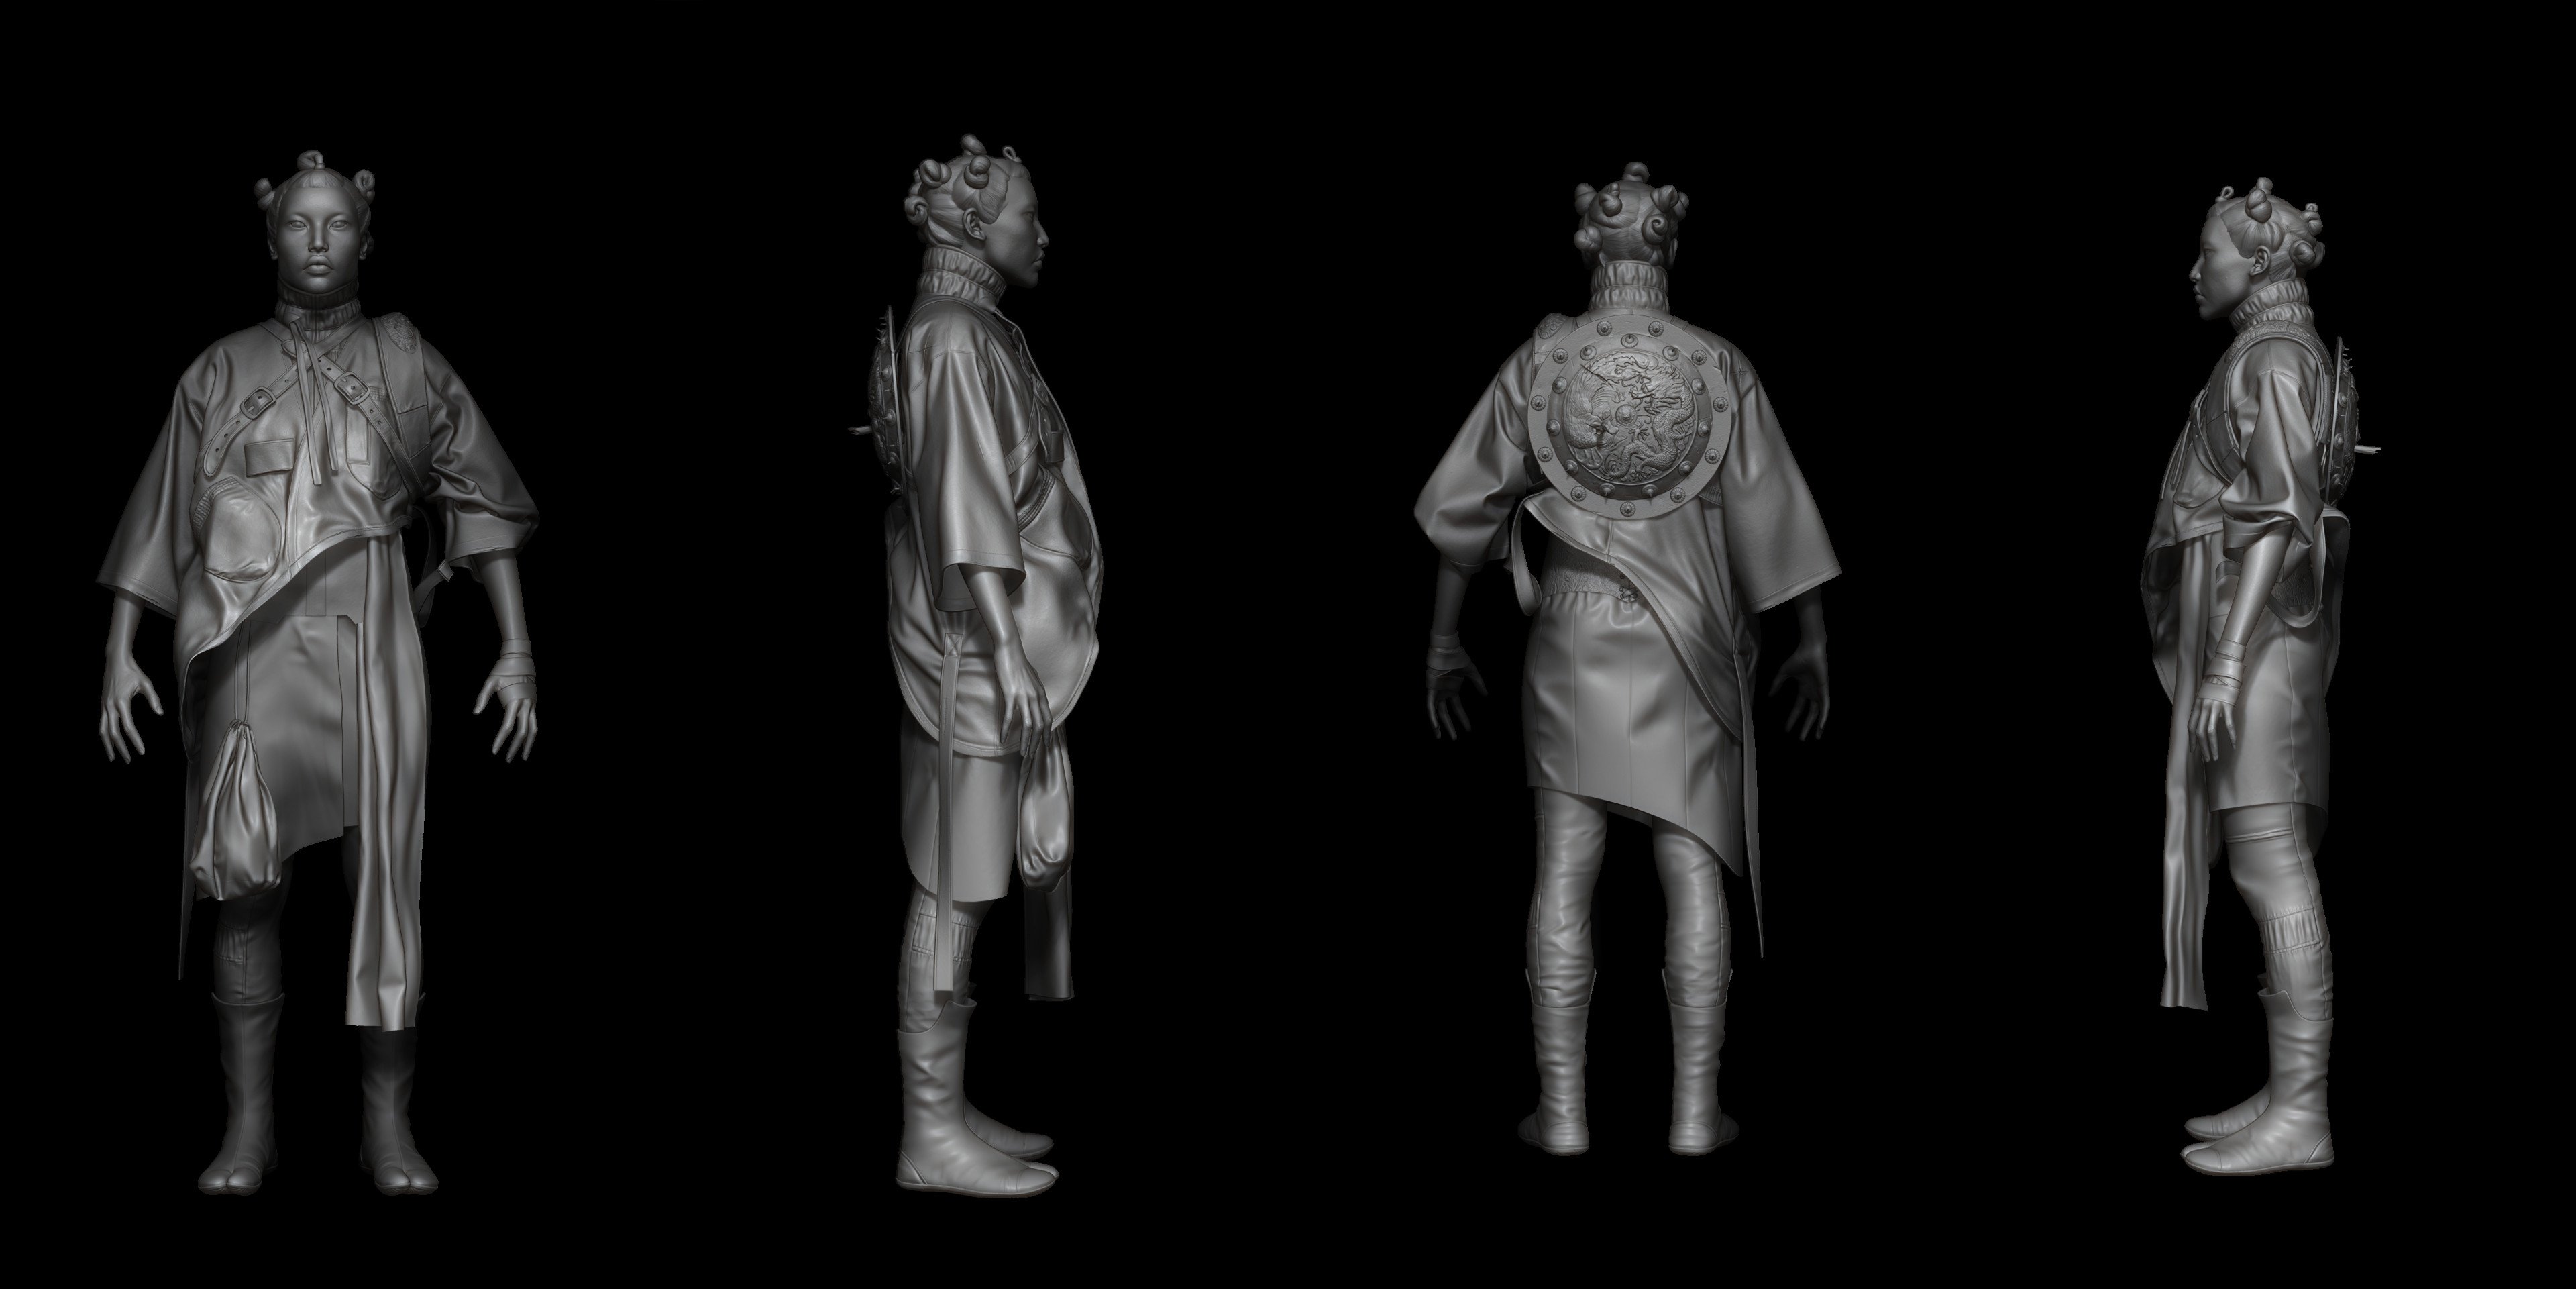
I usually use Marvelous Designer to create a base shape of the cloth. And this time was not an exception. All garments, with the exception of jeans and shoes, were primarily created in Marvelous Designer.
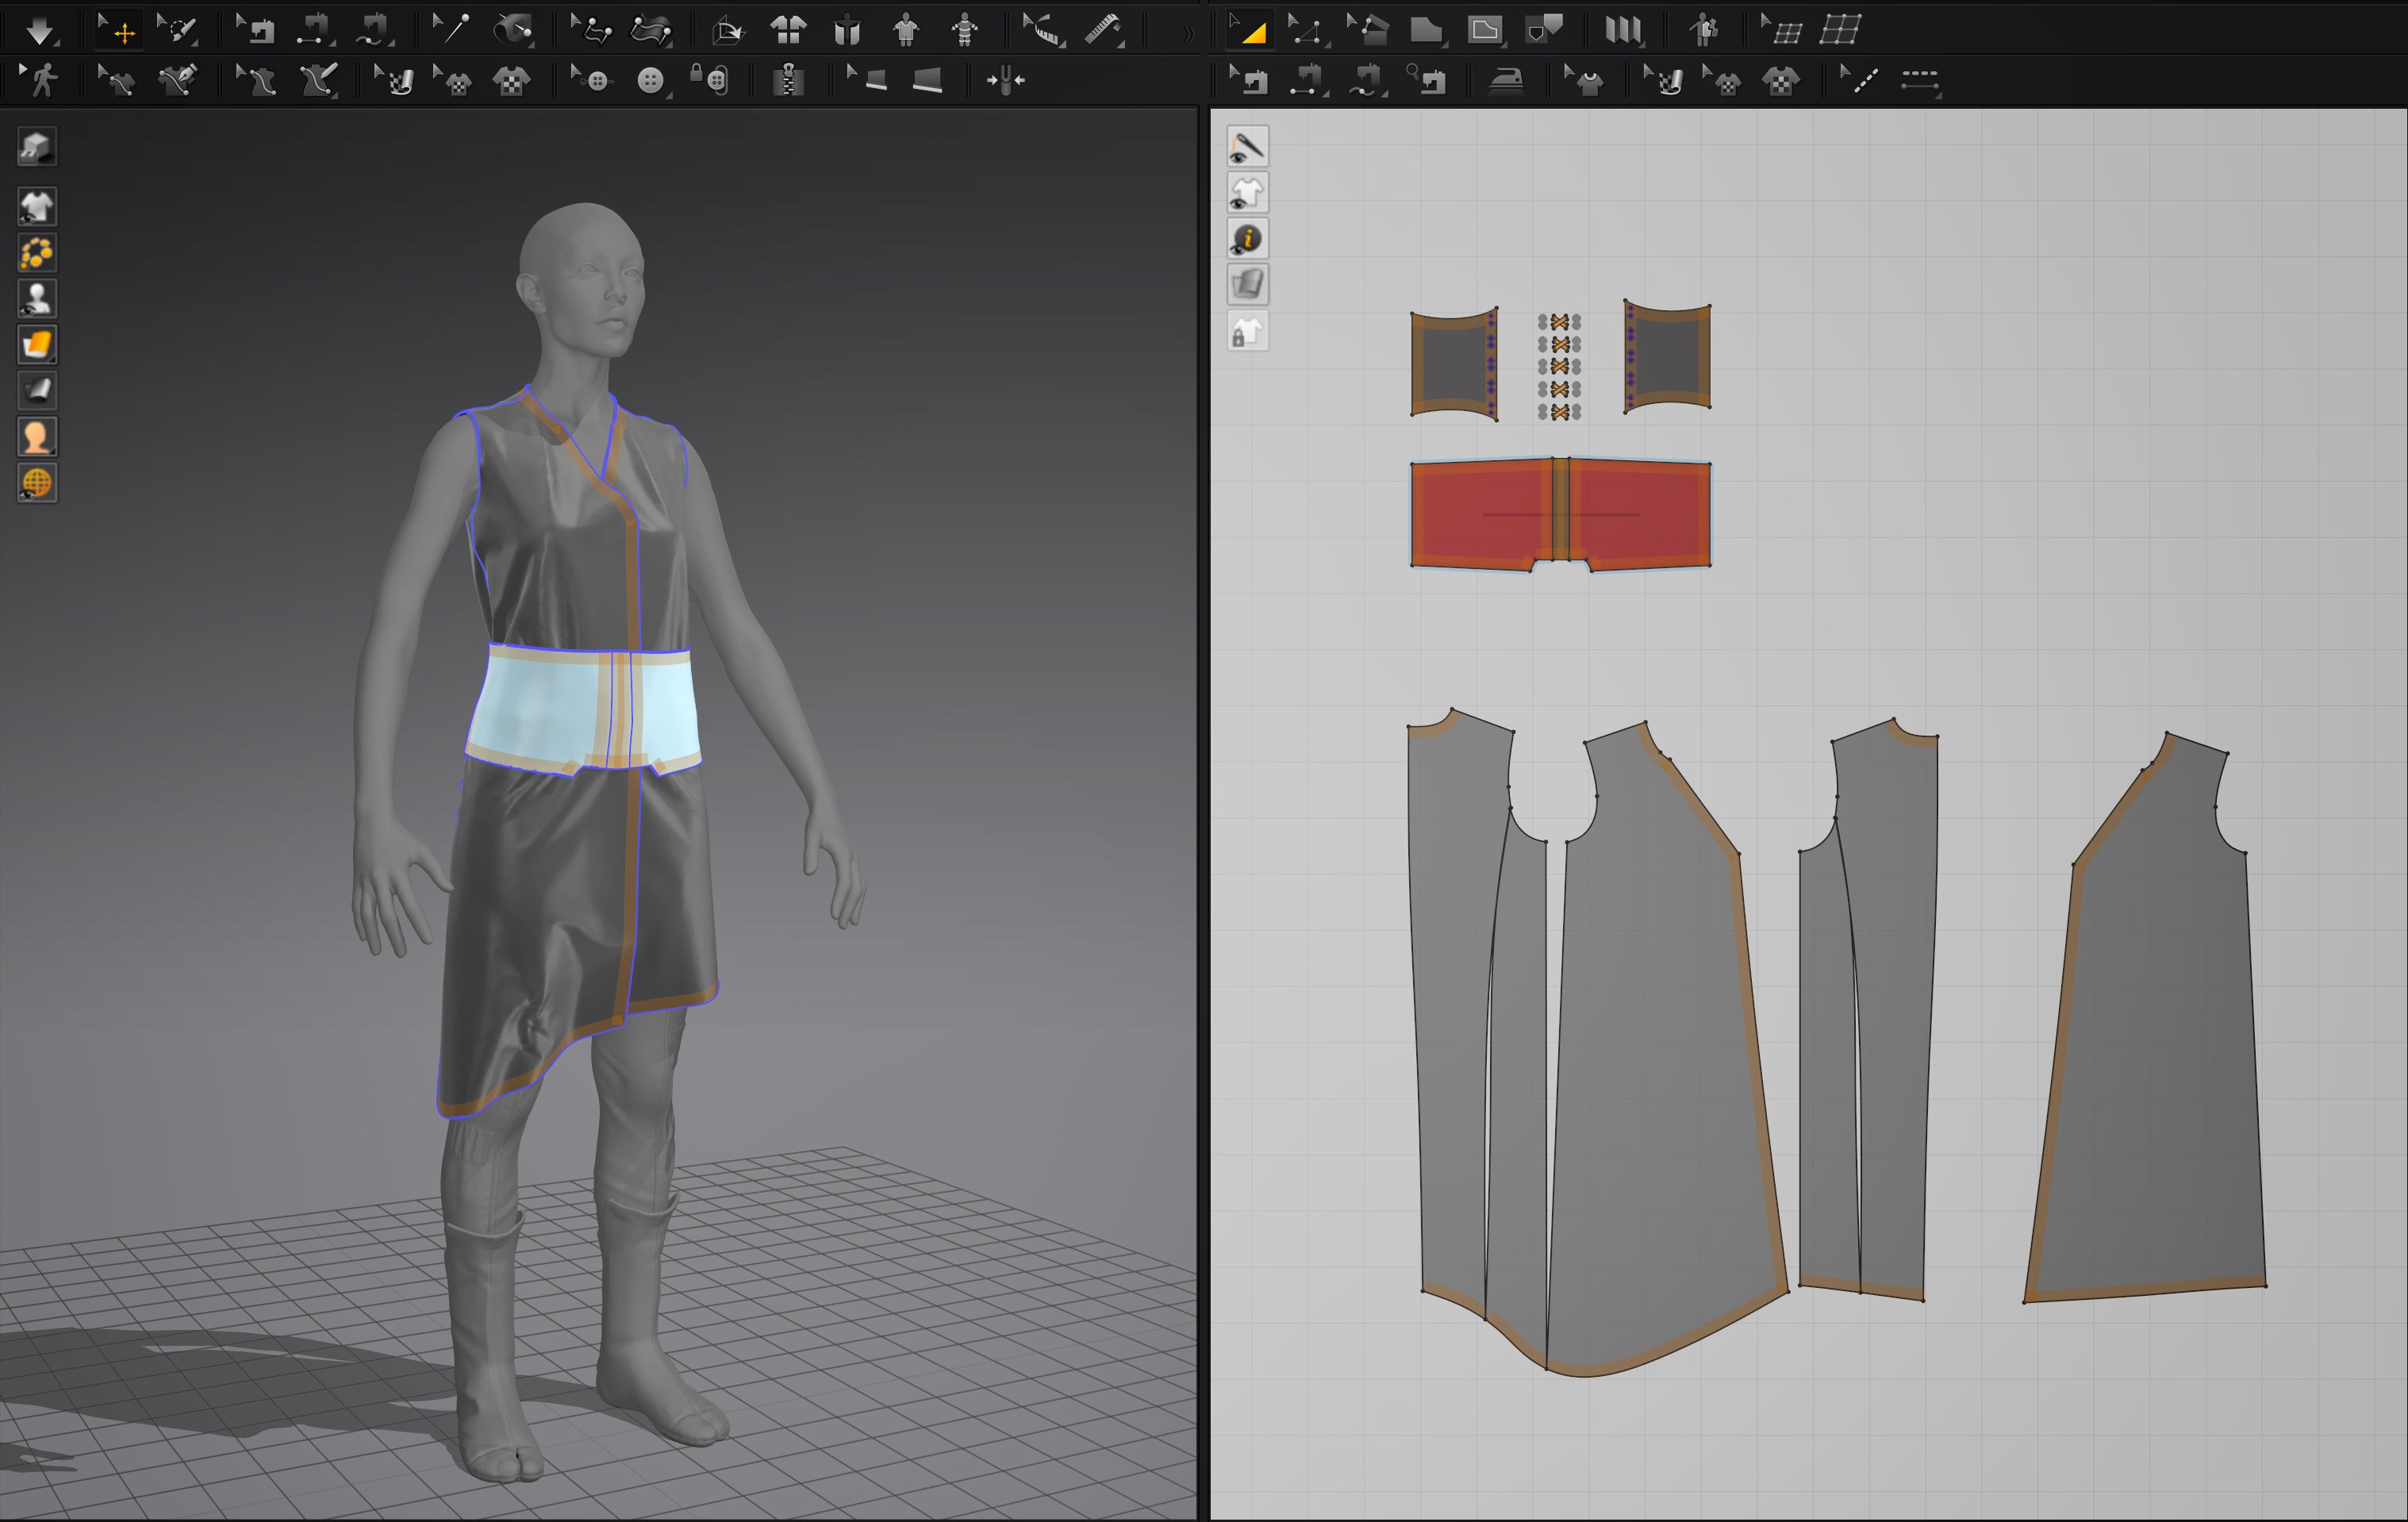

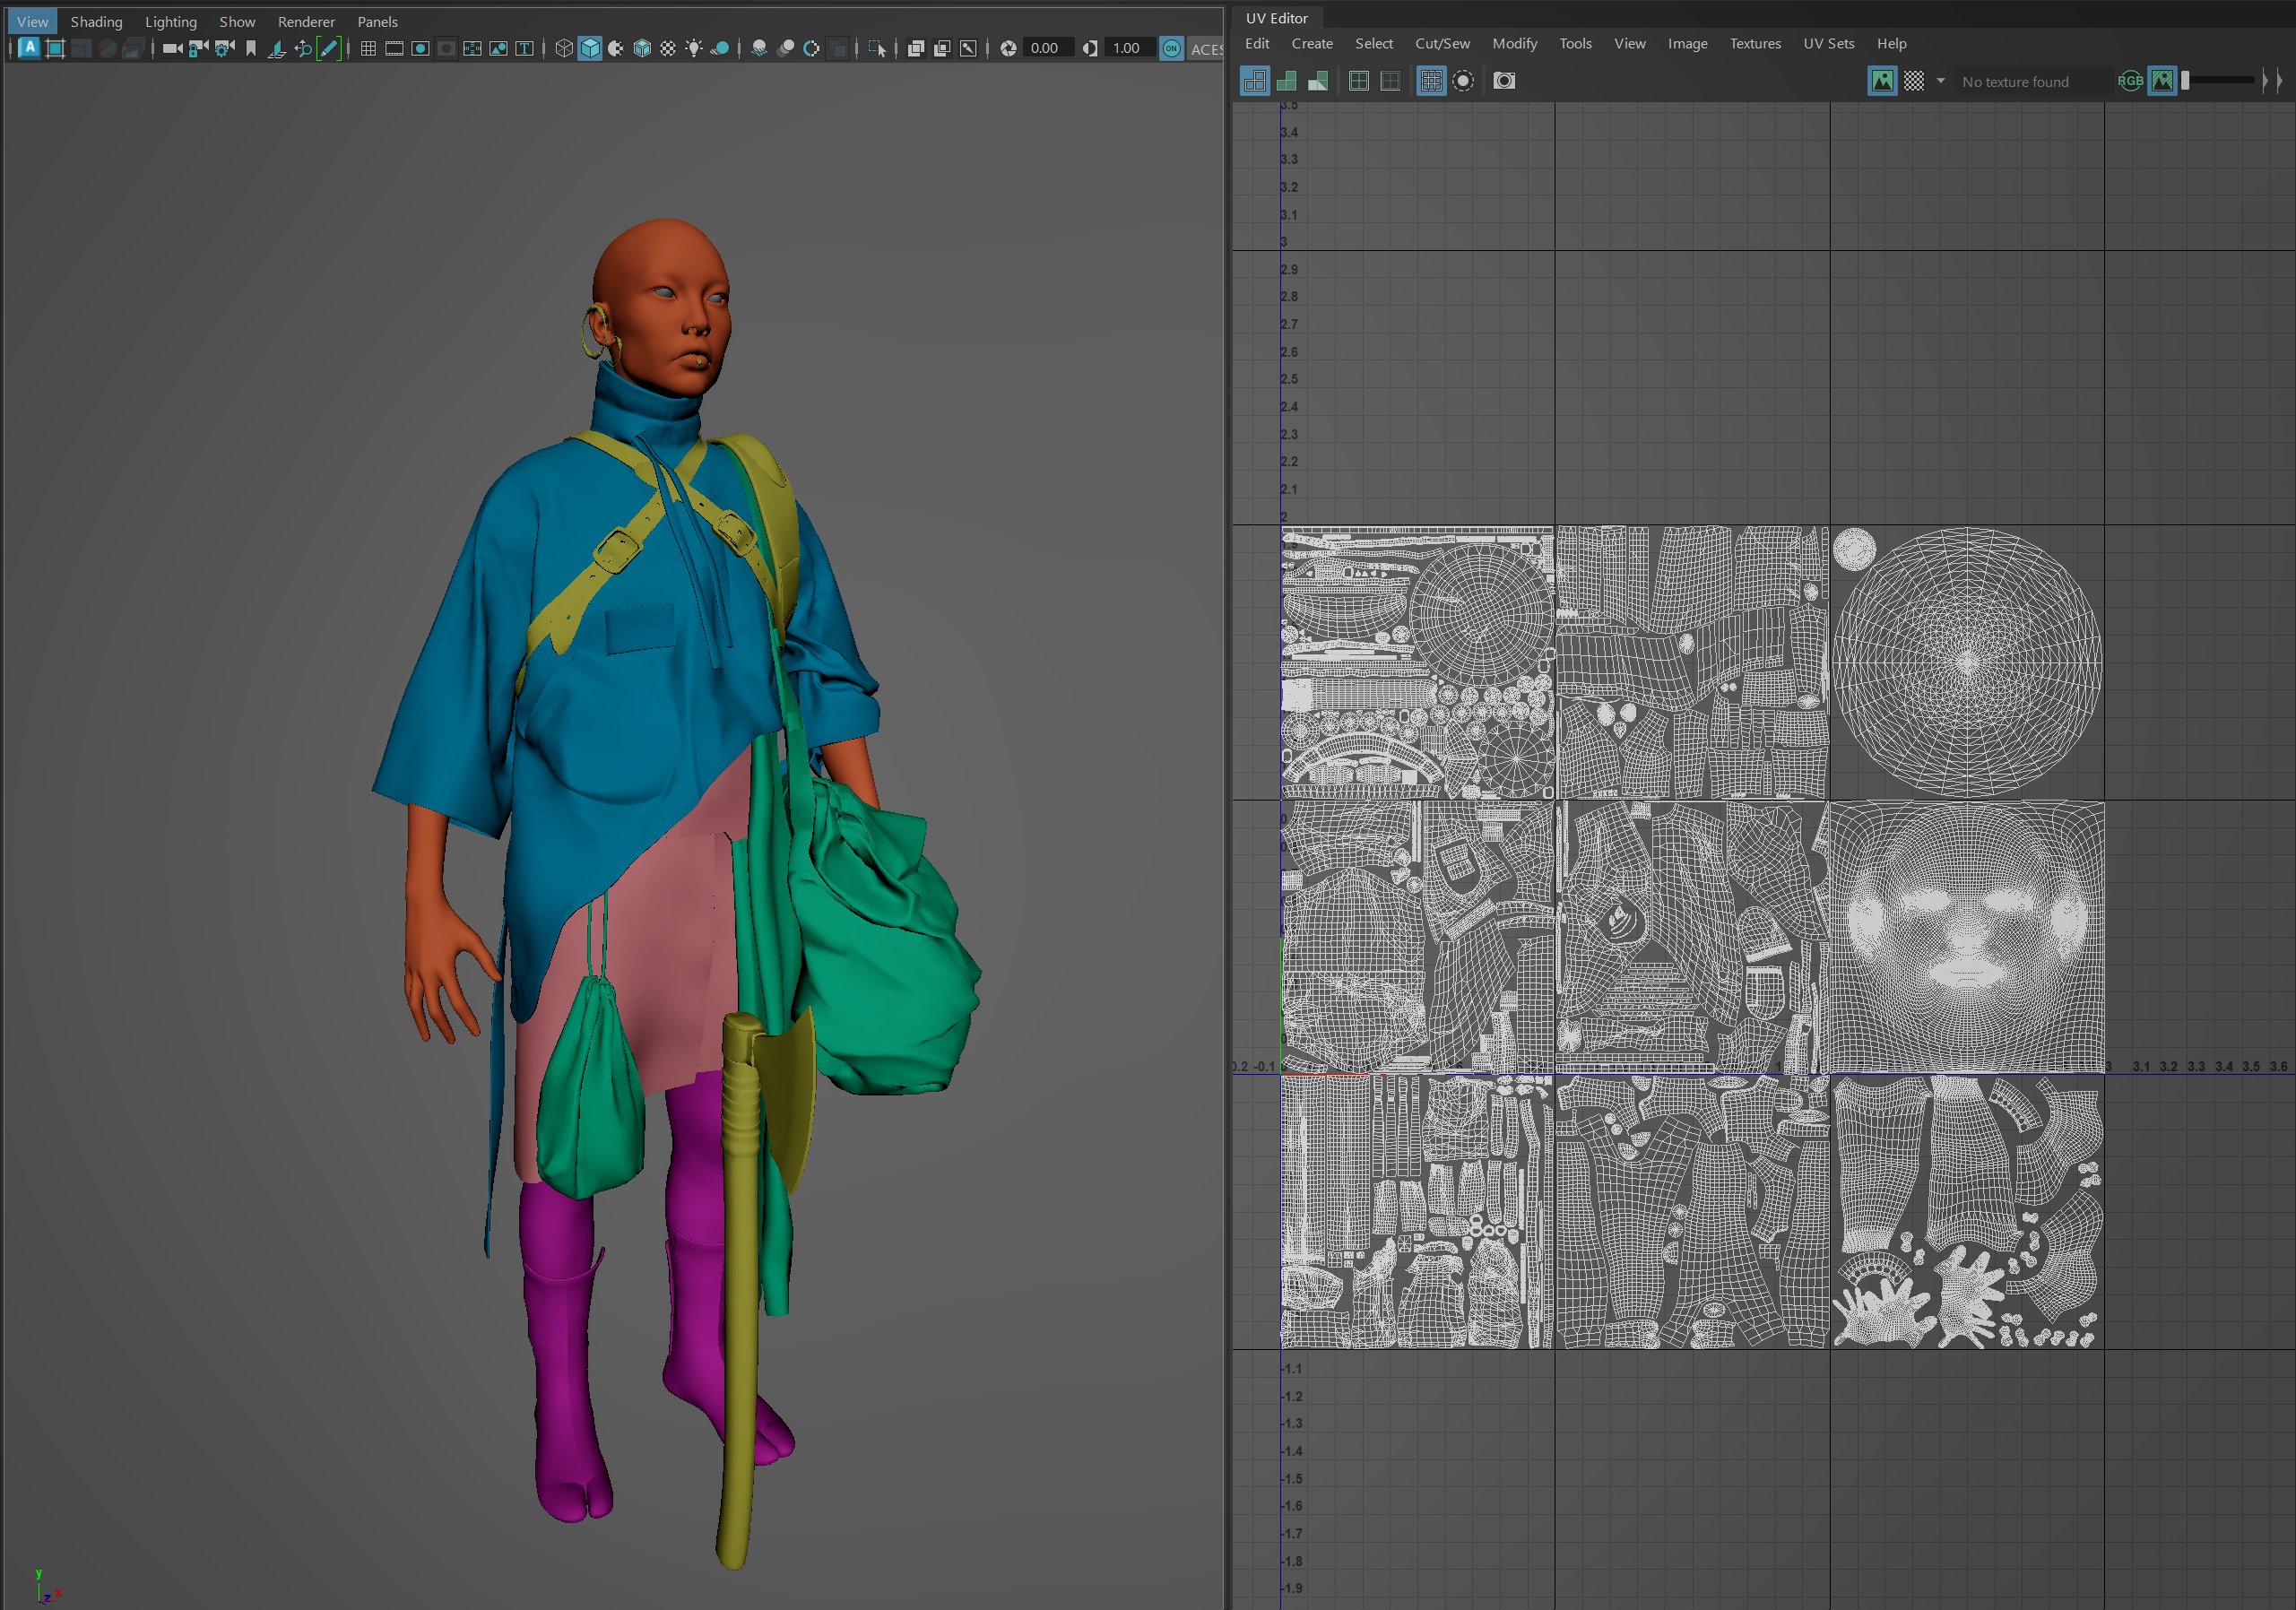
When I was satisfied with the simulation, I retopologized the clothes in Maya to get a clean mesh for further work in Zbrush.
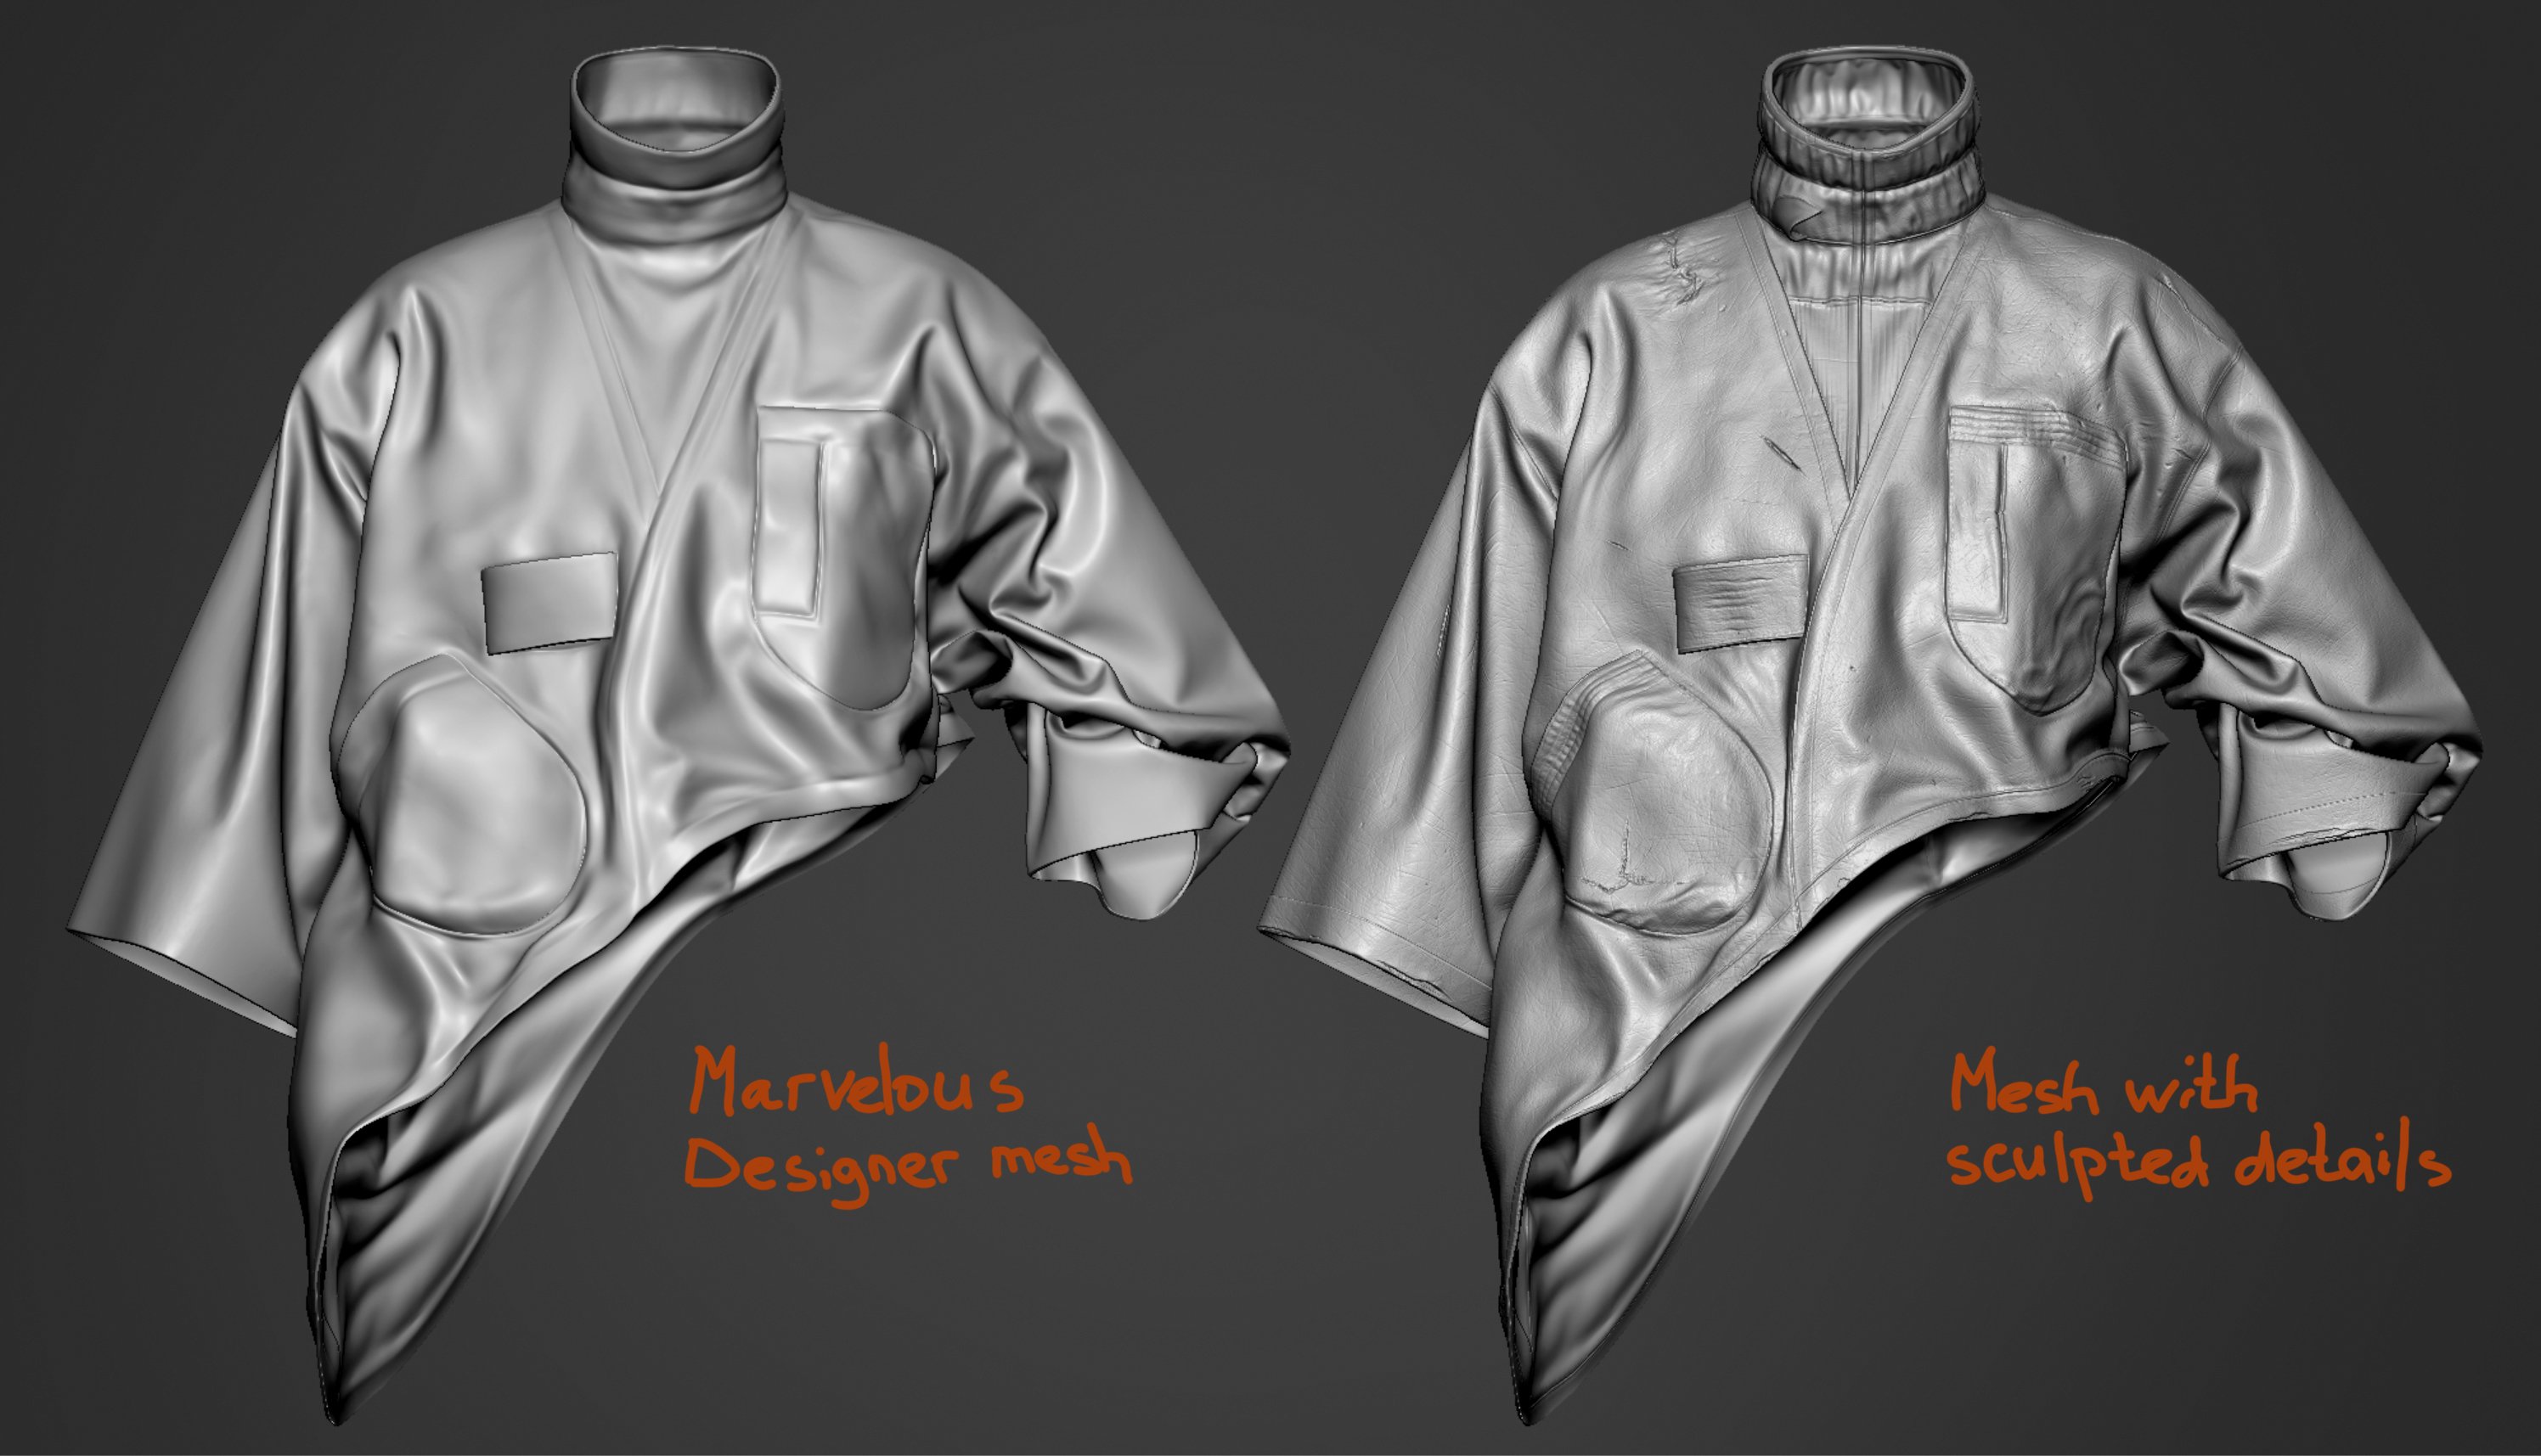
I brought the retopologized version into ZBrush. Here, each element went through several stages of additional detailing. I added damage, some memory folds, and fine creases, as well as seams and stitches.
I tried to find a balance between sculpting details on a high-poly mesh and creating them during the texturing process.

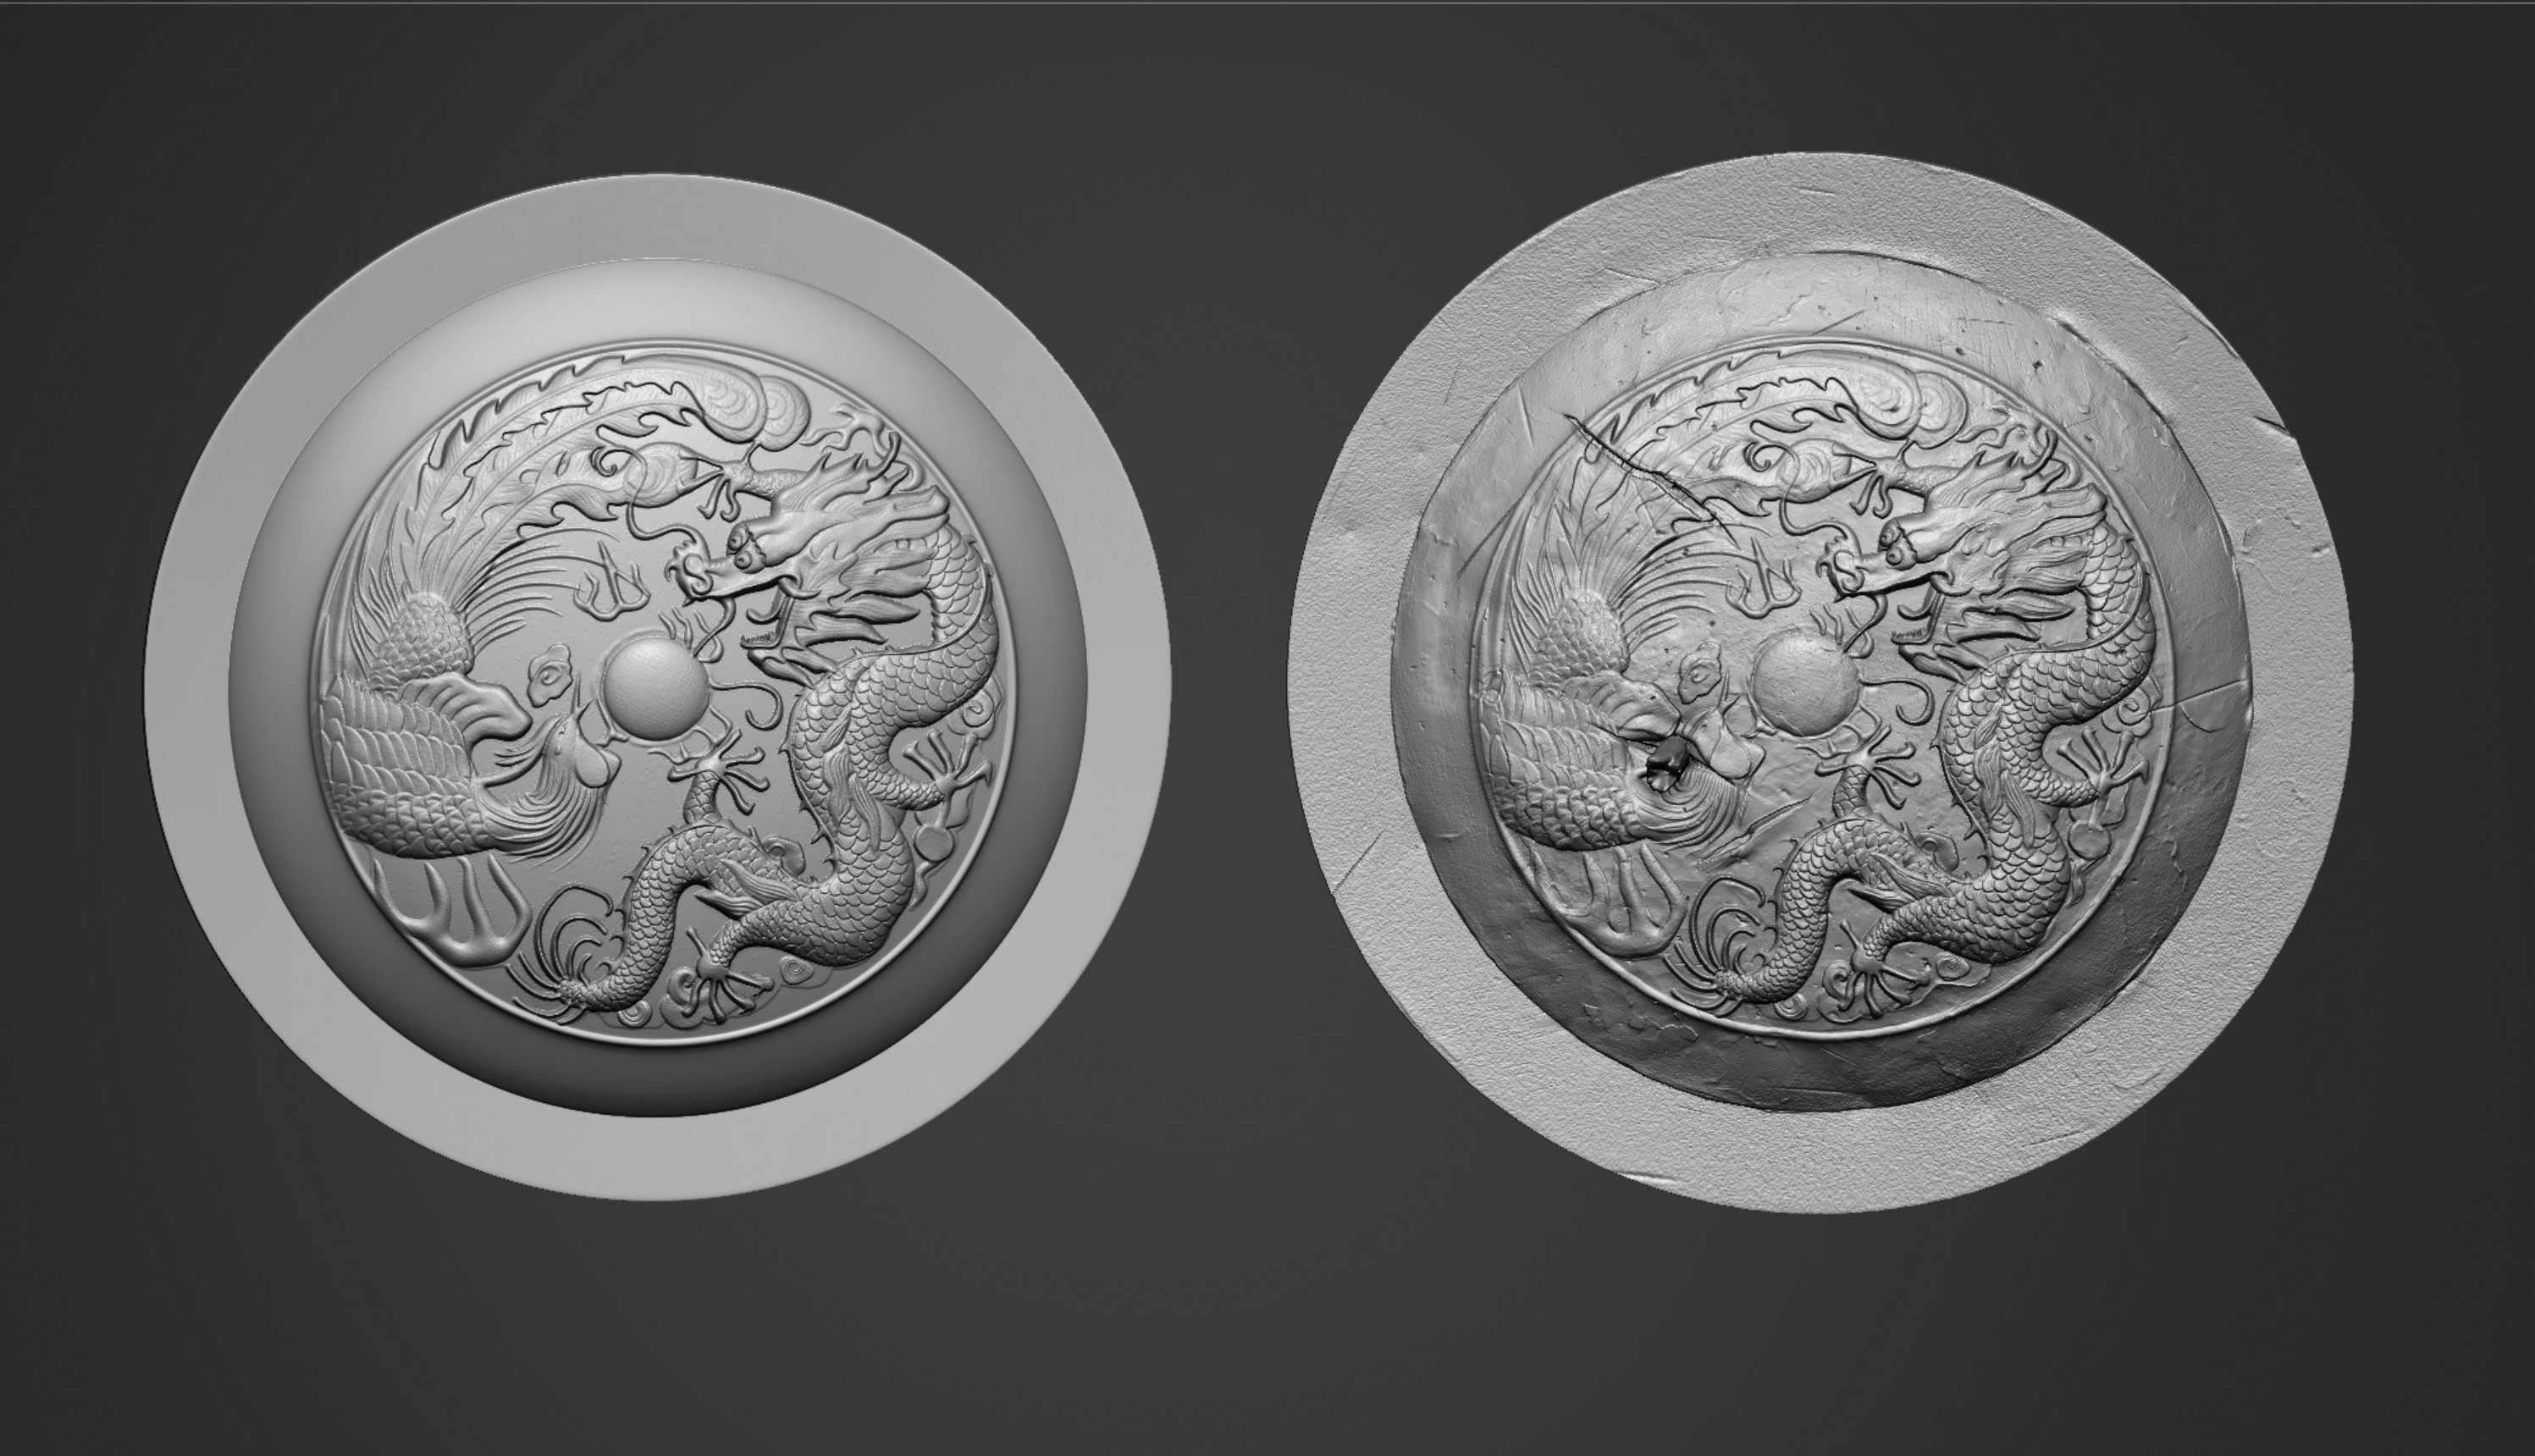
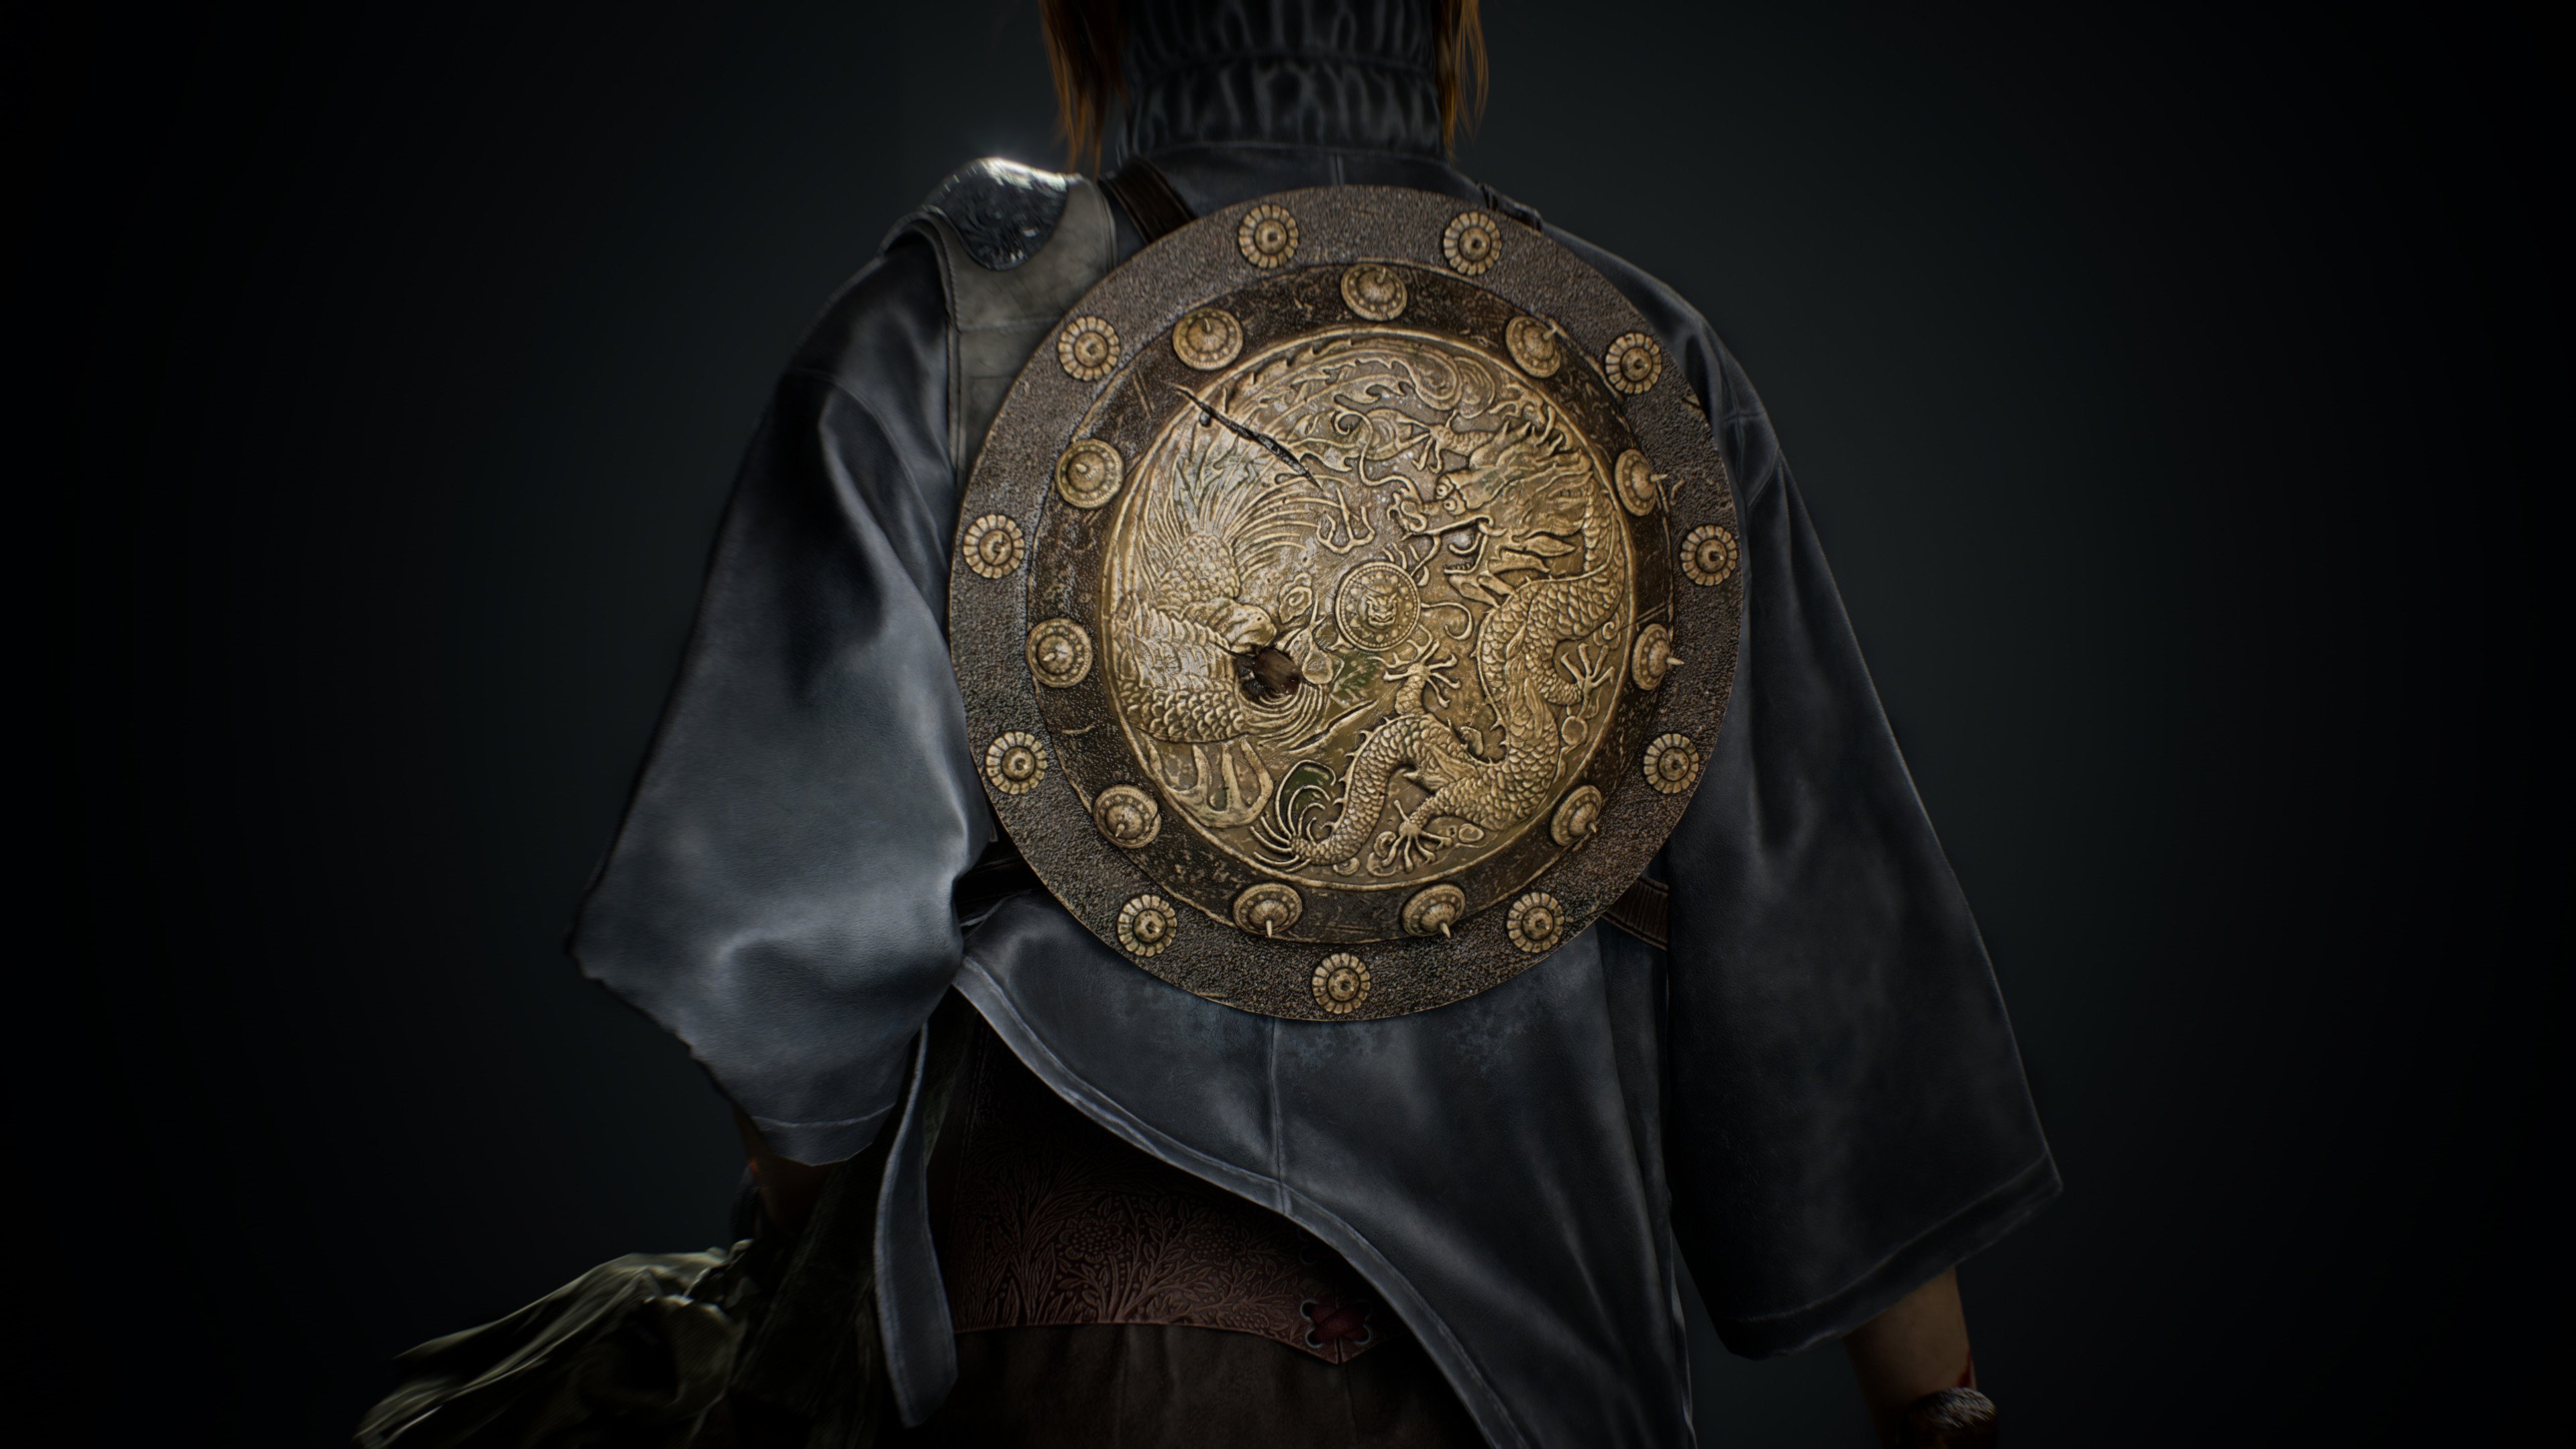
I wanted to add a point of interest on the back of the model. So I came up with the idea of a shield.
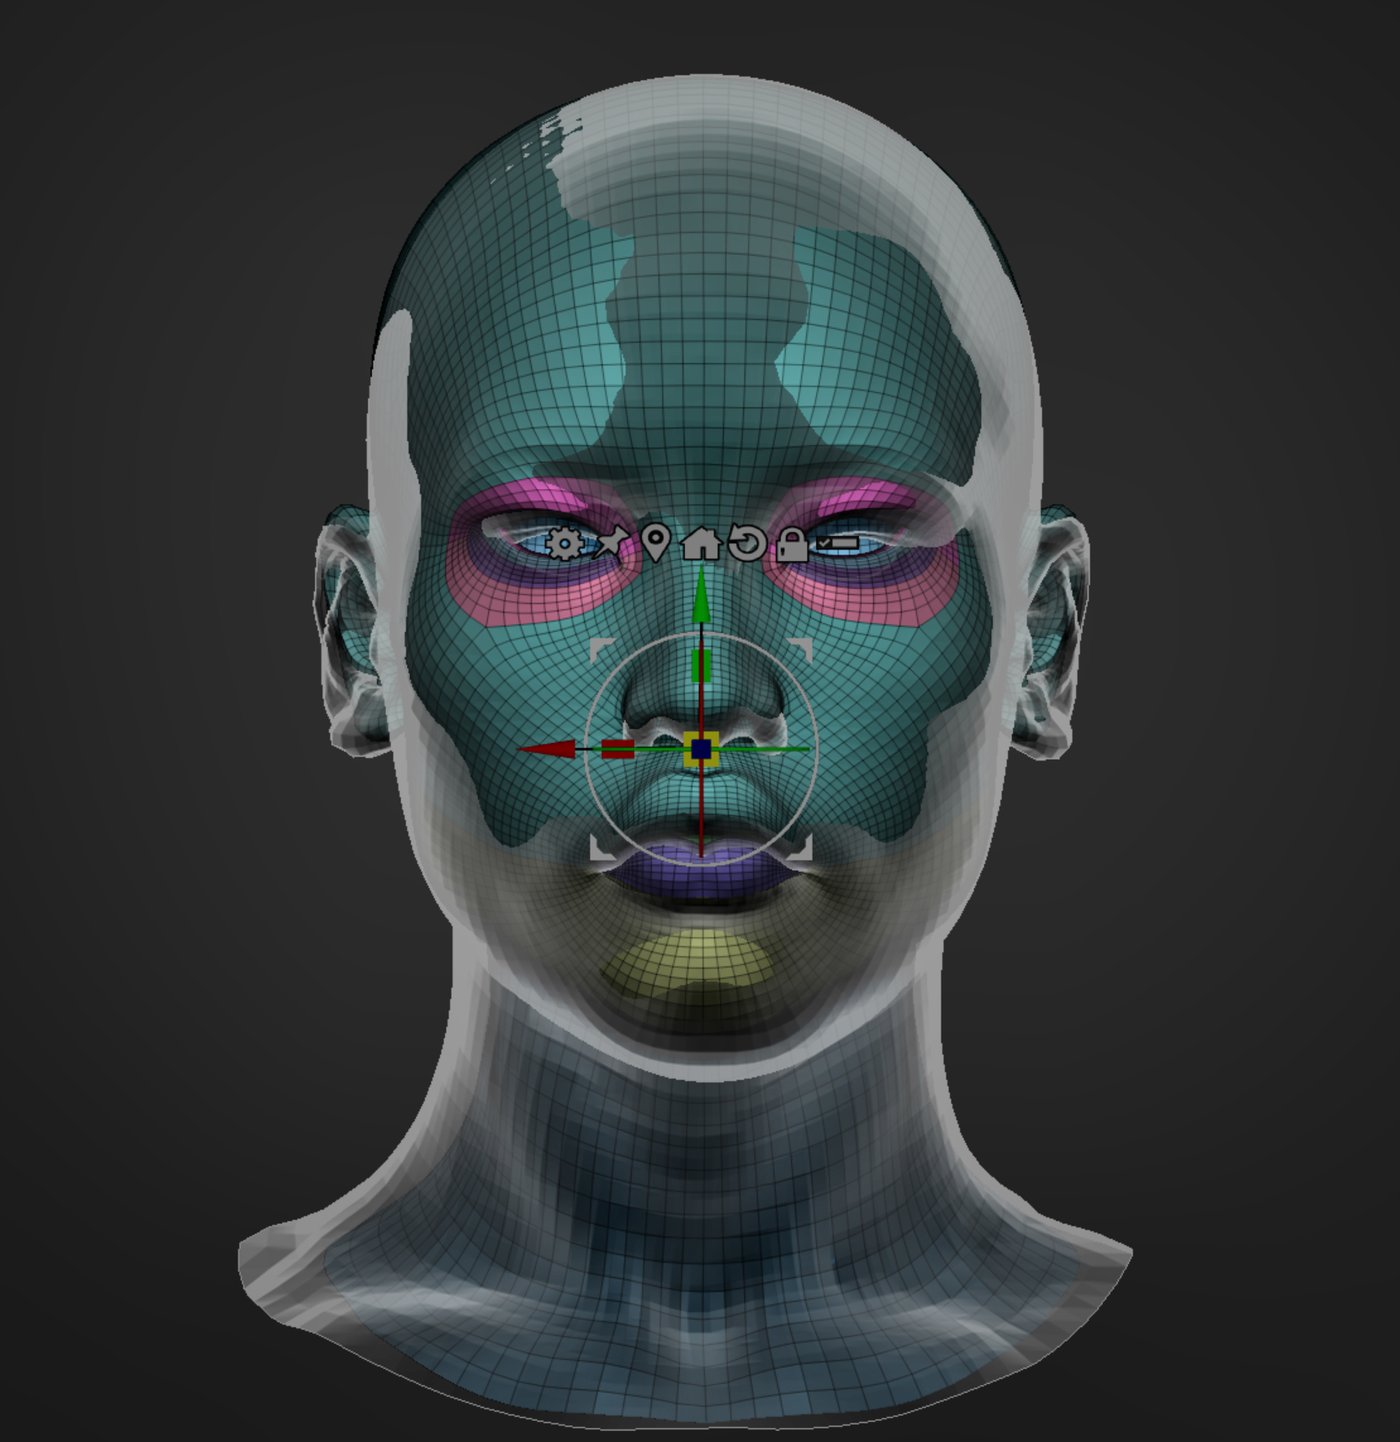
For this project, I used a Vface XYZ head. Since I was using my own mesh, I uploaded my model and the VFace mesh in ZBrush and fit the VFace to my model using the rotation, scale, and move tools. I ended up wrapping the mesh that was provided with VFace to my own to transfer the textures. I did it using ZWrap.

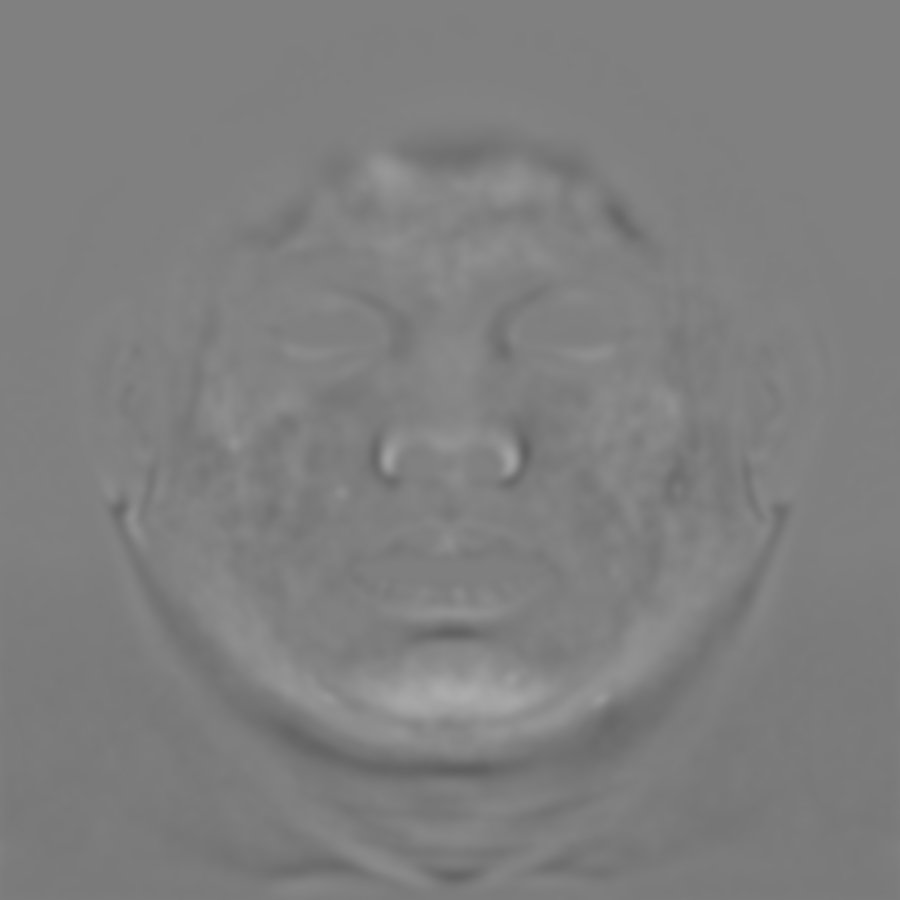
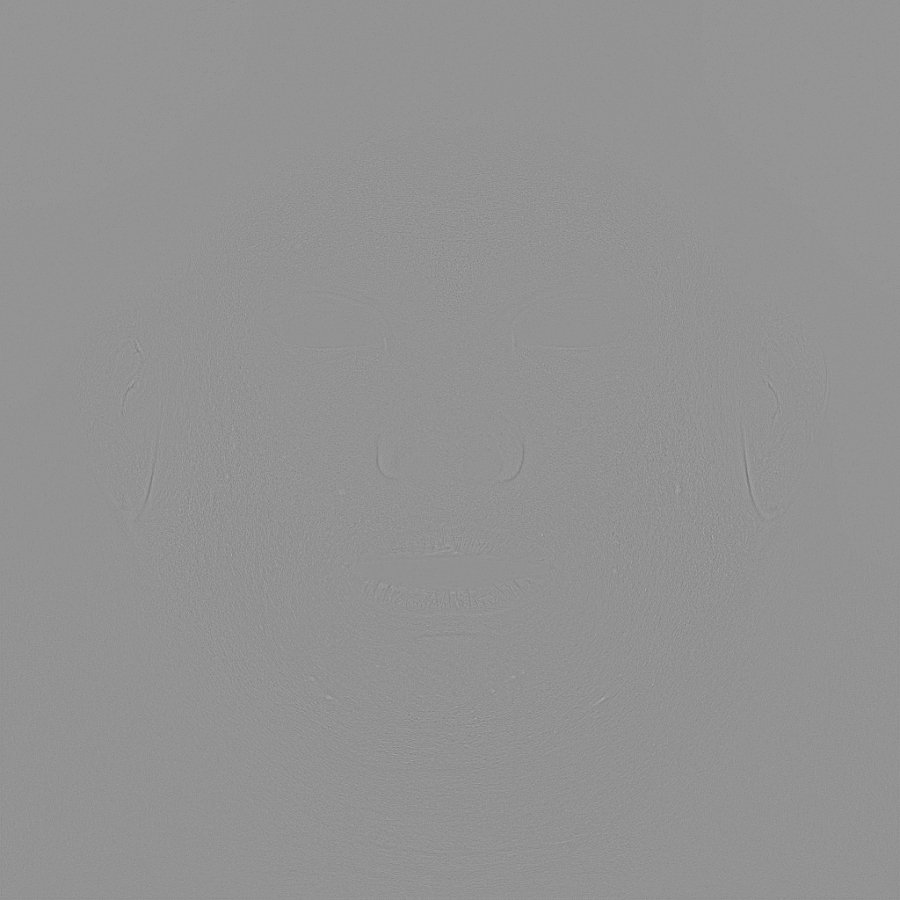
I then split a displacement map in Photoshop into three channels for each level of detail and applied them back in Zbrush as layers, where the intensity could be adjusted. Those areas that needed to be cleaned up were corrected manually. Zbrush’s layer system and a morph brush came in handy for this.

Once the high-poly was done, I decimated all objects and exported them to Maya.

For low-poly creation, I used the Quad Draw tool in Maya. To avoid a seam between the head and the body of the model, I matched the topology using vertex snapping.

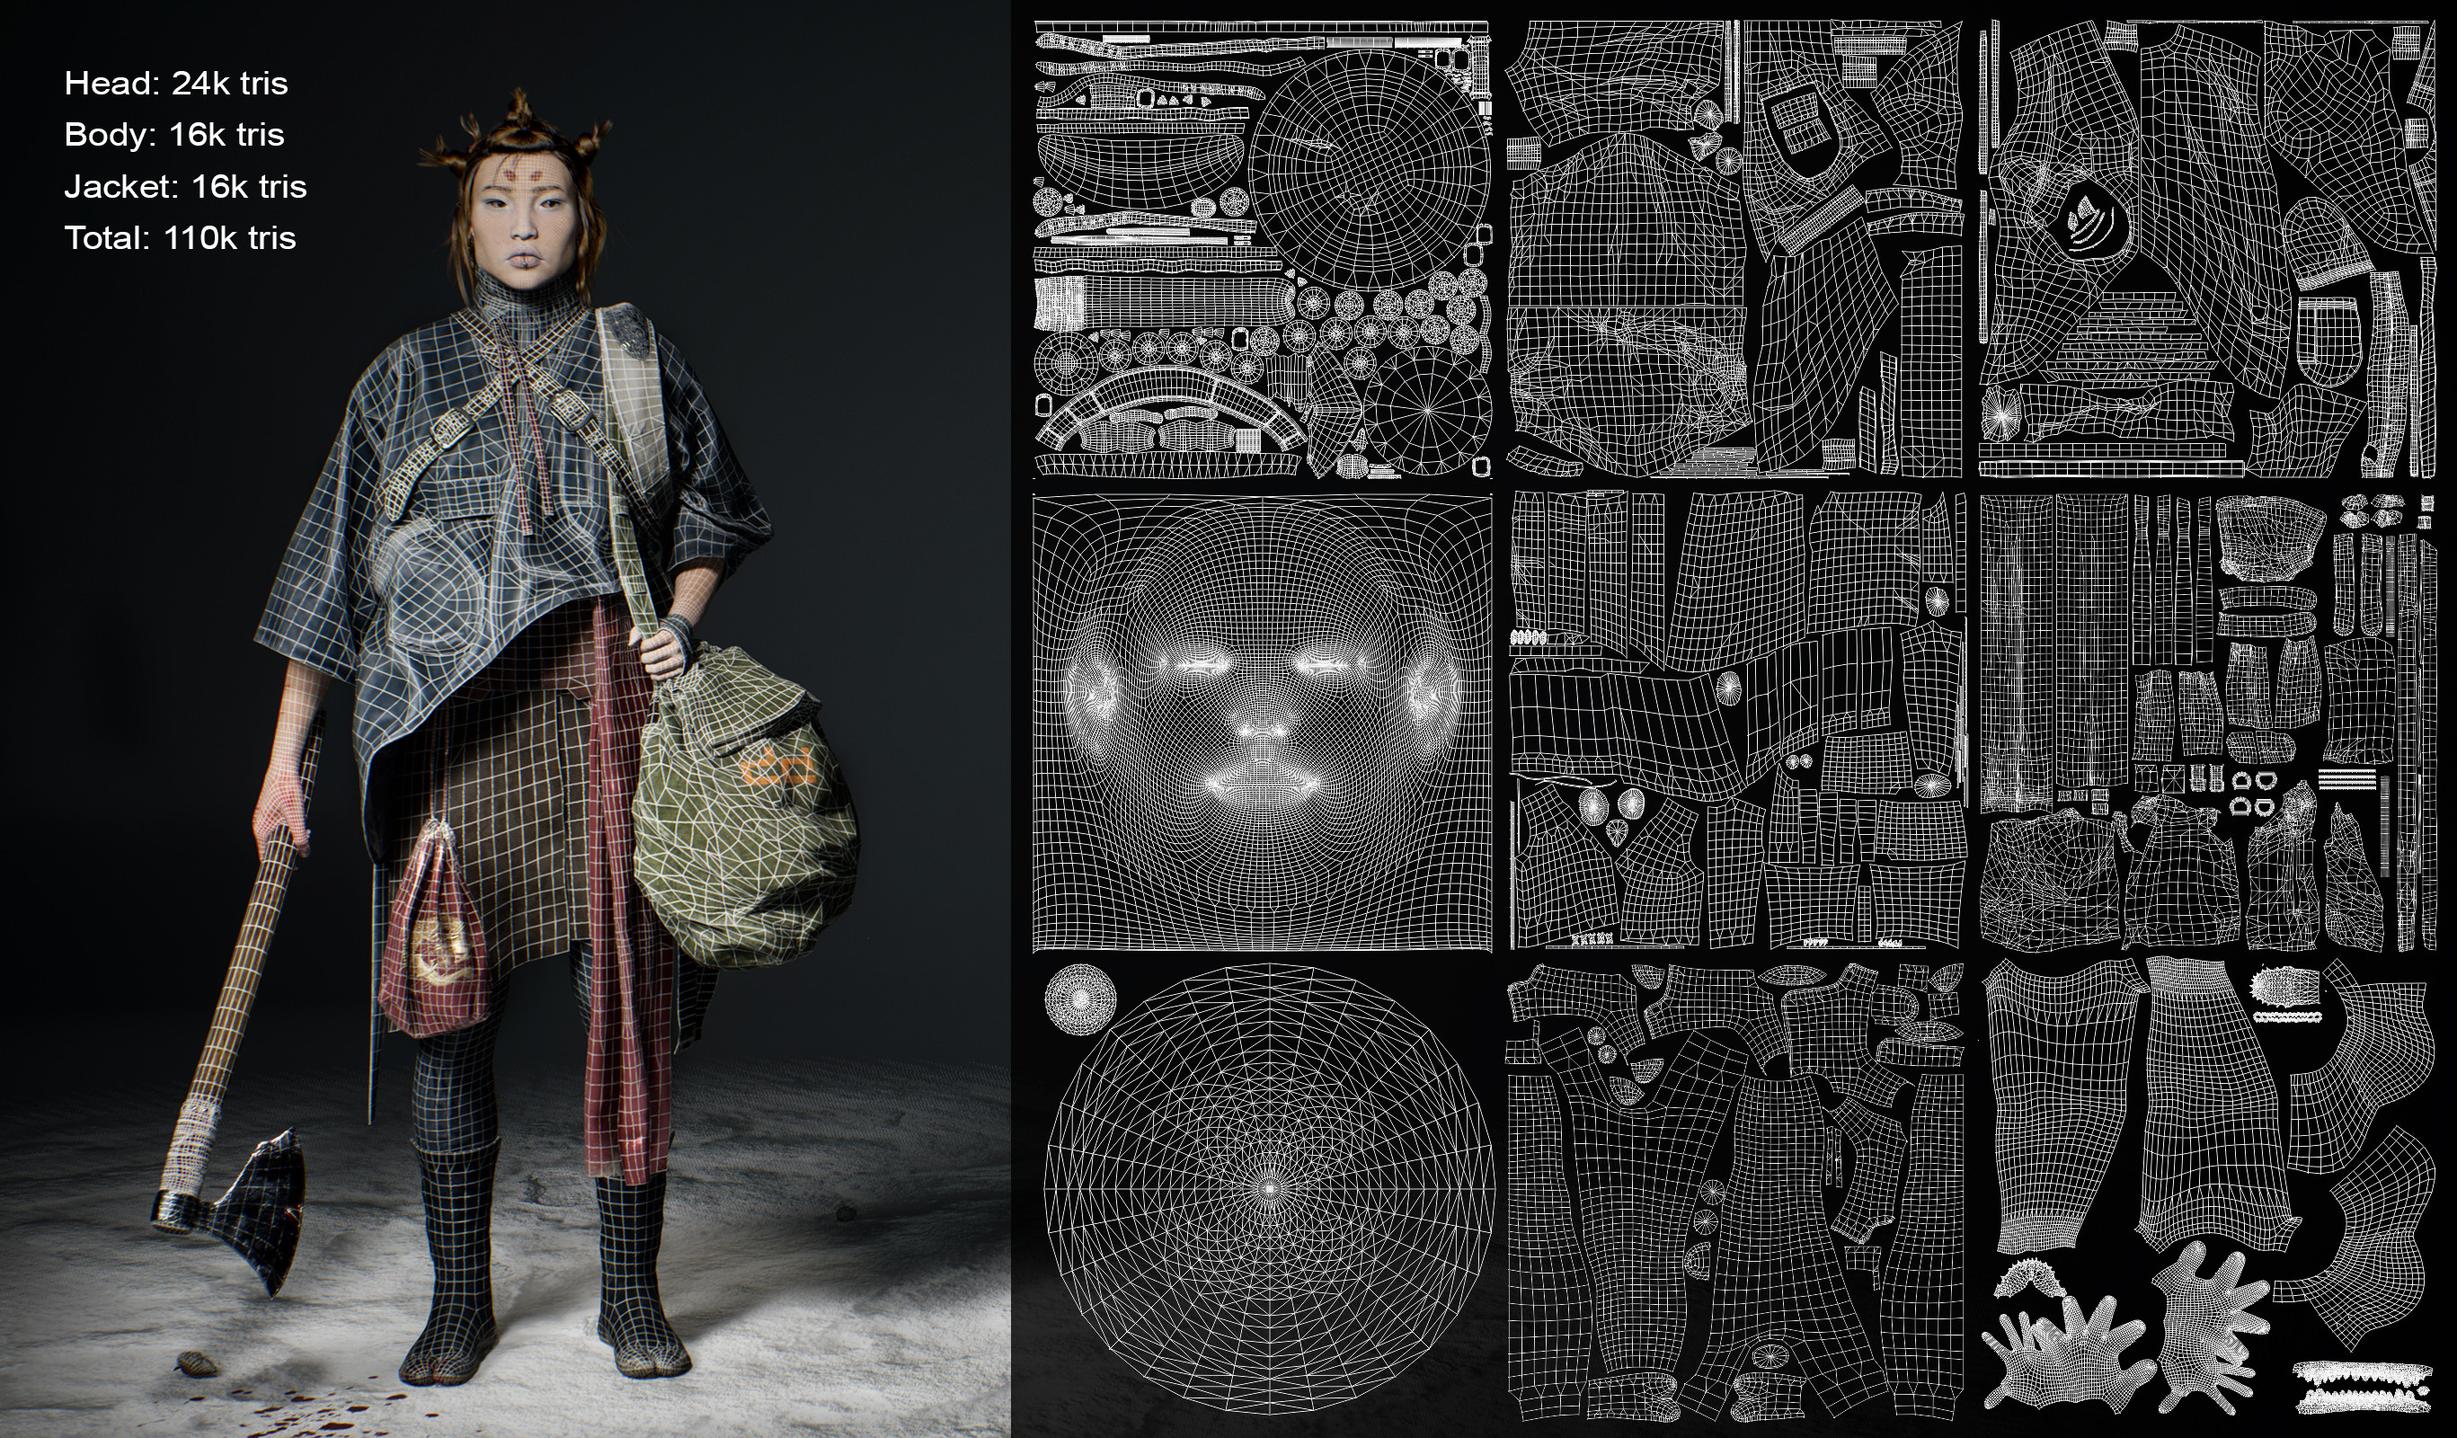
I manually unwrapped the objects, making sure to arrange them in the same direction where possible, and had the same texel density. The model was divided into six texture sets: Torso, Weapons, Fabric, Leather, Legs, and Skin.
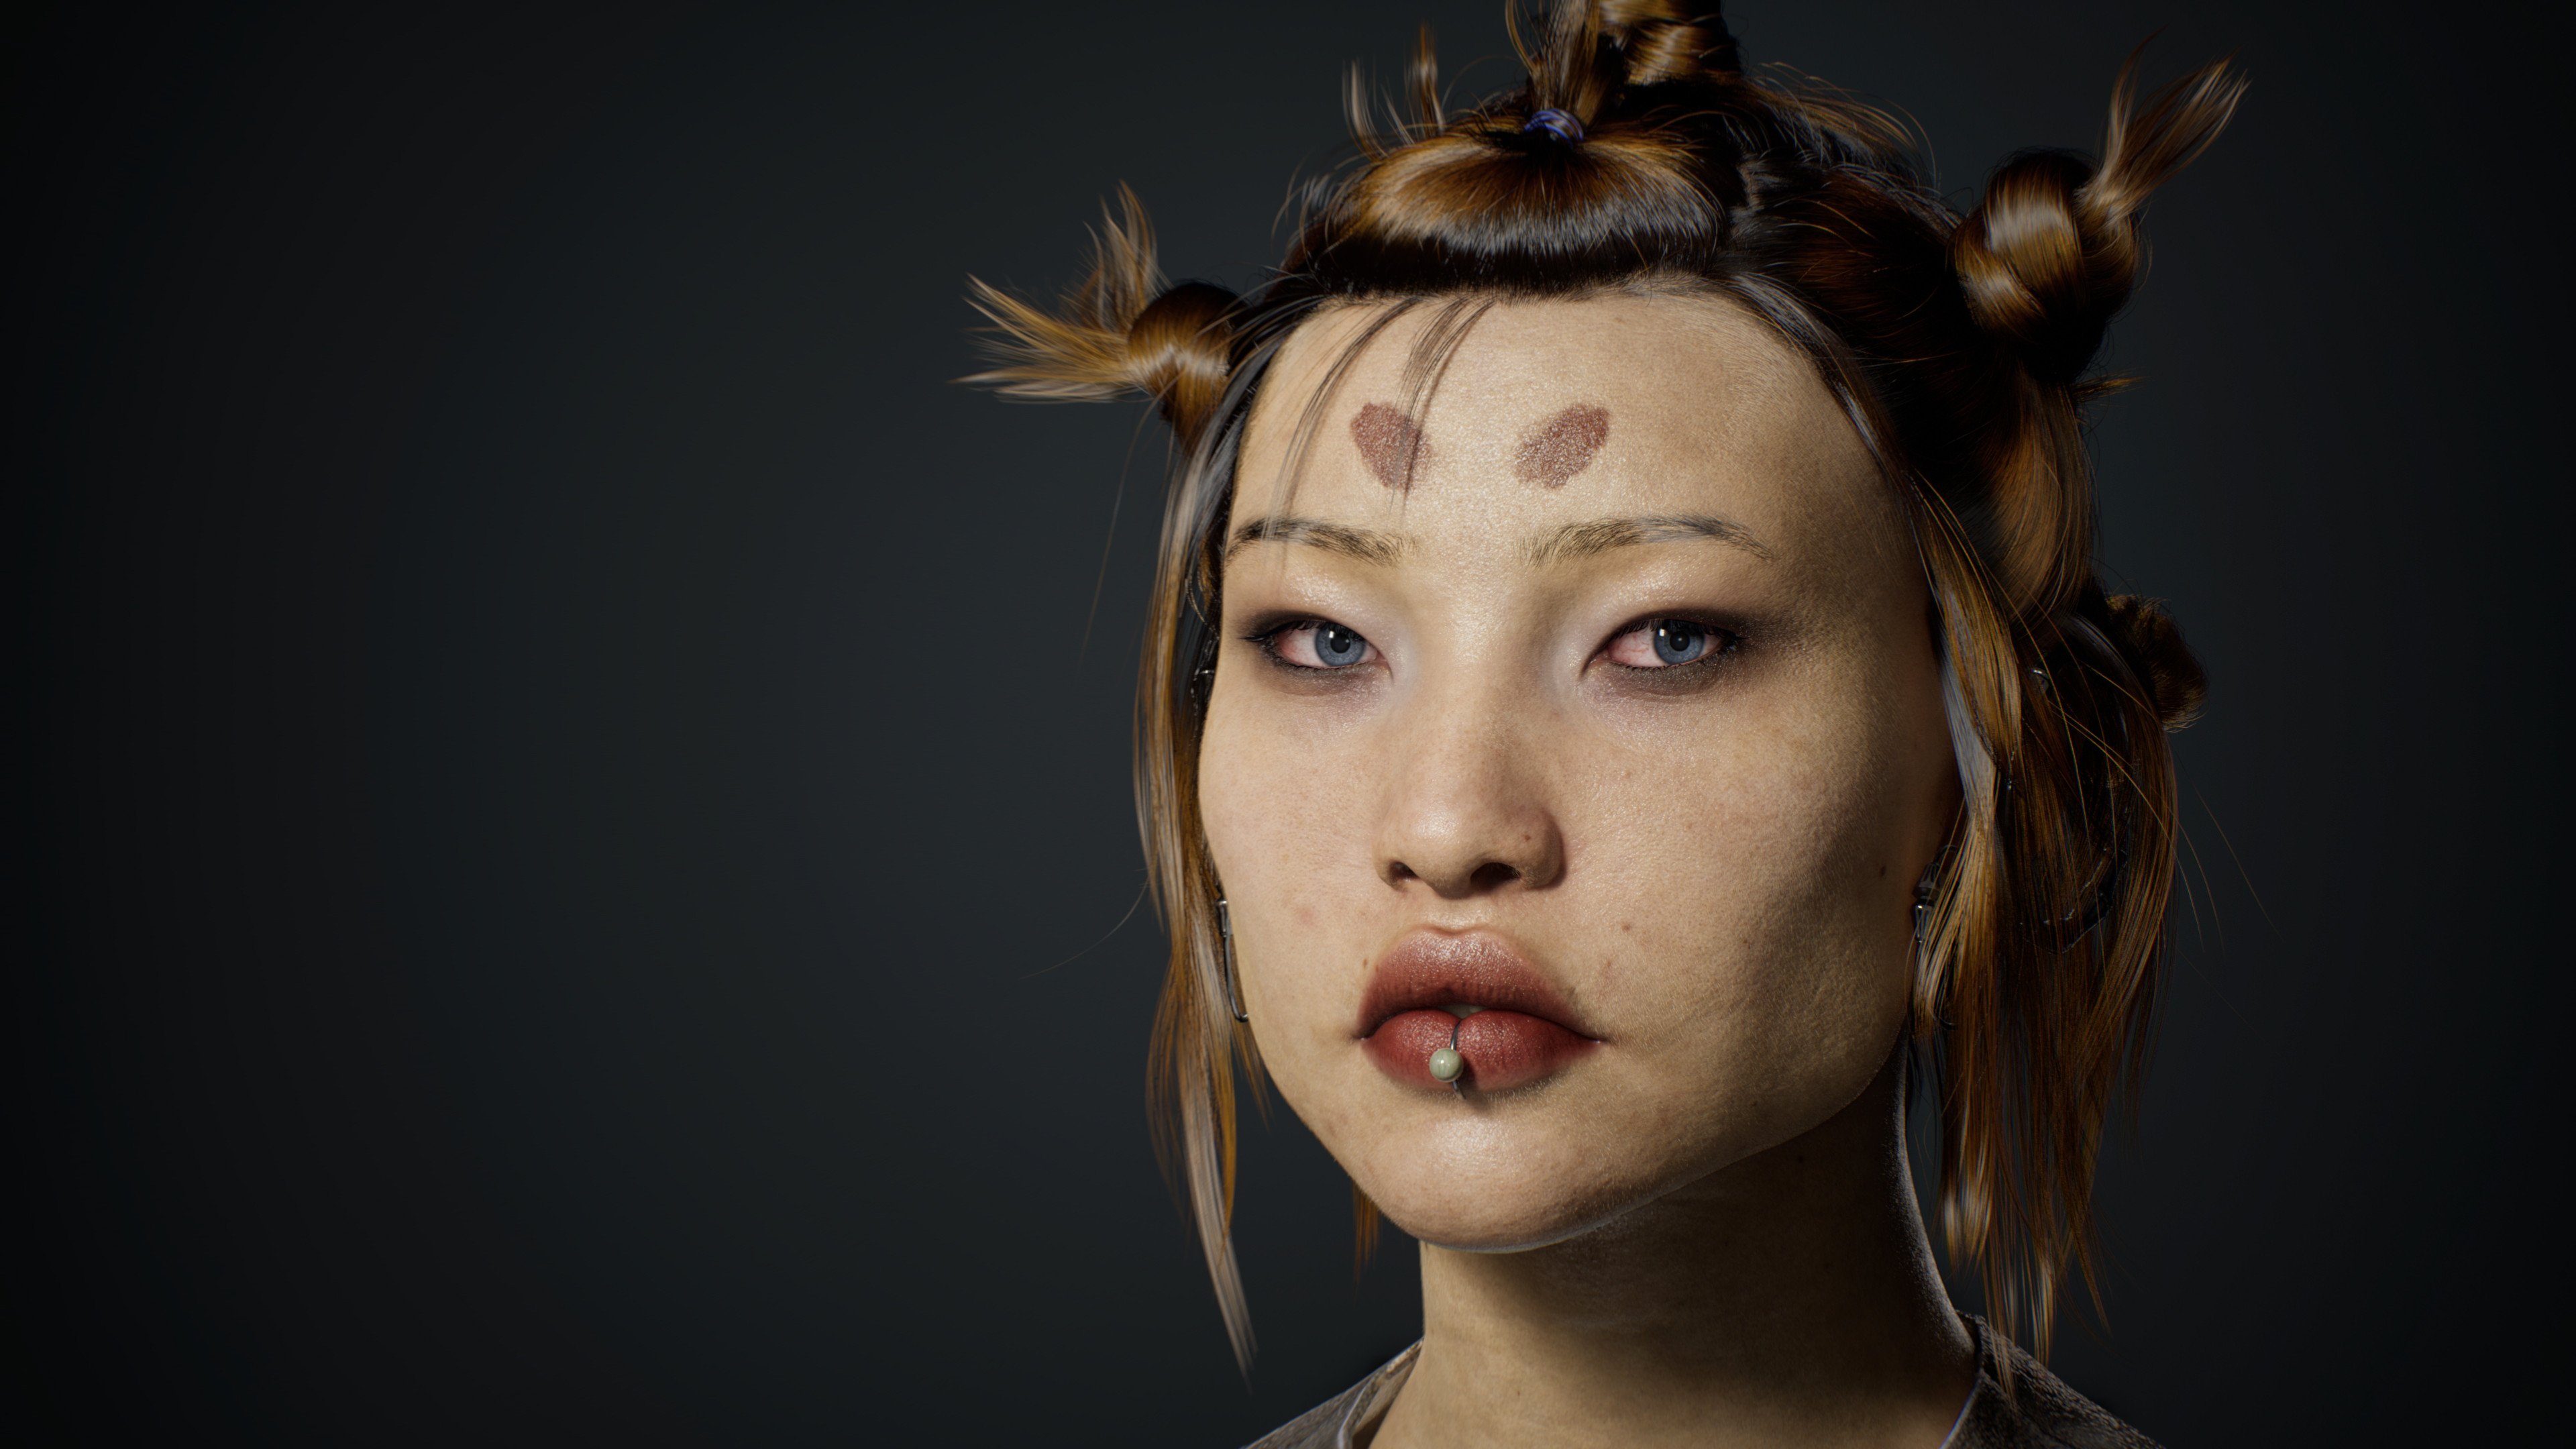
For texturing and baking maps, I used Substance 3D Painter. To create Base Colour for the skin, I did a lot of hand painting (blemishes, tonal maps, veins, arteries, freckles, and sunspots) to get the desired look. However, I tried to keep the natural look of the skin.


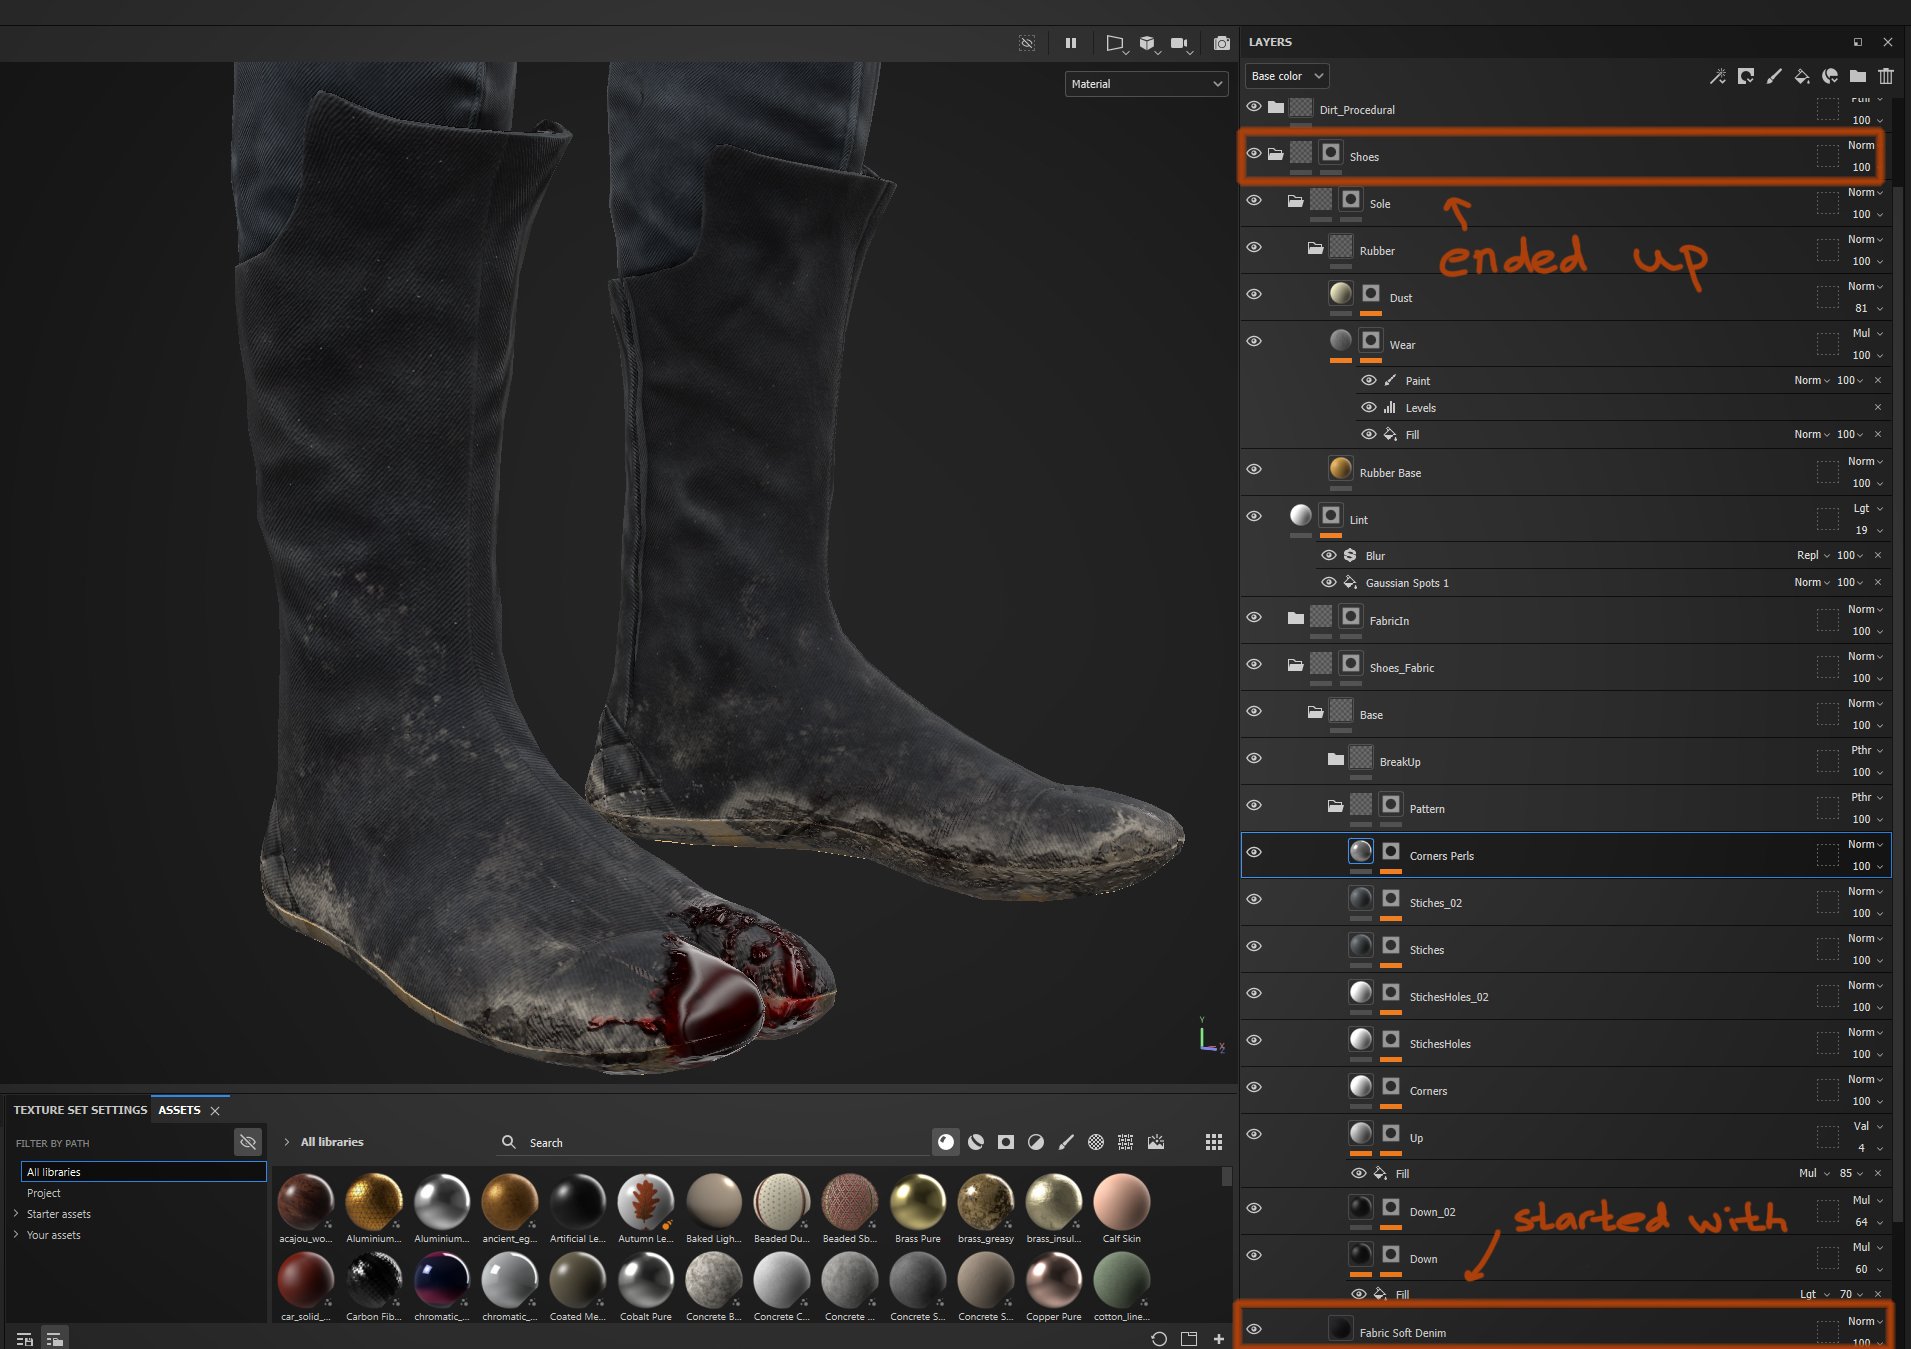
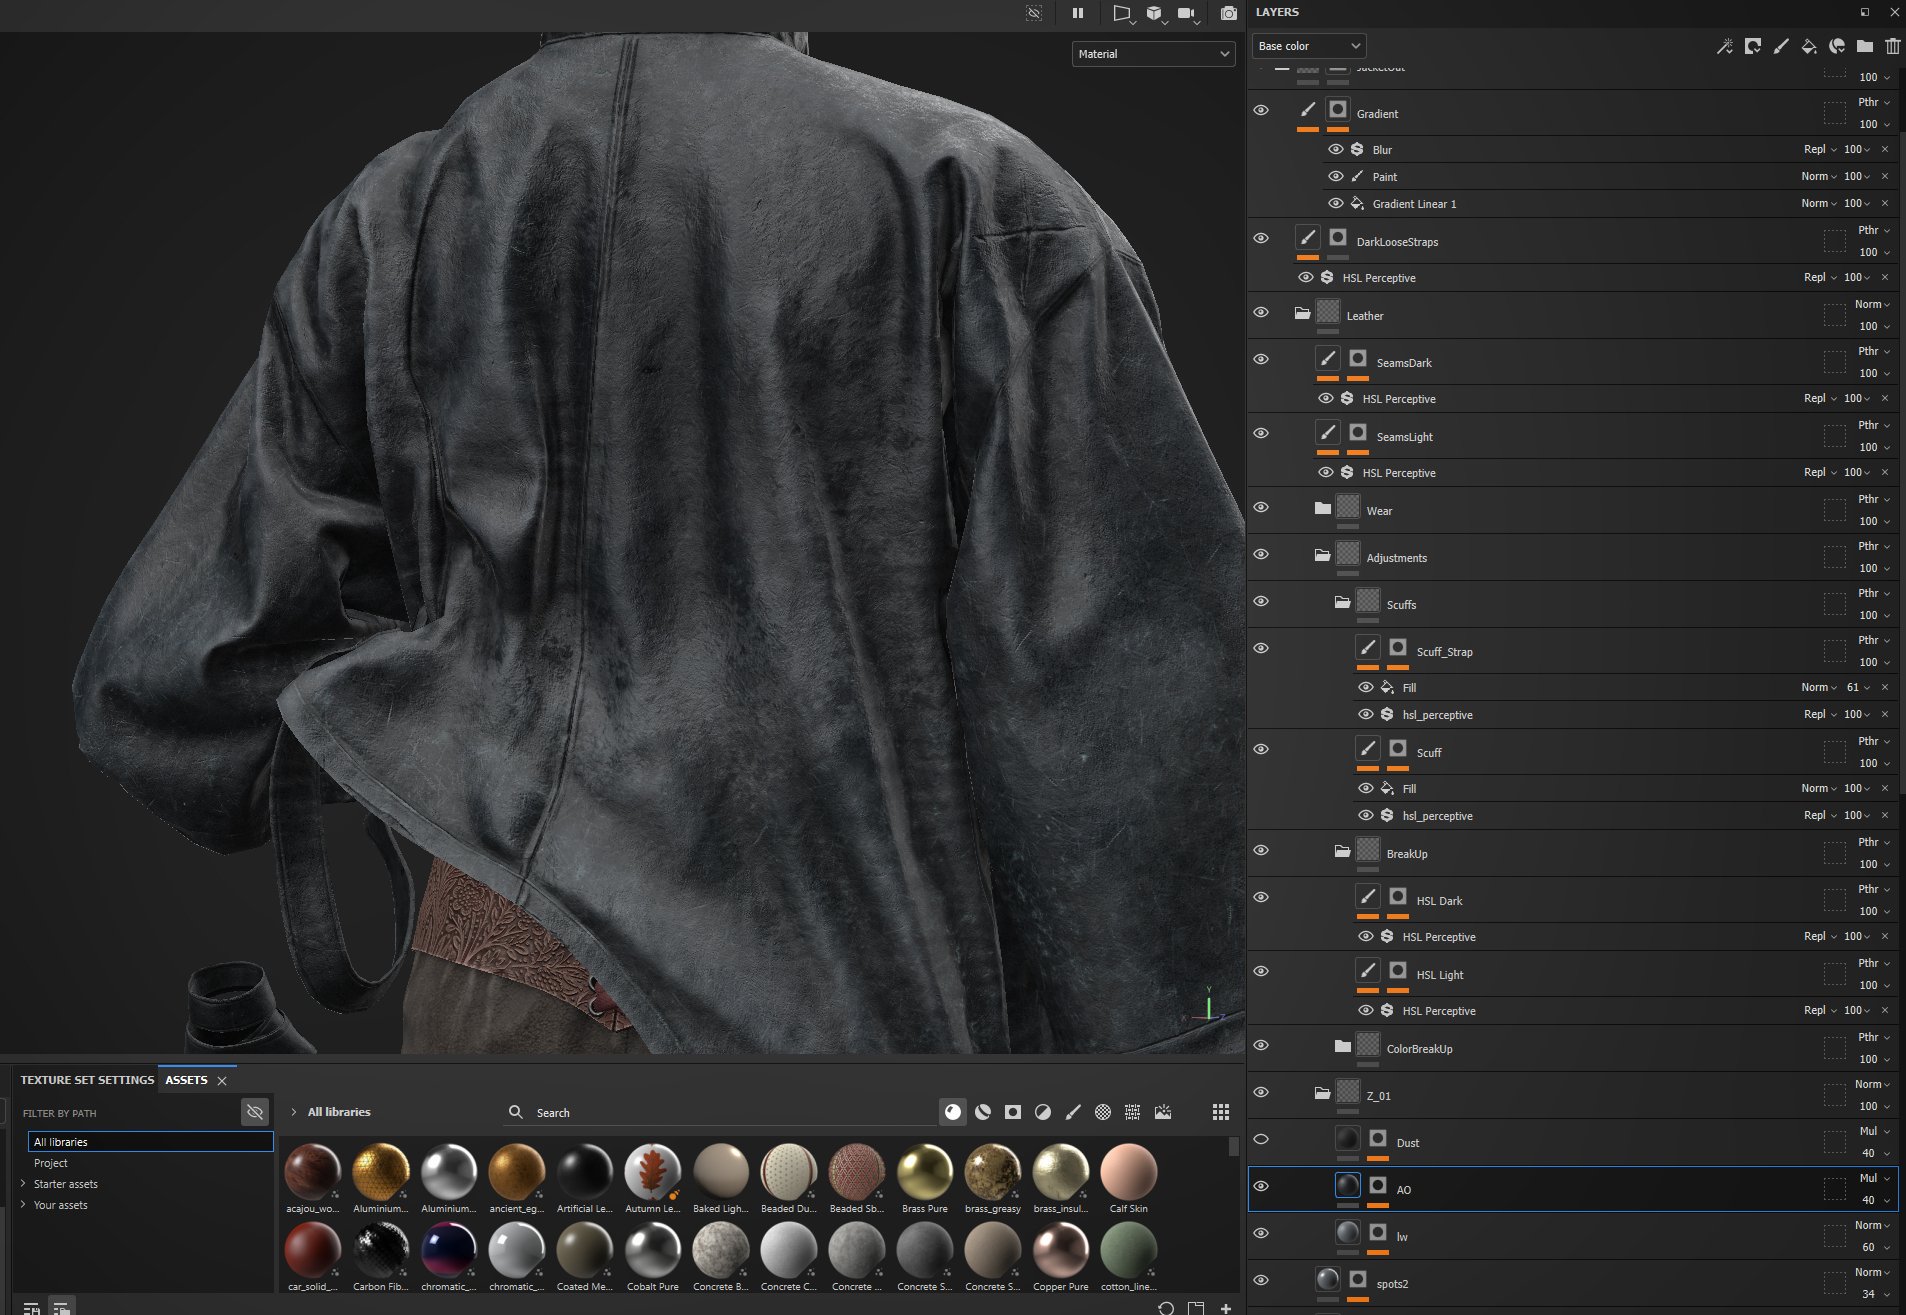
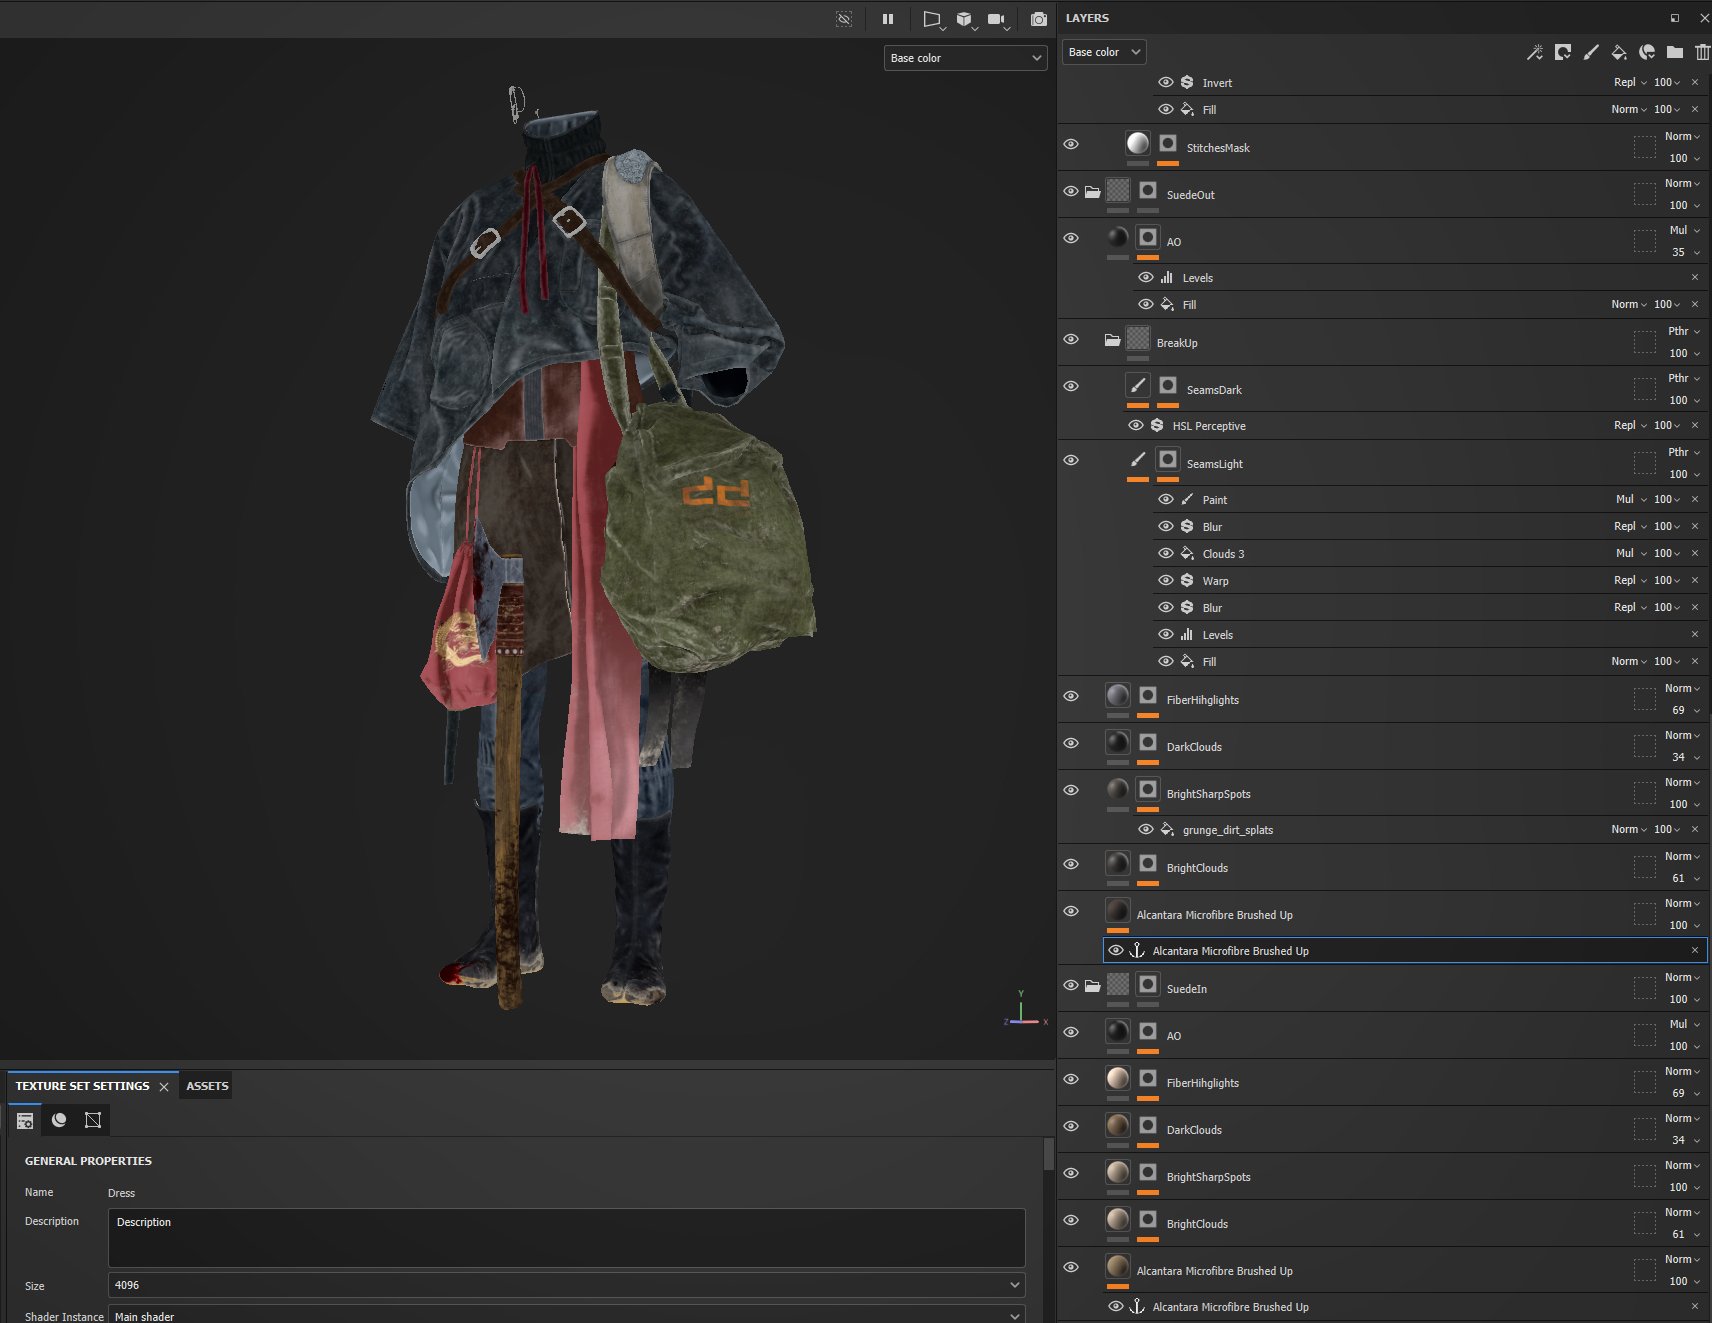
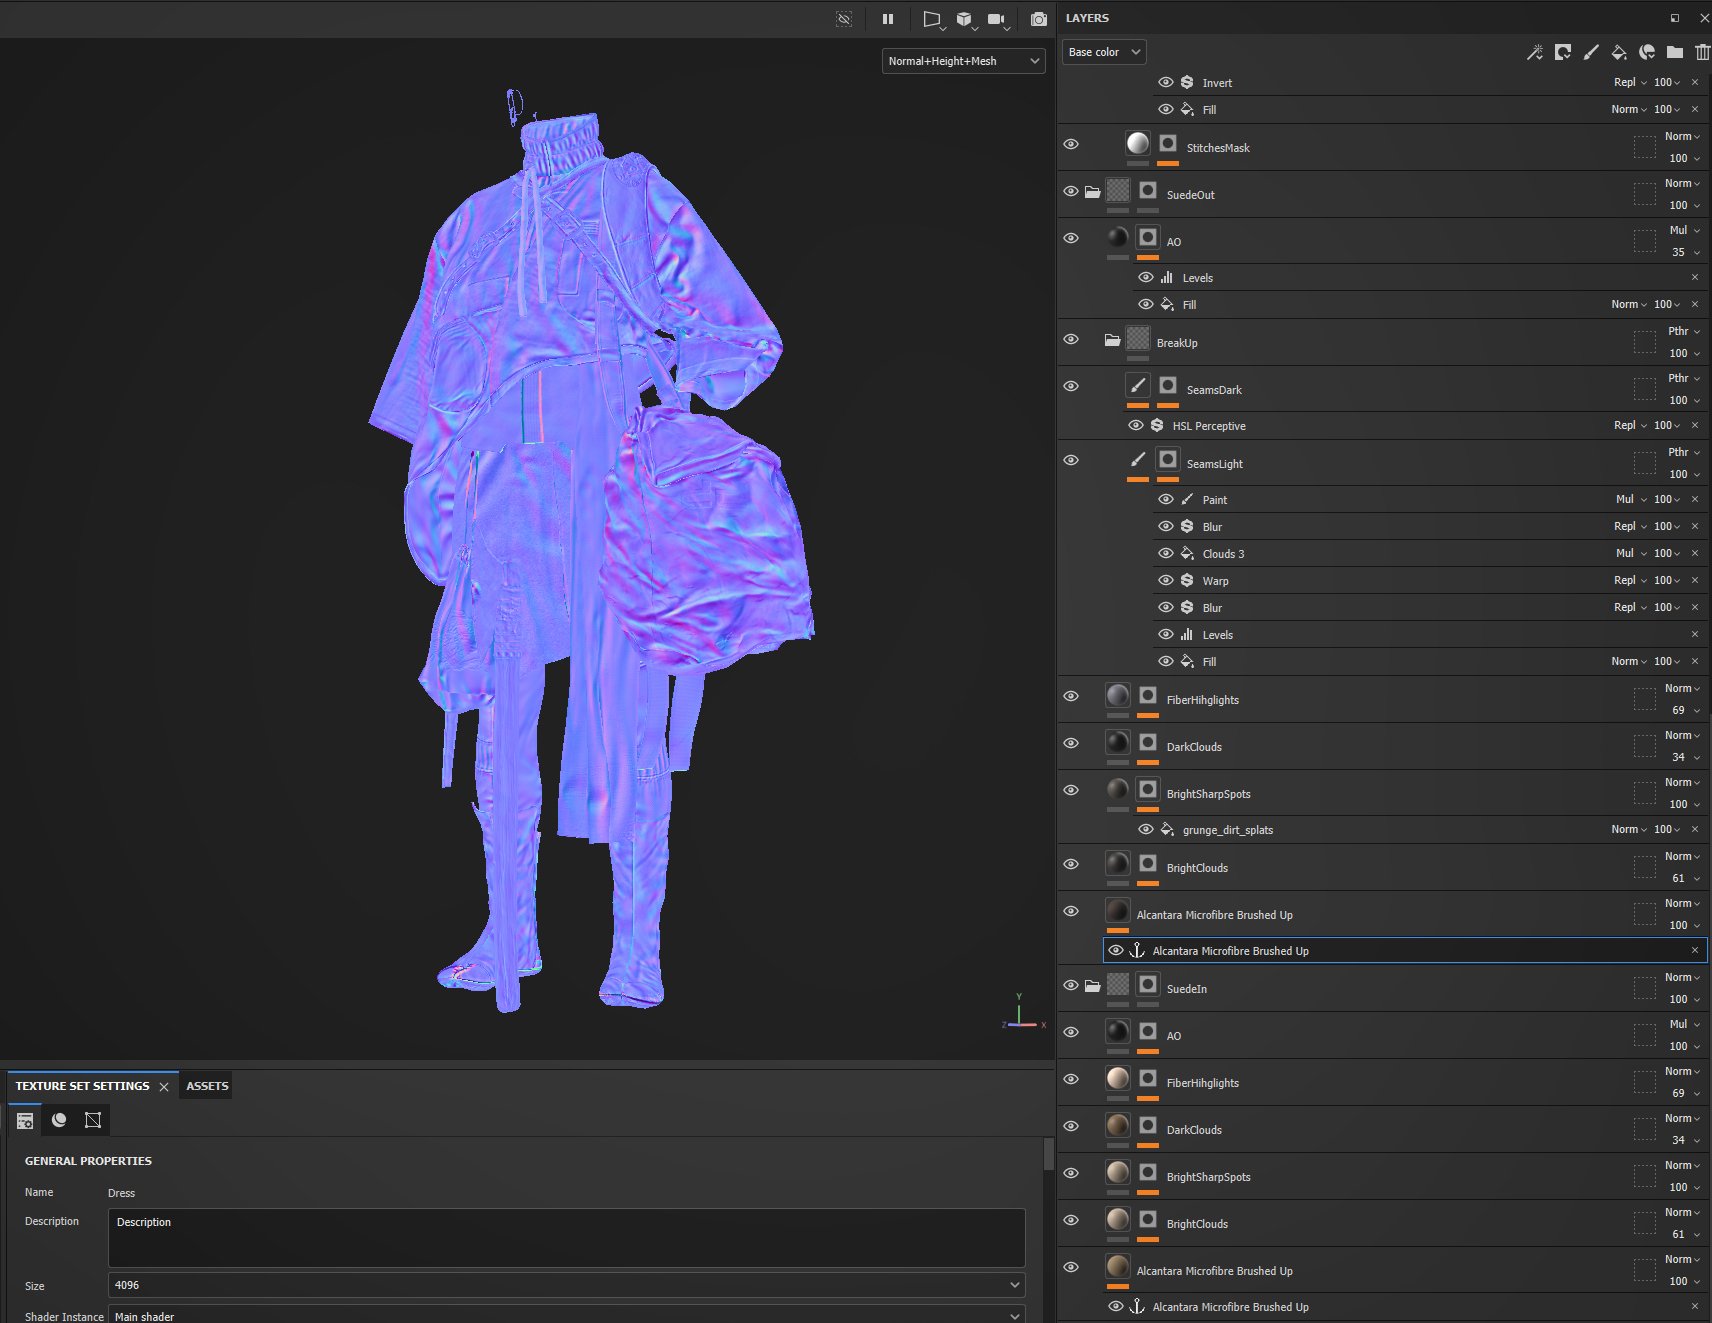
I used Substance materials as the base for the fabrics, and a dozen layers on top of them to accentuate the shape and add dust, dirt, and damage.


All grooming was done in Xgen. I broke the groom up into descriptions for the main hair, knots, strands, flyaway, eyelashes, eyebrows, and vellus hair.

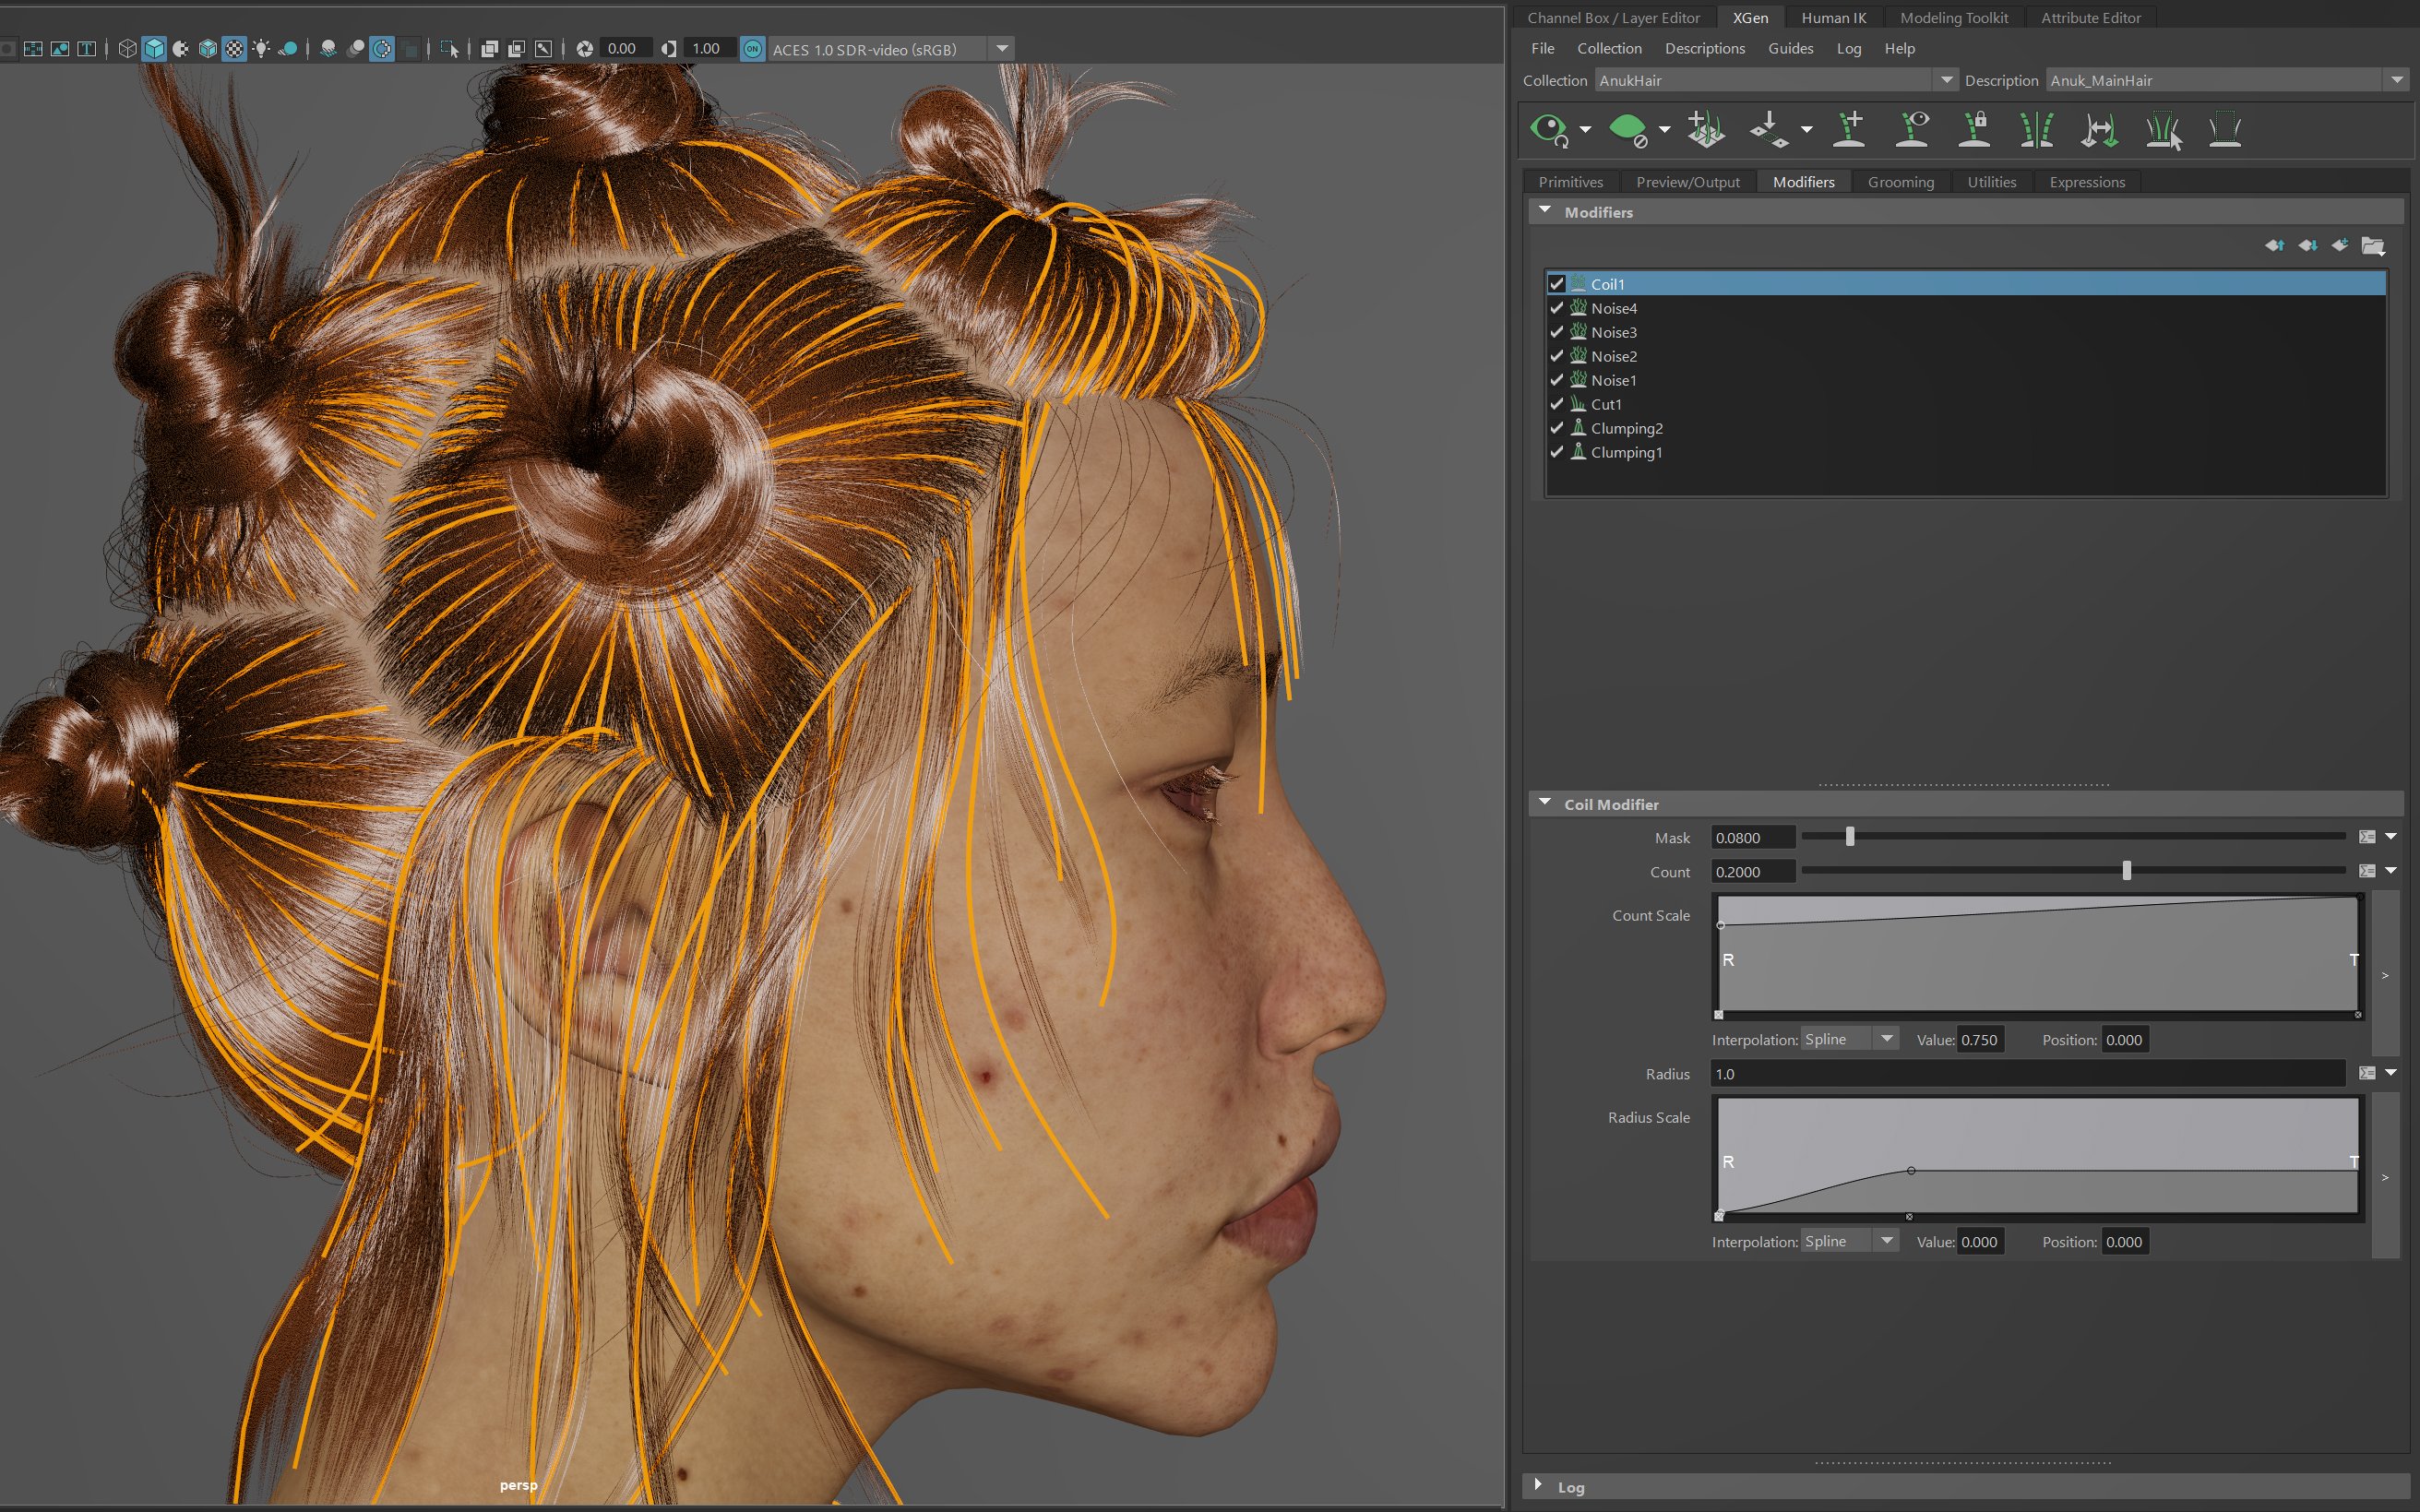
To create a separation on the main hair I painted a region mask.


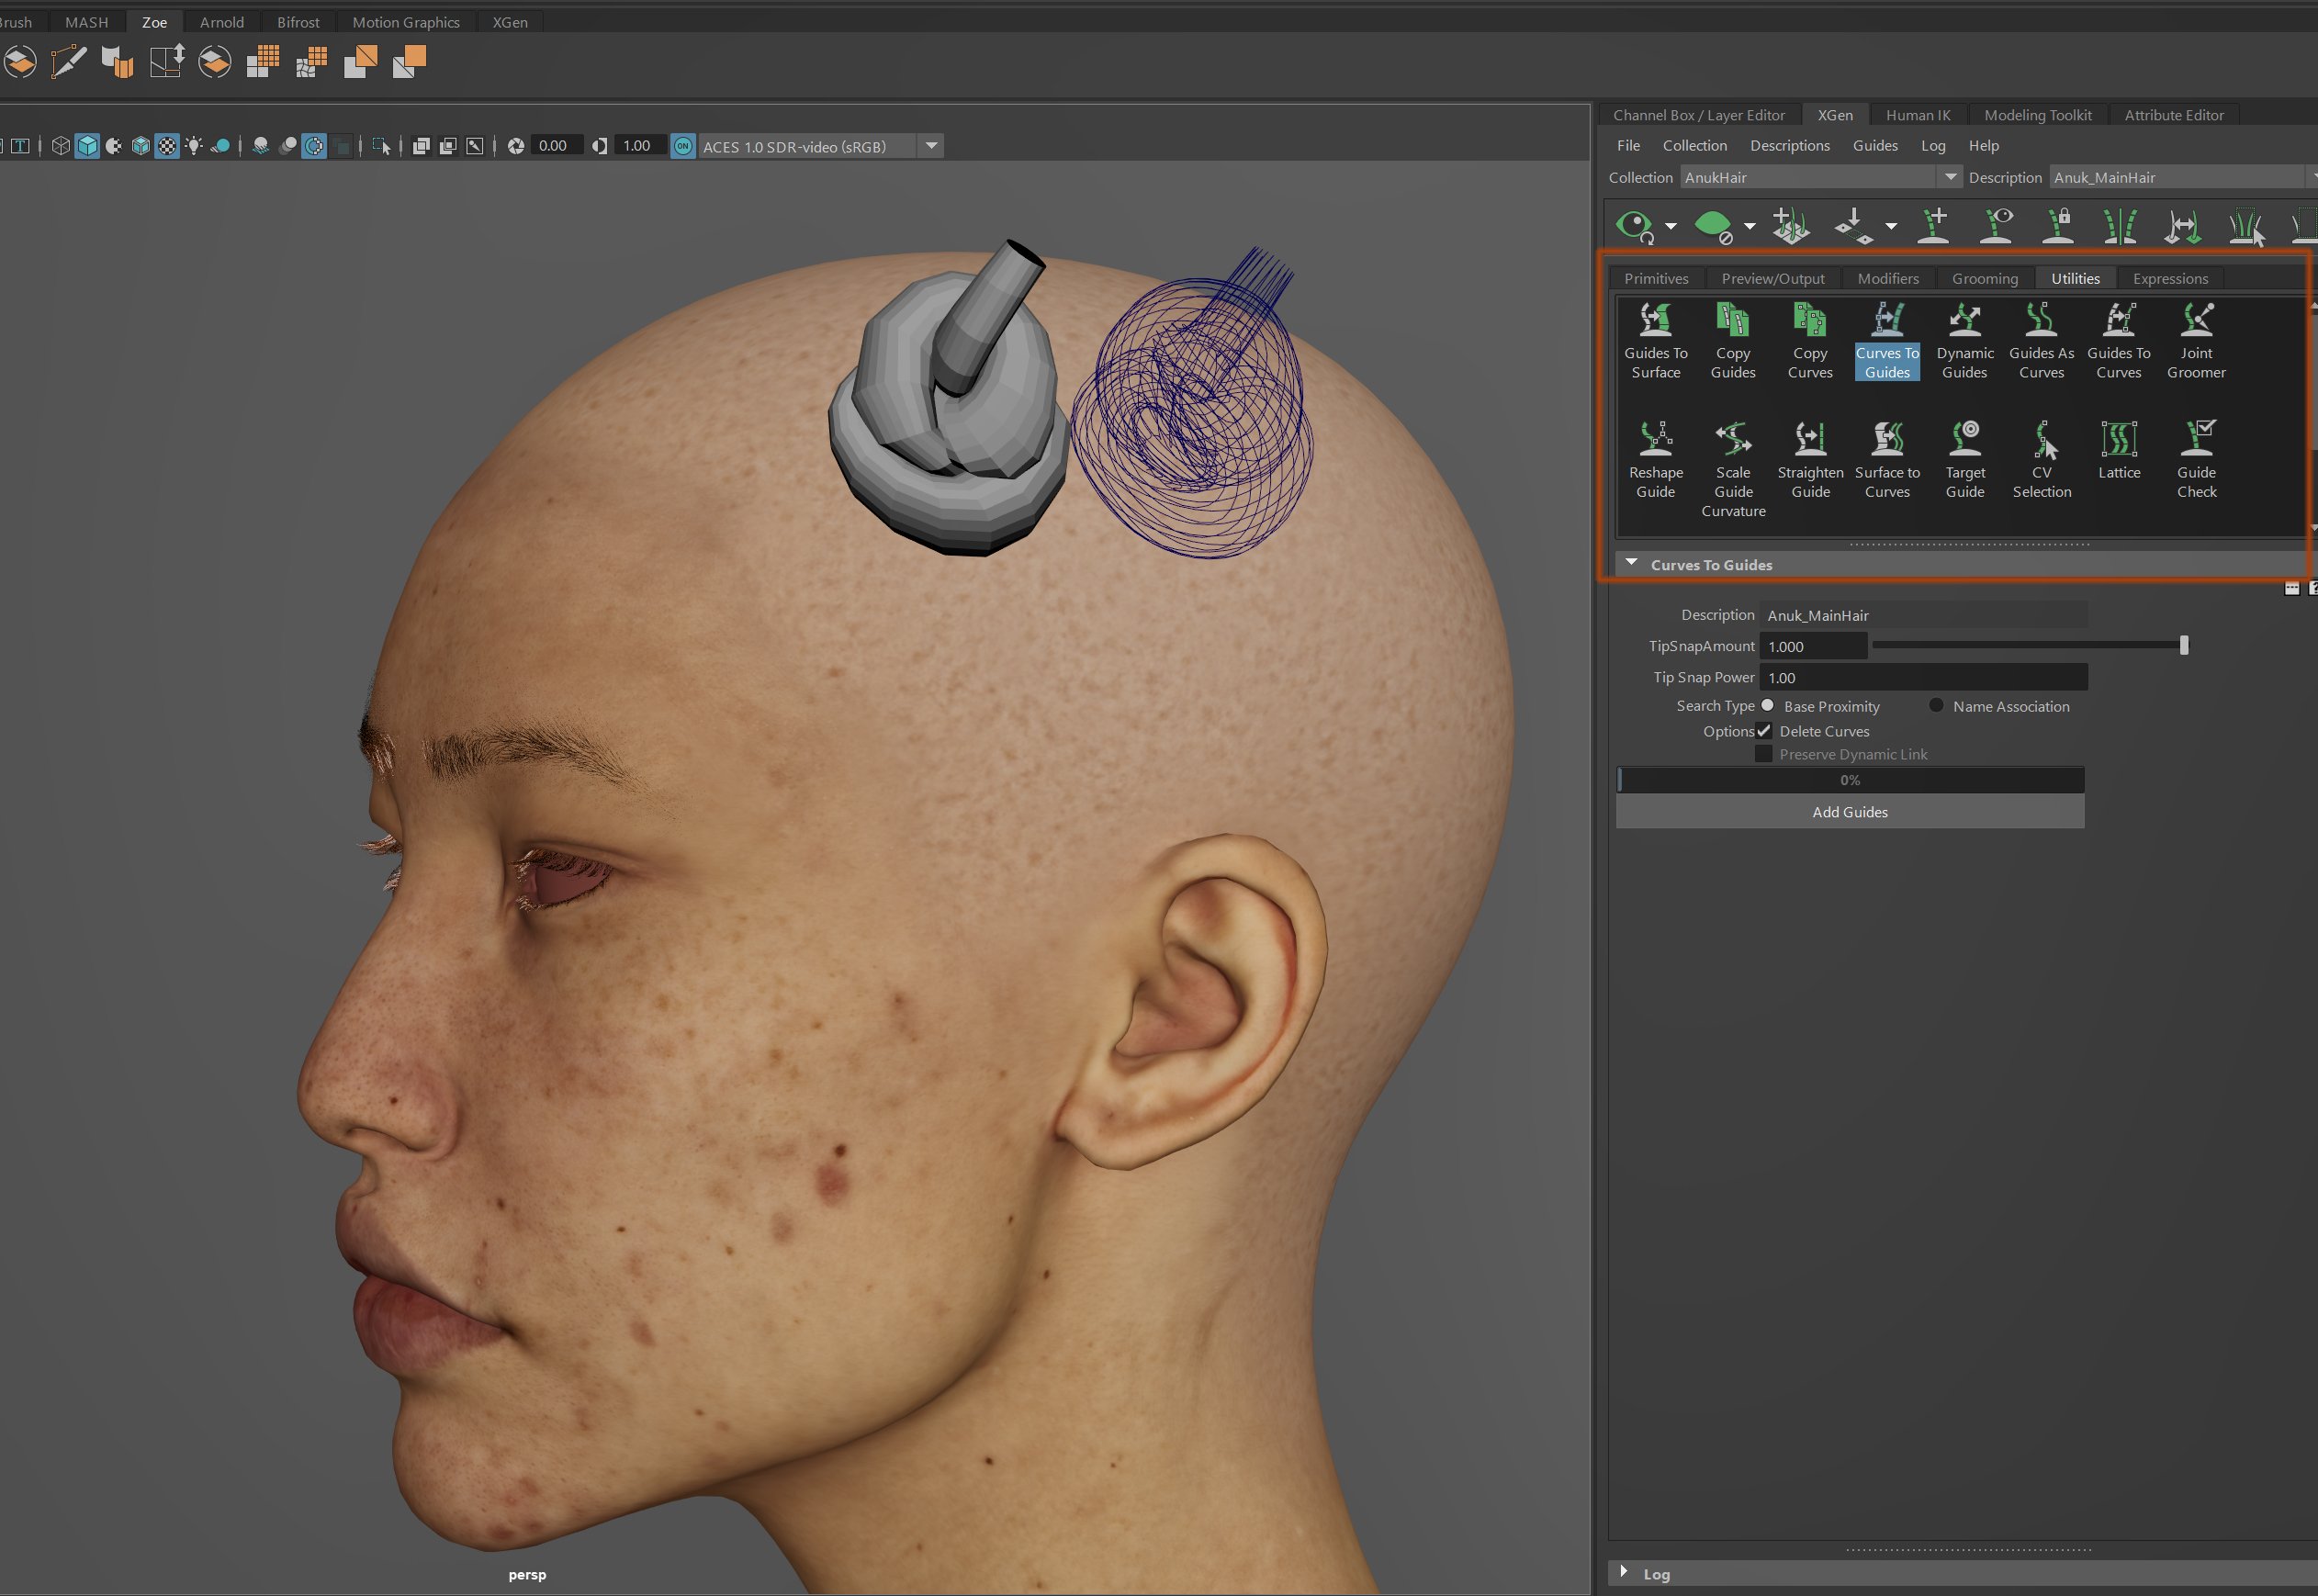
The knots were first modeled in Maya (I have four different types of knots). Then I converted the edges of the geo to curves. Those curves were then converted to guides using the XGen utility Cuves To Guides.

Once the groom was finalized, the Xgen descriptions were converted to interactive grooms and then imported as alembic cache into UE5.


My goal was to learn how to render a character in Unreal Engine.
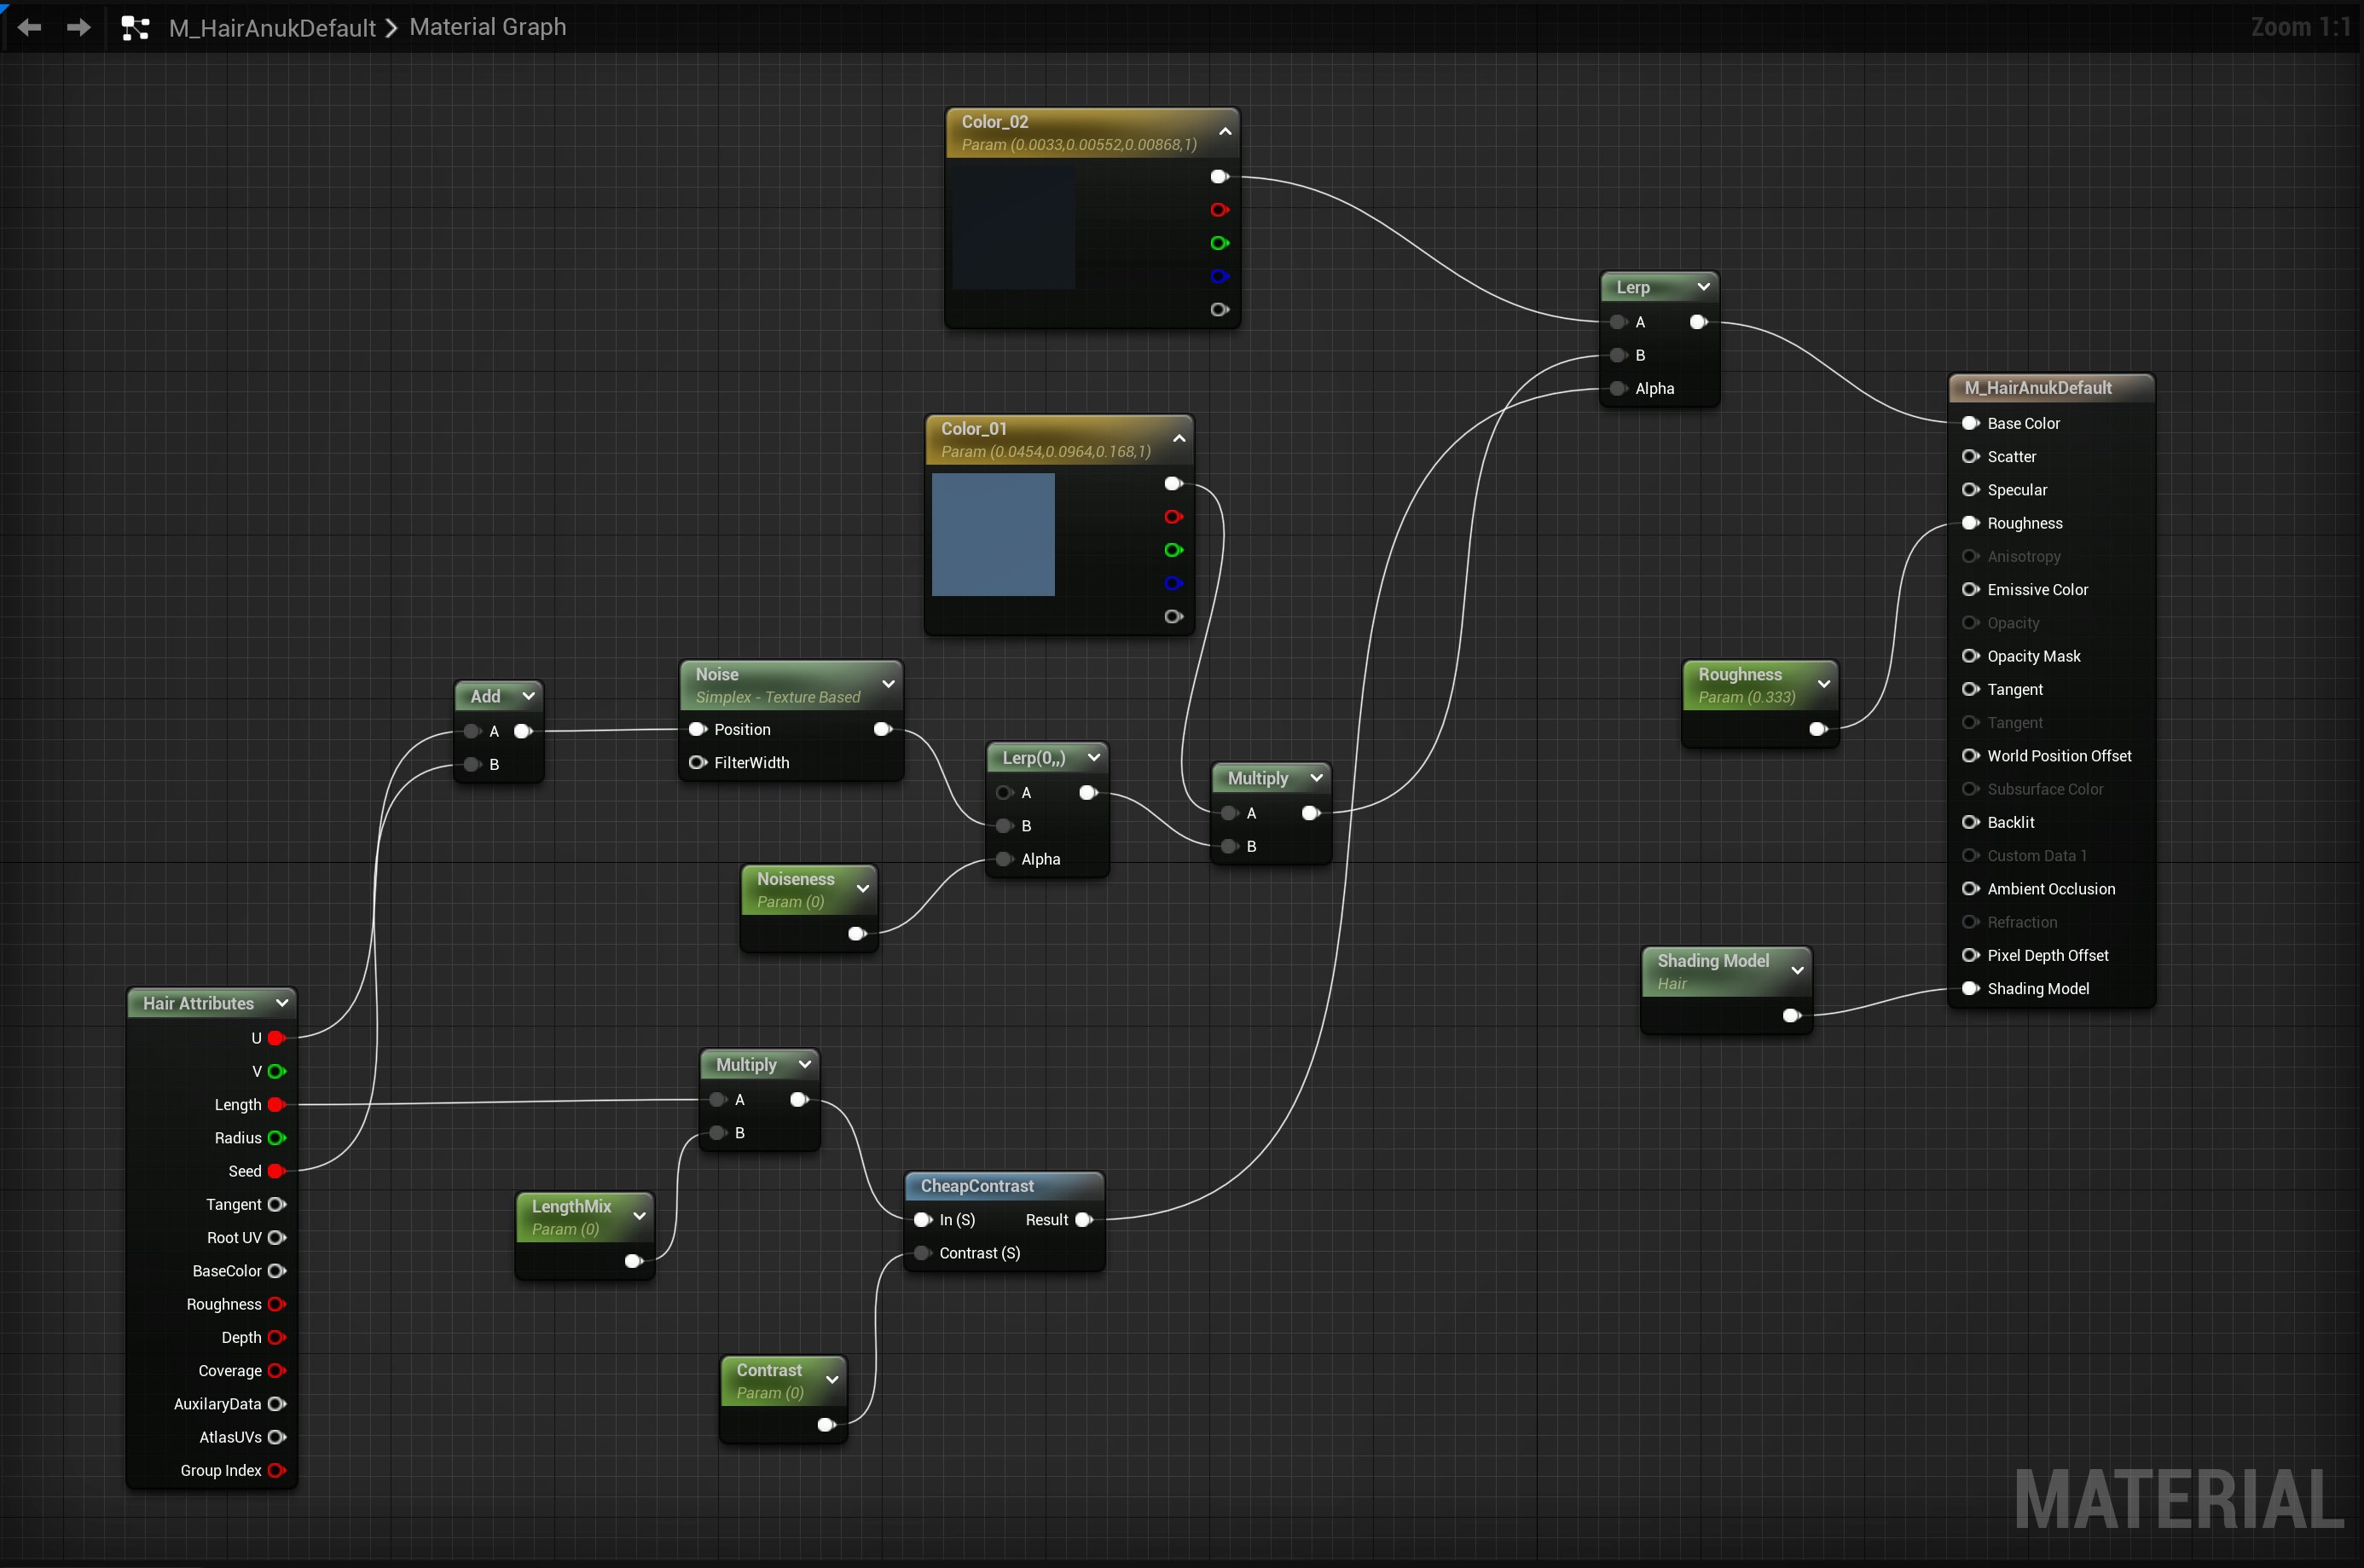
To create the hair material I was following the tutorial by J Hill and Unreal Engine documentation. As a result, I got a shader, that uses linear interpolation to change the hair pigment along the length of the hair.
As for the skin material my idea was to create it from scratch. The tutorial by Nick Rutlinh helped me a lot in understanding the shader workflow. The modular workflow was used here to make iterating on the material a lot faster. The material was divided into different groups to control individual parameters.
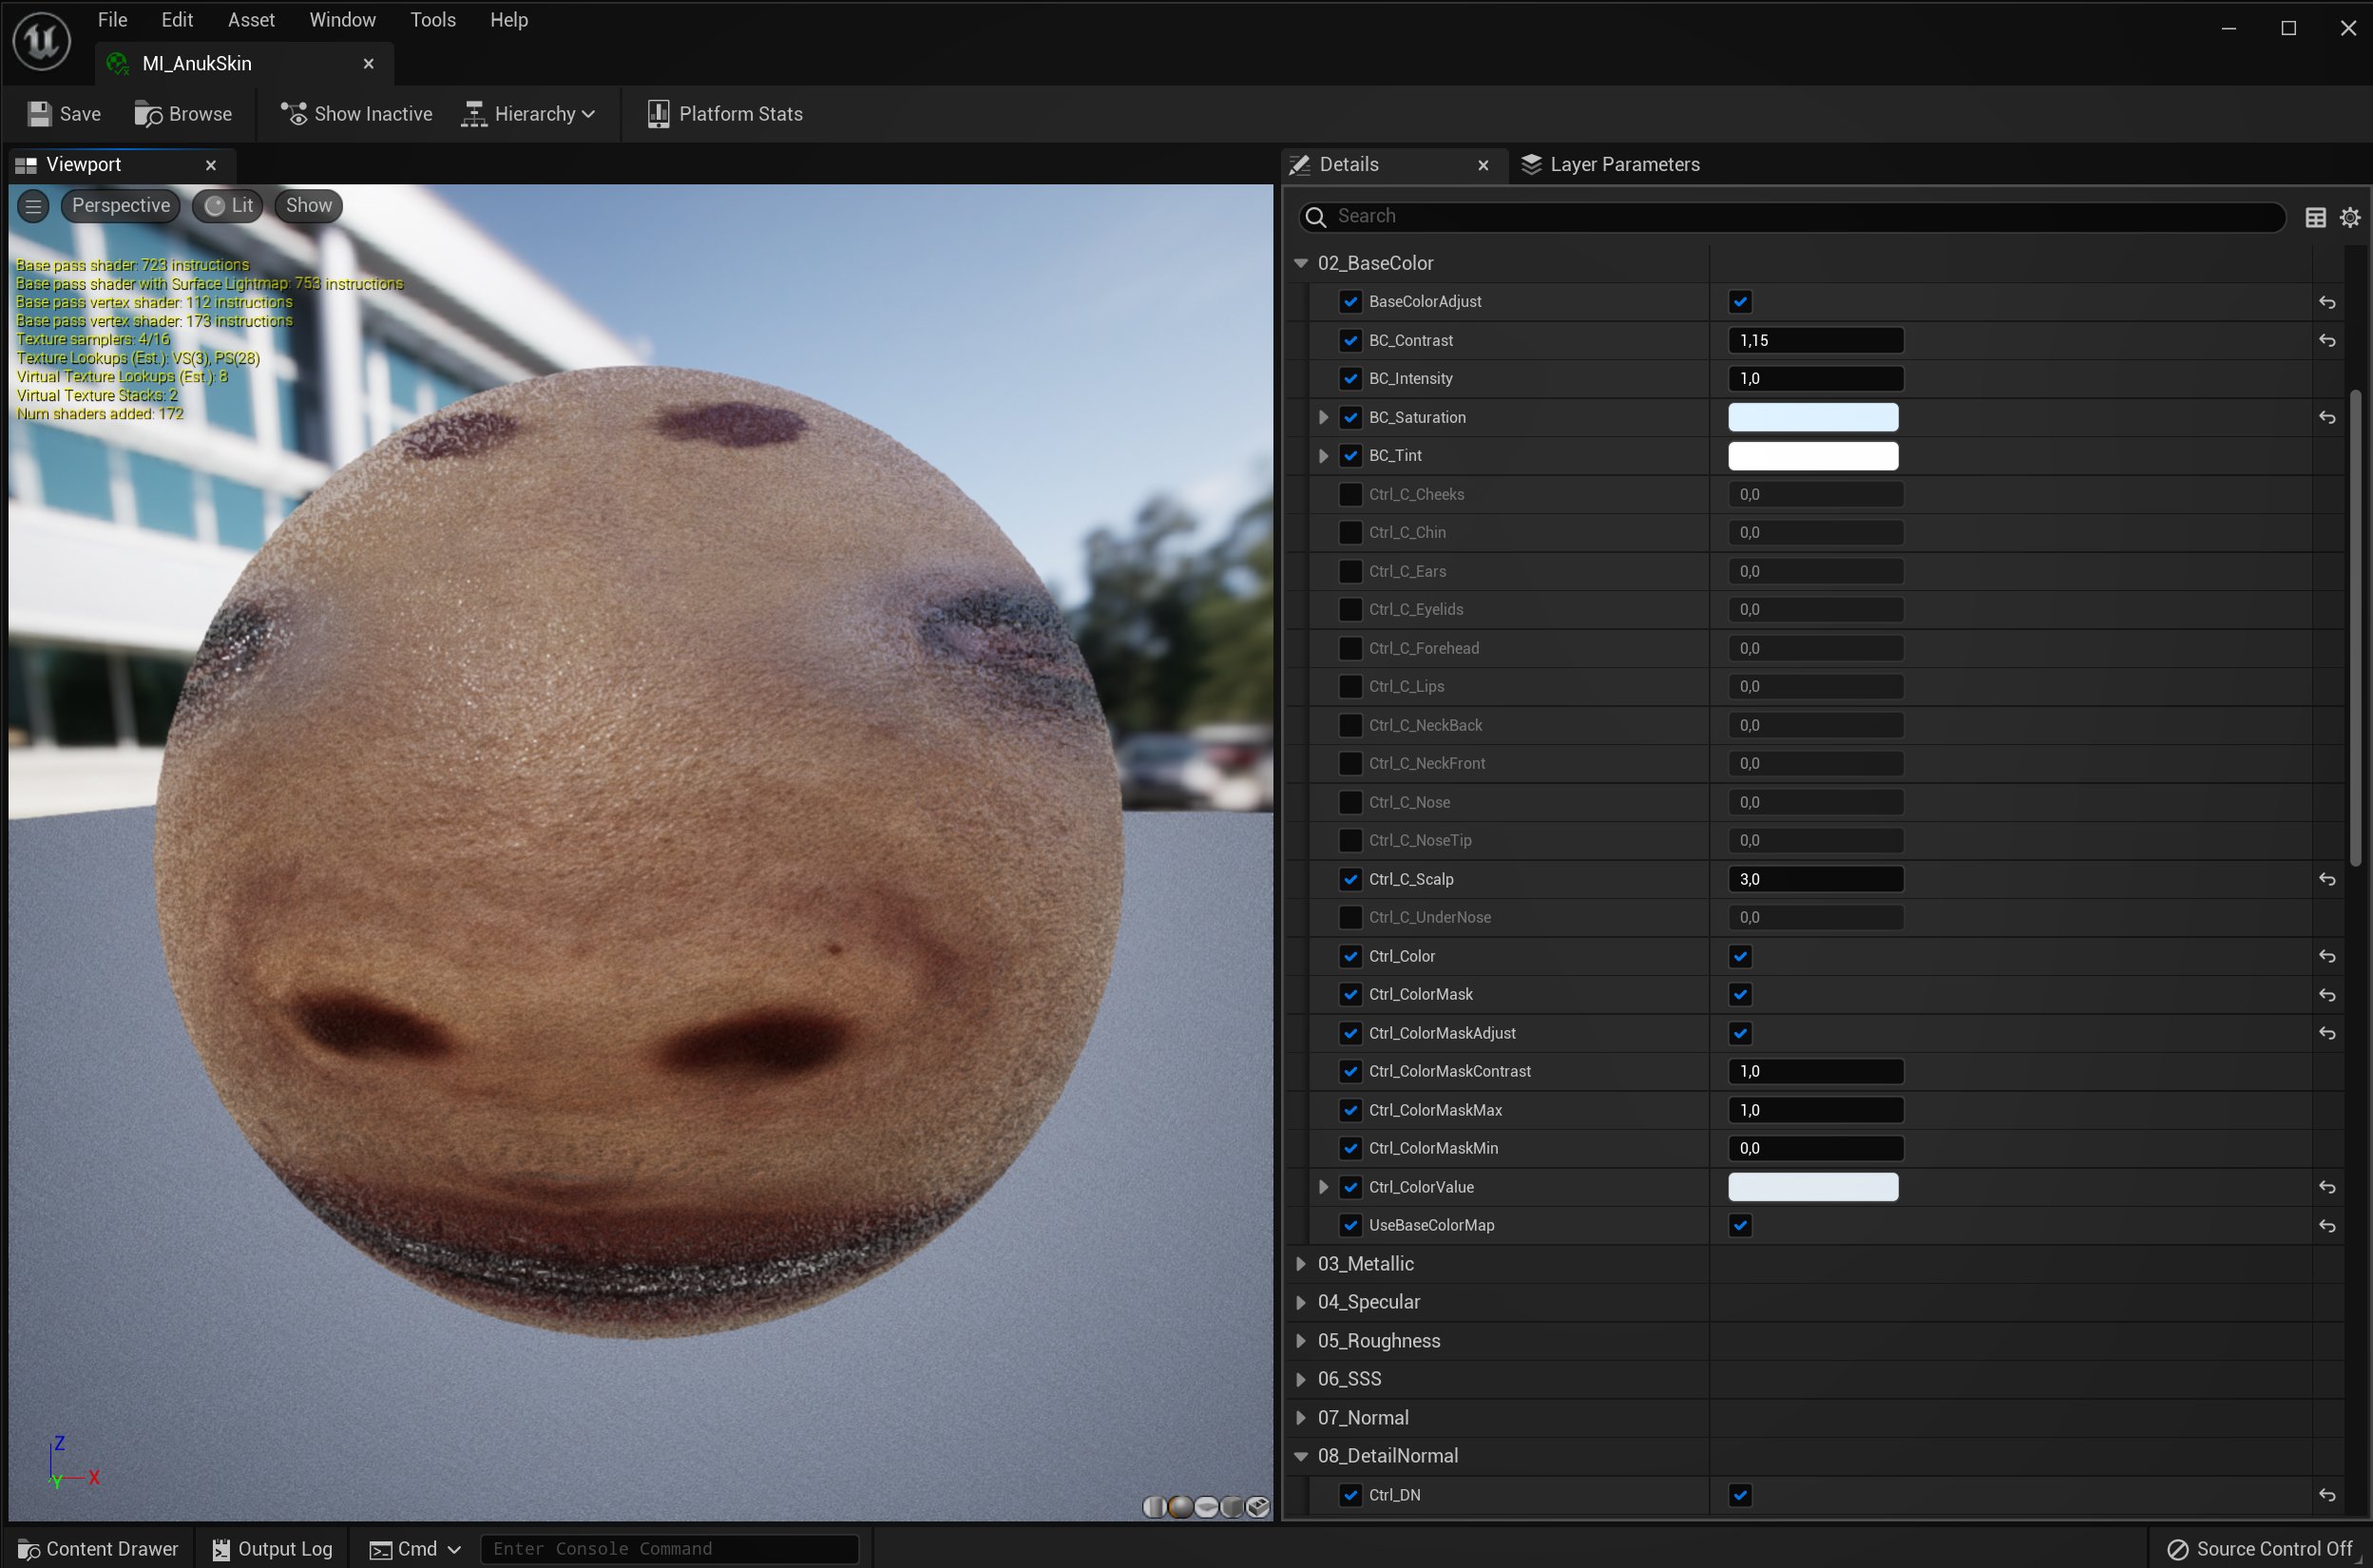
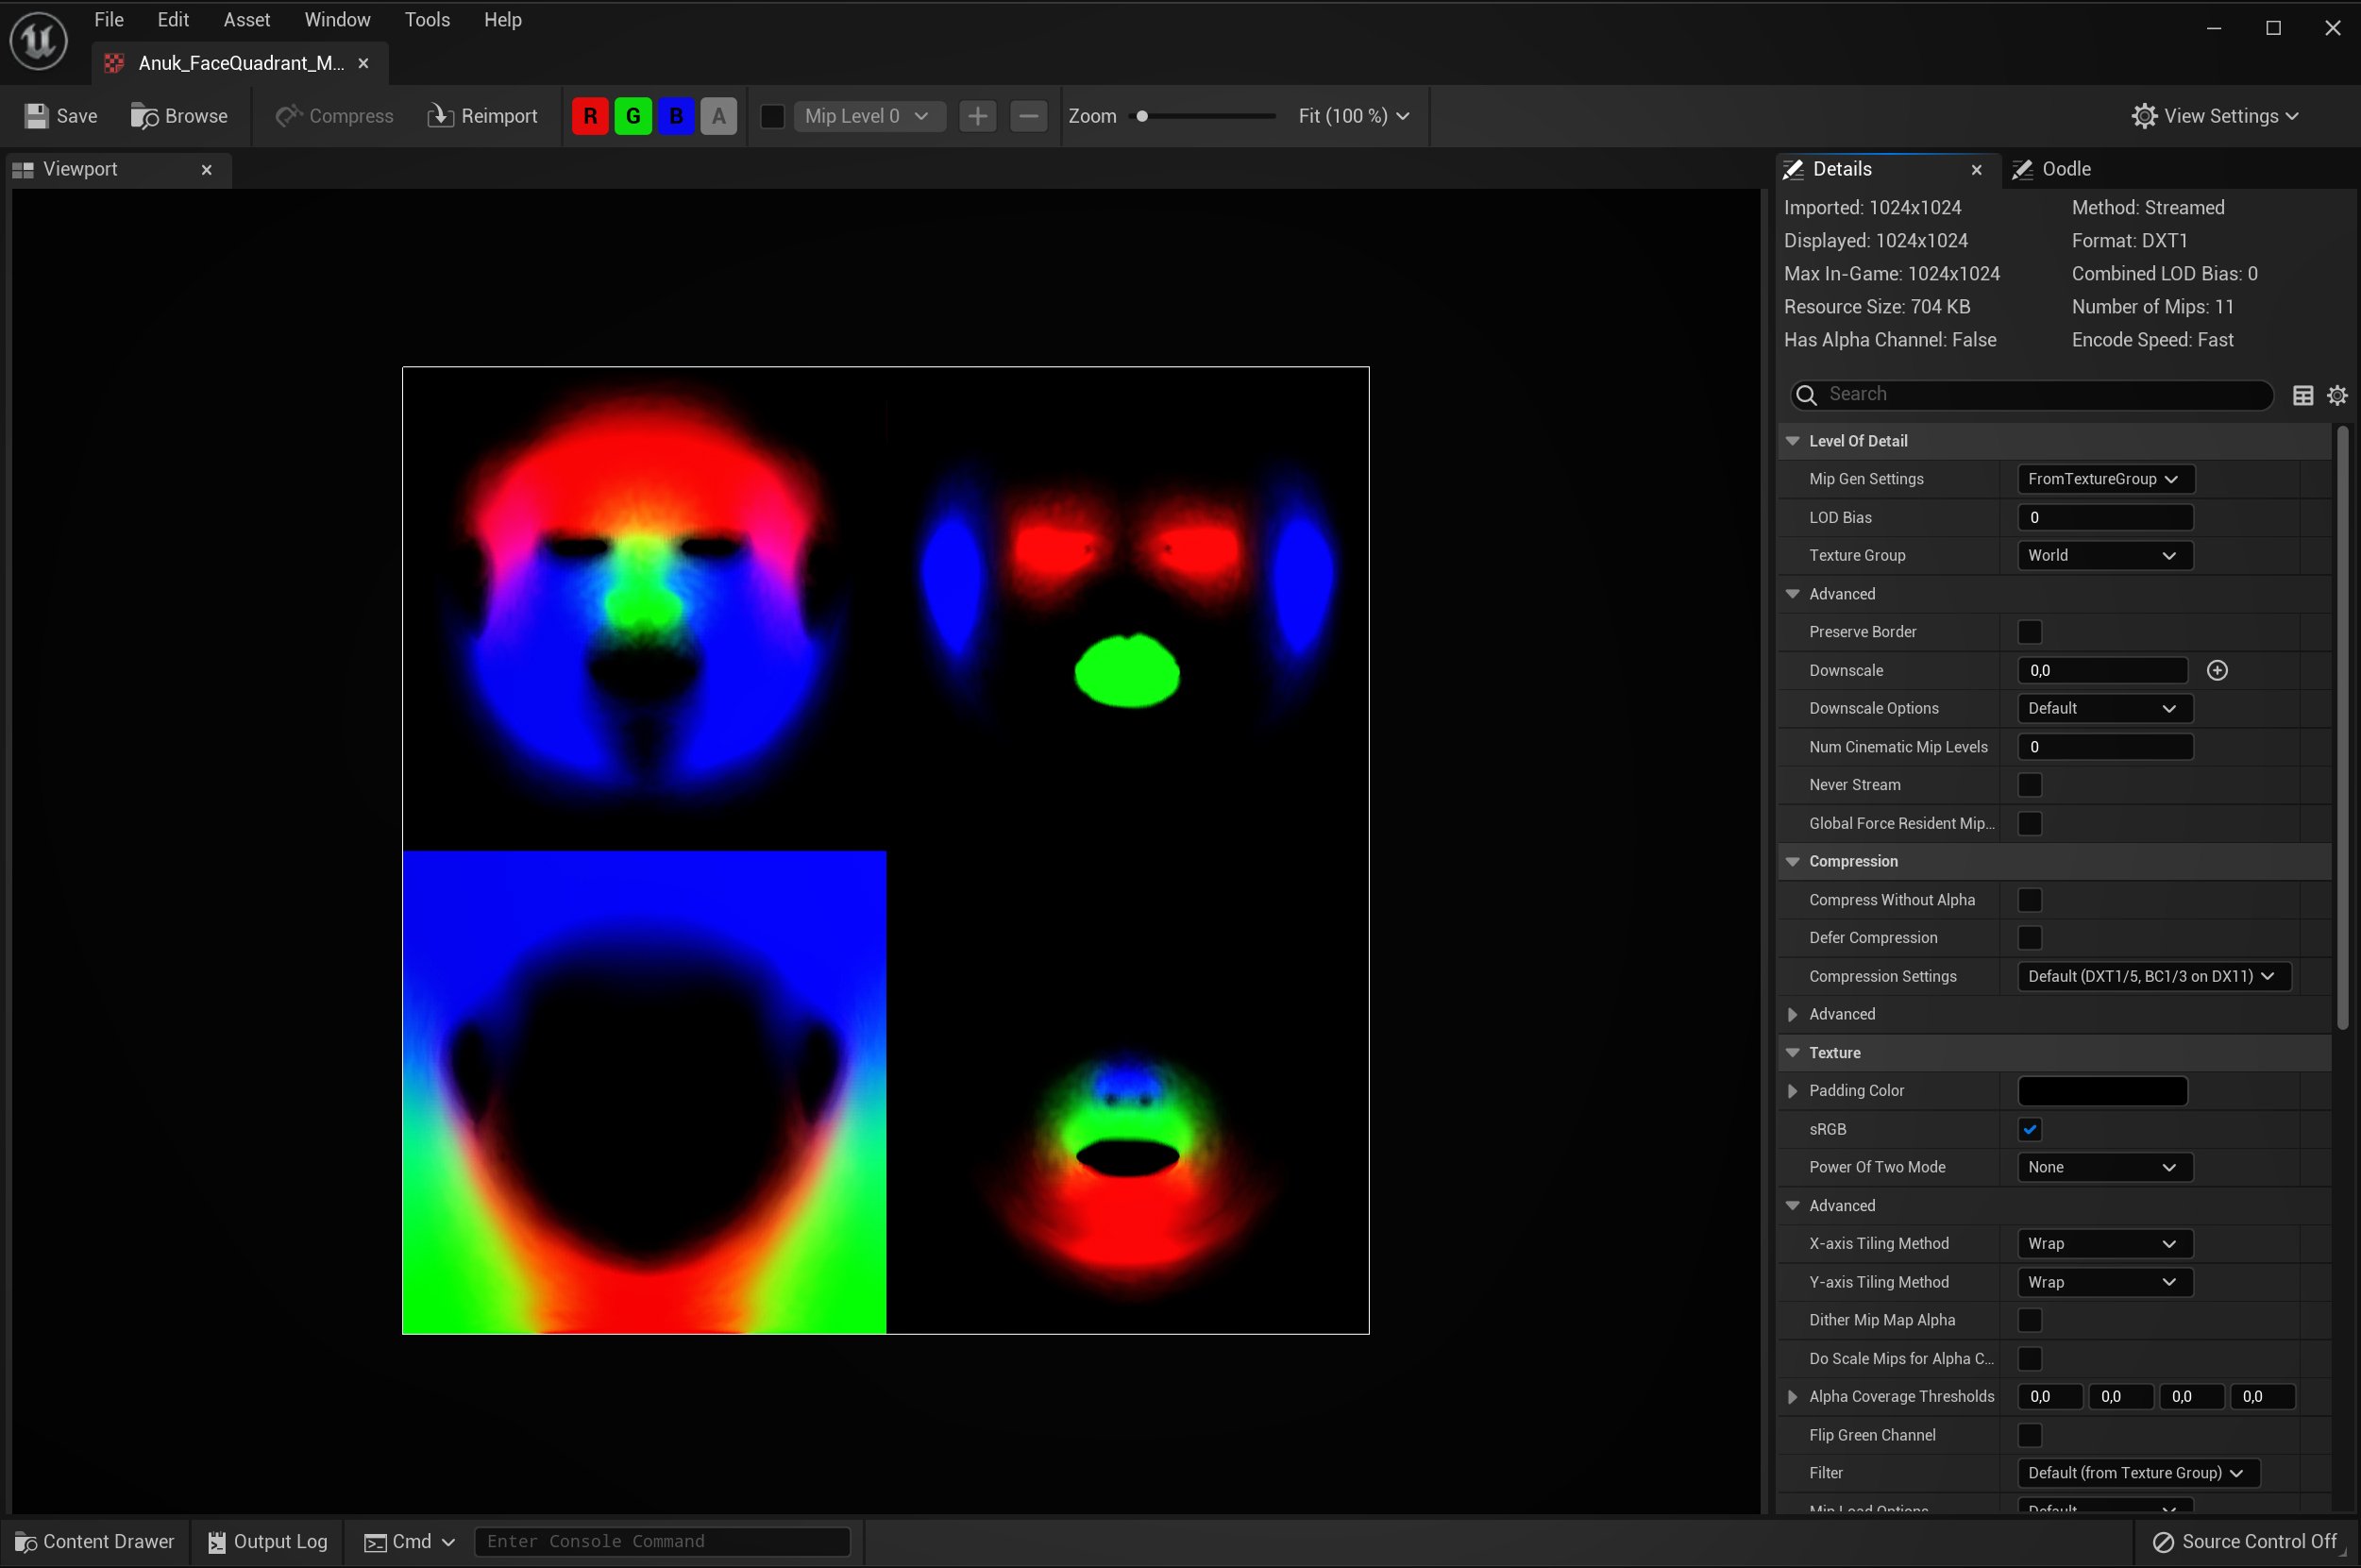
I also used a region mask to control different areas of the face. With this mask, I could easily reduce the roughness of a certain area of the face or change the color of the lips.
For the lighting, I used a skylight with custom HDRI and a few more lights – to emphasize the model's skin and hair. I didn’t use the skylight for anything major. I wanted it to add subtle reflections. So I set it to very low intensity.


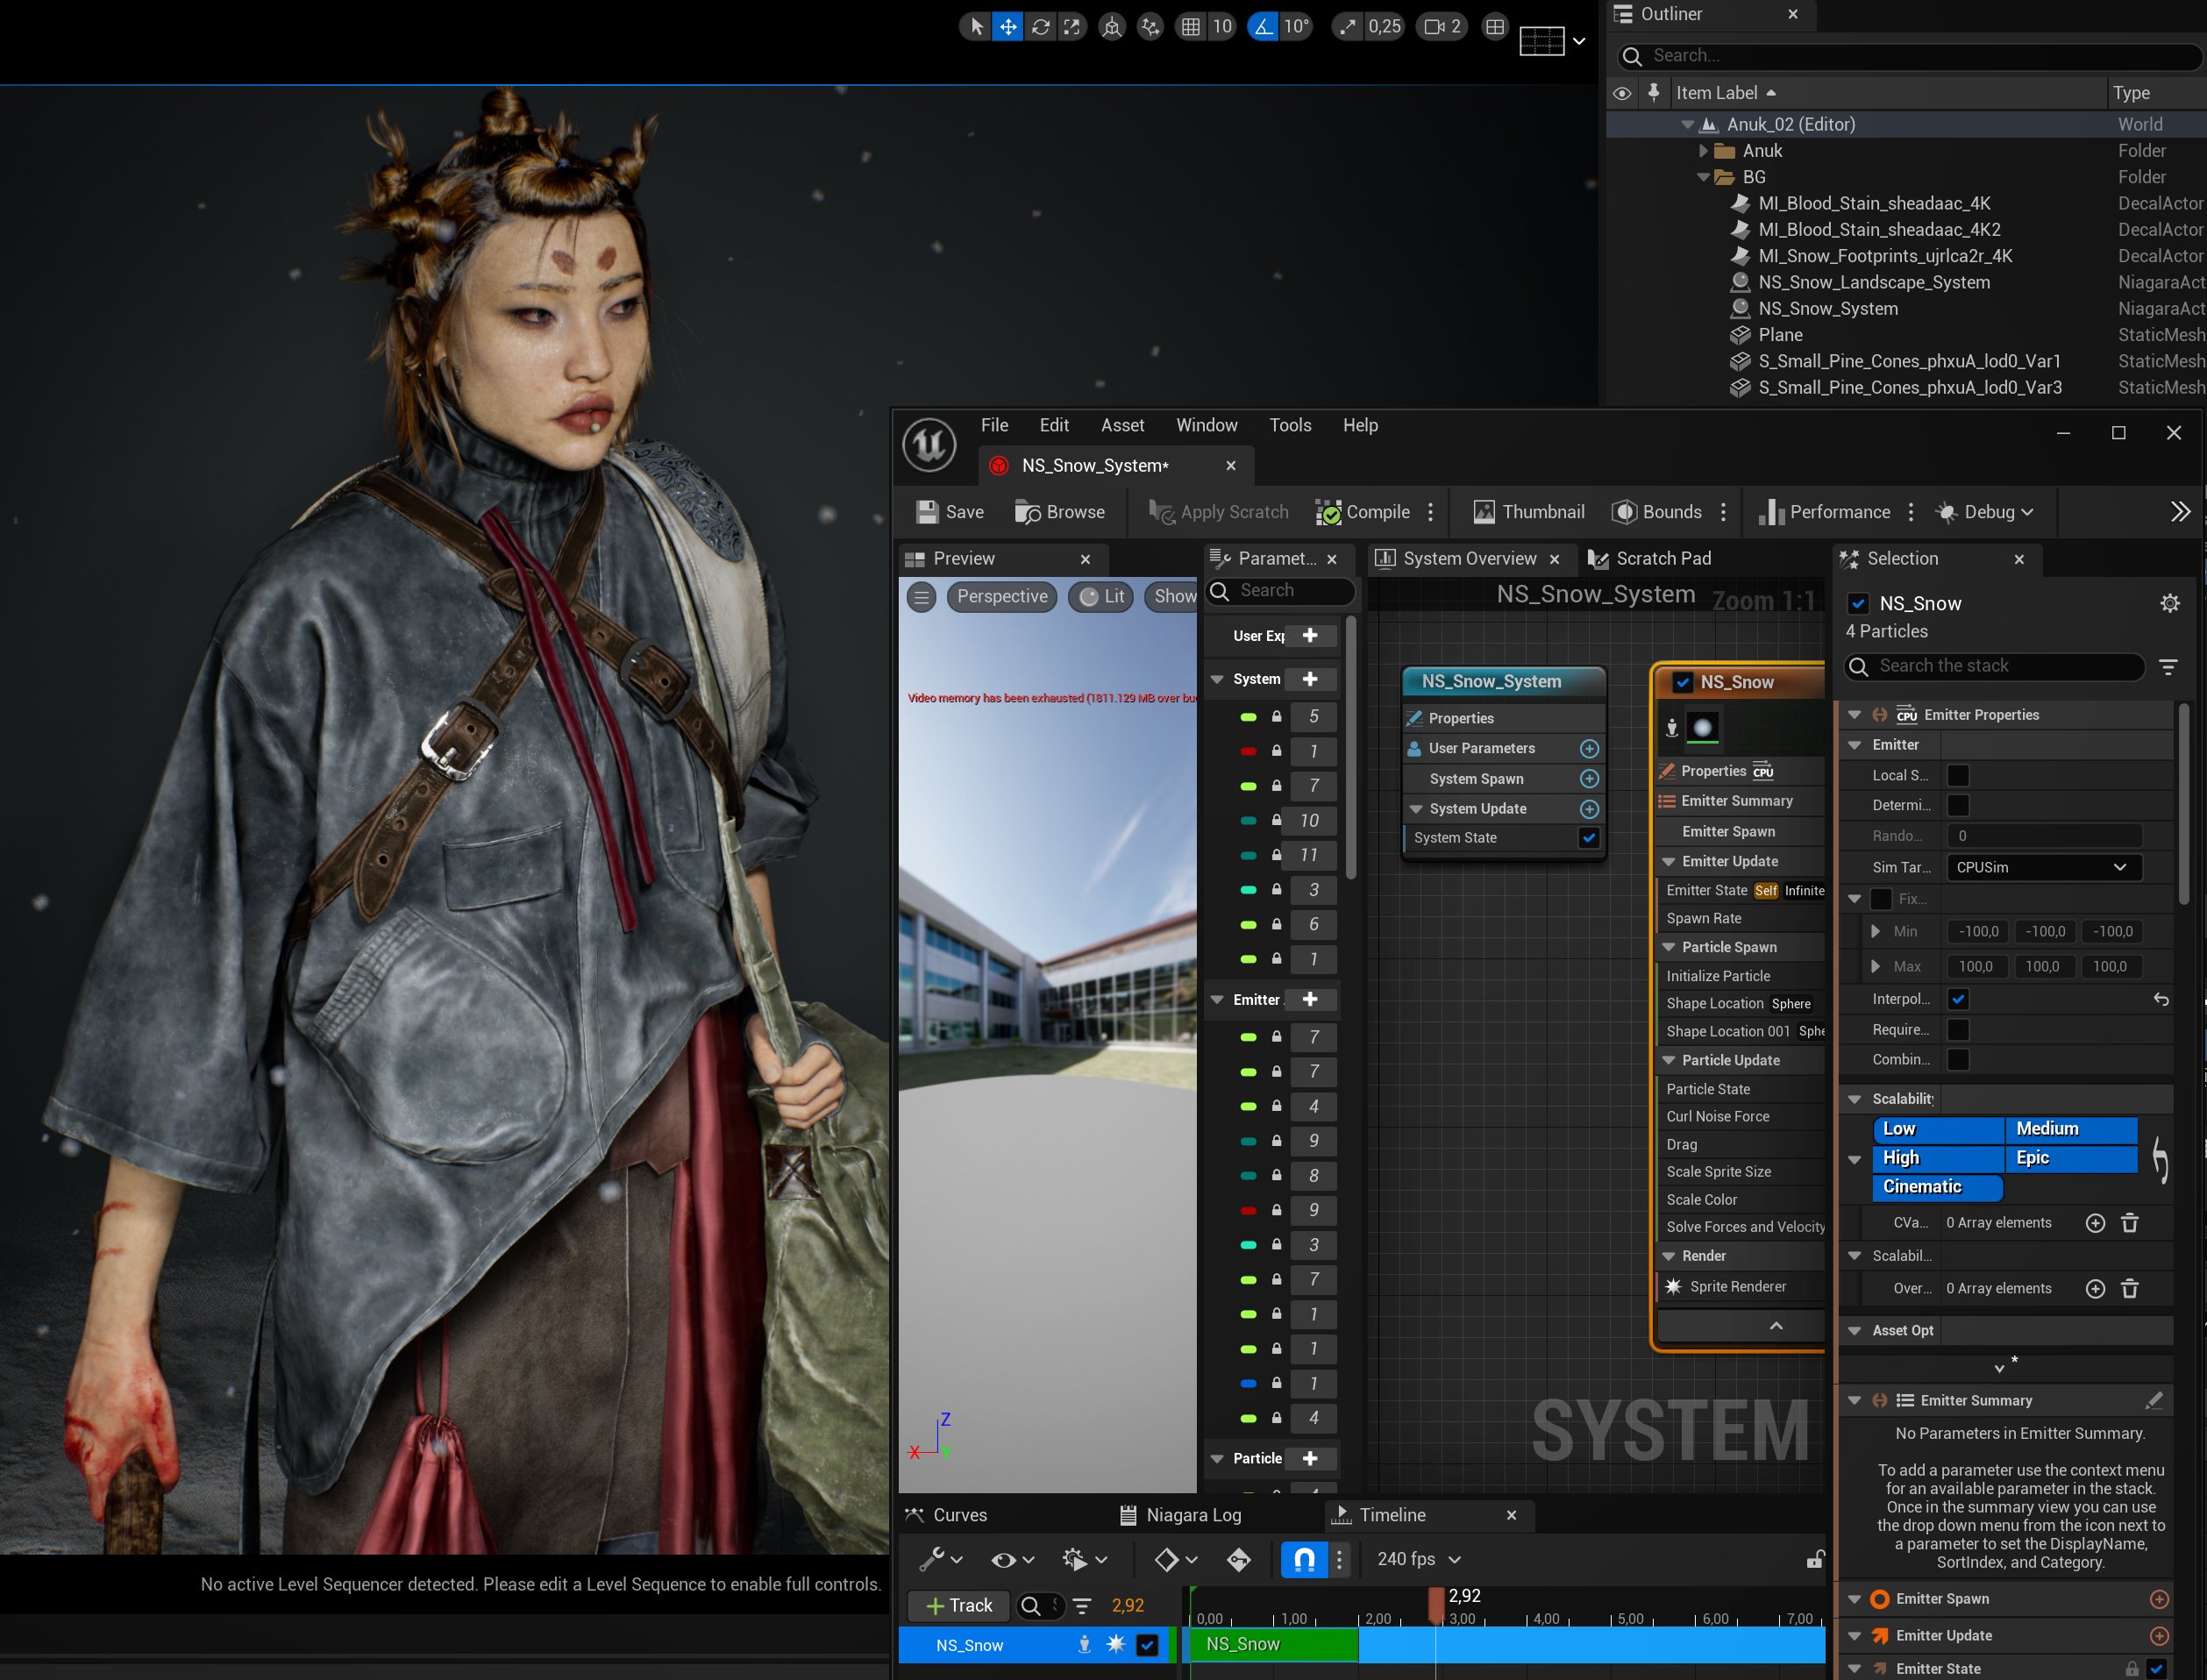
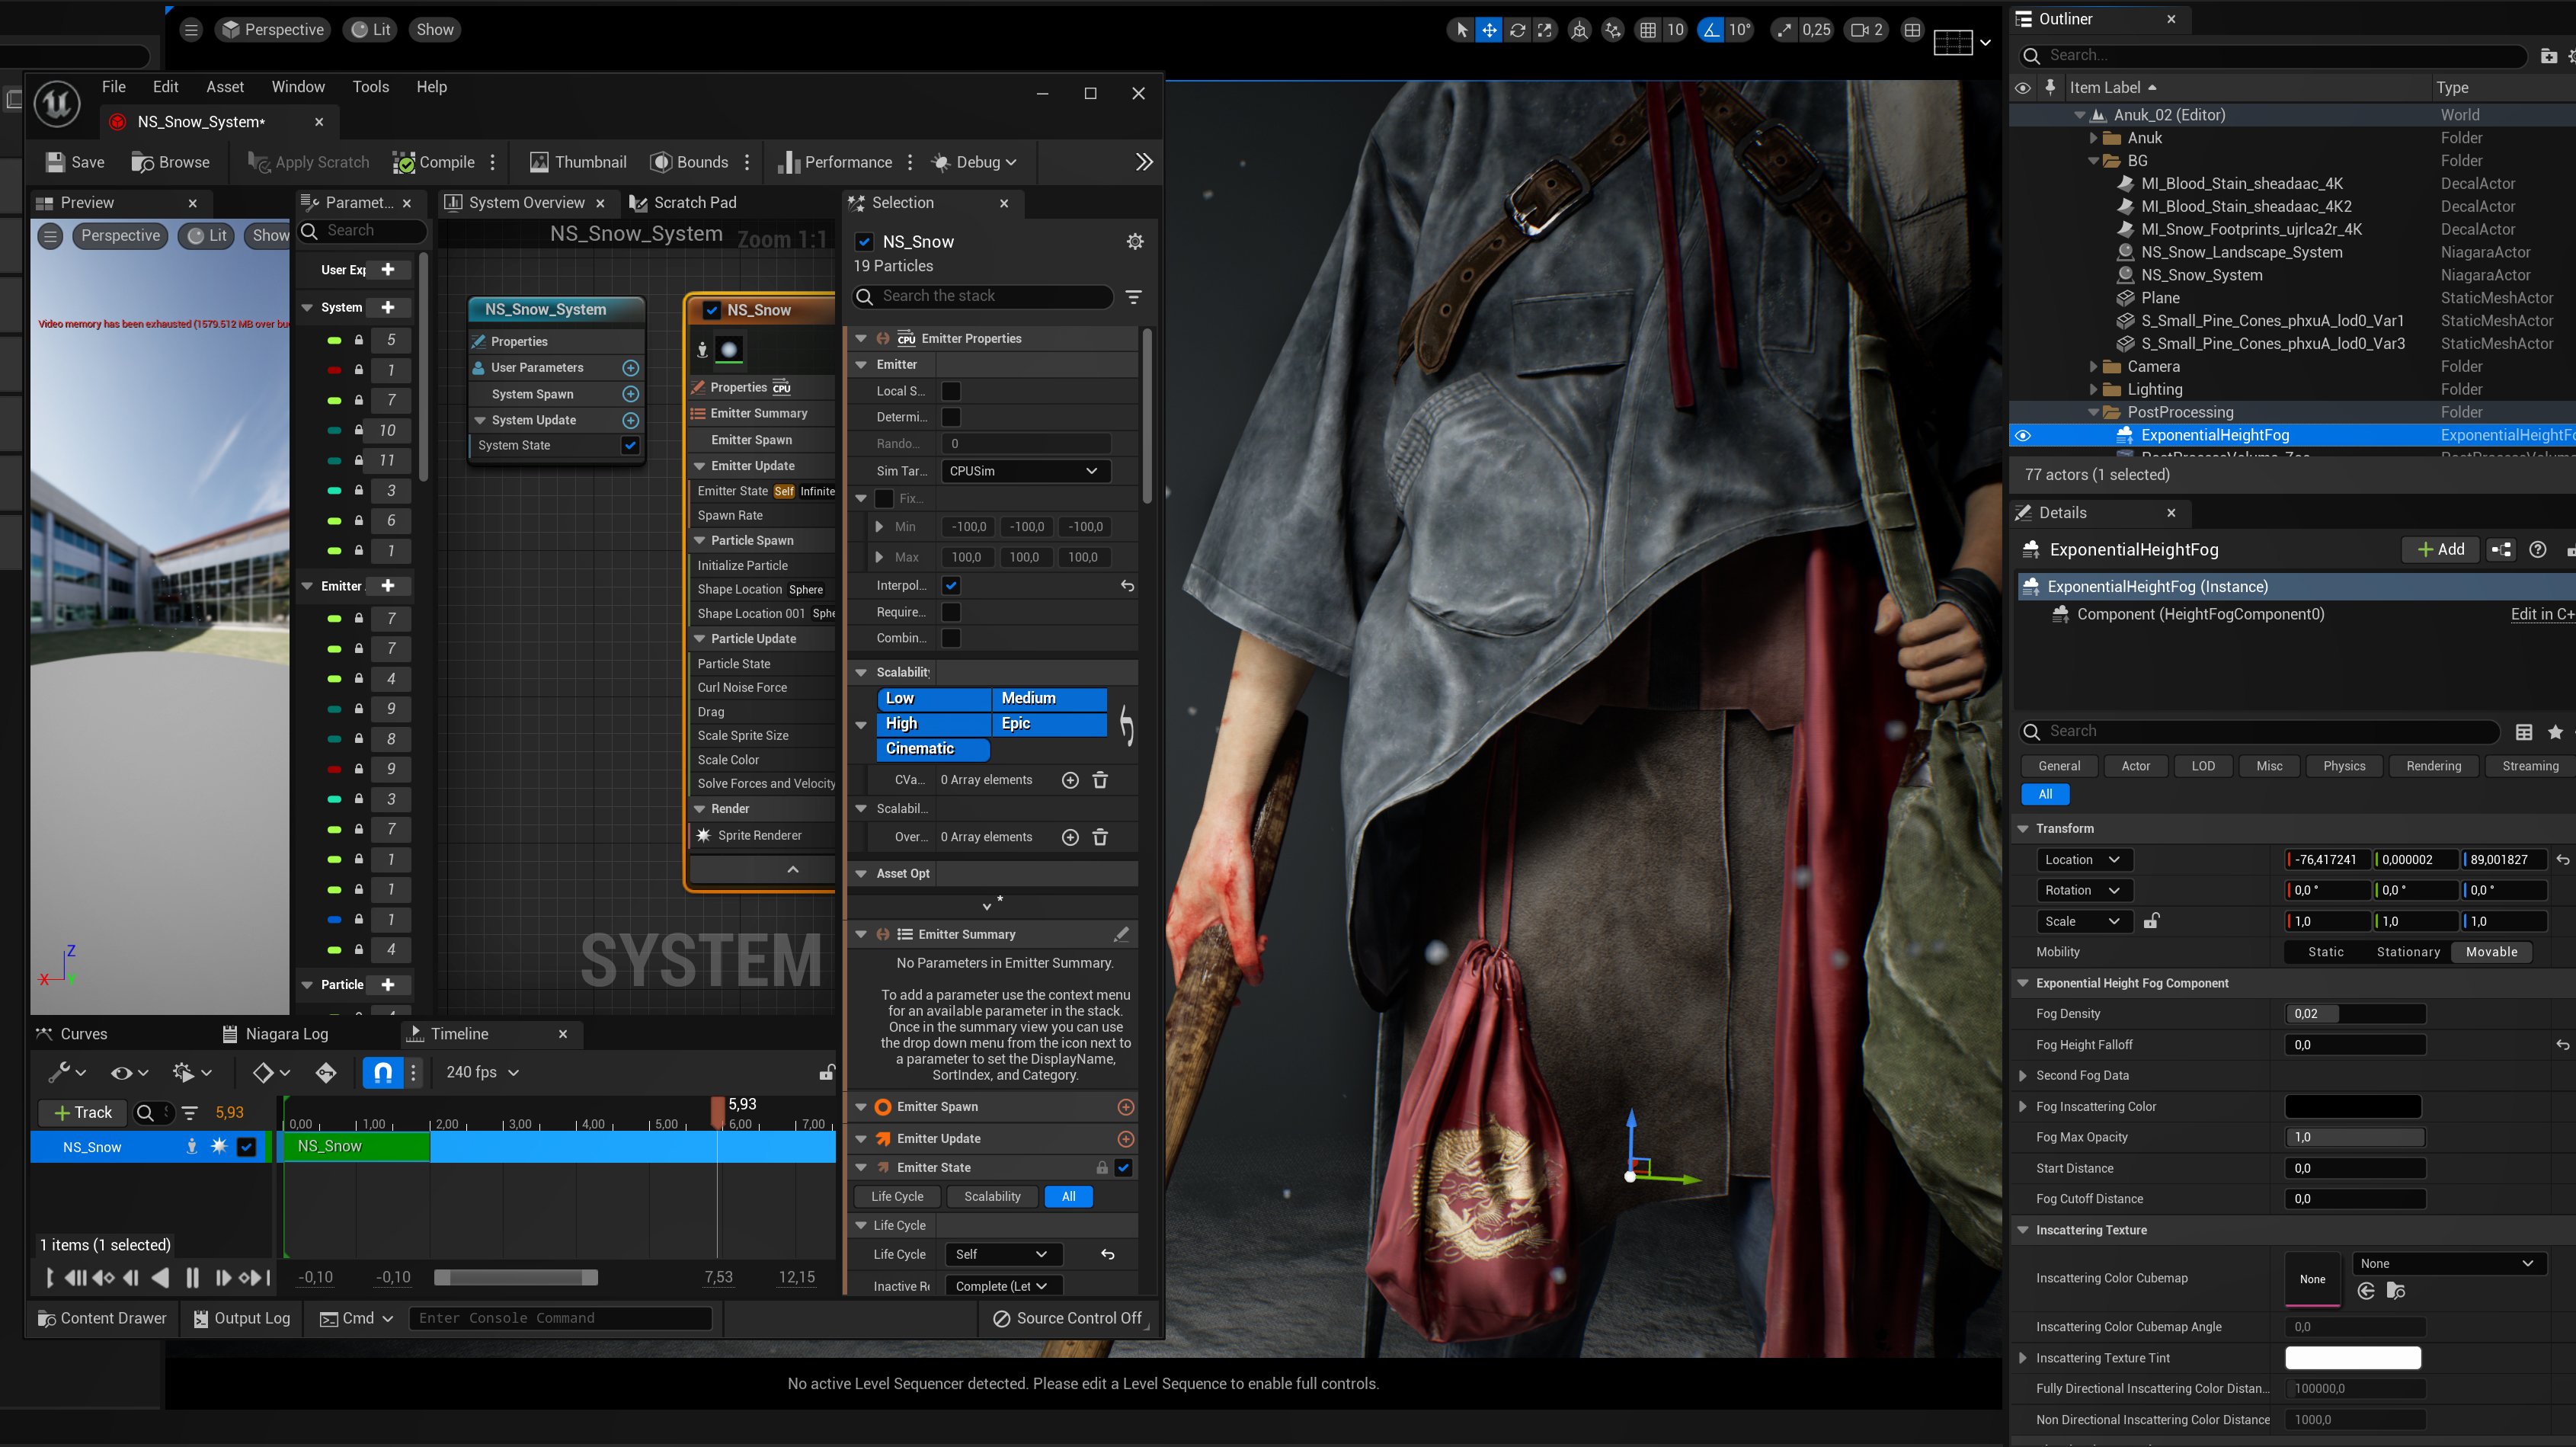
I also downloaded a snow texture from Quixel Megascans and assigned it to a plane. I used an ExponentialHeightFog and Niagara System for snow to create a cinematic effect.

I was able to finish the project in 12 weeks. In retrospect, a significant part of that time was spent on research and studying solutions for the lookdev side of the project.
Thank you for taking a look!


Comments (4)