
Architectural Visualisation


Hi, I am here submitting my very first rendered school project, explaining my year evolution as a 3D student. And how I went from scratch to this successful render.

Here's my entry for this year Rookie Awards, in the Architectural Visualisation category. It is my very first rendered school project, with texturing and lighting, and I am really proud of how well it turned out.
We had one month to fully reproduce a reference image from Ikea. We had to modelise the furnitures, texture them and recreate a atmosphere thanks to the lighting and camera parameters.
First, I will talk briefly about me. As I said, I am studying 3D, since september 2022. Before school, I did few tries with blocking and lowpoly scenes, basically following YouTube videos. I want to share here my evolution during my year of studies at Brassart school.
I will introduce respectively, the full process of my architectural project and quickly my texturing work referenced to the MeetMat contest.
Architectural Visualisation Process Breakdown - Start November 14th 2022, Due Date December 16th 2022.


We started of looking for a reference image that we would like to reproduce. I was looking for a scene composed of differents materials and textures. I ended up choosing this reference because we can find wood, metal, glass, vegetation, and above all, cloth, something I wanted to understand and then train with the simulations. I also liked the vertical composition and the centered subject.
Next, I made a moodboard, composed of the furnitures, and dimensions, I had to replicate. I made sure to highlight the details that made my image look realistic, like imperfections, dust, or screws. Then I went on 3DSMax, layed the perspective lines, the camera and blocked the overall room.


The modelisation step was rather easy, most of my objects were simple. I spent a long time creating the floor tiles because I wasn't able to find a texture which matched, I needed to completely remake the topology. Obviously the cloth simulations were hard to handle with the curtains and the cusin, I went back on it many times to get the desired effect.


The lighting and texturing stages were additionals and it was when I struggled the most : lighting my scene and understanding where the differents lights were coming from. I played a lot with exposure since the window was producing a backlight effect. Getting the right lighting on the glass bottles to make the transparency clear, or on the several fabric textures. The texturing was also complicated, with the subsurface scattering or sheen parameters of the curtain or the roughness variations on the stool. I also added a volumetric light, which was making this fog effect when illuminating the atmosphere density and dust. And, I imported the garlic and flowers assets.

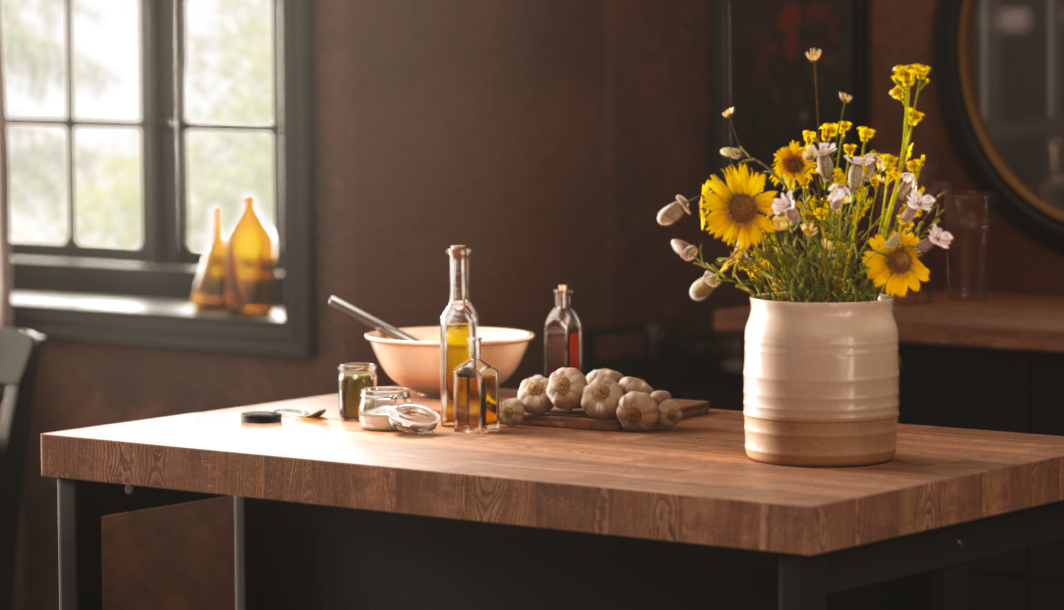
In chronological order during the lighting tests and renderings. I wanted to focus the attention on the kitchen island, so I chose to accentuate the depth blur of the camera.


Finally, I used Photoshop to touch up my image, adding the differents passes, redrawing, stressing important details. It was the last, and a really enhancing part of my process.


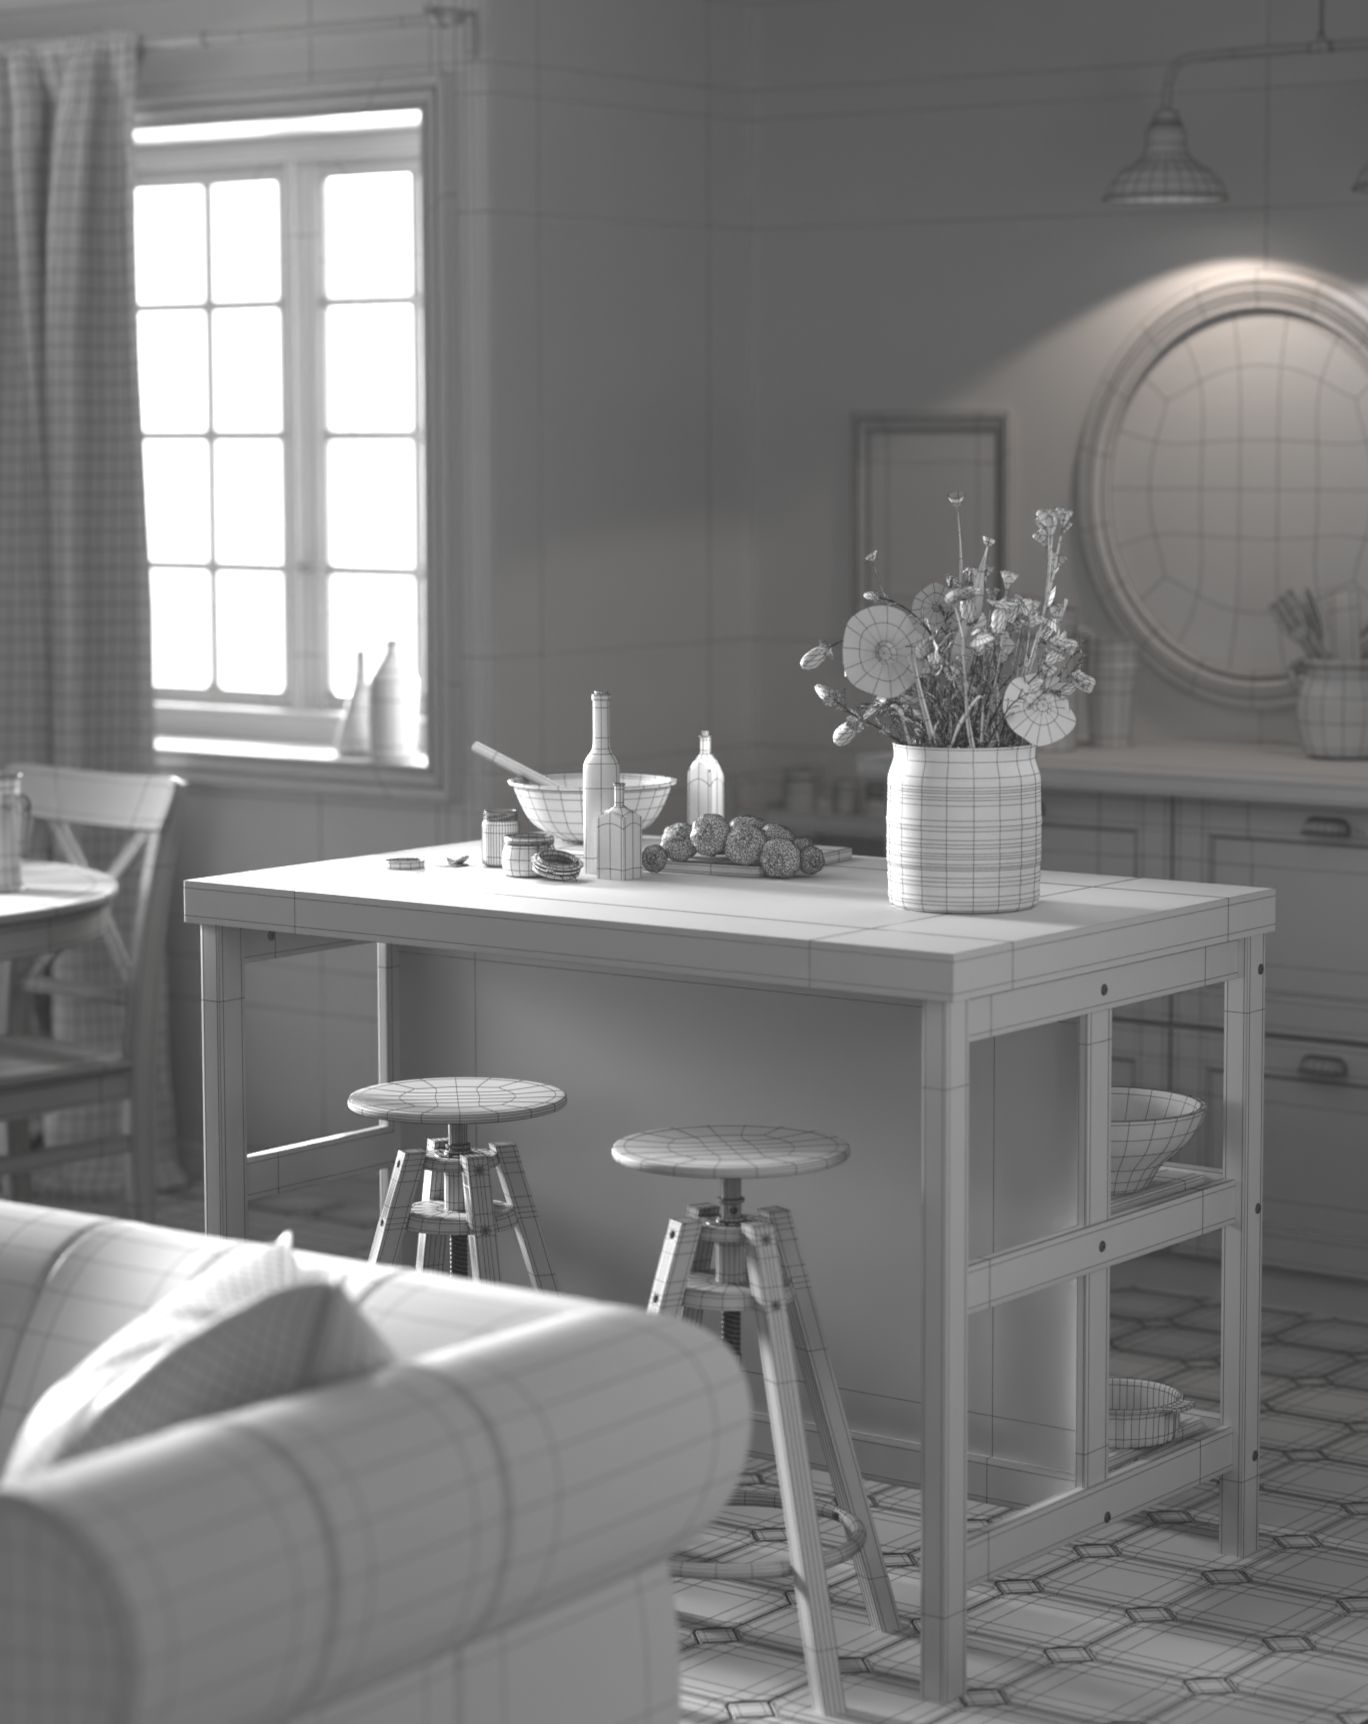
Wireframe views of my scene, where we can see the topology of the floor tile.

Texturing Meet Mat - February 2023

Here is my texturing project, Meet Mat, done in two weeks, during February 2023. I reproduced the great work of Wardblack to train on Substance Painter. It took me some time to understand the displacement mecanics with height maps, but it turned out pretty good in the end.
I have learned a lot about UVs and mostly about combining different textures, using generators and playing with several roughness maps or alpha maps for patterns. I have also worked with emissive a lot to make these screens.


Comments (3)