
Bavly Hanna - 3D Generalist


Hi, I'm Bavly, I'm currently studying at Gnomon School of VFX as a 3D Generalist. I had a dream to work in the film/game industry, and I came to Gnomon knowing nothing about 3D. A few terms in, I found passion in every bit of it, and I'm proud to present a different variety of 3D pieces I've been working on!
Bavly Hanna - 3D Generalist
A Day at Gnomon School of VFX
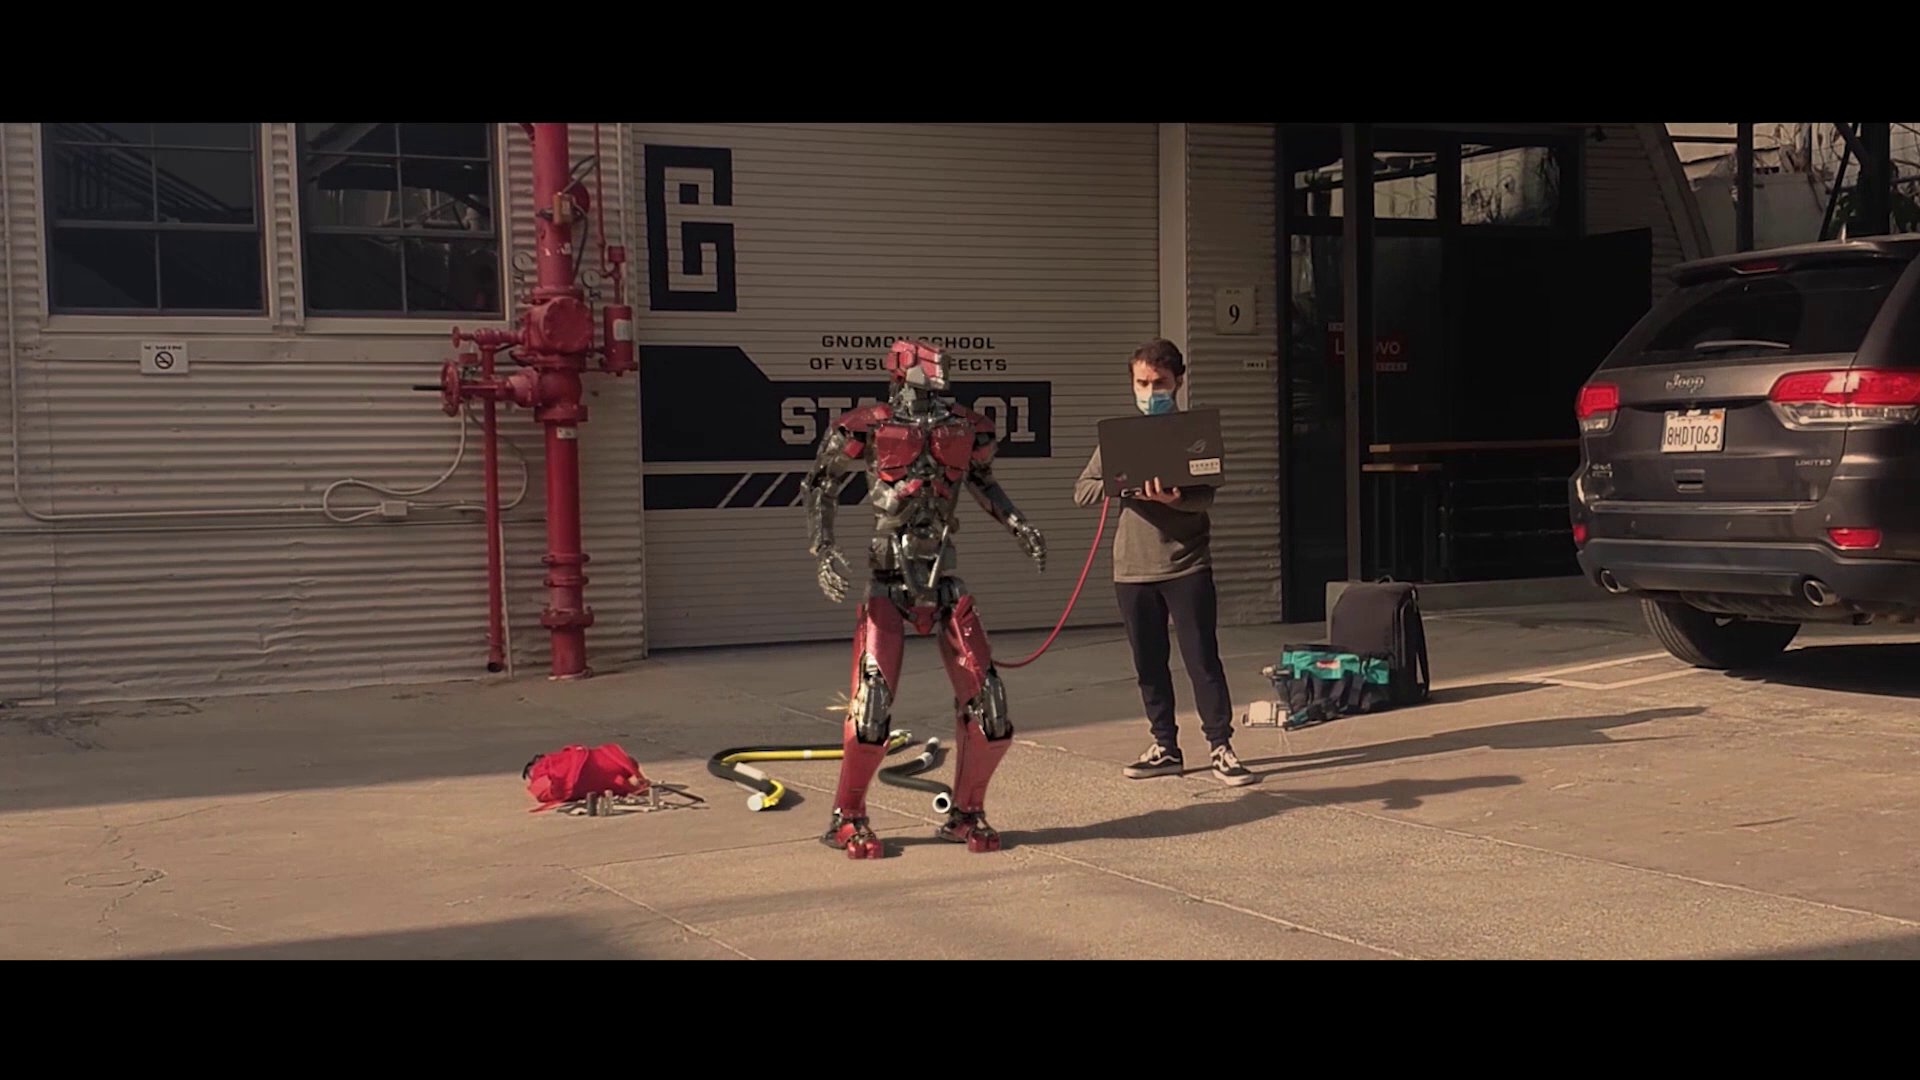
This is one of my most recent projects I've been working on during my first terms at Gnomon. I had an idea of making a short film for my HD Filmmaking and Matchmoving and Integration classes. I imagined what the school will look like in a sci-fi approach; where the 3d models students work on are real life models! I started planning my shots and filming locations at the campus, while coming up with a simple narrative that will connect everything together.
The main inspiration for my film was putting a (HULKBUSTER) in one of the labs we took classes in! Then I had the idea to create a whole story;
It's the final presentation day at Gnomon, where students are working on their final models. We are following the narrative of two students working on a HULKBUSTER! As we walk through the campus, we start seeing models created by other students before the big reveal!
Special thanks to all my friends and staff at Gnomon who helped me create this piece, and to my instructor Stephen McClure!
Enjoy!
Work Progress and Breakdown:
I used PFTrack, Maya, Nuke and After Effects, and for the shooting equipment a few lights, a drone, Sony FS5 camera, a slider, and my phone camera with a gimbal in one of the shots!
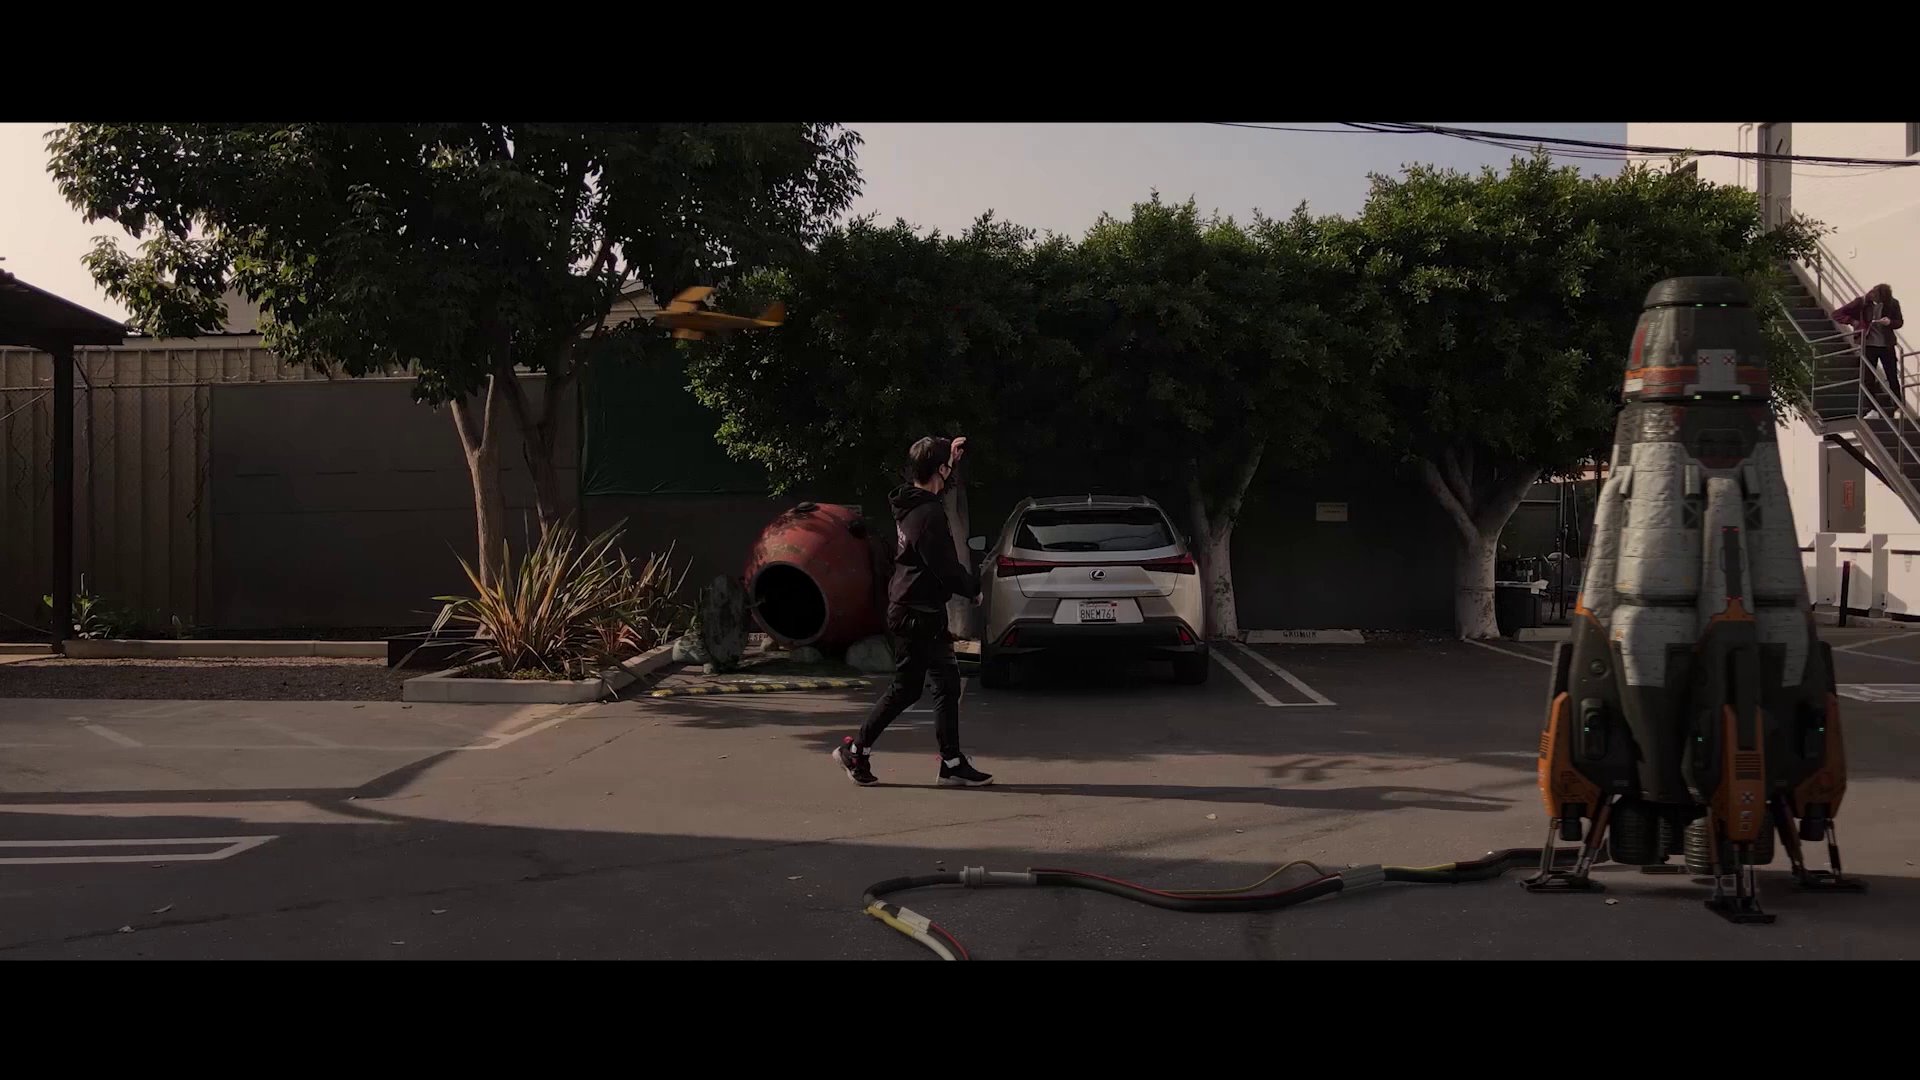
I started my project by planning the best locations for filming at campus, where I'll be able to get a cool look for the models. Setting my self up for success, I picked a timing in the day where I have direct sunlight that will help cast hard shadows on the ground; selling the integration effect better.
I was faced with my first challenge when I found out I had a one hour window to film all my outdoor shots, where sunlight will be visible and will cast hard shadows. Working alone on the project, I had to prepare everything beforehand; creating my storyboards, making arrangements with friends (actors), preparing camera gear and timing of each shot, and making sure I have all my shots ready for matchmoving.
The whole film was shot in one day.


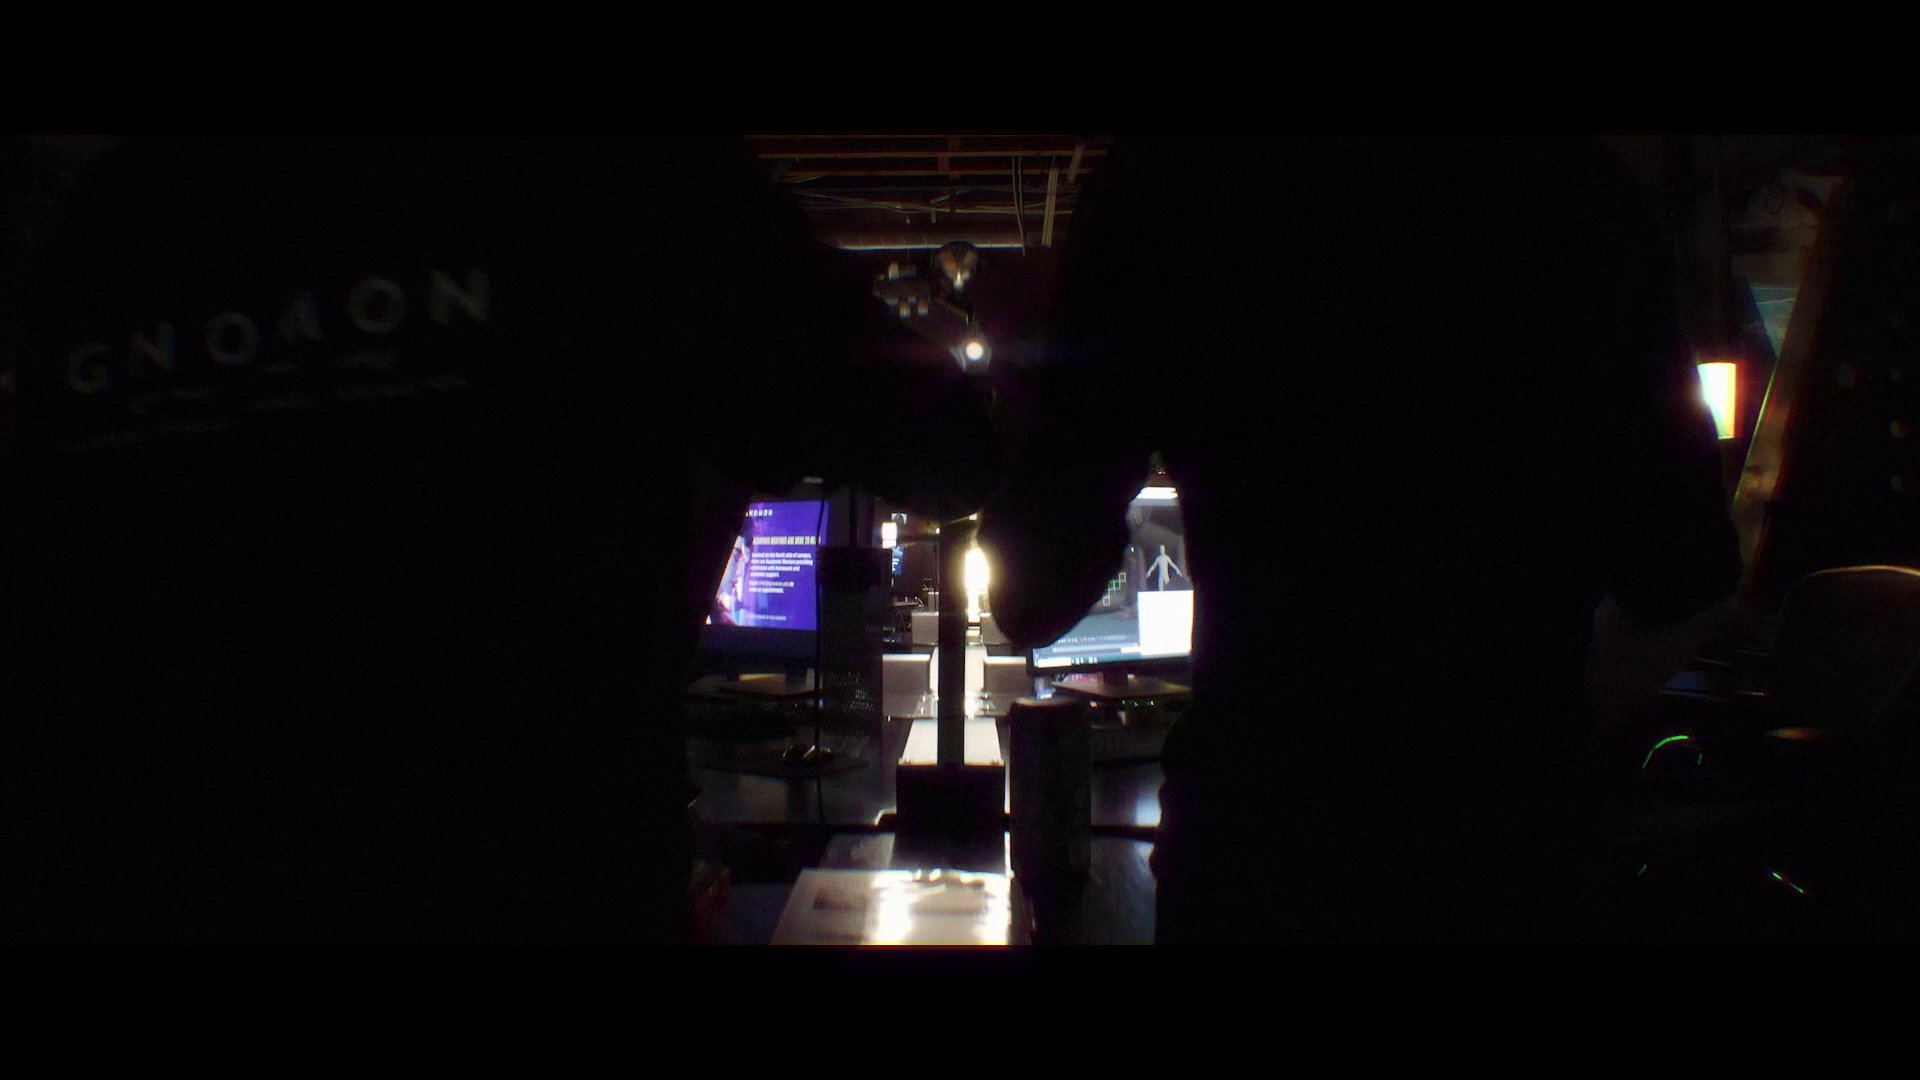
For Indoor sequences, I got inspired by the hologram effects in (Altered Carbon) TV show. I wanted to integrate 2d elements (HUDs) along with 3D elements, creating a hologram effect for my intro. I used different elements including animated HUDs, footage I recorded from my screen typing code and keyed out the background, as well as 3d Models, which I gave a point cloud/ particle look in Ae. Then I color corrected all the elements and put some glow and glitch effects to finish them up after I tracked my scenes in both PFTrack and Ae.


I made sure my shots didn't have a lot of motion blur or fast camera movements, so I adjusted my shutter settings accordingly to set myself up for clean tracking in PFTrack.
For the 3D models, I matched the lighting on the model to the scene by eye, lifting up and grading some areas in Nuke, since I didn't have time to take HDRIs and had to finish filming quickly. I rendered different passes to have more control with color correction and look dev in post.


For this shot I had to use my phone camera. Although I used a phone gimbal, the shot was very shaky, and I spent the time stabilizing it (using software as well as manually moving tranforms in some frames) to make it as smooth as possible. I tracked the shaky footage first in PFTrack and used it for integration, then I stabilized it along with the 3d Model in it.


I also fixed many sliding issues in Maya and Nuke/Ae after getting the best results possible from PFTrack.


Some shots had too much occlusion which gave me some challenges in tracking, so I painted roto masks and adjusted many trackers to minimize errors in PFTrack.
Rotoscoping was fun! I wanted to get a very clean roto for the Hulkbuster sequence, so I spent the time rotoscoping the actors, desks and computer screens frame by frame to have perfect results.
Compositing is key! I always find that 90% of the work done; tracking the shots, integrating and color grading the models will leave the scene looking fake and boring. The last 10% of work is always like the cherry on top. I threw in some glimmer, glow and lens effects, noise and grain, chromatic aberration and a heatwave effect to show hot steam coming out of the Hulkbuster, which blended the model more with the background.
I also played with lighting in Maya and in compositing along with sound effects that added a lot to the scene.
I used the drone in this shot as well.


I had so much fun creating this project, and for my first time doing matchmoving and integration I learned a lot of great techniques that would help me create even better projects moving forward!
Verdansk Hangar
Verdansk Hangar is one of my recent projects that I've worked on right after I finished my film. This is my first project in Unreal Engine 4, created in my Digital Sets class at Gnomon. It is inspired by a game that I grew up playing and has a special place in my heart- Call of Duty.
Opening Unreal for the first time, I was fascinated by how easily I can put elements together and create a whole project in a short amount of time. I really fell in love with the flexibility of the engine, as it allowed me to focus more on the creative process and composition of my piece without being too distracted with the technical side of the software.
This piece gave me confidence to go much bigger in my next projects; to add more elements and create more complex compositions and richer environments.
Work Progress and Breakdown:
Inspired by Call of Duty, I started my project modeling the jeep. I played around with the floor texture to make it look dirty/ oily using the blend material in Unreal. I kept throwing some assets around, not having a specific plan for the composition, letting the piece reveal itself a bit by bit as I build it up, utilizing the engine's power, which was a fun approach.
I also had fun learning Speed Tree and Gaea while working on the project and ended up putting one of the mountains I built in Gaea in the background. I used 2d flipbooks for the smoke and explosion sims, and I composited the snow particles over in Ae.
I added little tweaks including depth of field, color adjustments and anamorphic lens flare using the Post Process Volume in Unreal as I was finishing up. I wanted the piece to have strong saturated colors and lights, to fit the action & flashy look of Call of Duty.


Adventurer's Study
Adventurer's Study is my first 3D project. This one holds a special place in my heart. I played Uncharted 3 as my first PS3 game, and it is reason why I dreamt of working in the industry.
I really loved the aesthetic and style of Uncharted, but long before I played the game, my dad kept an old pair of binoculars, a Yashica camera and some old tin boxes stored in his wardrobe in our house that I always loved to play with, while dressing up like Indiana Jones. It was only natural I'd want to create such an aesthetic for a 3D piece.
Working on it I faced a lot of challenges; I was new to modeling and could only model cubes and cylinders, I knew how to texture a little bit in Hypershade in Maya, and I had no lighting experience.
This piece pushed me to model all the assets one by one, only to find out that I love modeling and actually enjoy the process of UV-ing! Then -thanks to my instructor Tran Ma- I pushed myself to texture the whole scene in Substance Painter.
Work Progress and Breakdown:
I gathered all the reference I needed, and I started modeling the scene a piece by piece. I concentrated on finishing all the assets I need for the scene, but as I was progressing, I was looking out for a nice composition.


SUPERHOT vs Totally Accurate Battle Simulator!
I had a lot of fun creating this narrative and animation. This was made for one of my first animation classes at Gnomon. I came up with the idea and decided to have fun putting it together, not worrying much about the modeling process, which gave me the idea to use characters from these two fun games: SUPERHOT & Totally Accurate Battle Simulator!
I decided to add some VFX to the piece as I was taking my Dynamic Effects classes, using Phoenix (for the fire sim), Bifrost (for the morphing effect), Maya Particle and Fluid Simulations, nCloth, and MASH.
Work Progress and Breakdown:
For the disintegration effect, I used animated B & W masks I created in Ae and plugged one of them to the opacity node of the statue's shader. The other one was slightly modified, and then connected to the particle emission node to control the place of particles' emission on my statue as it disappears by the other map.
The UVs of the statue had to be adjusted beforehand so that the masks I created were usable (since the animation of the masks goes from white to black from top to bottom). I plugged the textures of the statue and shield to the particles so that they inherit the same colors. Then I put some incandescence on the shield's particles that triggers on emission, to give the particles a fiery look.
Finally, the particles movement in space was controlled by connecting it a Maya fluid (smoke) emission, so that they would inherit the same movement of the smoke. I also used a uniform field to blow the particles to the right.
As for the left and right statues, the morphing effect was created using Blend Shape deformer in Maya, while tweaking the effect to be controlled with a controller using Bifrost. The morphing effect is connected to the controller's movement in Y axis (up and down), and the size of the transition between the morphed shapes is controlled by scaling the controller up and down.


The voxels look on the villain was created using MASH. They break when they hit the spear by adding a MASH Dynamics node and making the spear and the ground plane passive colliders.
I also added MASH time and transform nodes, to control the speed of the voxels' disintegration and to shift their position in space to my liking as they disintegrate.


Comments (4)