
Procedural Gingerbread House
Project 2 of 2 for CSANM 258: Scripting for Animation, completed in April 2022.
Procedural Gingerbread House
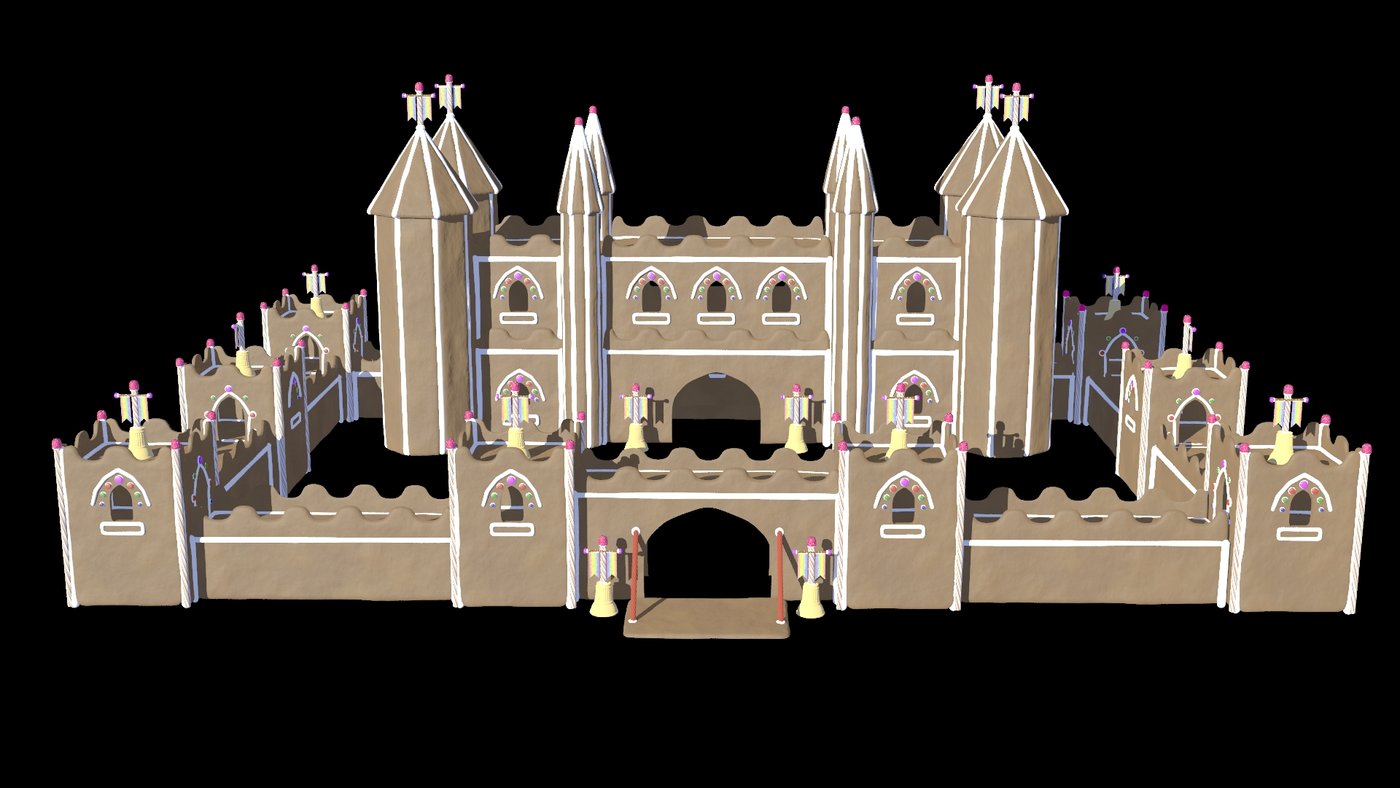
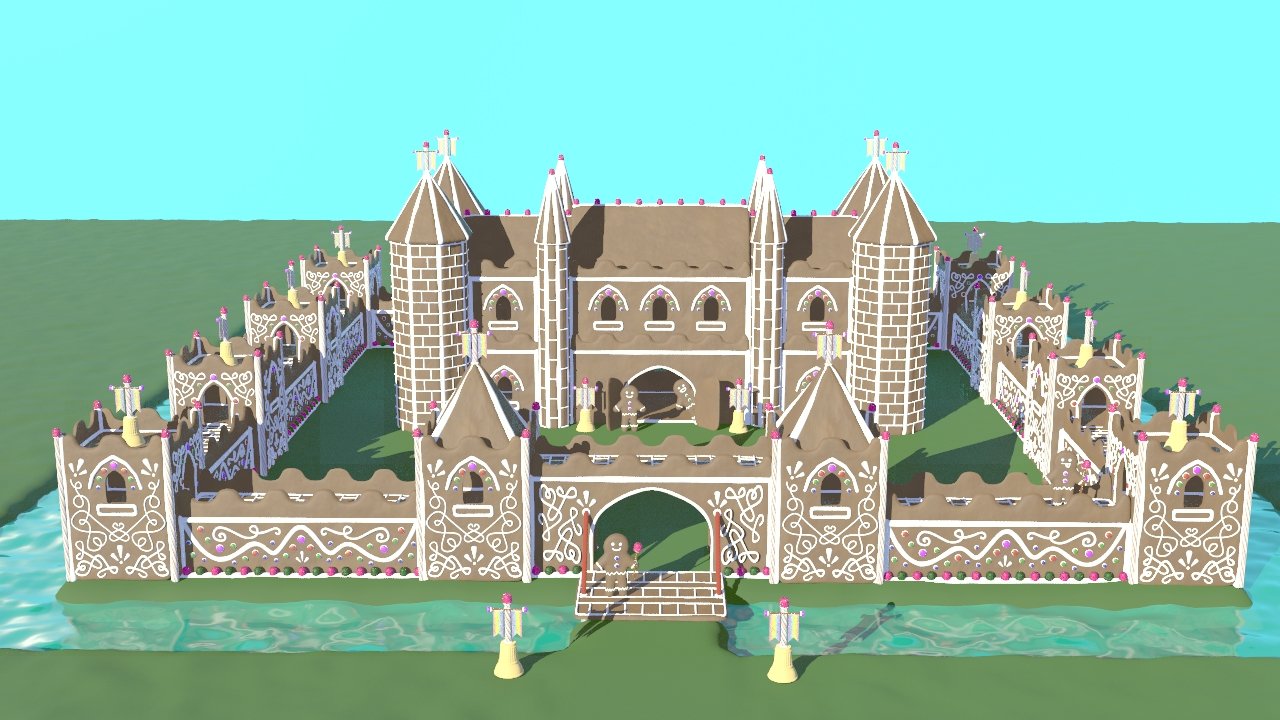
With our first animation tool out of the way, we moved on to learning about scripting in Houdini. This time around we had to automate a Gingerbread house, and I decided it would be fun to build an entire castle.

The main focus of this project was on repeating simple elements and layering them enough to create an interesting whole. So, I started out simple with just a few towers and walls made of gingerbread, then added icing glue and some candy decorations, and just kept going until I had a full castle.

Once the basic shape of the Gingerbread house was done the next part of our assignment was to put together a small set of candies and treats we could use to decorate it. They needed to be versatile and modular enough that they could be used in a variety of different places, and simple enough that using a lot of them wouldn't be too big of a strain on the computer when it came time to actually build the house.

We weren't allowed to model anything in this project by hand, so everything shown here was procedurally modeled in Houdini with geometry nodes. The licorice and mint stick were made by twisting cylinders until the slope of the ridges and stripes looked right, while the candy belts and gumdrops were done with a simple Scatter node and a Copy to Points node referencing the sugar geometry. Additionally, although this class didn't require any shading work, I chose to use what I'd learned in my Shader Programming class to put together some simple shaders for just about everything. The plain candies like the Spree or the gumdrops were almost boring in their simplicity - though getting the roughness, color, and opacity right was still no small task - while the networks for the mint stick, the sugar cone, the candy belt, and the gingerbread were much more involved.

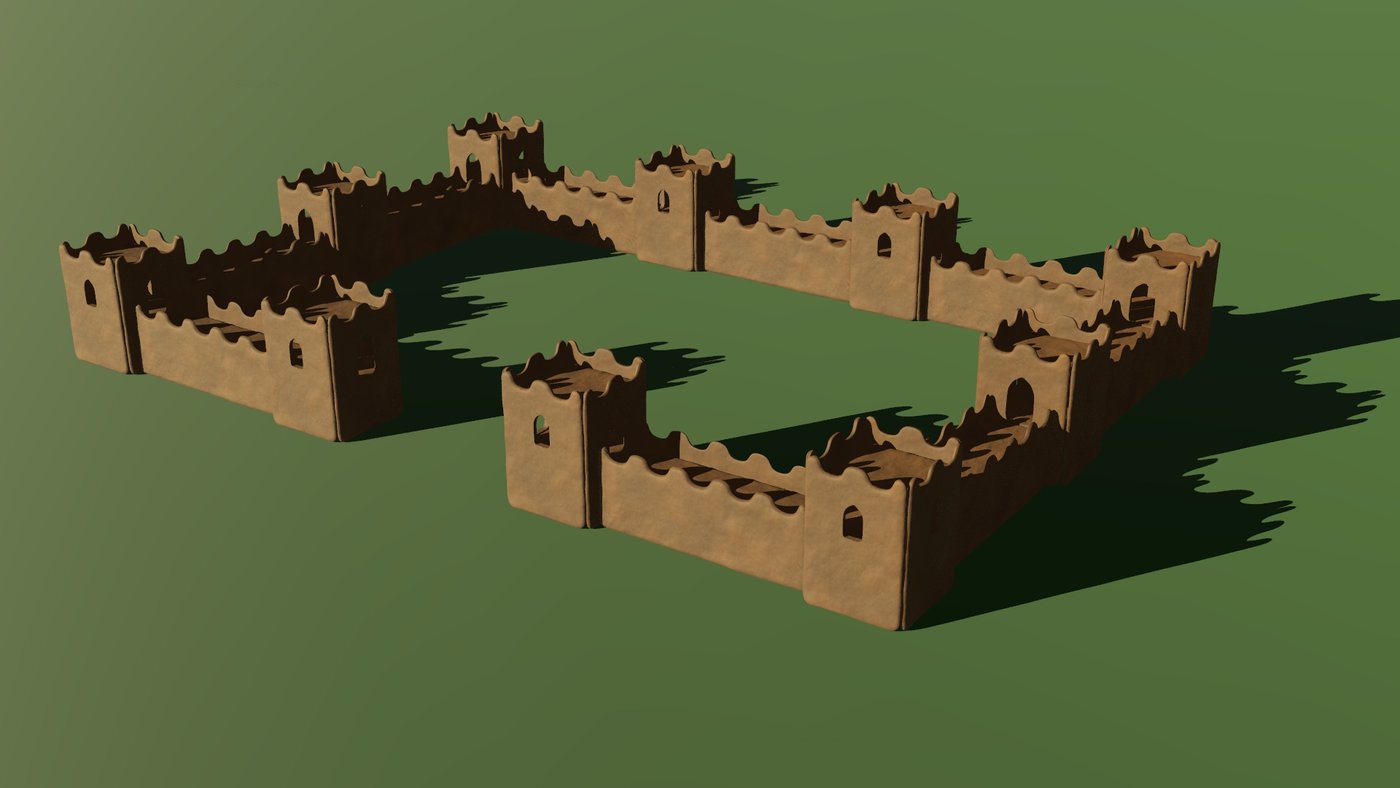
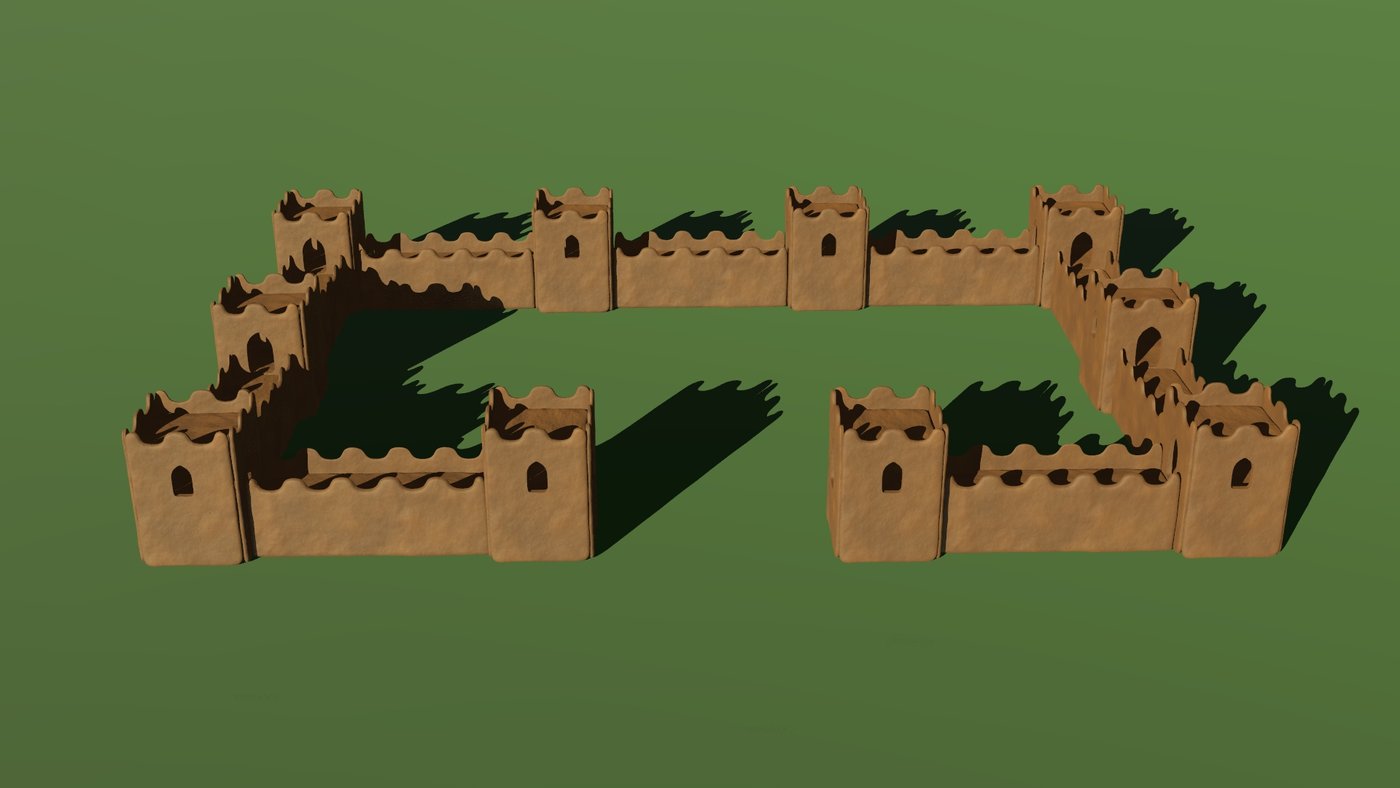
With so much going on in such a complicated and detailed structure, I very quickly discovered that I needed to find a way to simplify the model displayed in the scene view. My computer just couldn't handle so many points of geometry all at once and making changes to the repeated components was a pain if they were all separate copies of the same thing, so most of the castle was built out of Instance object nodes.

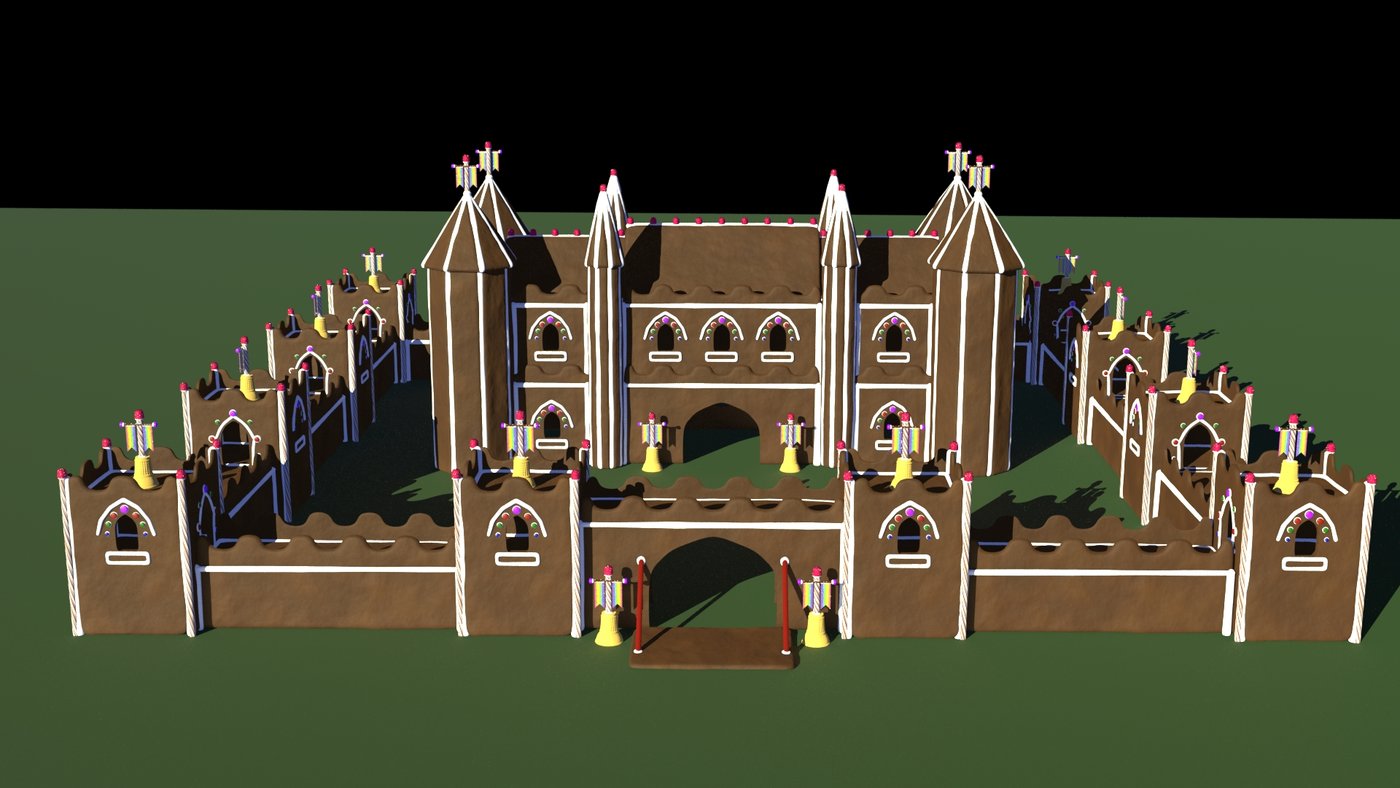
The top down view on the left shows the castle as it was in the scene view, with all the wall and tower components represented with a single origin point for each Instance object, while the front view on the right shows a simple version of the castle as it looks when it is rendered. The only things that weren't instanced were the things that didn't need to be repeated; the castle gate and the main building were unique enough that they had to be modeled on their own, while the towers and walls could be copy-pasted as needed.
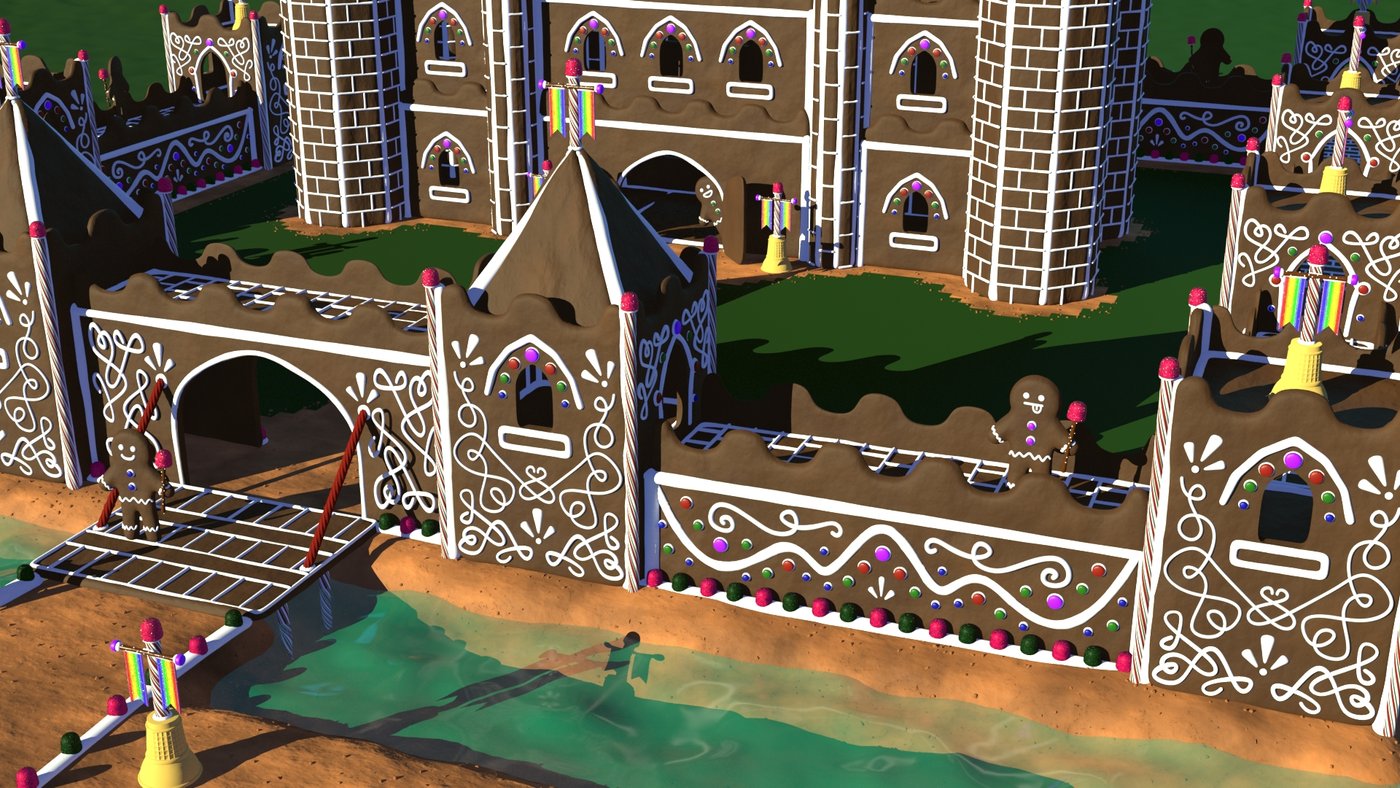
While decorating the wall segments, I realized it would be a nice touch if I could put a brick pattern on the walkways between the towers. I didn't want to place each line for every row and every individual brick by hand, so this was where automation really came into play. By specifying the length and width of the area to cover in bricks and the number of rows and columns in the pattern, my tool would automatically run all the necessary calculations to figure out the length of each line and the spacing between them, then build the geometry to those specifications.
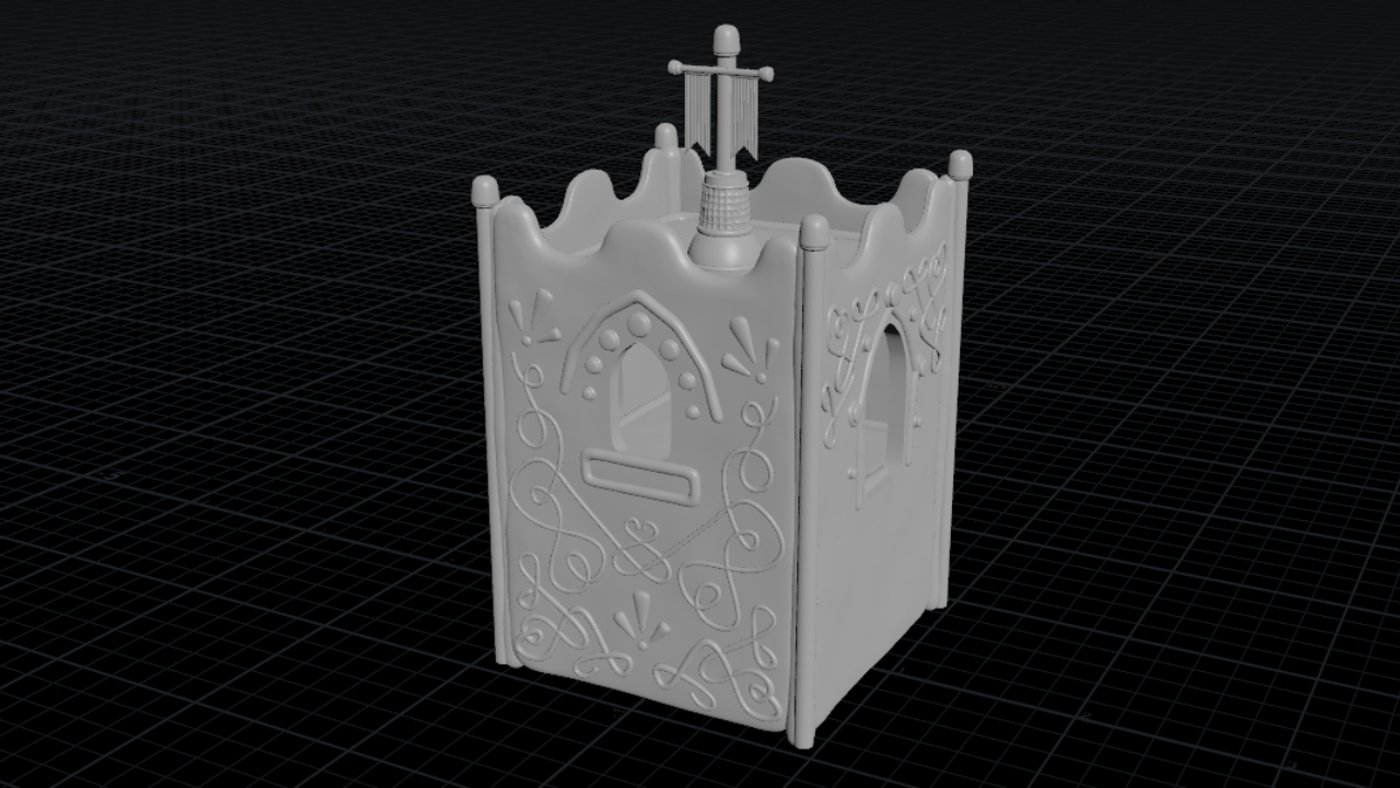
Once that was done, I used my newfound powers of automation to make a tool for building the castle's towers. With just one network I could make a tower with any number of sides, any height, and any width, and I borrowed the bricklaying code to decorate the walls. All I had to do was wire up the length and width of the brick tool to the height of the tower and the width of each wall, and the bricks were ready to go.
The hardest part of the tower's programming was definitely the roof. The walls were just a simple copy and paste operation once the first wall had been sized correctly, but the roof required me to calculate just about every dimension I could think of from multiple different directions. If I had chosen not to give the user the option to change the number of sides or give the roof an overhang then the math probably would have been a lot simpler, but I really wanted to take the time to challenge myself and build a versatile tool that could quickly provide me with a lot of design options.
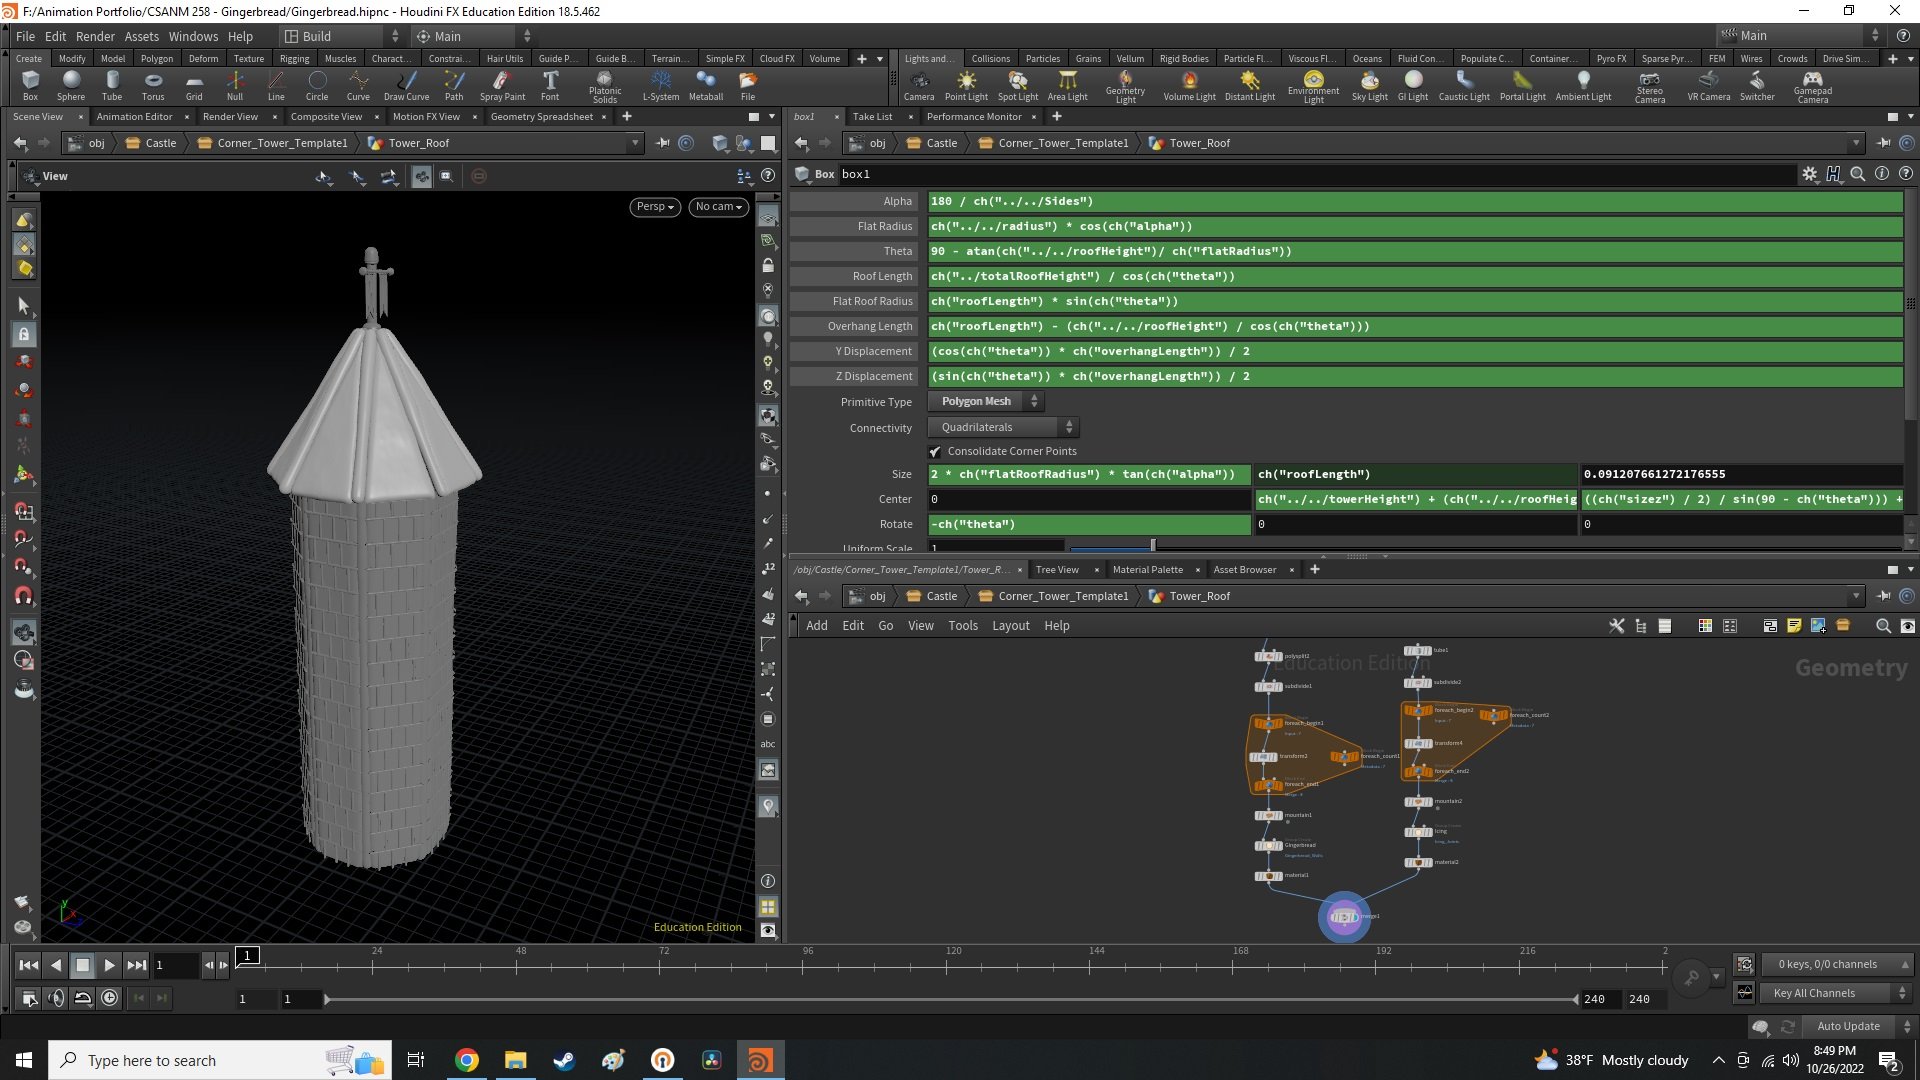
As it was the tower's roof involved a lot of trigonometry just to make sure it had the right number of sides, the correct slope on both the gingerbread panels and lines of icing, proper spacing between each of the panels, and was lined up with the rest of the tower. Note how changing the length of the overhang doesn't change the overall height of the roof - that feature alone was deceptively complicated, and the code shown here isn't even half of what it took to build the entire roof. The icing between the panels needed to line up with the corners of the tower rather than the flat planes of the walls, so it had to have its own set of measurements and calculations to find the angle of the slope, the length of each line, and the displacement from the center before any of it could be copied and rotated into place.
All in all it was a frustrating experience with way more trigonometry than I had imagined going into it, but in the end I like how it turned out. Once I got it working, it was a lot of fun to see the pieces of the tower grow and shrink with the changing parameters.
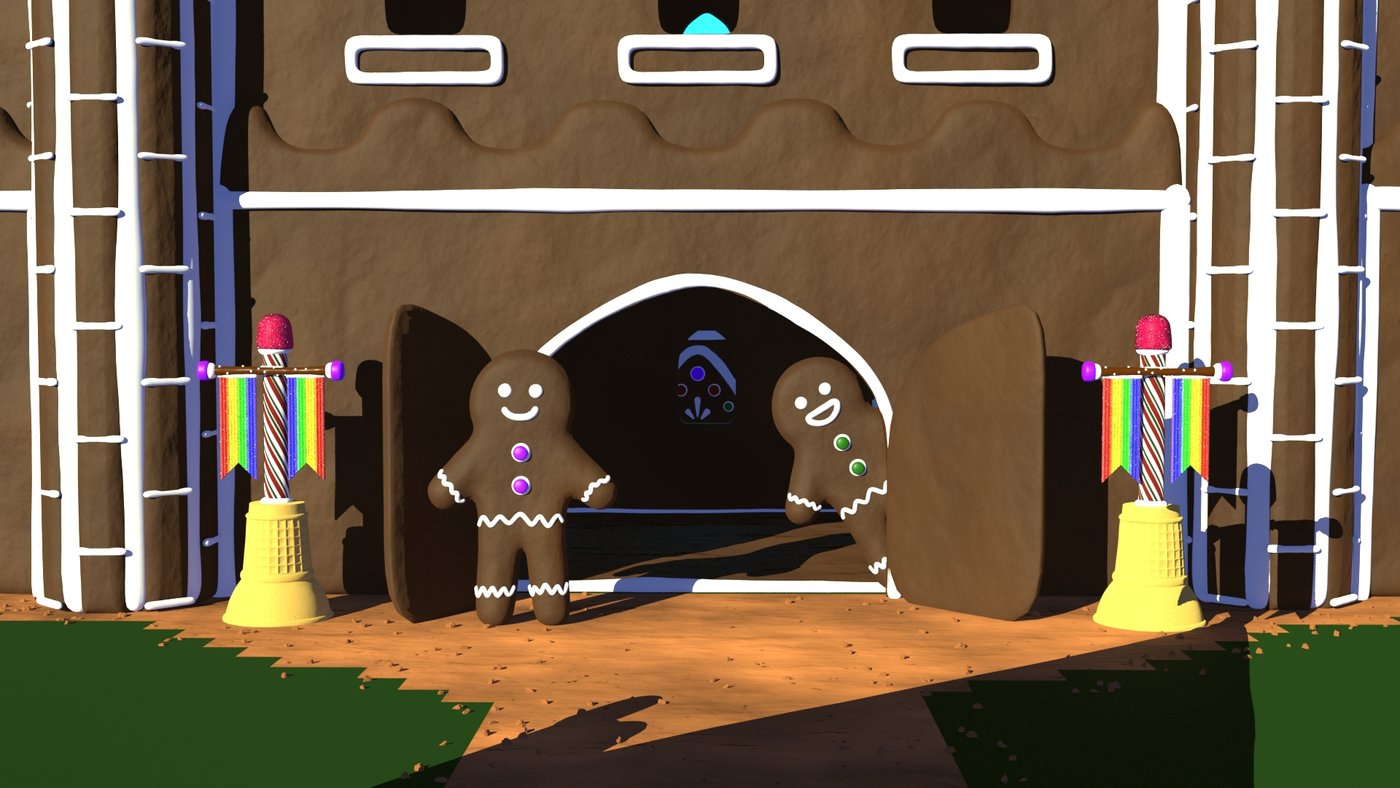
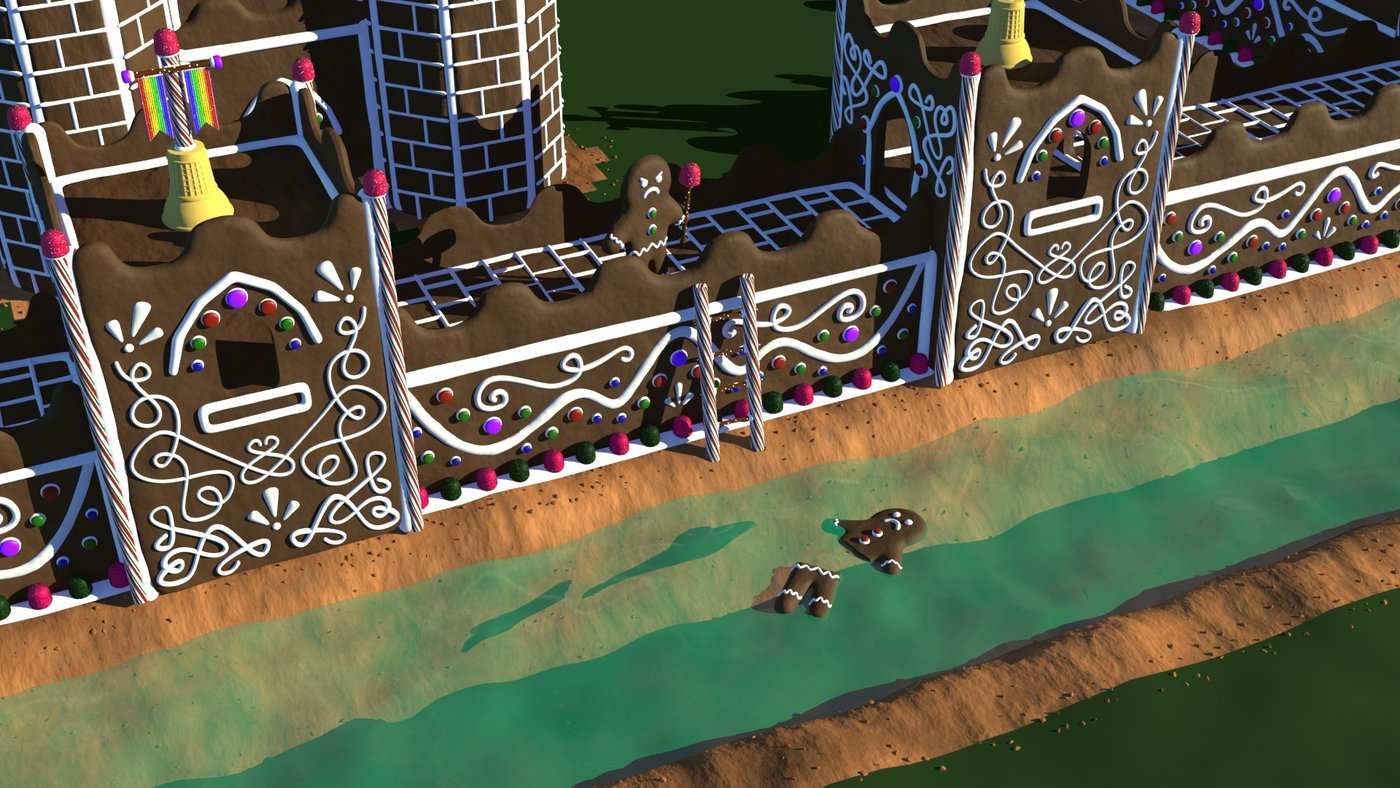
After the castle was done I still had some time before the submission was due to keep adding details, and I think I had the most fun setting up the gingerbread men around the grounds.
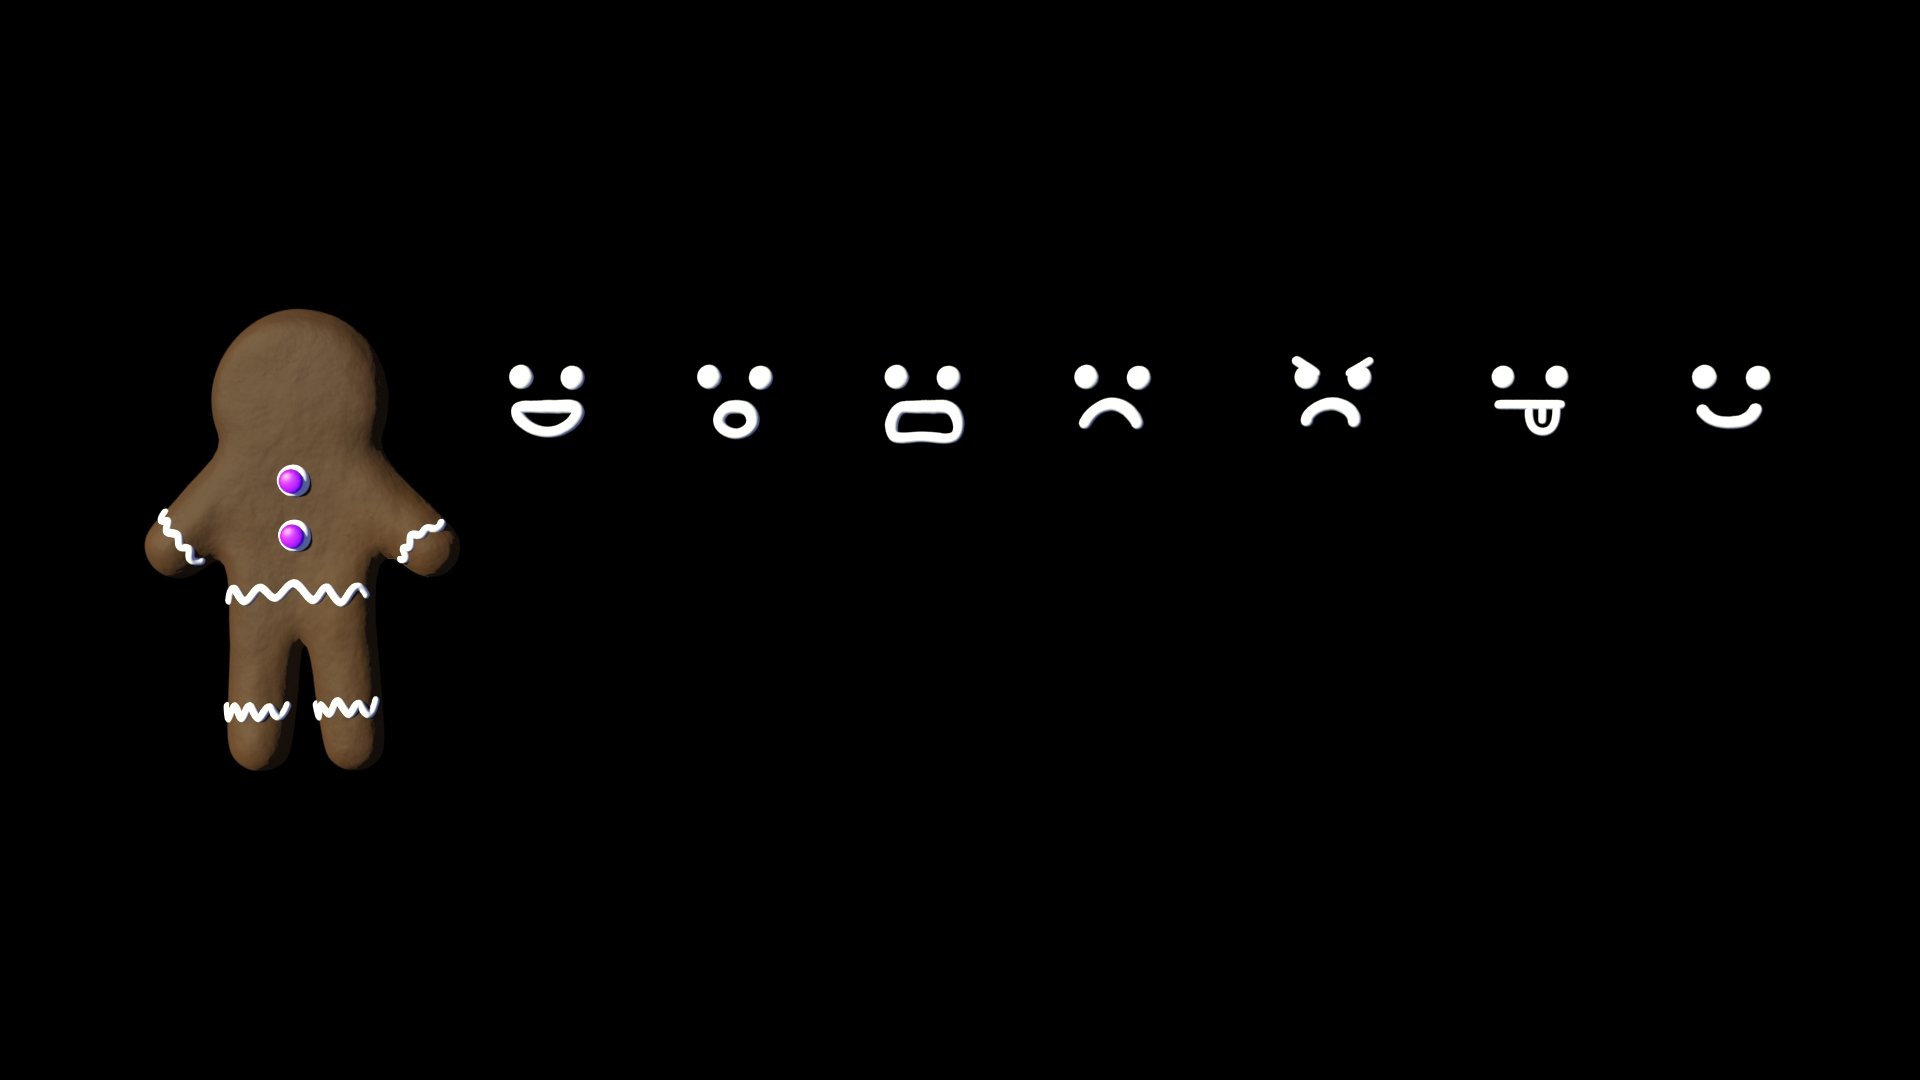
Once again, instancing saved the day. None of the gingerbread men seen in the finished renders were actually there in the scene. Instead, I used a single model like a paper doll to figure out the location for each one and then instanced in a copy of my chosen face and body. The bodies and faces were modeled separately to allow me to easily mix and match button colors and expressions without needing a whole new model for every combination.
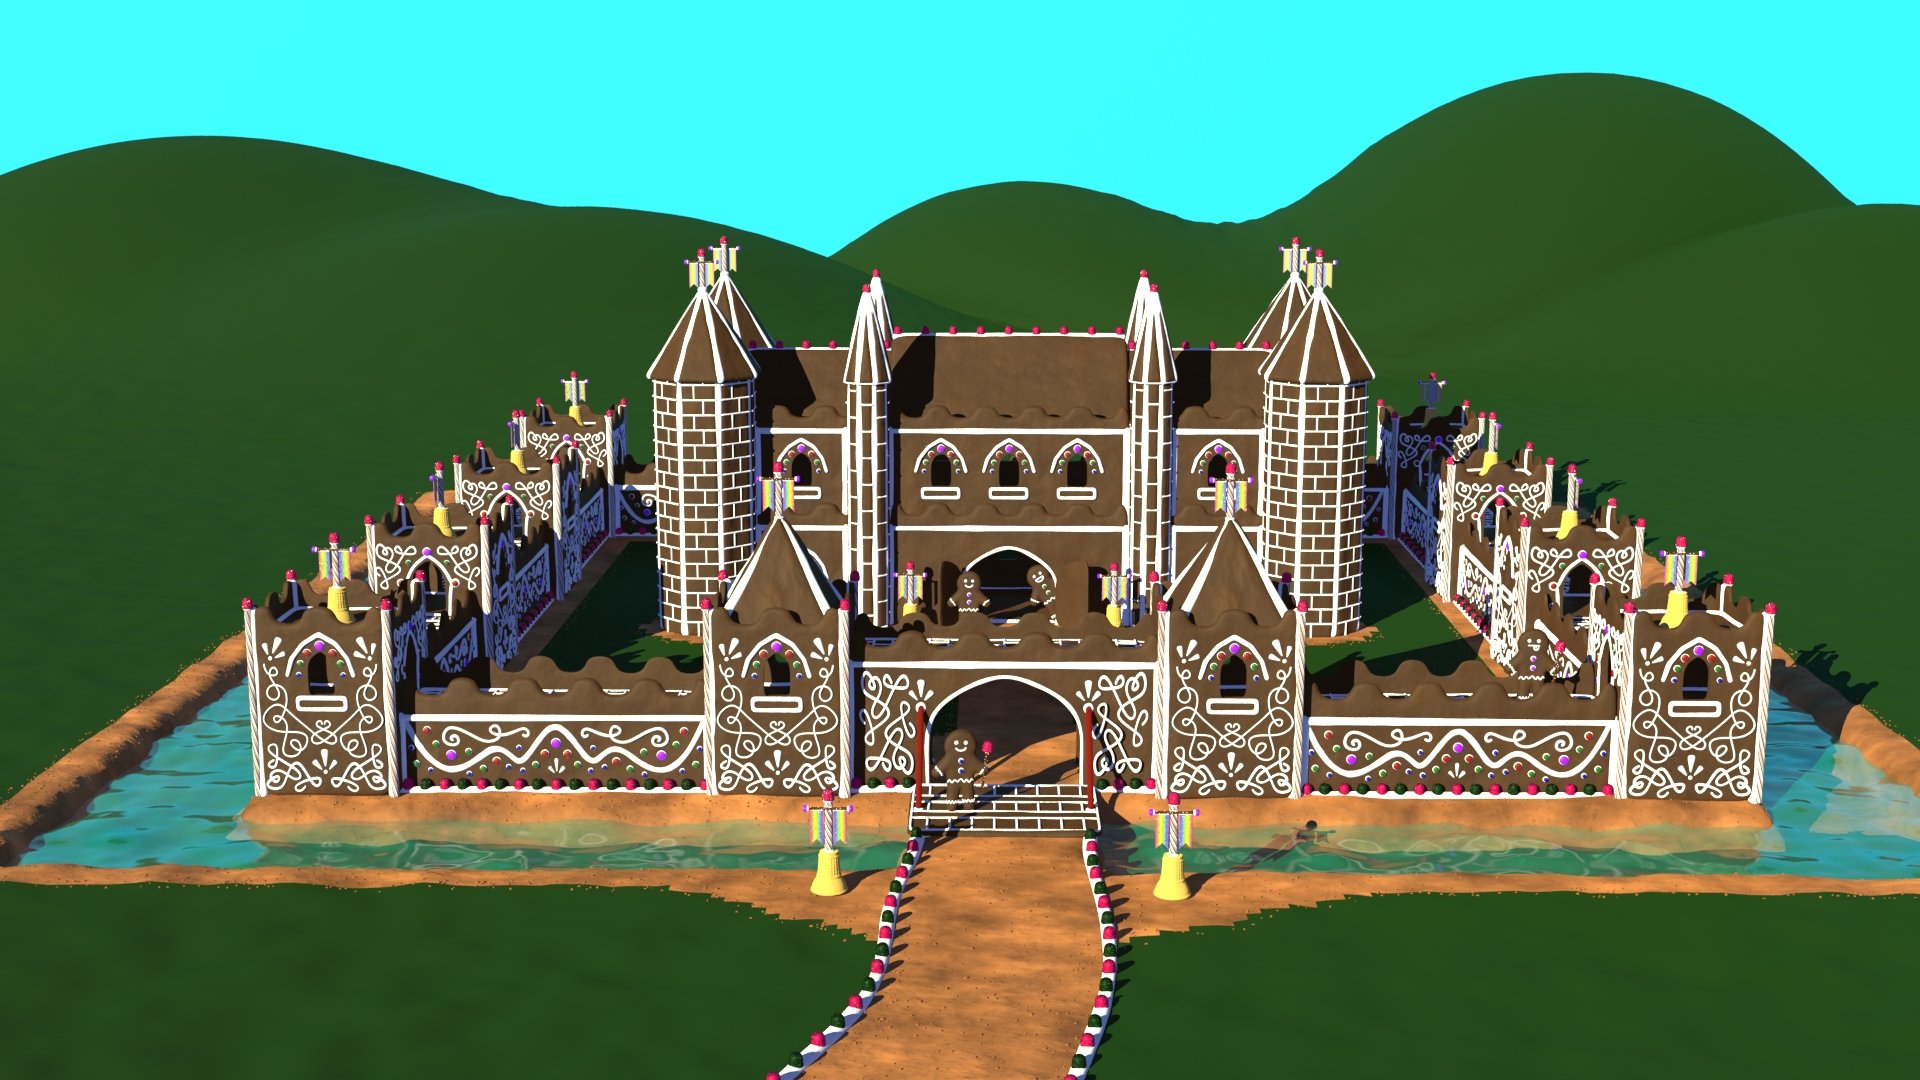

Once the entire castle with all of its resident gingerbread men was finished, all that was left to do was put together a nice context for it to inhabit. The gingerbread shader was repurposed into a graham cracker shader to represent the dirt on the road and around the moat and walls, crumbs were scattered on top of the shaded parts of the plane to give the dirt a little more texture, and some hills were put into the background with some simple Metaballs and a Bulge node. The lighting was adjusted to be a little warmer and a little less washed out, and I couldn't help but add in one more gingerbread man. As a treat.


Comments (0)
This project doesn't have any comments yet.