
Mario Leone | Environment Artist / Generalist


I'm excited to share my entry for Rookies 2024! I've worked hard on this project and included detailed breakdowns for anyone who's interested. My project 'NATURE', aims to capture the beauty of different biomes. Over four months, I created 12 environments LIVE connecting Unreal Engine and Nuke! Thank you ❤️
Mario Leone | Environment Artist / Generalist
NATURE - An Exploration of Our Planet
Welcome to my project "Nature"
I've spent four months immersed in my work at Think Tank, focused on capturing the beauty of our planet across various biomes. In this project, I've created 12 environments, each reflecting nature's incredible diversity and beauty. Thanks to my mentor Benjamin Hollrigl, friends, and everyone for the support and encouragement. Let's connect and explore more together! Responsible for all aspects but megascans.
To enhance the experience and immerse yourself in it, I would suggest you to watch it in 4k on a pc and with headphones ❤️
A project of this size can seem daunting, that's why I will share with you, very detailed insights about my workflow, and as you will soon find out, it is definitely an unconventional one. Are you ready?
Blockout & Layout

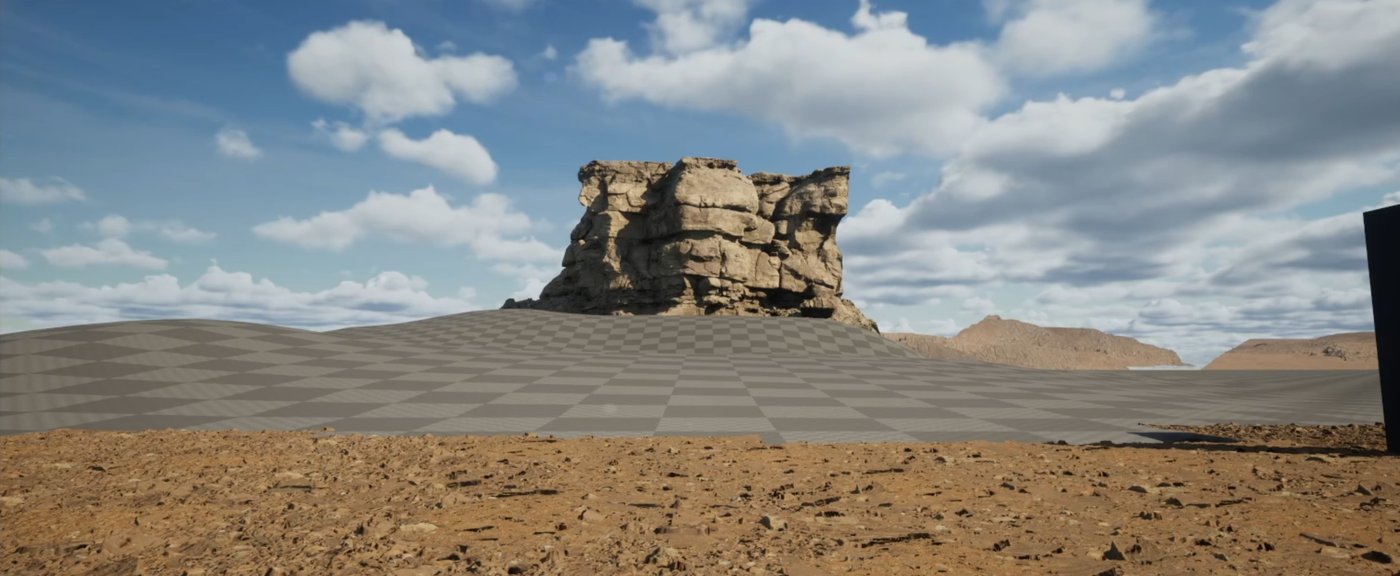
To start, I created basic environments, focused on composition, and set up camera animations to guide the project. Using wide-angle lenses like in landscape photography added depth to the scenes. To improve compositions, I used grid overlays in Unreal Engine's cinematic viewer and focused on slow camera movements to convey calmness.
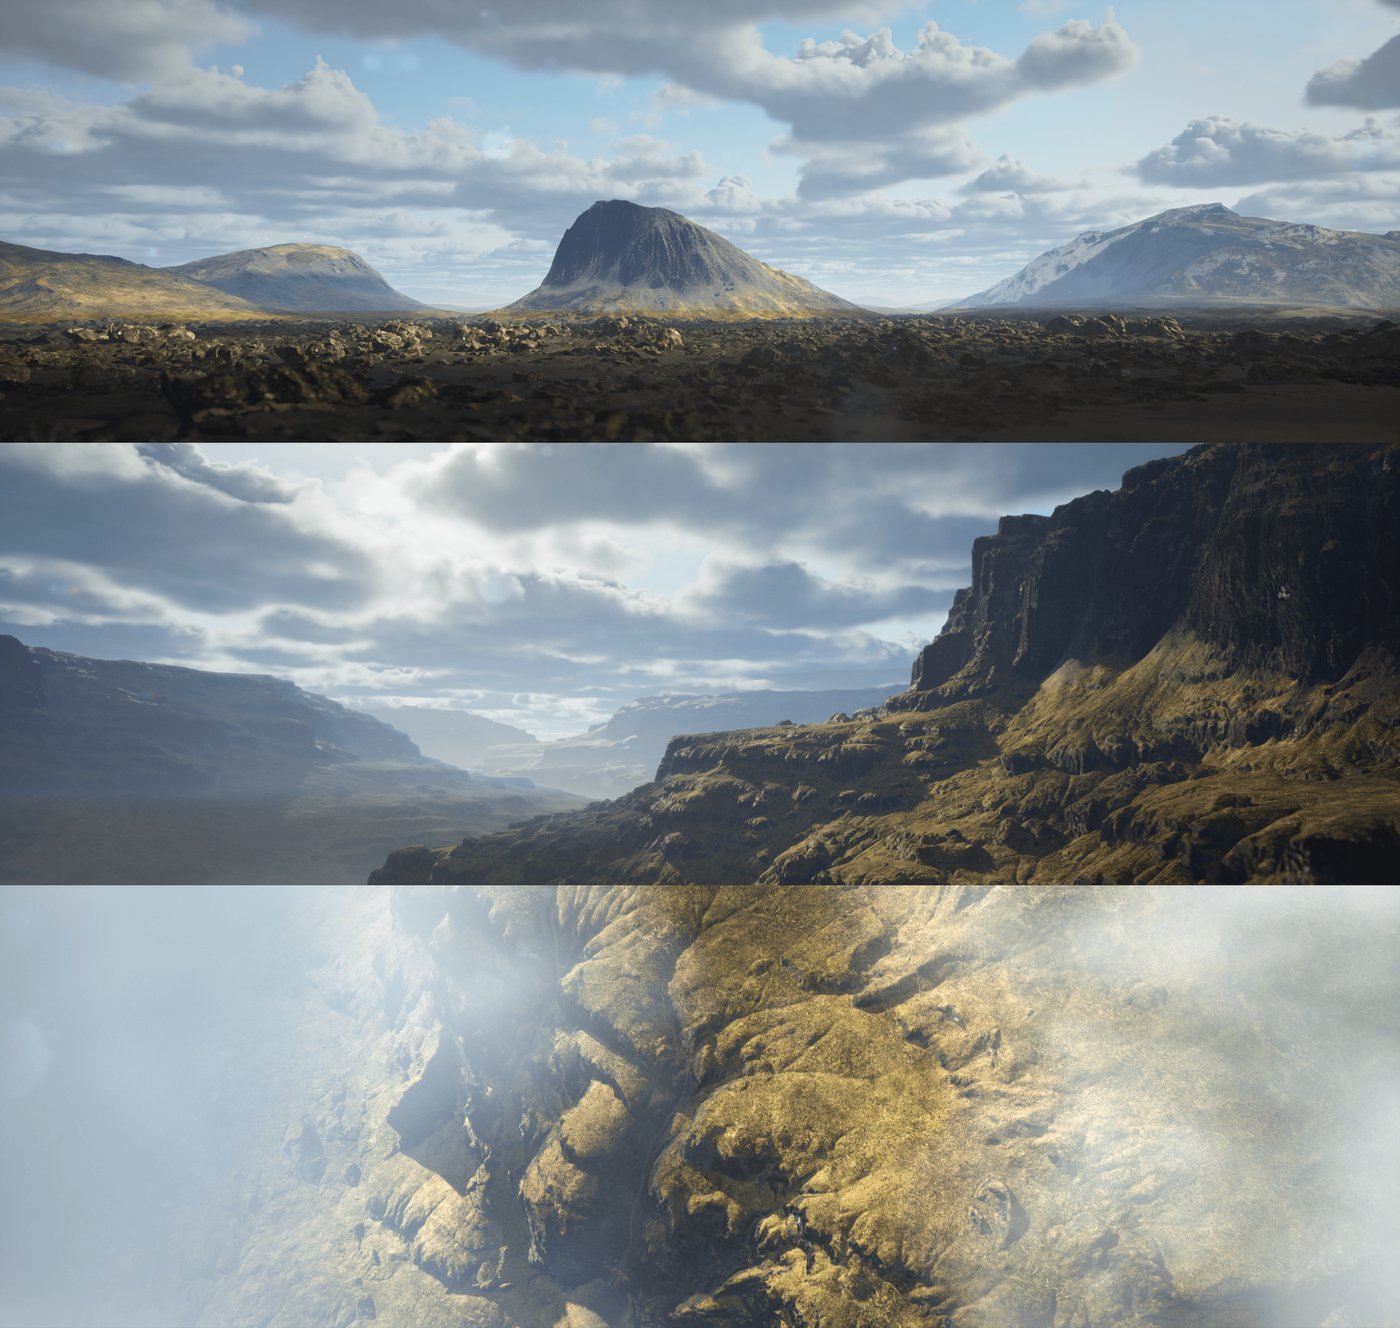
Terrains

Earth's diverse terrains, shaped by water and wind, inspired my designs. I experimented in Gaea until satisfied, focusing on simple but highly art directable setups
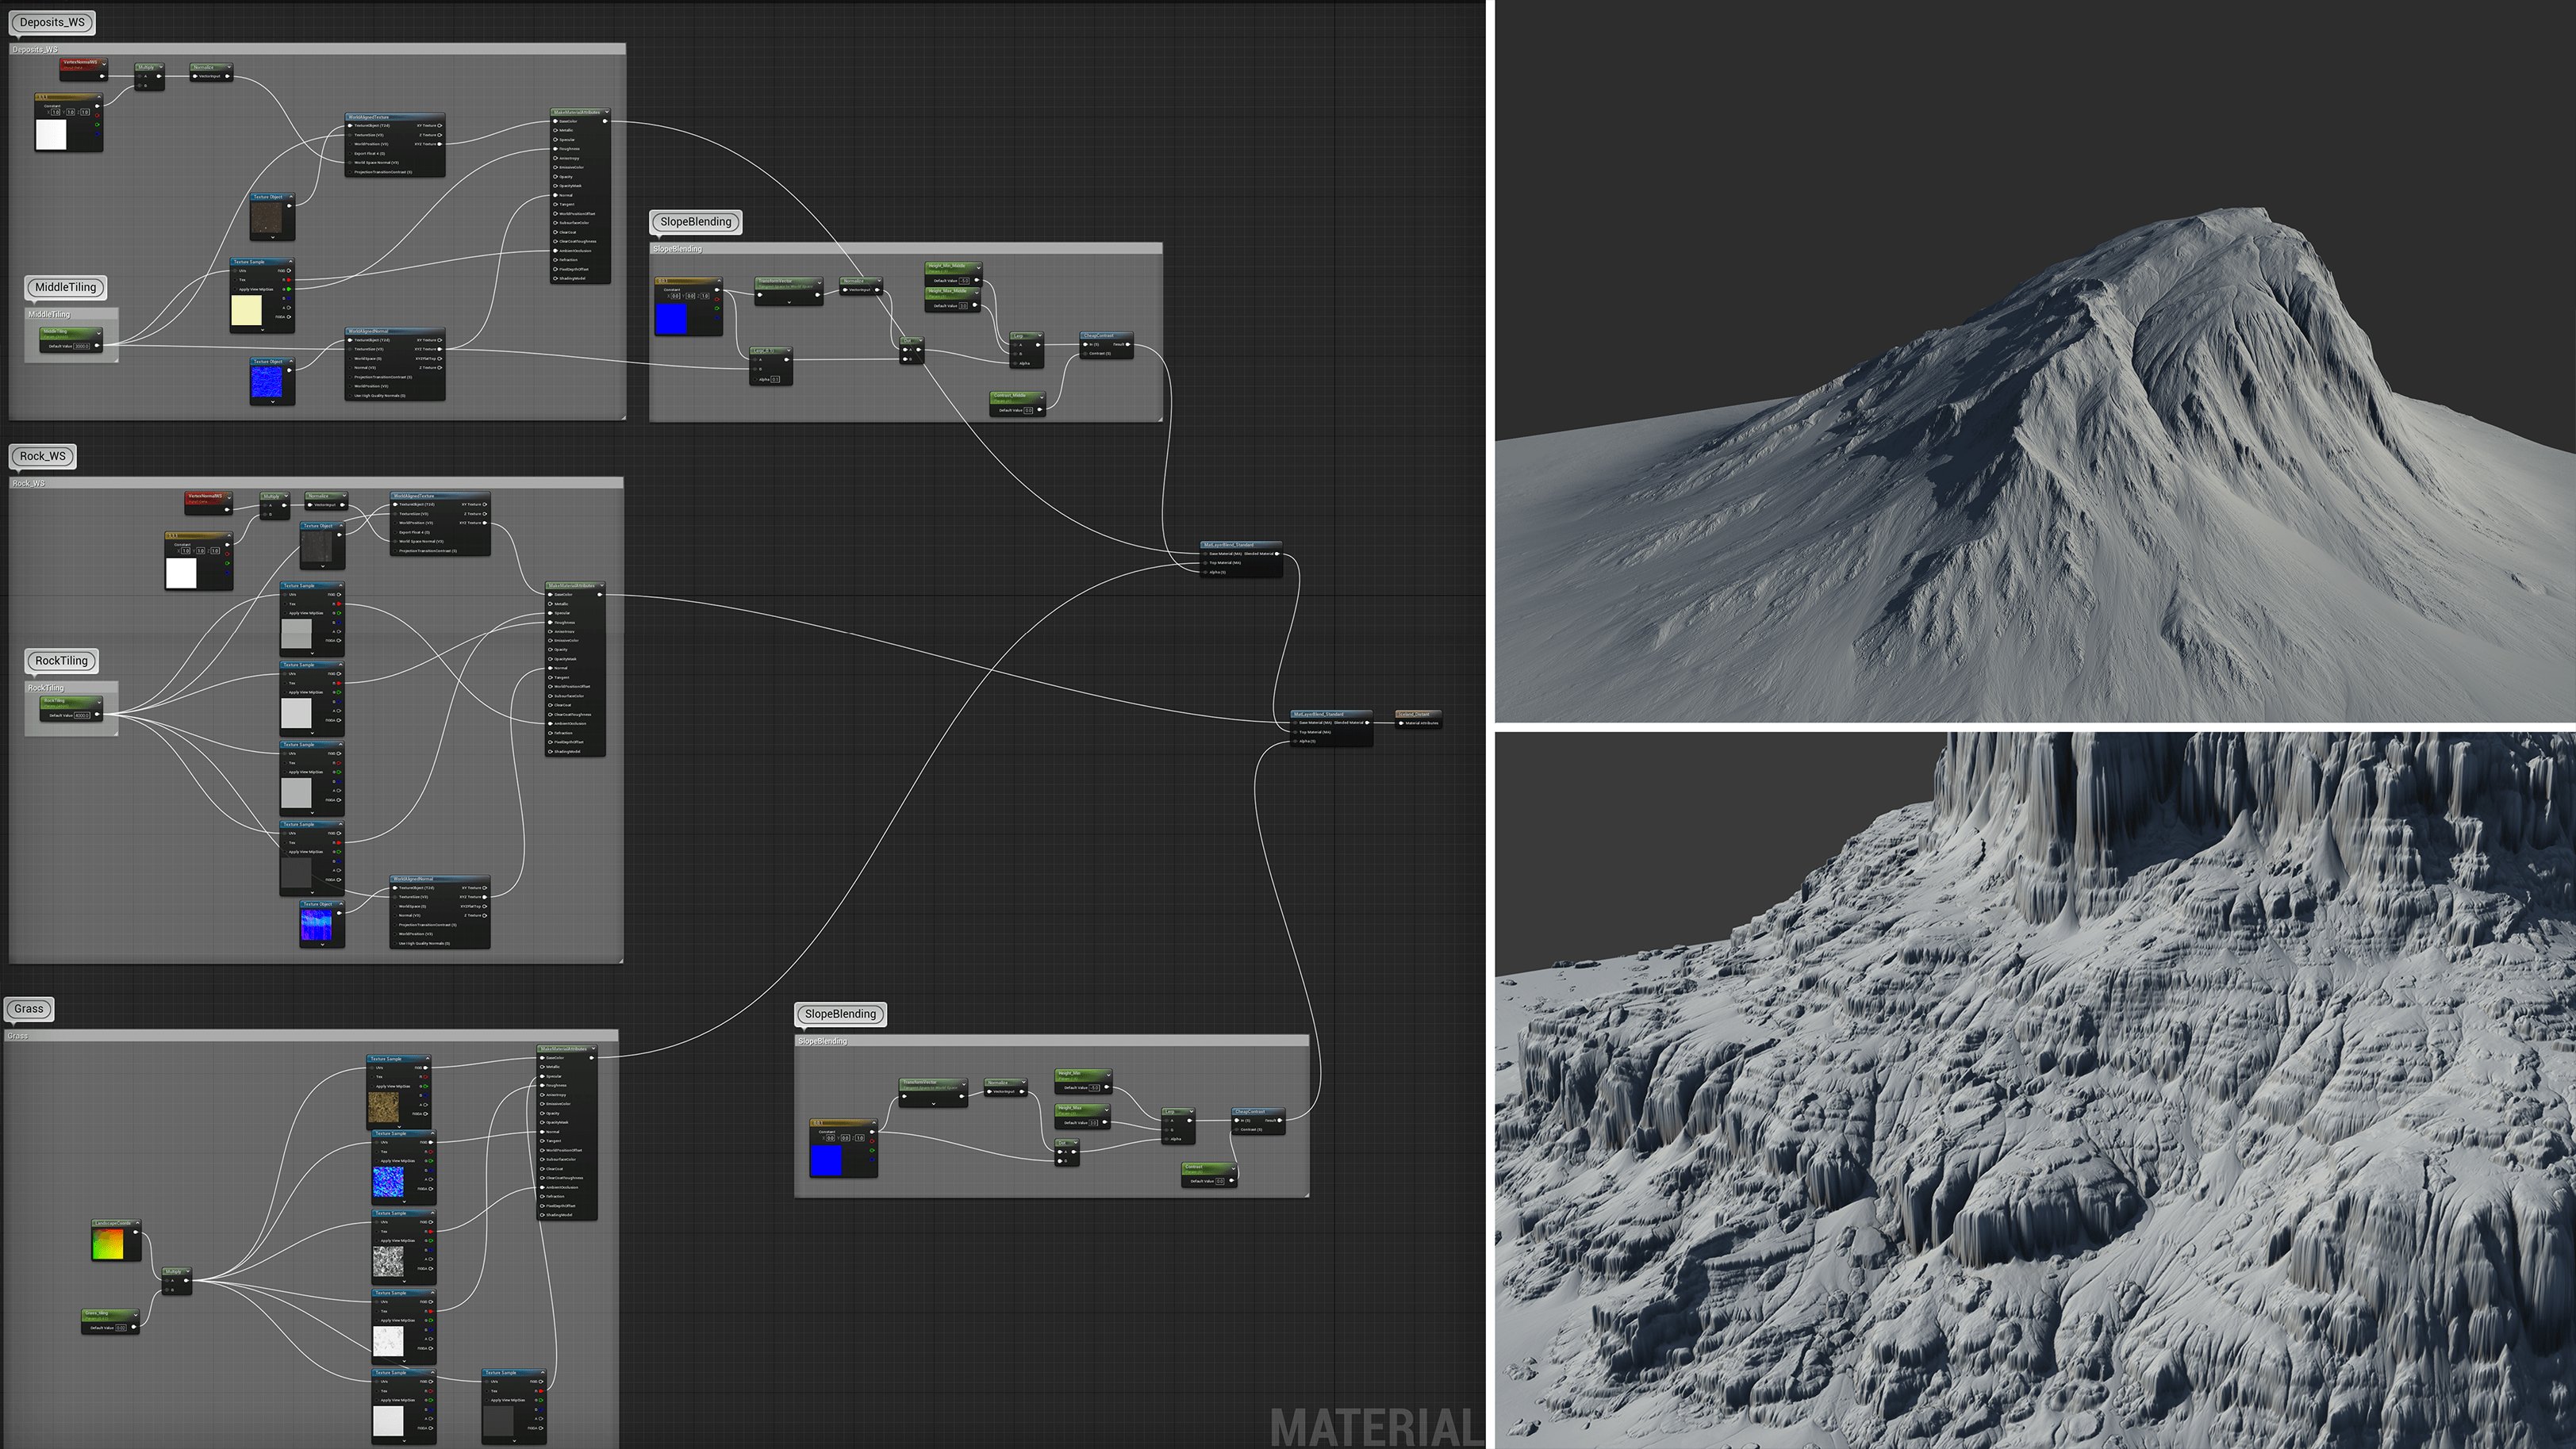
I imported the terrains as meshes into Unreal for optimized performance. Materials were managed with a master material in Unreal, applying textures based on slope angle!
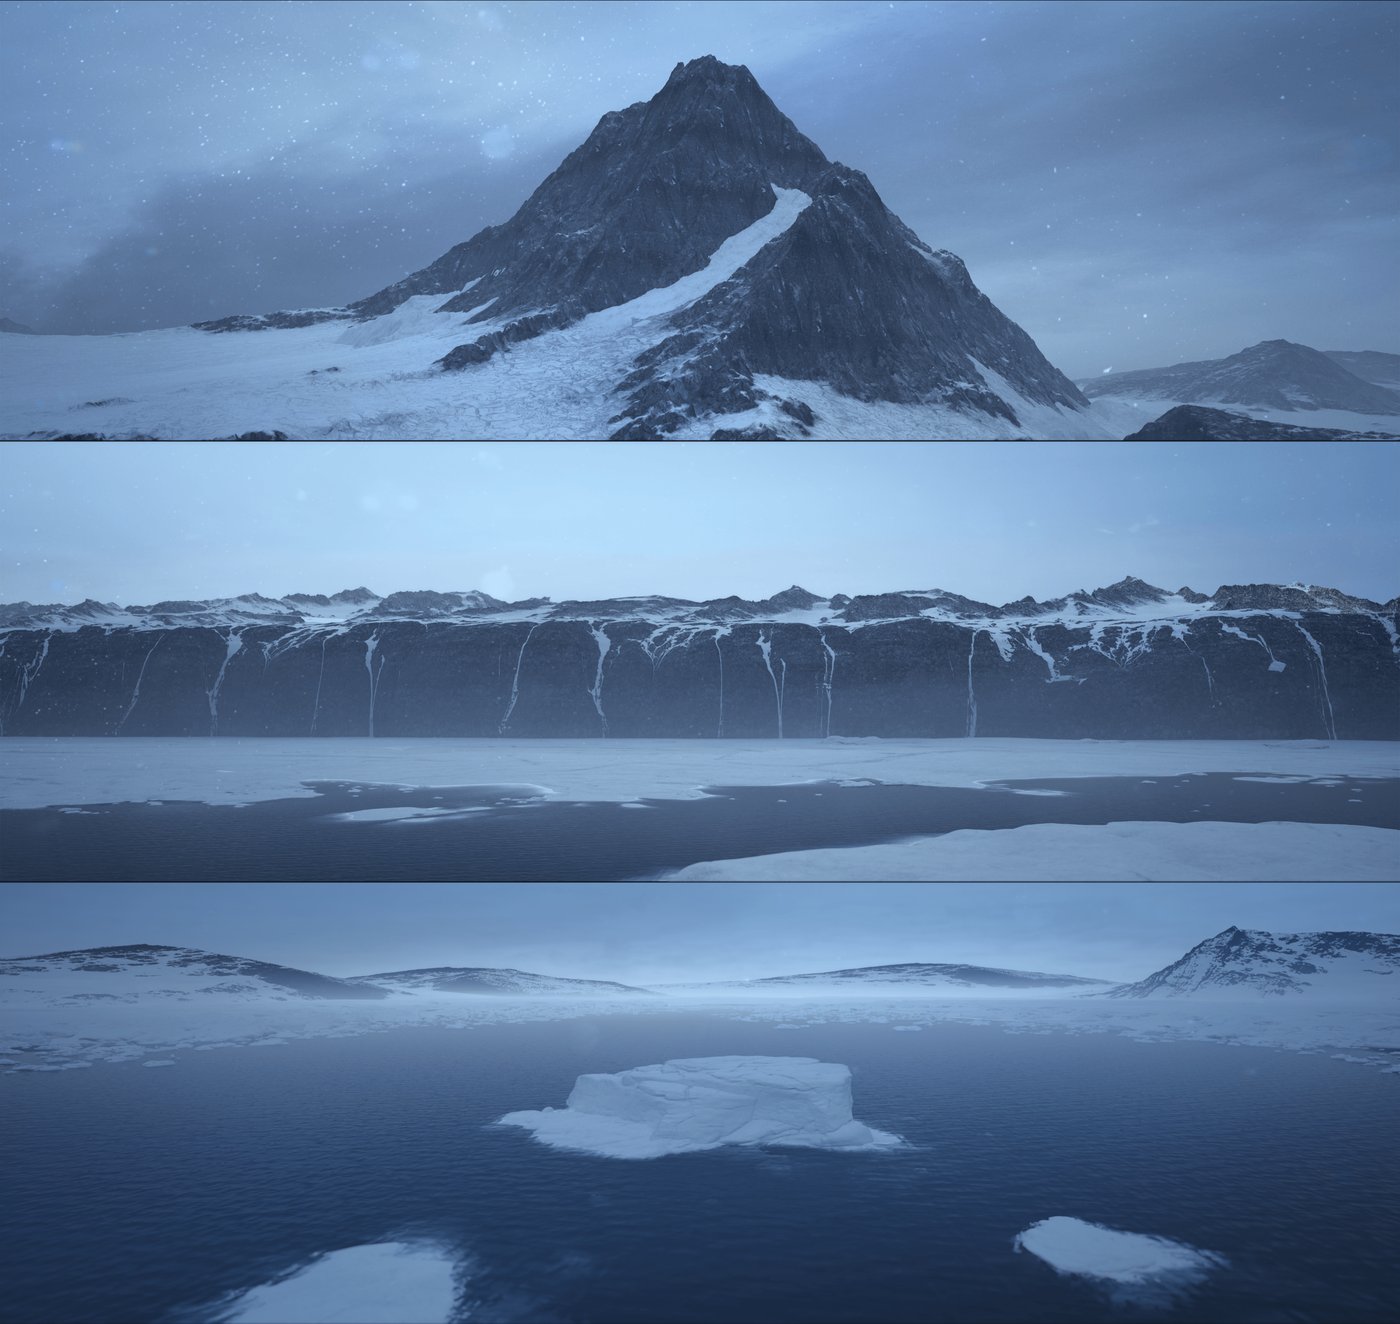
Northern sea
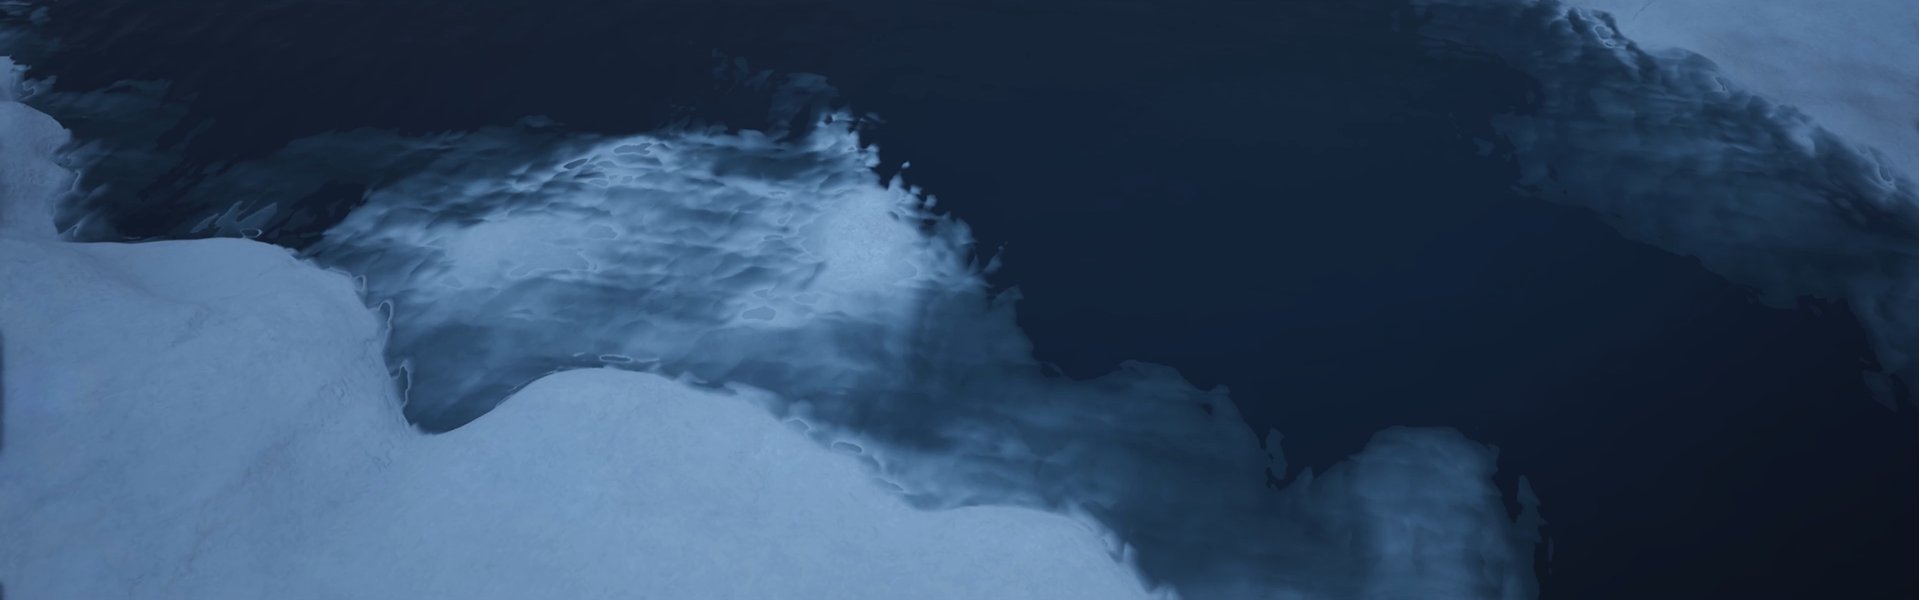
Unreal's default water needed adjustments for a natural look. Key parameters like normal strength and water shading were crucial. For transparent effects, adjusting absorption alpha was useful. Creating ice involved using Megascans rocks and applying snow textures. If needed, I used the Unreal modeling tools to refine the shapes.
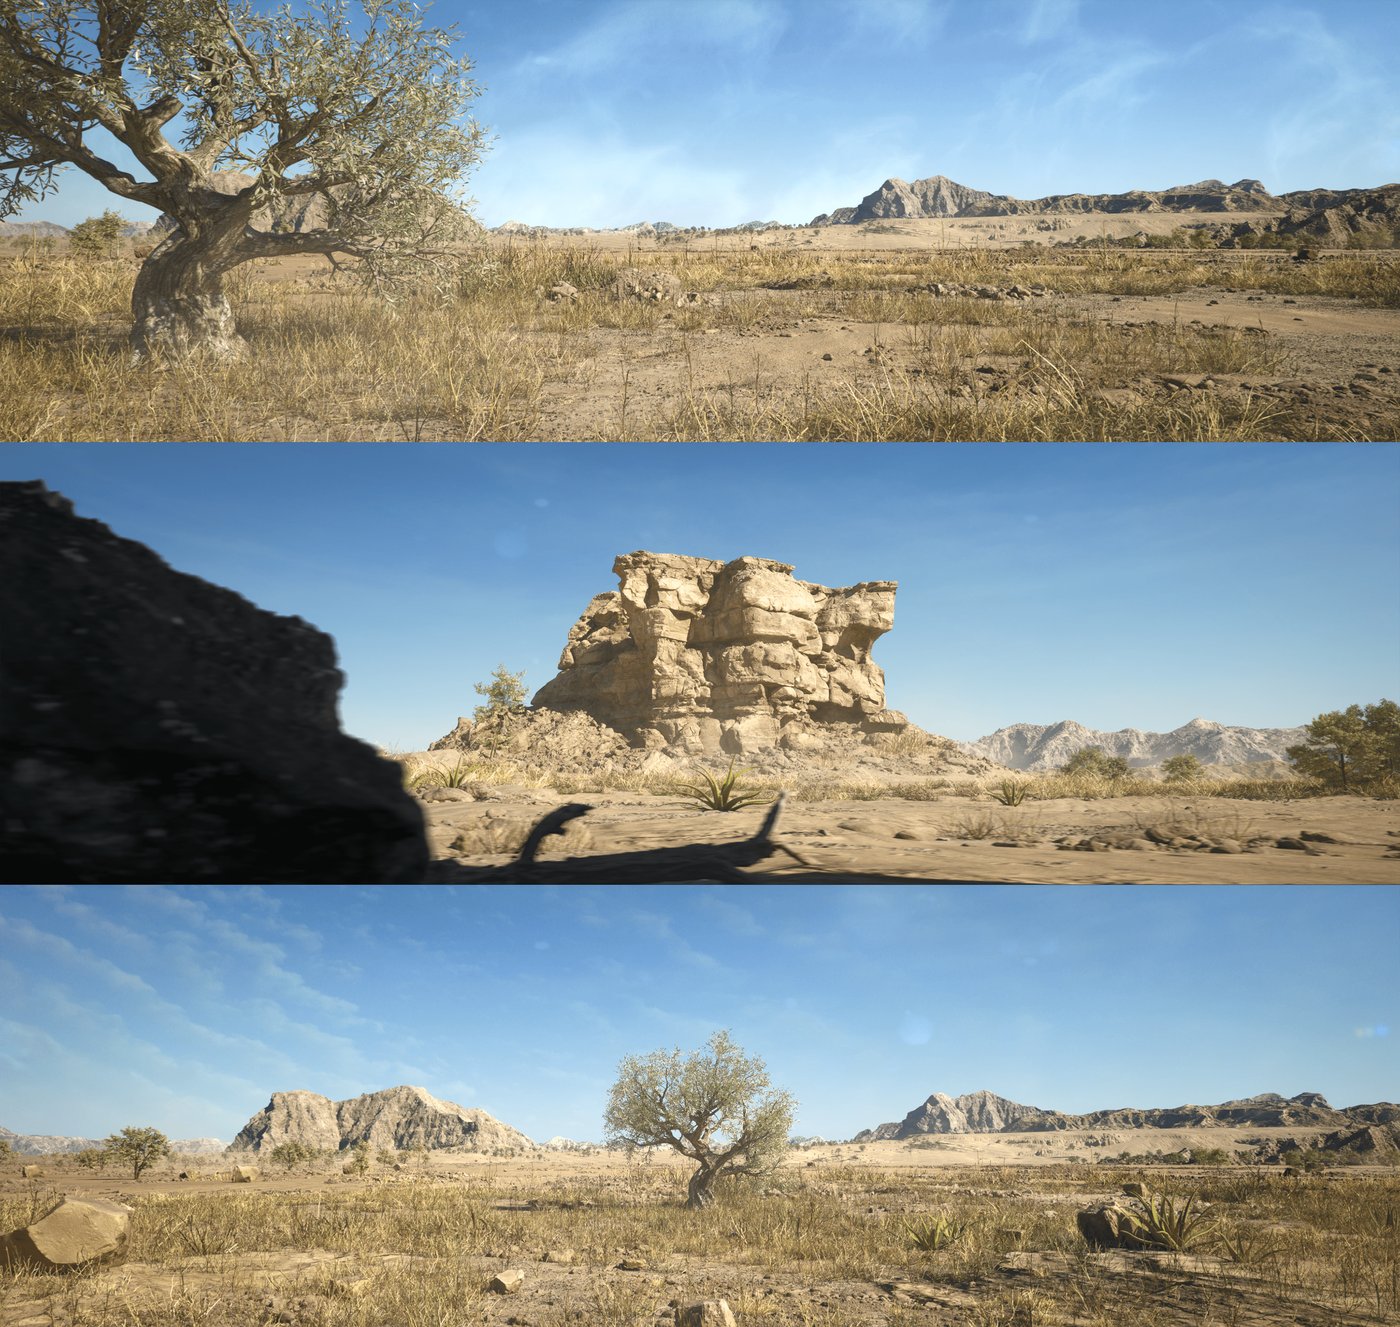
Scattering

Scattering is one of the most important parts in environment creation; it was done both manually and procedurally with PCG Volumes.

To add variety, I created ground patches in Quixel Mixer, blending multiple textures to avoid repetition. Displacement maps were applied in Unreal aiming for a realistic result.
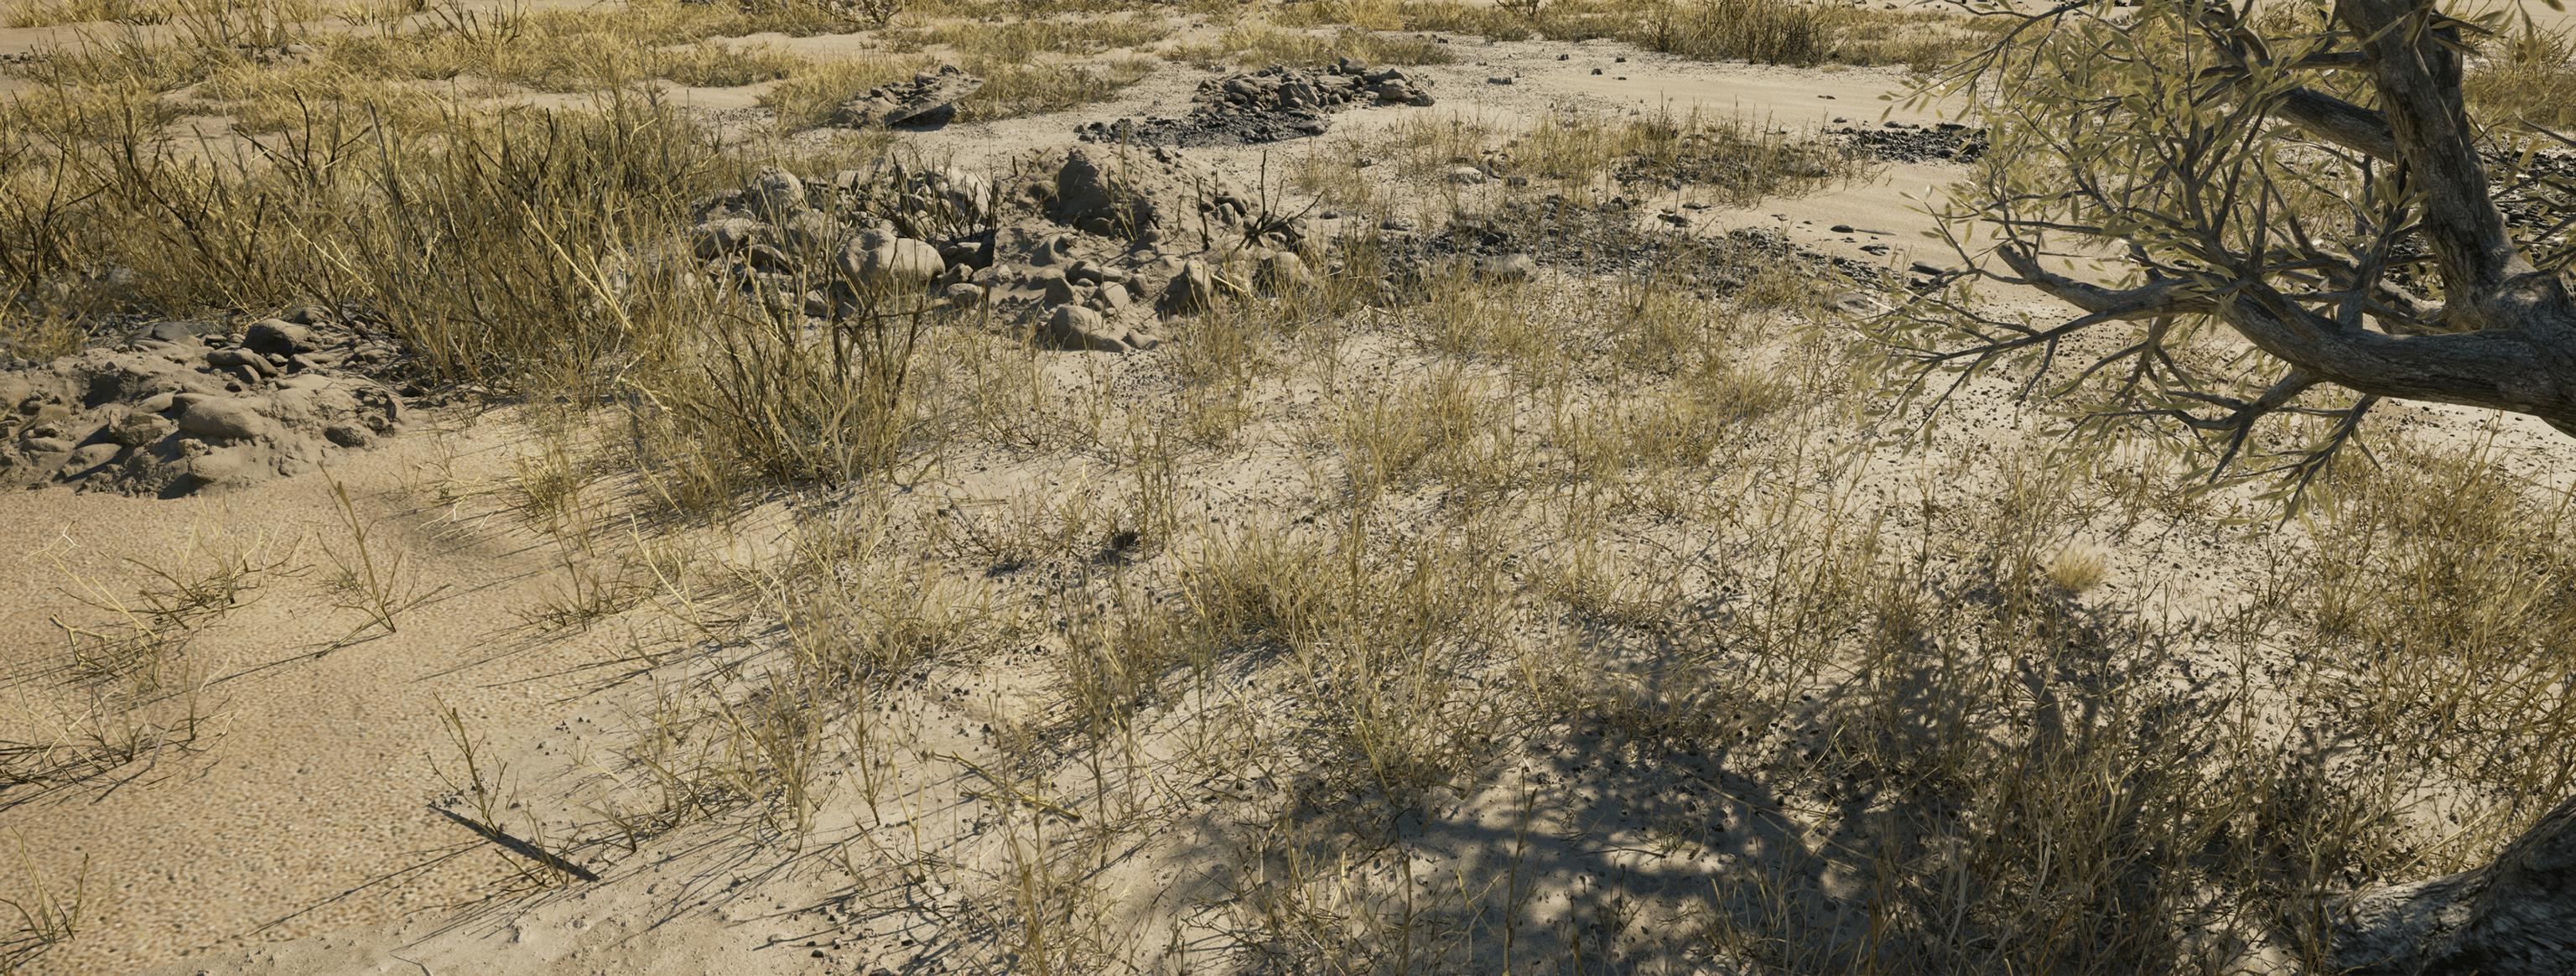
Another wip: I manually added Megascans assets like rocks and grass, adjusting scale and rotation for variation. Color variations enhanced realism, especially with grass and trees from SpeedTree.
Lighting
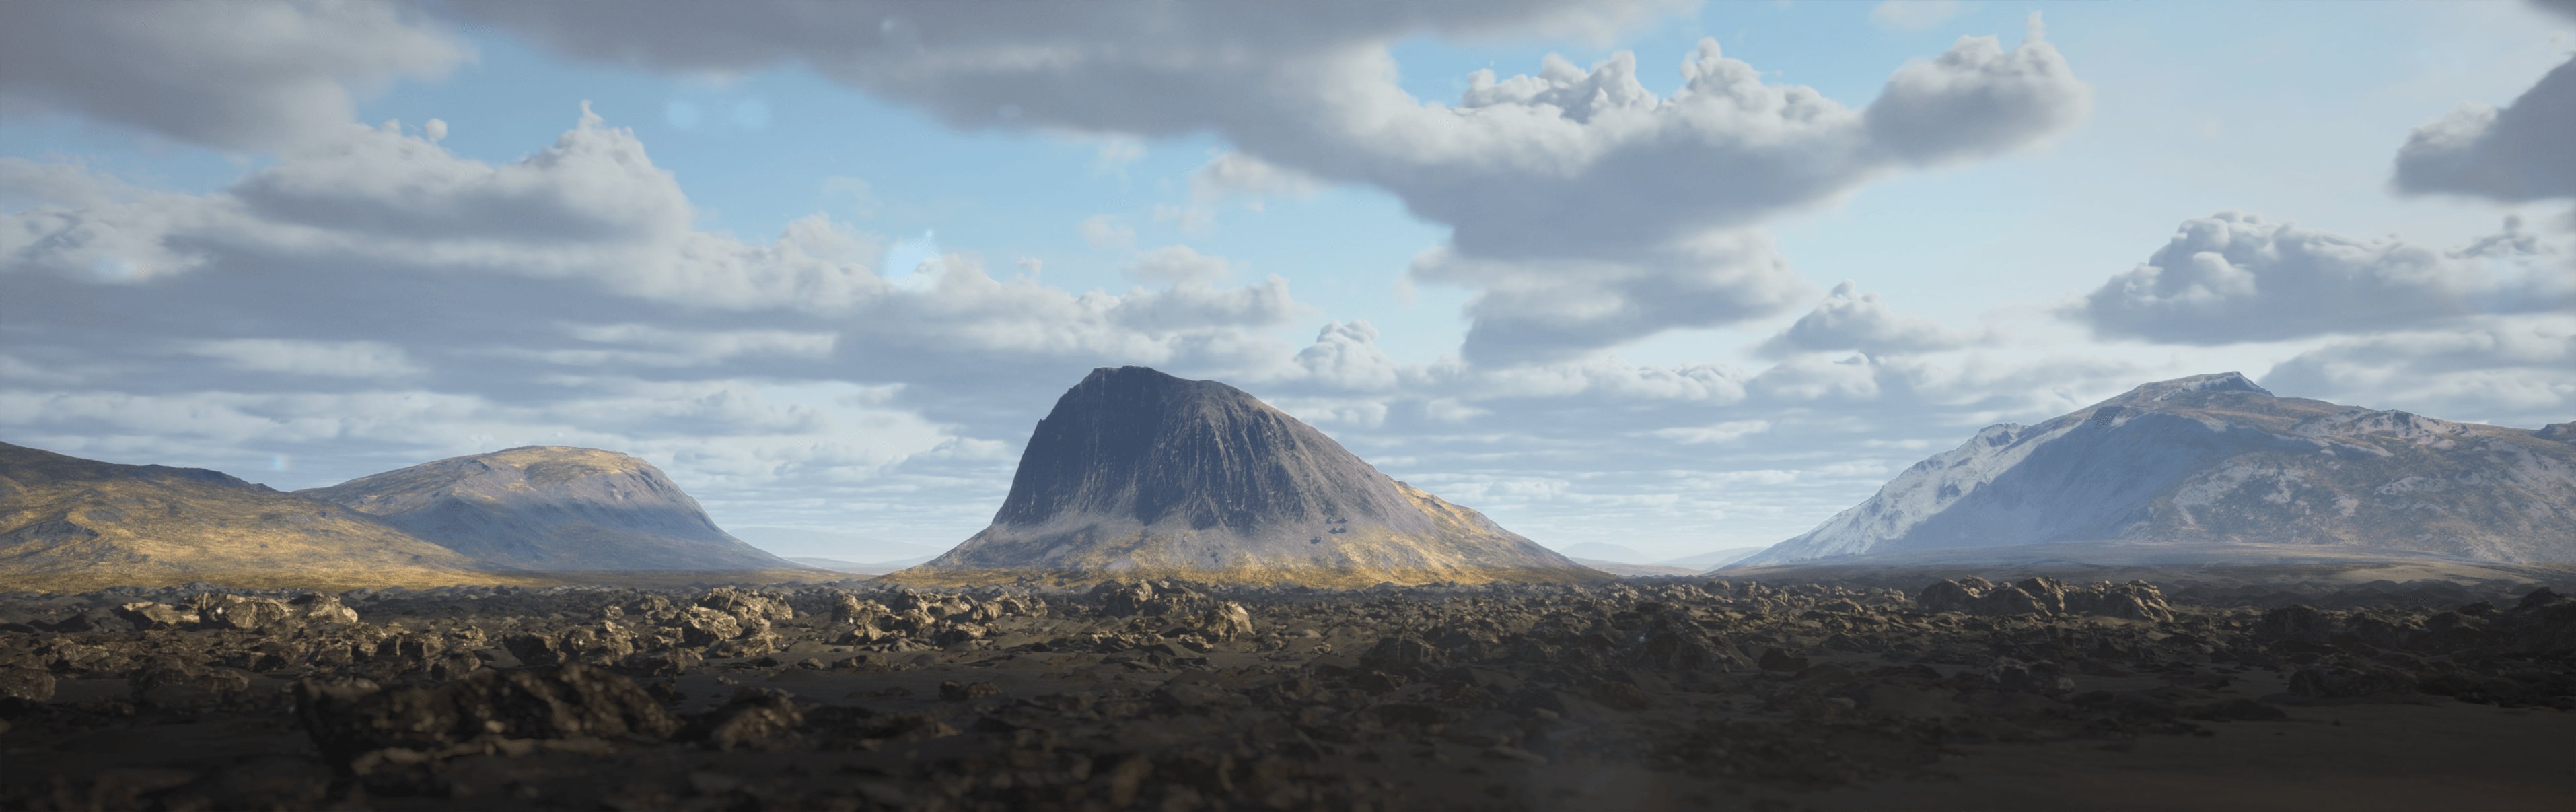
For realistic lighting, I used a plugin called Ultra Dynamic Sky from the Unreal Engine Marketplace. I adjusted cloud coverage and sun intensity mainly for realistic lighting effects.
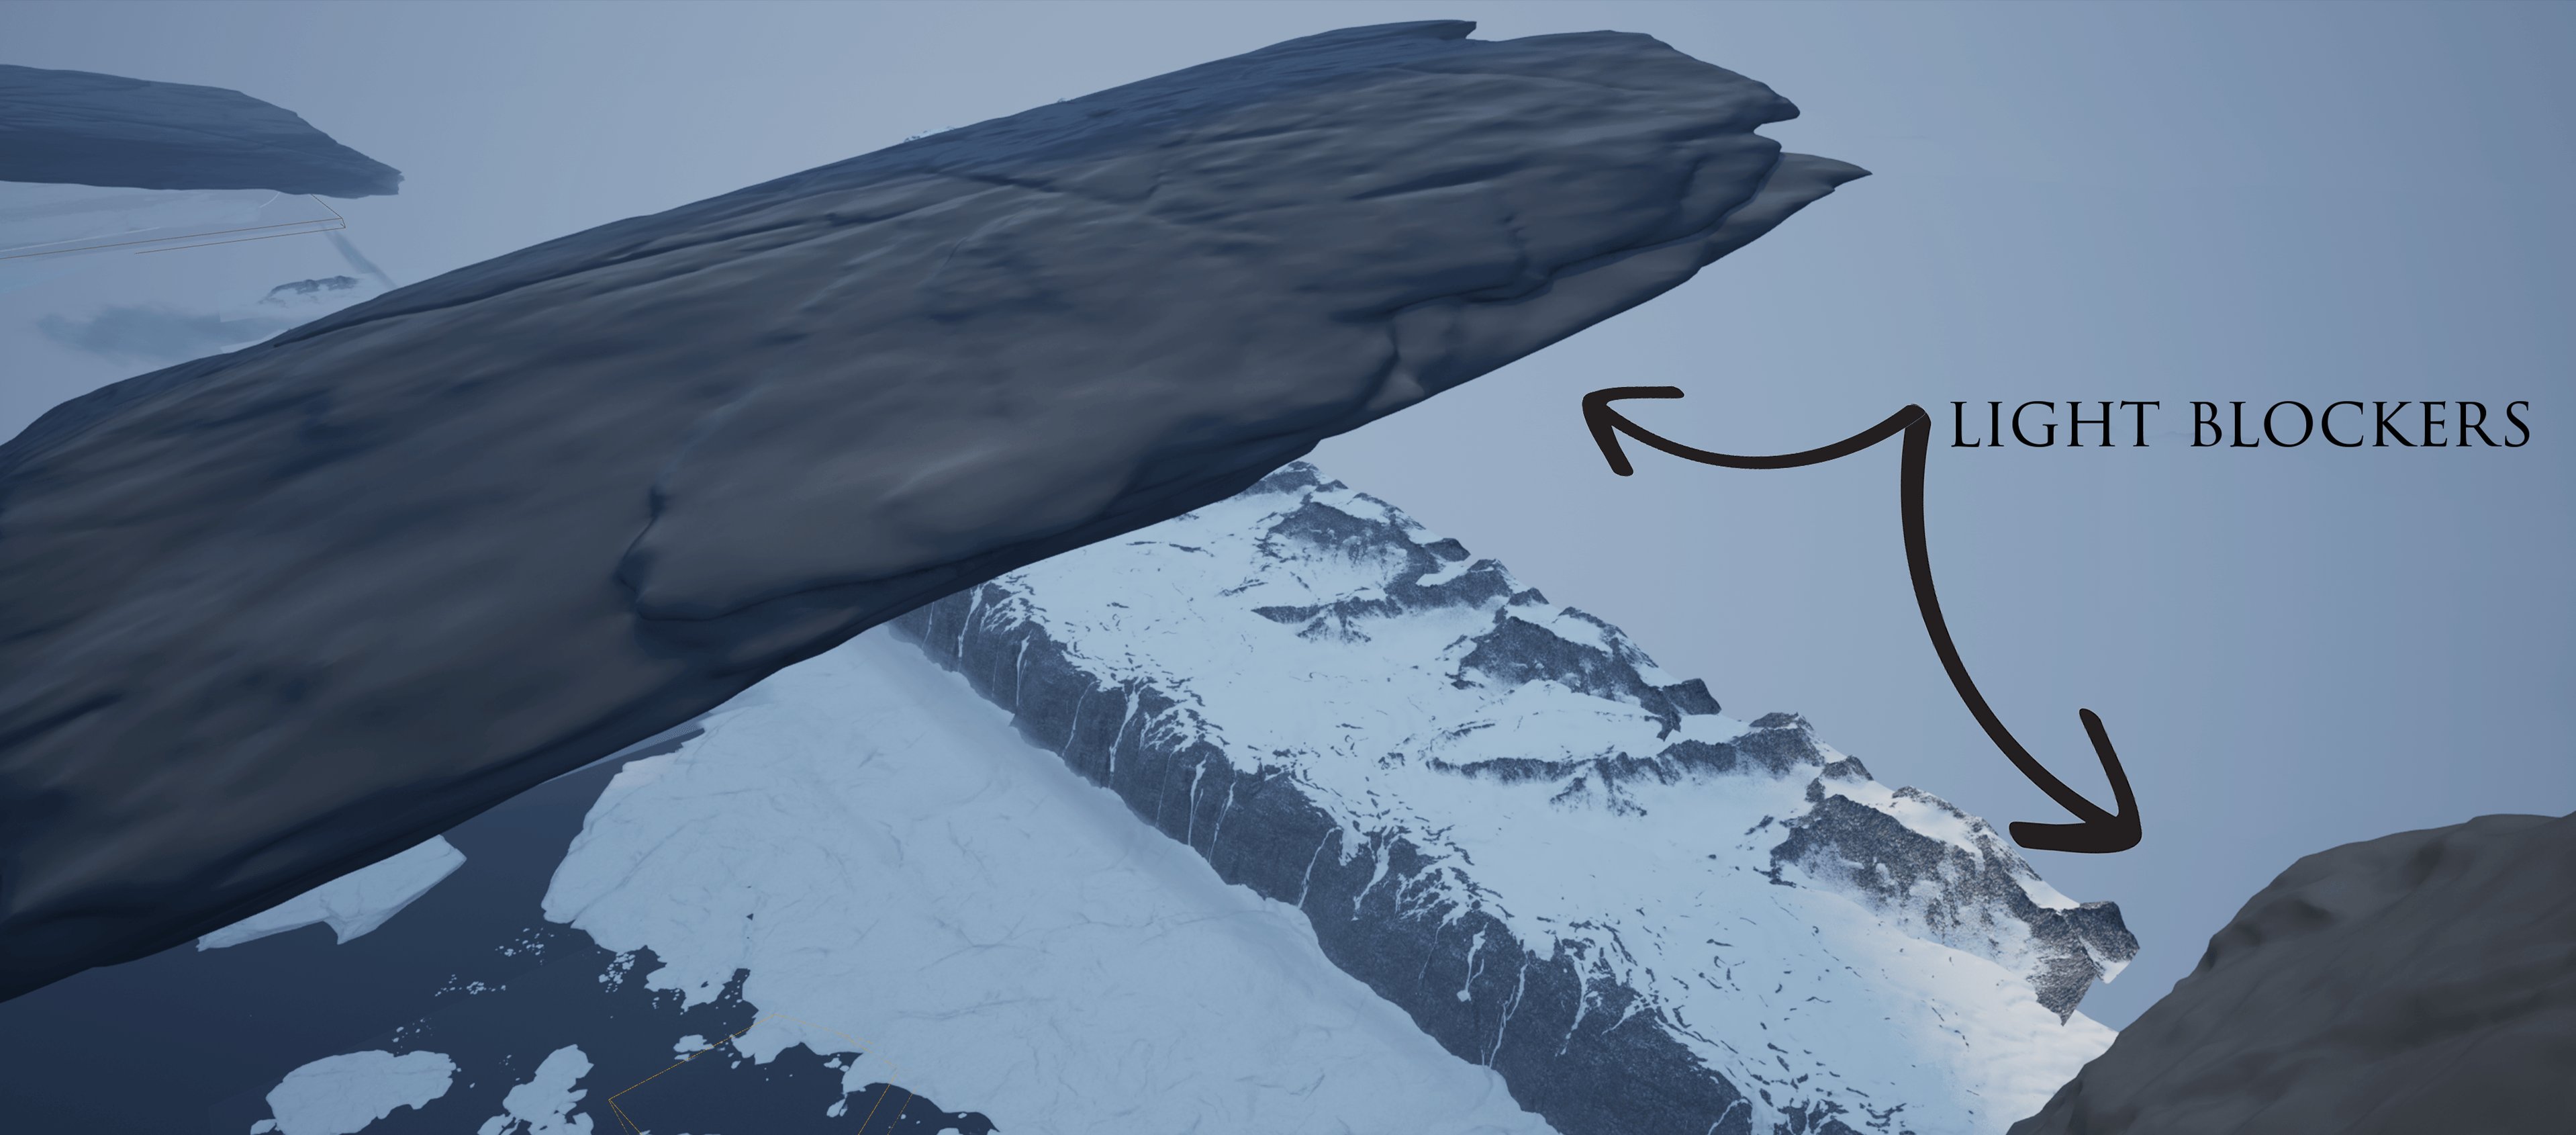
With lighting in Unreal, it was easy to reach that 90%, but for the last 10% fine-tuning every parameter is key. To have more control, I used geometries in the sky as light blockers and added some fog cards.
Rendering
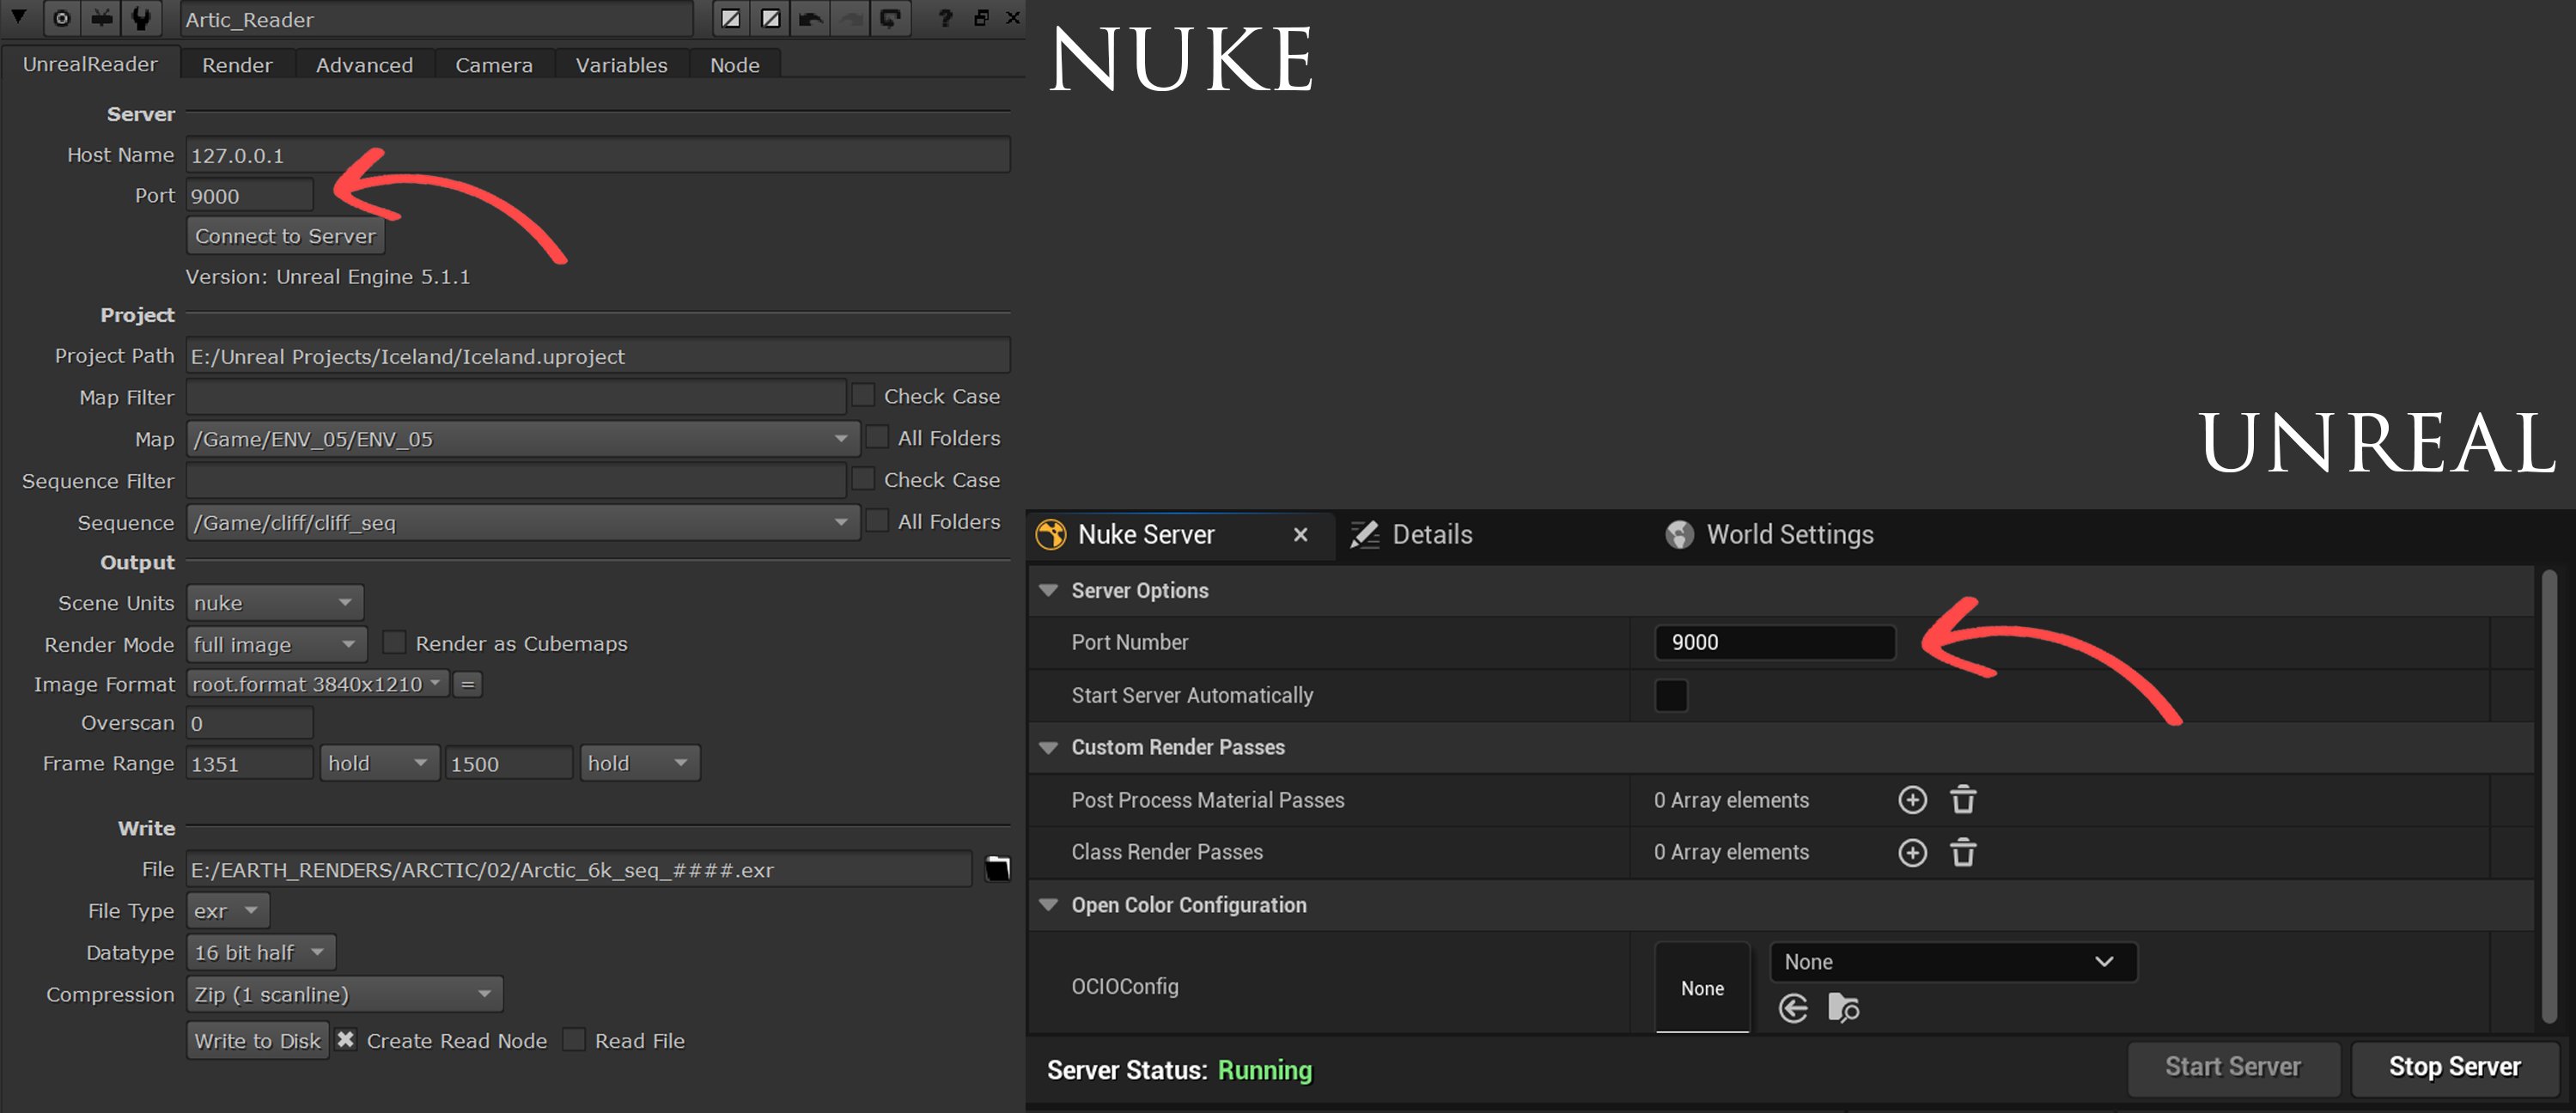
What sets my workflow apart is the seamless connection between Unreal and Nuke facilitated by the Unreal Reader node! ADD DETAIL AOV
To use this workflow, begin by installing the Unreal Reader plugin from the Foundry website and activating it within the Unreal Plugin Manager. Next, navigate to xxx and select "Nuke Server," which will open a new tab showing a server port number. Simply click "Start server" to prepare Unreal for connection.
Now, in NukeX, add an UnrealReader node. Enter the same server port number from Unreal into the UnrealReader node settings.
This establishes a connection between both softwares. By pressing "Connect to server" in Nuke, you prompt Unreal to render frames for viewing directly within the Nuke viewport.
Compositing
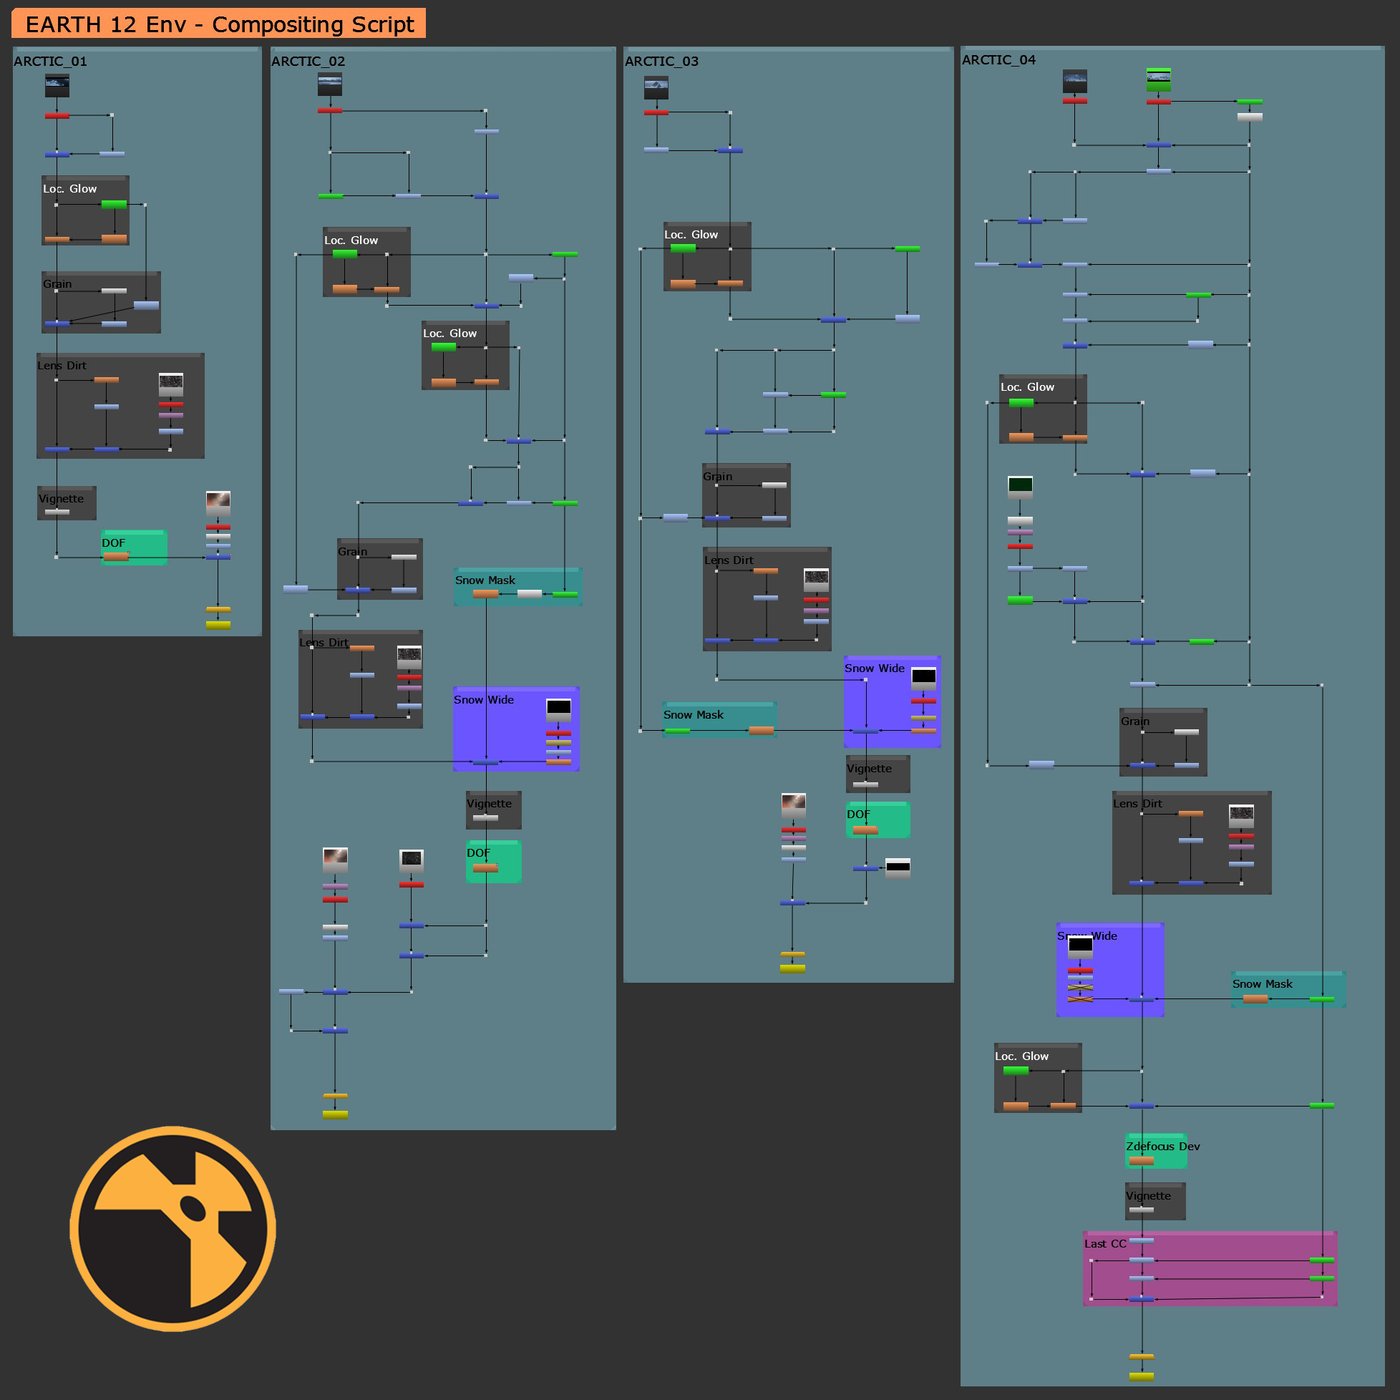


In the last phase, everything is assembled in Nuke for compositing. Keeping the node graph neat is key for efficiency. Adjustments are made for color, chromatic aberration, lens dirt, and motion blur to enhance the scene. Consistency in color across similar environments is ensured. Depth of field is animated afterward, giving precise control over focus points.


As last step, everything is written out to disk, is important to note that with this big amount of data (313gb), a clean folder structure is mandatory!
Nature - An Exploration of Our Planet | Breakdown
Sony Alpha
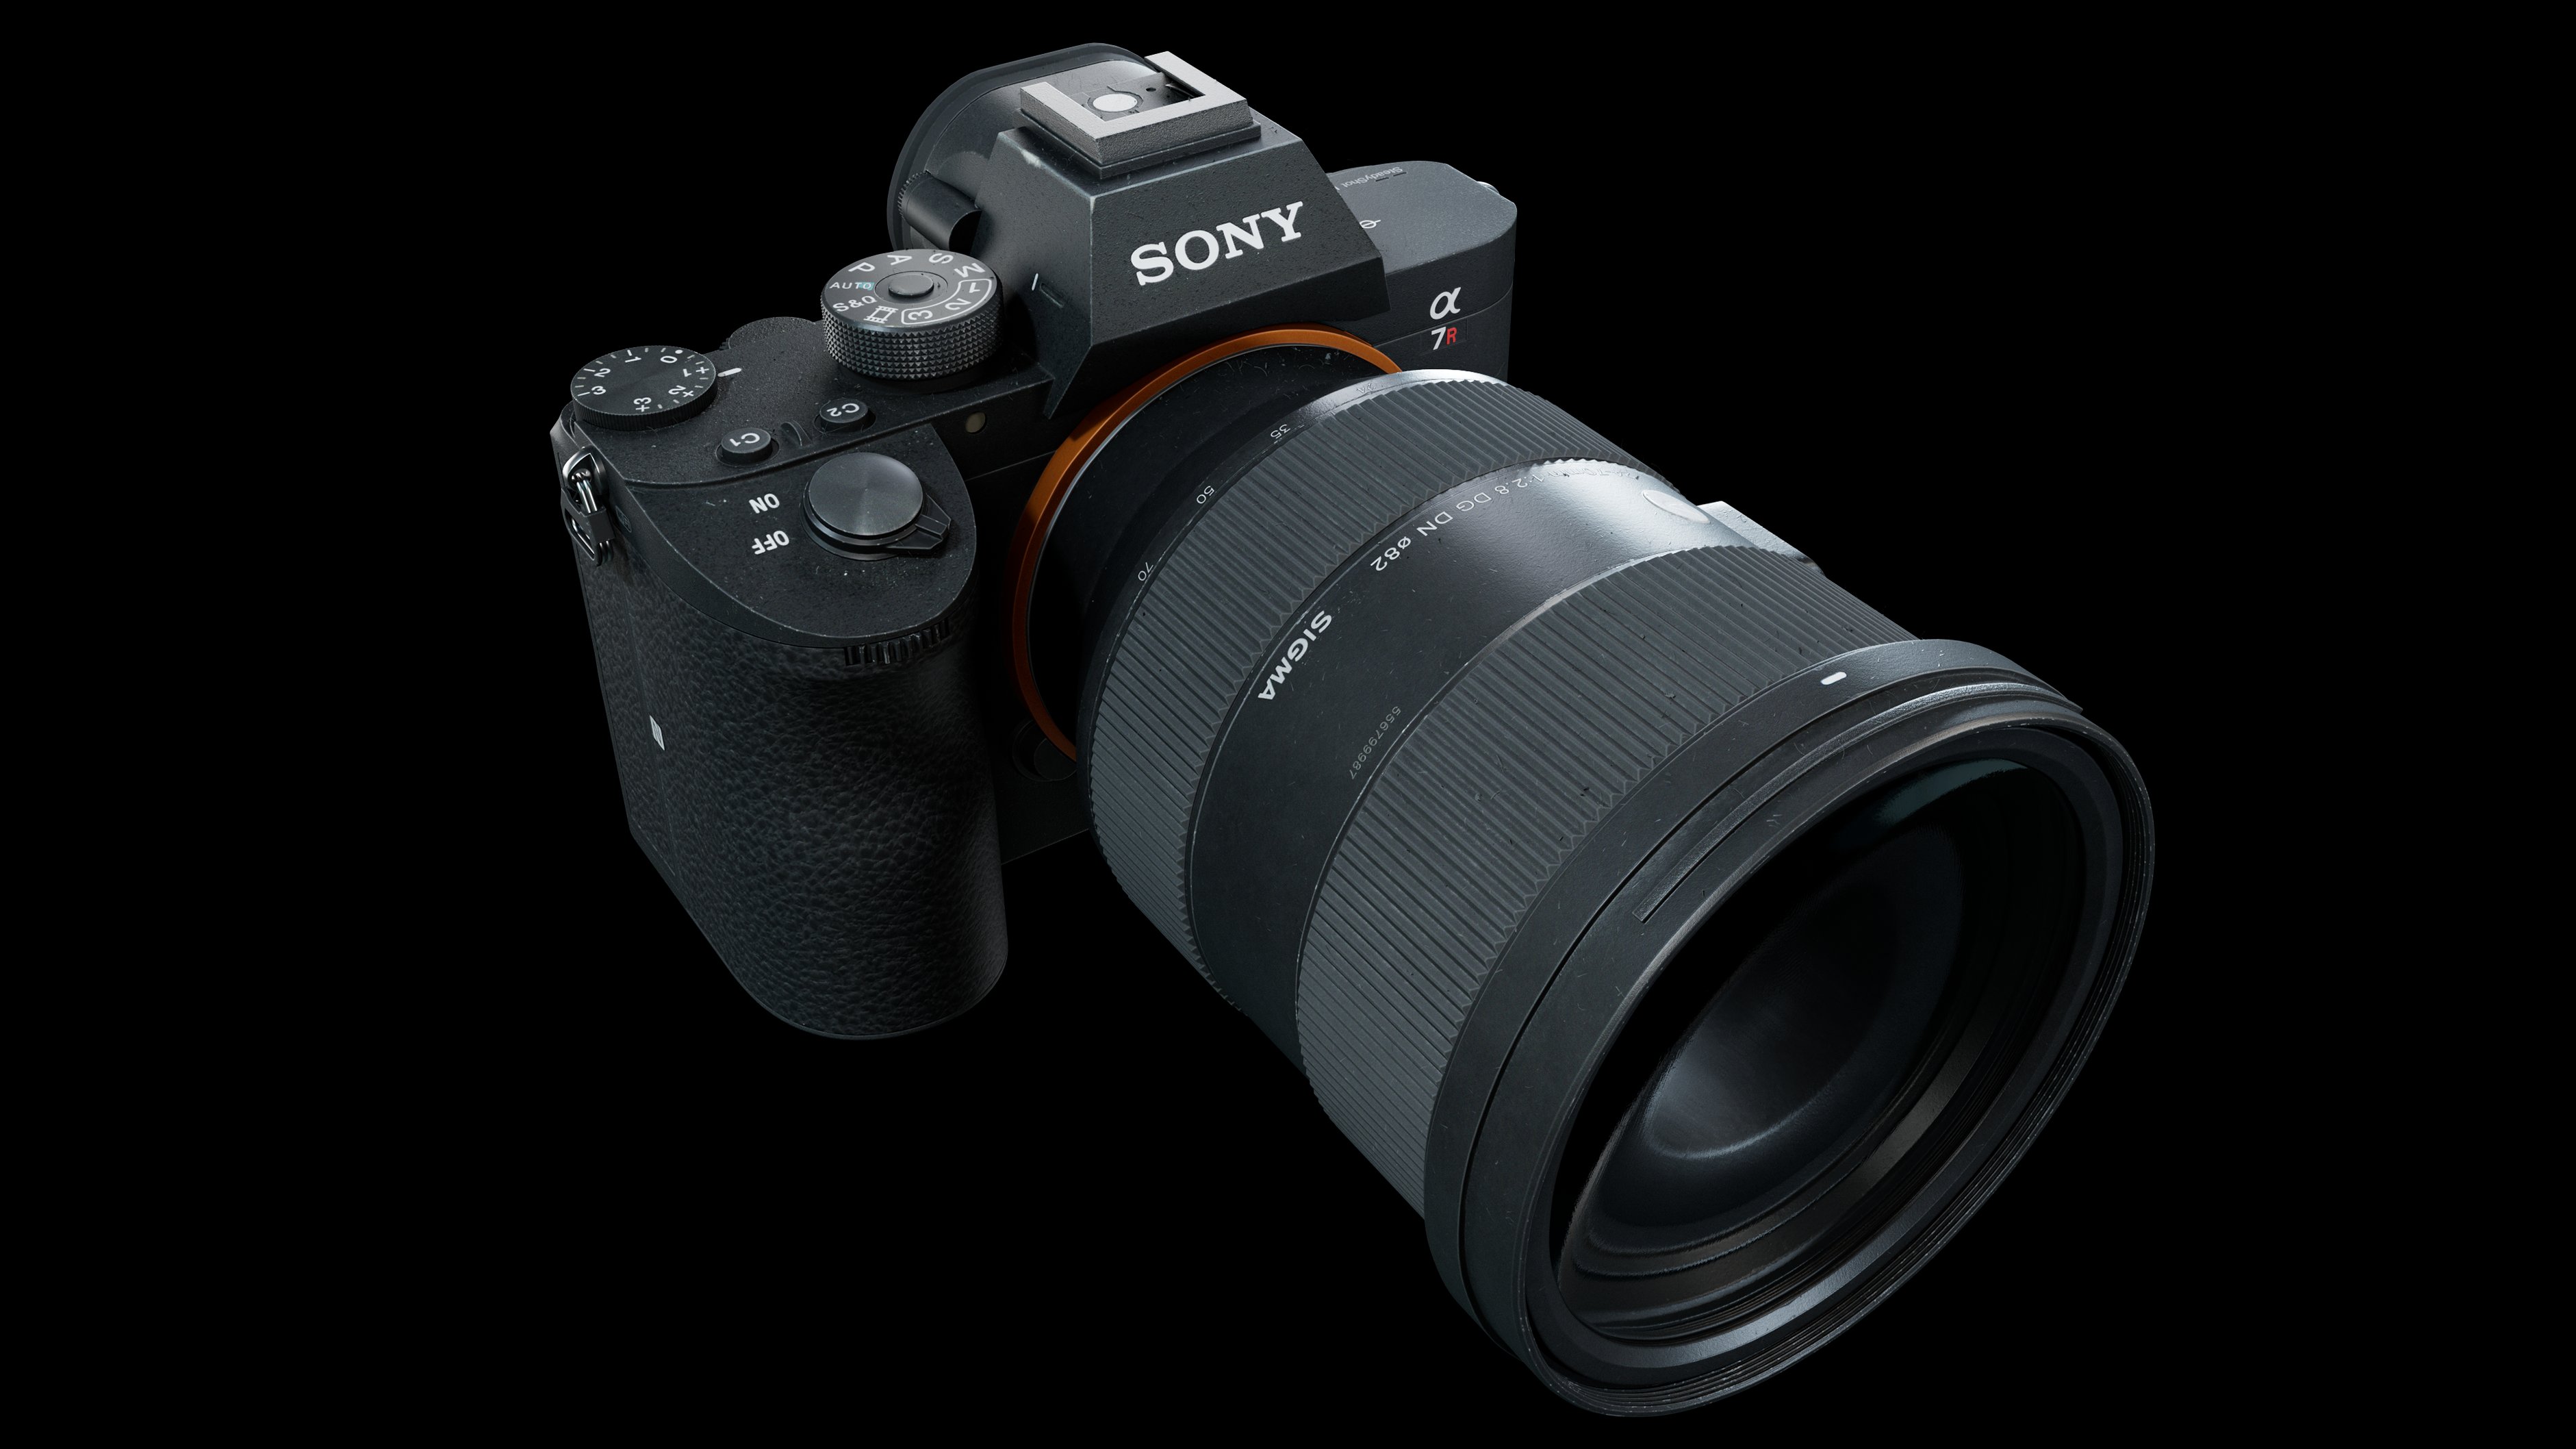
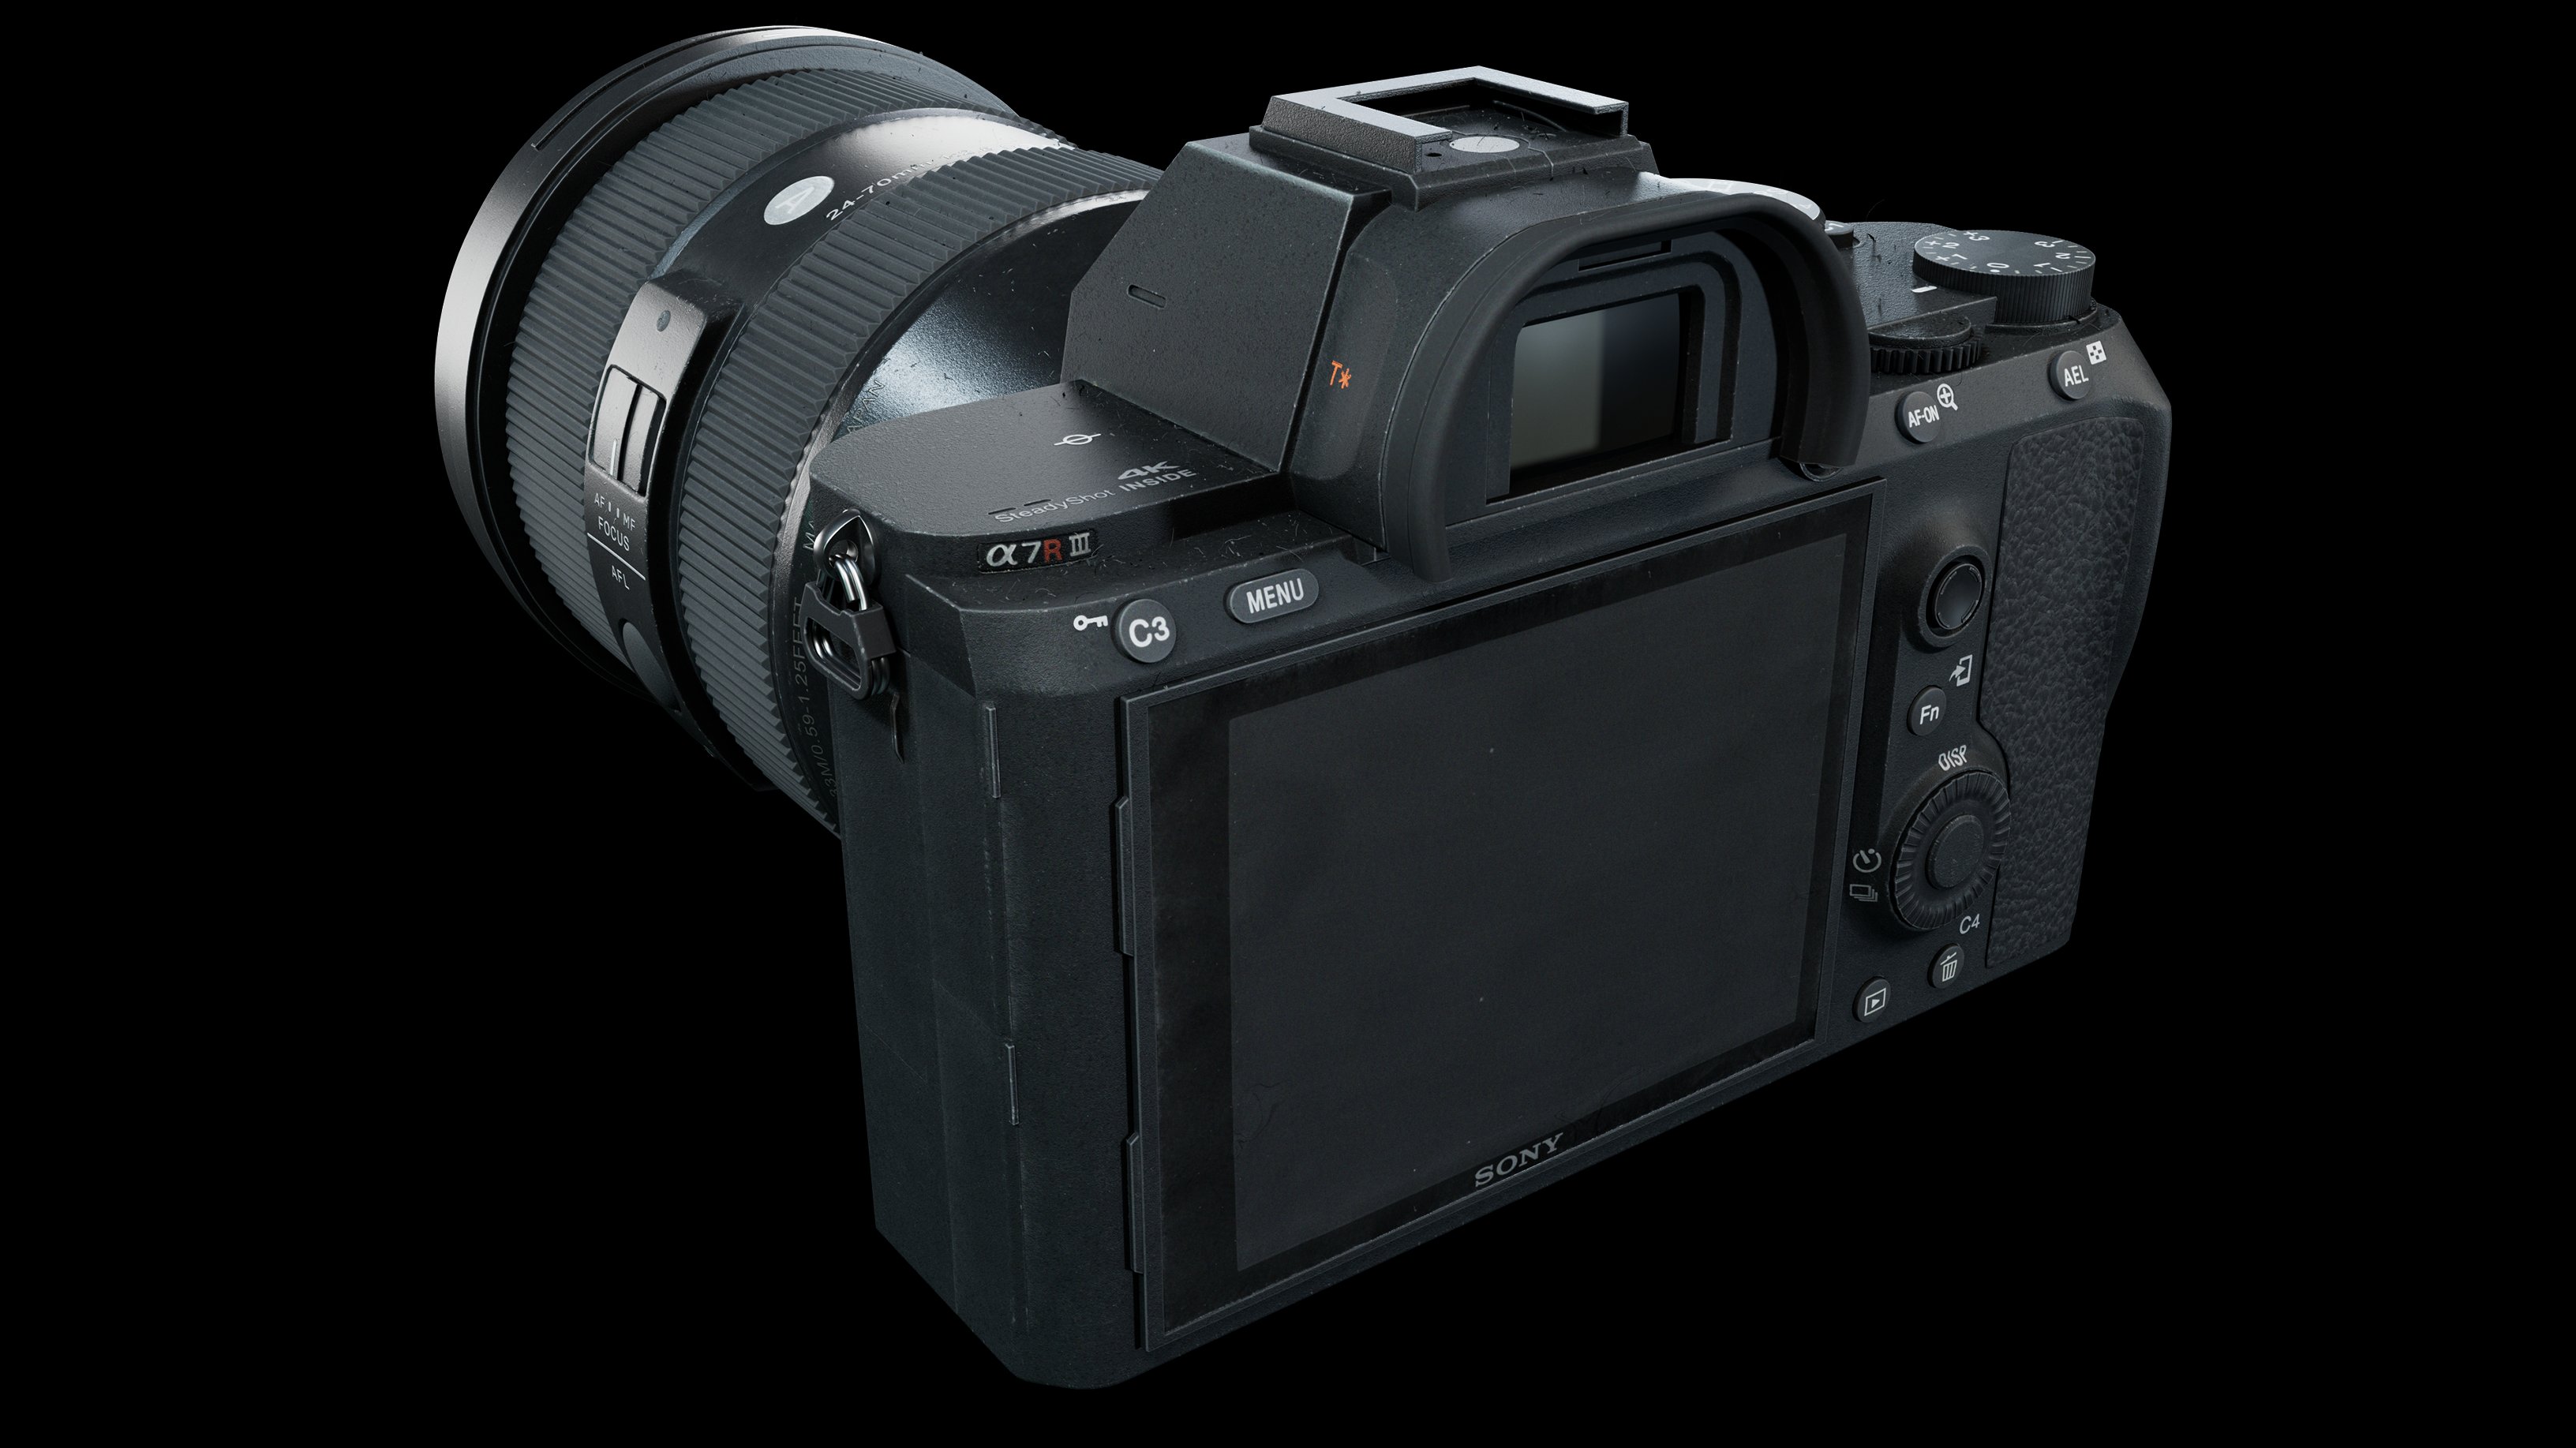
Welcome to my "Sony Alpha" personal project, I decided to model this camera because I wanted to challenge myself both in Subd modeling and Photorealistic texturing. (Time Spent: 1 month 15days) responsible for all aspects.
Turntables
References

Photo references have been shot by me, colour balanced and chosen carefully in the texturing phase
Modeling

I tried to achieve the cleanest topology I could, I spent some time practicing topology patterns in the past, while working on the model in Maya I applied a Blinn material to check any pinching issues
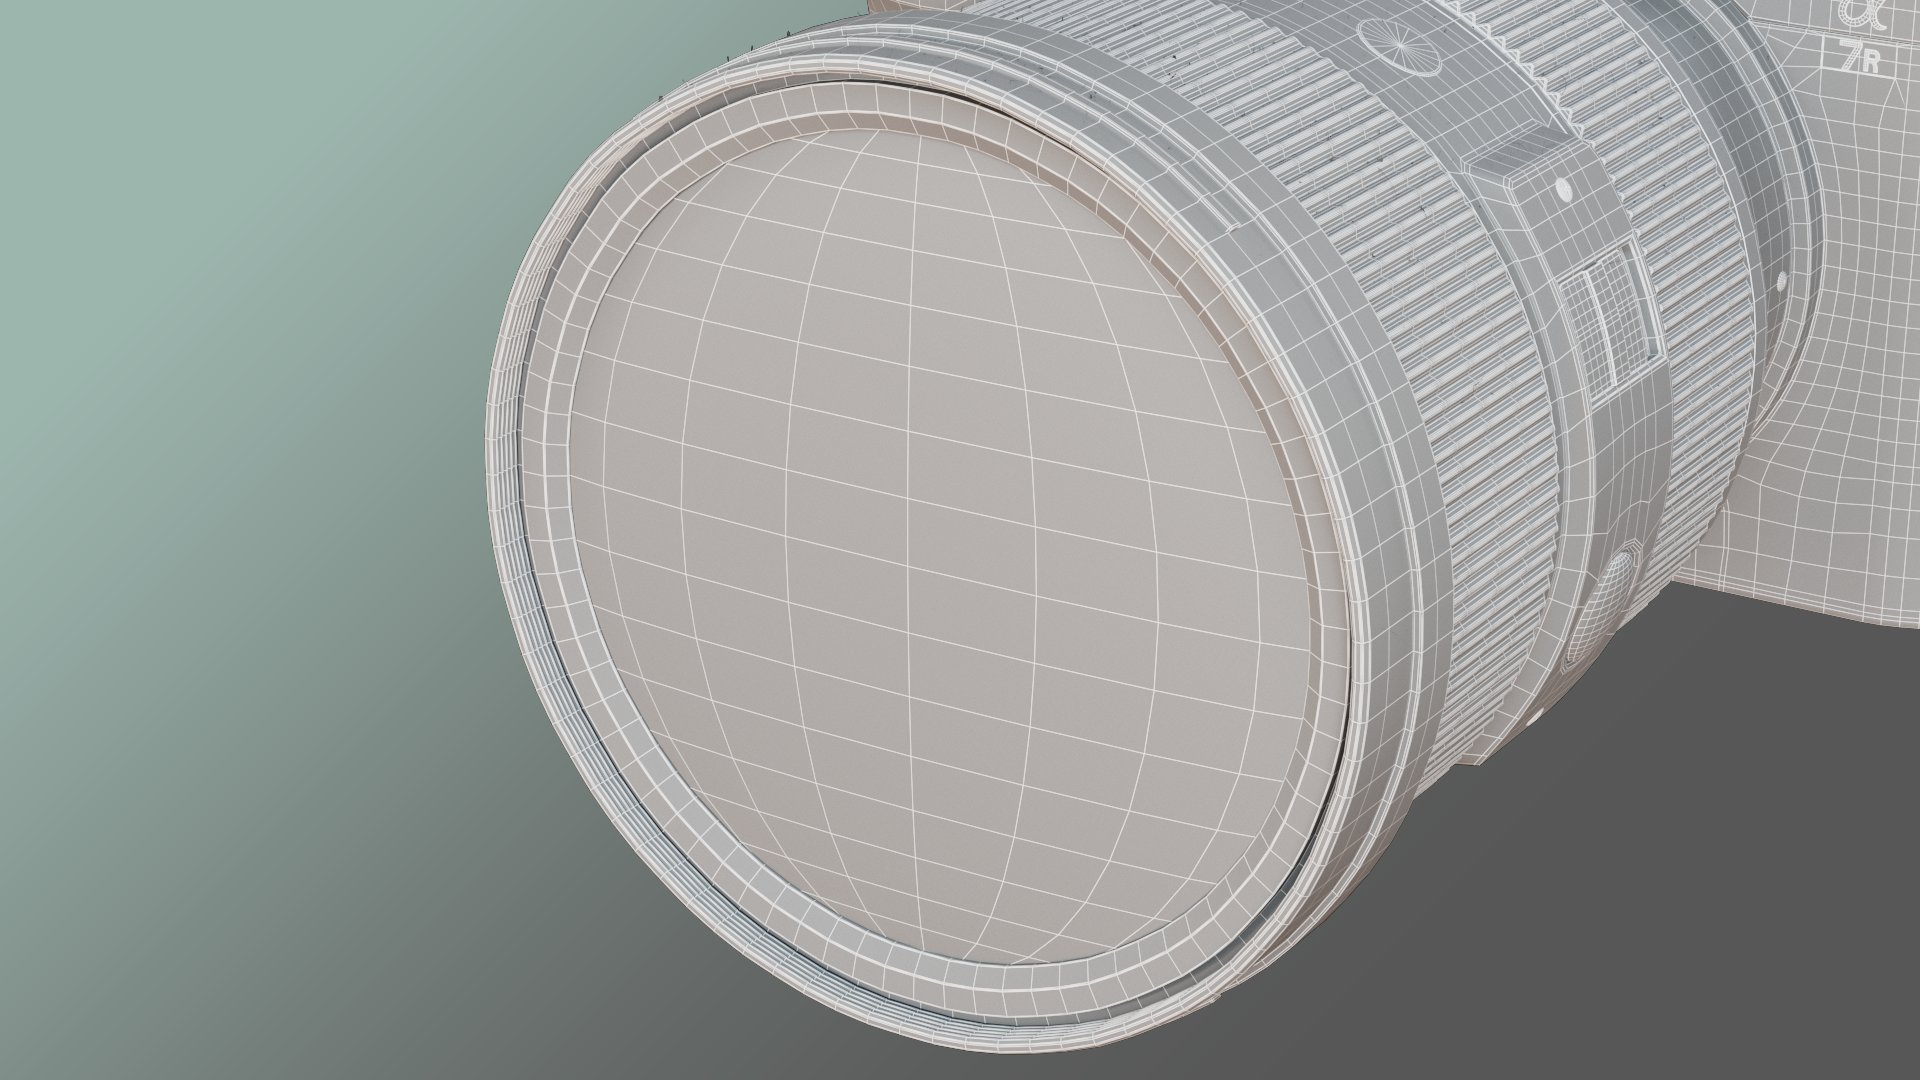


Take a look inside the lens...
Texturing

I did my texturing in Mari but I baked my Curvature, AO, Cavity maps in Substance Painter, I have also used Photoshop and Substance Designer to extract some alphas from the references and create Tilable textures
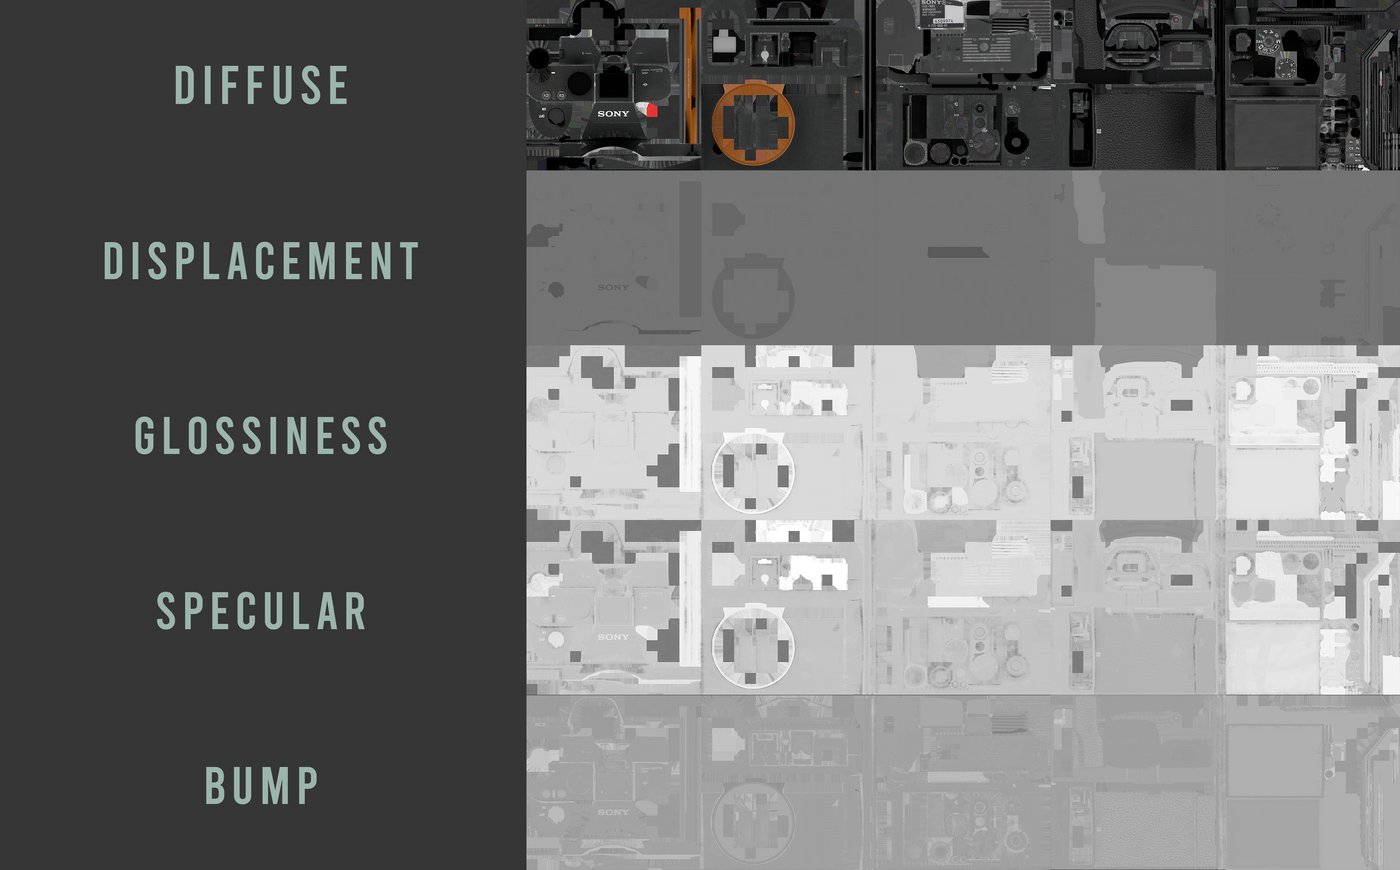

Camera UDIMs organized by channel

Have a look to my texturing workflow!
Dust Generator
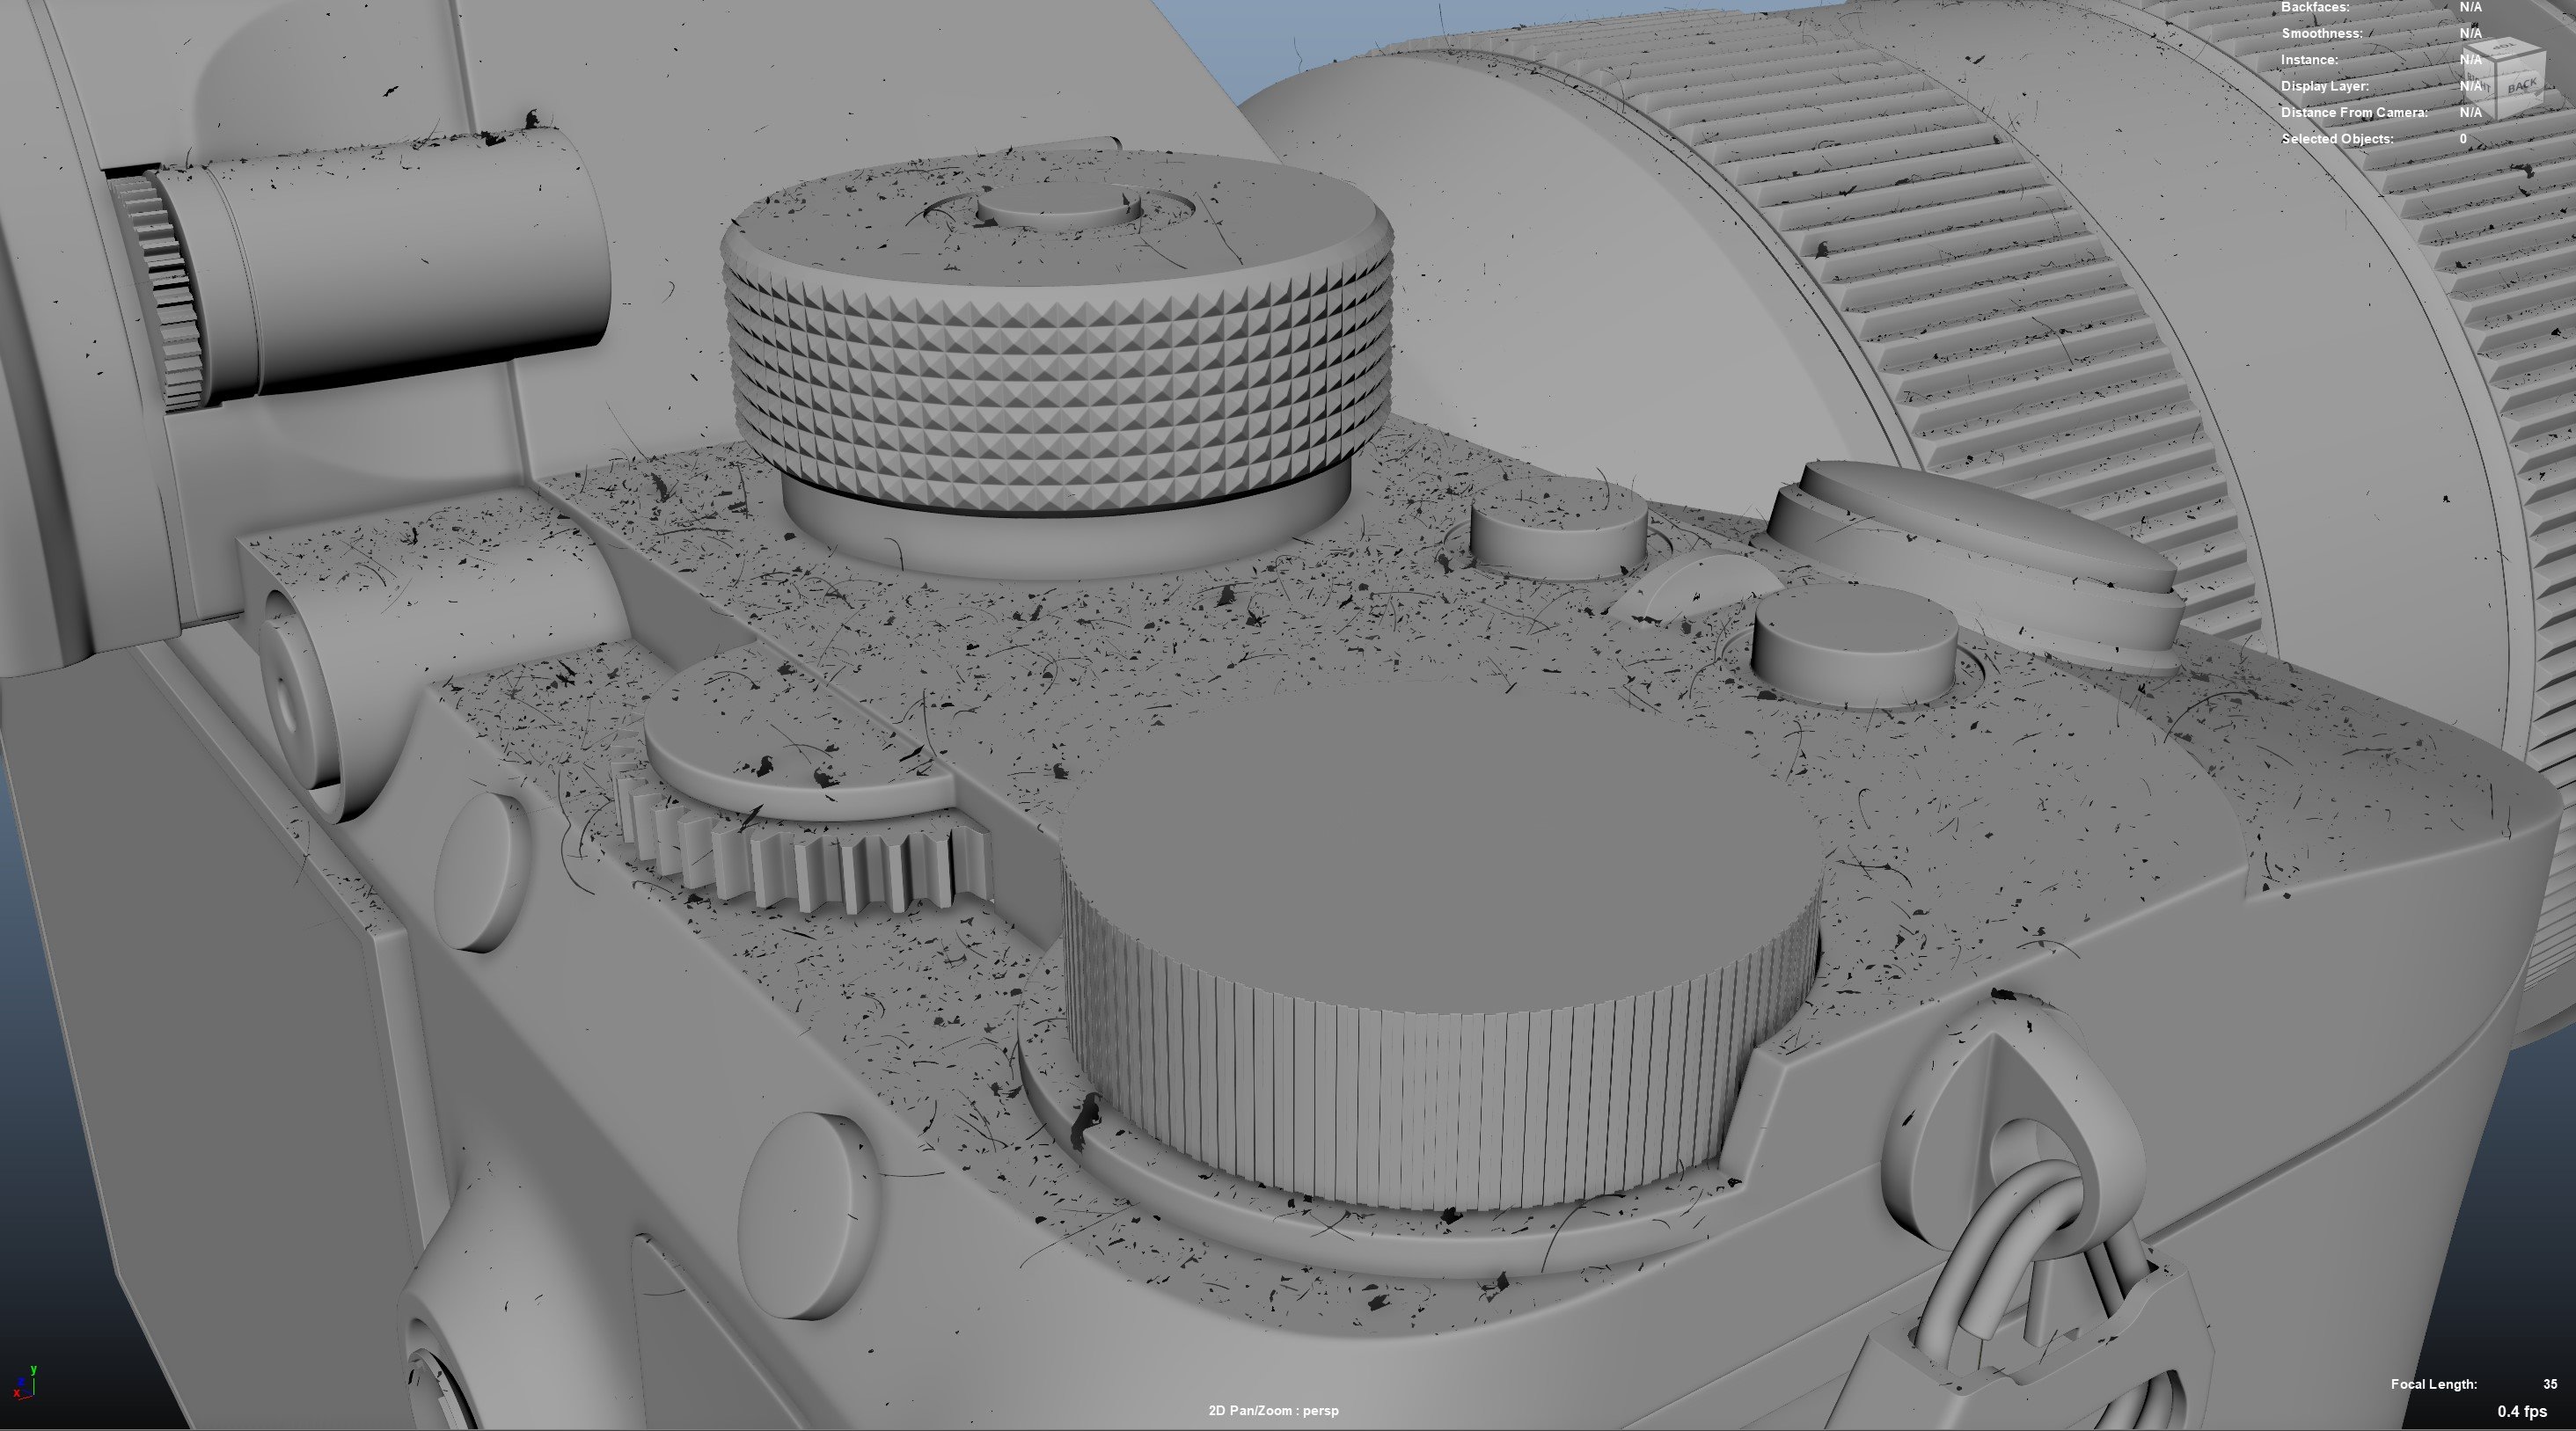
Before starting the project I knew that the dust was a big challenge so I made a dust generator in Houdini, to increse the realism I have defined the scattering zone based on the Y vector and Ao. The scattered geometry has been created in Maya
Rendering

I have rendered my turntables with V-ray GPU as it is a lot faster but still accurate. My stills have been rendered in V-ray CPU.
Gaea | Advanced Terrain Creation
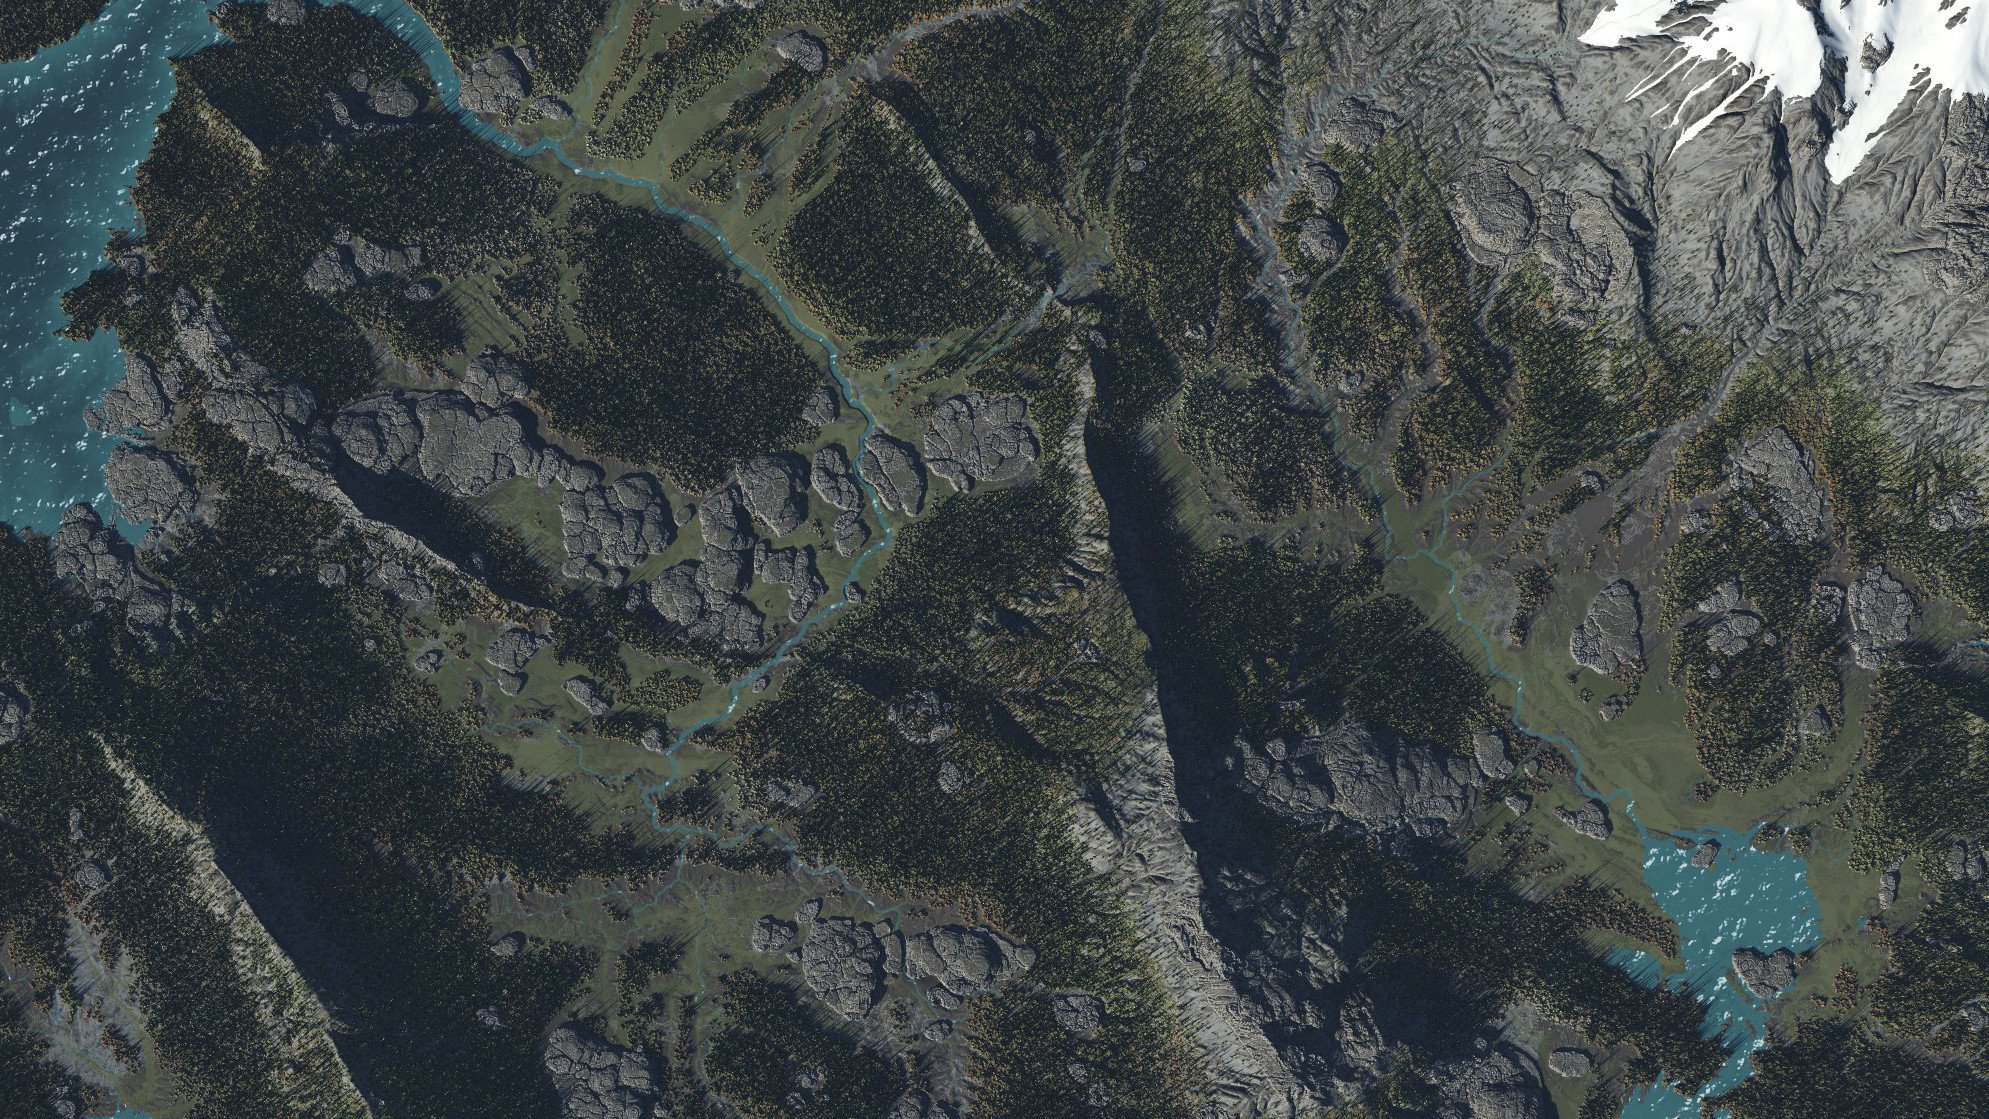

This aerial-view environment is procedural, meaning it can transform entirely with just one click while still adhering to established rules throughout the process.
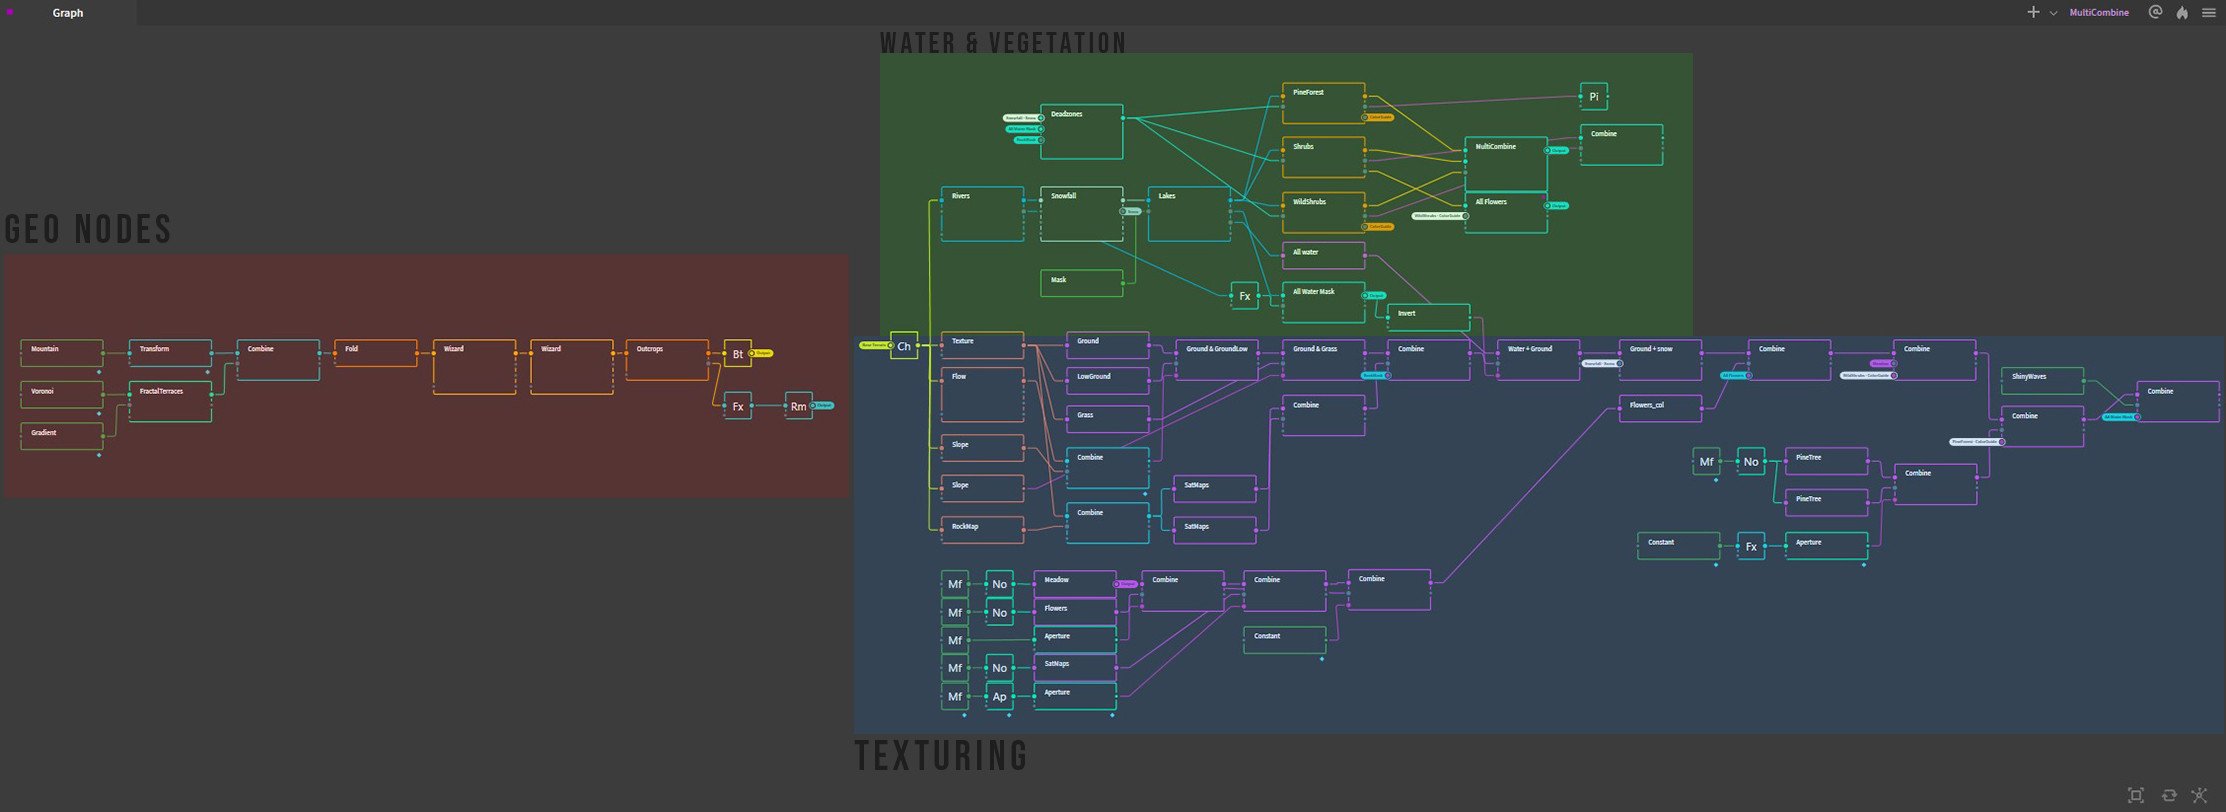
The full graph covers geometry creation, water, vegetation setup, and procedural texturing using earlier generated maps.
Houdini 20 | Feathers

Hi friends, I would like to share the result of my recent experimentations with the new SideFX houdini20 Feather Tools. The Feathers have been rendered in Karma XPU, I loved the workflow, after my studies I was able to produce this result in few hours after work. I would like to thank the people at SideFx for their beautiful documentation! I would like to thanks Moritz Schwind for his tutorials that helped me in my learning journey... I hope you like it.
Cheers ❤️


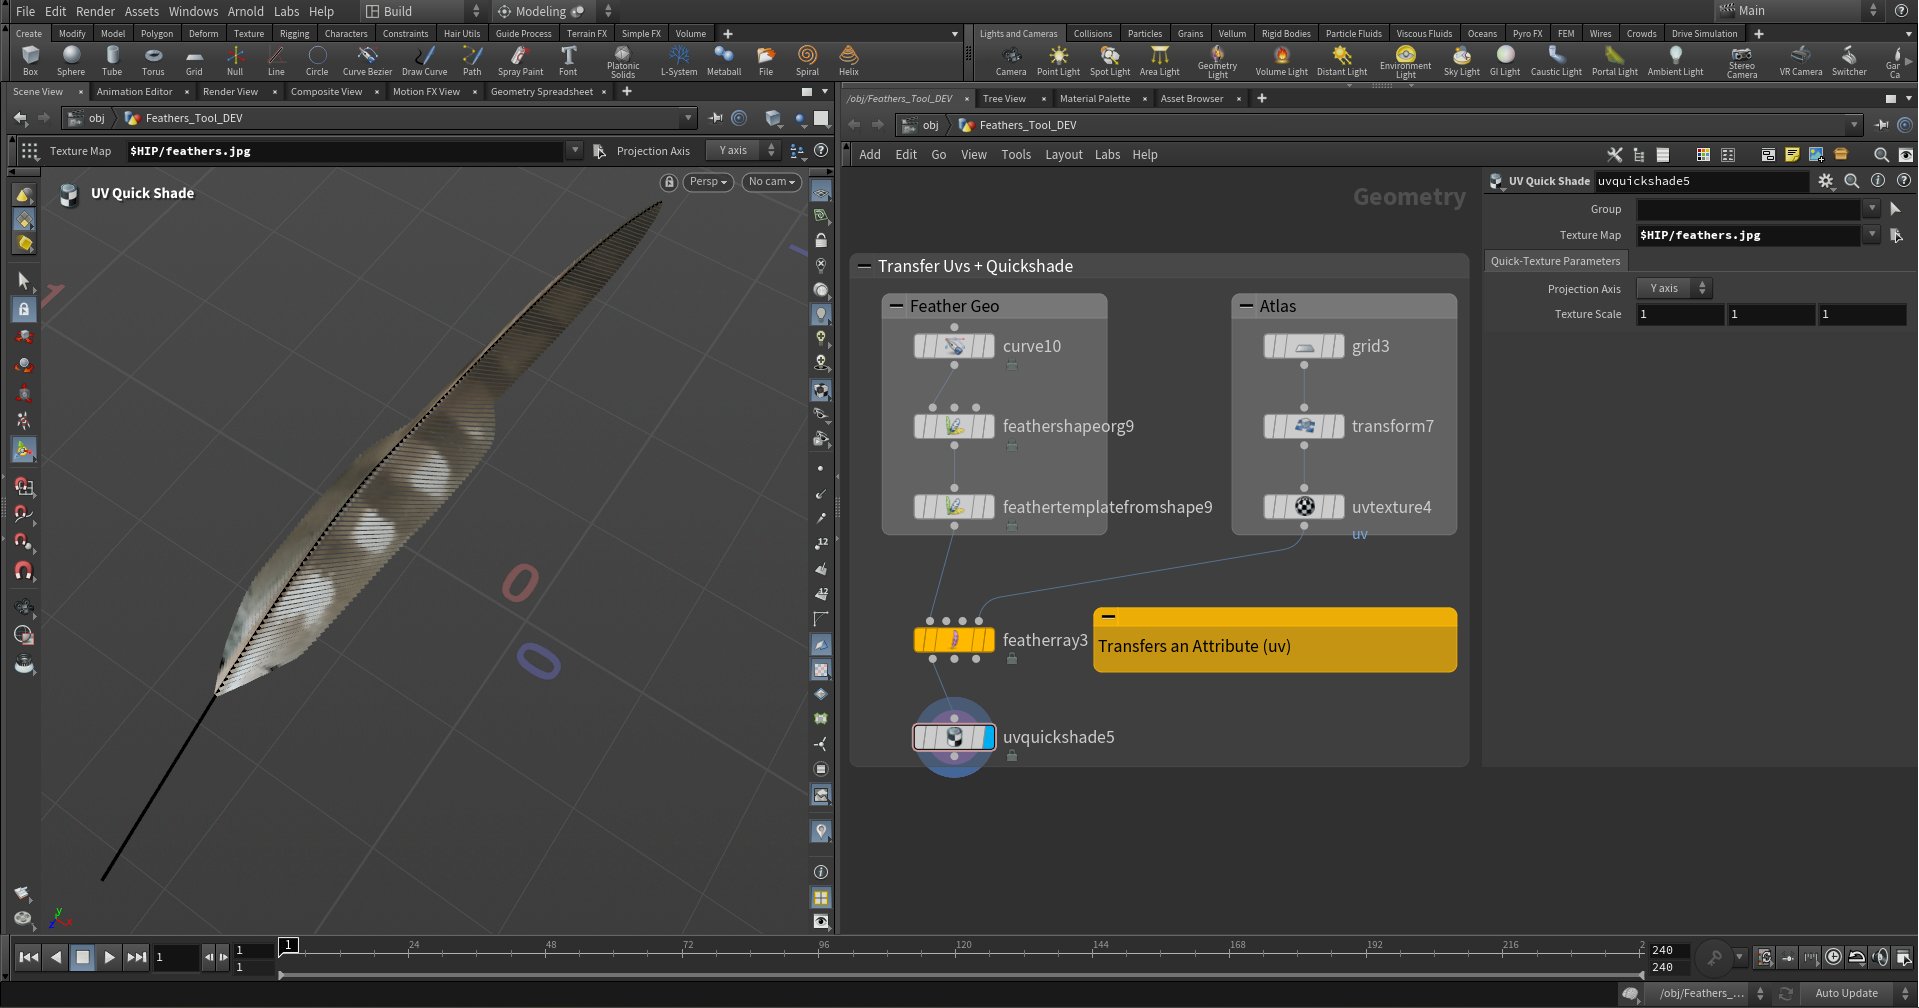
To color your feathers, start by sampling from our Feather Atlas image. Then, transfer the UVs from the grid to the feather. Use the "Feather Ray SOP" to streamline this process. Connect your feather geometry to the first input and the atlas-assigned grid to the third. Make sure to specify the transfer of the "uv" attribute in the "Feather Ray" node properties. This allows you to visualize the texture on your feather model and adjust it as necessary for a perfect match.

I always like to push new systems to their boundaries, in the new houdini feather system we don't have the possibility to add "barbules" that is why I used the existing grooming tools to groom the feather start based on @curveu.
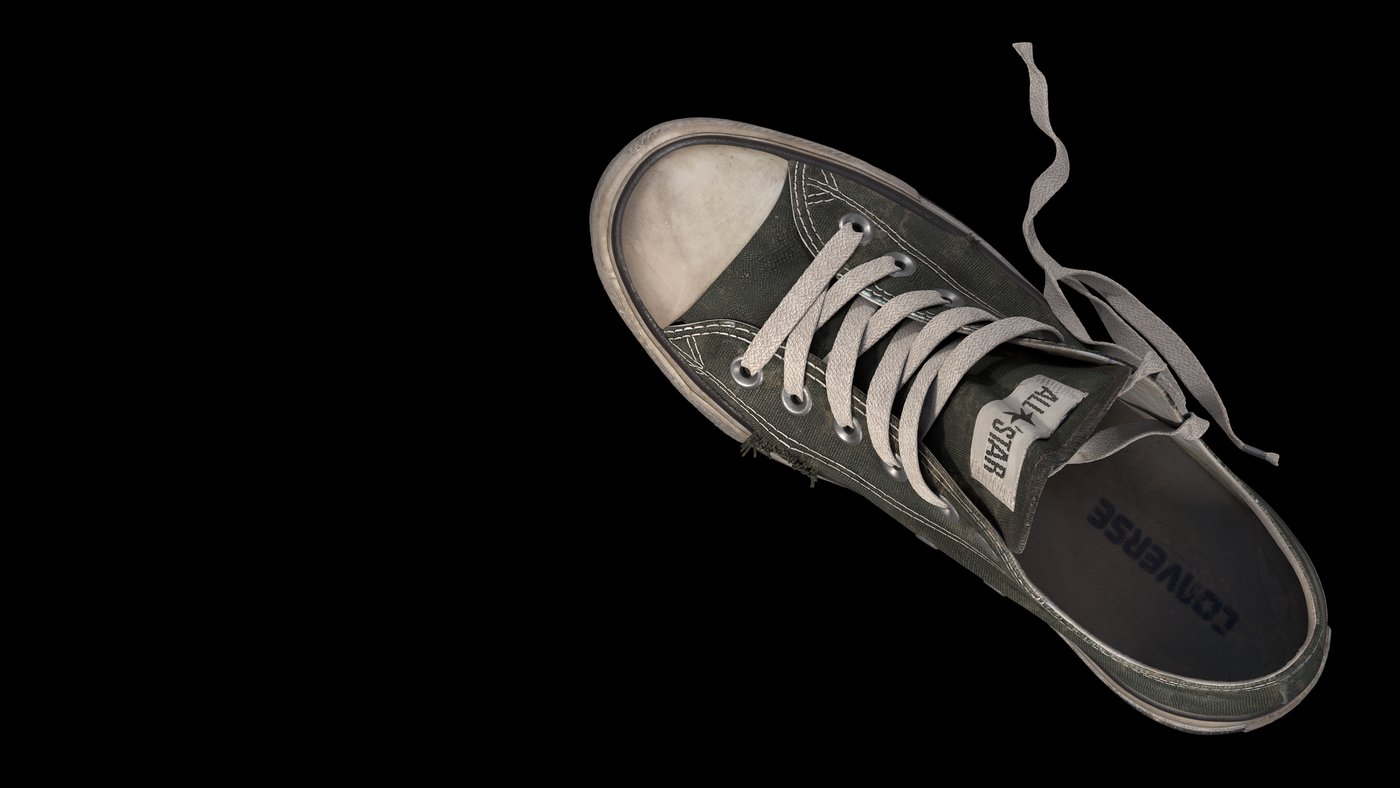
Converse Shoe

The Converse Shoe is a School assignment I had the pleasure to do, the model and the references were provided by Think tank, made by Emily Bélanger, I am responsible for Uvs, Texturing, Lookdev, Lighting and Rendering with Vray (Time Spent: 1 month)

Turntable & AOVs
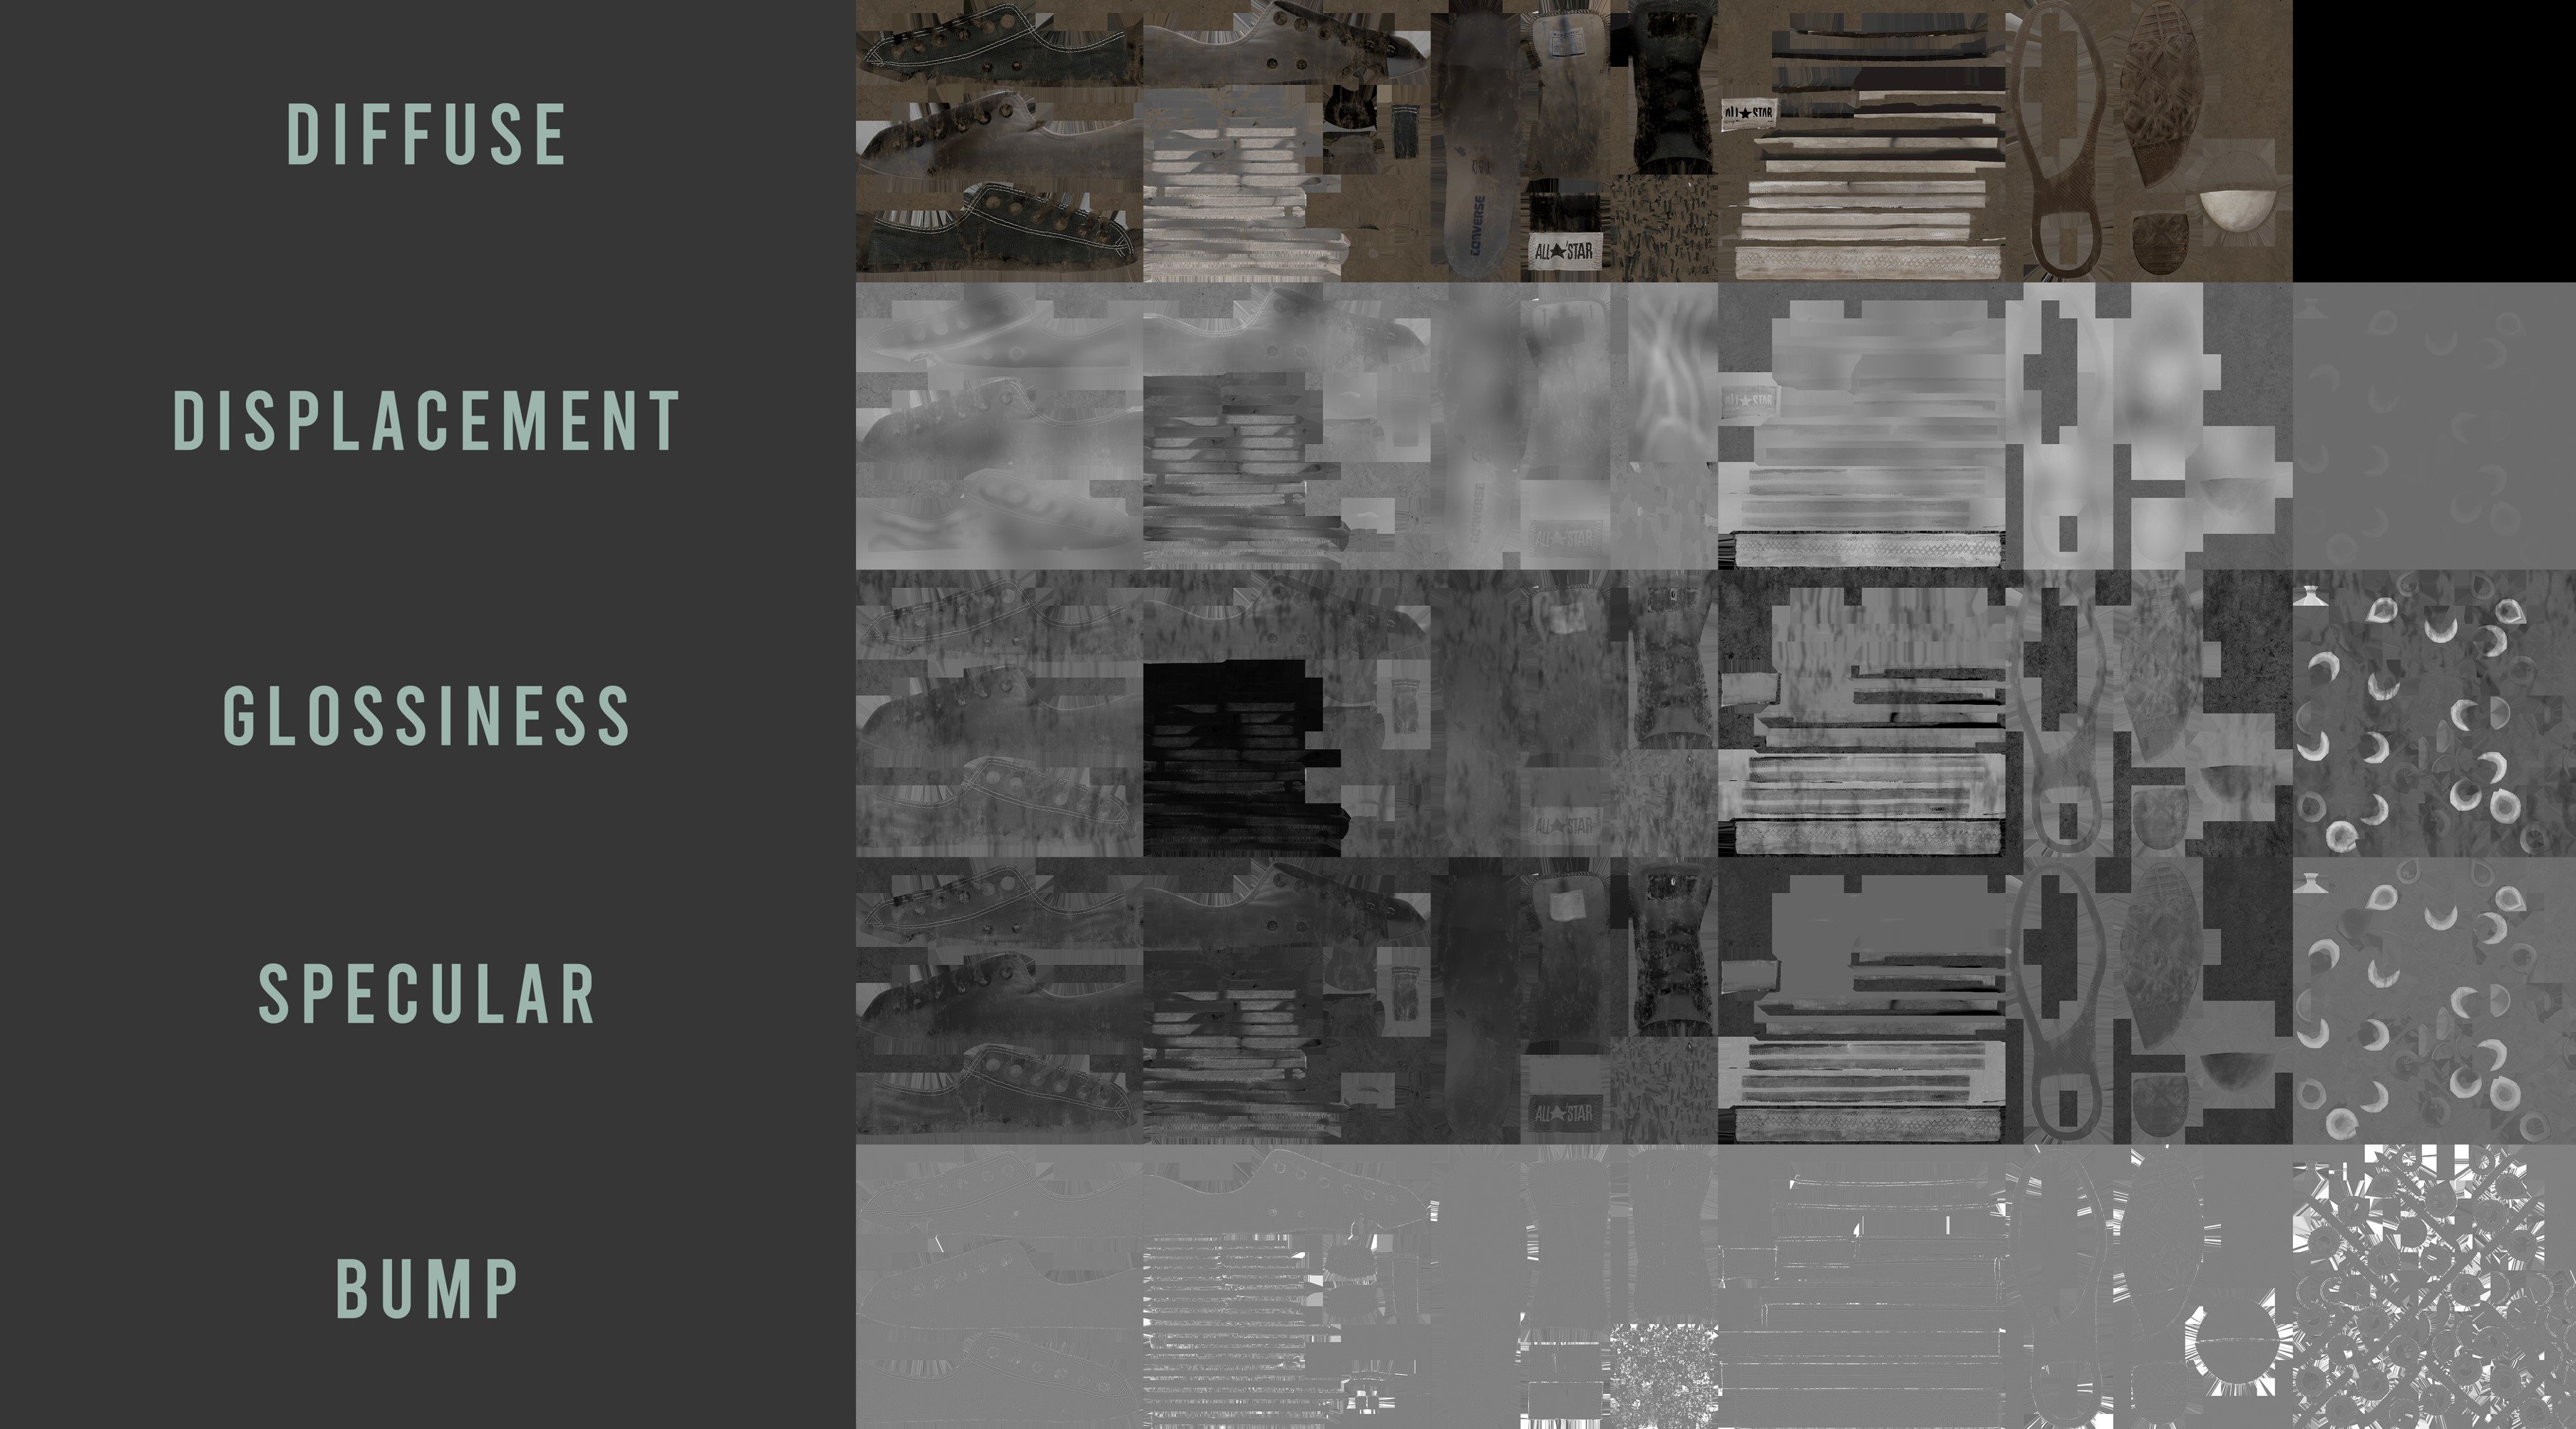
When projecting details on top of my model I learned that consistency between references is key so I fixed the white balance in some pictures and made sure to choose the ones with the sharpest details
Thank you!
Feel free to reach out if you want to work with me ❤️
Here are my main socials:
EMAIL - [email protected]
LKDN - https://www.linkedin.com/in/marioleone3d/
INSTA - https://www.instagram.com/mario.fbx/


Comments (58)