
Good Morning - Interior Scenes

Environment work done during my study at 3dsense Media School
Good Morning - Interior Scenes
GOOD MORNING - INTERIOR SCENES (GAME ENVIRONMENT)
This real time game environment was modeled based on the concept of Kiara Leneuf during my time at 3dsense Media School game art diploma course, which lasted approximately around 4 months.
The experience was invaluable as it was my first time doing a real time game environment in Unreal Engine 5. Under the amazing guidance of my mentor Venny Lie, I was able to explore many workflows within the project and was able to showcase the process of producing a game environment! I was able to showcase modular workflows, creating tileables and trim sheets, modeling, vegetation, setting up materials and decals in Unreal, to lighting and rendering using Lumen and much more!
Kiara Leneuf Concept: https://www.artstation.com/artwork/zPmob2


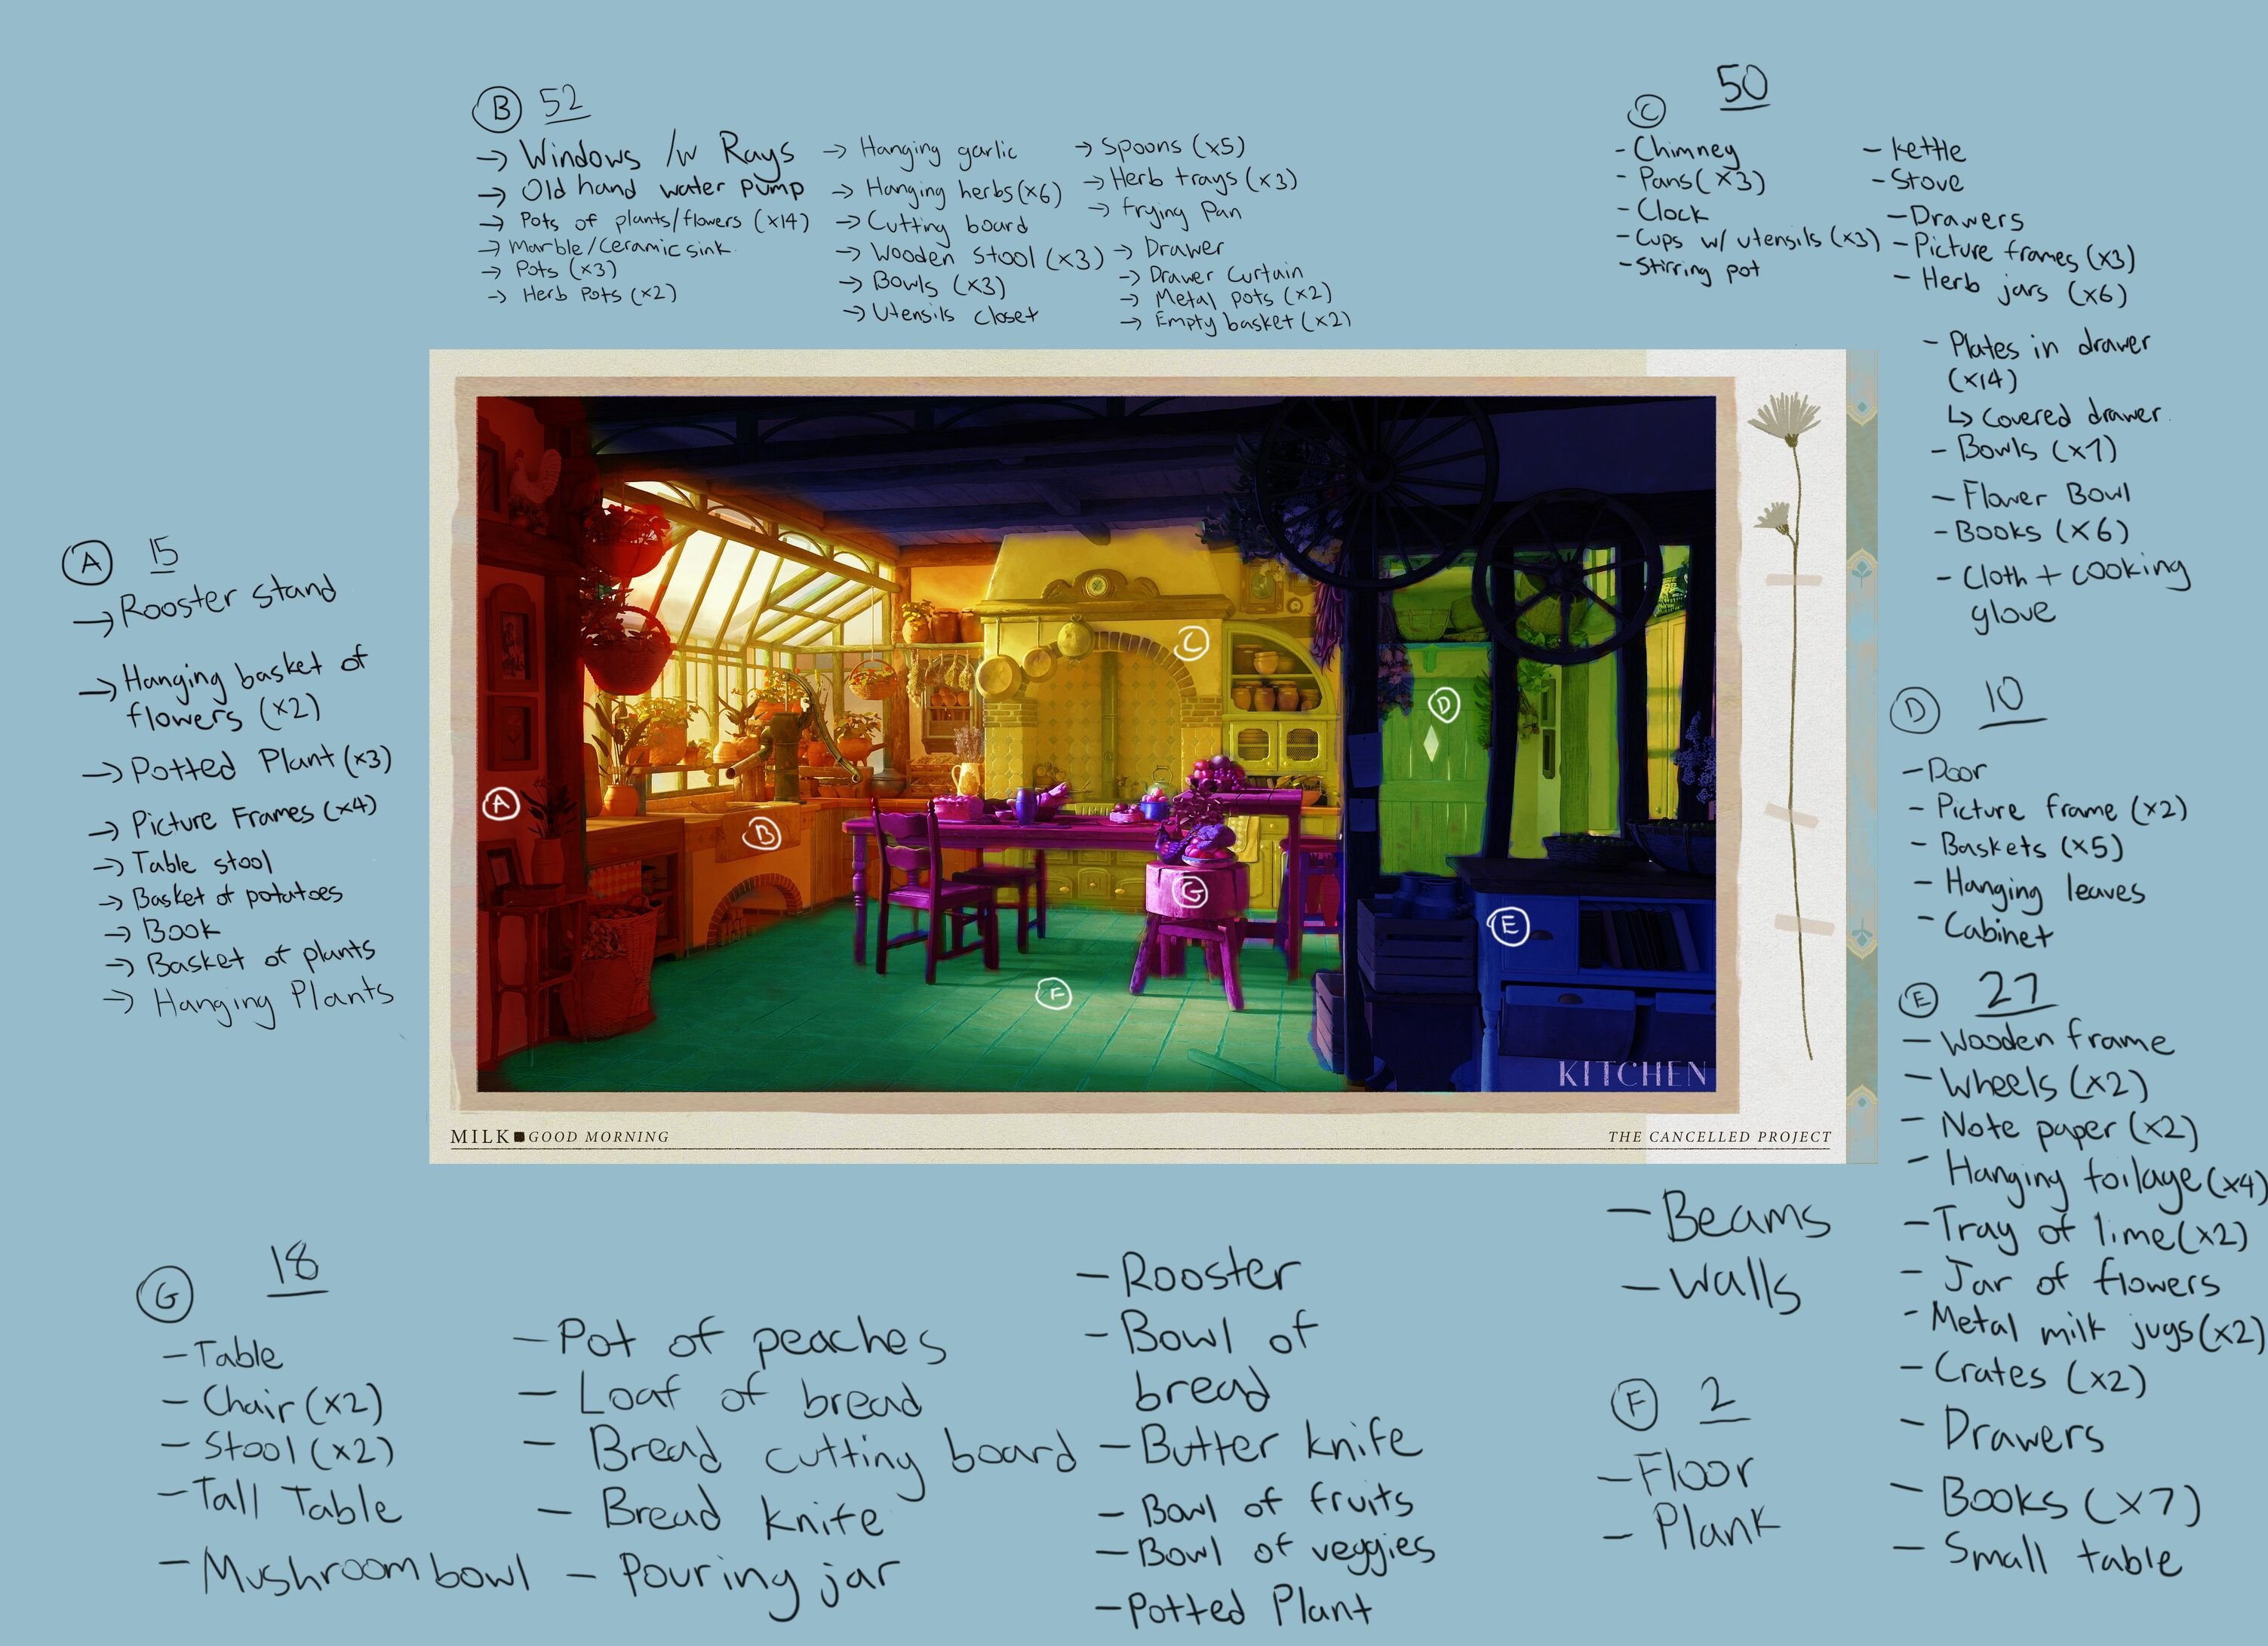
Planning Stage:
The planning stage is important as I had to figure out the amount of assets I am required to do and it also acts as a checklist. I brought the reference to photoshop to break it down into 7 different groups while also planning in google sheets whether the asset was modular, reusable or unique and whether tileable or trim sheet should be used.

Reference Gathering Stage:
Gathering reference is important especially since there were a lot of things that were quite unclear with this environment. Because of this I had to clarify a lot with the concept artist. I mainly gathered 3 types of references: Geometry references, 3D references from games/artists, and real life references.
I would like to especially thank the concept artist Kiara Leneuf for clarifying my questions regarding the concept!


Blockout Stage:
I started by bringing the reference into a software called F-spy, this software assisted me in matching the camera to the reference very well. After I matched the camera perspective, I imported the camera into maya and focused solely on blocking out the larger assets while getting the silhouette right.


F-Spy:

Once satisfied, I moved the entire blockout into Unreal and placed the first lights to set the mood.

Props Detailing:
After blocking out the props, I exported each set of props into zbrush to create a detailed high poly.
One of the unique props that I sculpted and detailed was the hand water pump, which was fun and challenging to create because the references for it were quite hard to find and a lot of research had to be found from real life photos and assembly manuals in order to find out about the storytelling, the mechanical function etc.

Additionally, I also beveled the majority of the assets to give it that organic look as in real life, organic objects do not have purely sharp edges, so bevelling and giving it a soft edge would help it to make it look less low poly and blocky.
Unreal Integration Stage:
As I detailed the props and made changes, there was a lot of back and forth from maya to unreal from tweaking materials to setting additional lighting to set the mood better. I had a lot of fun especially since it was my first time using a node based system.
Setting up in Unreal:
I made different master materials with separate instances in order for easier modification. During this stage I also learned how to implement the LERP node, use gobos to fake shadows and use fake fog.
As my concept had a lot of fog outside the environment, fake fog really helped a lot to add depth to the scene. I added this material onto a cube mesh that unreal provides.


Fake Fog and shadow:


Trim Sheets and Tileables:
While I made most of the props unique using a high-poly to low poly baking workflow, it wasn’t effective time-wise.
Hence, trim sheets and tileables are very important as they help to speed up the process of asset creation but it also saves performance on the overall texture memory since multiple assets are sharing one material.


In order to make the trim sheets less repetitive, I made the base using Quixel Mixer and brought them to substance painter to gave it variation.
Quixel Mixer:

Texturing:
When texturing, I had to export constantly from substance to unreal and do major tweaks as the color will change a lot especially since substance viewport uses a different color space from unreal. So in order to solve that problem, I used an external substance plugin called ACES plugin. This really helped a lot with the problems I had previously and because of it I only had to do minor tweaking in unreal.
ACES Plugin:

Assets and Breakdowns:


Lighting & Post Processing Stage:
I started out with a directional light and the main lights in order to simulate the main light source from the window. Lighting channels are incredibly overpowered and I use them a lot especially when I added more lights eventually to emphasize the highlights of the assets in the concept. I also used an exponential height fog very slightly to give it a sense of depth and used a fake fog material, in order to fake depth and bloom too.
To add some final touches, I added some post processing to improve the colors and the overall feel even more.
Process:


Lighting Icons:
Post - Process:


Render Passes:


Comments (7)