
Tiziana Pirina 2024 - Character Blend Shapes
Hello, I'm Tiziana Pirina. Today, I'm excited to present a project I developed during my time as an assistant at Skyup Academy
Tiziana Pirina 2024 - Character Blend Shapes
Today I'm excited to present my entry, a tribute to "Avatar", a cinematic masterpiece that has shaped my artistic and professional journey.

It was this very film that sparked my desire to transition from my old path of traditional sculpting to a career as a 3D artist.
I chose to challenge myself by focusing on sculpting Neytiri. This allowed me to refine my skills in sculpting and creating blend shapes.
By concentrating on a single expression, I explored deeply into modeling facial details, studying subtle muscle movements and their impact on the character's appearance.
This work was done during my time as a student assitant at Skyup Academy under the supervision of my theachers Mauro Baldissera, Chiara Rovoletto and thanks to them I had the opportunity to connect with Matteo Stirati that helped me really brig it to life.
This experience enabled me to explore new techniques in digital sculpting and push my artistic boundaries.
The process of researching references played an essential role.
I searched through countless images and behind-the-scenes footage to truly understand the intricate details of Neytiri's character. Each reference became a guiding light, offering insights into her anatomy, facial features, and the nuances of her expressions.

I started with creating a basic structure using fundamental geometric shapes, and then proceeded with detailed sculpting development, adding depth and realism to the character.
Throughout the process, reference research was essential to ensure accuracy in representation. Finally, the sculpture was refined with the addition of fine details to make Neytiri vibrant and authentic.

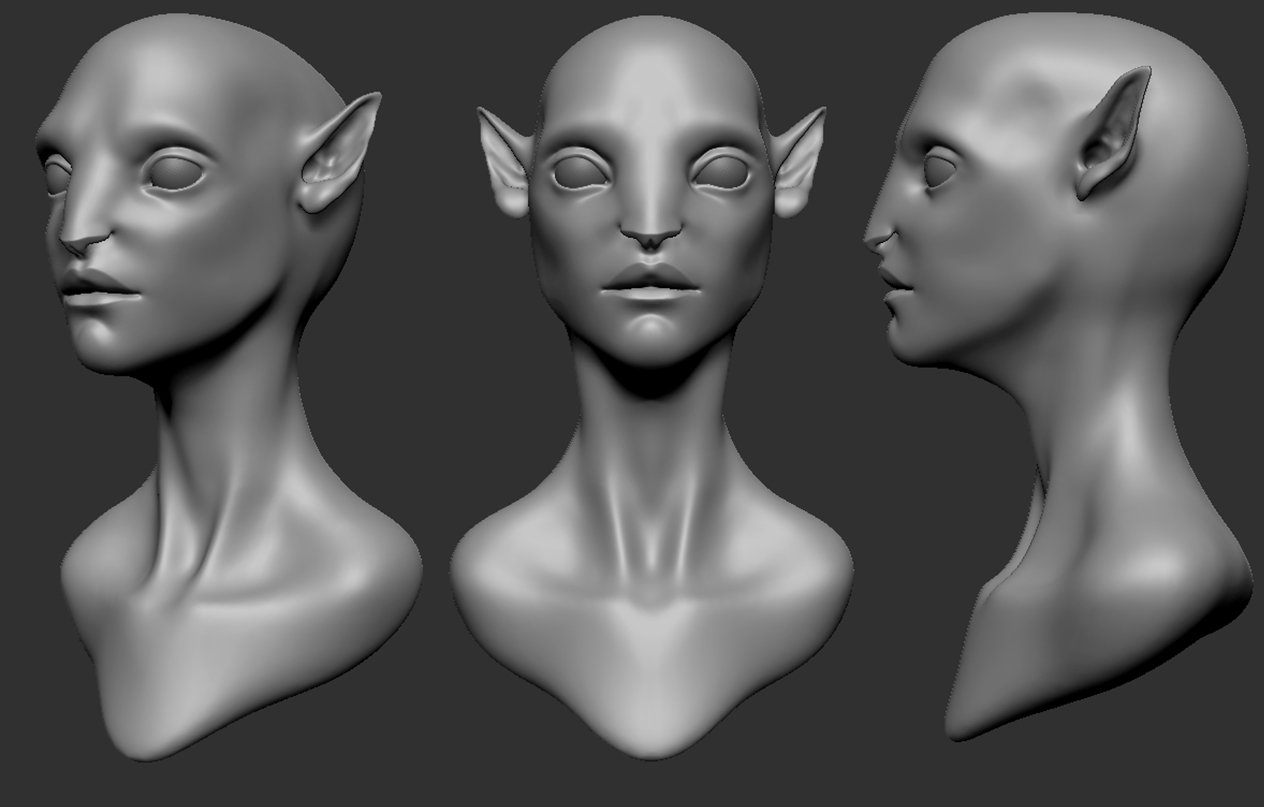


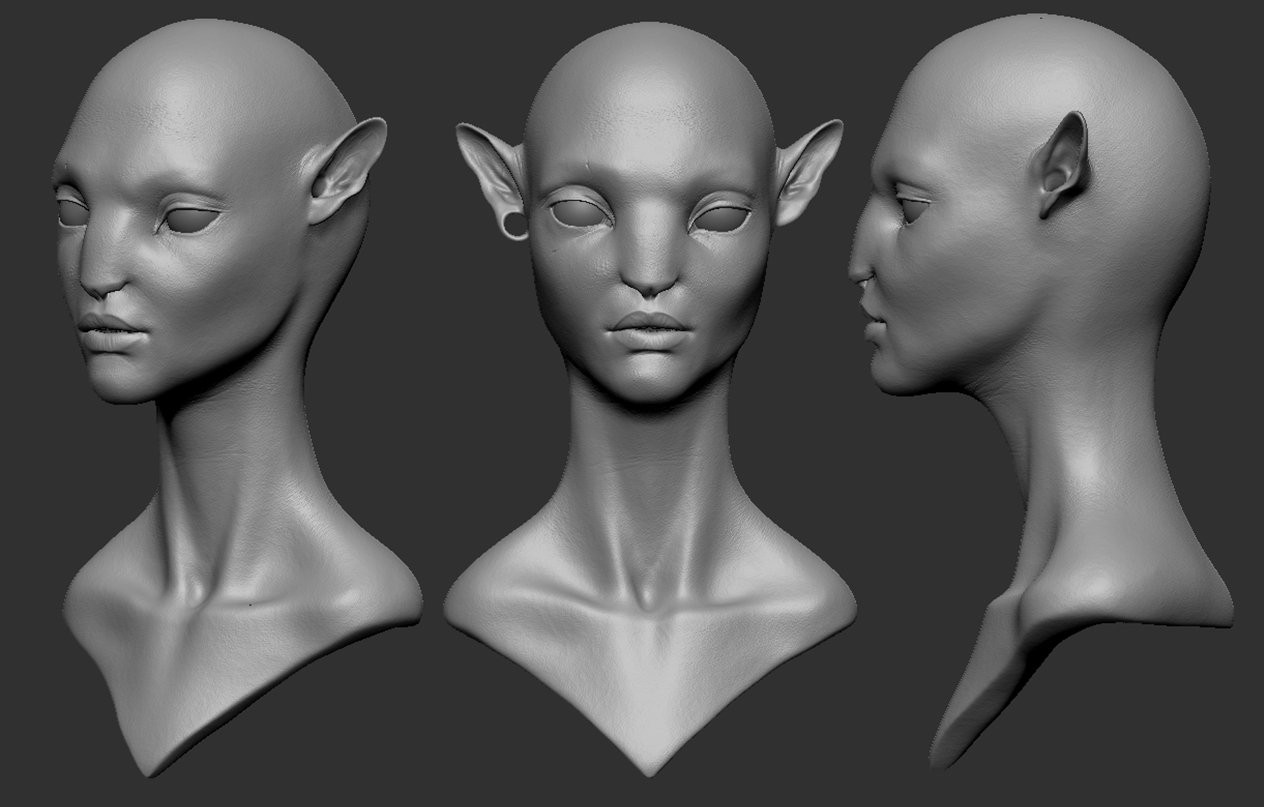
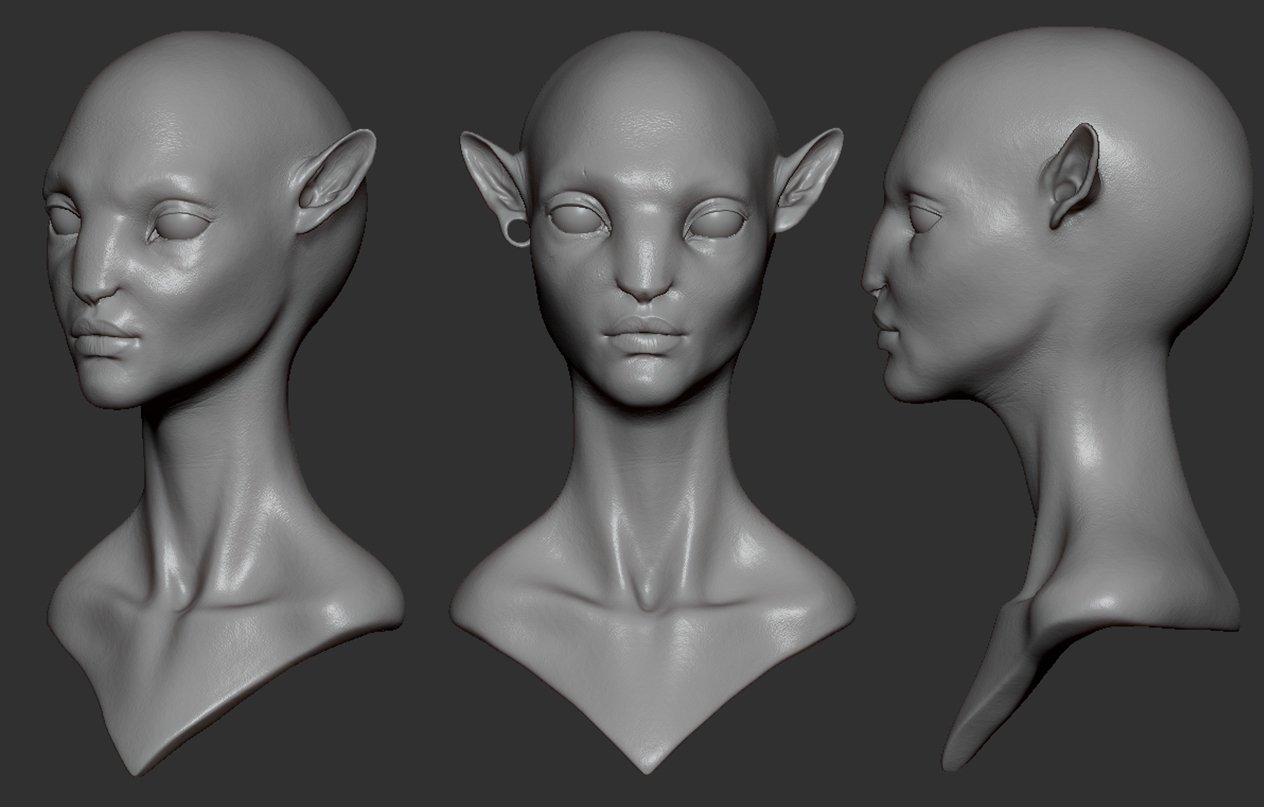
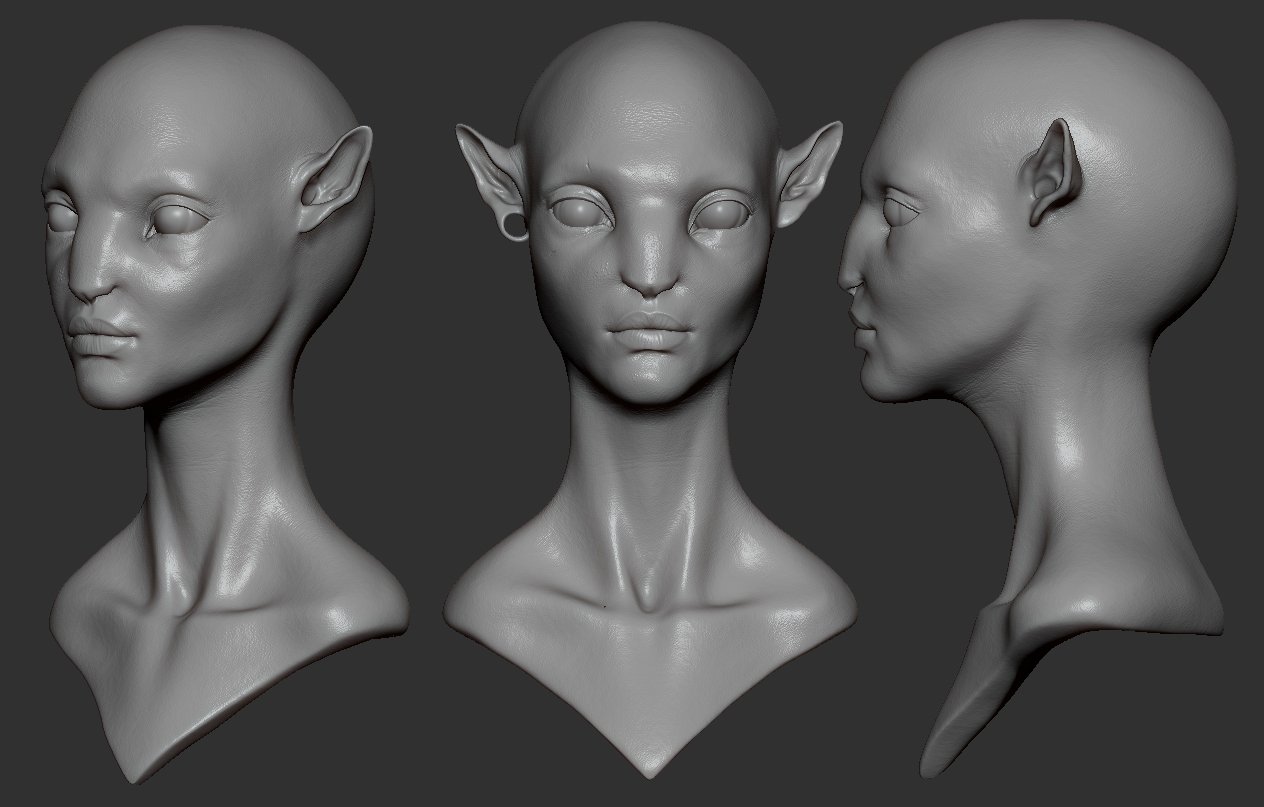
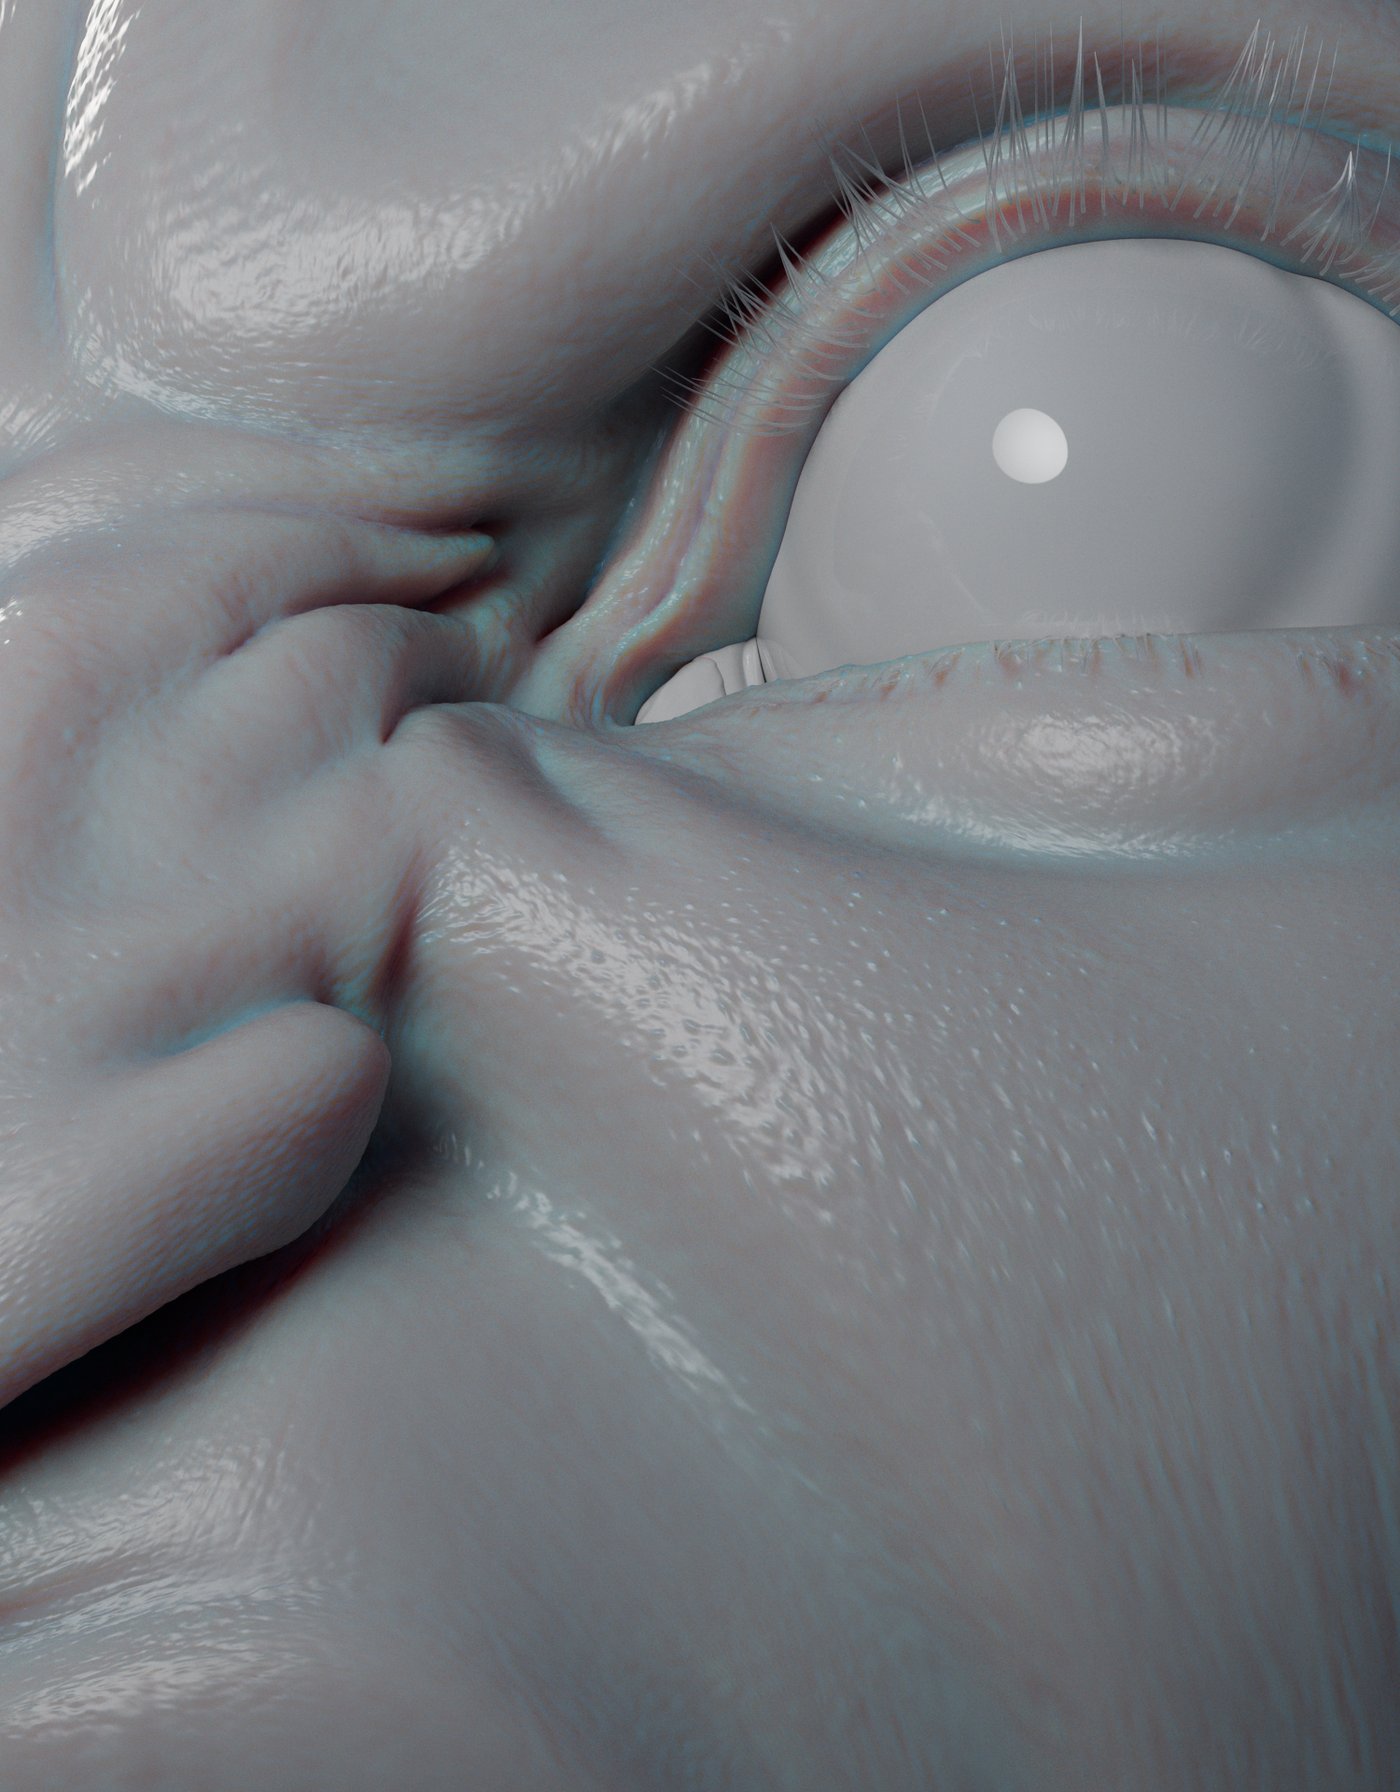
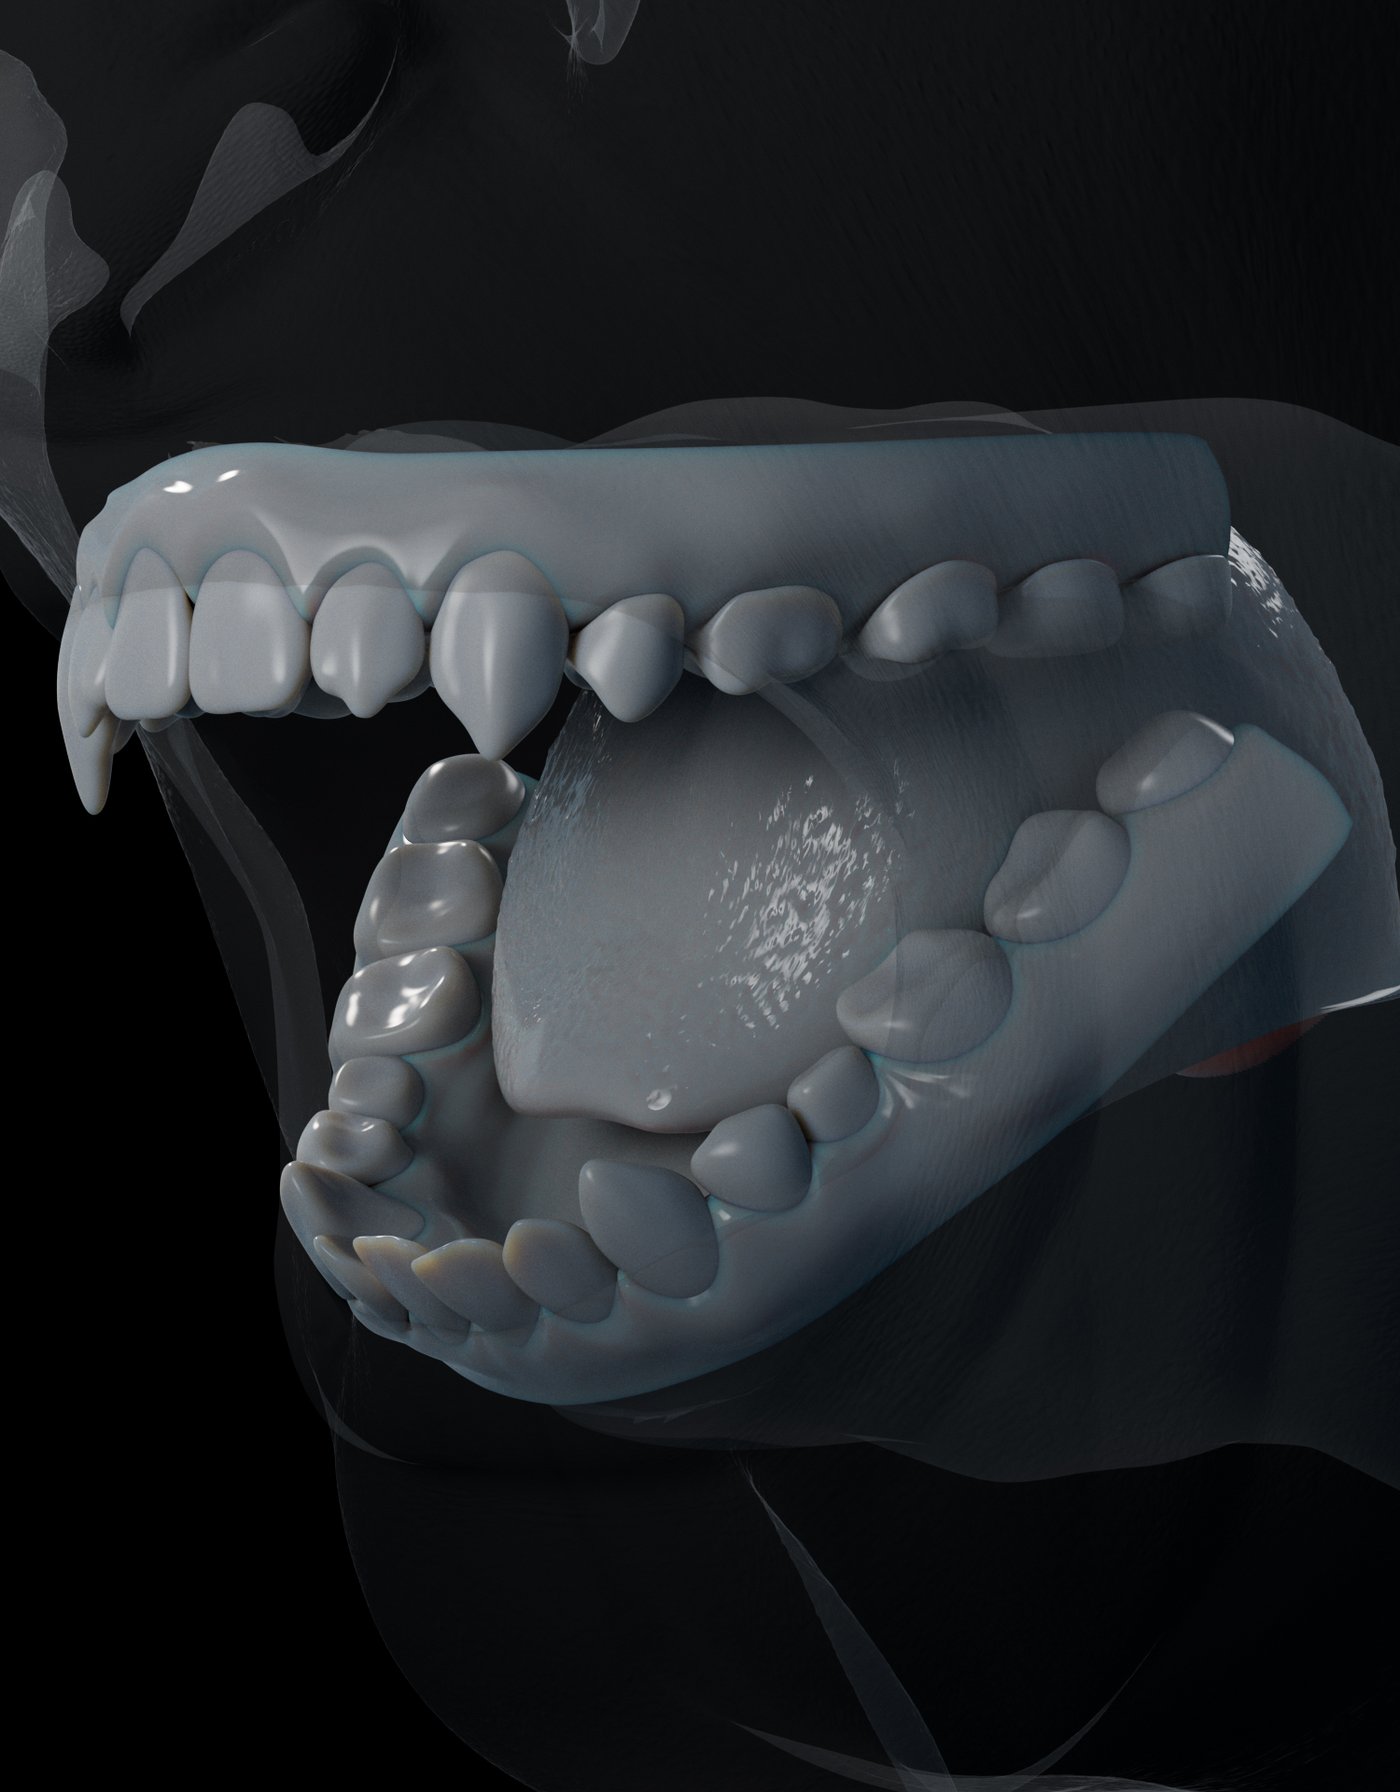
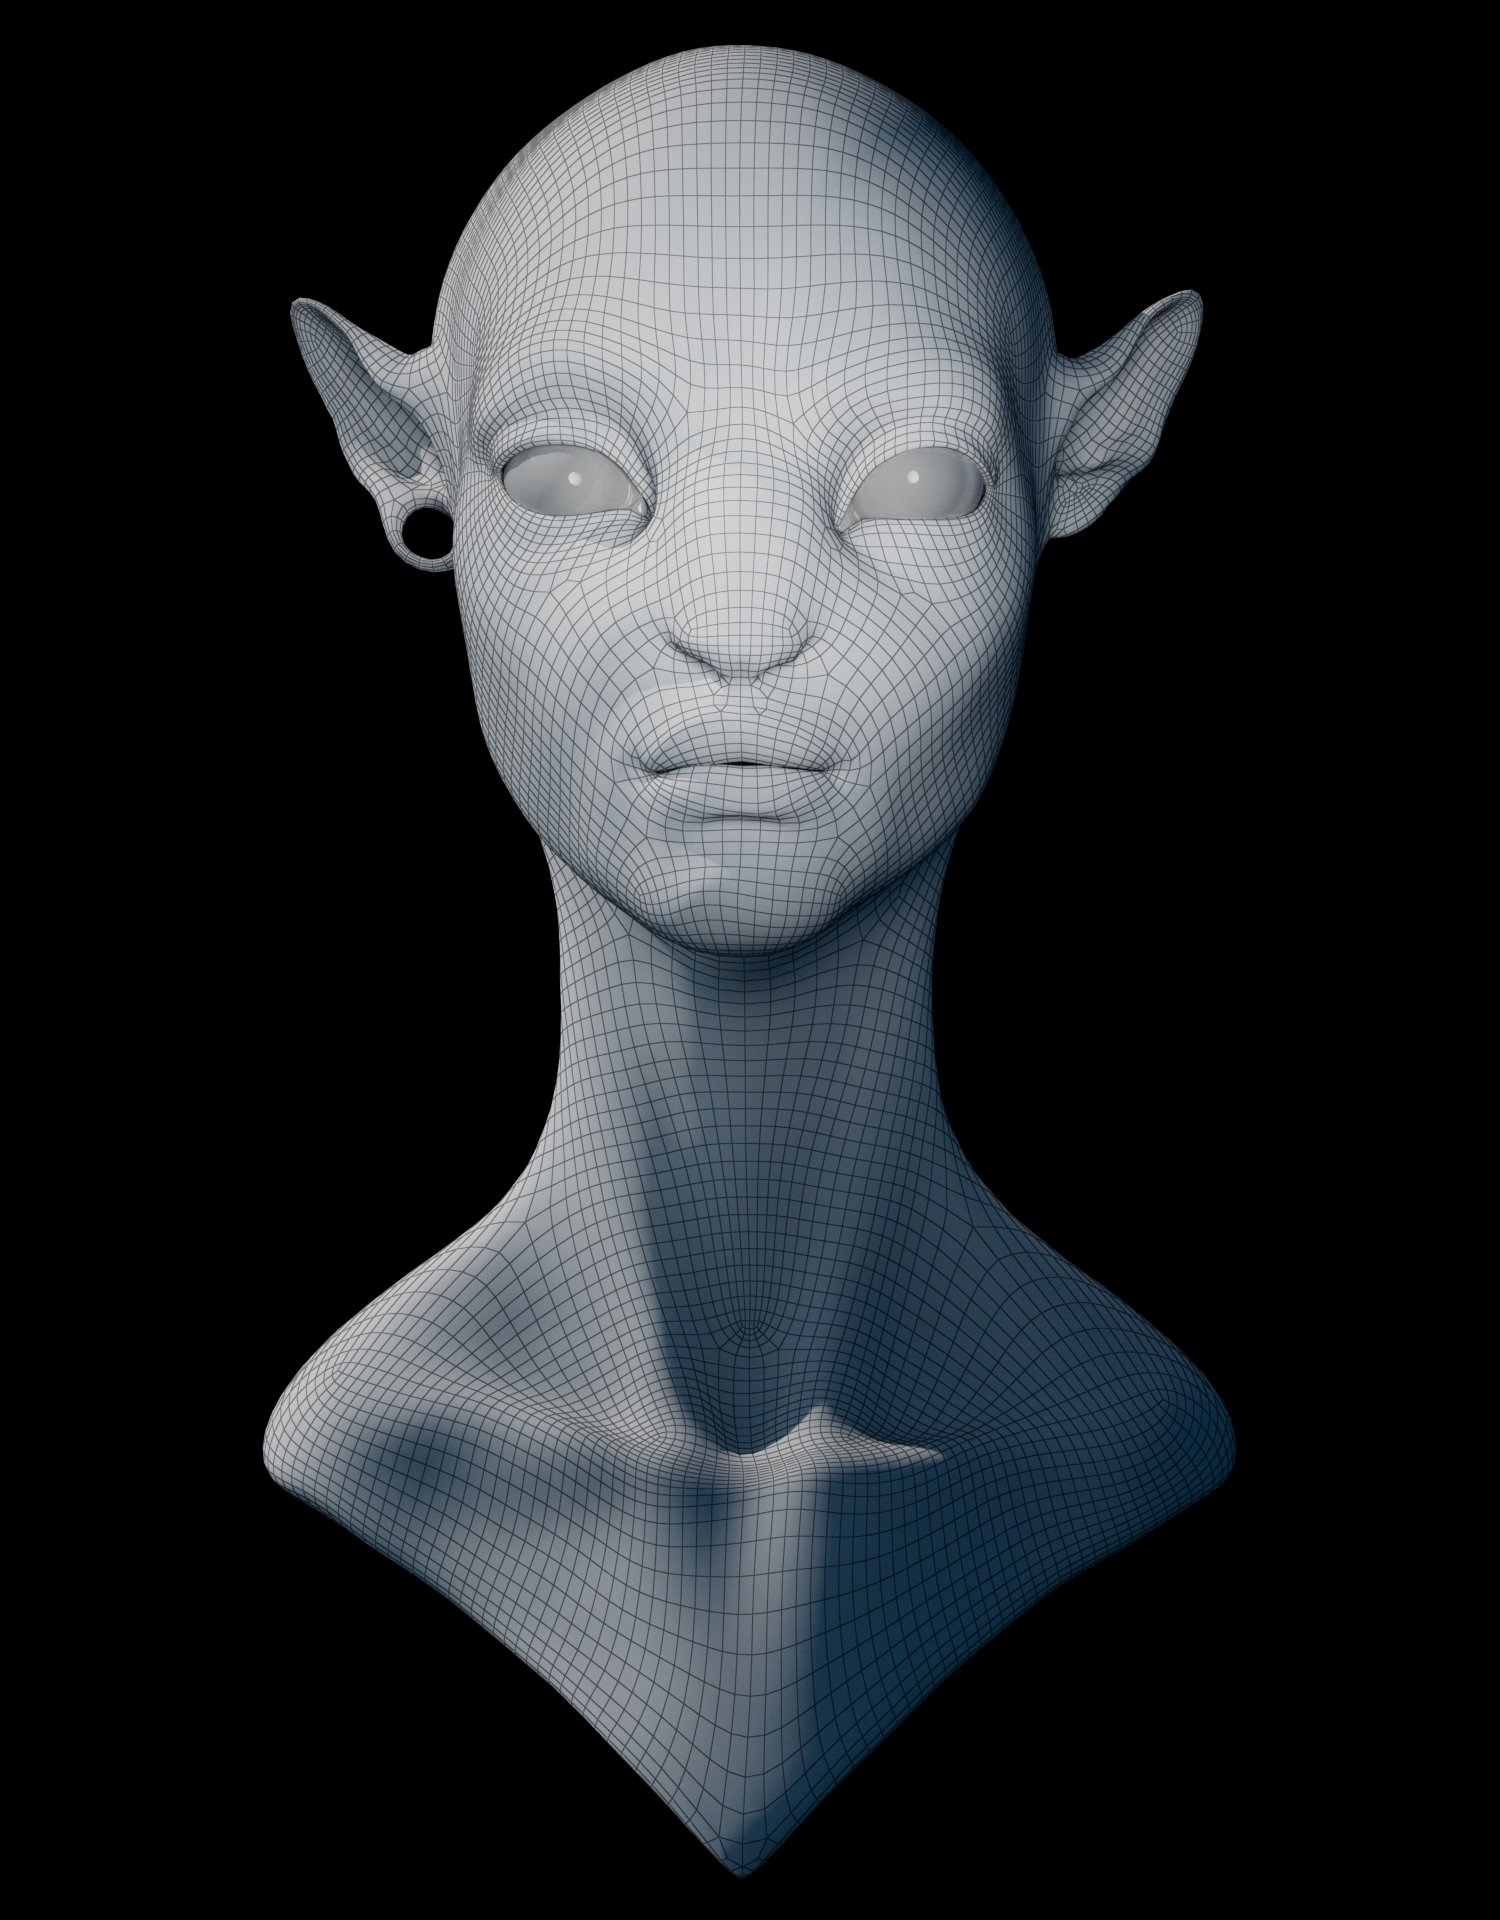
After this I focused on adding intricate details to enhance realism, including sculpting features like the eyeballs, tear ducts, tongue, and teeth.
Firstly, I sculpted the eyeballs to ensure accurate shape and positioning within the eye sockets, refining curvature and surface texture for a natural look. Then, I meticulously crafted tear ducts to add depth and realism to Neytiri's gaze.
Attention was also given to sculpting the tongue anatomically and adding subtle details like veins and muscle definition. Finally, I sculpted the teeth, refining shape, size, and arrangement to match Neytiri's appearance.

After completing the initial sculpting phase, I focused on optimizing Neytiri's model for further detailing and animation.
This involved reworking the model's topology by creating polygroups to control different areas of the face. I then used ZRemesher in ZBrush to generate a new topology, adjusting settings to make sure that it followed the polygroups and to preserve sculpted details. This step was crucial for achieving a clean and efficient topology.
After exporting the model to Maya, I further refined the topology to ensure smooth edge loops that supported realistic movement and expression, paying close attention to areas where proper edge flow is essential.
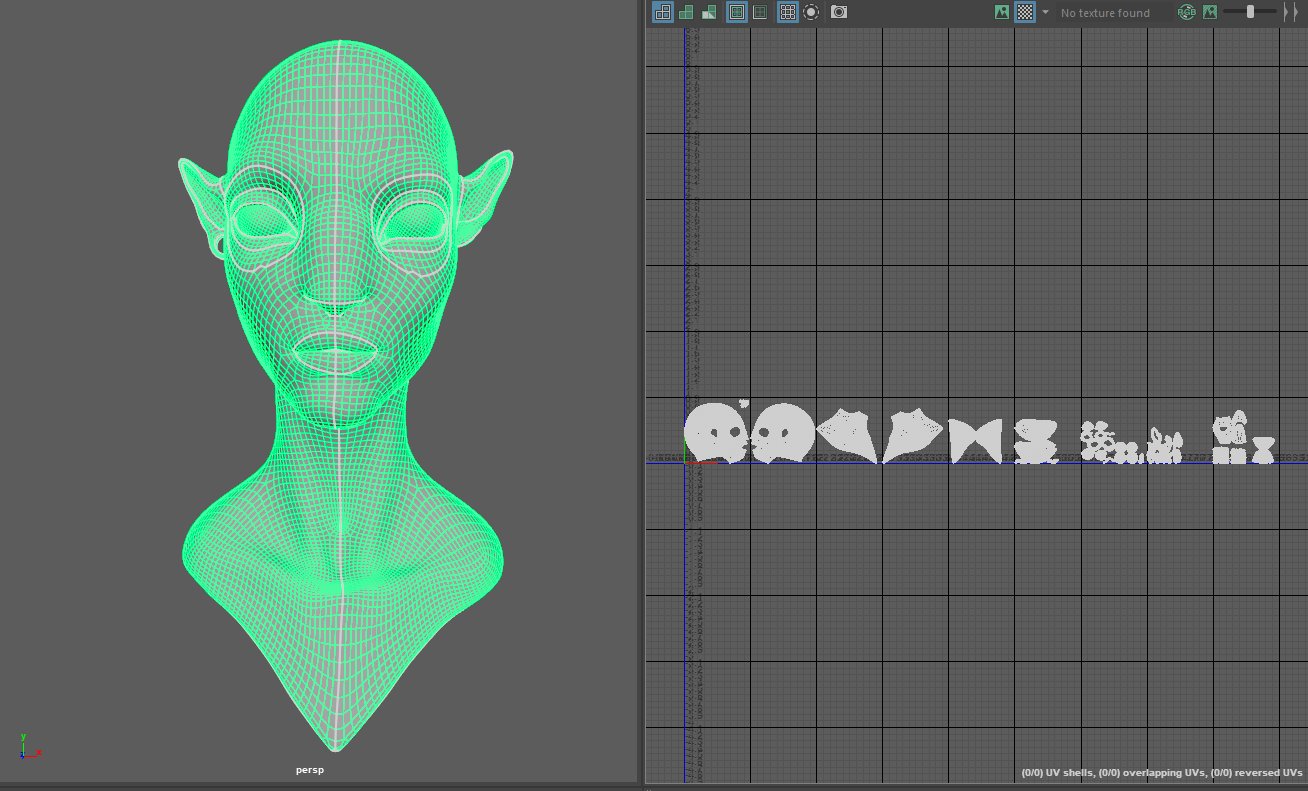
With the topology now optimized and finalized, I proceeded to UV unwrap the model to prepare it for texturing and shading. This involved laying out the UVs in a logical and efficient manner to minimize distortion and ensure consistent texture resolution across the model.
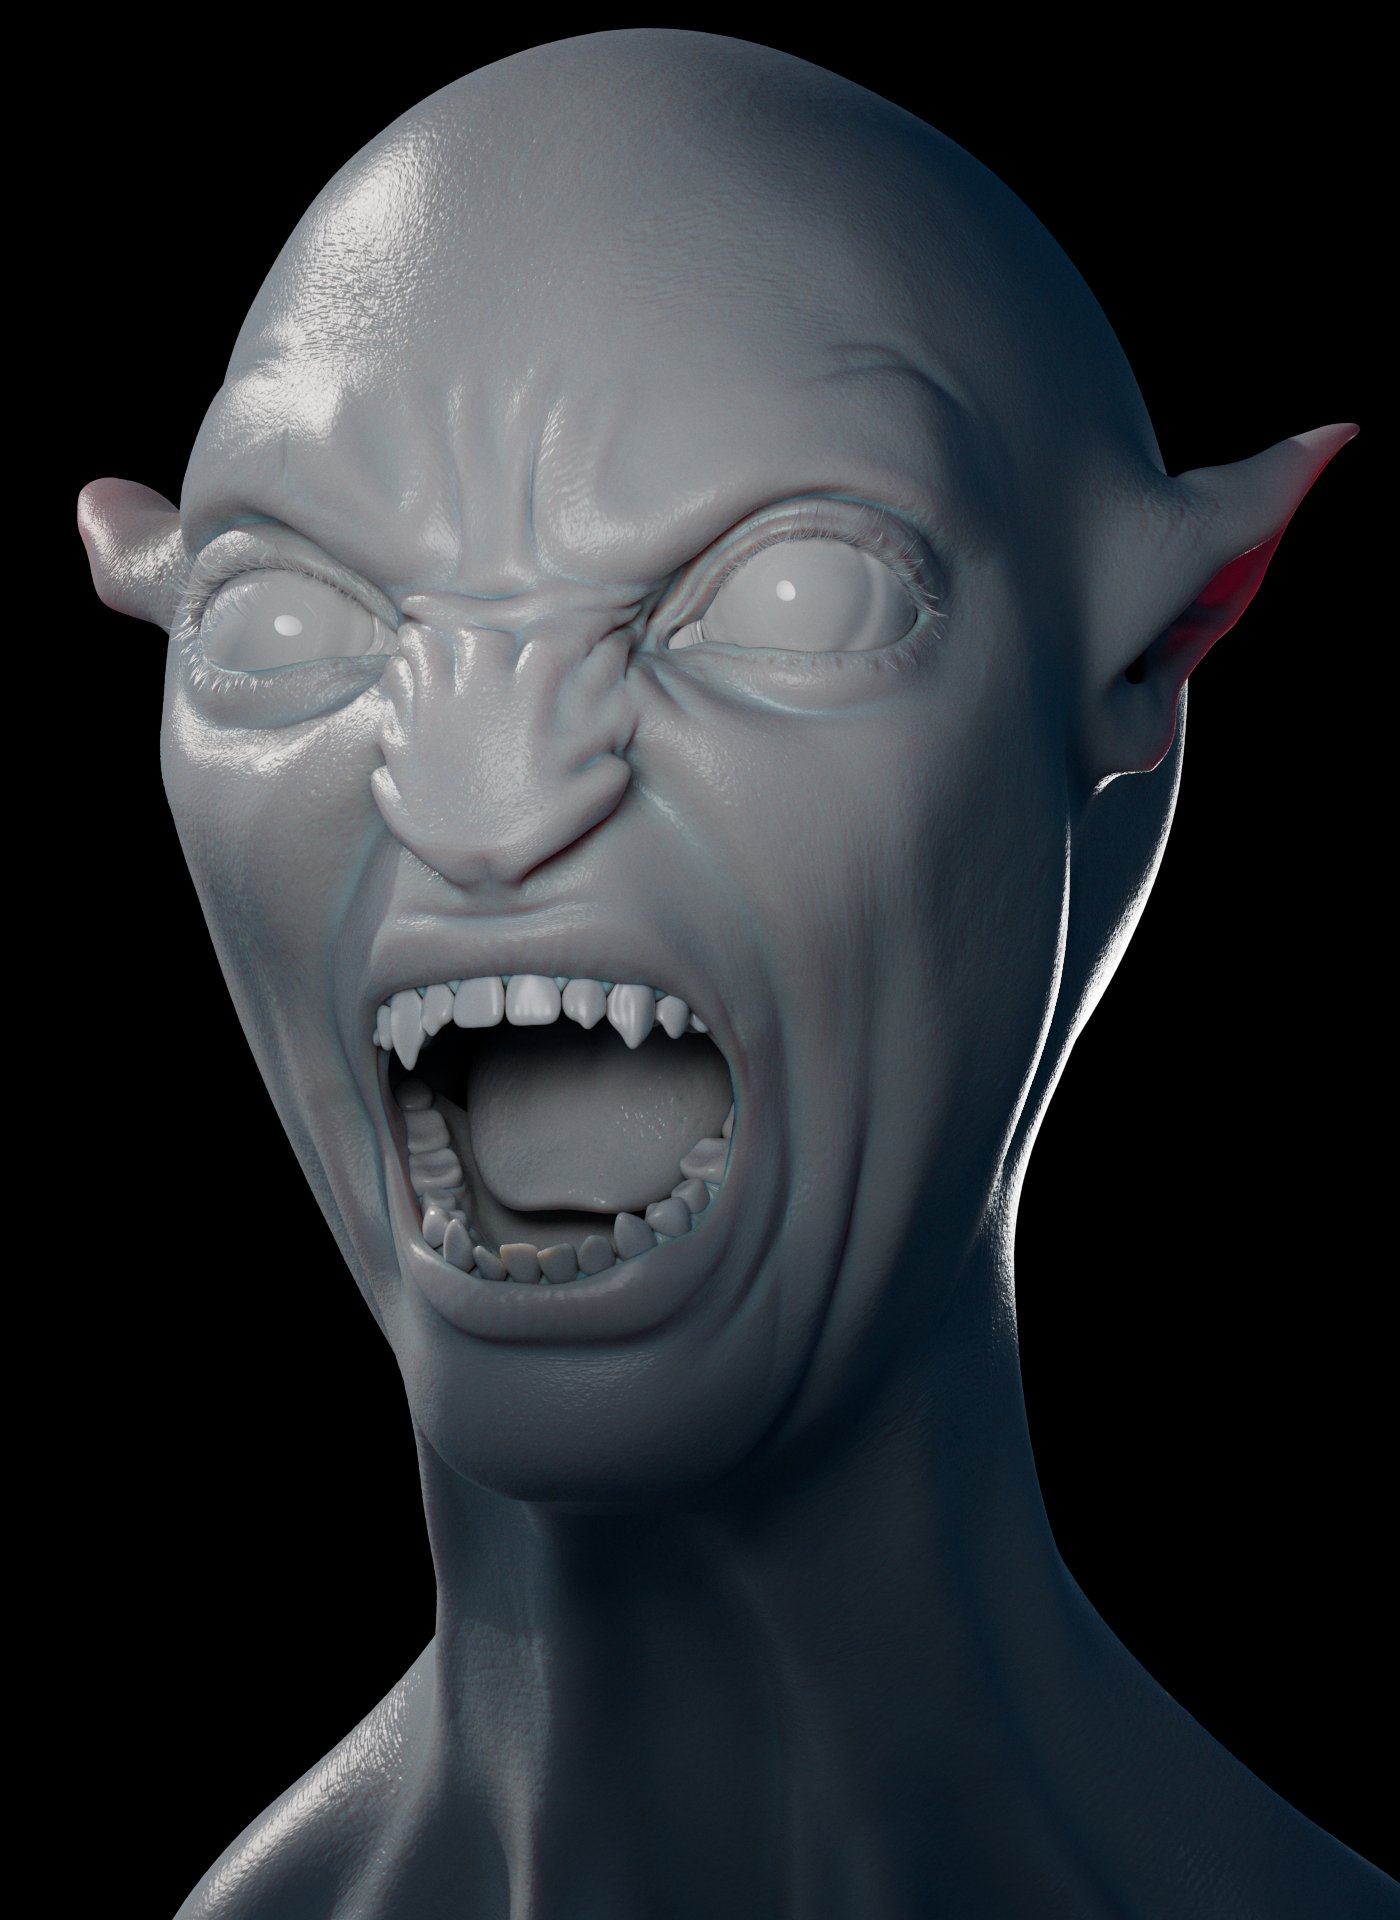
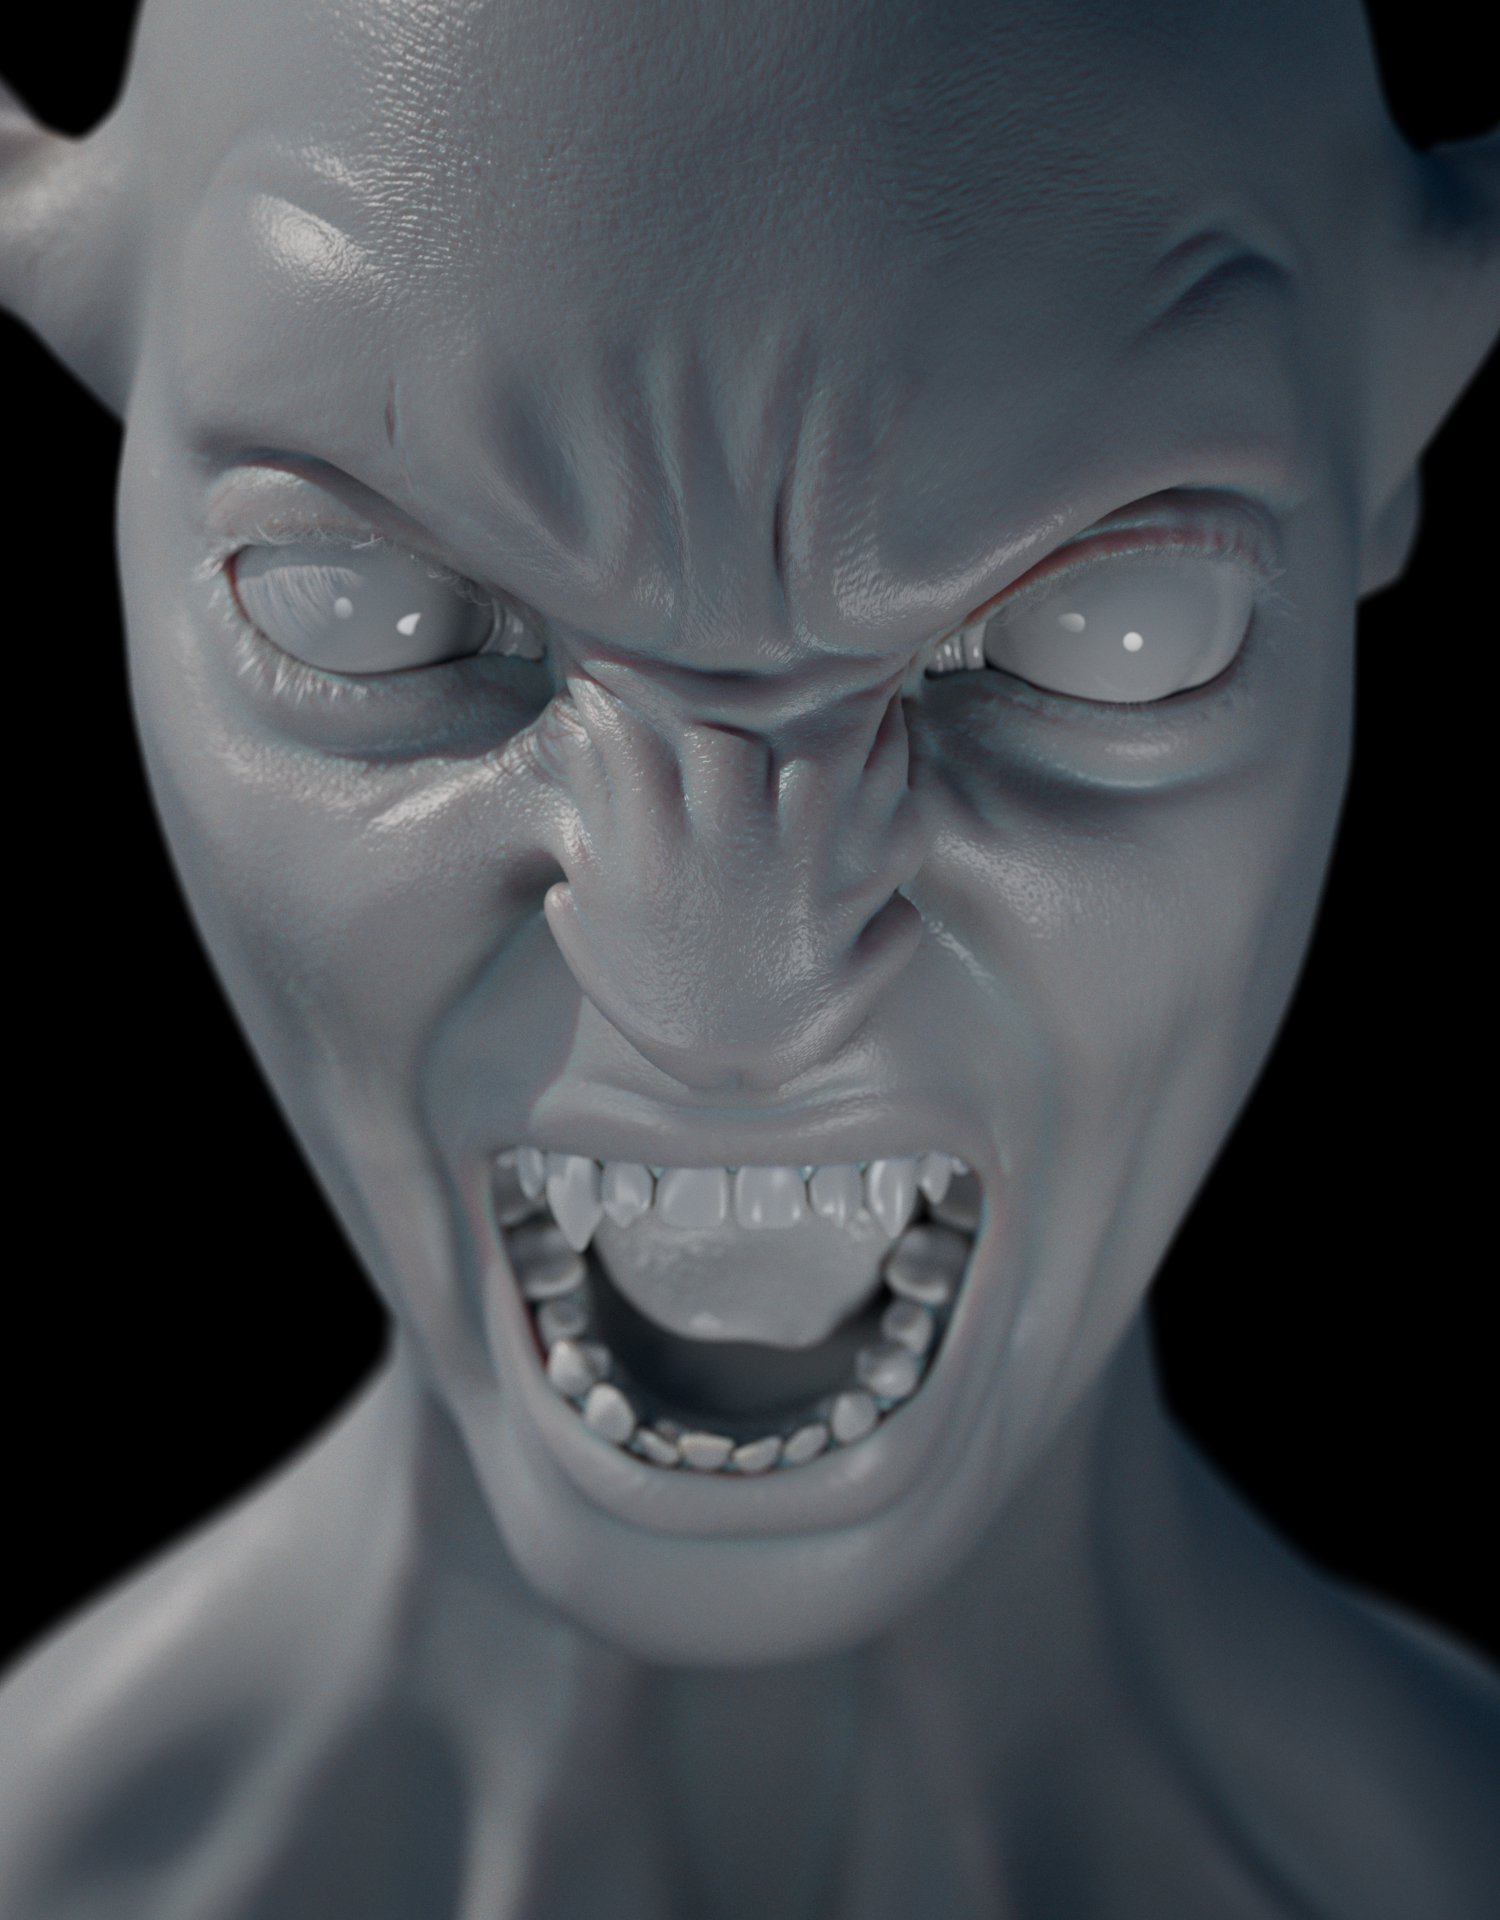
After this I started with sculpting the expression.
To depict Neytiri's rage, I utilized ZBrush's layering system, creating a separate layer.
This allowed me to sculpt and blend the rage expression seamlessly while preserving the underlying neutral expression. Using sculpting brushes, I exaggerated features associated with rage, like furrowed brows and narrowed eyes, focusing on conveying intensity.
Constantly toggling layer visibility, I ensured a smooth transition between expressions, refining details iteratively for the desired emotional impact.


After sculpting the angry expression in ZBrush, I imported the model in Maya.
There I created a new blend shape for it. Then, I adjusted the weights of the blend shapes to animate the angry expression smoothly, allowing me to control its intensity and transition seamlessly from the neutral expression.
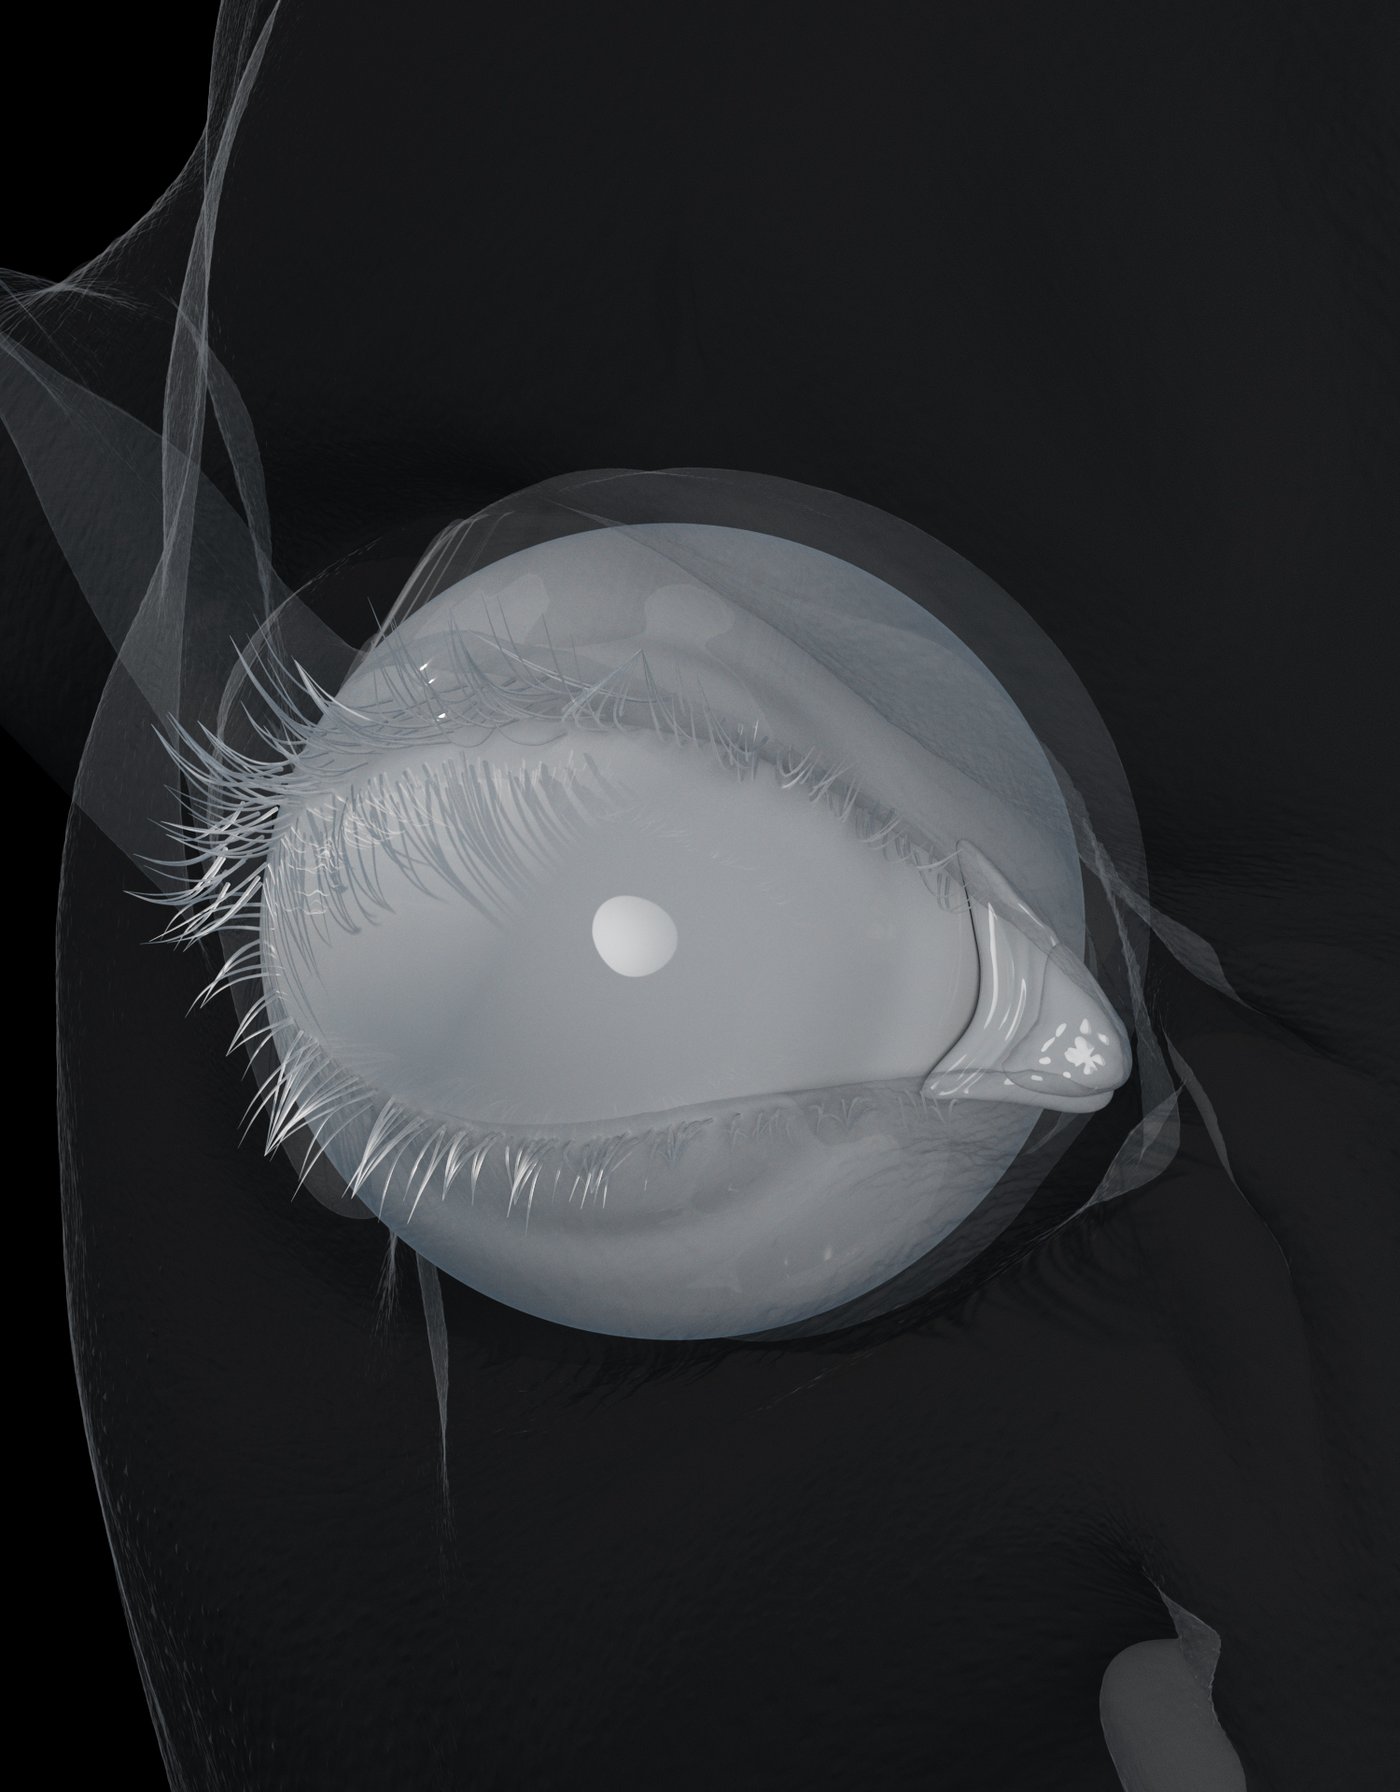
To create eyelashes in Maya, I utilized XGen, which offers precise control over hair generation and distribution.
Firstly, I created a new collection within XGen for her eyelashes. I focused on shaping the eyelashes to replicate her elegant look, using editing tools to position them naturally along the eyelids.
Finally, I added realism by applying appropriate V-Ray Hair Next Material.

When planning the cameras and lighting for Neytiri's scene, I took a meticulous approach to highlight her features and set the desired mood. I selected multiple camera angles, including close-ups, mediums shots, and wide shots, to showcase various aspects of her character.
For lighting, I strategically positioned key, fill, and rim lights to complement Neytiri's appearance and enhance the scene's mood. Environmental lighting was also used to add depth and realism.
Test renders were conducted throughout the process to refine the lighting setup for each shot, ensuring she was presented in the most visually appealing way possible.

I would like to express my gratitude to all those who have shared their time and knowledge with me along the way. Every shared experience and lesson learned has been fundamental to my artistic and personal development.
I'd like to extend a heartfelt thank you to every one who has taken the time to view this post.
Thank you for your time!


Comments (4)