
Mat the Enchanted Baker
I recently started working as a baker and I also wanted to learn Substance Painter on the path to create stylized environment art. Never drew anything digitaly. Never did anything like this. This is going to be a piece of cake (or perhaps bread?)
Update - 1 Jan 2024
There is not much more I can do about the entry, but I am surely glad I participated. I learned a lot and I'm thankful this contest happened.
Still, I am more glad I am free to pursue other projects I have in mind :P
Thank you for your time and I wish you a prosperous new year :]
Update - 26 Dec 2023
Hopefully, everyone had a nice Christmas. I know I didn't; I have a flu LOL
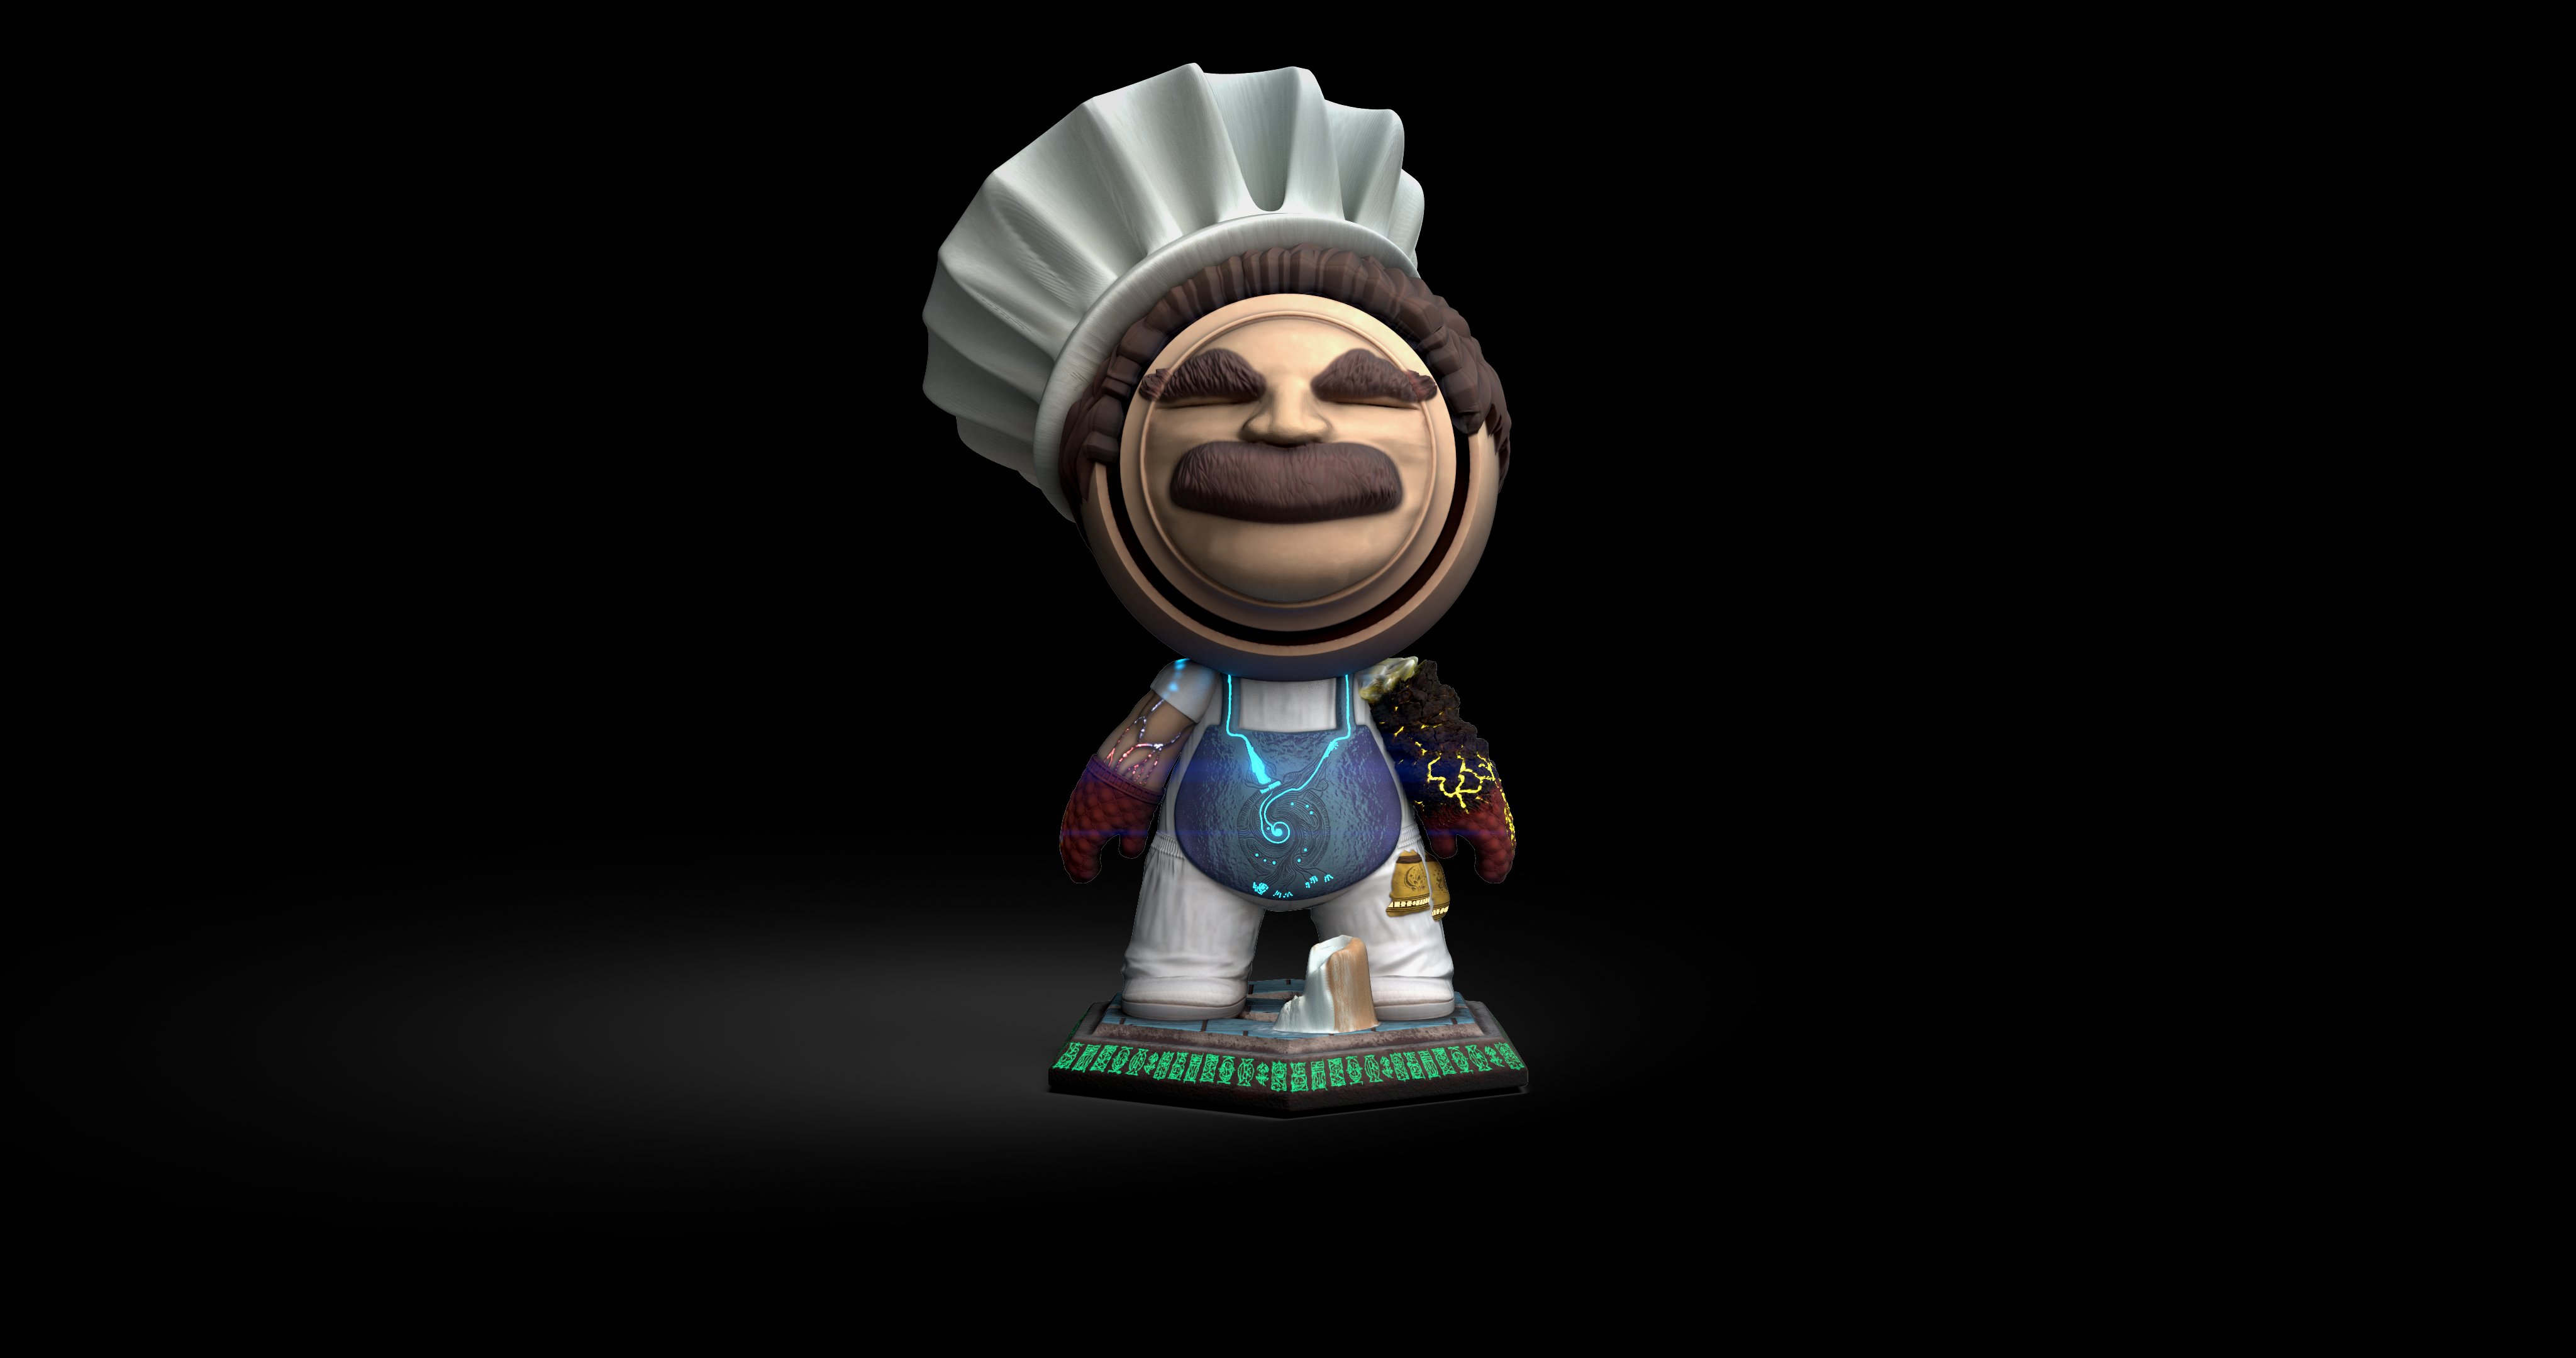
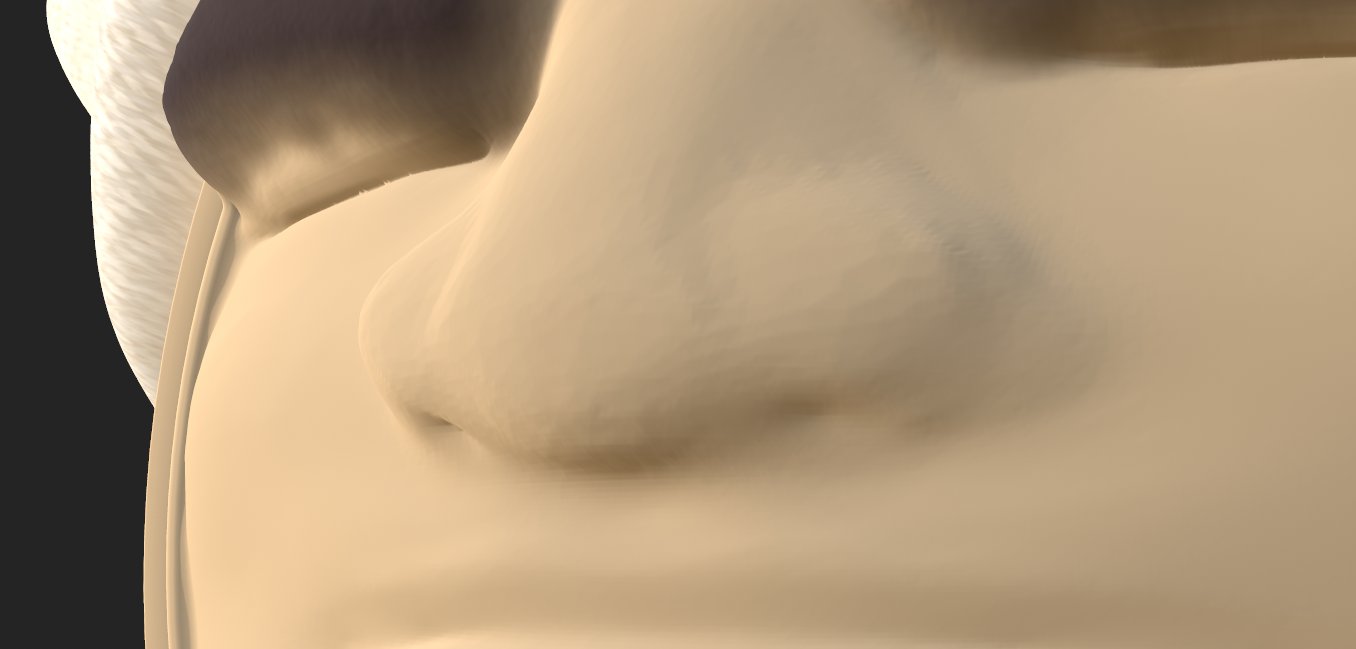
Immedately after making a previous update, I noticed that the Enchanted Baker doesn't belong to the Base. He seems to be floating. I manually painted in some ambient occlusion to the Base.


I was out of ideas on what I should be doing next, so I searched a bit on Youtube if I could find anything that can be used in my project. Lo and behold, a filter called Baked Lighting Stylized.
At first, it did not seem to be working, but that was because I was trying to put it into the Mask channel like any other filter. I found: one has to put it into the Material channel of the layer... I am not exactly sure what's the first part of the layer called, the one left of the mask.
Anyway, after compiling every mask of every part of the mesh into one complete mask..


... I used it as a texture in Micro Details of Baked Lighting Stylized filter, so it is able to generate proper light onto the displaced mesh.
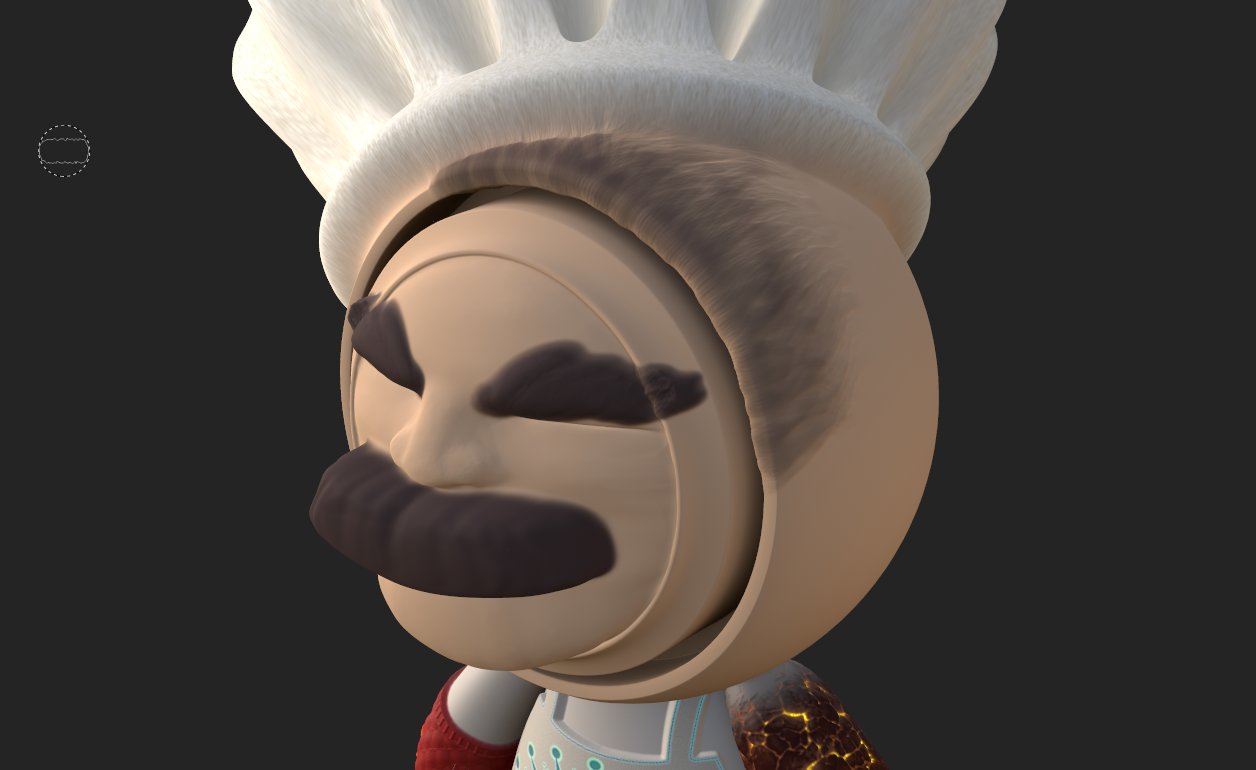
With this, the Enchanted Baker got enlivened one step further... but alas, his eyes remain closed. I guess that's the way he looks like.

Hmm his hat got a bit too blue, but that should be easy to fix.
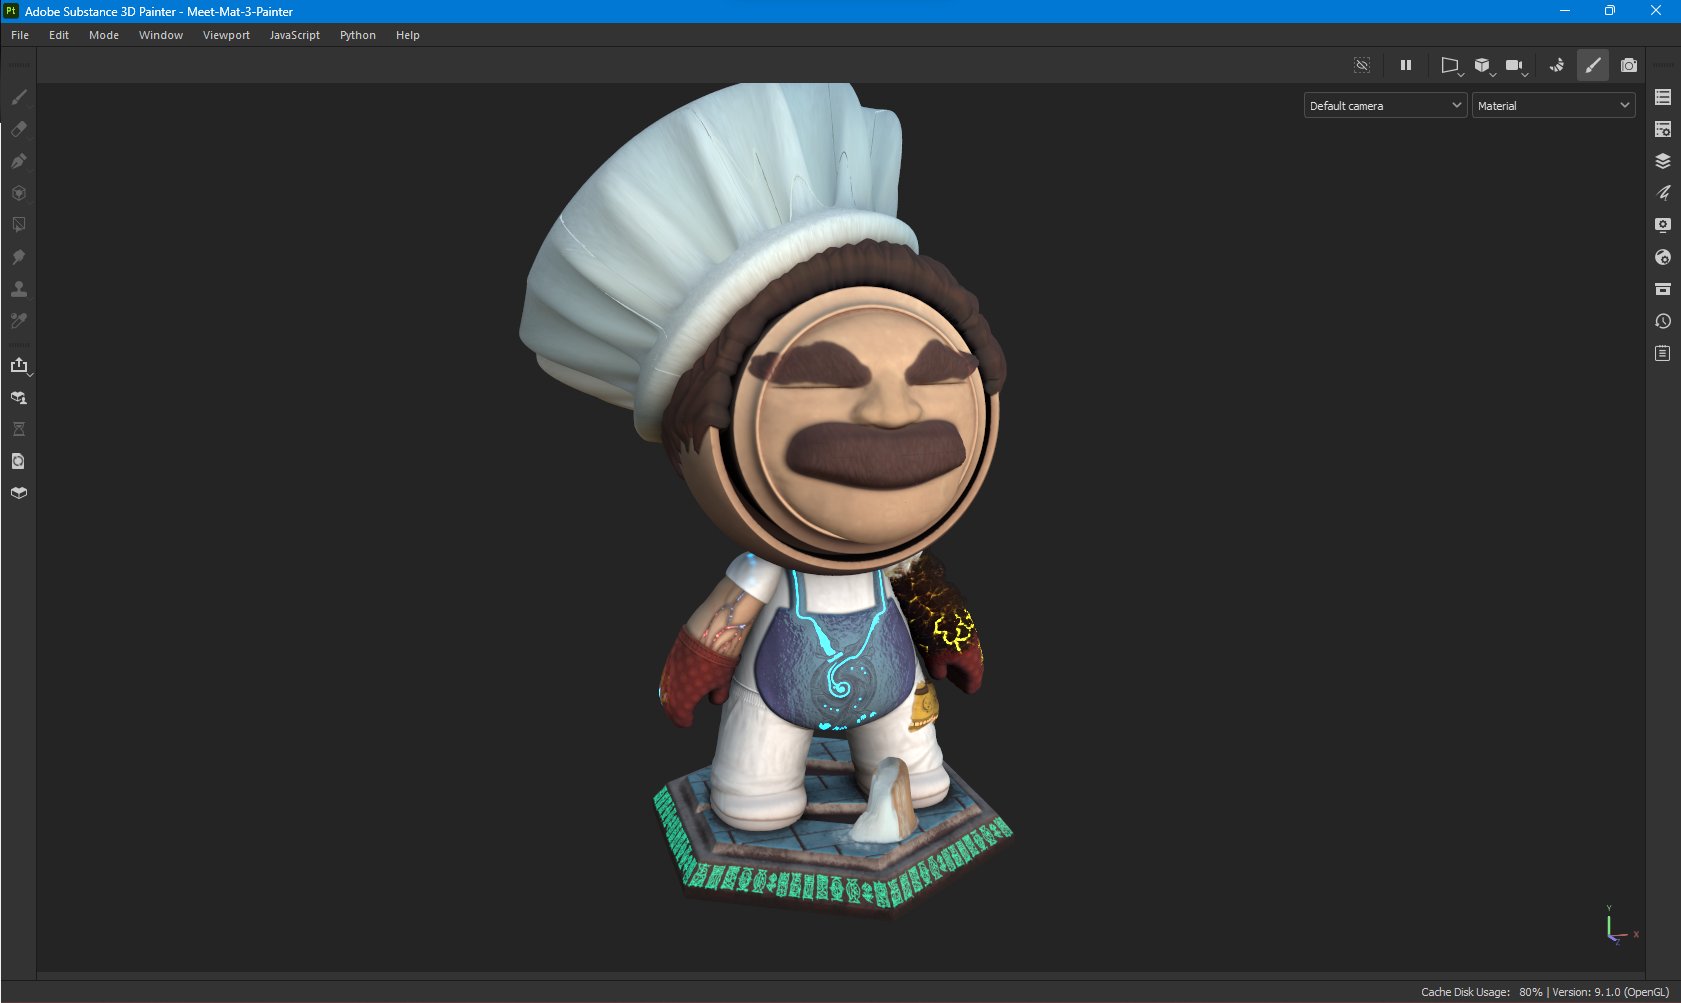
And with this, I have exhausted a whole one month of accumulated knowledge, which leaves me to do a render with Iray. Now to figure that one out hahah :]
Update - 22 Dec 2023
In this entry, I wanted to breathe life into my character. The textures mostly looked flat, so it was paramount to add some variation.
To do that, I wanted to incorporate some techniques I learned in one video about making stylized textures. The techniques are most useful on a complete model; not on a model that's littered with displacement maps. I had to make use of Micro Details as a workaround.
The video I am referring to is: https://www.youtube.com/watch?v=cT5PJKMPTdg
I especially like the philosophy of making the Base Color channel look good. Basically, if it looks good in this channel, it will look great in the Material channel. This philosophy will be on my mind with every next project I do.
Comparison of before and after...


It certainly does have that 'oomph' to it.
I did the same with the rest of his body and the base.
Before and after...


And if anyone is interested in how the Base Color channel looks...
This might be the end to my journey...
I will take several days to think about what else can be done to the model.
Until then, Merry Christmas :]
Update - 20 Dec 2023
It was time to add some details on the Base.
The first thing that came to my mind was a flour sack and how flour escapes its tight bounds.
It was tricky to have everything look coherent; like flour and the flour sack, as well as the texture on the sack. I had to use Warp Projection to try and adjust the texture on the sack, so it doesn't look stretched. Initially, I wanted the sack to be white as well, since we are working with white sacks in the bakery, but it did not look that good, especially the distinction between the sack and the flour.
After working on it yesterday and tweeking some things, adding detail on the flour, this is what came out of it...
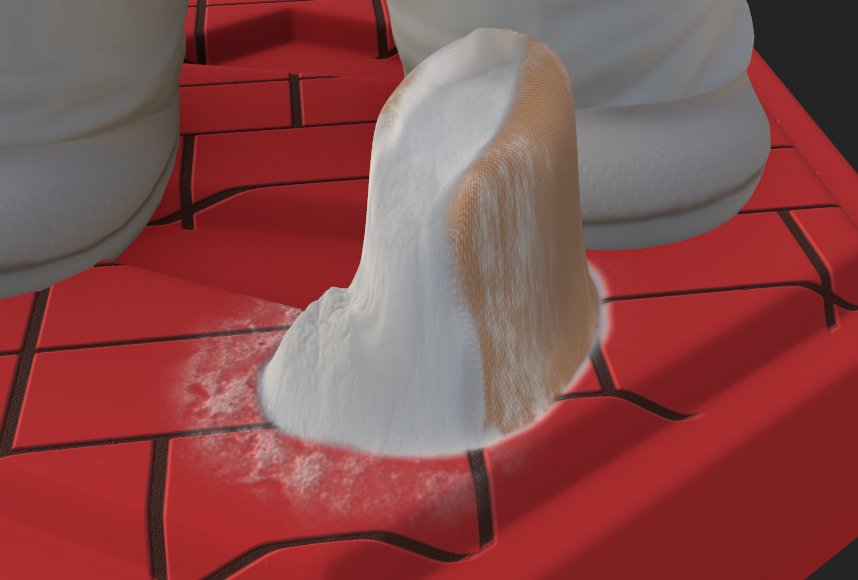
I am glad the flour turned out the way it did.
I already prepared the floor yesterday. Today, I tweaked the tiles and added some other details. Beneth the tiles is concrete and I pasted some runes on the concrete using cylindrical projection.

It looks fairly nice. I will see if I want to add anything else or any other details to the Base.
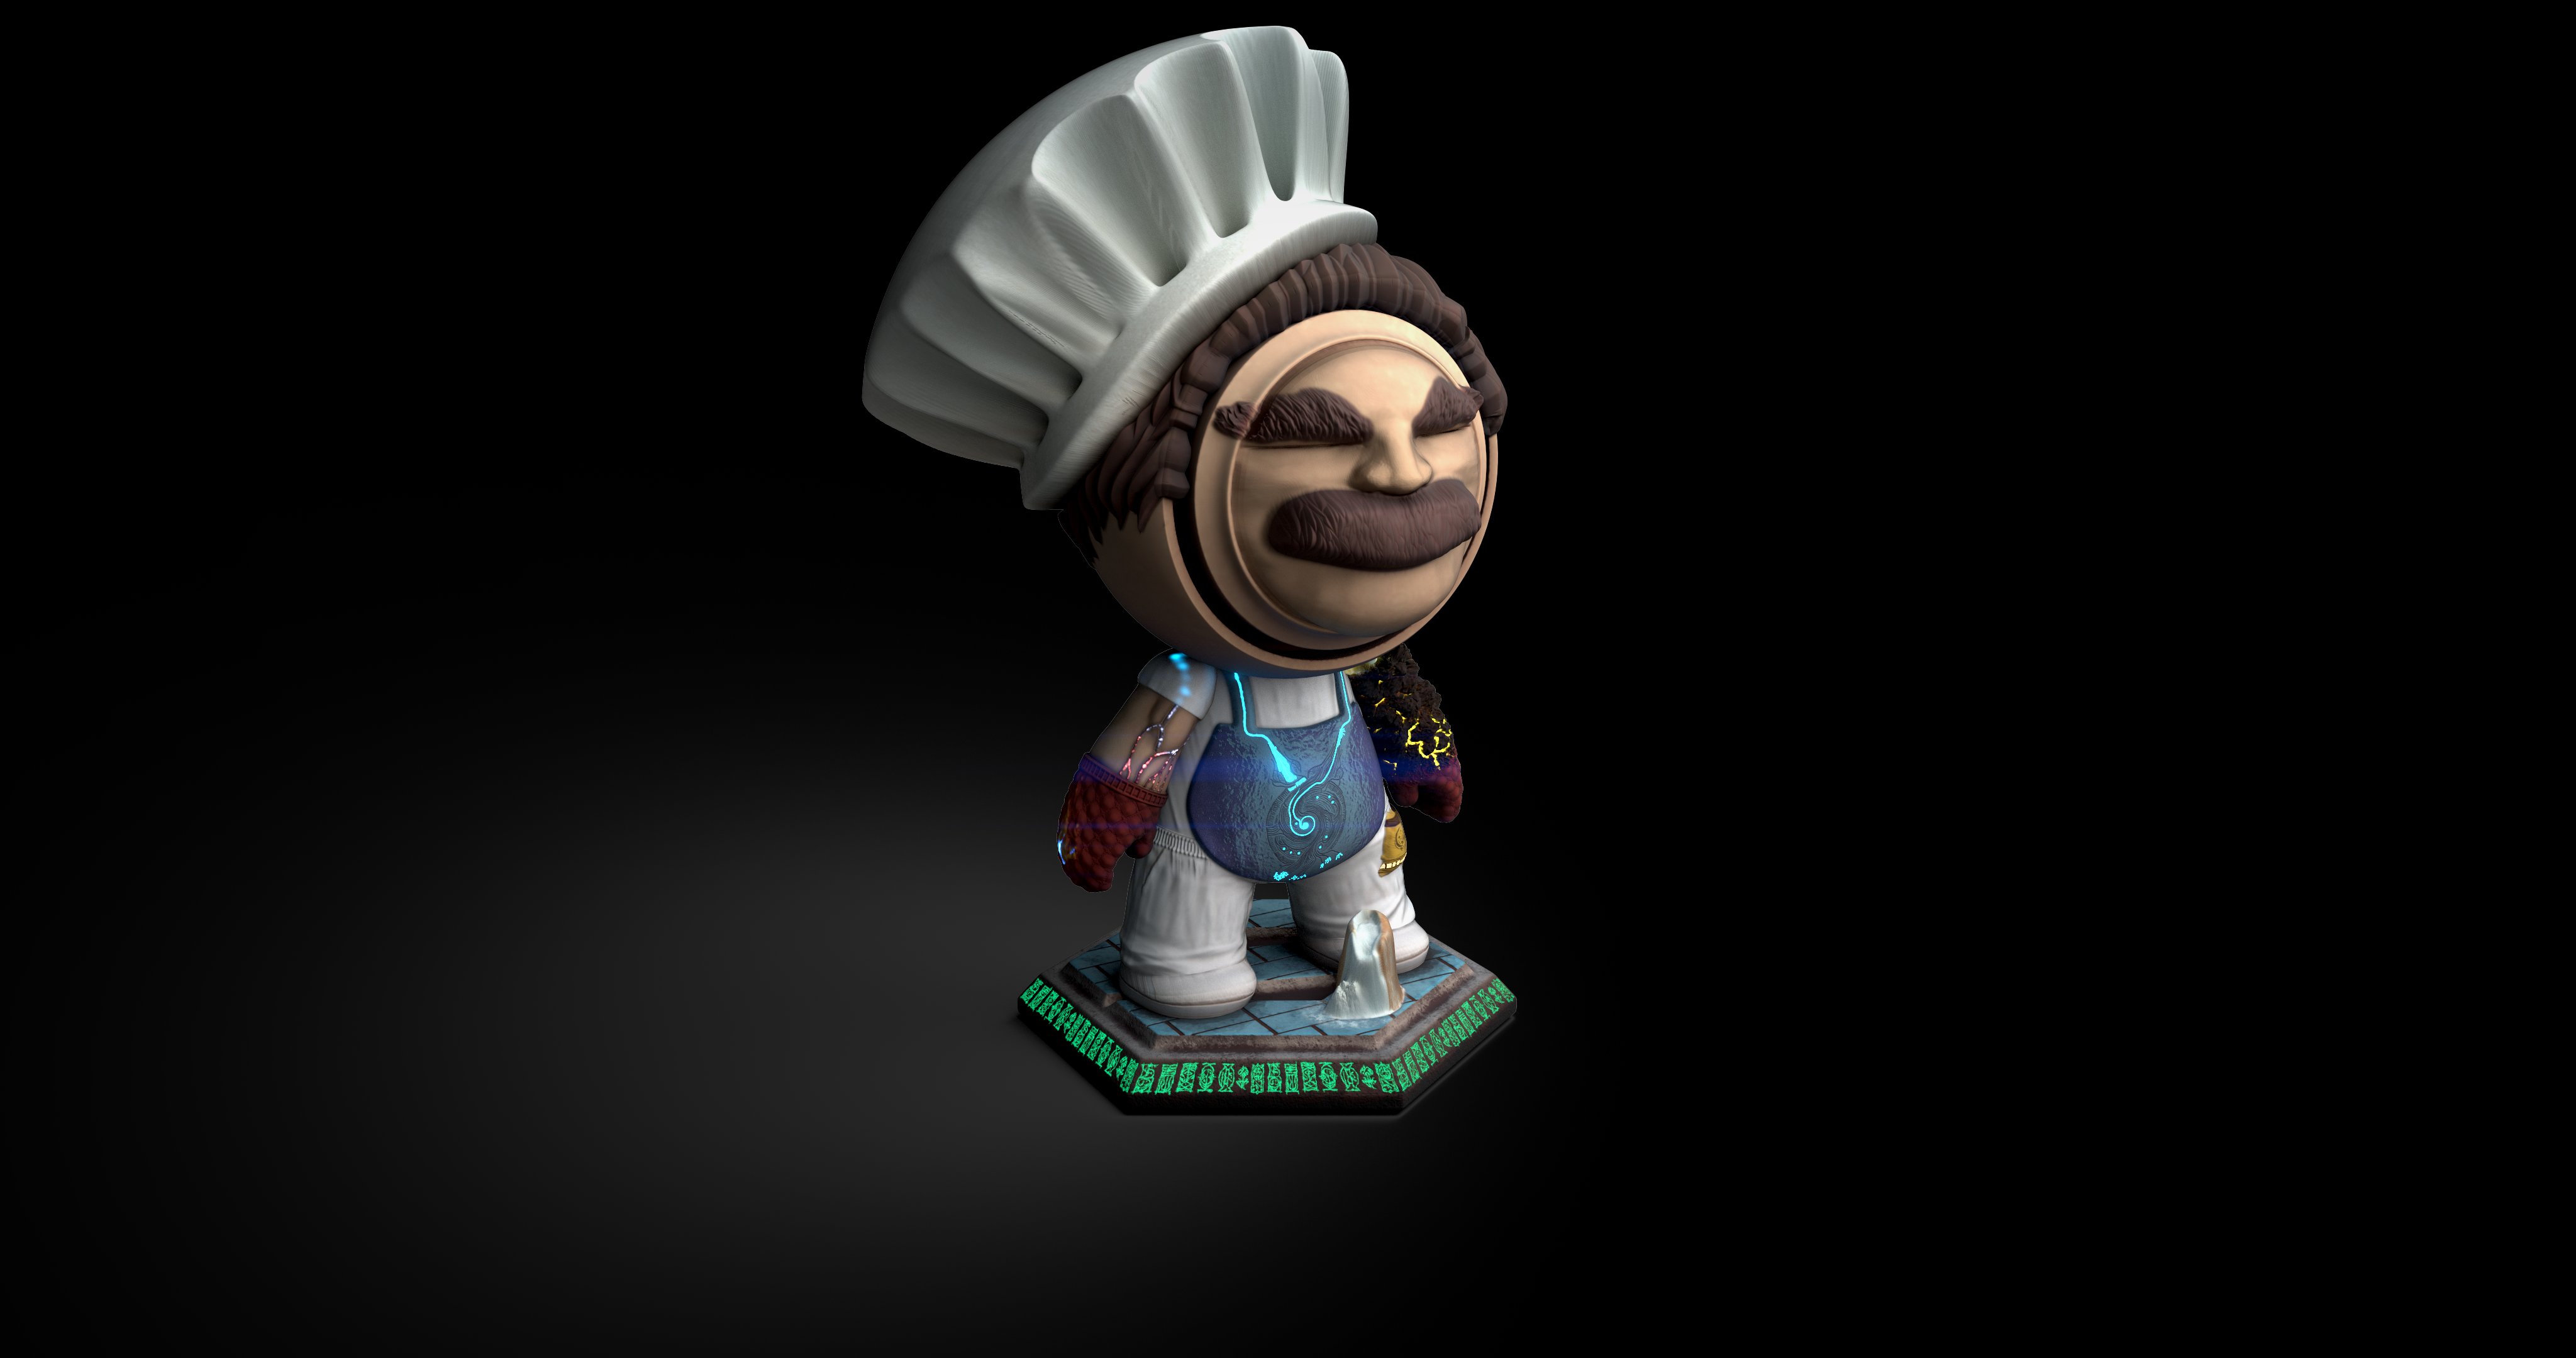
With this, every part of the Enchanted Baker has been painted. I don't consider it the end yet. There are still parts where a detail or two would come in handy, so I will work on that.
His current look... :]

Update - 18 Dec 2023
In the last episode, I lamented my inadequate abilities. Even though nothing much changed, I have learned about a couple of new filters, which are Warp and Mask Outline. Latter I've learned through a third official tutorial and how one can use it to drop shadow, which I used in my model to give the objects more depth. I learned in another video that Blur can be used to achieve similar effect by choosing Subtract instead of Replace.
I wasted a bigger part of a day, trying to draw a nice pattern for the apron, having in mind the shapes of watery waviness and electric... buzziness, I suppose :]
Unsatisfied, I scrapped it and tried again, deciding to forgo any kind of symmetry.
'What is it', you ask?!
Well, I have no idea, but it sure has that feeling of waviness and buzziness to it, as well as having that 'source of power' look. It sure did power my artistic soul...
Having the BG of the apron be completely white did not sit well with my enhanced artistic soul, so I coloured it, put this source of power on it, surrounded it by some darkness being dispelt by the blue energy (thanks to Warp), and since I drew with the mouse and the drawing looks like it was drawn by some primitive tool, I decided to embrace it. By 'embrace' I mean I used Warp, Blur Slope, and Blur as much as possible wherever I used colour before.
The apron...

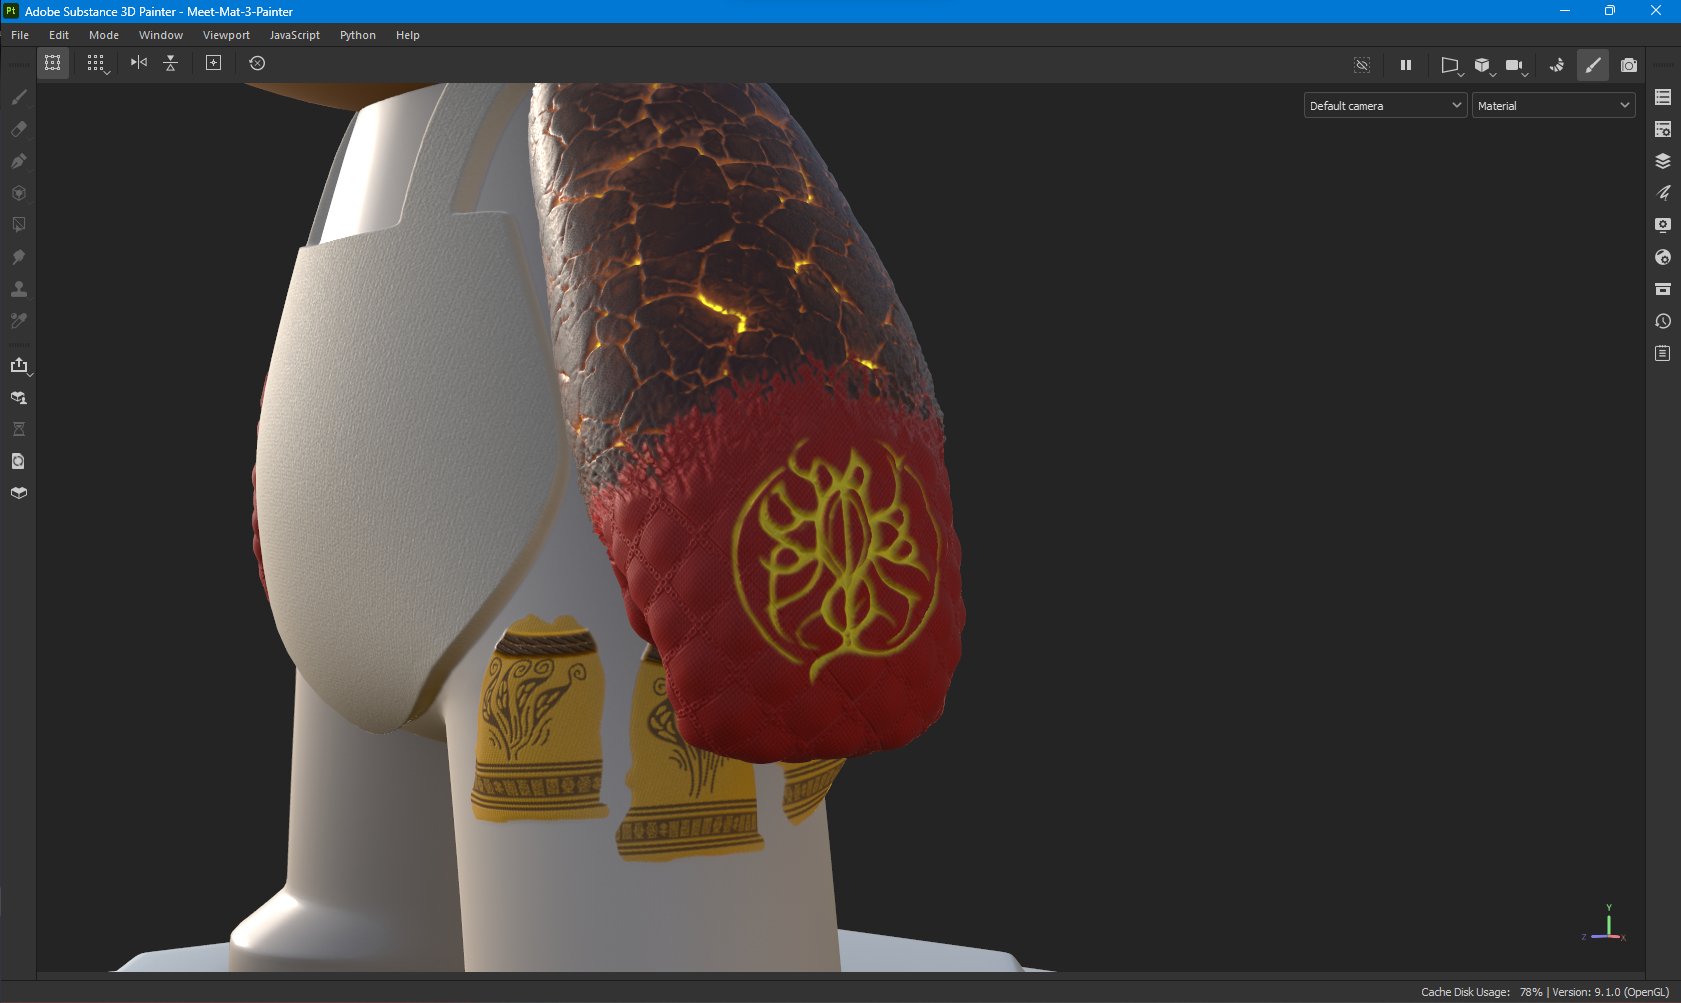
Some veins popping and tearing skin, just for good measure, with energy flowing beneath...

Changed the flame on the right arm as well. Thanks to Warp, now it looks like a proper flame.

To the other arm I adjusted colours as well using previously mentioned methods. It makes everything look a bit more chaotic.
In the end, which is already in the images above, I added a nice drop shadow effect.
I must say I actually like the current look of my Enchanted Baker. We are not done yet, though. There is still the Base on which he is standing that requires an artistic touch.
The Enchanted Baker in full frame...
Update - 16 Dec 2023
I did not have much time to continue with the project in the last couple of days.
Though, I did make some changes:
- adjusted muscles on the right arm (added more definition and "made them look" more like muscles)
- added shoes (for some reason, voronoi texture is not giving me a consistent and regular pattern, so I opted for using a static texture; left and right picture respectively)
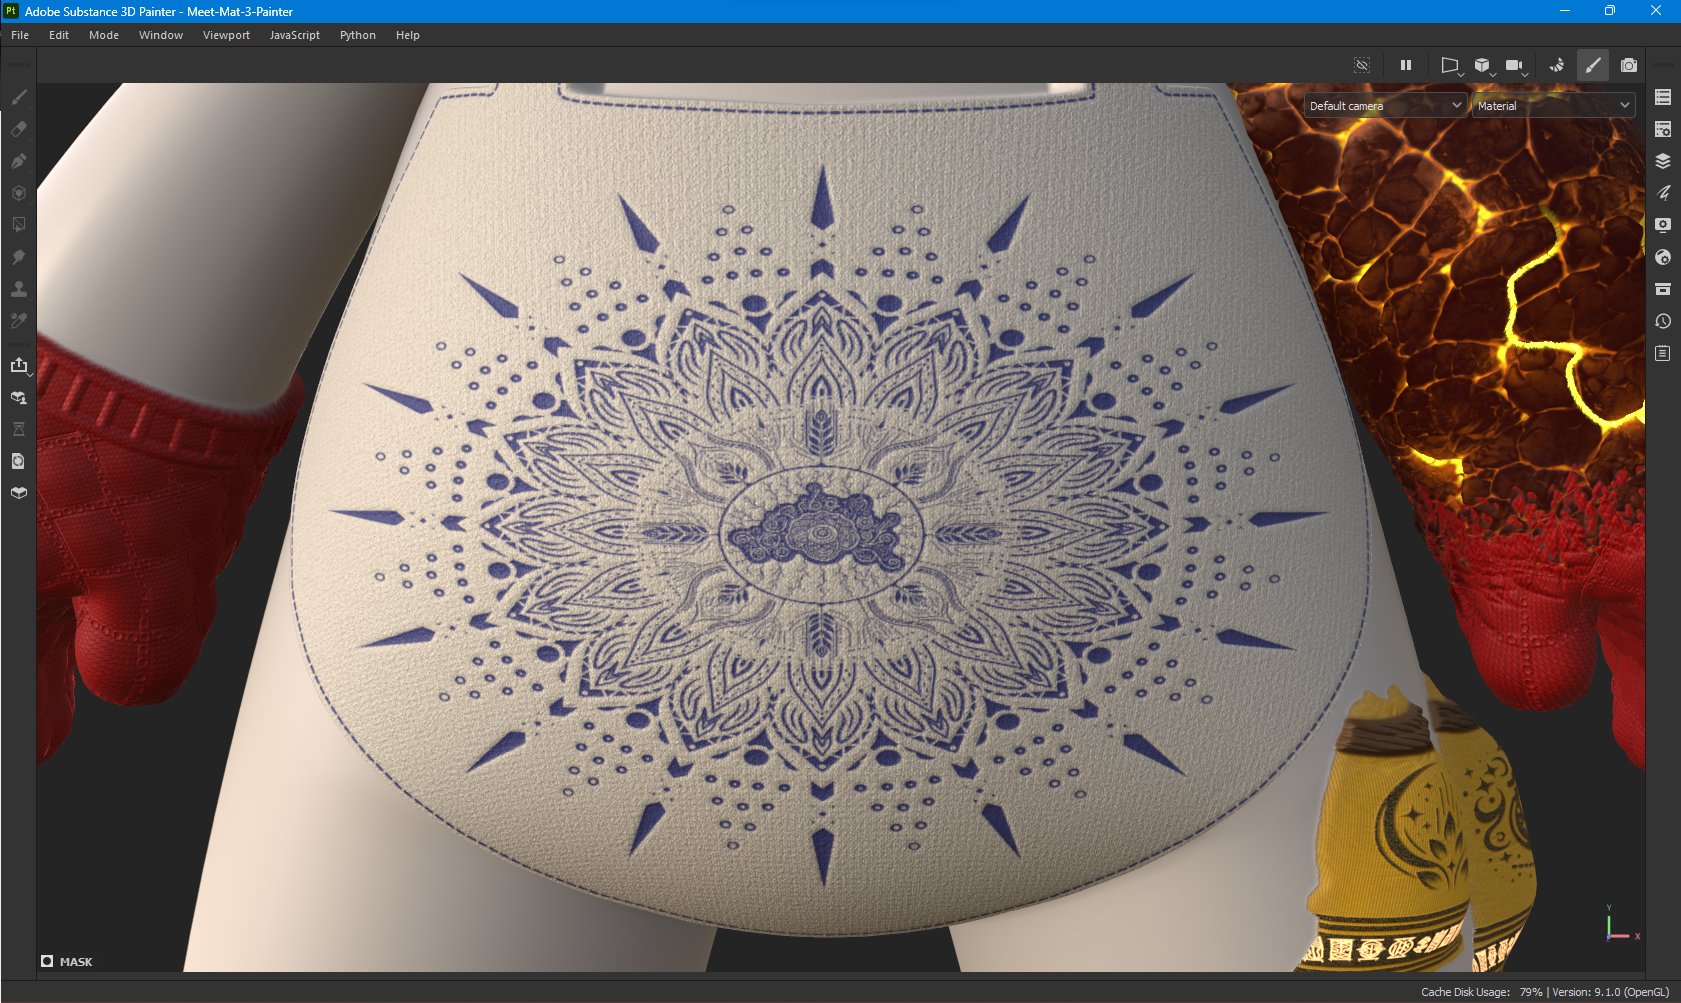
- removed the mandala pattern from the apron and gave it some nice folds


I don't find any of these things to be perfect, but they will have to do for now... Well... I don't find anything to be completely perfect in the model to be honest. I also know that anything I do can never be perfect, but I do strive to have the perfect vision in my head to be translated onto the model, at least to some superficial degree.
What I do hope is that in the future, with enough practice, I will have enough skill and experience to at least make it easier to concentrate on creating, rather than to be pulled down by my inadequate knowledge of the program and the creation process.
Oh, and the reason I removed the mandala pattern from the apron is because, even though the pattern by itself looks beautifull and I spent a whole day creating it, it doesn't look that good on the apron, not fitting the overall design. It is hard, but as they say in the literature: "Kill your darlings for the greater good of the story."
I will have to think about what kind of pattern or look I want to have on the apron...
Update - 14 Dec 2023
I spent some time to give the pants some more detail, but the bigger challange was to incorporate the shirt into the design.
I spent a whole day going back and forth between layers of the shirt and the layers of the left arm, trying to come up with a solution to the transition between the two. I wanted an elegant solution, a smooth transition, and didn't want to brute force it, but whatever I tried didn't seem to work. I figured it was the normal that was causing the issue, but I wasn't able to overwrite it. Google didn't help.
I had to paint in the details manually. The end result...

Not splendid, but it will have to do for now.
I also added creases to the shirt. I will have to do the same to the apron.
On the other side, I did not want to leave the right arm bare. I already had an idea to give it some muscle definition. After all, with those moustaches and hairy eyebrows, he has to have big muscles. I painted the muscles from three sides of the arm. Not sure if there is a better solution.

Splendid!
His current appearance...

Update - 11 Dec 2023
Previously, I was wondering how it would be great if there was a tool in SS Painter that could calculate Ambient Occlusion based on the displaced mesh. It turns out that there is such a tool.
Using AO Generator, there is an option under Image inputs called Micro Height. One can use an Anchor Point mask to generate AO. I suppose there is the same option under other similar Generators, but I haven't yet tried it out.
Anyway, here is the hair when I use AO from this Generator to add some additional darker color...

I also did the same for moustaches and eyebrows.
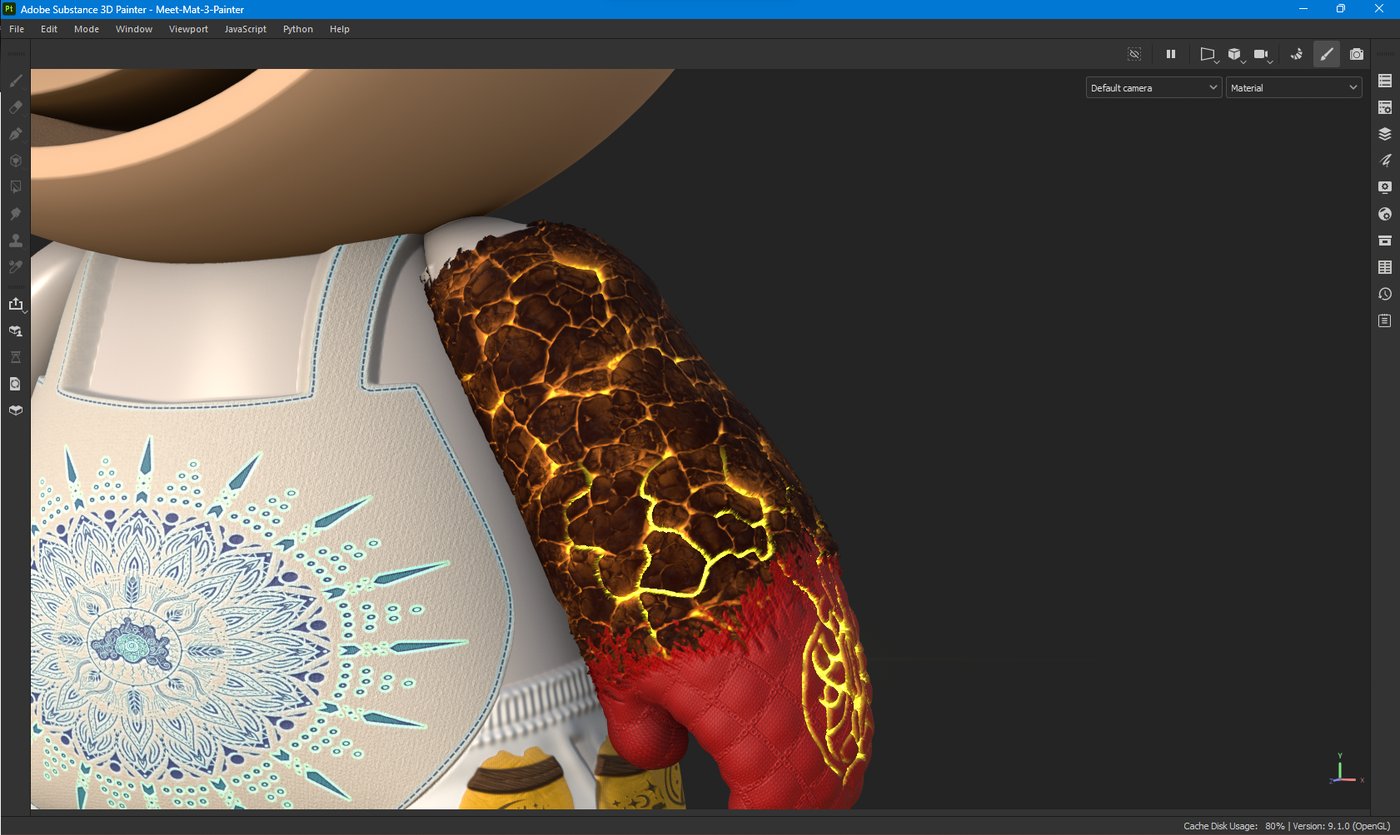
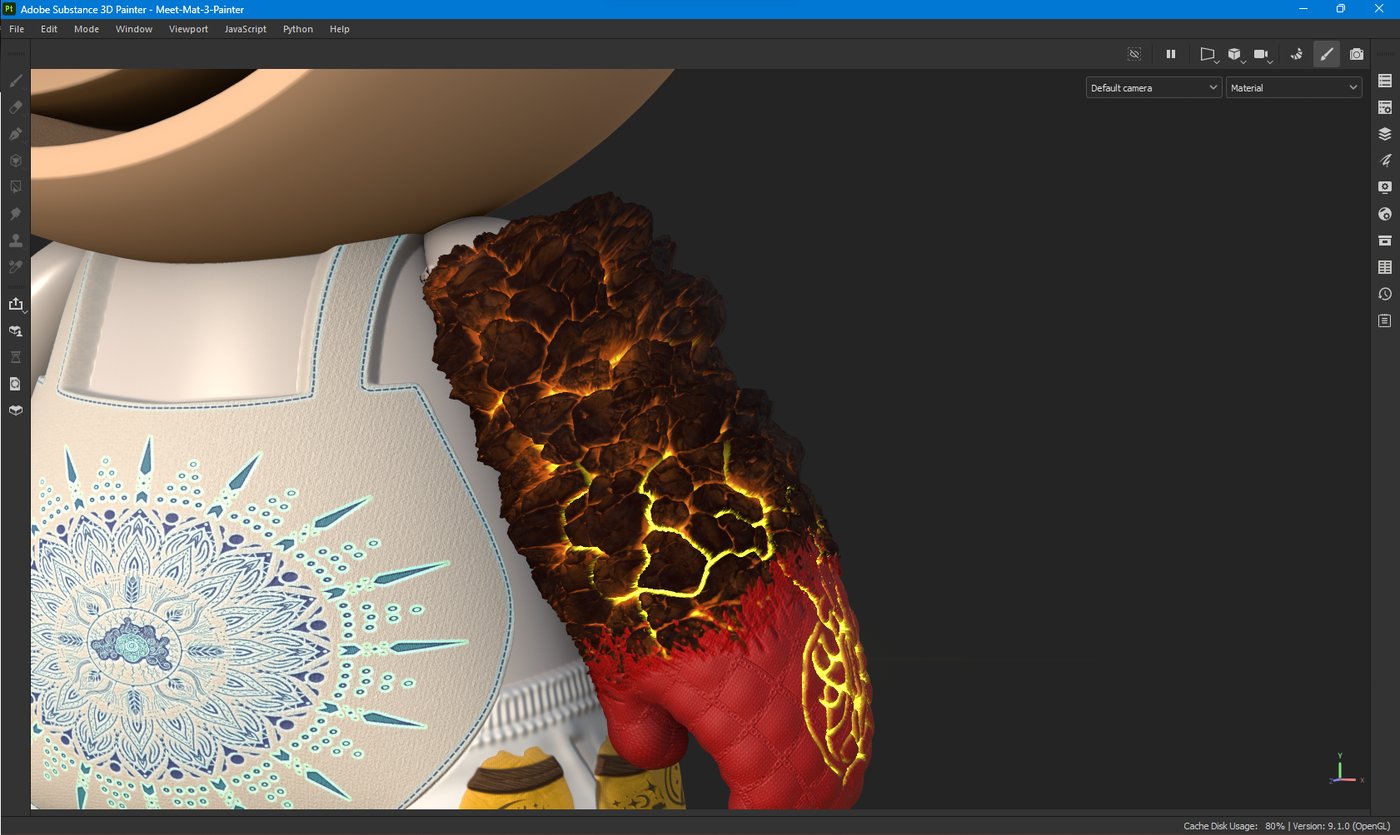
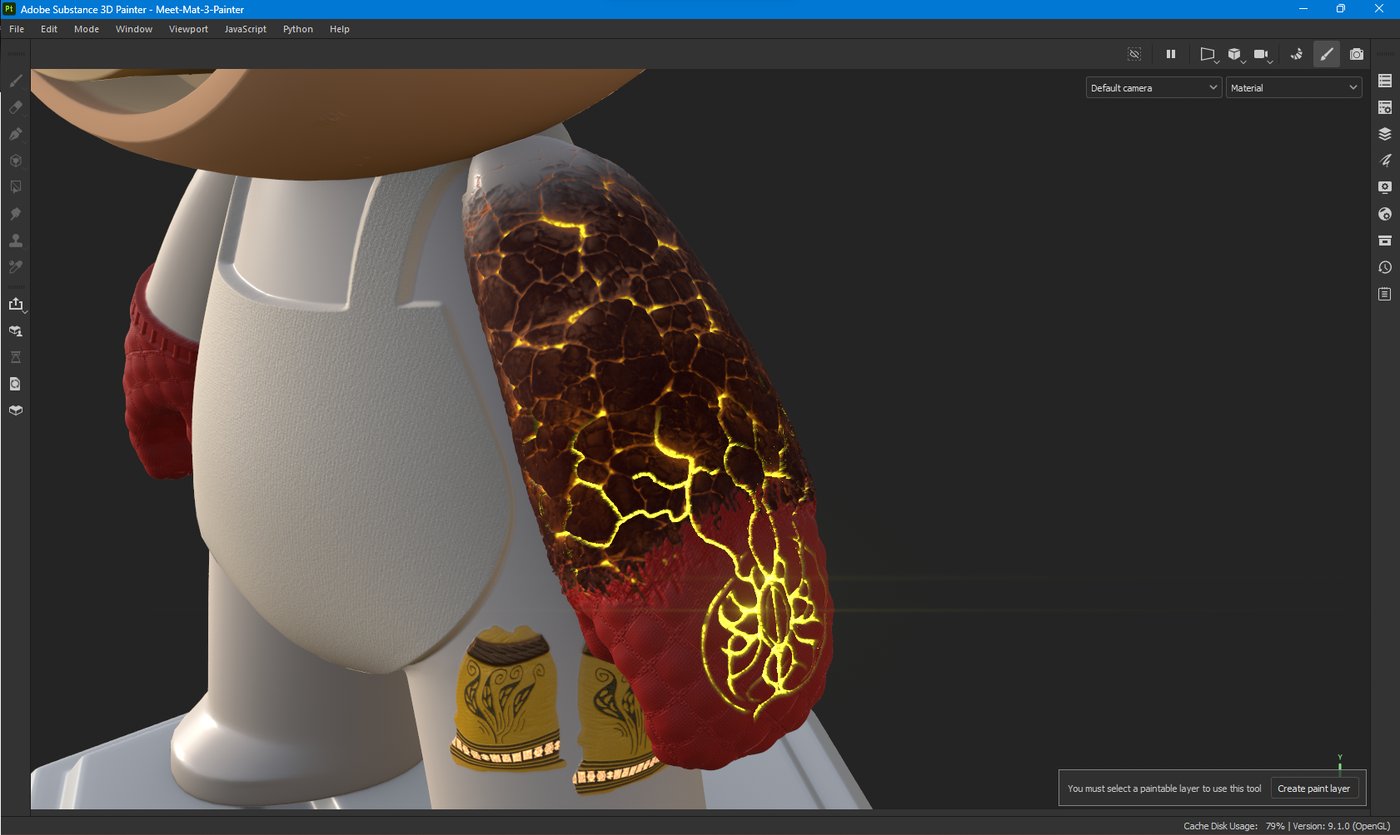
In other news, I added variations to the lava rocks which includes displacement and color.
Notice that I also made the pants. Based on the reference images, they should have some ridges on the waist. I added two layers of folds, leaving pockets for the end.

Update - 10 Dec 2023
Here we go again...
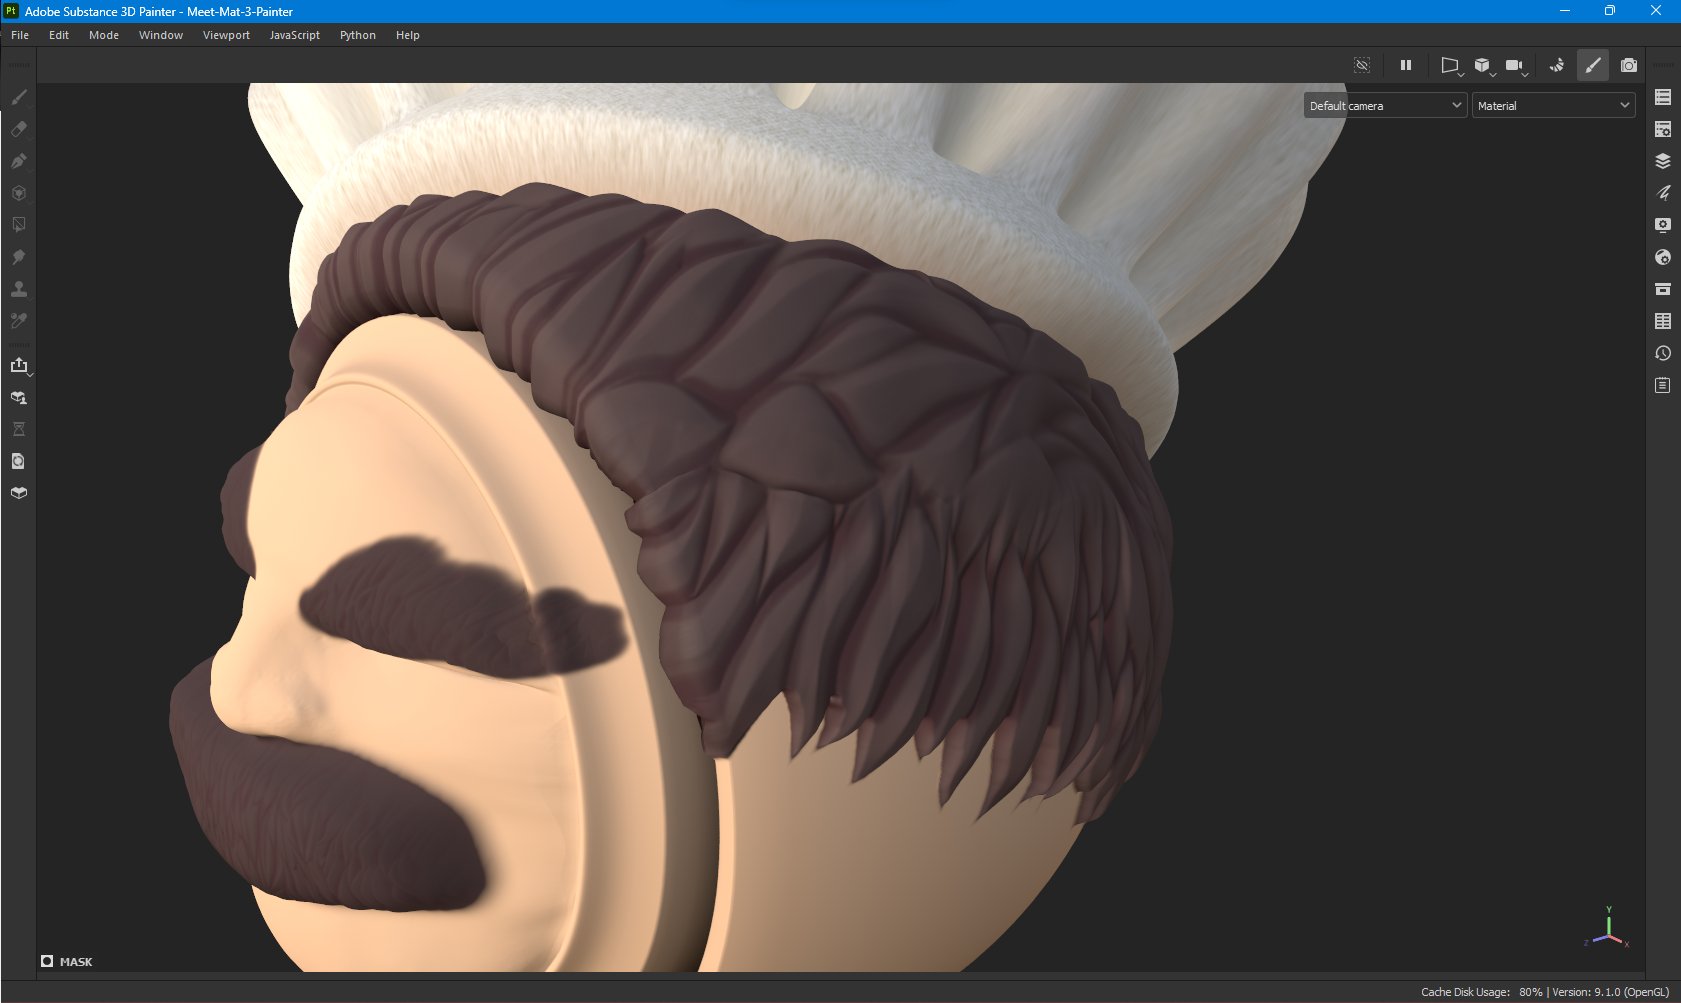
I changed the hair for a third time. This is the final change... I think...
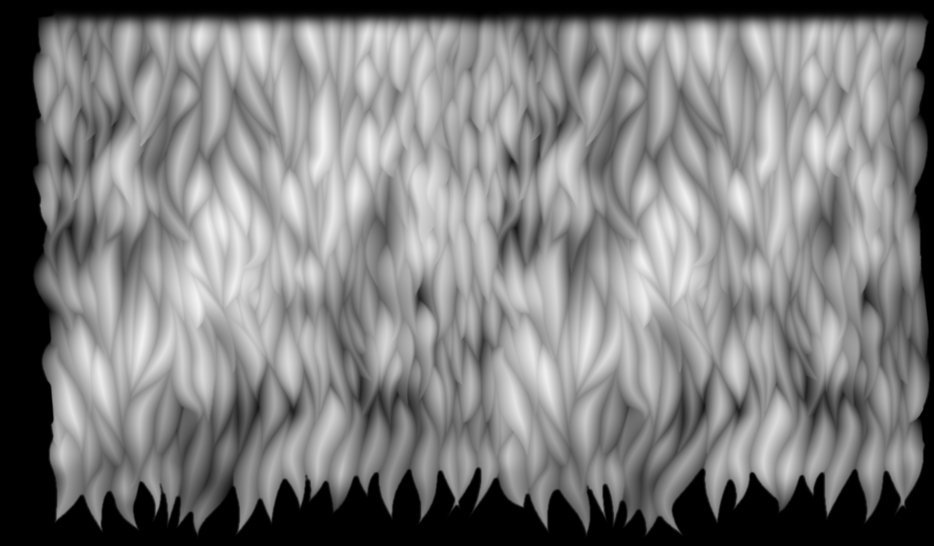
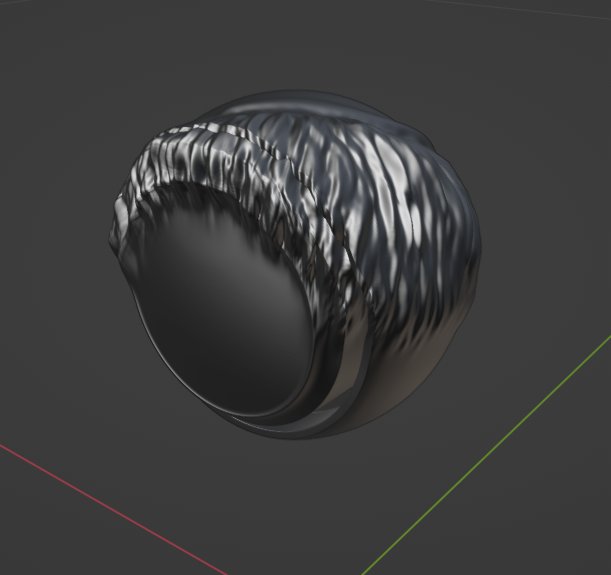
After I made the last update, I started thinking about the hair again. I remembered a tutorial about making stylized hair, but it wasn't applicable to my situation... or so I thought at the time. But then again, I could make a nice texture if I align each strand of hair perfectly.
I already knew it was going to be tedious, but it was the best option I could think of. So I started putting each strand manually, one by one...

It took me a whole day. Though, it was worth it.
Of course, like always, there were issues. Couldn't project a plane from the bottom to create a displacement map, so I had to do it from above. I would invert it afterwards, but it created several other issues that I tried to correct. After trying and each time being dissatisfied with the outcome, I thought of something else.
Why not project another plane onto the first plane, but from the proper side, so that way I wouldn't have to invert the map? Genious!
Yeah, that did not initially work as I intended it to, but it was not a big problem to solve.
Anyway, I had my displacement map...

I know, I know, it is not perfect, but it will have to do.
Some adjustments are in order; a couple of blurs here and there, some brightening and darkening, as well a completely removing the top part.
And here it is when displaced...
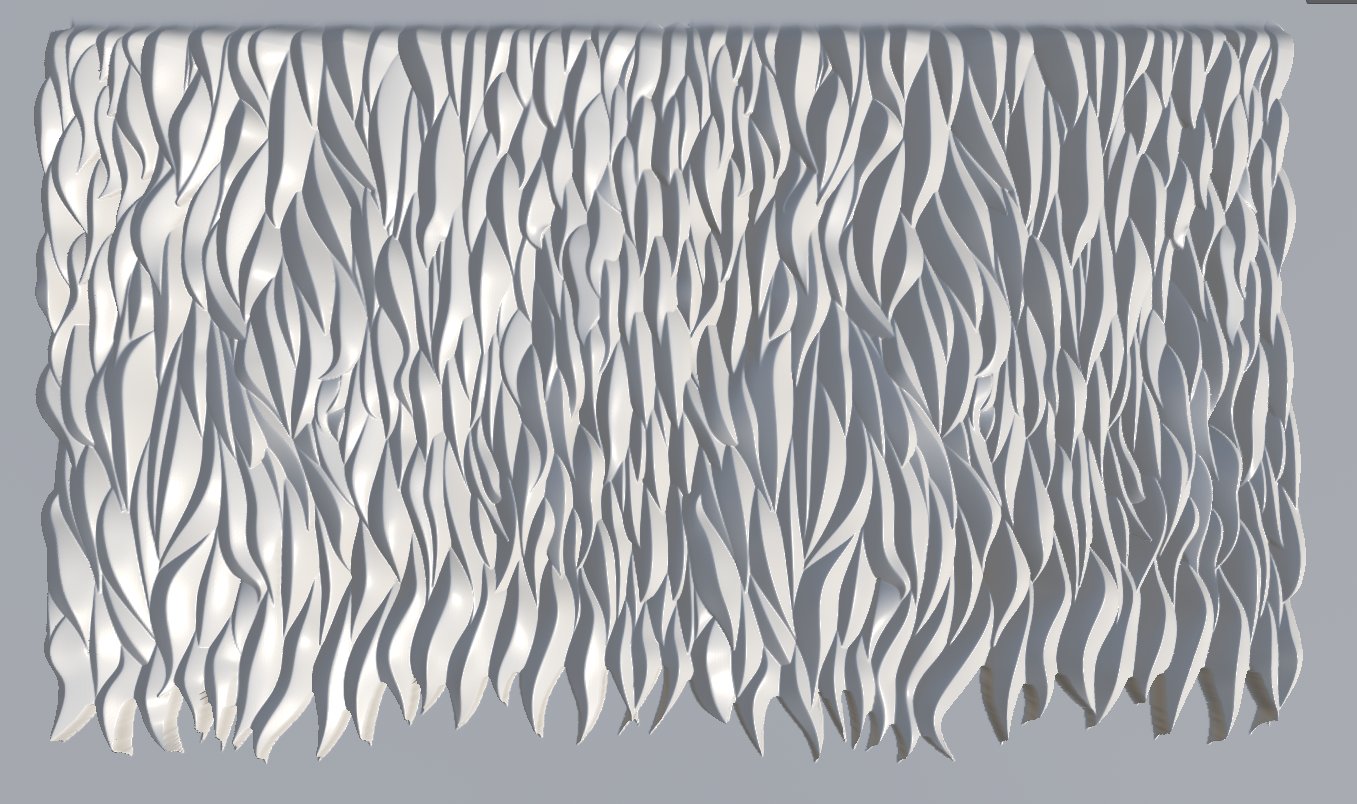
Moving on to the fun part and the moment of truth. Did it work in the end?
Well, I can say I am more satisfied with this result than with those two that came before.
The hair looks more interesting and is stylized. I adjusted the moustache and the eyebrows to have the same look.
P.S. I also baked AO map to darken the hair where strands touch.
Update - 8 Dec 2023
Yes, mustaches were next. They were fairly easy to do and to make a displacement map. I immediately started working on the hair. I figured it was still going to be more difficult to do than the rest. Turns out I was right.
I made a custum brush using Dynamic Brush Maker and started painting in the hair.
I wasn't sure if it was going to end up looking good. It turned out ok, but I might change it in the future. If anyone has any suggestions, I am happy to try them out.
I will say for now that my Enchanted Baker really likes to keep his haircut combed and tidy :]


Update - 7 Dec 2023
Yeah, the face and the hair was not cutting it. I couldn't handle the way it looked so flat. I decided to change it, but still keep the eyebrows of course.
I stumbled upon a picture of peak character design and knew that that is what I need.
Hairy. Bushy. Huge chins. Cannot go wrong!
Sculpting, projecting, baking it out. It was rinse and repeat until I had a displacement map that worked. Well... not entirely, but I'll get to that. Behold this marvelous design that took me half a day...

Marvelous indeed!
Bake it out from a flat plane, put it into Painter, and with some warp projection and using path to keep the face from spilling outside the border, we get this...

Hmmm, I better put some eyebrows quickly...

Yes! That's my man!
There is a slight issue with the eyebrows where they go over the border. I could not solve the issue, so I decided to embrace the flaw and make it a feature. So now he has a cut on each eyebrow, making him even more manly.
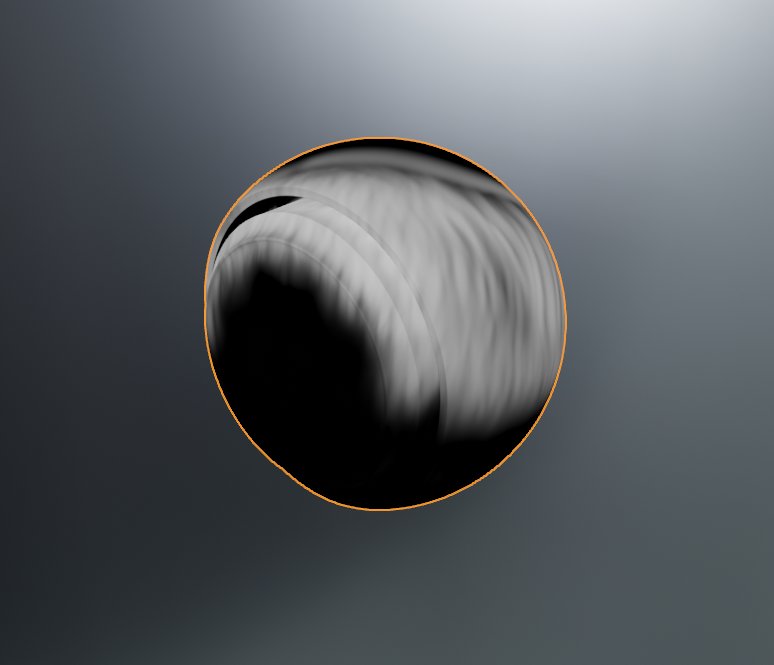
I wasn't so easy though. I had problems with height. I tried everything. Bluring this and that, increasing bit depth, increasing resolution, changing it to .exr, mixing and matching, but I could not get rid of these contours (and the internet was not helpful at all)...

The solution? Simple, of course! It usualy is...
'Changing the bit depth in the height channel itself' was the solution.
Good enough for now. The end result...

Comments (2)
Update - 6 Dec 2023
I was so busy last several days, I did not havbe much time to do an update.
First thing I did, I altered lava and rocks to have more contrast and less specularity.

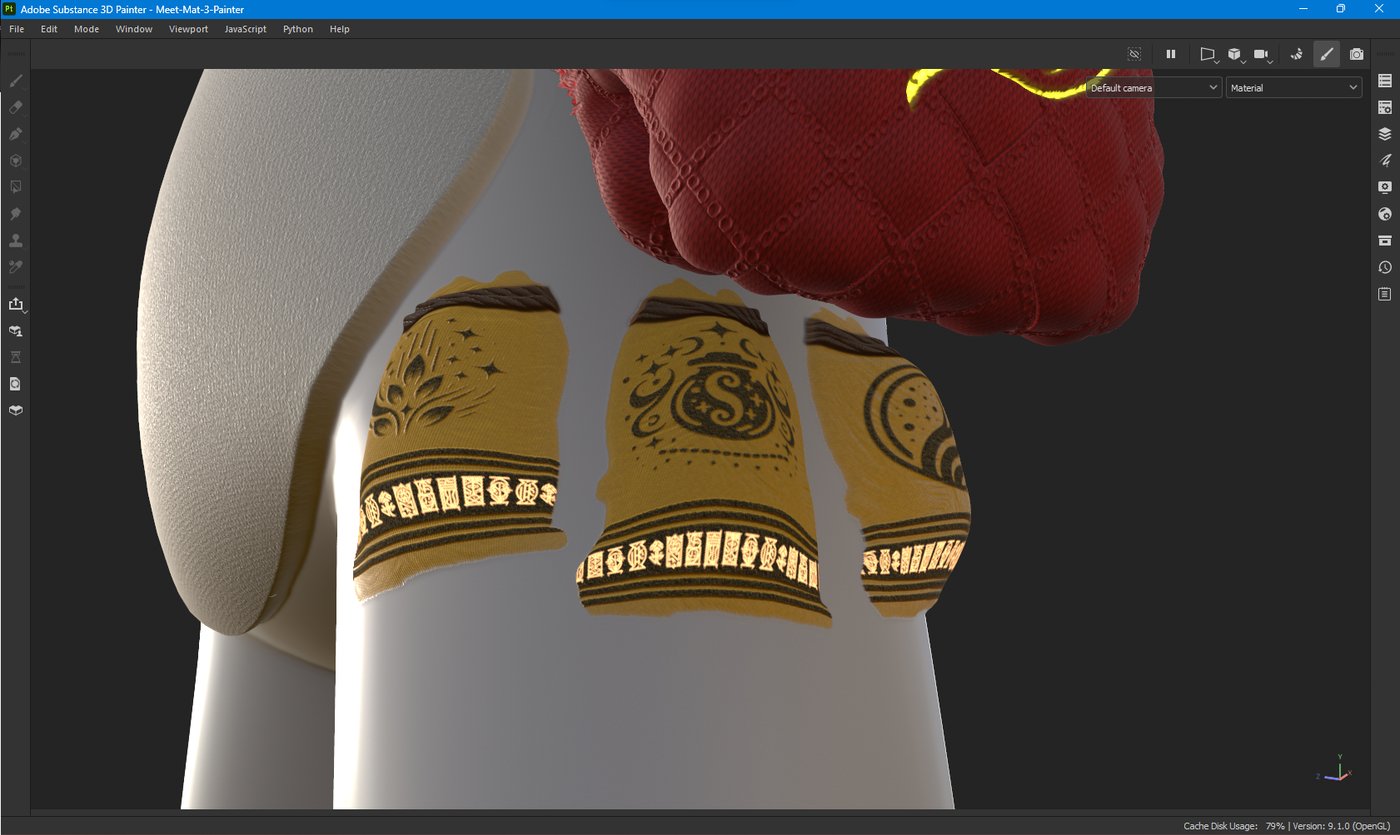
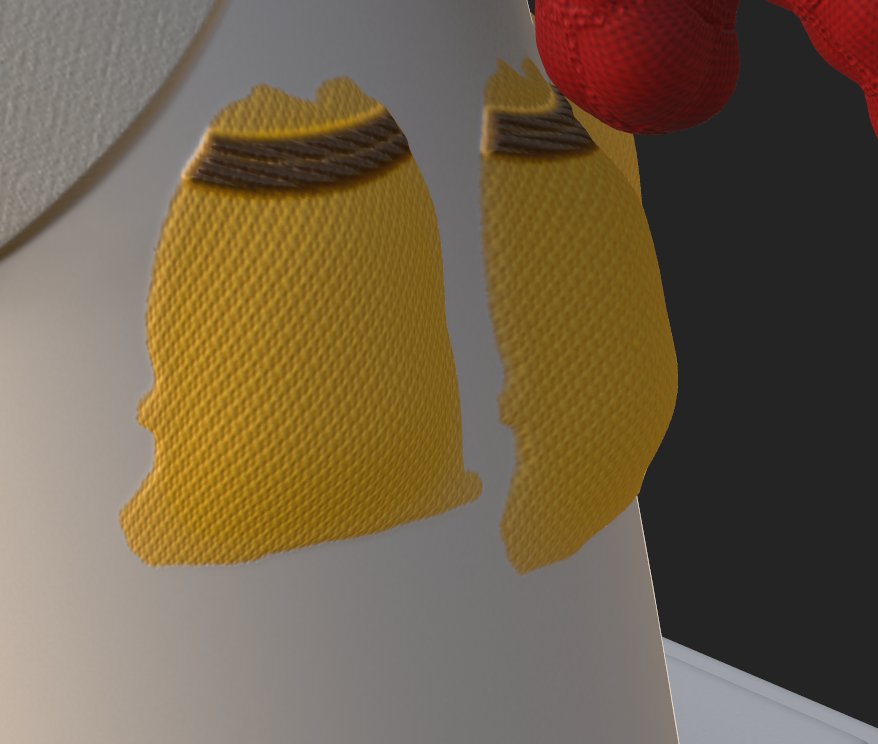
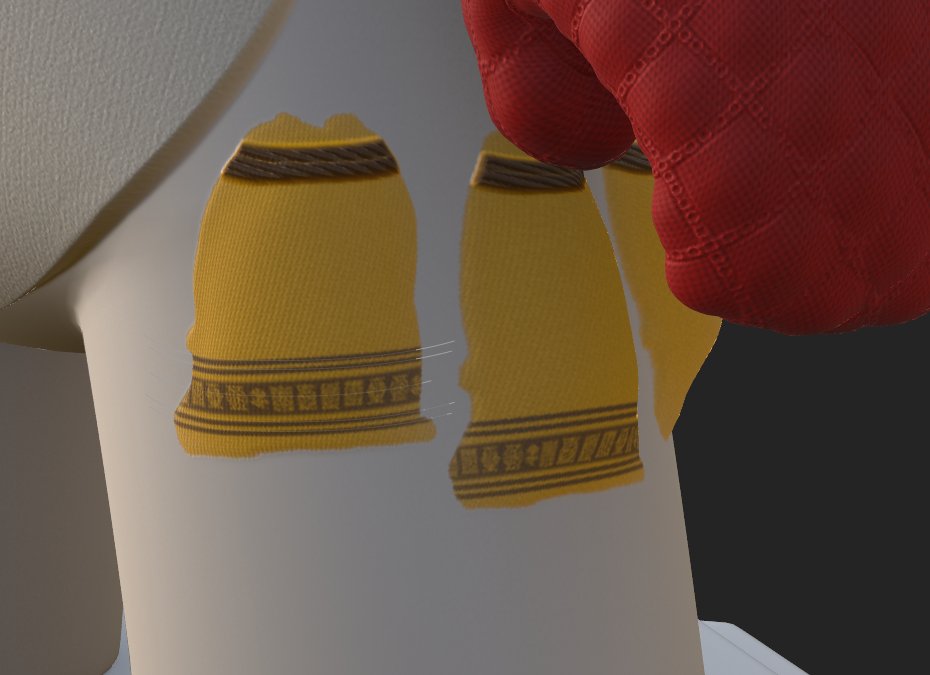
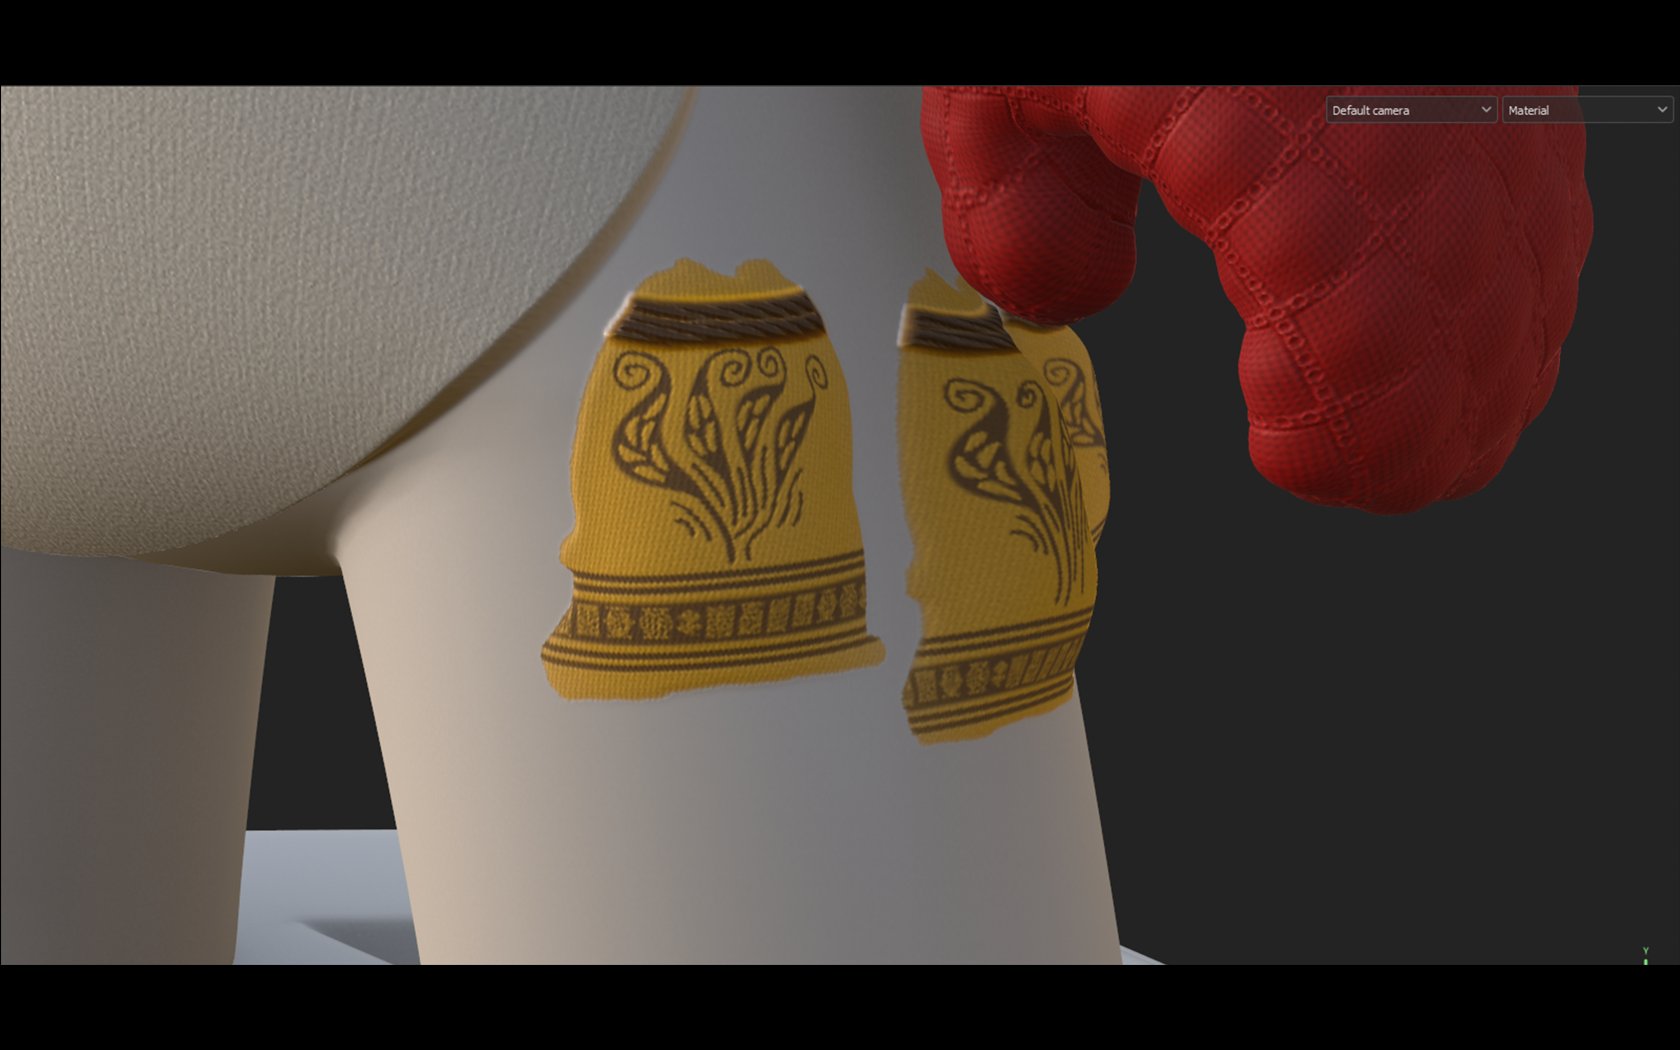
Next thing I did was to change the pouches and the rope. I did not like that highlight where rope touches the body. Even though I spent a lot of time creating the images on the pouches using path tool, in retrospect, it is not a tool suited for drawing. Made some alphas outside of the program, each image representing flour, salt, and yeast. Other detail that I included were creases, so the pouches don't look so flat.

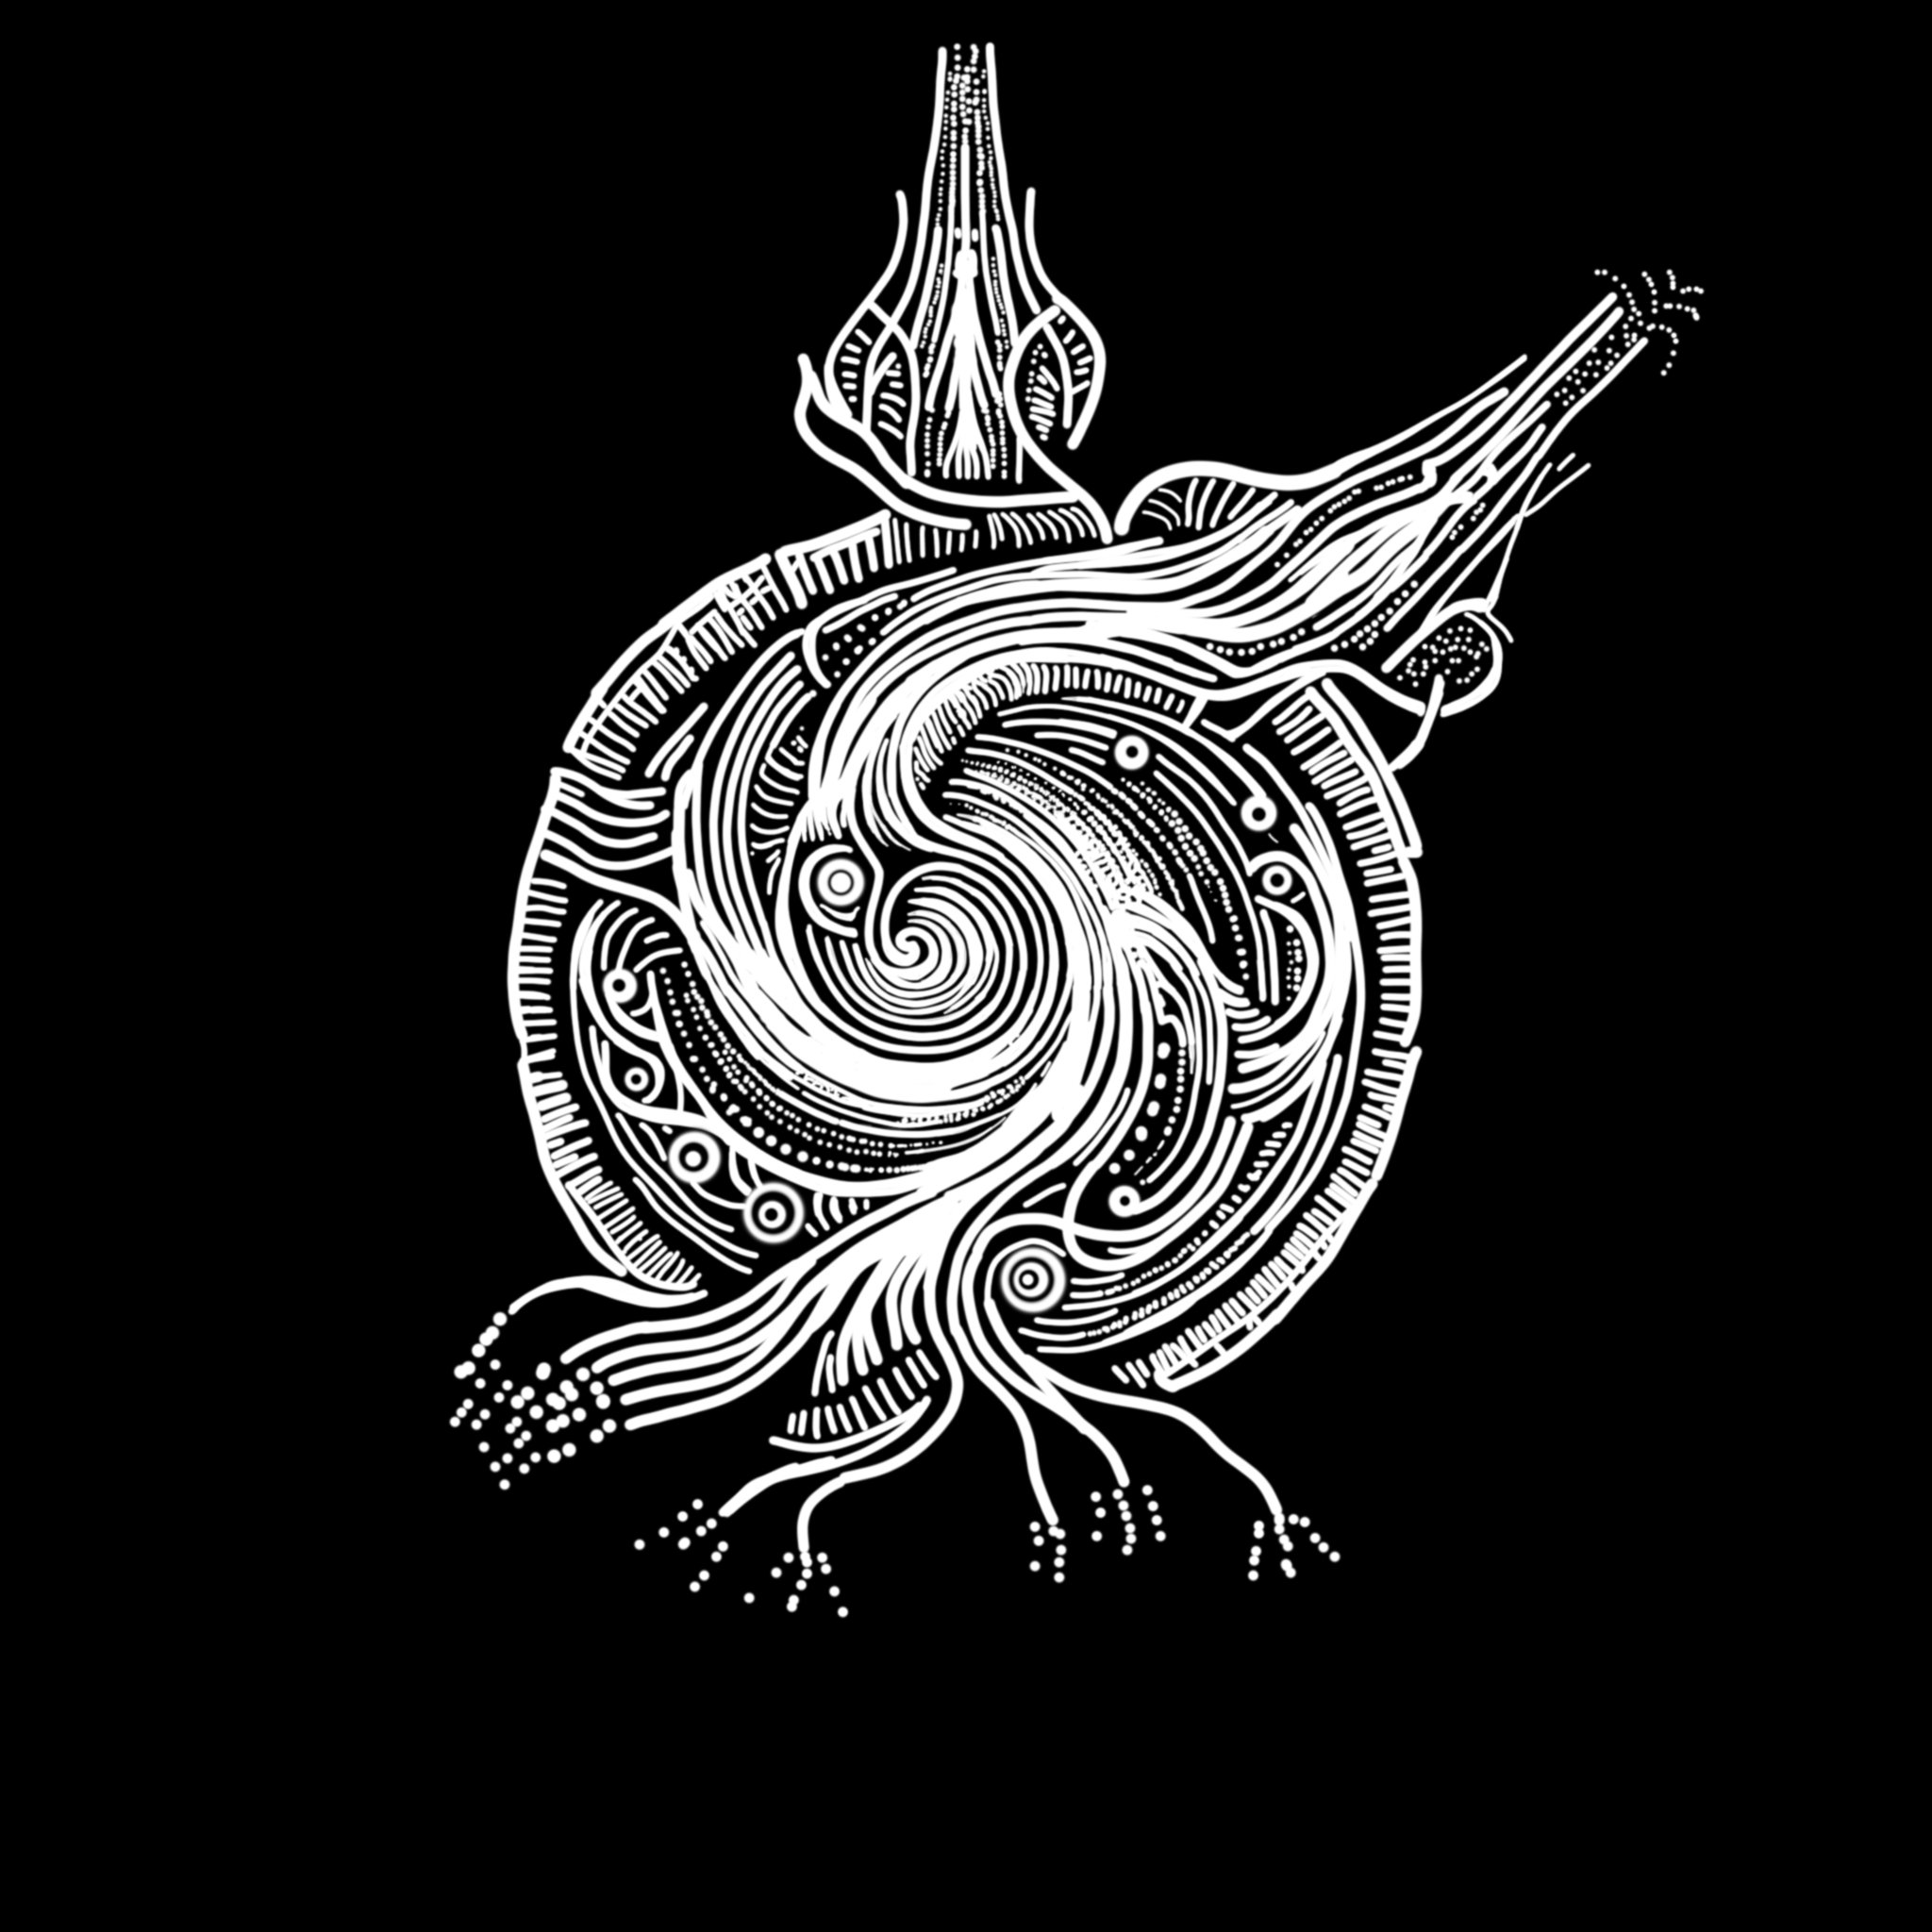
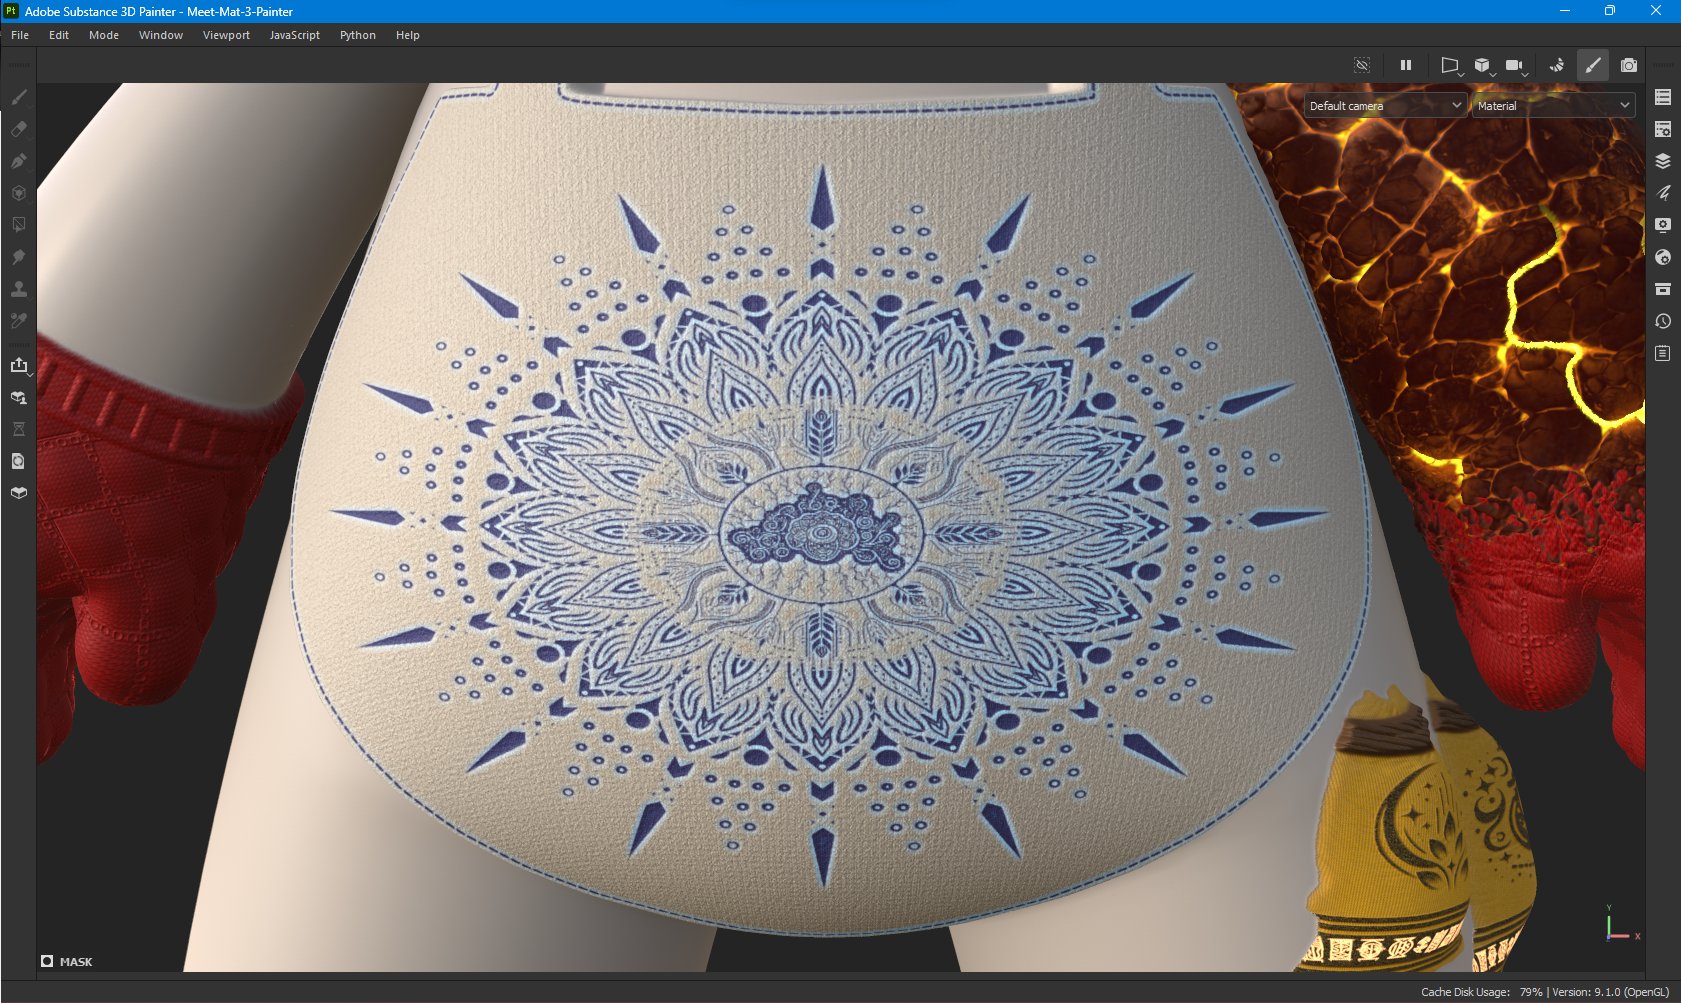
Next thing was the apron. I already had an idea of having mandala pattern on the apron to make the character more magical. There is something about mandala that makes it magical.
After some effort and with the help of photoshop, I drew one. It started chaotically at the center with roots extending outward, becoming wheat, and finally turning into a nice mandala pattern resembling a flower. I am very happy with how it turned out. I thought it was going to be harder to draw, but it seems that almost any line looks good when it is symetrical and mirrored to other lines. Very nice!

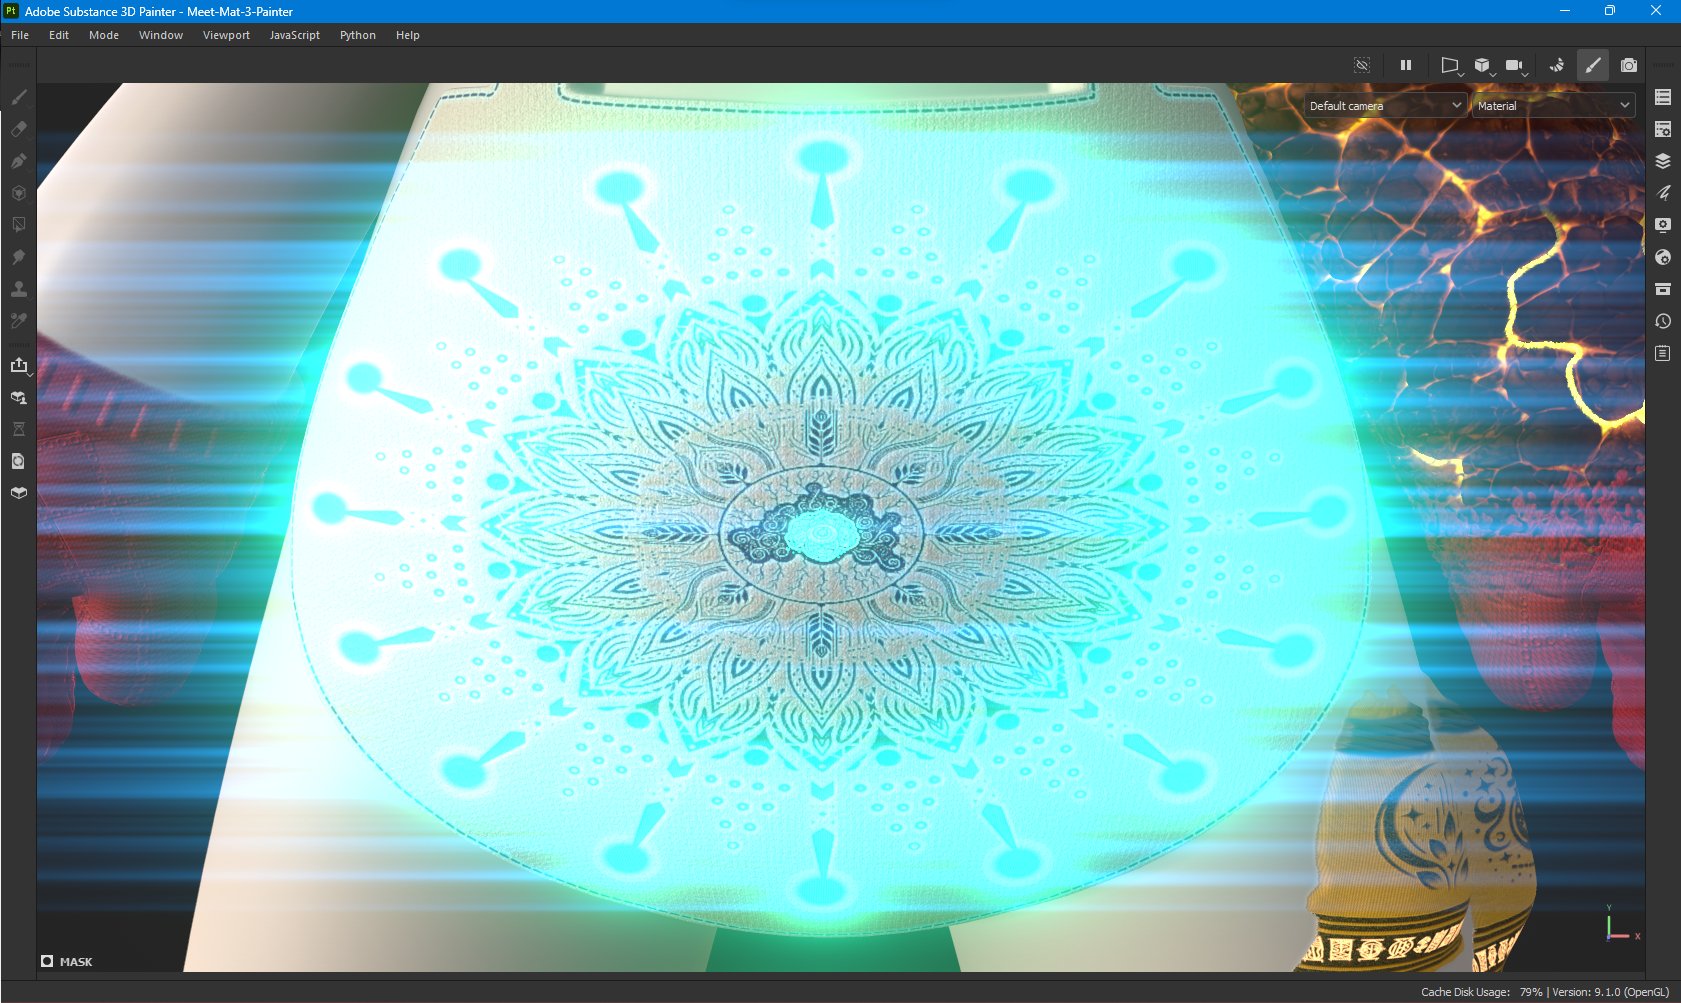
After putting it on the apron, adding stitches, hight as well, and giving them some nice light-blue and greenish highlights, it all ends up looking like this.


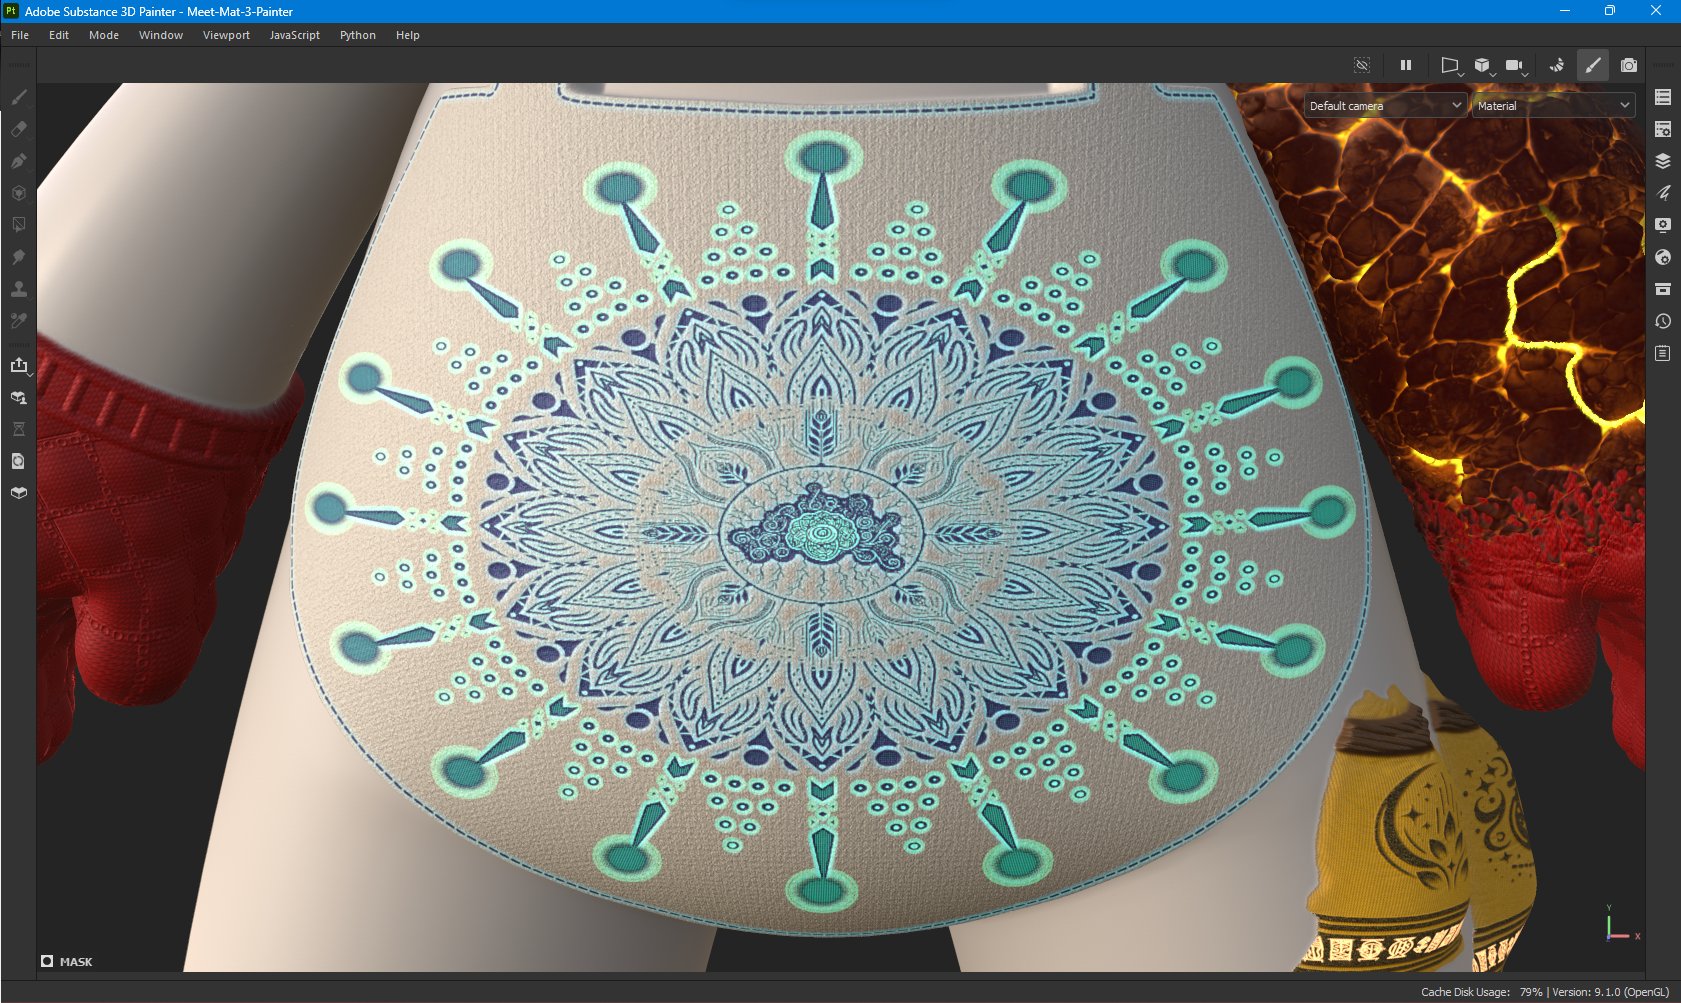
Taken to extremes...
Update - 3 Dec 2023
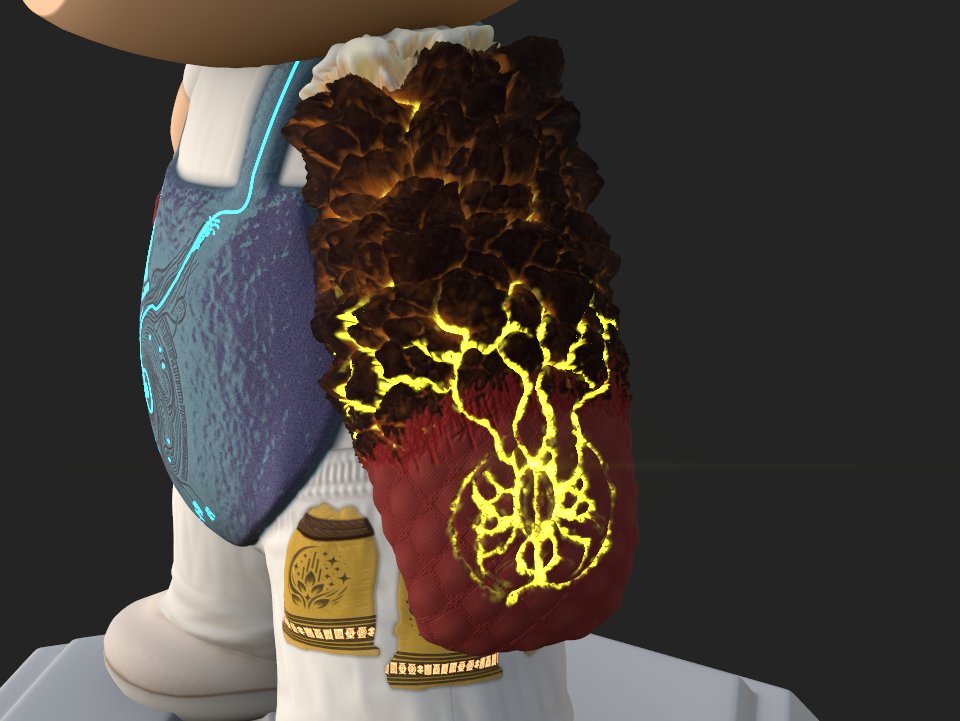
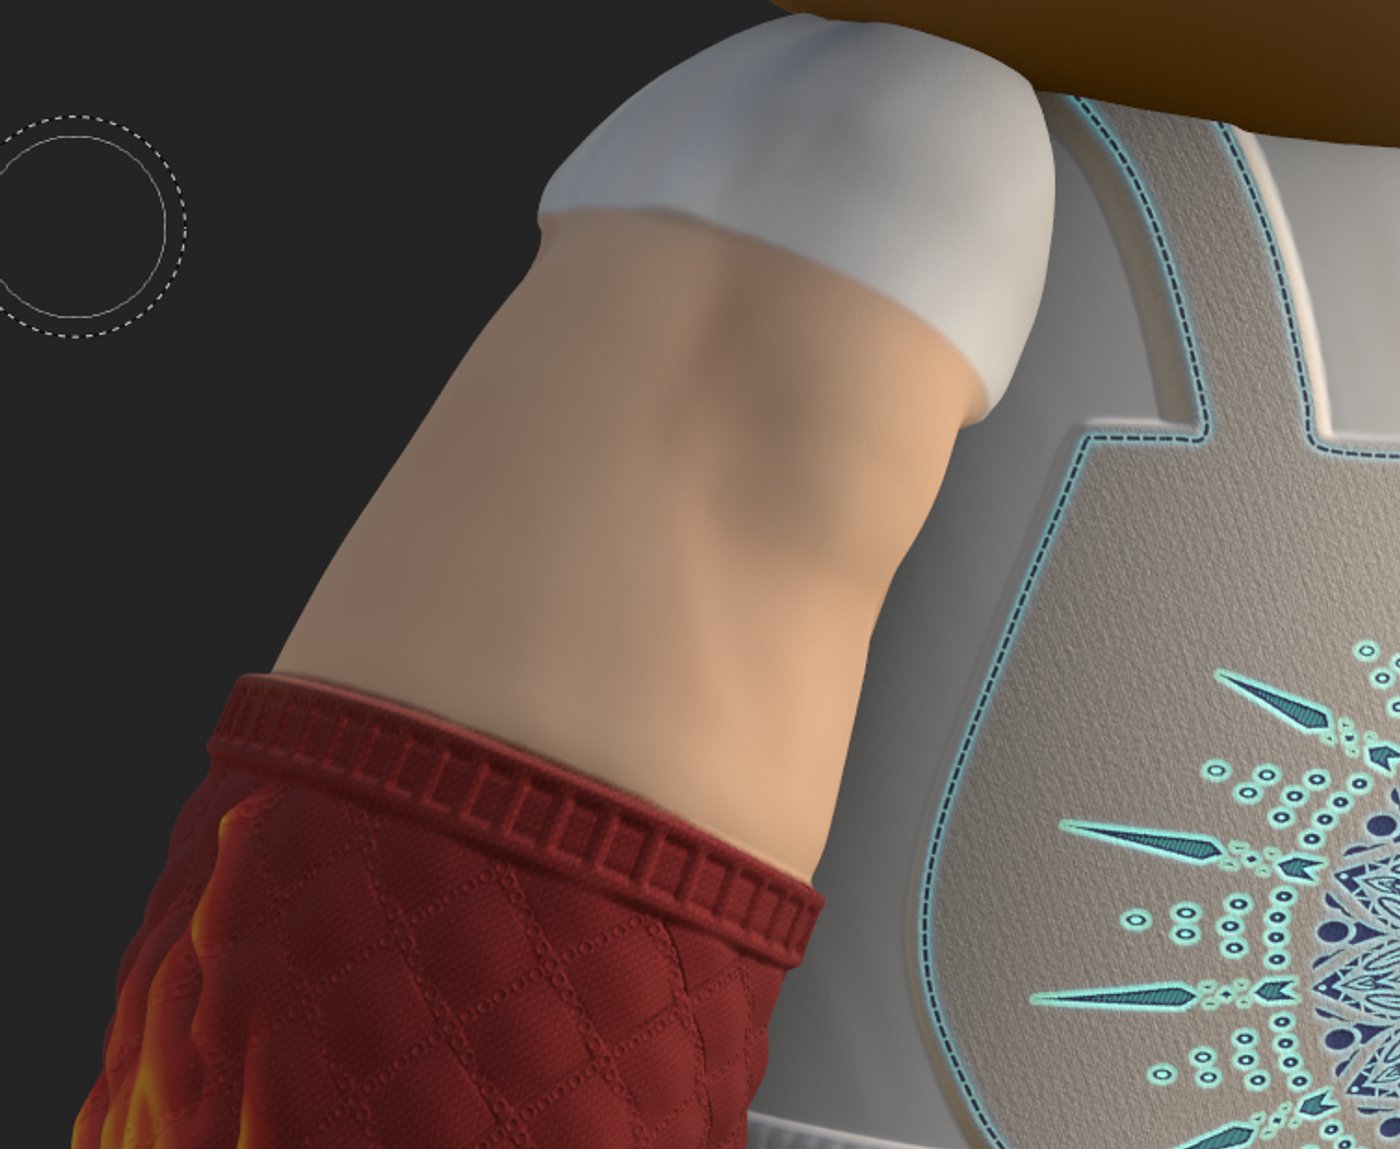
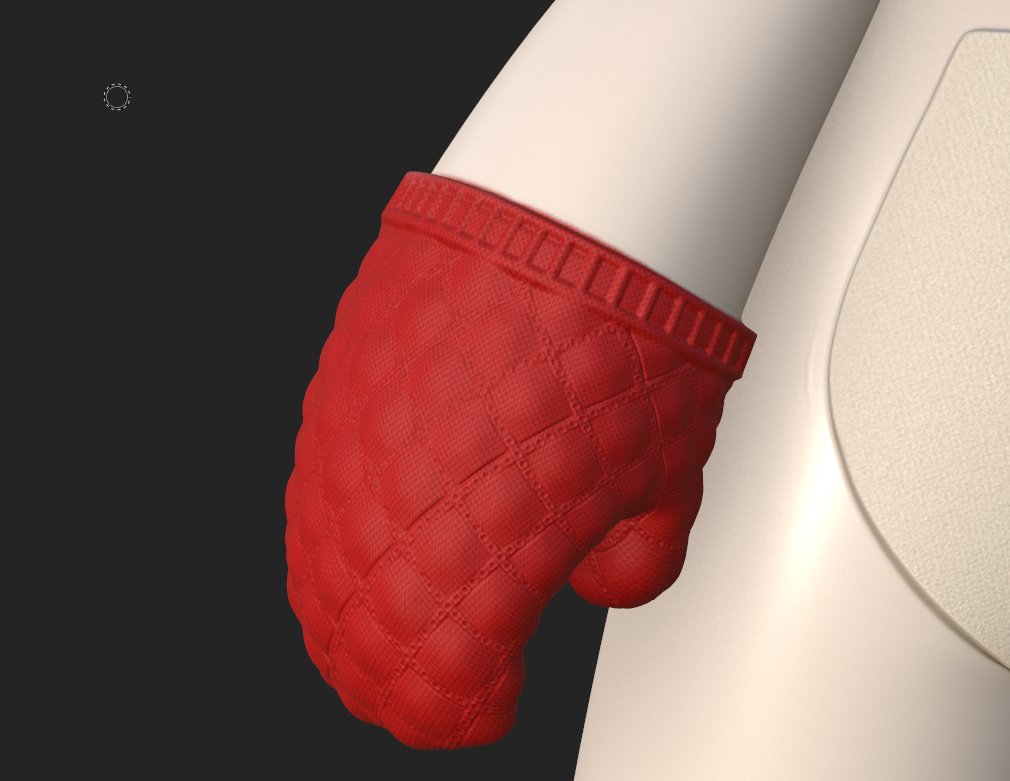
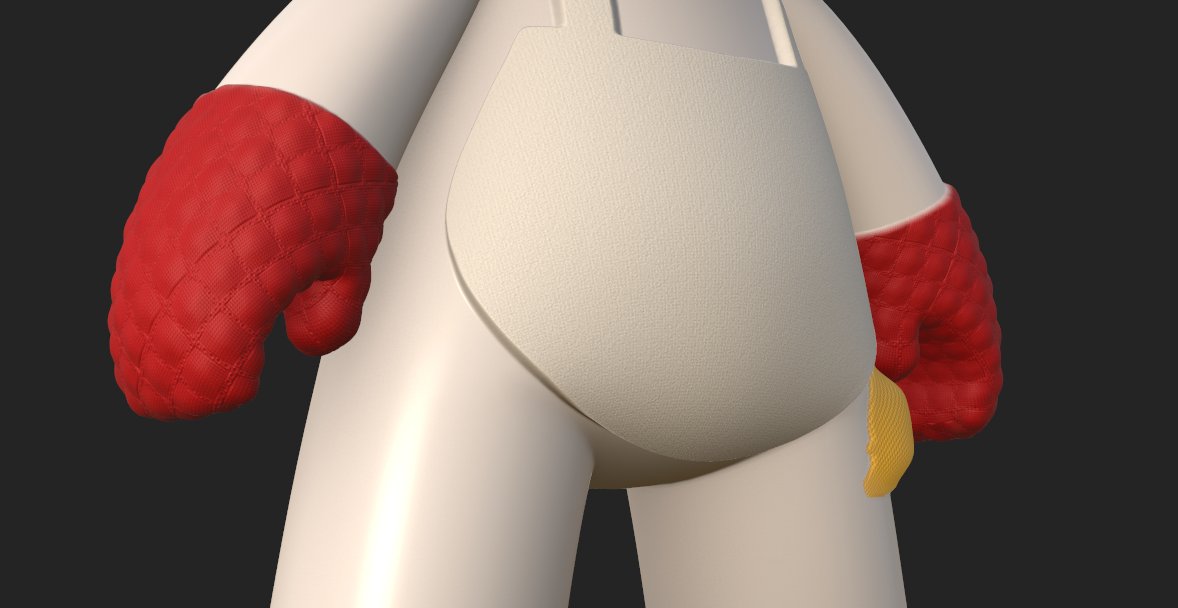
I thought that my gloves looked a tad too simple. I gave them elastic strings so they don't fall off of the baker's hands.
I was thinking what I was going to do with his left hand. It had to be something hot, since in my job as a baker I am handling a hot oven on a daily basis. I also heavily burned my left hand a couple of times, so that is why I am doing what I am doing.
Hot lava rocks. Simple and effective. With several layers and a nice transition between the glove and lava rocks, the end result ends up looking very nice.


But is it magical enough? I think not!
Let's pump up the enchanting part with a magical sign and bring the connection with strings of magical energy.
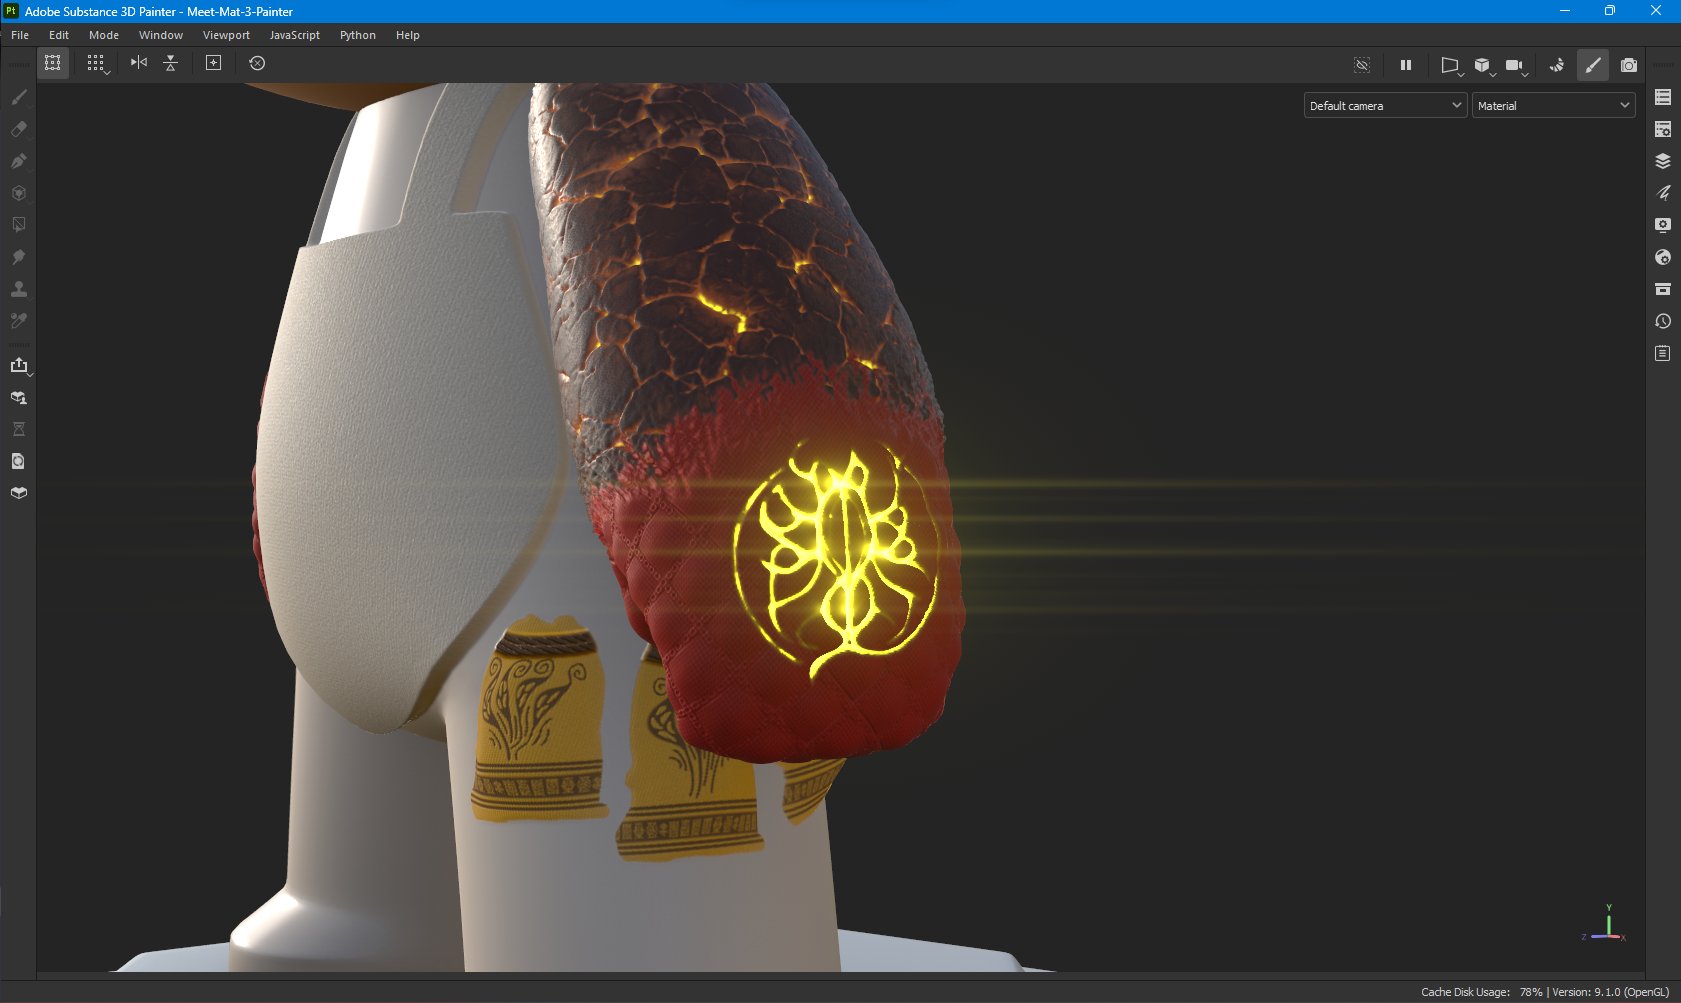
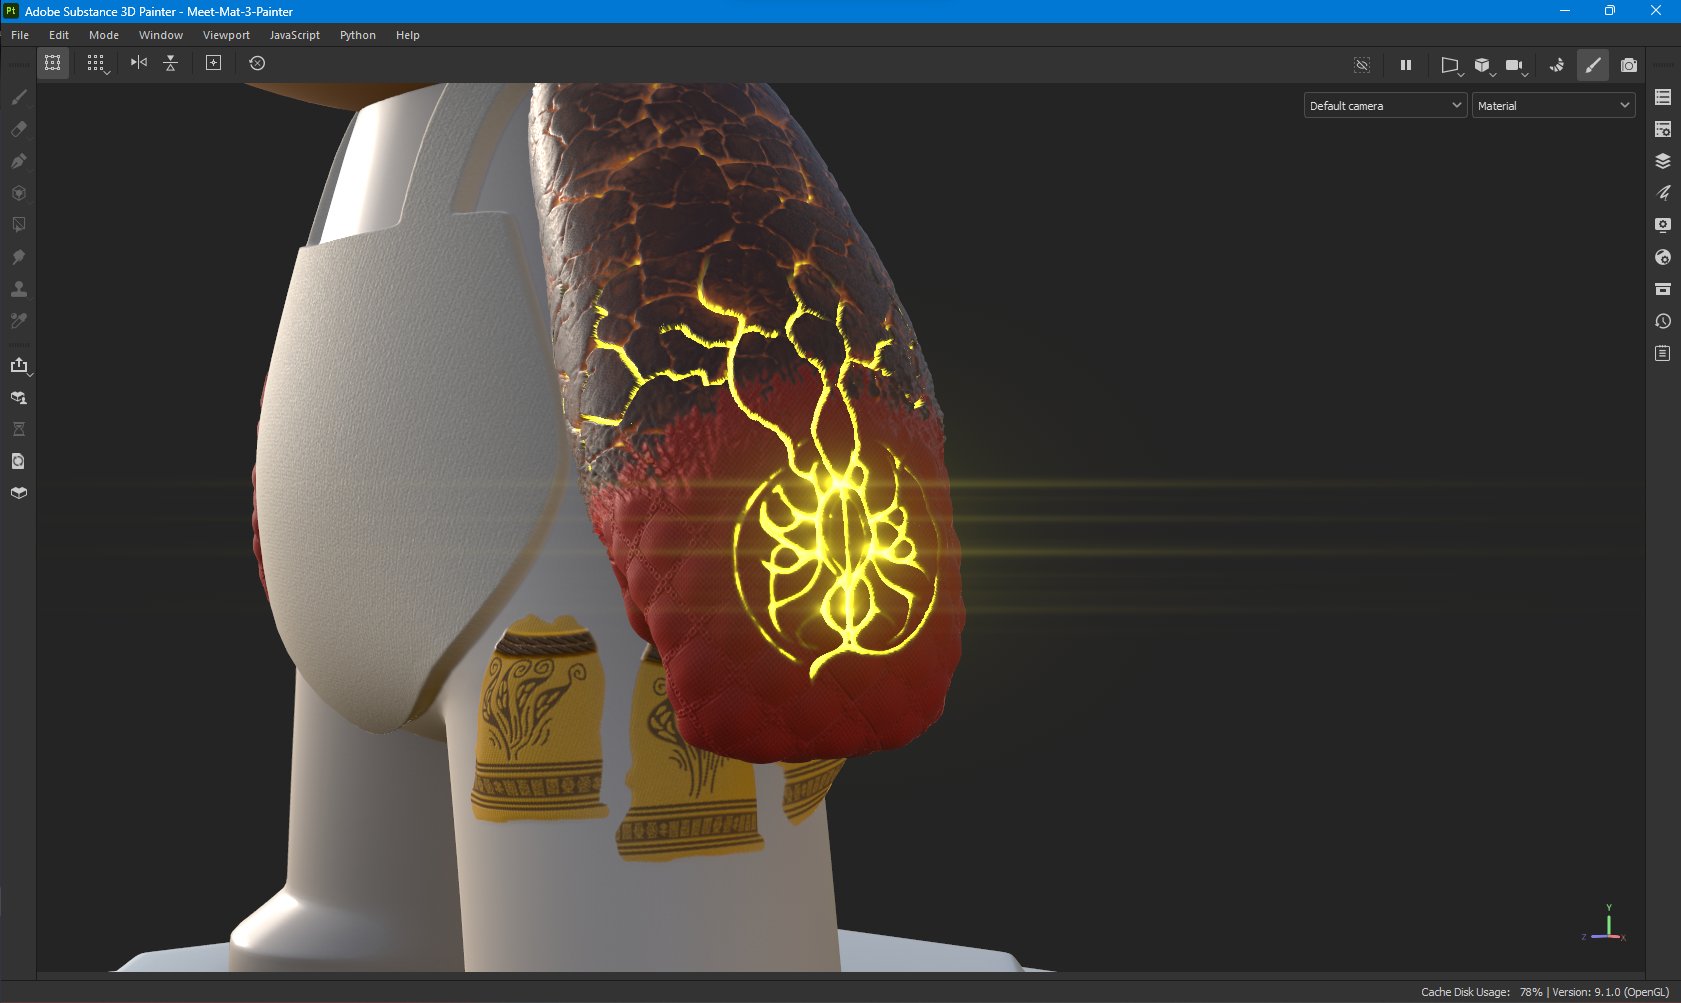
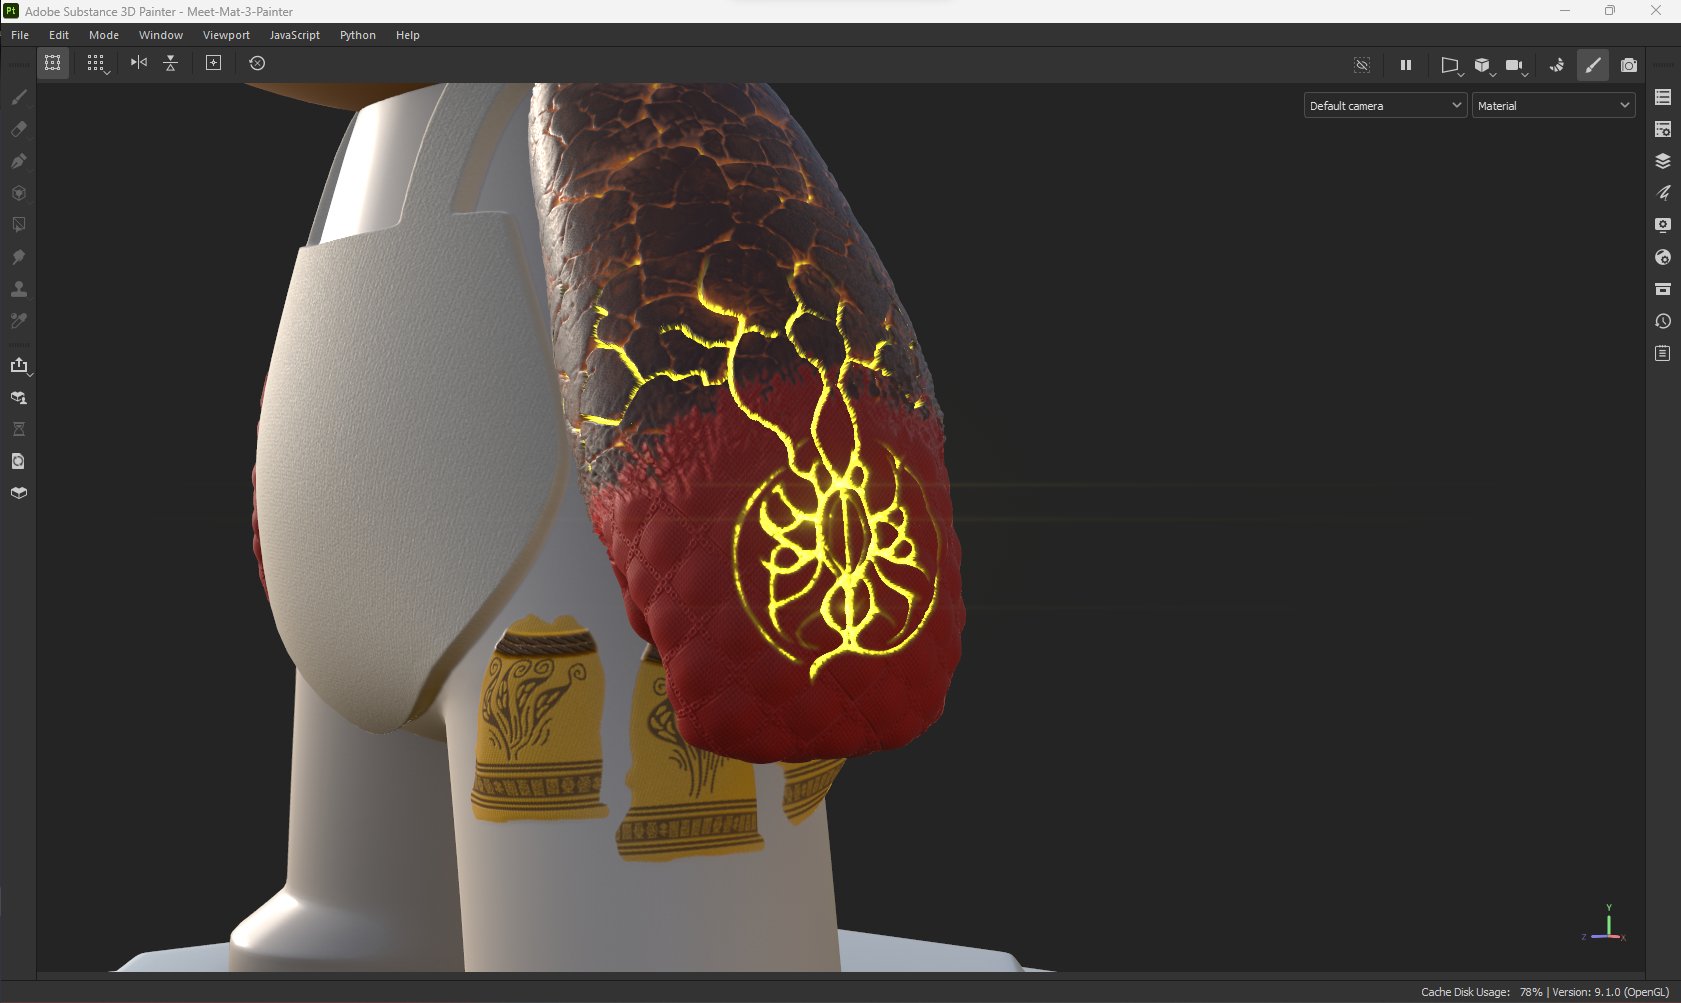
That's more like it.
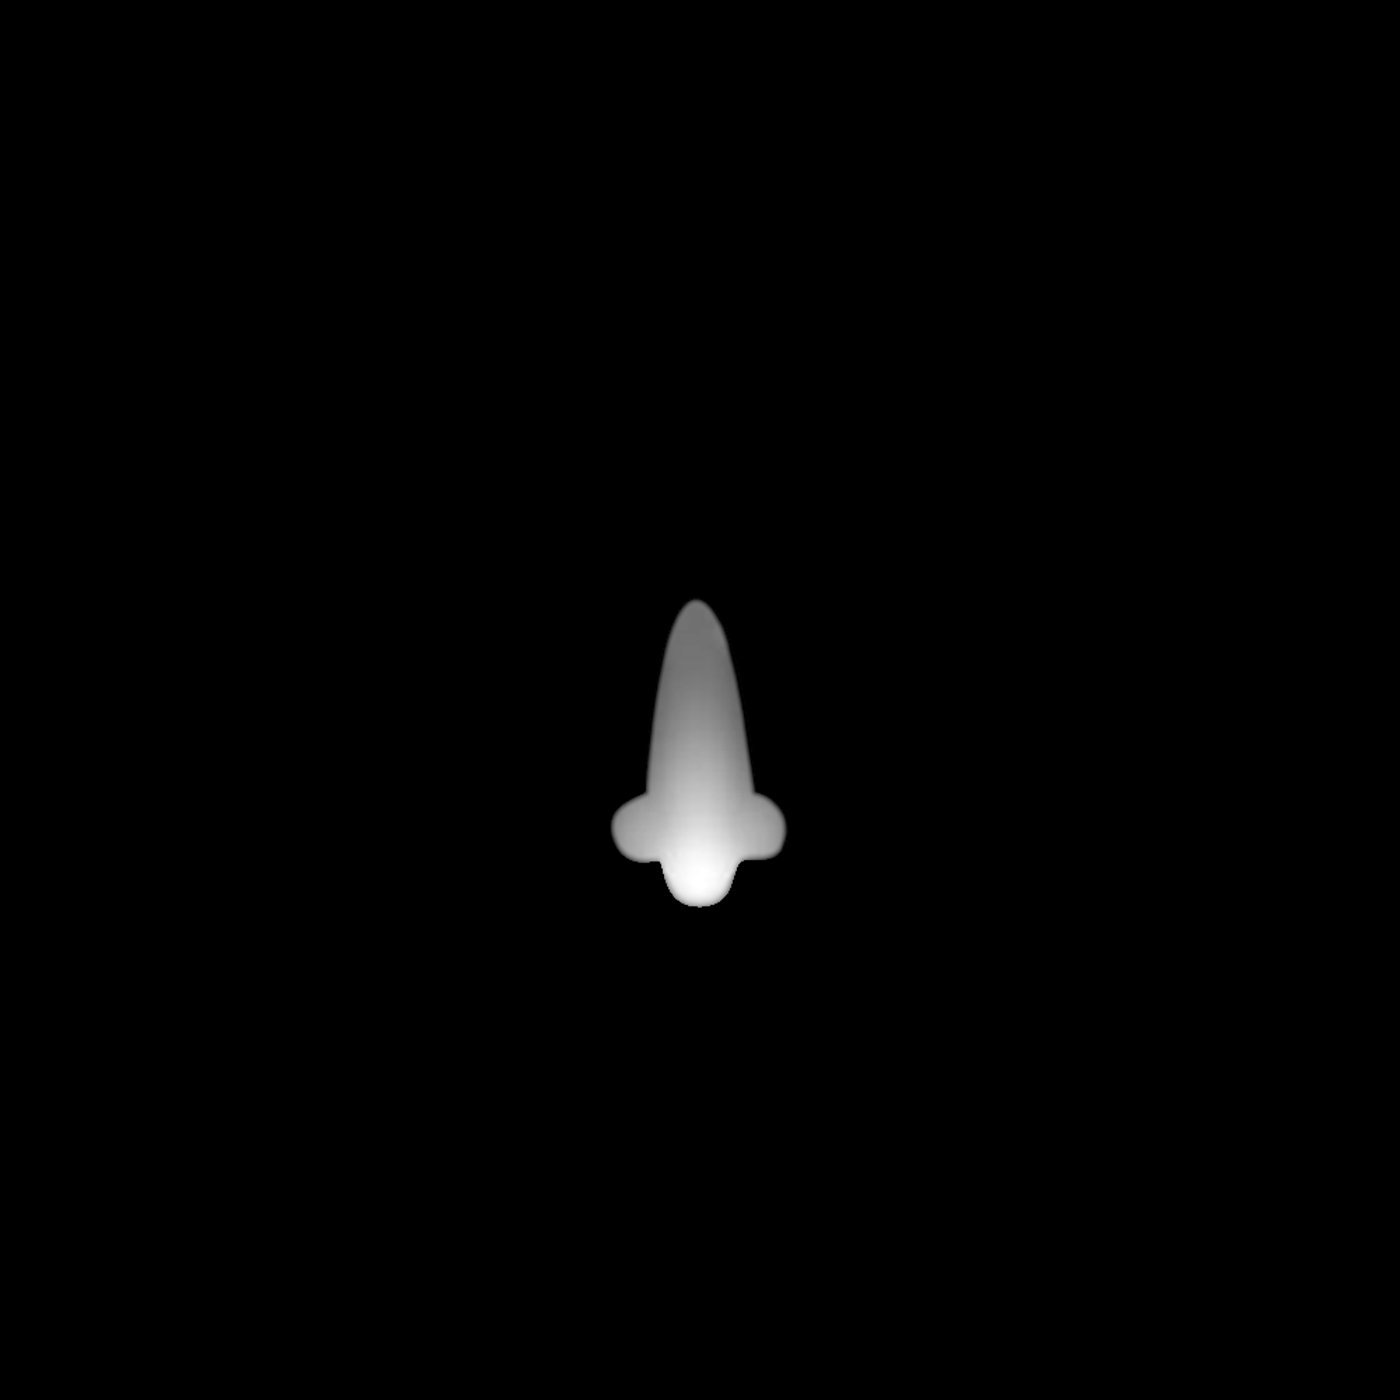
But what about his right hand? Meh, I think one measly flame will be enough for know.

Those would be the current state of things. I might go for the apron next and give him some blue hues...
Update - 2 Dec 2023
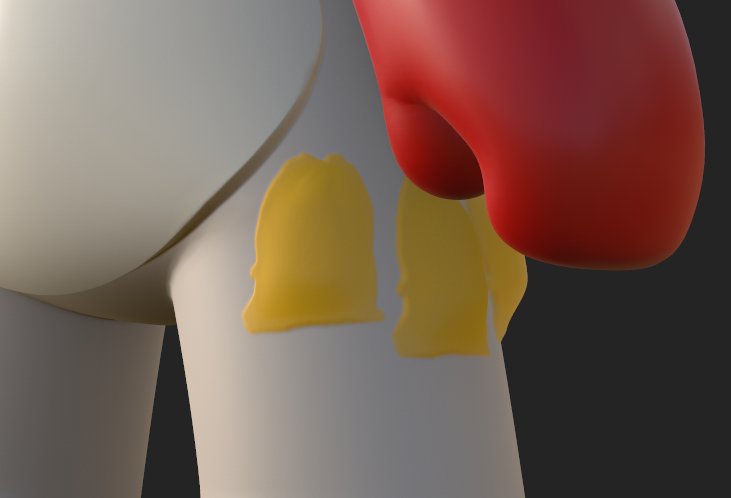
Today, I wanted to give my baker's pouches something nice to look at. First, some rope. Even though he is supposed to be enchanted, using his abilities on mundane things such as tying his pouches is way below his paygrade. That is why the pouches are now tied with a rope.
In doing so, I discovered another tool in SS Painter; Anchor Point, which is very neat. I was already wondering if there is something with which I can reference masks. Thank goodness it exists. Now I can stop copy-pasting layers.
Next, some inscription is in order. It will surely give my baker that enchanted look. In process, I discovered there is Warp projection. It surely makes things easier. I wish I knew about it before.
And just to give my baker more... "bakerness", I drew wheat on his pouches, using nothing but Path tool. I will not be doing that anymore, as it is very tedious. I did not know if there was a way to copy the desing to other pouches. Alas, after drawing wheat on the second pouch, I tried using an Anchor, referencing it on the same mask, which worked. I projected it on the third pouch, but it doesn't look as good. I still left it as a testament to my resourcefulness.

But what is this!? This doesn't look enchanting at all! We need MAGIC!
Yes, let's put some emissive layer on the inscription...
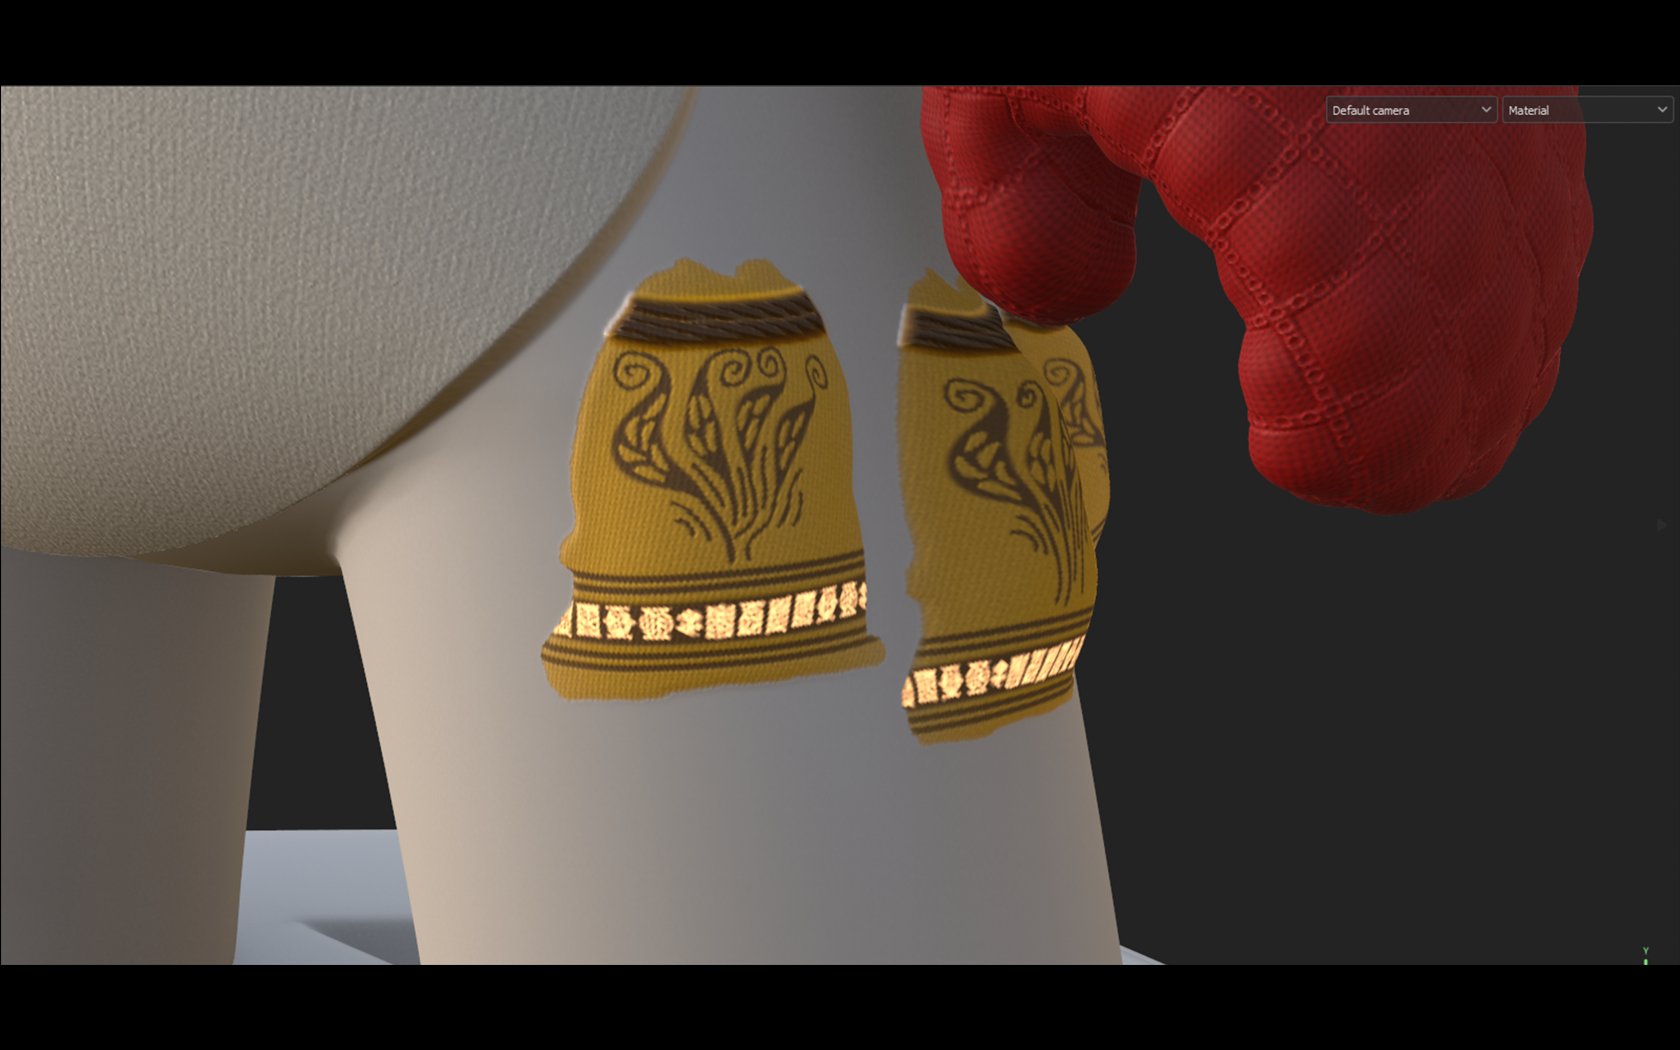
Mmm yes... very enchanting...
Update - 1 Dec 2023
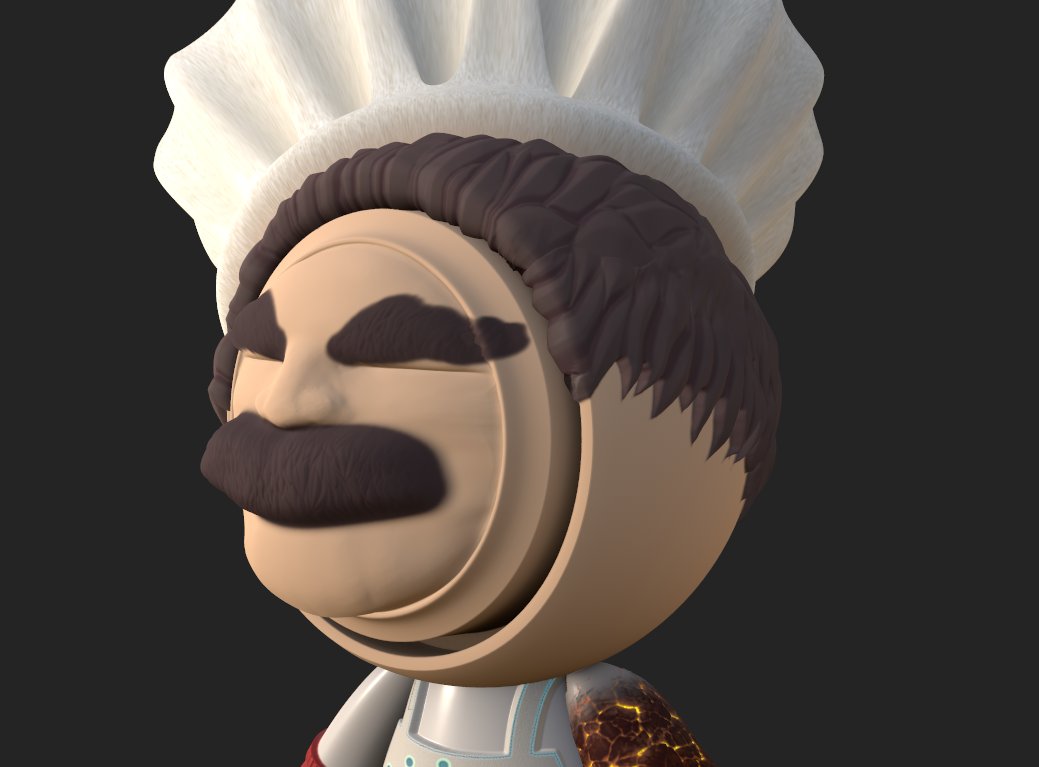
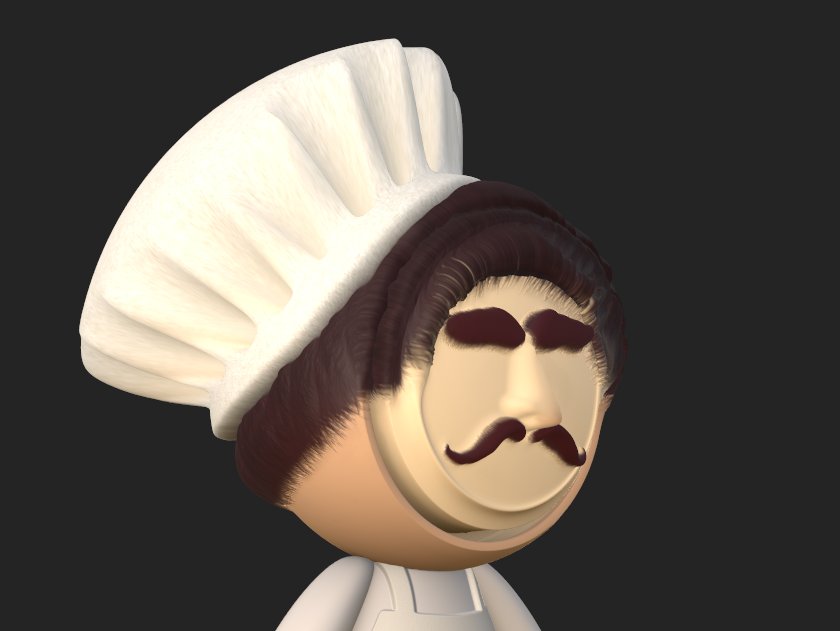
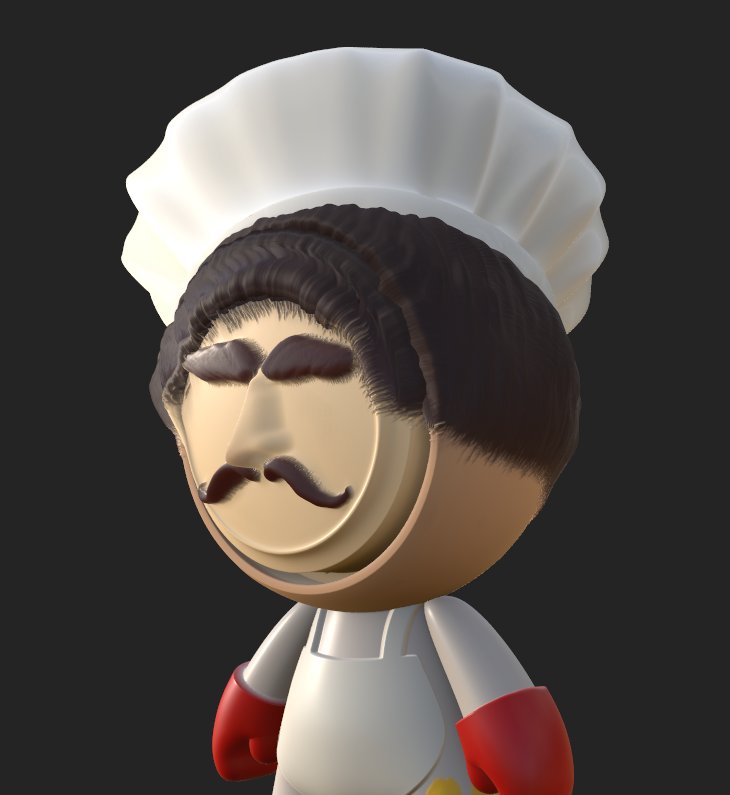
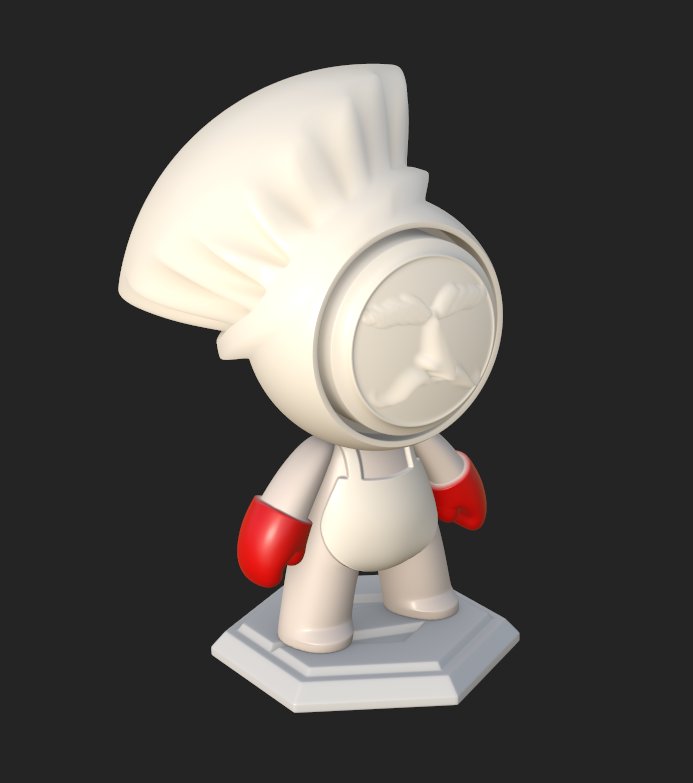
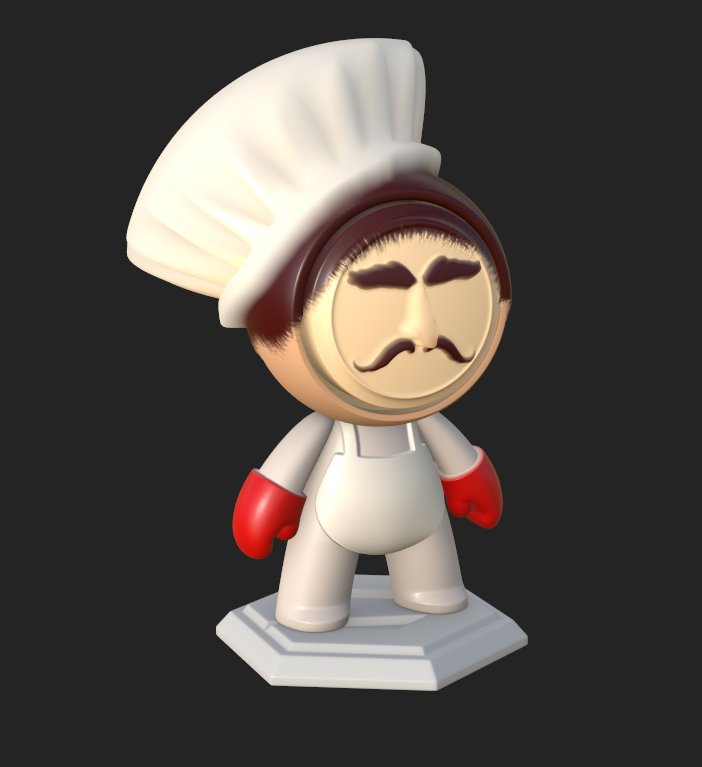
I wanted to give some details to my character to have him look more as a baker and not so flat. I started with his hat, cleaned up some issues with displacement and color, which was especially troubling where his hat met with his hair. Now the hat fits snuggly to his head.
After that, it was time to change up his gloves. It was nigh time! He looked like a baker look-a-like who suddenly decided to take boxing as a next step in his lacklustre career. I was having none of that. At first, I wanted to make a tileble displacment map using sculpting, but that was not going very well. I never did any of this, so I have no idea how to troubleshoot some issues. Anyway...
I did it the oldfashioned way and made some using photoshop. I first found some dot pattern online and then proceeded to add lines and detail. I did not expect to have it right on the first try, so I had to go back and forth between Photoshop and Substance, going through several iterations, before getting the displacement map right.


Adding it to the gloves in Substance, mixing and matching some other textures, as well as adding some details to the apron and pouches produced this result:
I might change it up in the future. For now, it looks adequate. My current Enchanted Baker looks like this:

Update - 30 Nov 2023
I did not have enough time to do much today. I mostly struggled with finding a way to give detail to his hair, as it was rather flat. After doing some research on how one does that in Substance Painter, I baked the textures and imported them into Blender, together with Meet Mat's model. I sculpted the hair where it was supposed to be. Used up a lot of time finding an alternative way to bake a displacement map, since the regular way wasn't working how it was supposed to.
Long story short, I modeled his hair, baked the displacement map, imported it into Substance Painter, gave the Baker more hairy details in general, finishing for today.
Update - 28 Nov 2023
Ok. I really was not satisfied with this thing on Enchanted Baker's head. When I added red color to his mitts that look very much like gloves, he started looking like a 12th century boxer or at least a some misguided person that doesn't know what he is doing with his life, almost like me. Hey! Maybe I should have left it as is...
Anyway, I had to play with stacking heights and displacements, giving him a proper baker's hat (or something similar).
Give him some nice skin tone, some hair, color it, and he even starts to look like a baker.
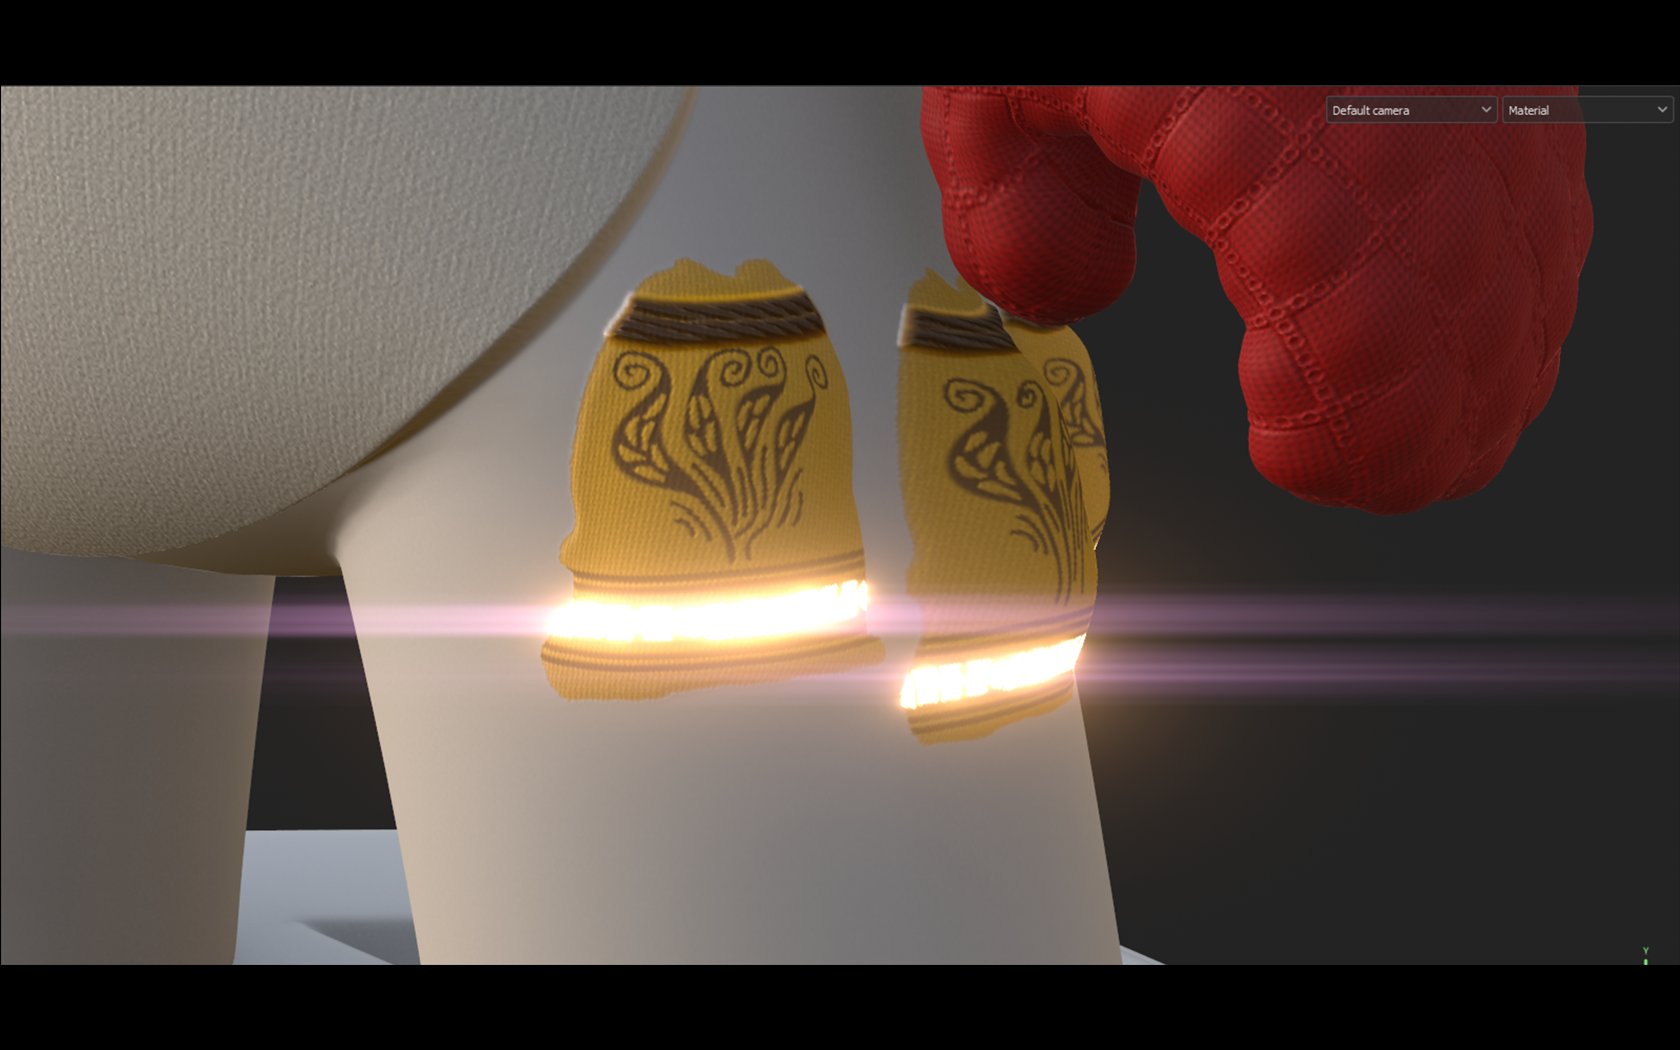
And as for his pouches, I used a picture of a pouch in my reference, using ZoeDepth to calculate depth map, and with a bit of photoshop I had a three pouches on him.


This would be the current version of my Enchanted Baker.

Update - 27 Nov 2023
I started shaping my Enchanted Baker by displacing his hands and torso, effectively making his gloves and his apron, as well as his... hair? hat?... still not sure what that thing is...
It was rather easy to do; the path tool is great for making smooth curves, wich is how I used it to make edges of my displacements. Well, except the neck strap; that is just one displaced path.

Then I got stuck.
What about a face? Should he have a face? Maybe he is a she? 'She' he isn't, since my decision was to grant him a face of an old man with facial hair.
I got stuck even more when I found that painting a displecement over a complicated texture provides a horrific result:

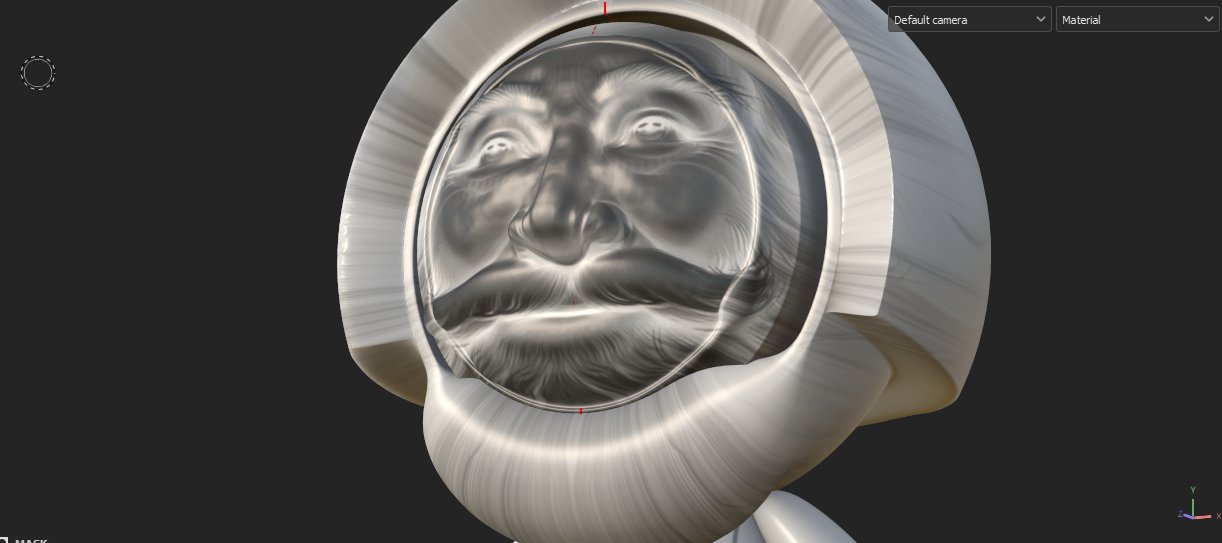
After thinking a bit, there was only one thing to do. Delete the monstrous face and see if there are any good bearded displacement maps. Spoiler alert; there are none.
I had to make my own. But how?
The long story short, I learned a bit how pen tool functions in photoshop, learned from a tutorial how to make a gradient that goes from the edge to the center by using inner glow, and suddenly I had a decent face at my disposal.


I am not sure if I should leave him without a beard or give him one. Anyway, this is his current form...

Update - 25 Nov 2023
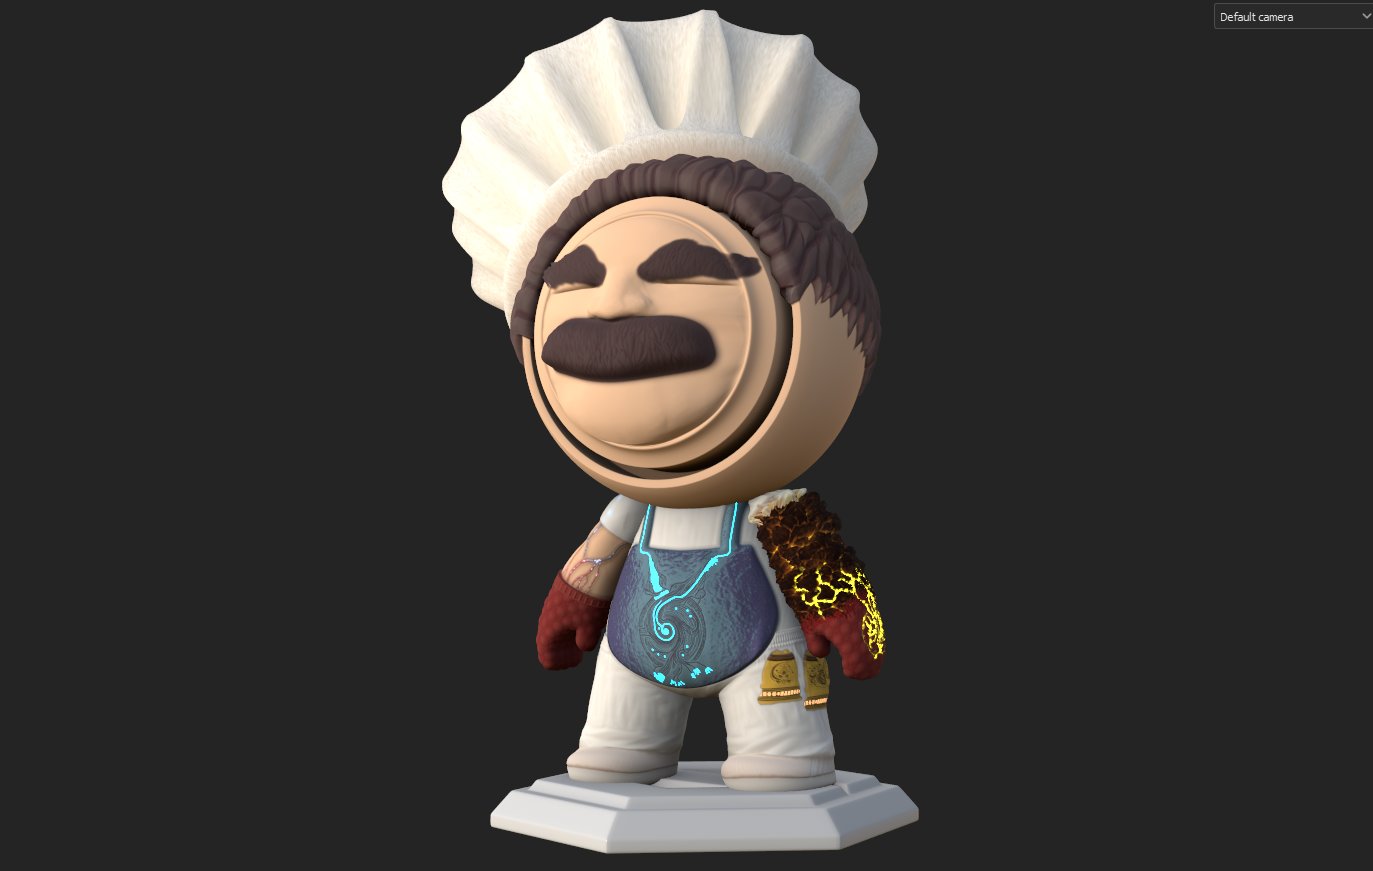
As I continue on this treacherous path of an artist, to bear this heavy load over my beaten back a bit easier, I've recently started working as a baker. To commemorate this joyous event, seeing how this contest was underway, I've decided to summon an amalgamation of me as a baker, fantasy, and my imagination, calling it Mat the Enchanted Baker.
I imagine him having mostly white clothes with fiery red gloves whose heat extends up his left arm, pouches of yellowish pigment, always close by and attached to his hip, enclosing some of Mat's best magical ingredients, and an apron enchanted with beautiful shining blue mandala patterns.
That's the idea...
The problem I am facing is that I've never even used Substance Painter. I don't even have a drawing tablet. Well, Substance Painter is something that I recently decided I wanted to learn, and I don't think there is a better occasion than a proper rookie contest.


Comments (1)