
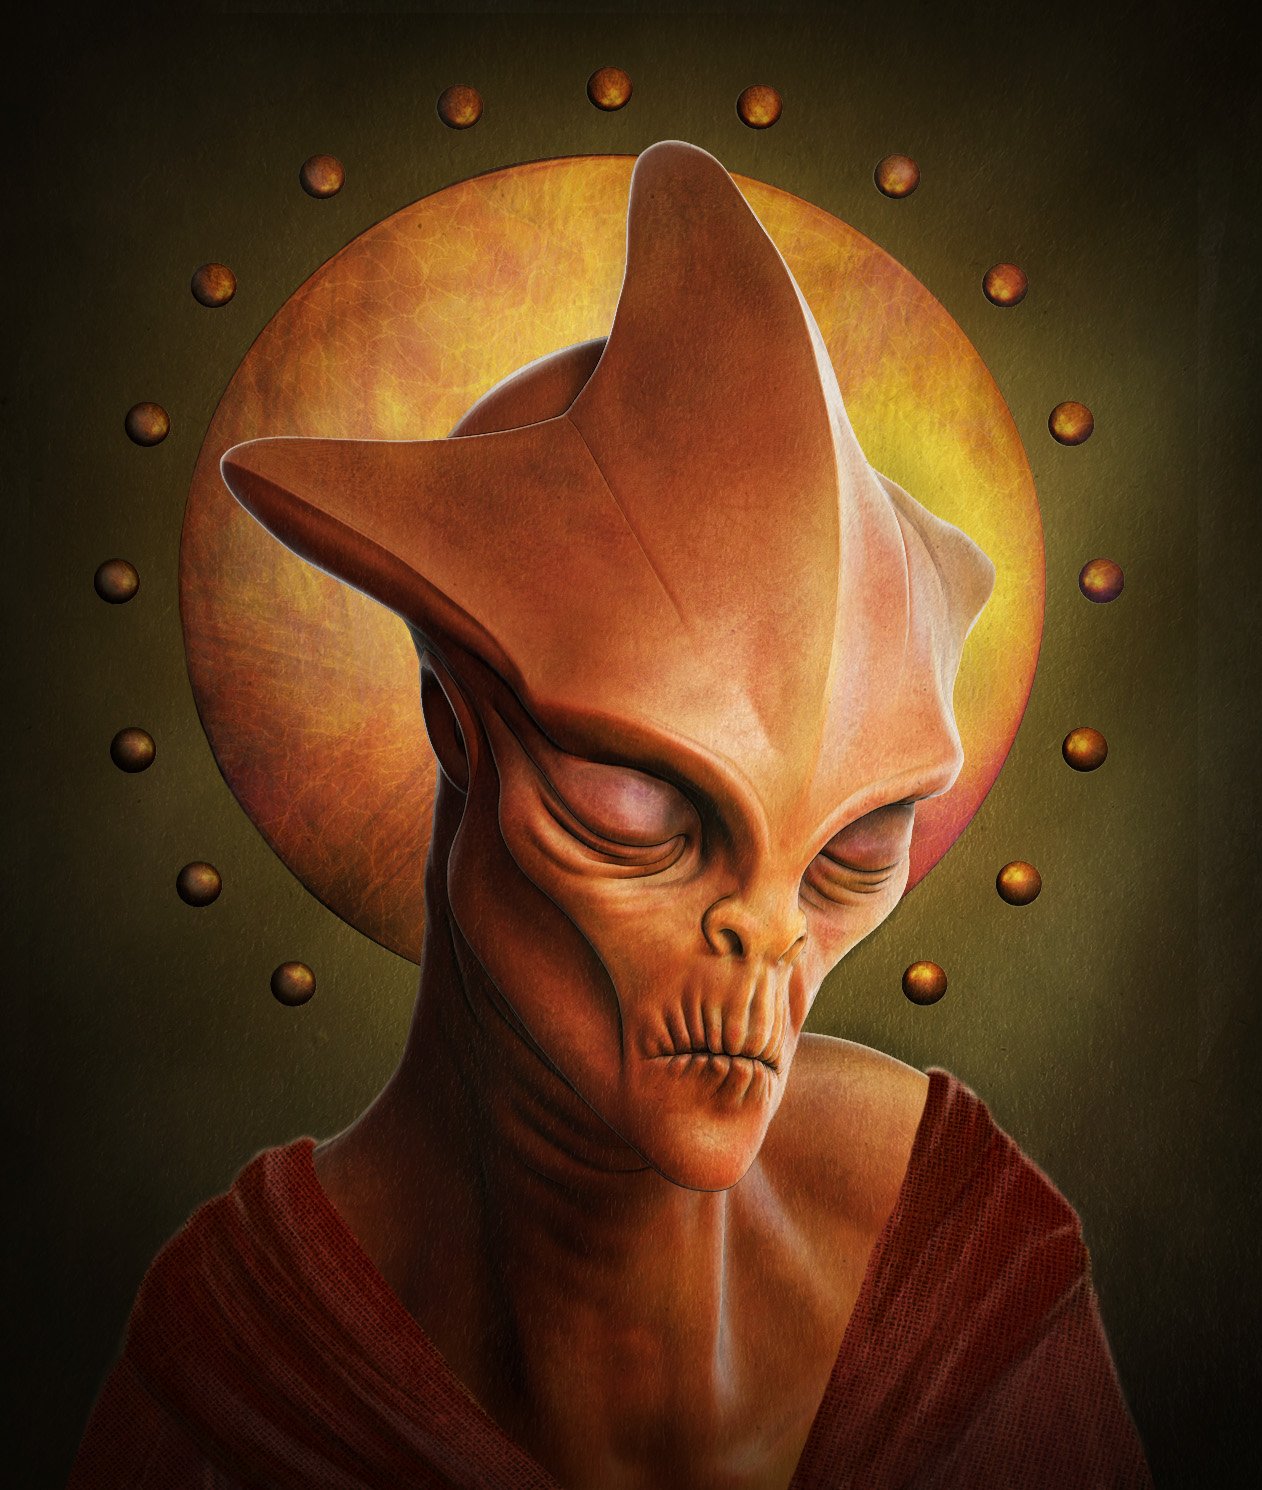
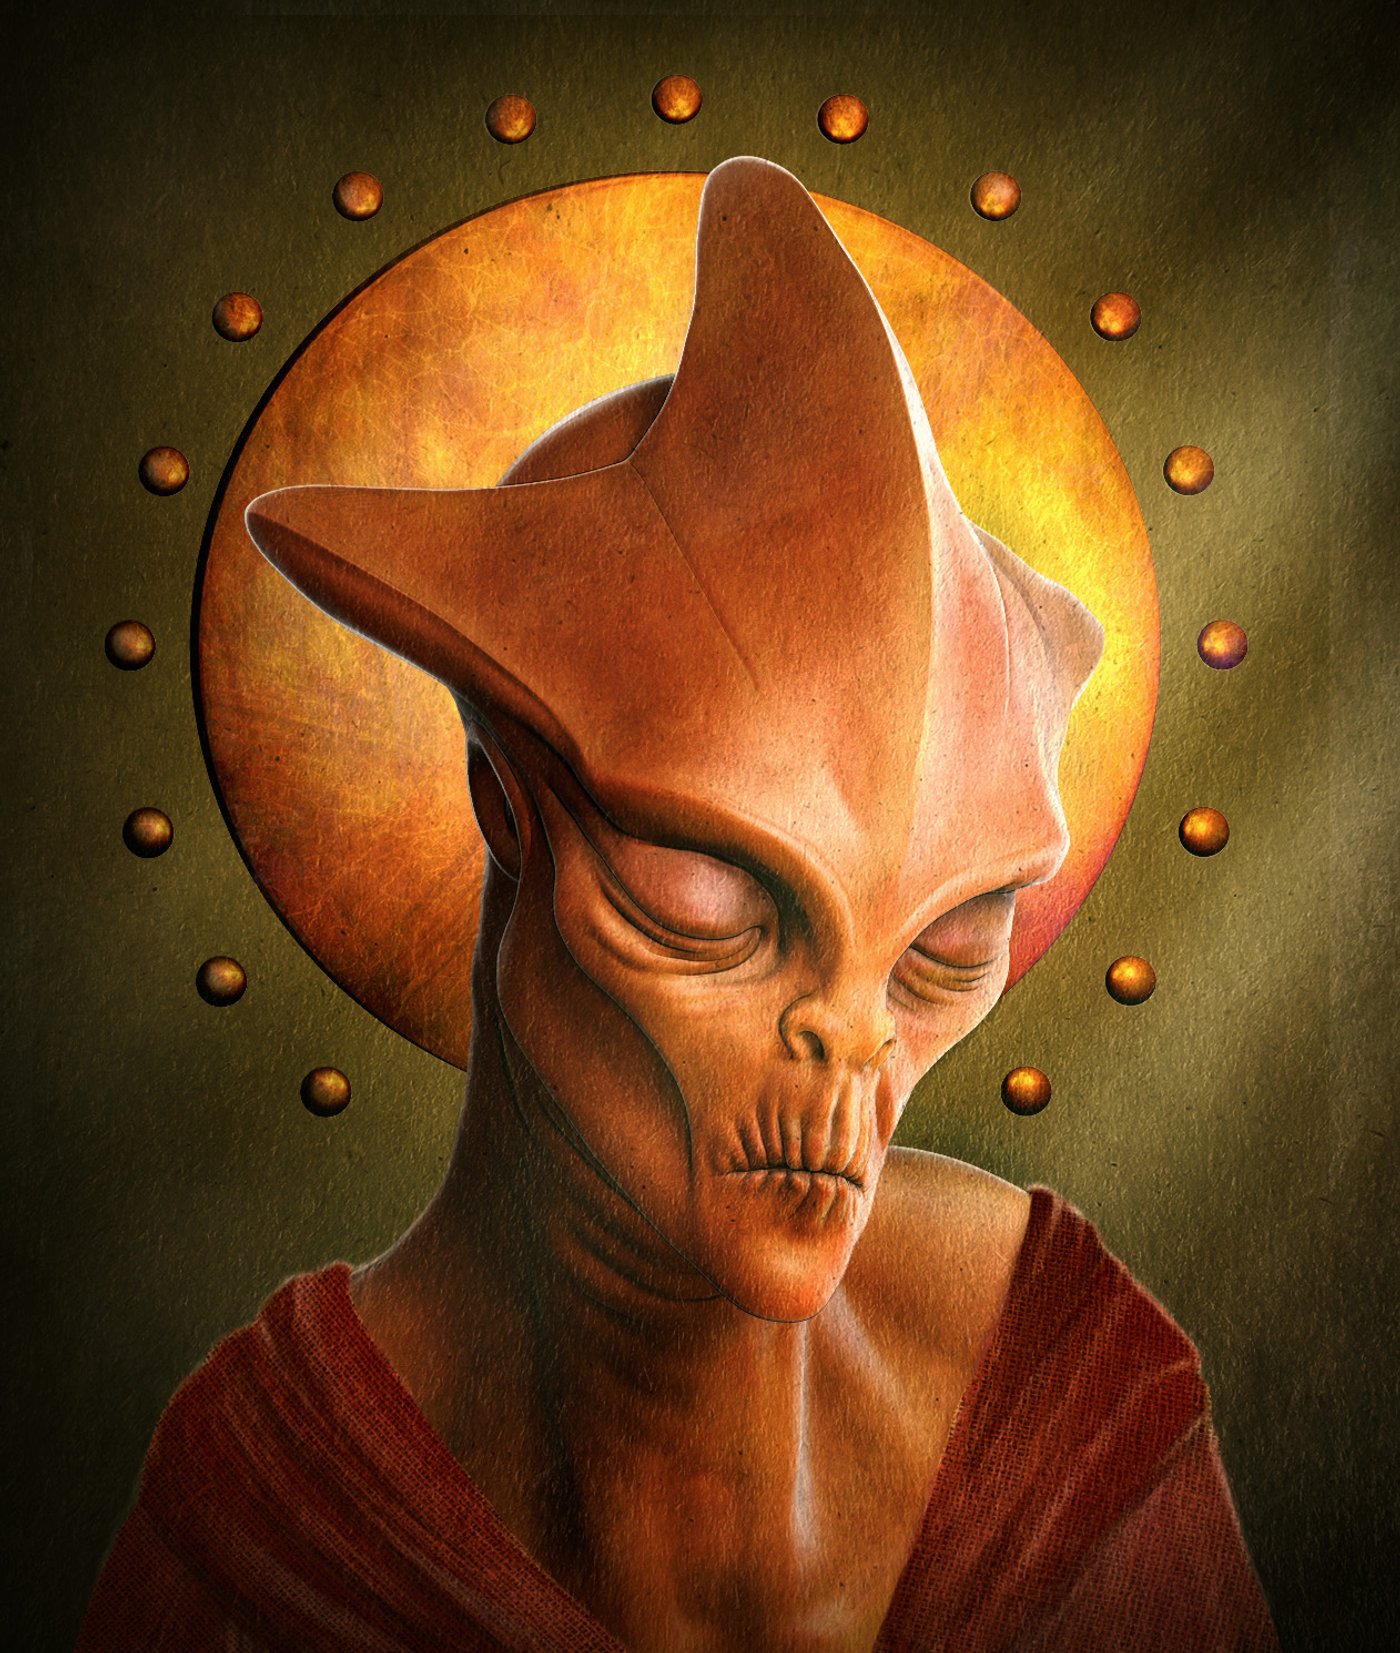
Alien Mother
Alien bust sculpted in Zbrush, using material composition, photobashing, mattpainting and manual paint in Photoshop.
Alien Mother
Update - 1 Mar 2024
Alien Mother
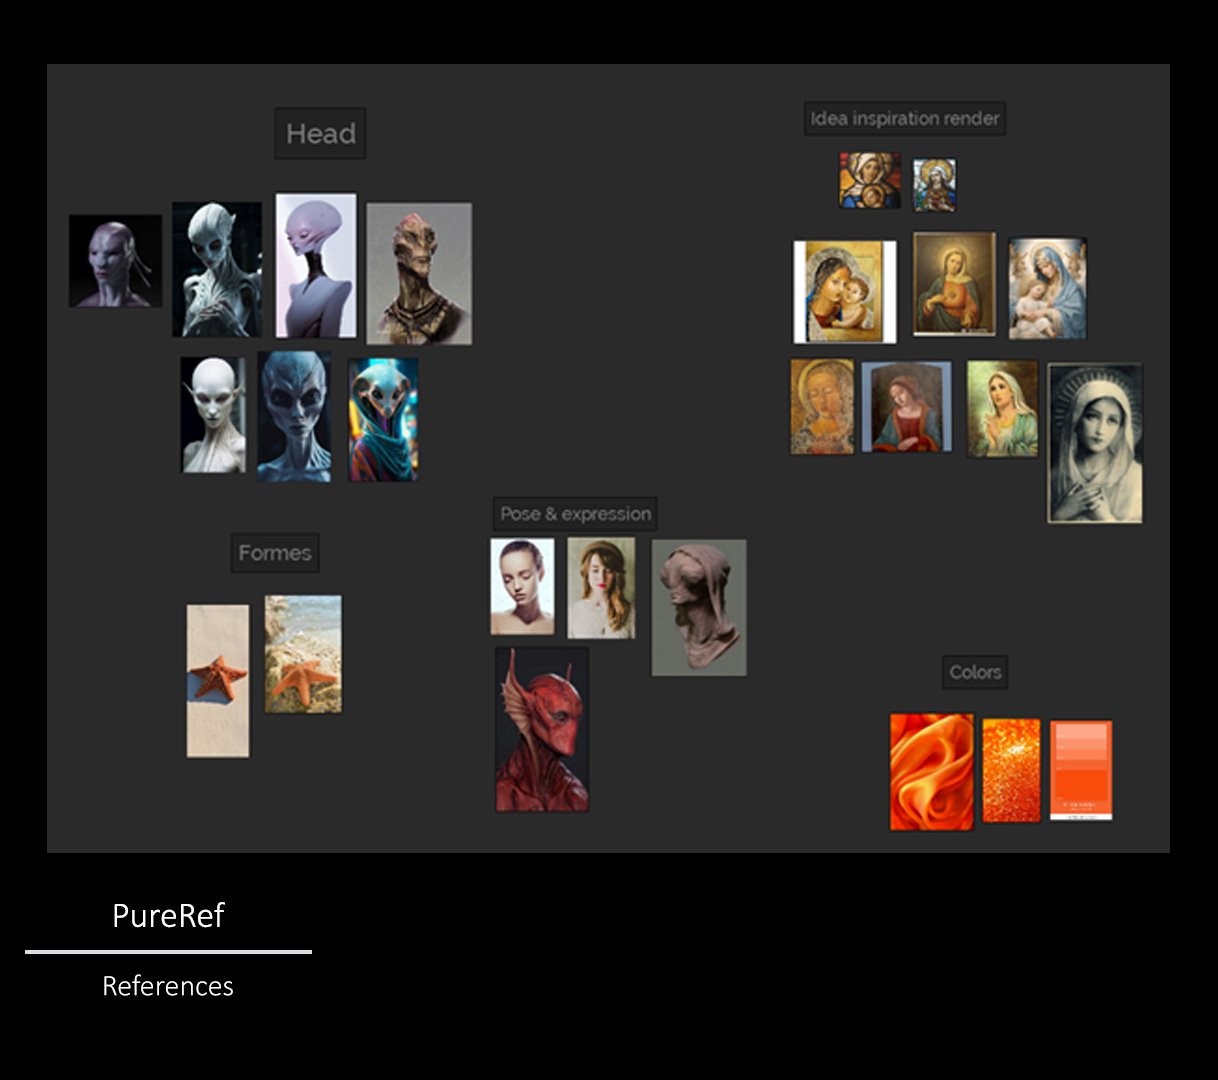
References
Investigations focused on the upper part of the body, with a view to designing the bust to come. Given that the alien is frequently associated with clichés, inspiration was drawn from a religious reference, with no negative intent in the creative process. The aim was to modernize, while preserving a touch of paint for the final grain.
Zbrush sculpting
The aim was to direct the viewer's attention to the final expression, inspired by the religious context. It was essential to explore soft shapes, accentuating certain features to give the character more consistency. More pronounced forms were thus applied to the top of the head and the back of the skull, inspired by the configuration of a starfish.
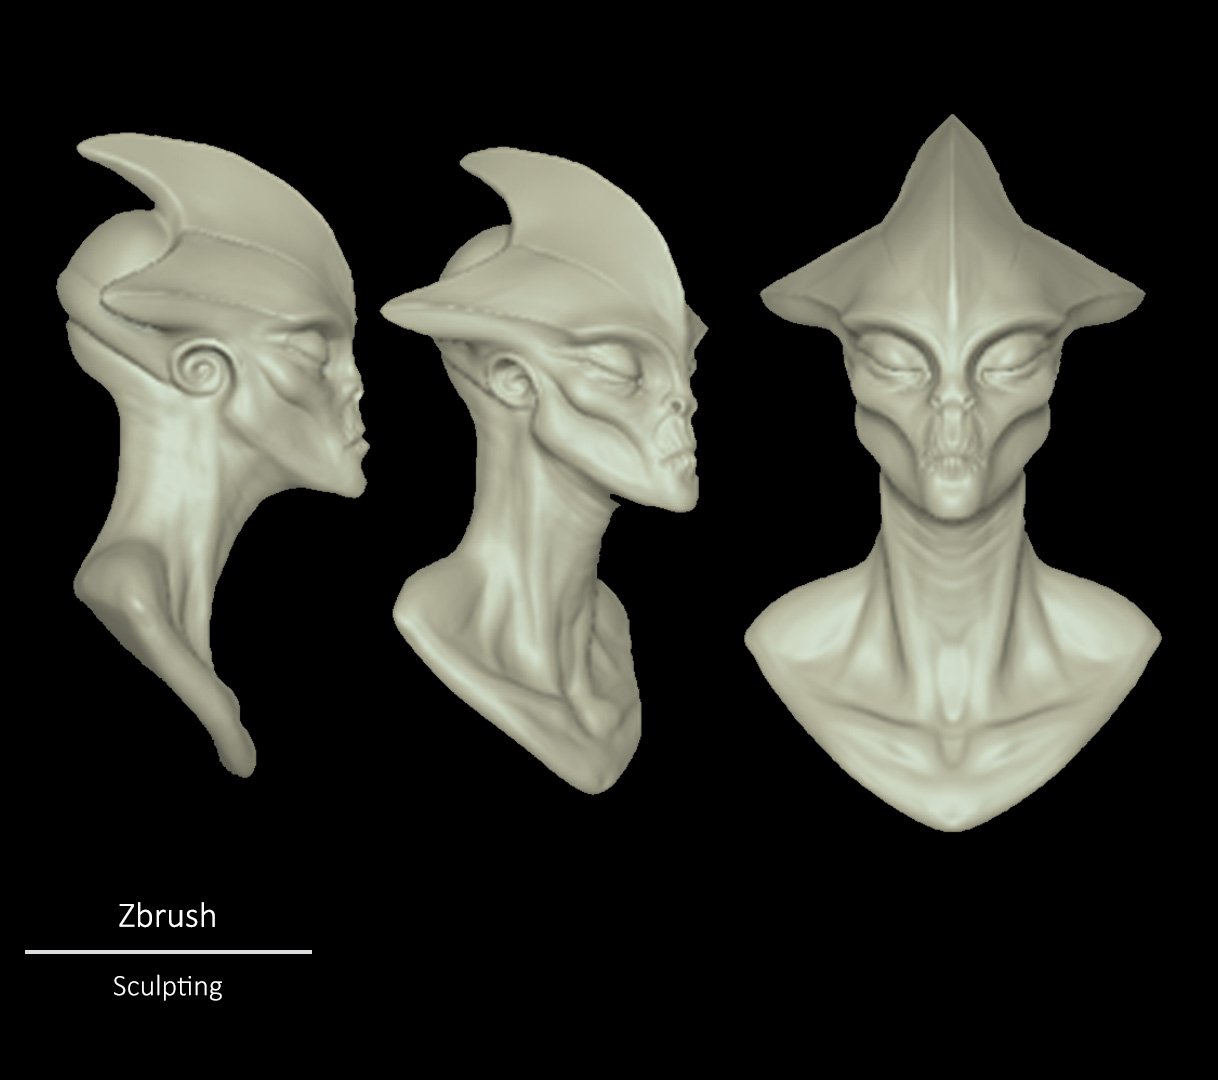
Although topology optimization was not essential, detail projection was relevant, especially to allow more sculpting possibilities around the mouth to refine and accentuate hollows. Consequently, the decision was taken to switch to ZRemesher mode to optimize the topology. Prior to this step, the bust was duplicated, then the ZRemesher guide was applied, followed by detail projection and finally subdivisions.
Six subdivisions were applied, as the first initial subdivision comprises 5368 polygons. This offered the opportunity to test various details which, in the end, were not integrated.
To maintain an aesthetic close to the final painting and ensure that the shapes corresponded to the desired idea, it was decided to keep the bust particularly smooth, without the addition of any skin grain potentially altering the rest of the process.
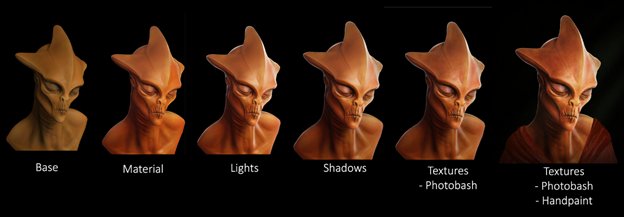
Materials

A simple fill color was used, initiating the selection of various materials in preparation for the future composition. The aim was to incorporate a variety of reflections in anticipation of their later combination. Having already explored different materials in previous renderings, it was easier to target those offering a soft reflection.
Photoshop
Materials were prioritized according to color and softness of reflection. Each layer was given a distinct blending mode, and some were given a mask to select only specific details.
A more intensive photobashing approach was adopted in this project. Given the absence of grain in the final render, it was crucial to add grain to the skin using a variety of openly licensed textures. This approach introduced a richer textural complexity and enhanced visual reality.
A hand-painted base was created for the drape before a burlap texture was superimposed to enhance realism. This combination of methods resulted in a more detailed and authentic representation of the drapery.


To achieve a canvas-like grain in the final rendering, extensive research was carried out into the appropriate type of process. Finally, a texture pack was purchased for licensing, including textures suitable for various purposes such as watercolor, oil paint and linen grain.
The selected texture was adjusted using black and white curves. In order to achieve a more complex texture, the layer was duplicated, one set to dark mode and the other to light mode, with additional curve adjustments for each duplicate. This approach brought a variety of nuances to the canvas grain, contributing to the visual richness of the final result.

Conclusion
In the process, although resembling the latest renderings of PBR materials, I was able to re-explore a variety of materials, techniques and 3D modeling to texturing, lighting and composition. Aesthetic choices, including the color palette and the decision to draw inspiration from a religious figure, helped define the visual identity of the project.
The diversity of materials used added a realistic, nuanced dimension, reinforced by in-depth research into photobashing and the integration of varied textures. The judicious use of different lights sculpted the shapes of the bust, creating a captivating interplay of shadows and reflections.
The post-processing phase on Photoshop was crucial for fine-tuning the details, in particular with the addition of canvas grain to bring an authentic texture. The clay renderings, envisaged following strategic discussions, open up exciting prospects for future integration into a demo reel.
The project to create the alien bust was an artistic journey rich in technical and aesthetic discoveries. It has also laid the foundations of an effective methodology for future projects, underlining the steady progress I've made in mastering the tools and techniques of the Game Art field. This bust represents not only a visual achievement, but also a significant milestone in my evolution as a 3D artist.


Comments (0)
This project doesn't have any comments yet.