
Vichy...a return to Déco!
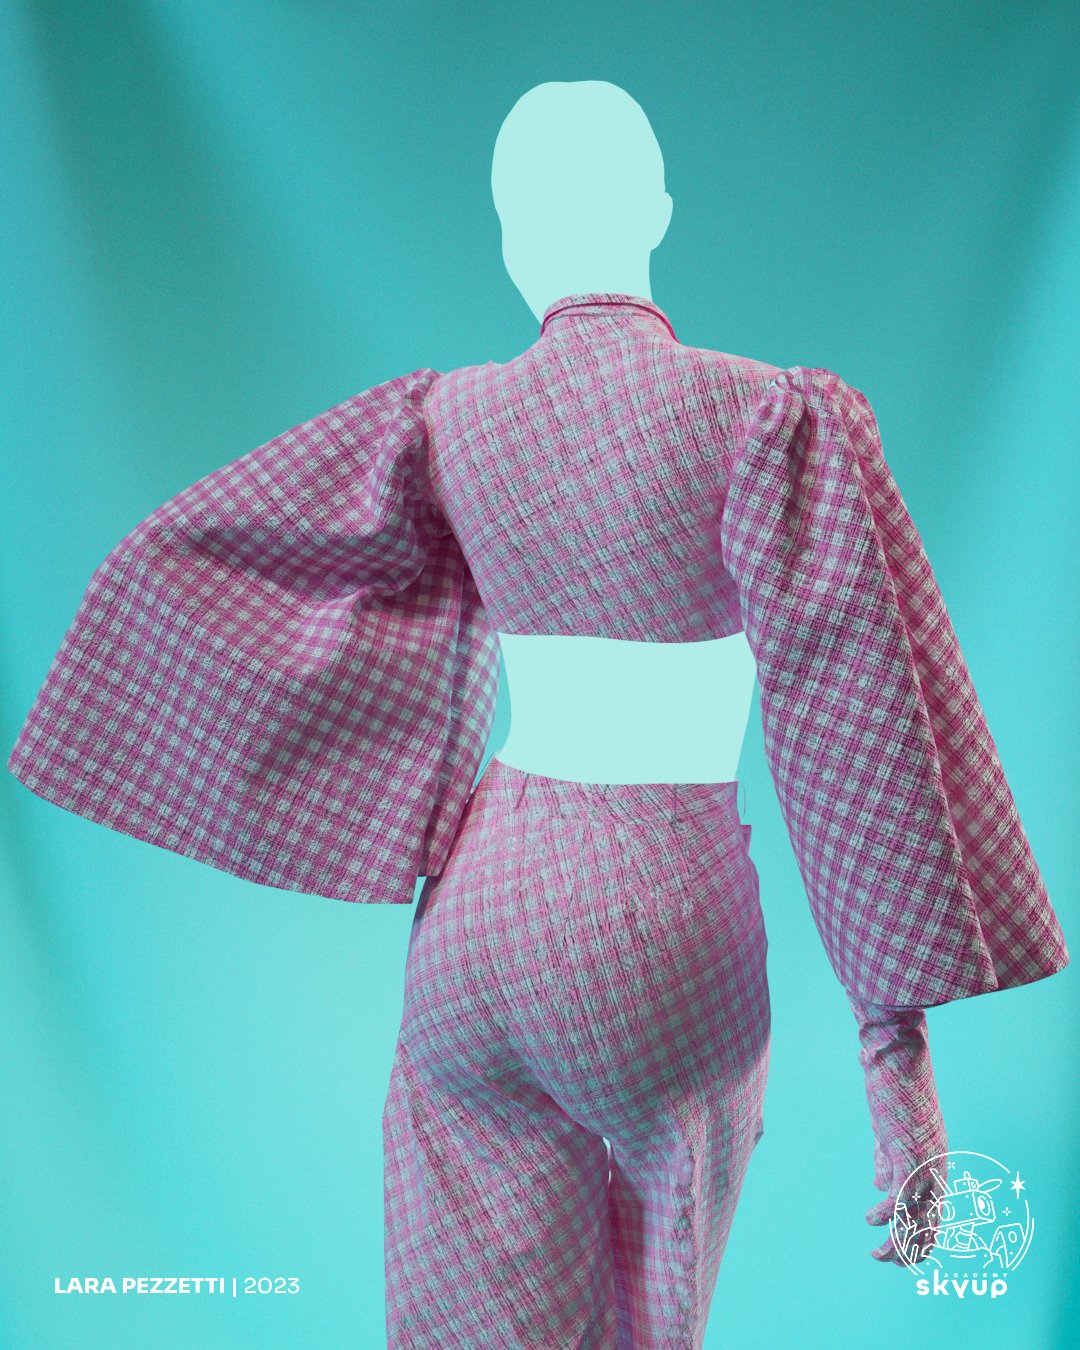
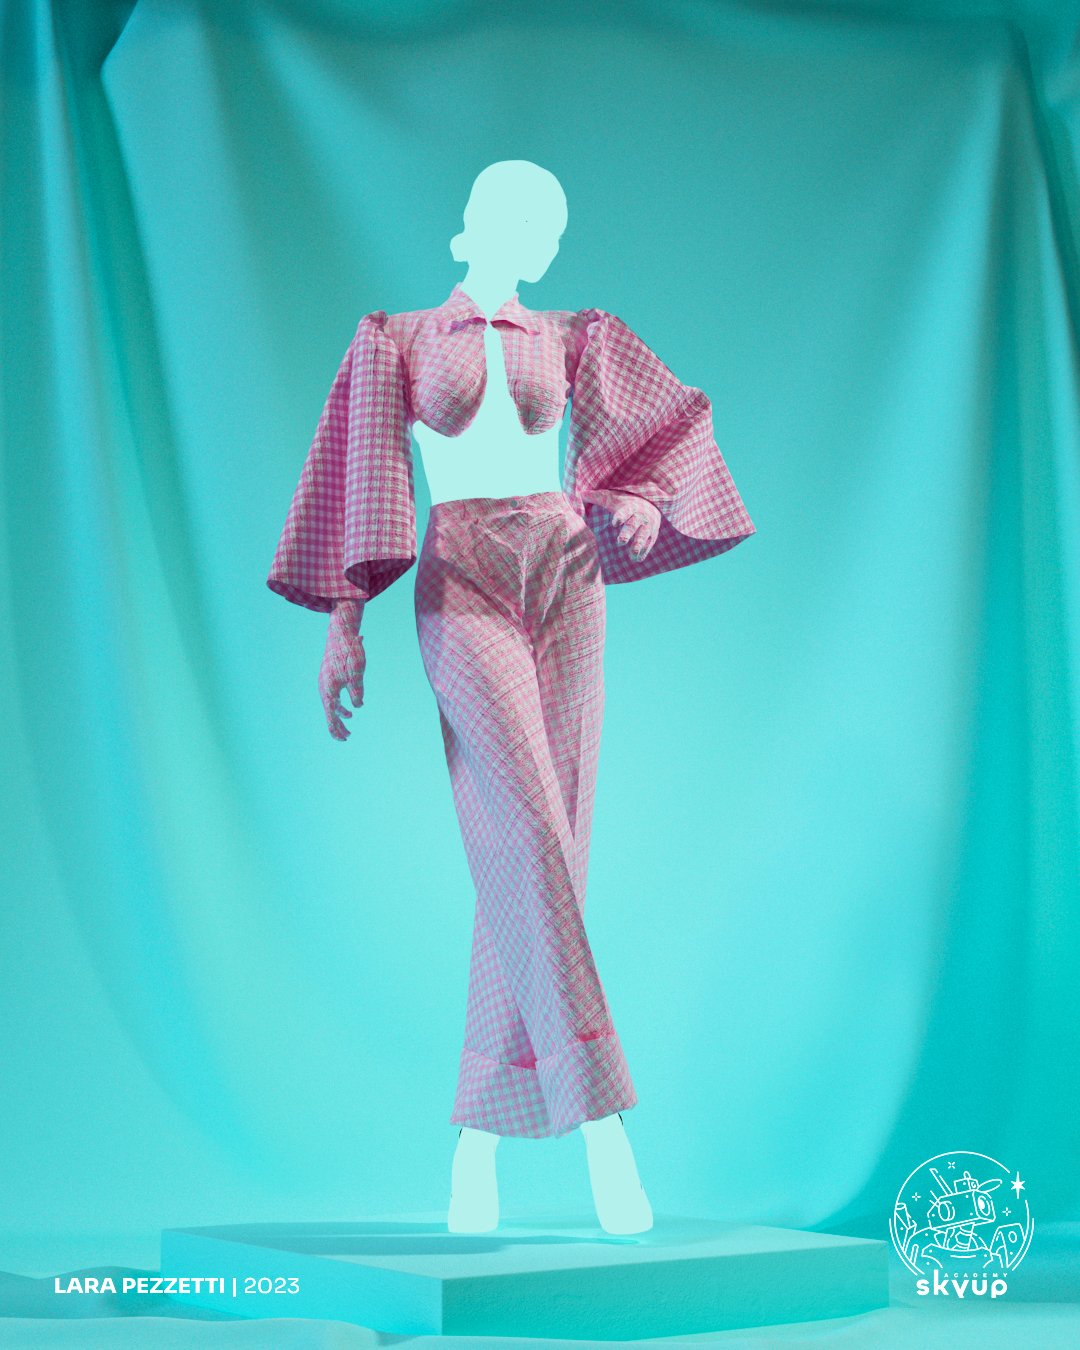
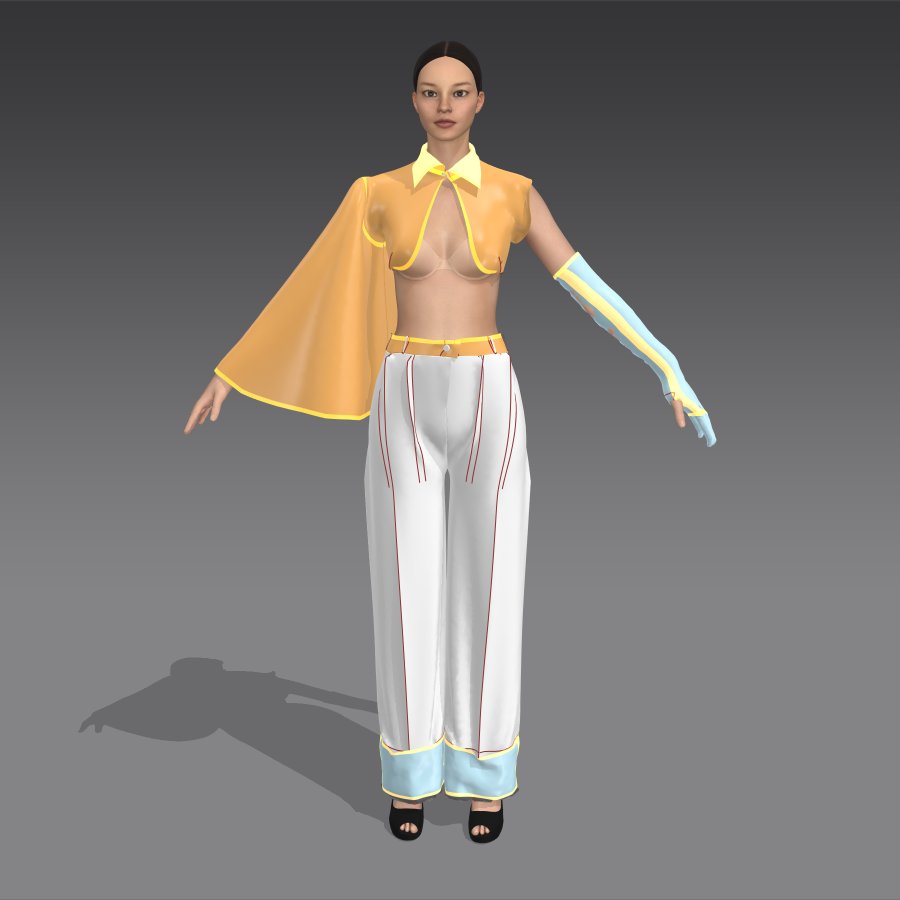
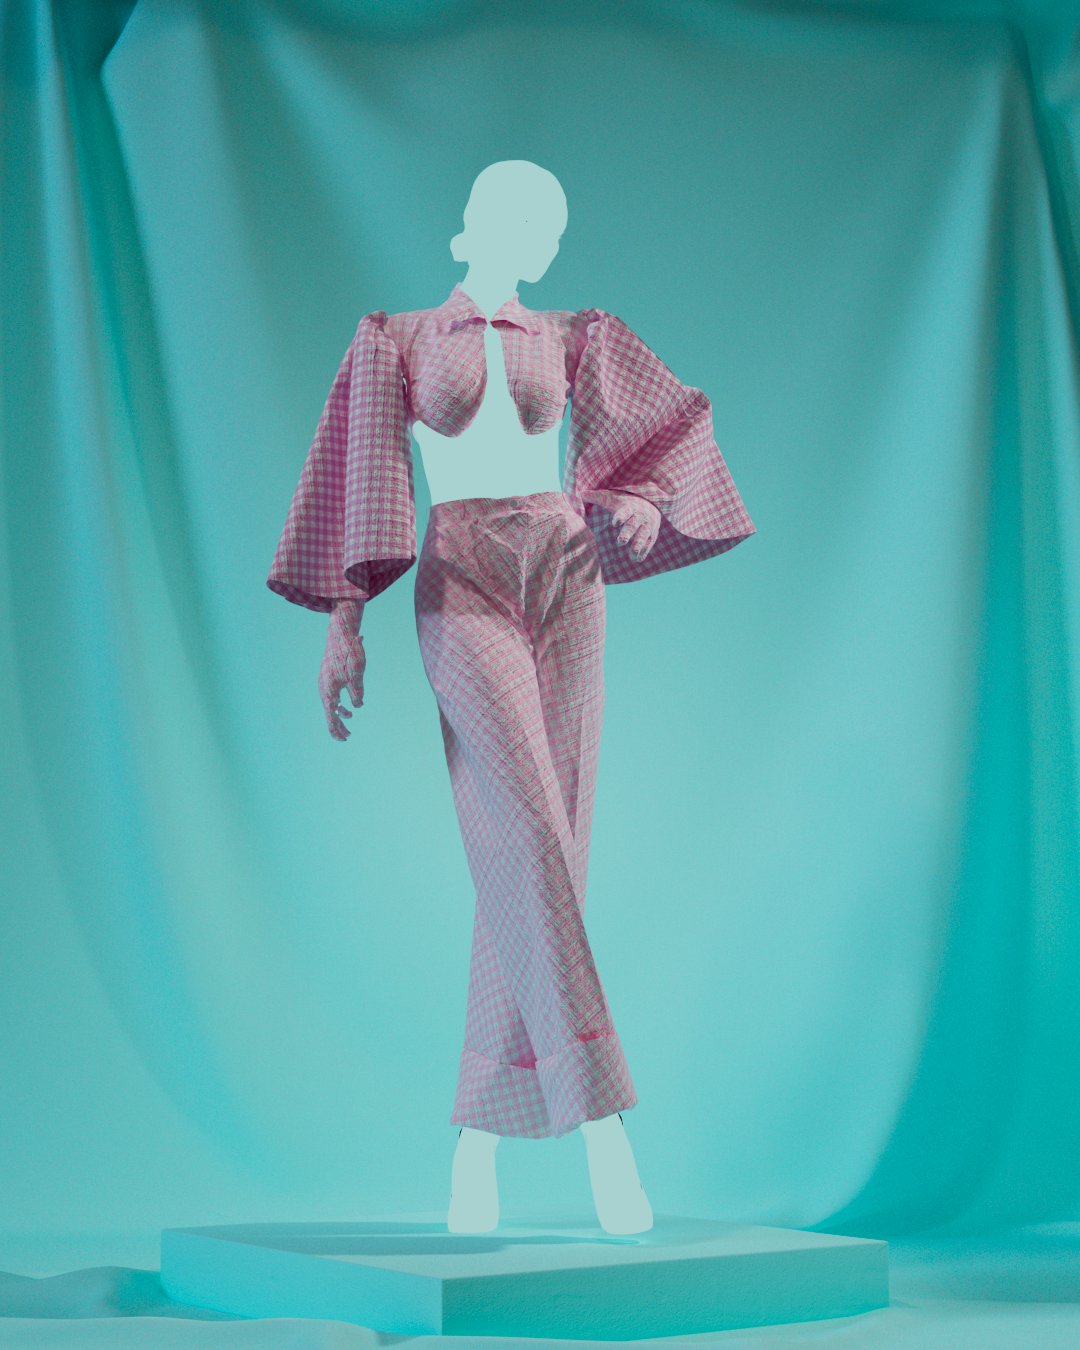
Personal Project- Emilia Wickstead, Spring 2020- Complete set with Vichy pattern shirt, trousers, and gloves in pink color.
Vichy...a return to Déco!
Hello everyone!
I’m finally showing you one of the latest project I have been working on at SkyupAcademy .
My reference is the incredibly outfit from Emilia Wickstead, Spring 2020.
I modeled the dress in Marvelous Designer, textured in Substance Painter, and rendered with Vray.
Really hope you like it!


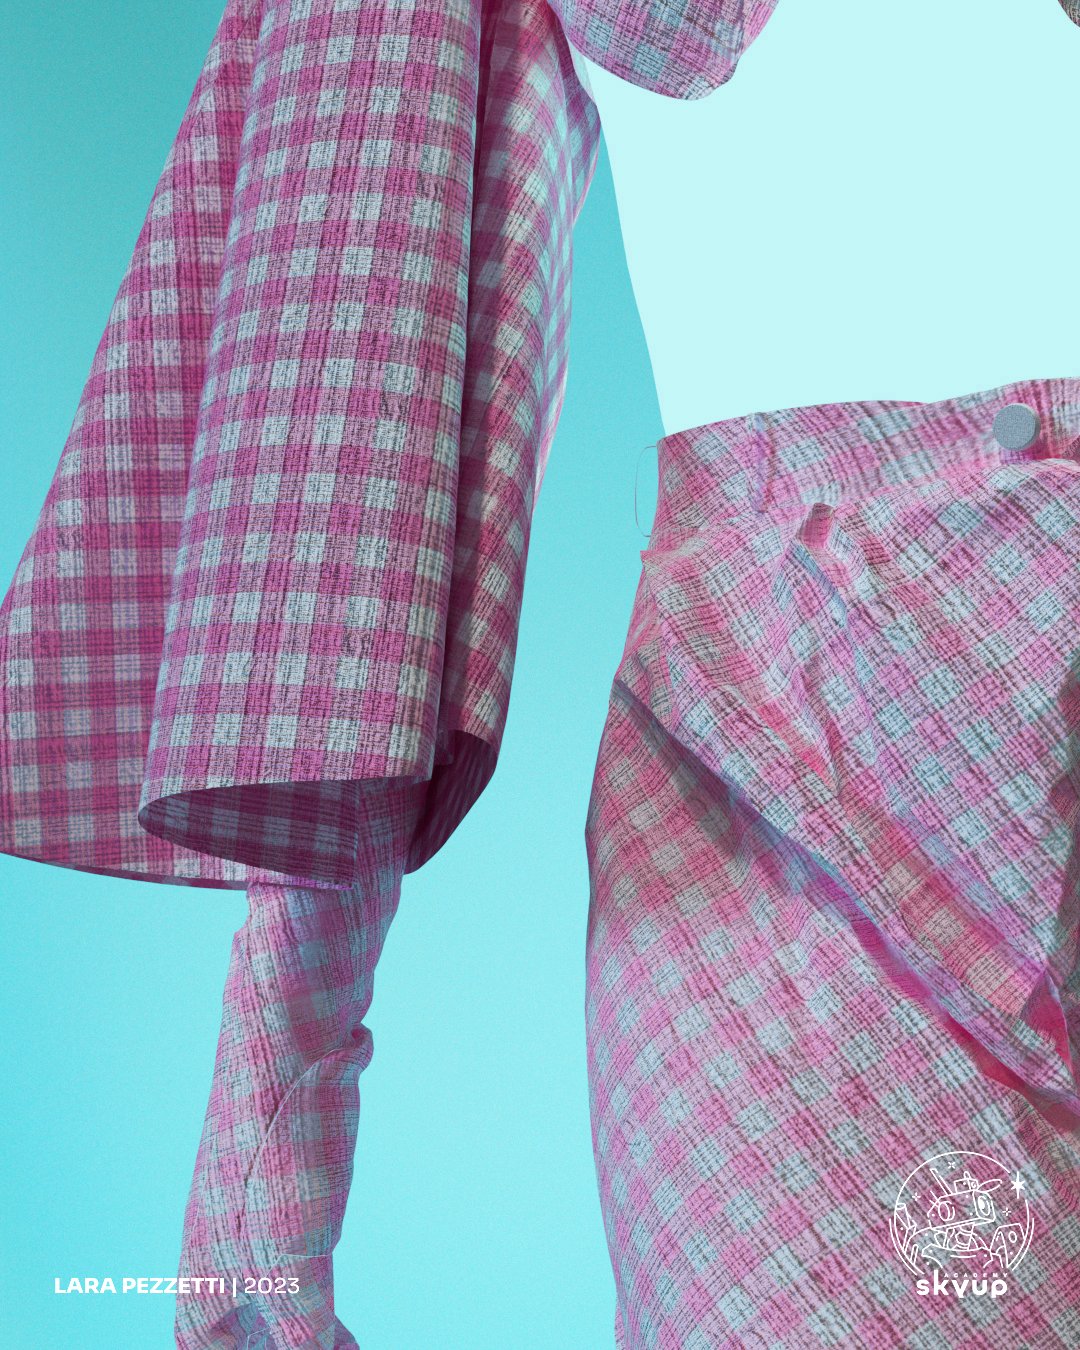


I love the world of fashion, and I enjoyed reproducing a print like this one. Originally designed for tablecloths (pic-nic), it evolved in the 1960s into a distinctive fabric print, first worn by Brigitte Bardot. Today, it's featured in many fashion shows and on various garments.
1. Getting all the material to start
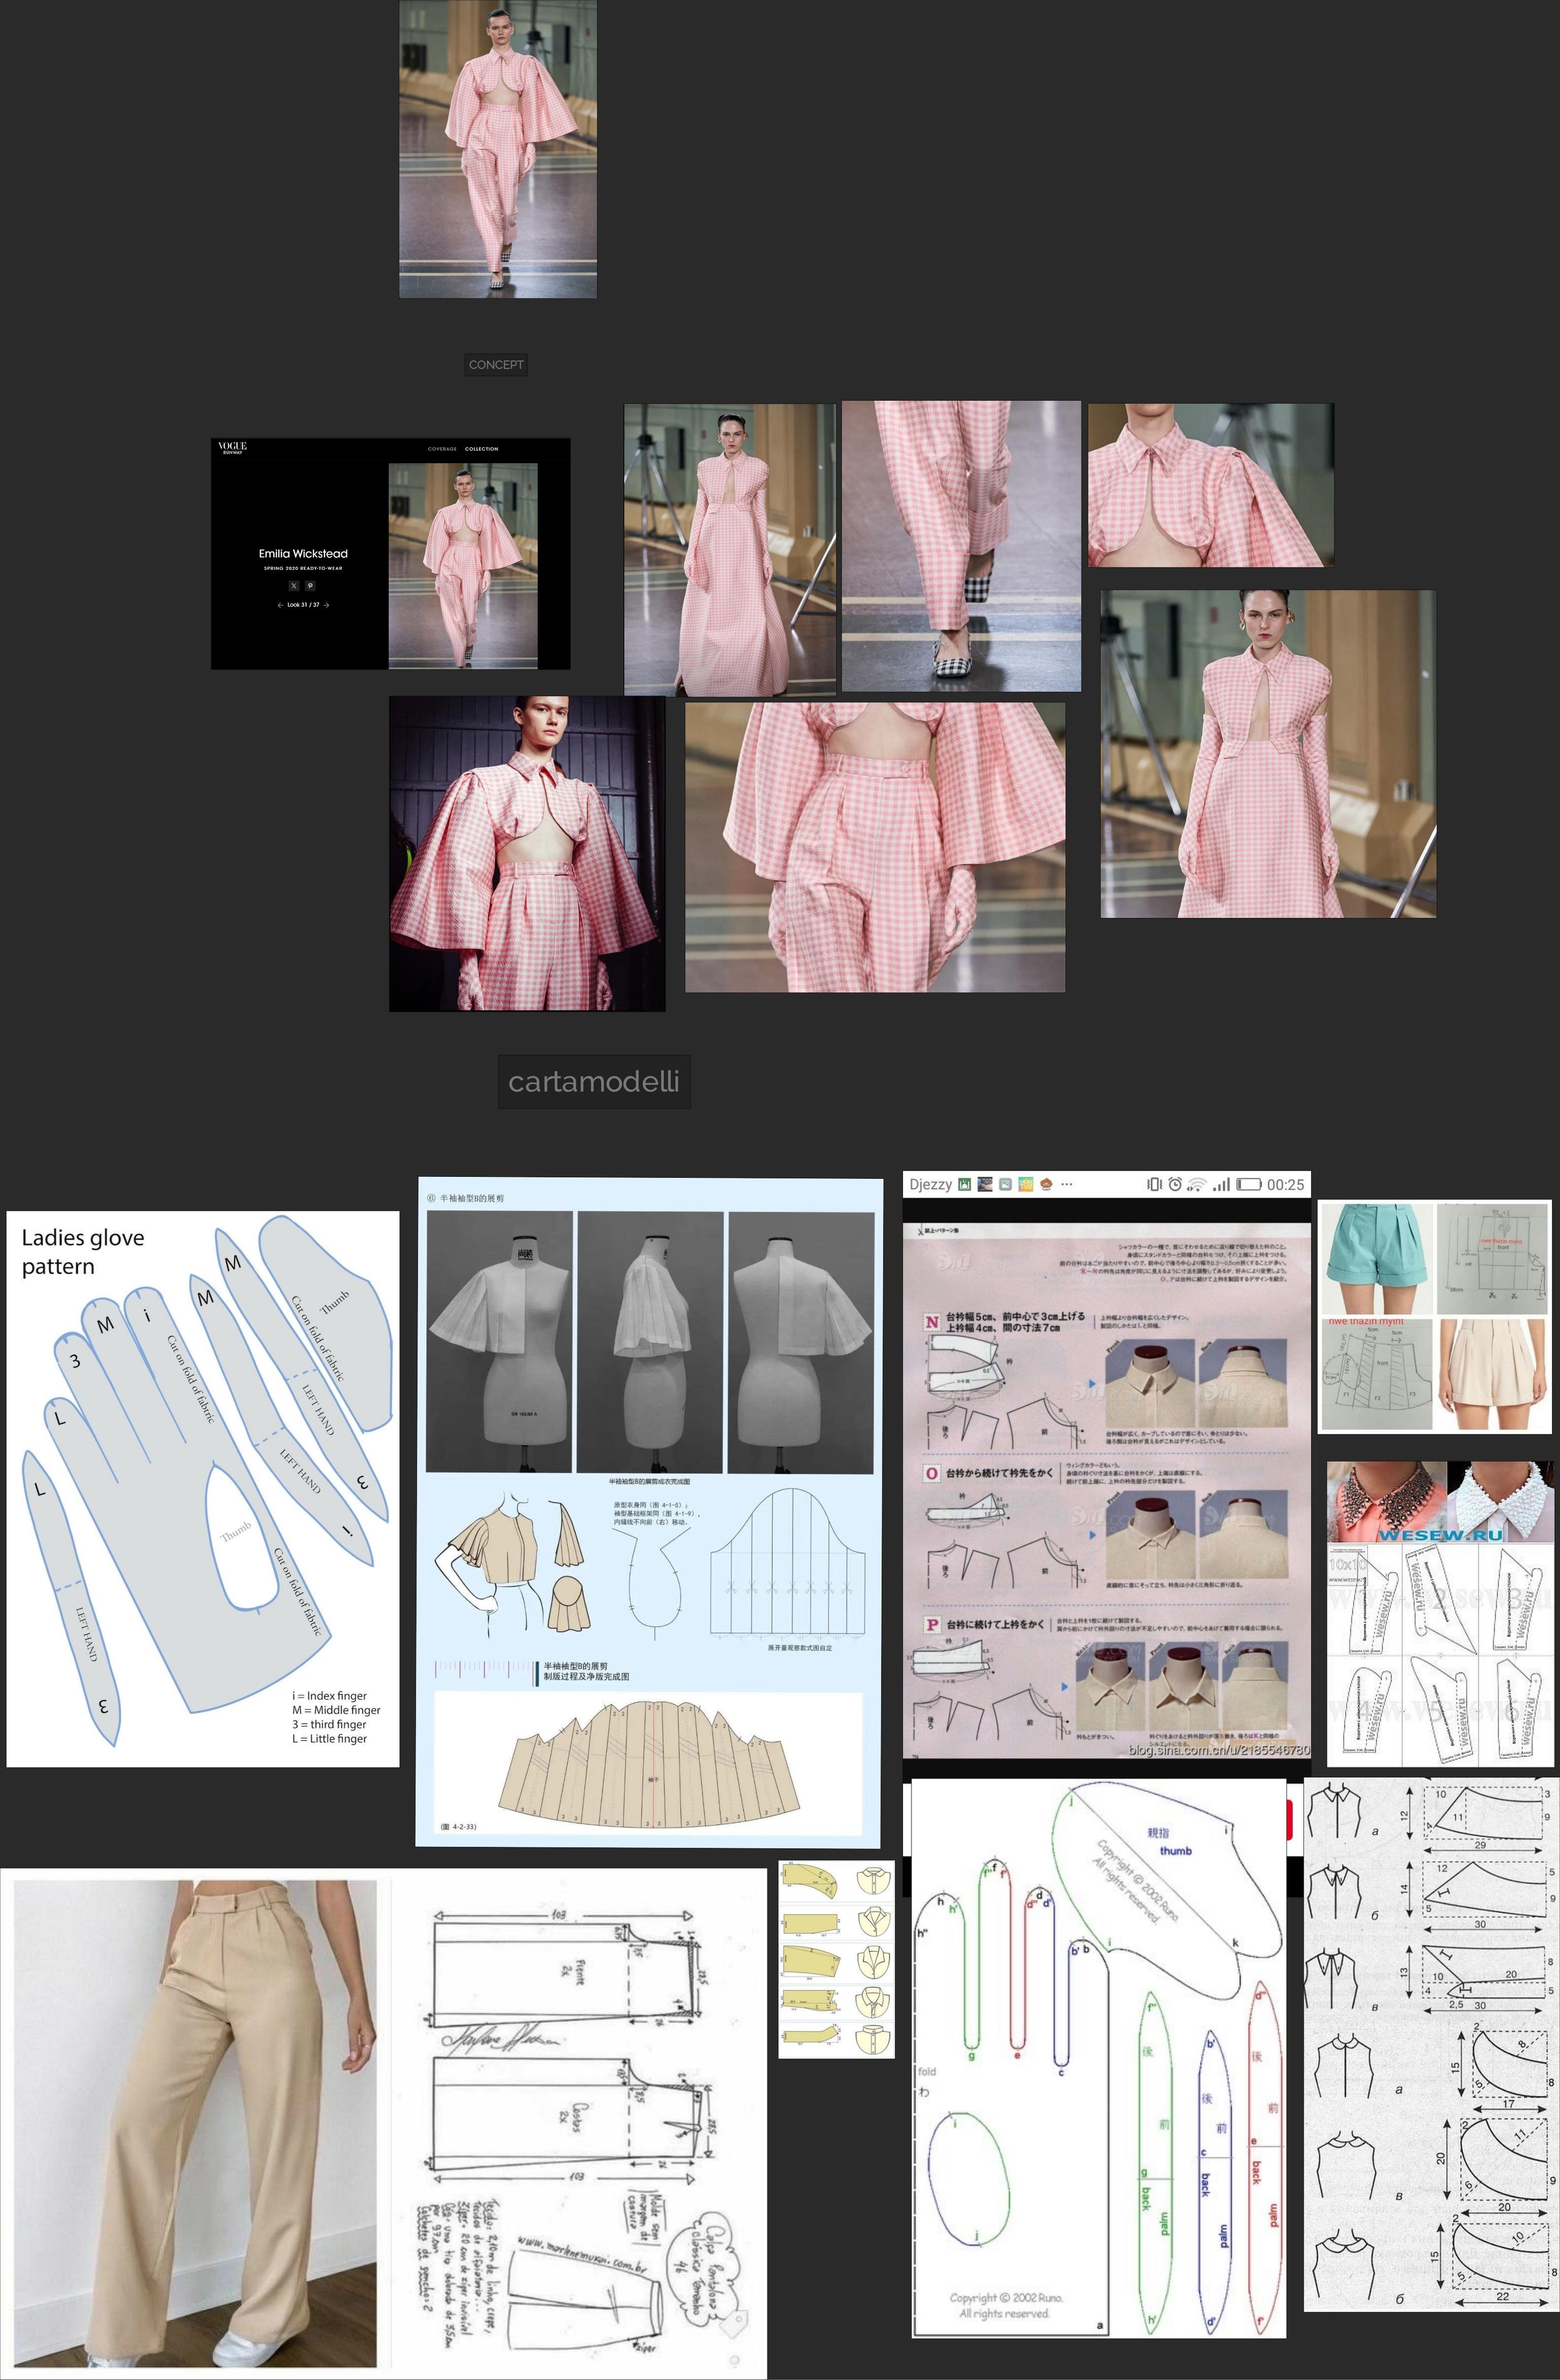
First, I started my work by researching materials. I began with the study of my reference and the Emilia Wickstead fashion show to understand the materials she used and the cuts and shapes given to the clothes.
Later, I opened Pinterest and began searching for patterns that closely matched my garments. Since the shirt had a unique cut, I had to combine multiple patterns and design one of my own to ensure accuracy rather than relying solely on intuition.


Once the research for references was complete, I began my modeling in Marvelous Design. It was my first experience with this program, but after dropping the dress many times, I started to get the hang of it.
When it comes to modeling, the parts that tested me the most were the gloves – a significant challenge. Especially crafting the thumb required a lot of time, but I am satisfied with how they turned out. The second major issue arose with the cut of the shirt around the chest area; it tended to open up and leave too much space in the center. Additionally, initially, I wasn't pleased with the cut I had given to the shirt at all.


The one that, from my perspective, suited my outfit the best was this one – delicate and sensual, just like the dress.
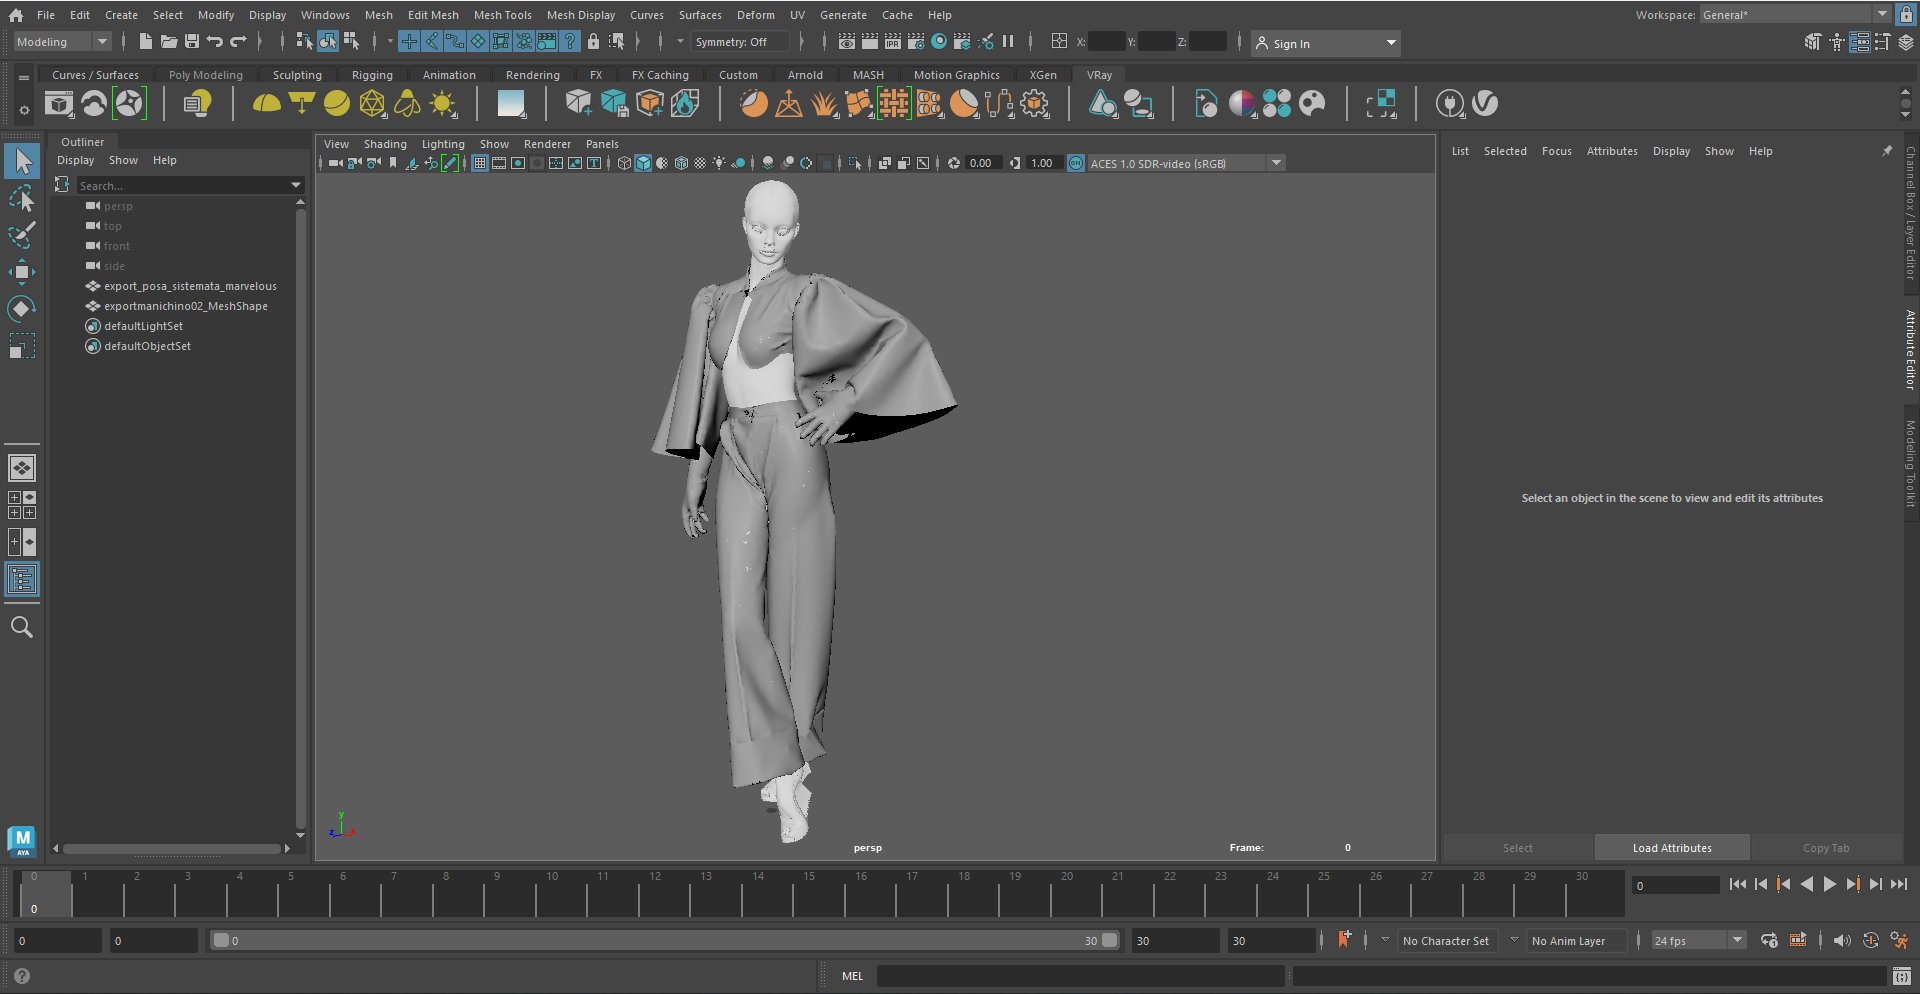
After downloading the pose from Mixamo, I imported it into Maya and created an animation using the animation window, ranging from 1 to 15 seconds.
I then imported it into Marvelous and tested it directly on the character to fix any errors that might have occurred during the posing, such as various stretches in the dress.
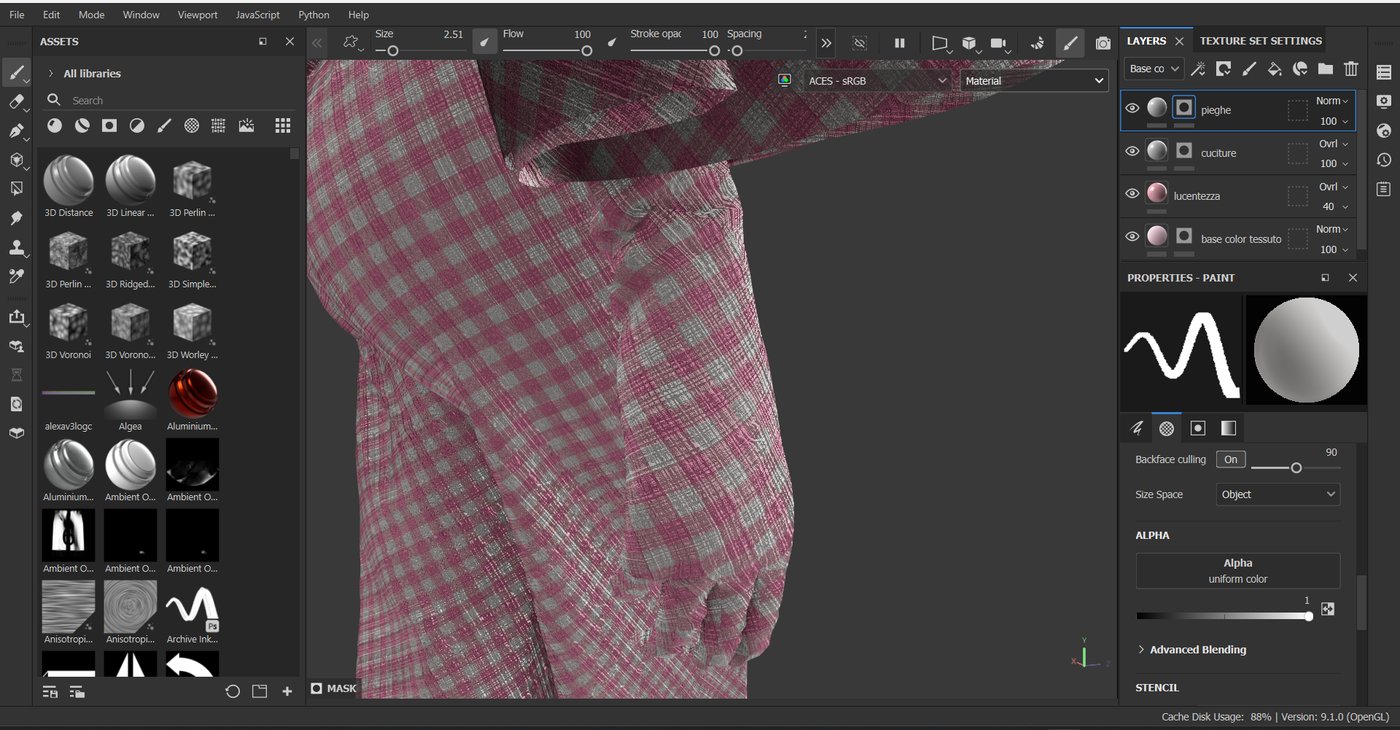
After that, the texturing phase finally began. I had a lot of fun during this stage. Finding the right fabric was challenging, as I wanted it to be as similar as possible to mine. After locating a base fabric, I created a map in Photoshop, modifying it to my liking.

Throughout the texturing phase, I used Substance Painter. Once I carefully applied the fabric to my entire dress, I started working on the roughness. This is because every fabric, especially in clothing, will never be perfect as if it just came out of the factory. To achieve a realistic appearance, I focused a lot on adjusting the roughness. Another aspect I worked on was the folds of the dress. I wanted the folds to create distinct shadows, giving a nice 3D effect to the fabric. So, I used a brush to accentuate each fold.


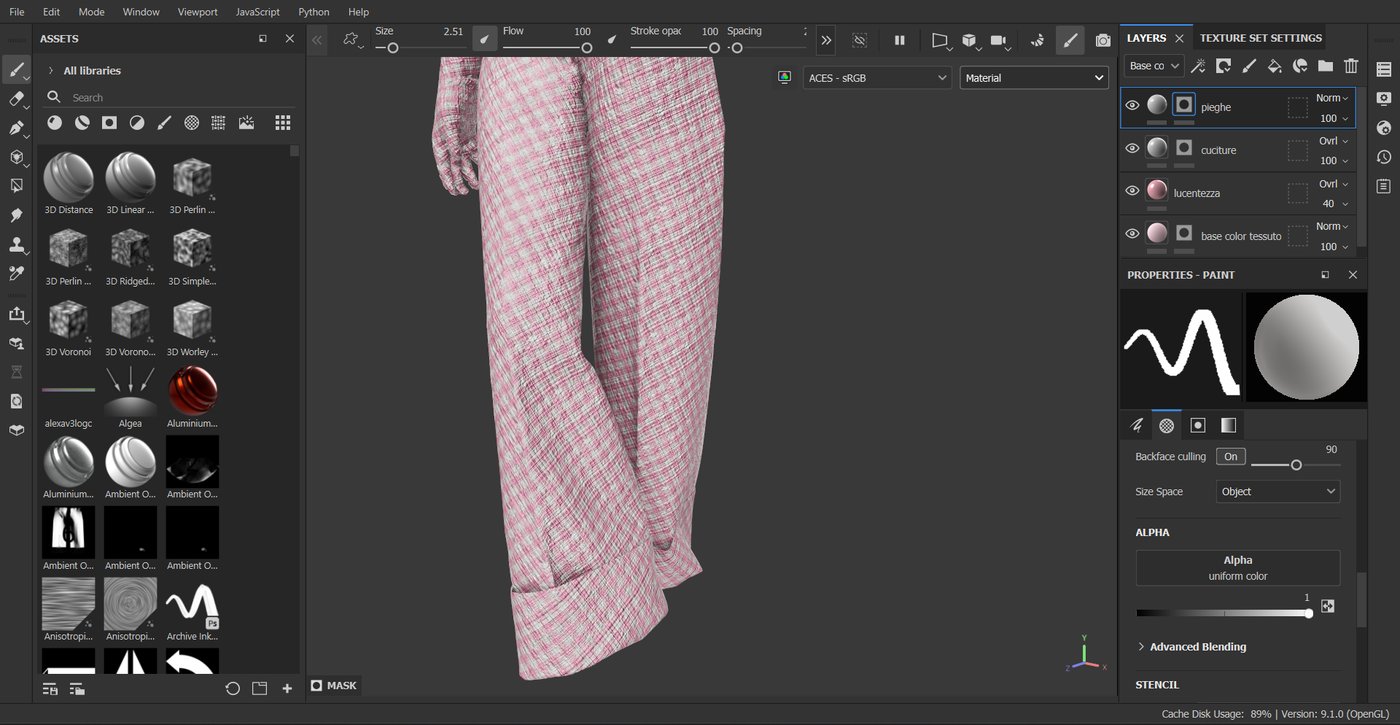


I also focused extensively on varying the color of the base because, in reality, our clothes consist of more than a single color tone. I applied two different shades of pink and a warmer base to add warmth to the overall color.


Here starts the final part of my work.
After completing the texturing phase, I went back to Maya where I compiled all the materials.
So, I moved on to lighting.
First, I looked for a reference to have a starting point rather than working blindly.
I aimed to create simple lighting that wouldn't interfere too much with the fabrics because the focus was on the dress.
I adjusted the mannequin's lighting in a way that would always highlight the dress.


Consequently, I created and added both panels.


Since I felt like something still wasn't there after the lighting, I jumped into Photoshop and did some color correction and work on the shadows. The initial render was a bit flat in my opinion, shadows were not that strong and some colors were off.
Then, I worked on the lights and contrasts to achieve a much more vibrant and realistic render.


Comments (1)