
The Enigma Eclipsis
A Fusion of Gothic Grandeur, Electronic Resonance, and Ethereal Couture
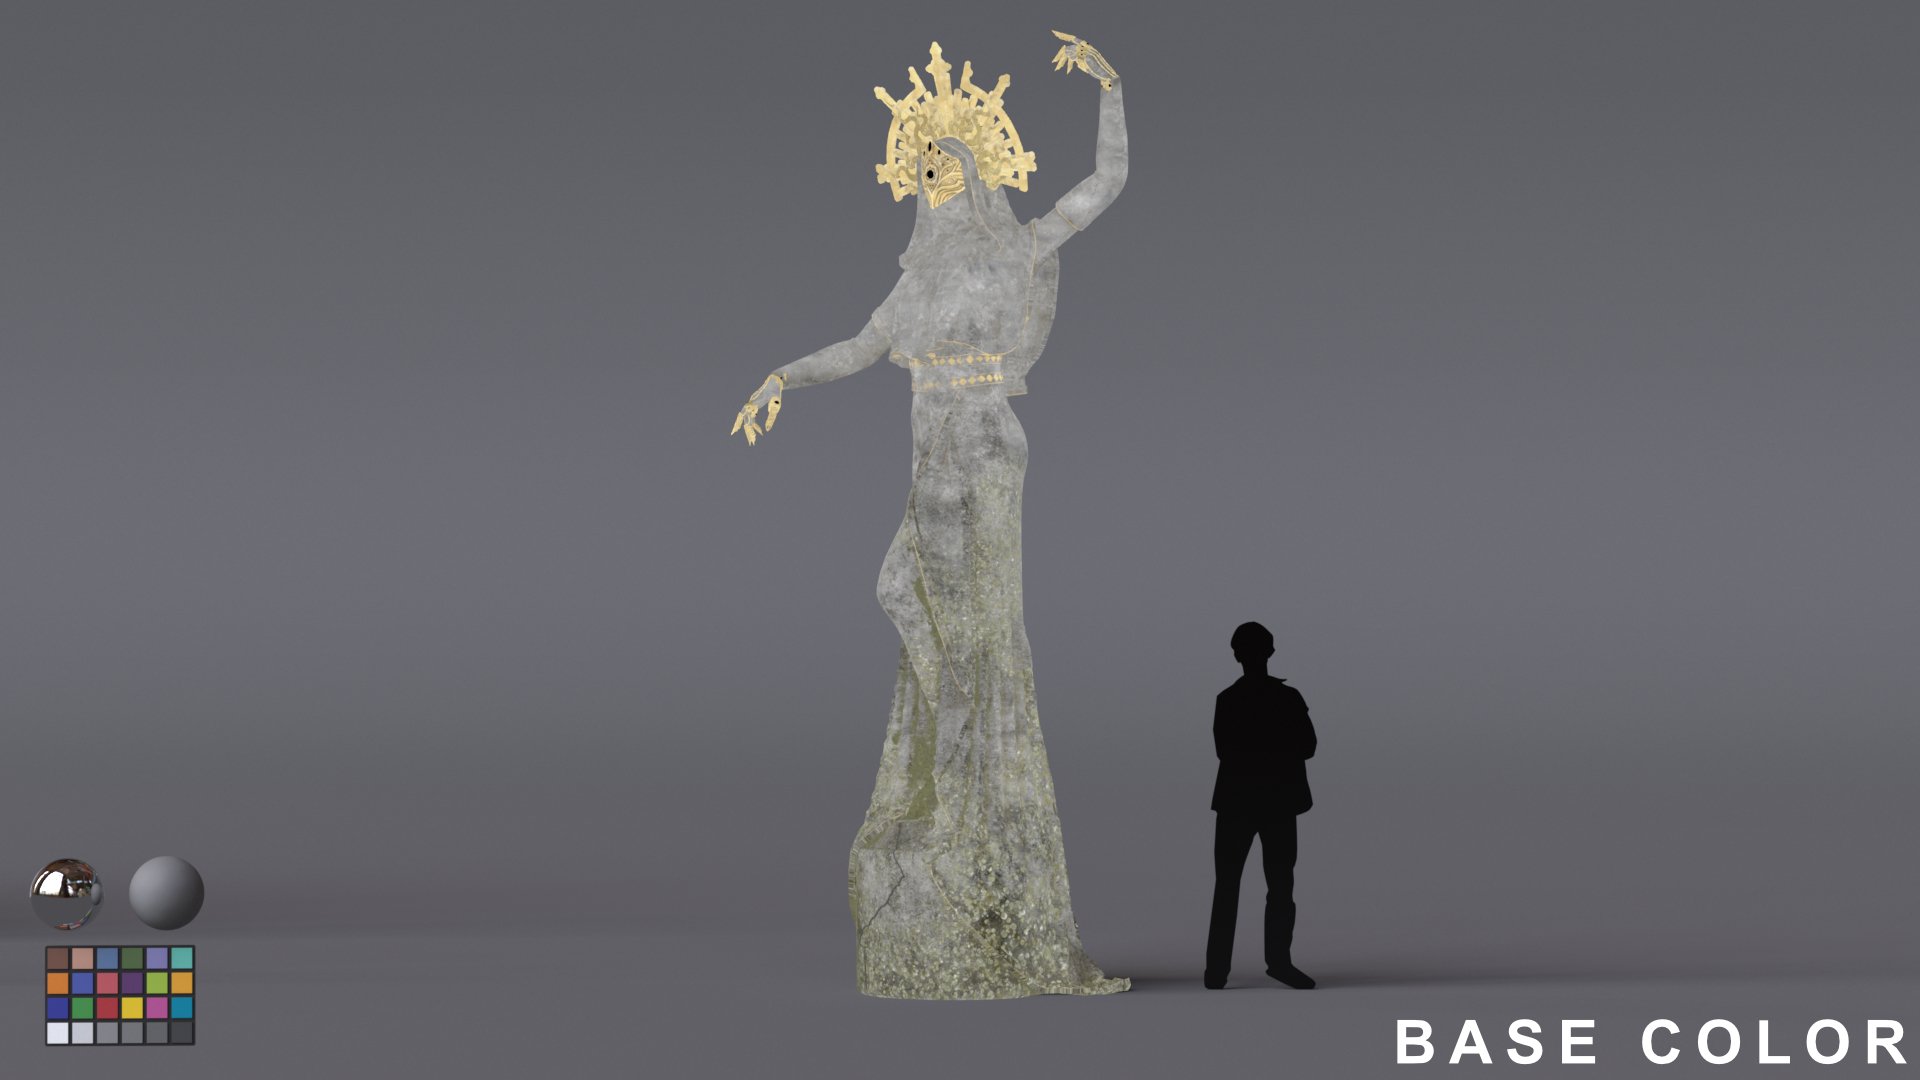
For my last midterm assignment at Pixl Visn Media Arts Academy I embarked on a creative journey fueled by a desire to blend my passions and inject a fresh perspective. Drawing inspiration from my affinity for dramatic lighting, gothic architecture, and electronic music, I conceived a captivating 3D model—a female statue bedecked with opulent gold accessories, a mysterious mask, and an elegant crown. The project was not just an individual endeavor but a crucial part of a larger group collaboration, prompting me to seek a balance between personal expression and cohesive contribution.
Given that this was my final midterm project, I decided to push my creative boundaries and introduce an element of fun. This intention manifested in my exploration of new techniques, notably using Marvelous Designer for the first time. The introduction of this tool allowed me to fashion a dress with a hood and sleeves, adding an extra layer of intricacy to the overall composition.
In essence, my initial idea was a deliberate amalgamation of my artistic passions, a commitment to contributing distinctiveness to the group project, and an opportunity to enjoy the creative process in my last midterm at Pixl Visn Media Arts Academy.

In my pursuit of creating a unique female statue adorned with gold accessories, a mask, and a crown, reference became the linchpin of my creative process.
Drawing inspiration from gothic architecture, electronic music, and dramatic lighting required a meticulous understanding of their nuances. Reference images of architectural details, historical artifacts, and lighting scenarios served as invaluable guides, providing the visual vocabulary necessary to infuse authenticity into my project.
Additionally, references played a crucial role in capturing the intricacies of gold accessories, the mask, and the crown. Studying historical and contemporary designs informed my decisions on material properties, reflections, and intricate details, contributing to the lifelike quality of these elements.
In summary, the project exemplified how referencing not only fueled creativity but also served as a practical guide in navigating the complexities of diverse elements. It played an instrumental role in ensuring accuracy, authenticity, and the successful execution of a visually captivating 3D model."
1. Define Learning Objectives:
At the project's outset, I took a moment to clarify my learning goals. Firstly, I aimed to contribute meaningfully to the imminent pipeline group project involving the statue. Additionally, I sought to expand my skill set by delving into Marvelous Designer, with the specific objective of creating a highly detailed 3D model featuring impeccable textures and flawless topology.
2. Gathering Reference:
Extensive research marked this phase, involving the collection of reference materials. My focus was on gothic architecture, intricate accessories, crowns, majestic poses, and female anatomy. This step laid the foundation for an authentic and accurate representation in the final 3D model.
3. Sculpting in ZBrush:
With a rough concept in mind, I initiated the project by sculpting the female body in ZBrush. This step allowed me to establish the foundational form and intricate details, ensuring a realistic and visually appealing starting point for subsequent stages.
4. Marvelous Designer for Dress Patterns:
In a bid to introduce dynamic elements to the project, I decided to utilize Marvelous Designer to craft intricate patterns for the dress sleeves and hood. This marked my first foray into this tool and added a layer of complexity to the cloth simulation.
5. Retopology in Maya:
Once the dress patterns were established, I opted for retopology in Maya. This approach, known for its efficiency, allowed me to create the desired topology for the dress, maintaining a balance between detail and manageability.
6. Cloth Assembly with Transfer Attributes:
The cloth assembly phase involved using the transfer attributes tool in Maya. This step allowed me to morph the flattened, retopologized mesh into the shape of the cloth from Marvelous Designer. The focus here was on achieving a seamless and cohesive appearance by merging the patterns at their borders.
7. Modeling Accessories in Maya:
Turning attention to accessories, such as rings, crown, and mask, I utilized Maya for hard-surface modeling. Precision and detail were prioritized to ensure these elements complemented the overall design and added visual interest.
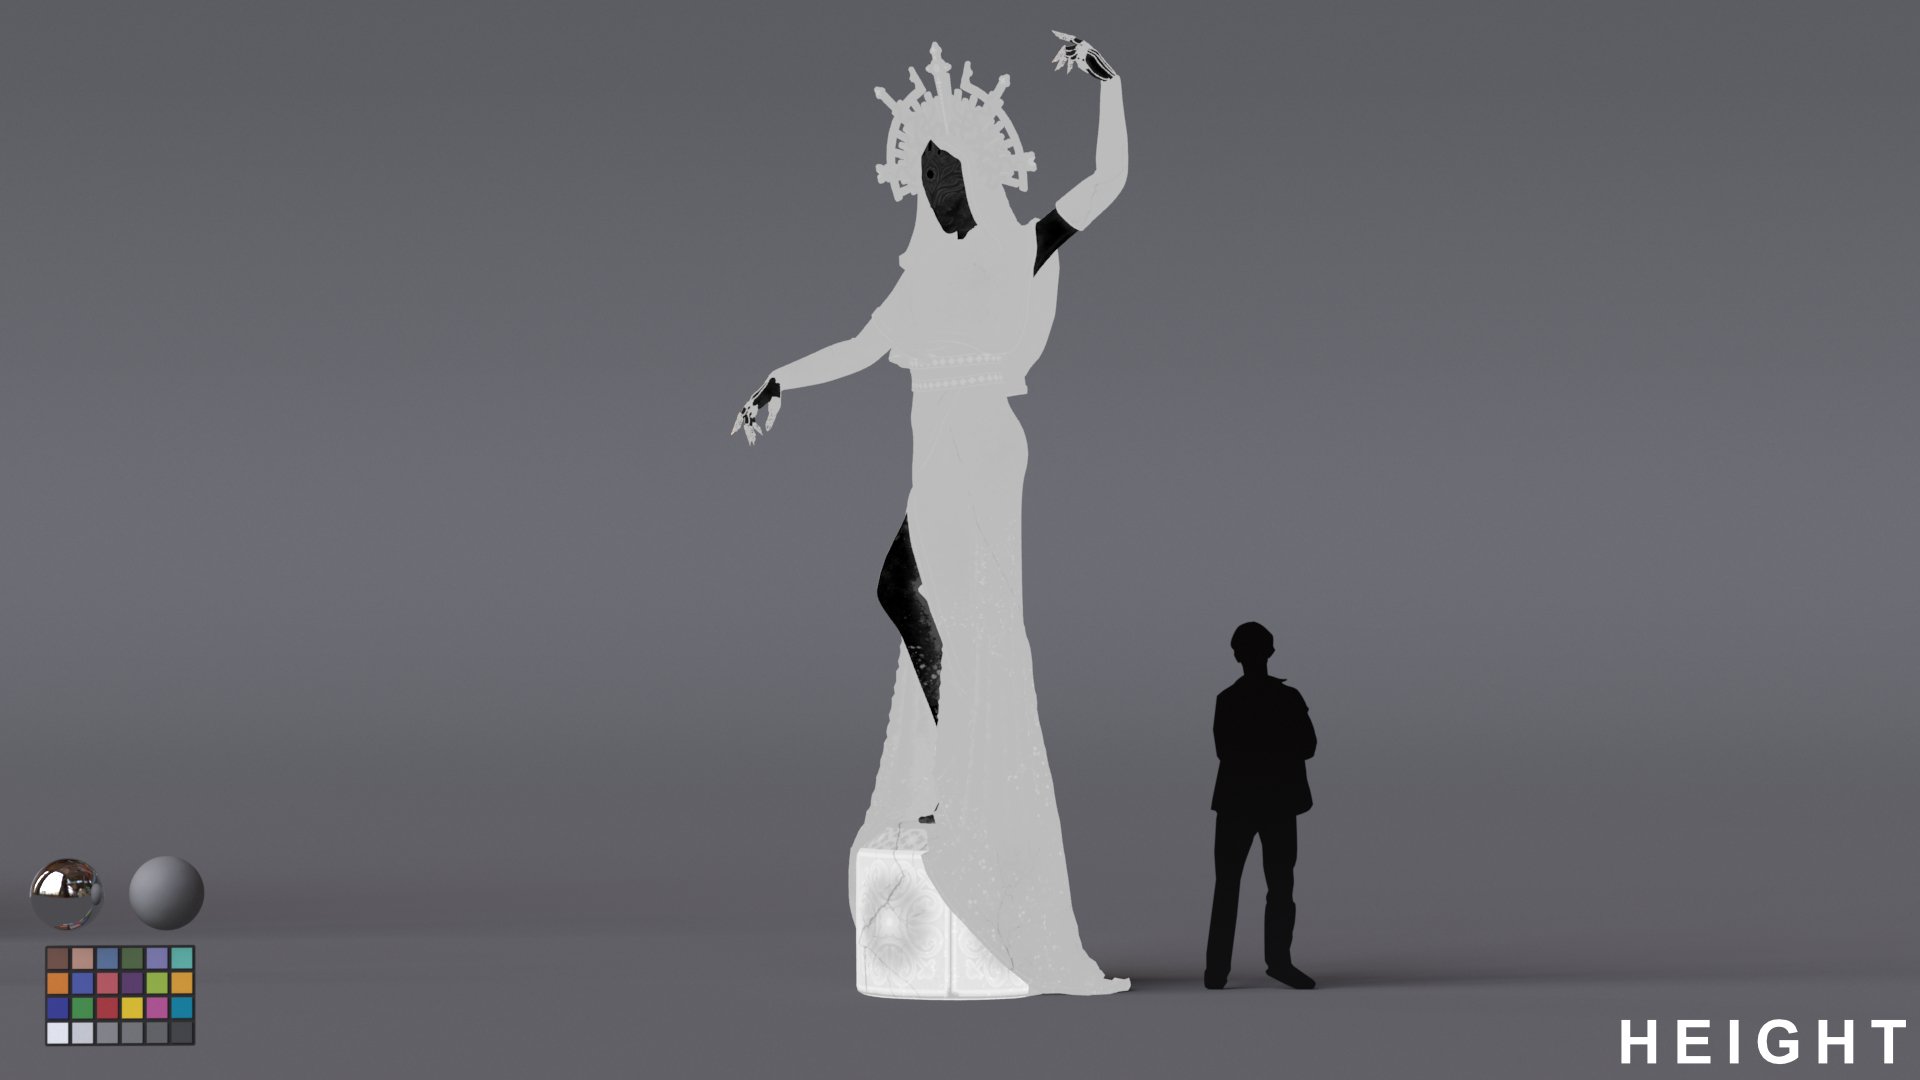
8. UVs and Texel Density:
UV mapping in Maya was crucial for texturing. A universal texel density was established using a UDIM workflow, setting the stage for accurate and high-quality texturing across the model.
9. Detailing Accessories in ZBrush:
Accessories underwent detailed sculpting in ZBrush, with a particular focus on intricate details, especially for the mask. This step added a layer of realism and visual appeal to these elements.
10. Texturing in Substance:
Substance Painter was employed for texturing. The new version's capability to work in ACES color space was leveraged, and the 'paint along path' tool was used for engaging and dynamic texturing.
11. Environment Setup and Animation:
To enhance the project's visual appeal, I quickly built a simple yet suitable environment. Cameras were strategically established for different shots, and lights were animated to synchronize with the beats of the electronic music, introducing a dynamic visual element.
12. Rendering with Redshift:
Rendering was executed using the Redshift renderer. This phase aimed to capture high-quality details, ensuring that the 3D model and its surroundings were visually compelling.
13. Color Grade and Lens Effects in Nuke:
Post-rendering, the sequences underwent processing in Nuke. This involved color grading and the addition of lens effects to enhance the overall visual aesthetics and cohesion of the project.
14. Final Assembly in Davinci:
In the final assembly phase, all project components were brought together in Davinci Resolve. This involved combining the 3D model, rendered sequences, and post-production elements to create a polished and cohesive final output.


The biggest challenge encountered during the project was delving into Marvelous Designer for the first time. The unfamiliarity with the software presented a learning curve that required careful navigation. Marvelous Designer, known for its cloth simulation capabilities, demanded an understanding of its unique interface, tools, and workflow.
Navigating the Interface: Marvelous Designer boasts a distinct interface compared to other 3D modeling tools. Understanding the functions of each tool, the significance of different panels, and the overall workflow required dedicated time and exploration.
Mastering Cloth Simulation: As the project involved creating detailed dress patterns, mastering Marvelous Designer's cloth simulation was pivotal. This aspect required a grasp of parameters like fabric type, density, and collision settings to achieve realistic folds and drapes in the virtual garment.
Iterative Learning Process: Given the short timeframe of the one-week project, the challenge was exacerbated by the need for a rapid and iterative learning process. Trial and error played a significant role in understanding the intricacies of Marvelous Designer and fine-tuning cloth simulations to align with the envisioned design.
Another significant challenge was the retopology of the cloth, especially after using Marvelous Designer to create intricate patterns. Retaining the fine details of the simulated cloth while optimizing the topology for efficiency required a delicate balance to ensure both aesthetic quality and manageable computational complexity.
Flattening and Retopology: The patterns generated in Marvelous Designer, while visually intricate, needed to undergo a flattening process for efficient retopology. This involved translating the dynamic, simulated 3D cloth into a 2D representation that could be effectively retopologized.
Preserving Fine Details: The challenge lay in preserving the fine details of the cloth patterns during the retopology process. Ensuring that the optimized mesh retained the folds, creases, and intricacies generated in Marvelous Designer was a delicate task requiring a balance between topology efficiency and visual fidelity.
Efficiency vs. Detail: Striking the right balance between optimizing the topology for efficient rendering and retaining the level of detail crucial for a visually appealing cloth simulation was a constant consideration. This involved making informed decisions about where to allocate polygons to capture the essence of the cloth without overwhelming computational resources.
In overcoming these challenges, the project not only enhanced proficiency in Marvelous Designer but also honed skills in optimizing and preserving intricate details during the retopology process, contributing to a successful and visually compelling final 3D model.

Software used:
Maya:
Used for both modeling and rendering. In the project, Maya played a crucial role in creating the 3D models, including the female statue, accessories, and the environment. Additionally, Maya was employed for rendering the final scenes using the Redshift renderer.
ZBrush:
Utilized for detailing. ZBrush, a digital sculpting software, played a key role in adding intricate details to various elements of the project. Specifically, it was employed for detailing the accessories, with a particular emphasis on the mask.
Marvelous Designer:
Used for cloth simulation. Marvelous Designer, known for its capabilities in cloth simulation and pattern creation, was introduced for the first time in this project. It played a significant role in crafting the detailed patterns for the dress sleeves and hood.
Substance Painter:
Employed for texturing. Substance Painter, a 3D painting software, was utilized for the texturing phase of the project. It offered advanced features, including the ability to work in ACES color space and tools like the 'paint along path' tool, enhancing the overall texturing process.
DaVinci Resolve:
Utilized for final assembly and post-production. DaVinci Resolve served as the platform for the final assembly of all project components. It played a crucial role in combining the 3D models, rendered sequences, and post-production elements to create a polished and cohesive final output. DaVinci Resolve's capabilities in color grading and lens effects contributed to the overall visual aesthetics of the project.

My biggest learnings were:
"Less is More" Philosophy: The project reinforced the idea that sometimes, focusing on fewer, high-detail assets can lead to a deeper understanding of the subject matter and result in a higher level of craftsmanship. This contrasts with the approach of creating numerous assets with limited detail.
The Power of Specialization: I realized that specializing in a single subject or asset can provide the opportunity to dive deep into its intricacies, resulting in a more comprehensive and detailed final product.
Application of Learnings: Reflecting on these lessons, I plan to apply them in future projects. This might involve selecting a specific, highly detailed asset as a focal point to leverage the depth of knowledge gained from this experience.


Comments (0)
This project doesn't have any comments yet.