
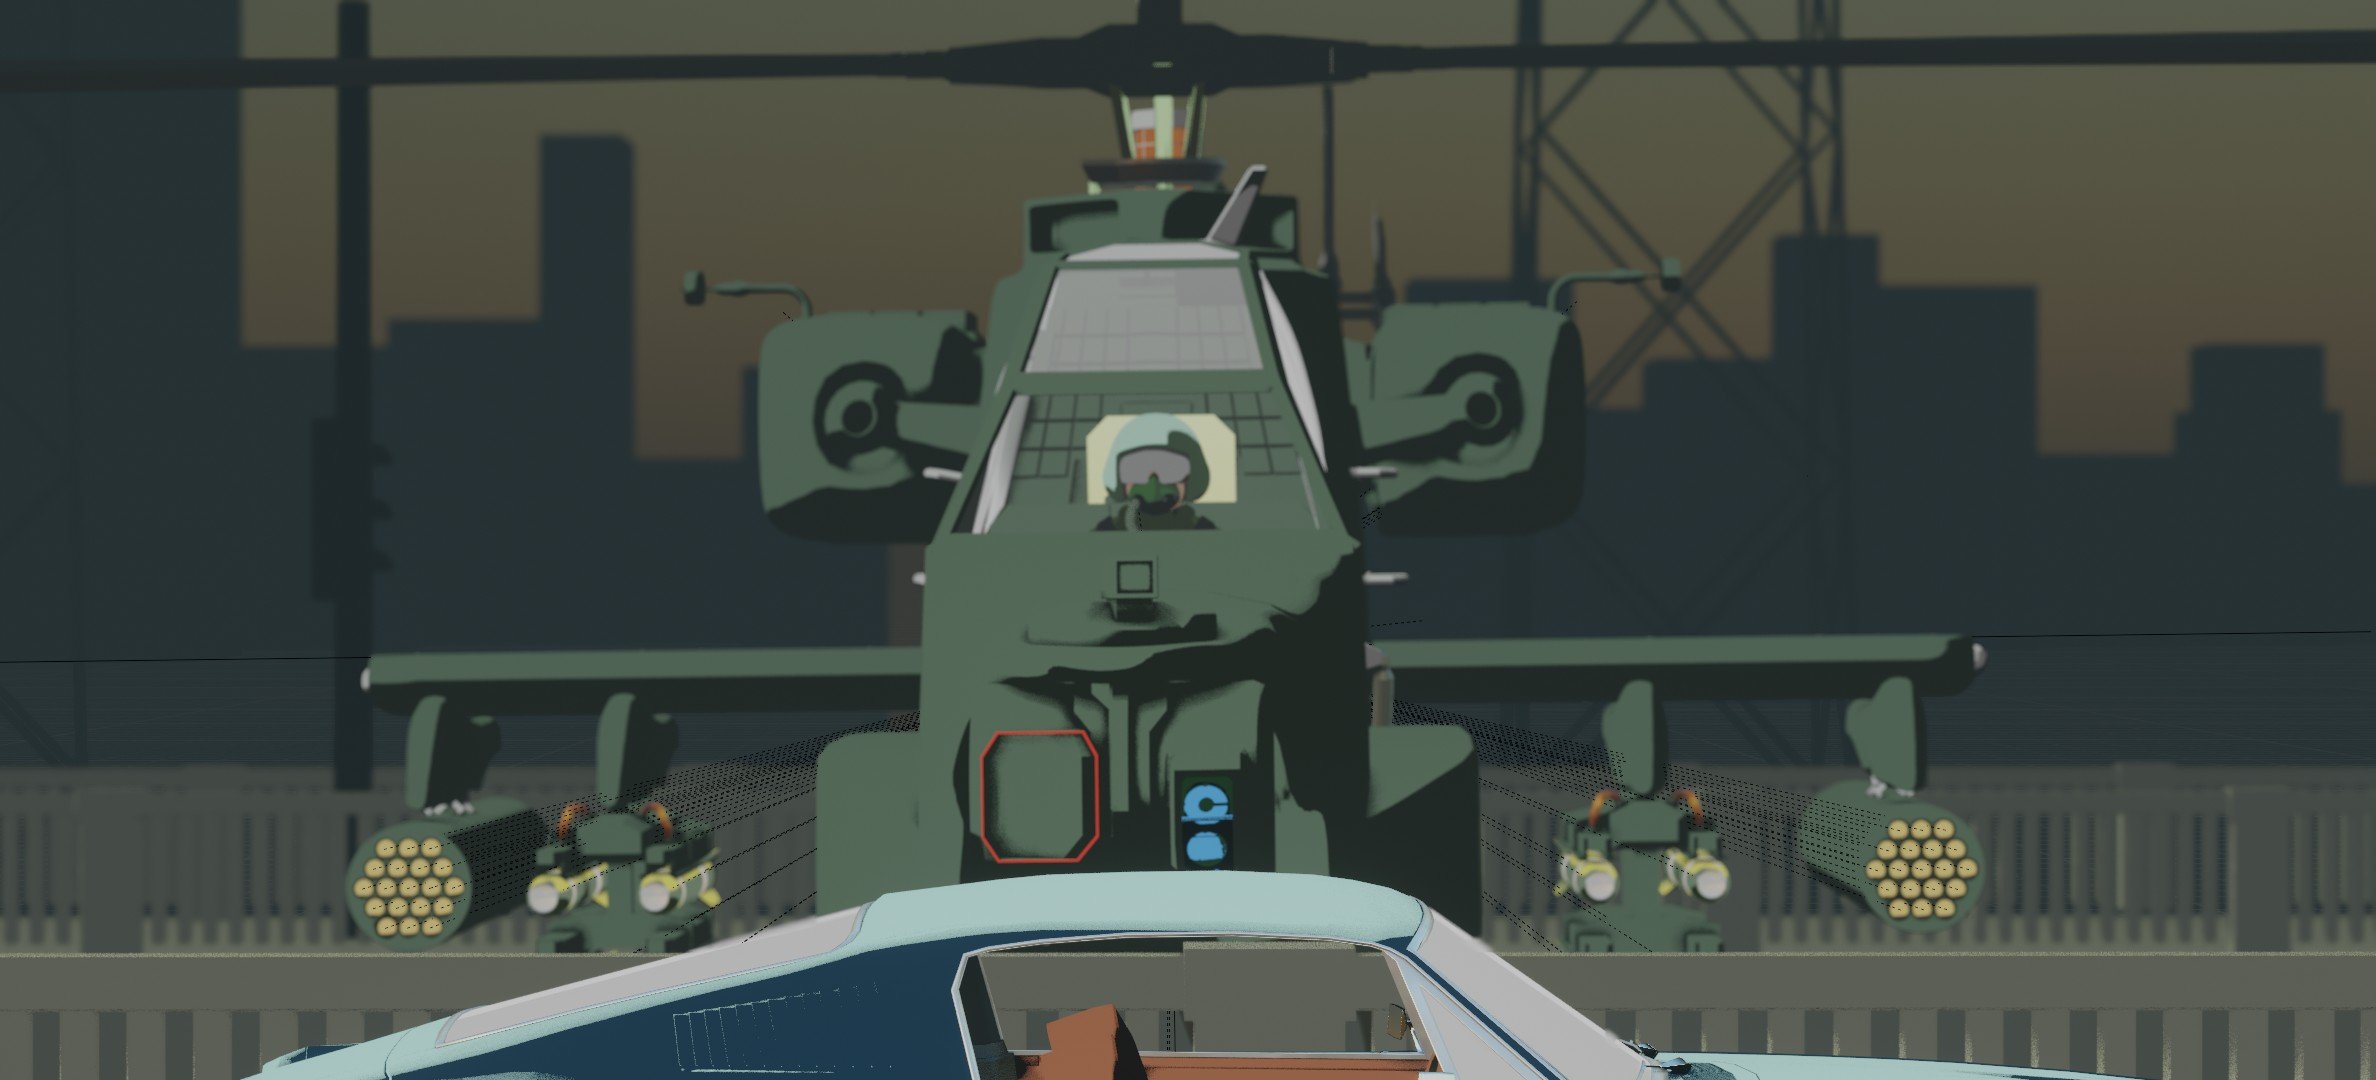
Film study - Blue Thunder Helicopter
I wanted to remake this shot in an animated style. Used 3rd party vehicle assets.
Film Study - Blue Thunder Helicopter
I saw a video from the movie Blue Thunder, where a helicopter seems to emerge from nowhere, and thought it looked really cool. I wanted to recreate the shot in an animated style (I purchased the vehicle assets from Blender Market):
Here is the result:
Here is the reference shot (starts around 1:00, also - not my video):
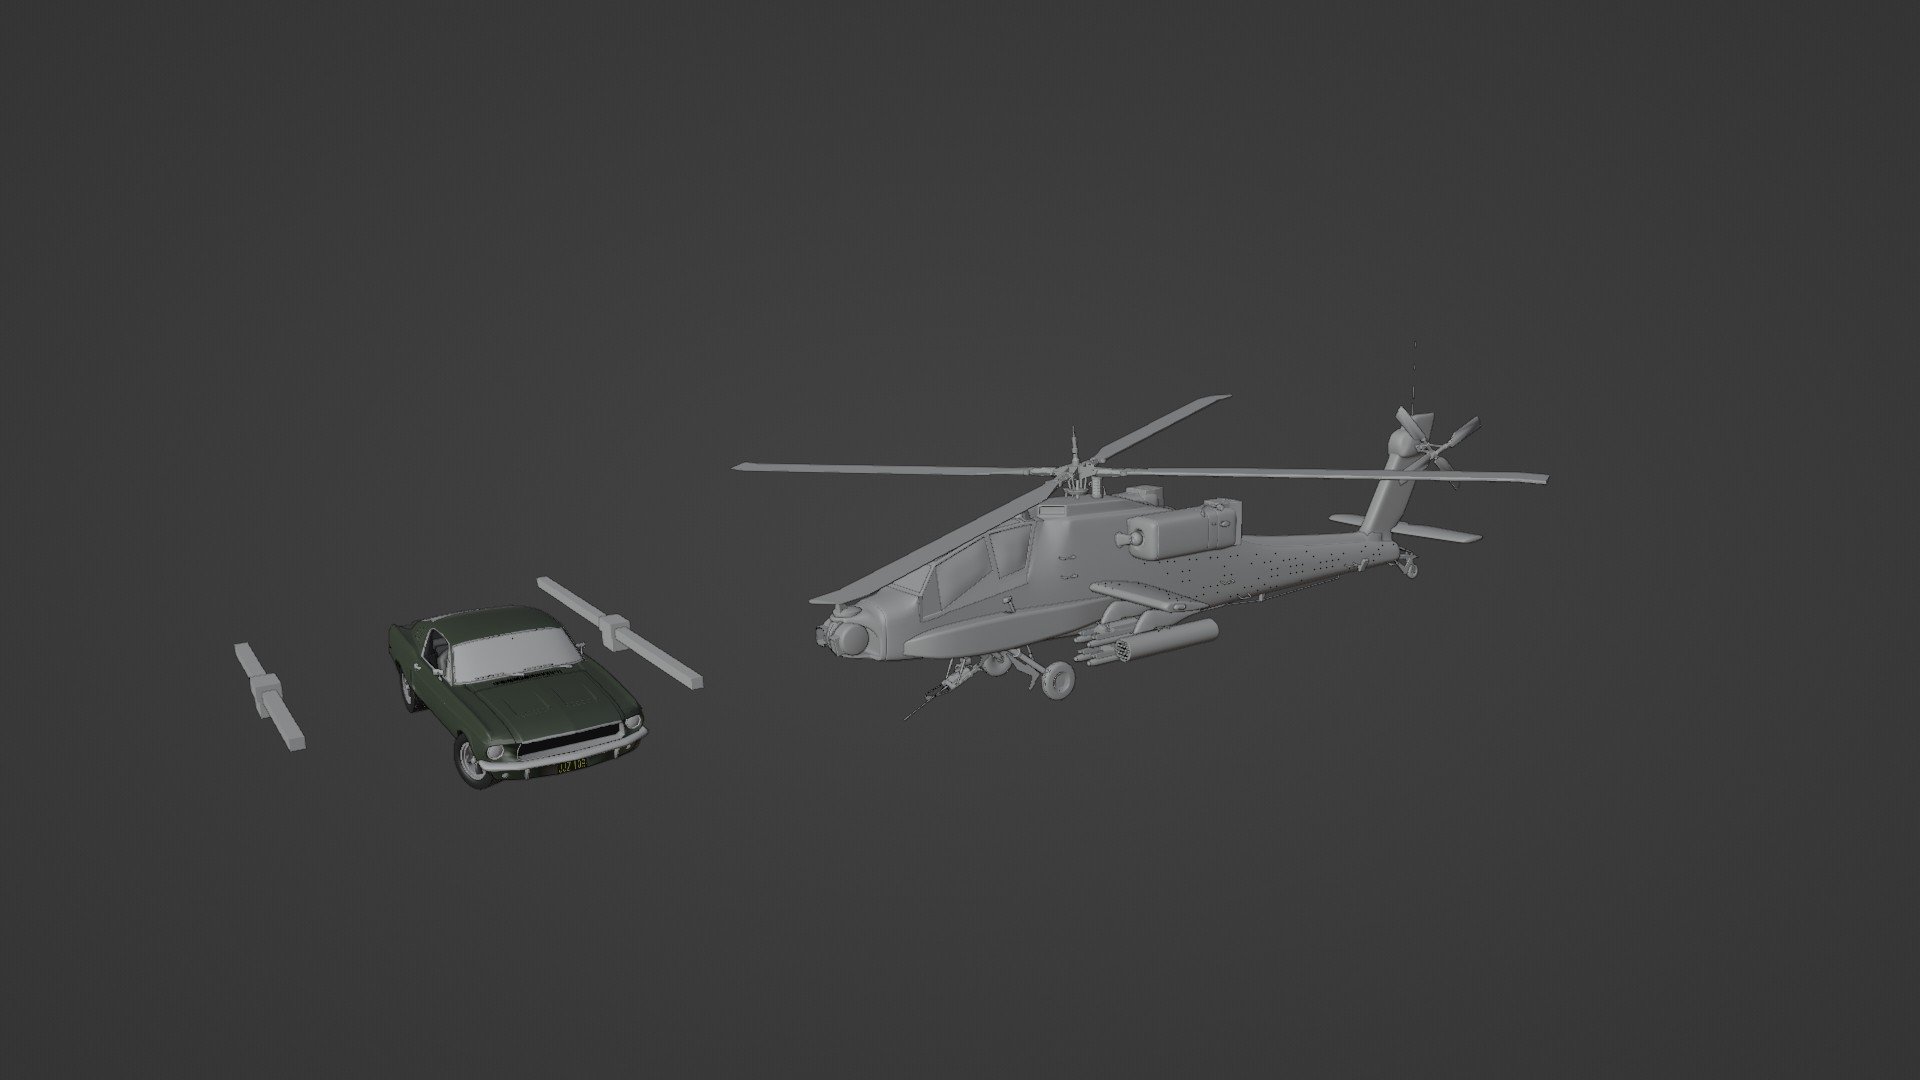
Note: The car and helicopter are assets from BlenderMarket - I didn’t make them.
I started by making a quick demo, seen here:
Layout and first pass helicopter animation
The first thing I did was arrange the car and helicopter into roughly the layout I wanted, and added some placeholders for the bridge to establish the height of the car. I also worked on the helicopter animation. The model didn’t come with any rigging, so I had to make some adjustments to get the blades to spin nicely. The camera needed to rise with the helicopter, but that is just animated separately.
Shading
I began replacing the realistic materials with a simple cel-shader style material. In some cases, I was able to modify the source materials by using a “shader to RGB” node connected to a “Color Ramp” in constant interpolation. This is a common way to get a toon style shader in Blender.

Sky
I was going for a specific effect where light was coming towards the camera and objects in the background were in silhouette, so I used a “Sky” node, and this seemed to work well.
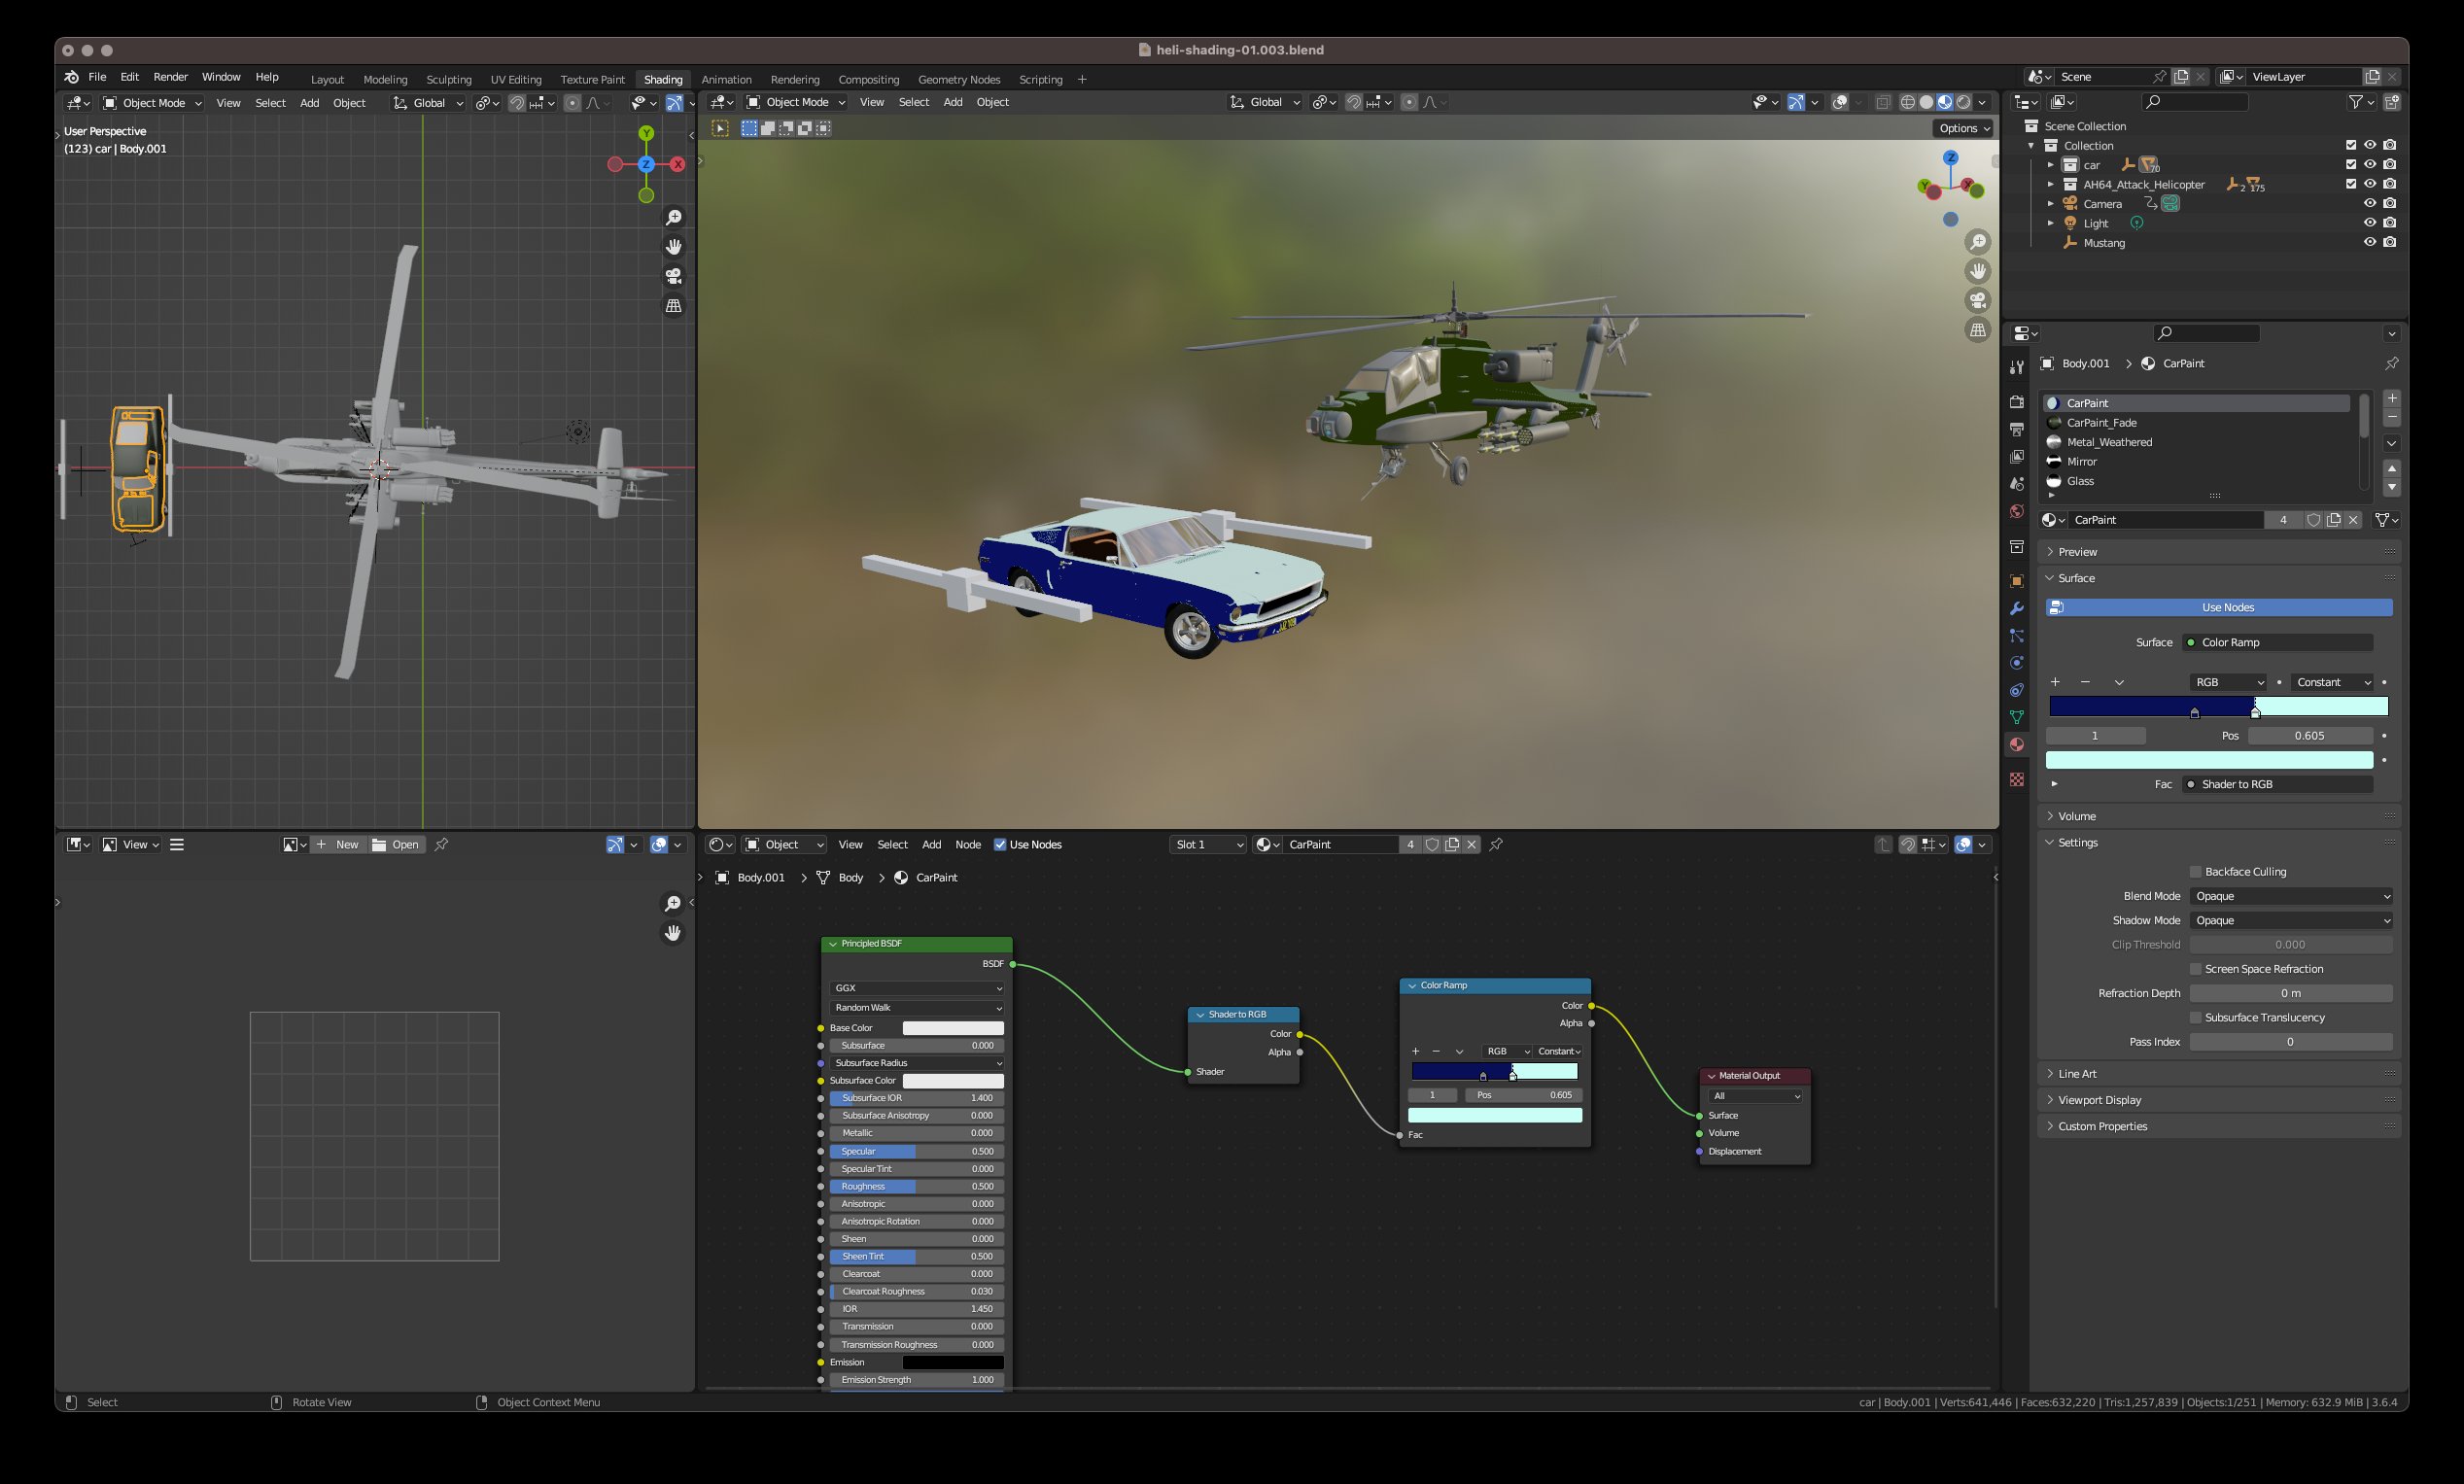
Also of note, I’m not a helicopter expert, and I have no idea what the little blue lights are, or why one looks like a “C”. I think part of this was an artifact of how I was doing the shading, and something I may revisit on a future update.
Around this time I noticed something was missing. The helicopter blade were spinning nice and fast, but looked weird - then I realized it needed motion blur. This is just a setting in Blender, but it made a huge difference.
Background
I liked the general idea of the background in the reference video - some sort of pylon structure, and silhouetted buildings.

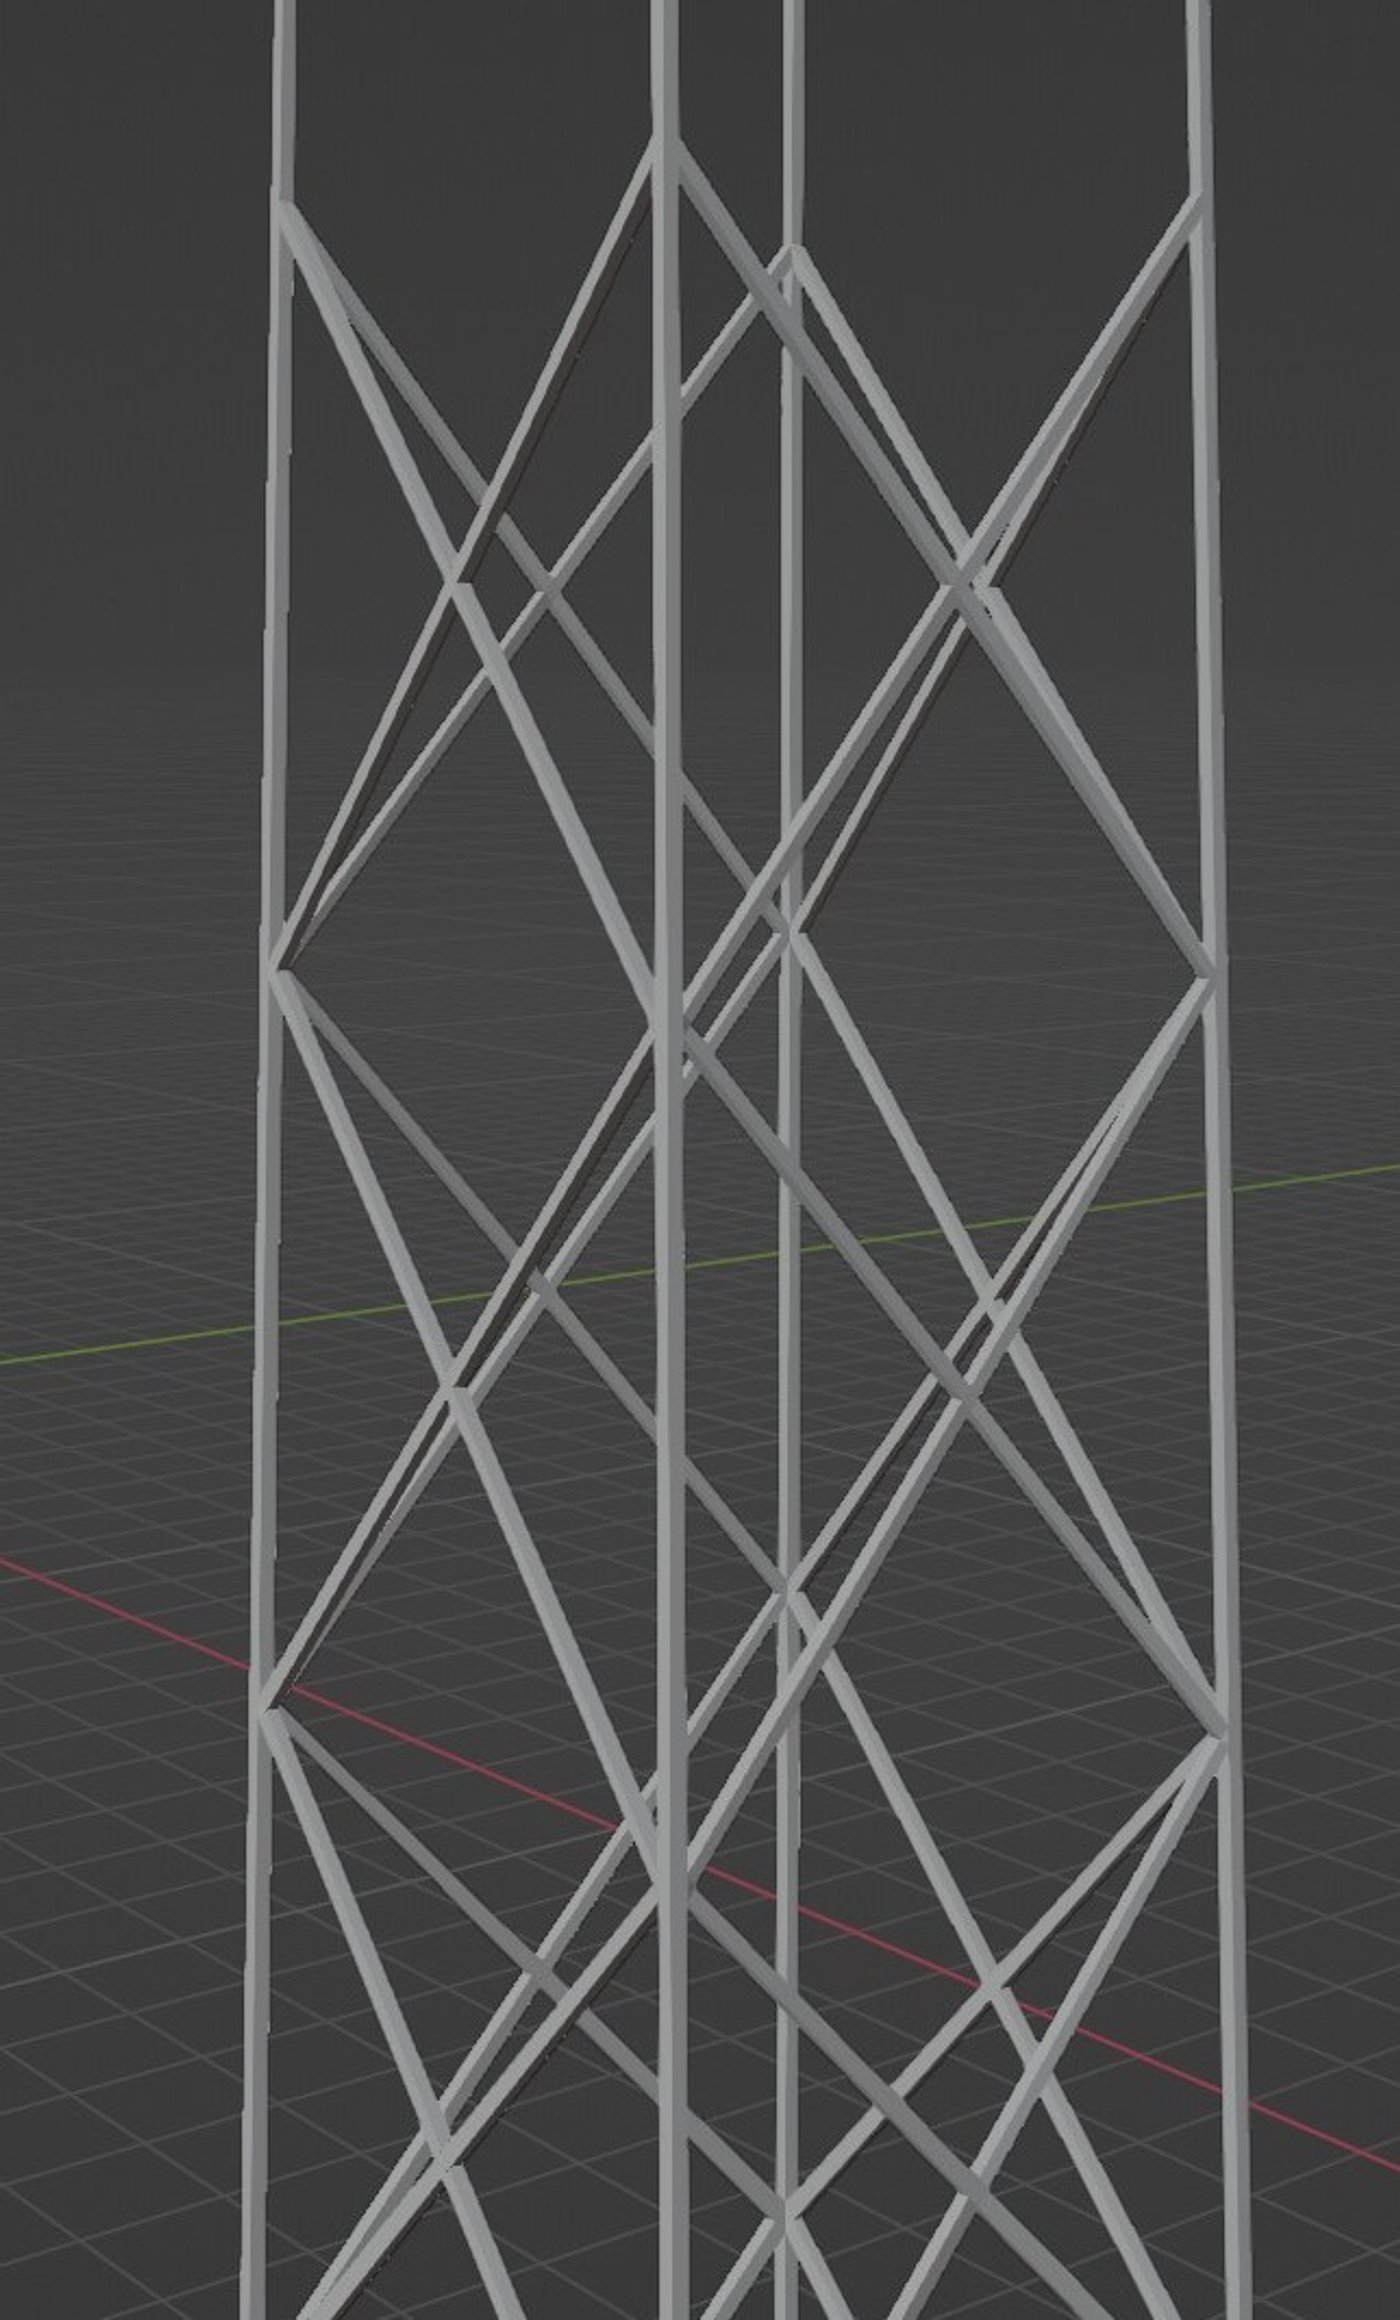
The pylons started as a cube, and smaller cubes stretched out into long shapes, mirrored and arrayed, but I started having issues with alignment. In the silhouette, I could see little spaces and gaps, so I ended up taking the time and attaching the cross-beams to the pillars to create one large mesh. I did one, and then mirrored it, and attached. This was not as efficient as I had hoped to be, but it got done in the end, and looked a lot cleaner.
Buildings
These are just cubes, and a few spheres arranged to look like buildings with some cylinders to look like spires. They looked a little sharp, so I beveled them, and applied a dark gray texture.
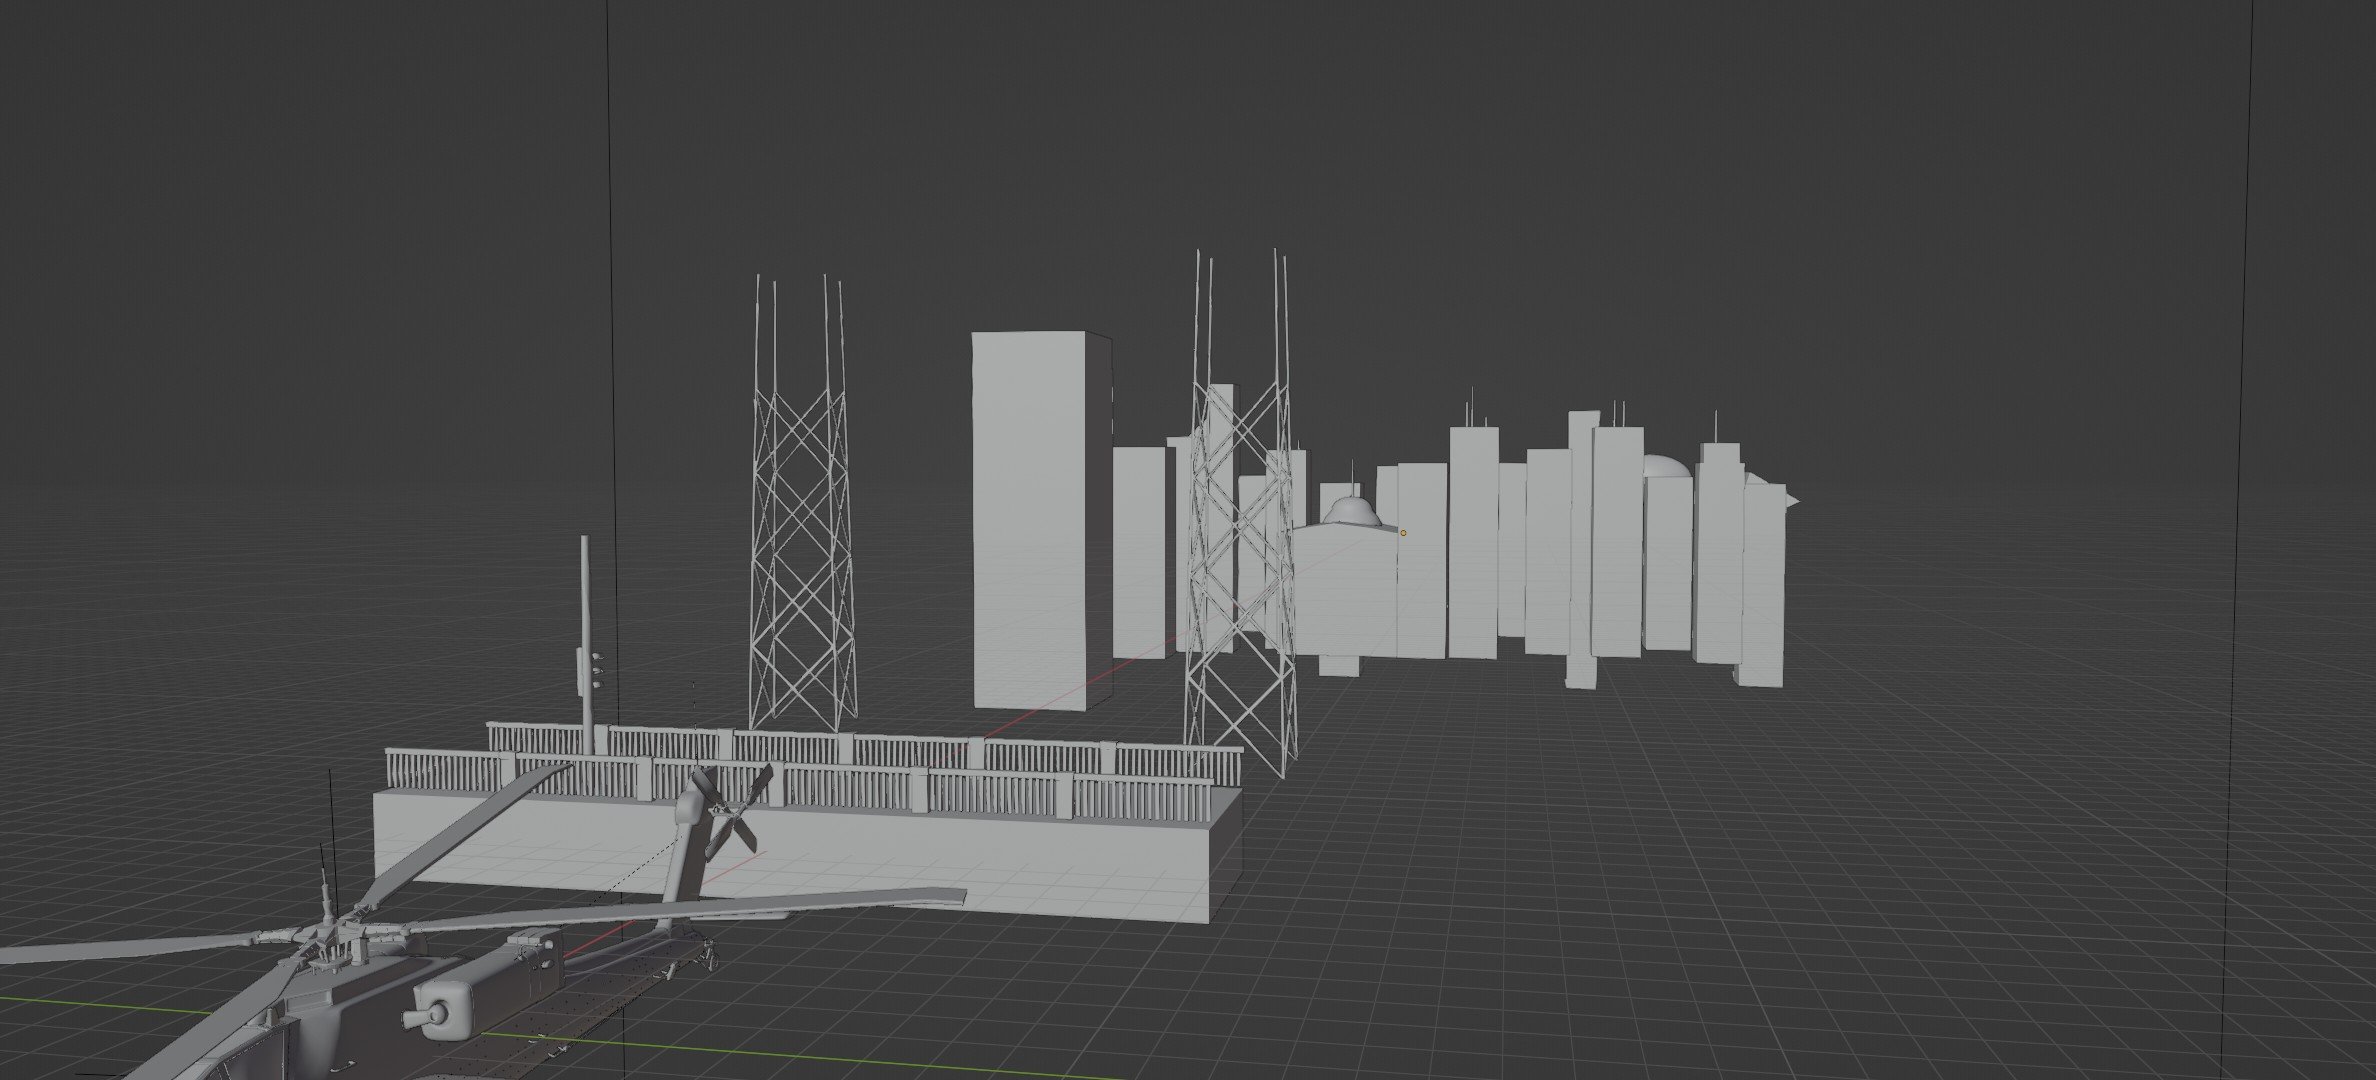
Added a cube with a Principled Volume shader to add some haze to the buildings in the background. Also, here is the first appearance of the pilot.

The Pilot
Initially I was just going to draw a pilot, and use a 2D image. This is the image:

Something about a static image looked off to me. I thought about animating it moving and the highlights changing, but instead I decided to make a simple 3D pilot.
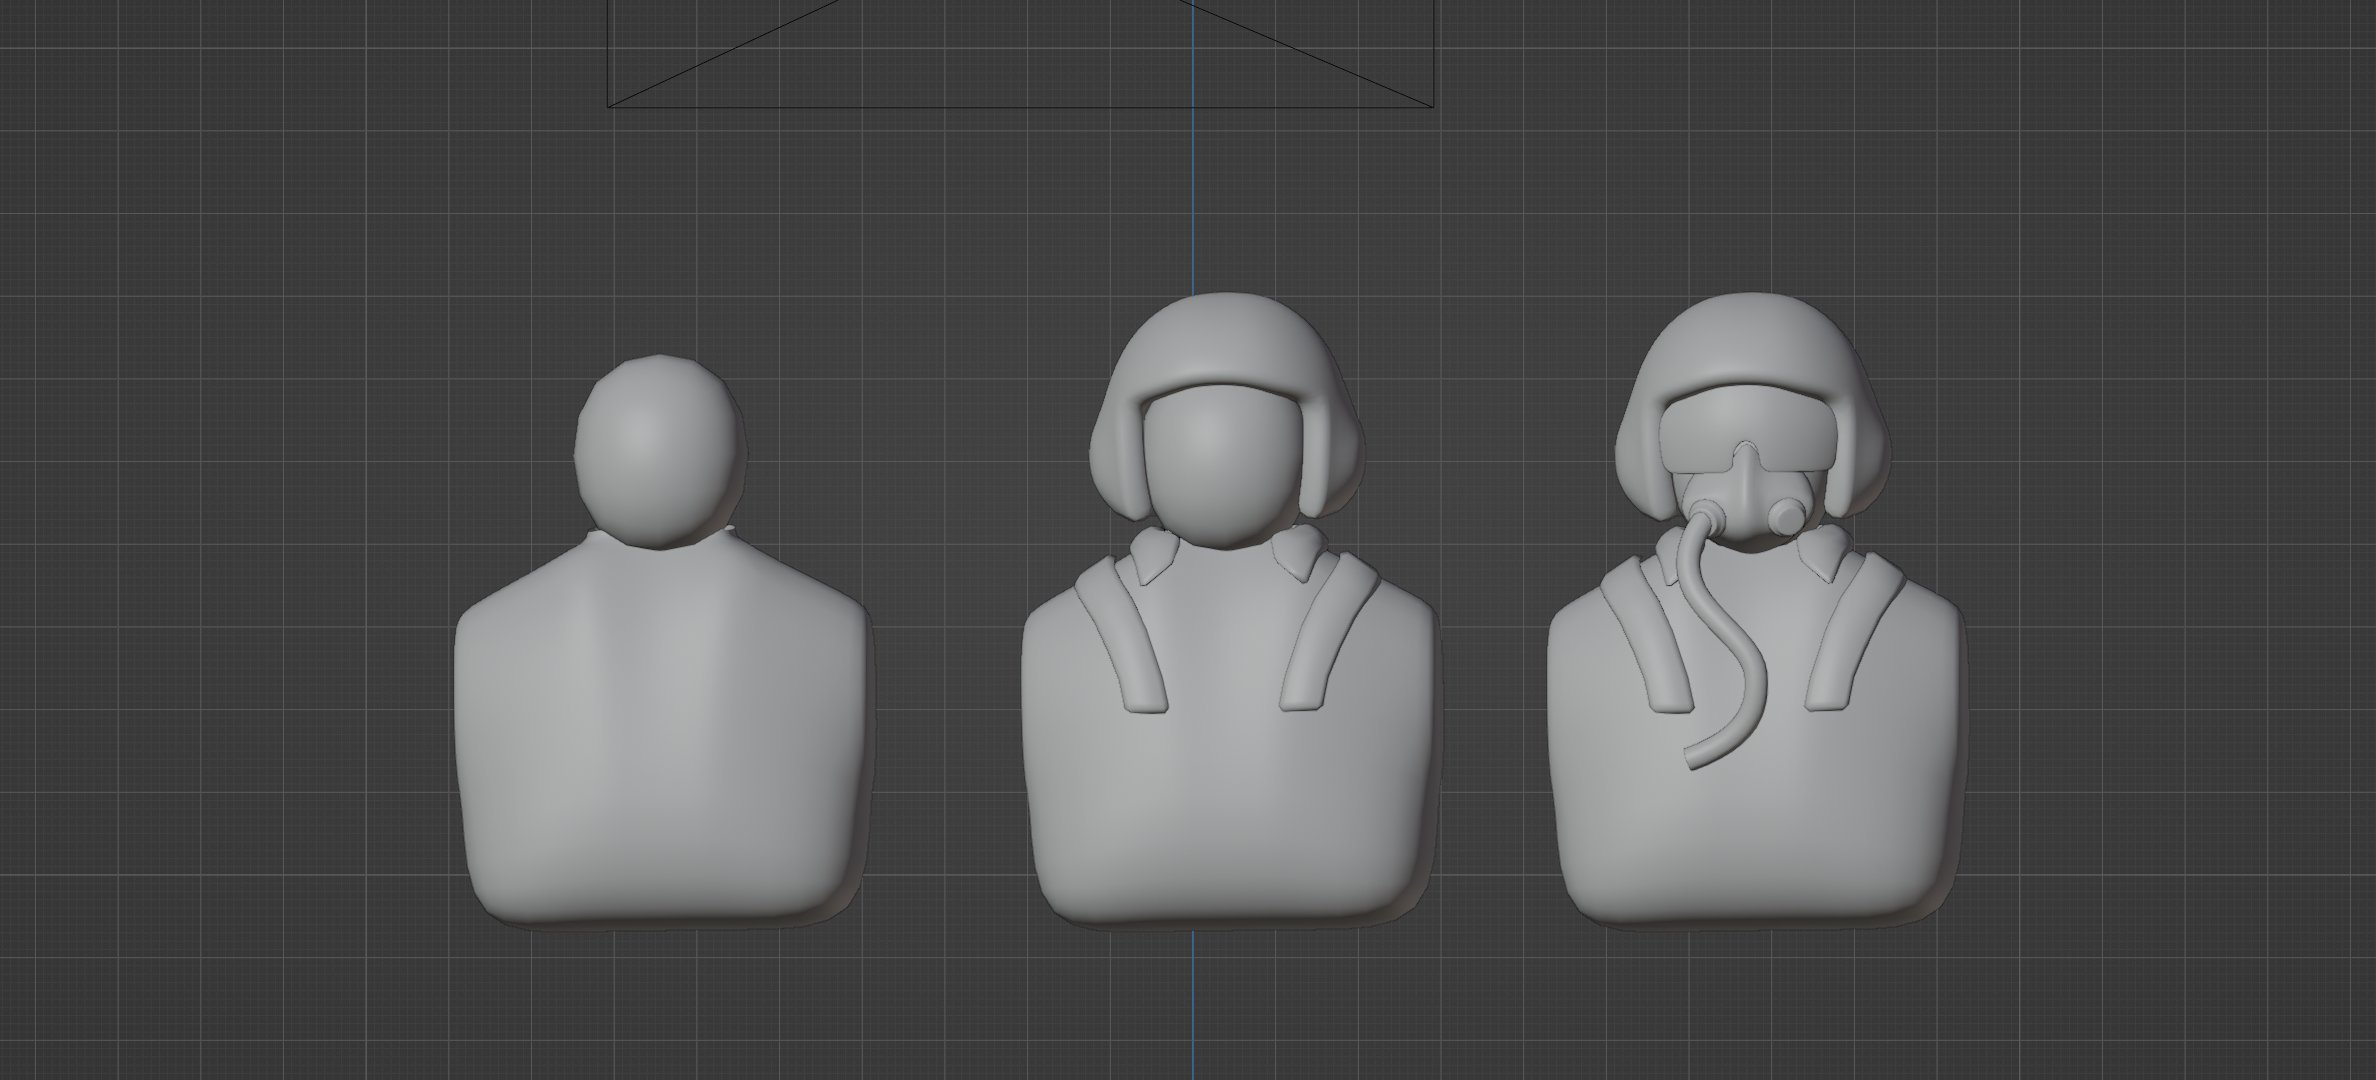
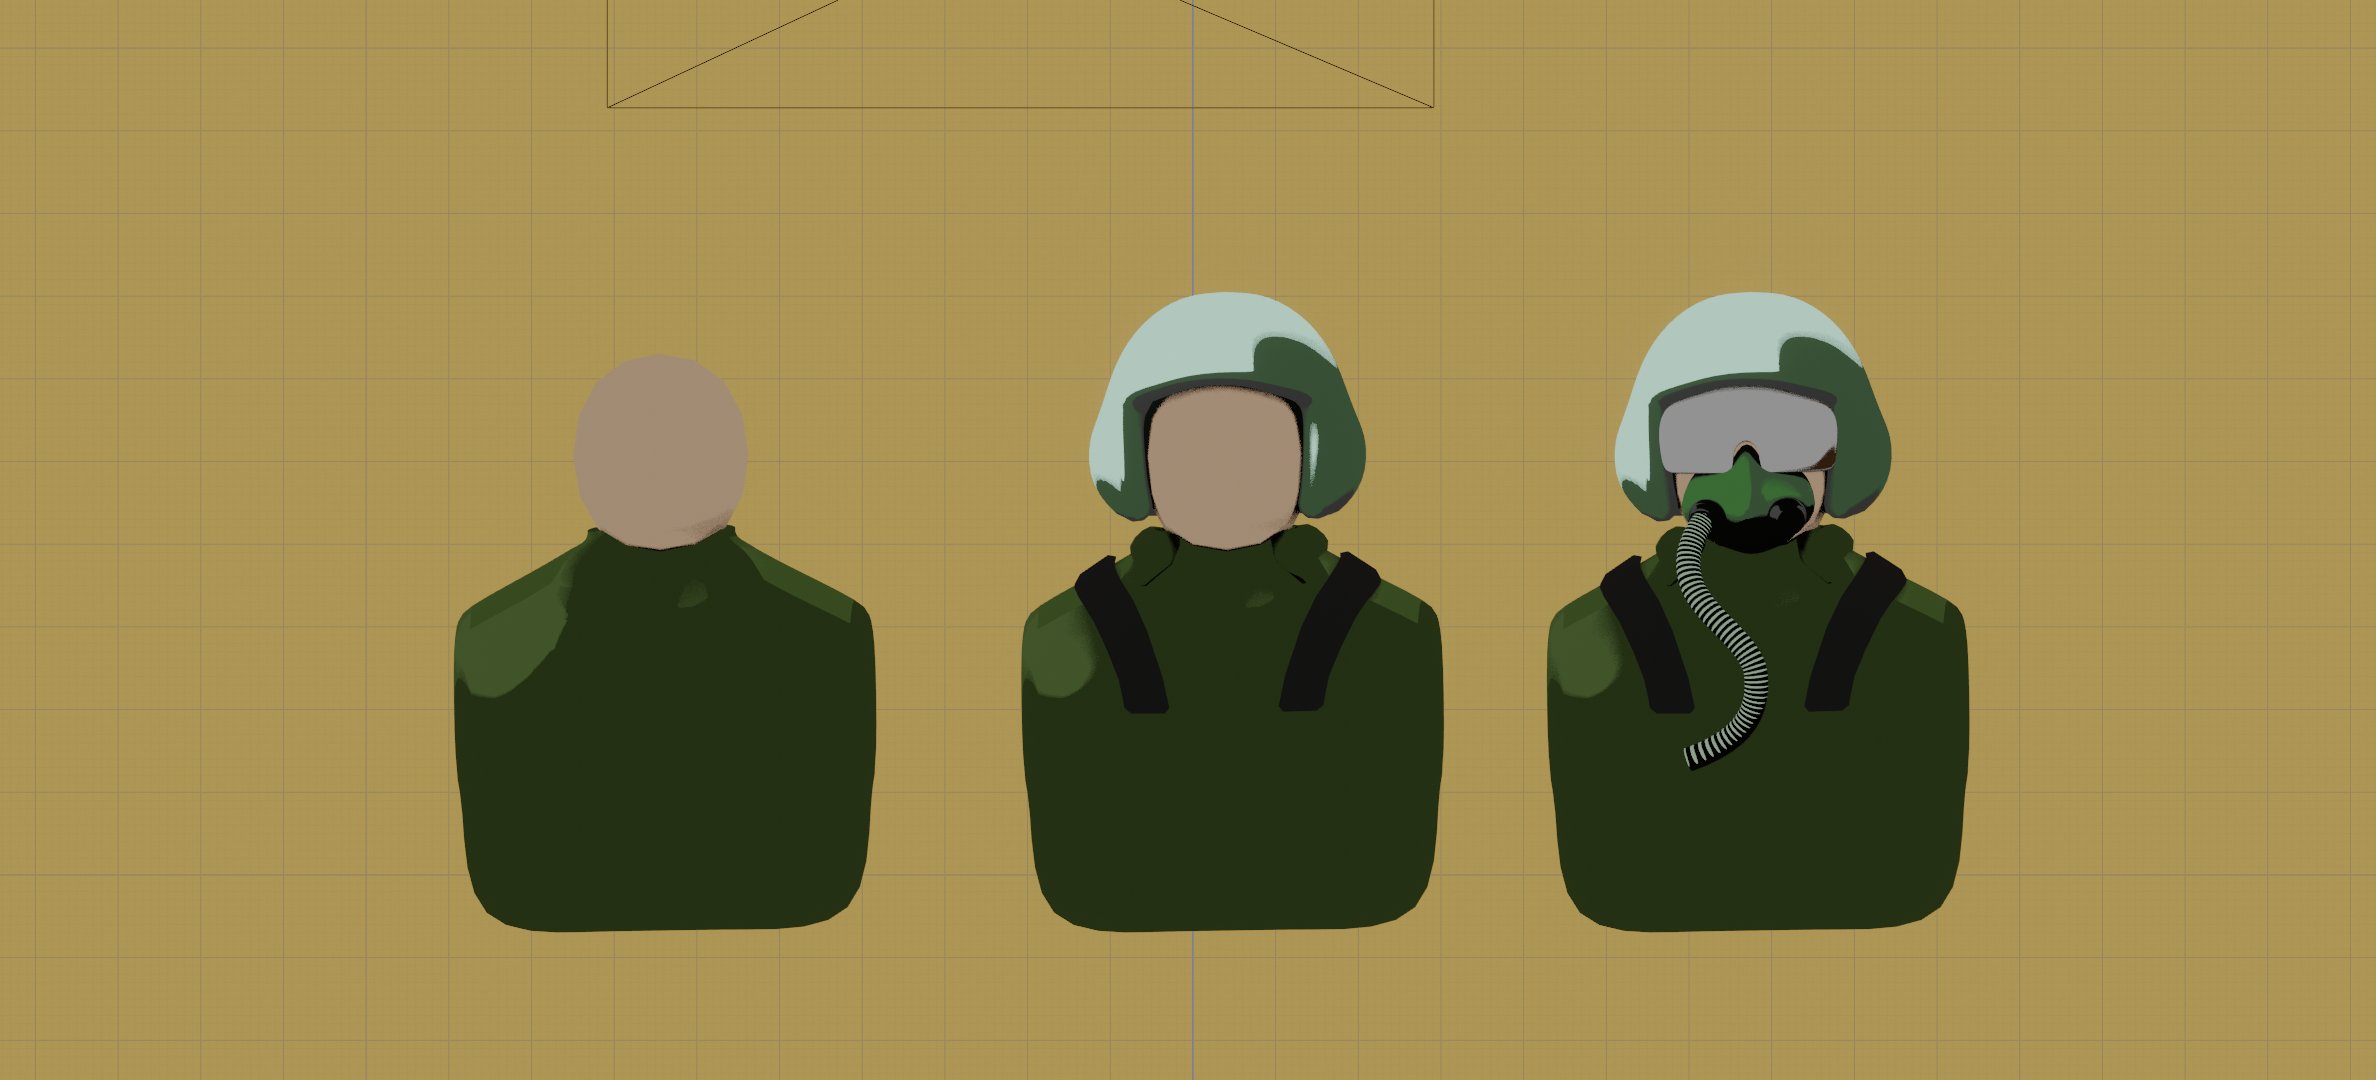
Until now, I hadn’t really committed to including characters in this shot. It was more just going to be a “style demo”, but now I’m in too deep to back out. For the pilot, I didn’t bother with an armature. I just moved the body and head a little to play against the movement of the helicopter.
Line art
I spent more time on the line art than I had wanted to. I tried to use a “line art” modifier, which is a relatively new addition to blender, but I was running into issues with it. I think these meshes are either too complex, or have too much geometry. I ended up using the “inverted hull” trick to get what I consider “adequate” results. This is another thing I might like to come back to in the future.

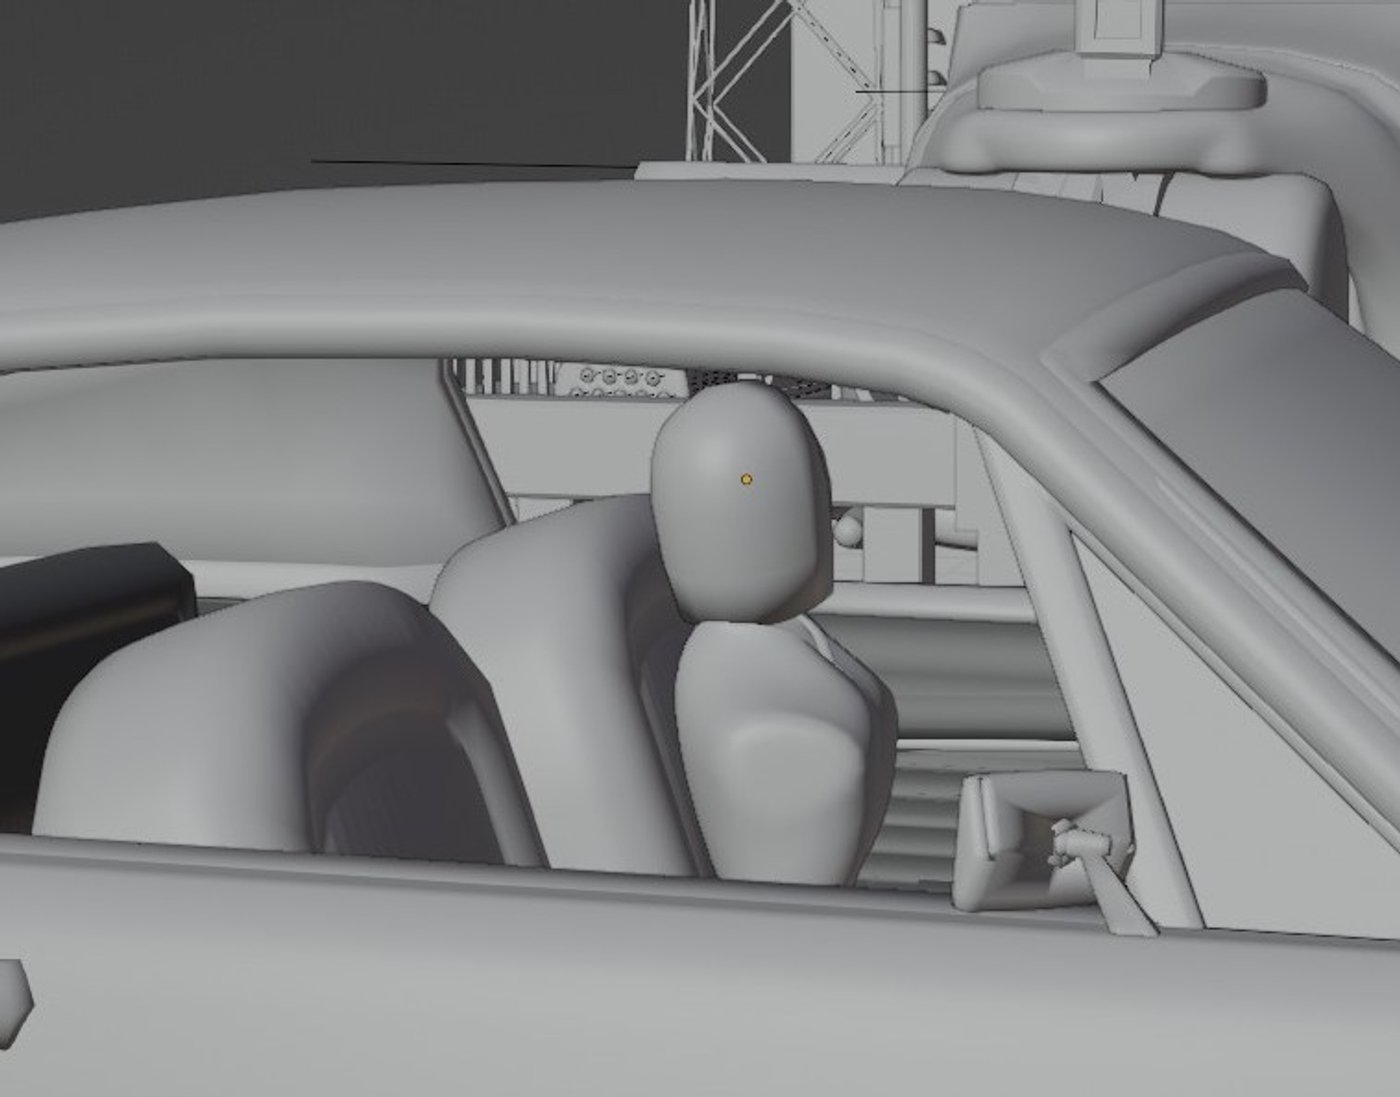
Lady in the car
Basically, I copied the head and torso of the pilot, and made some adjustments, and added a hair object (not using any sort of hair tool, this is just a simple mesh with a basic hair shape).
This character needed to move in a slightly more complex way, and the method I used for the pilot was not cooperating. I added a very simple armature to get the head/body movement I needed.


Police officer
It seemed weird to me that a helicopter would menacingly emerge on this hapless lady in her car. This was telling a story that seemed incomplete, so I guess I need a police officer to be giving her a hard time.
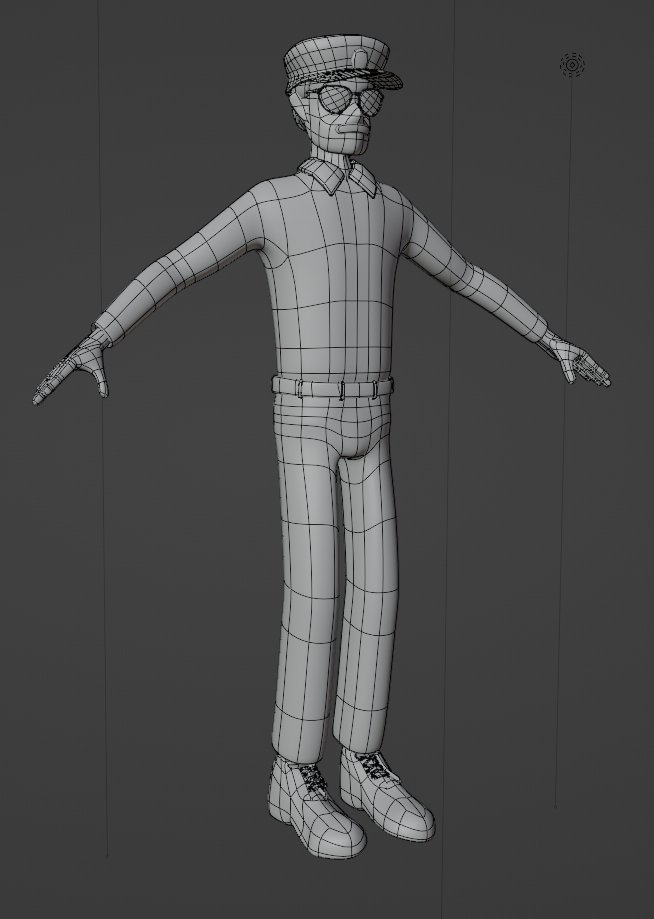
I was not planning to make a complex character for this shot, I decided to keep him as simple as possible, this was modeled, rigged and animated in 2 days.
I started with a rough face and hat, and made some sunglasses
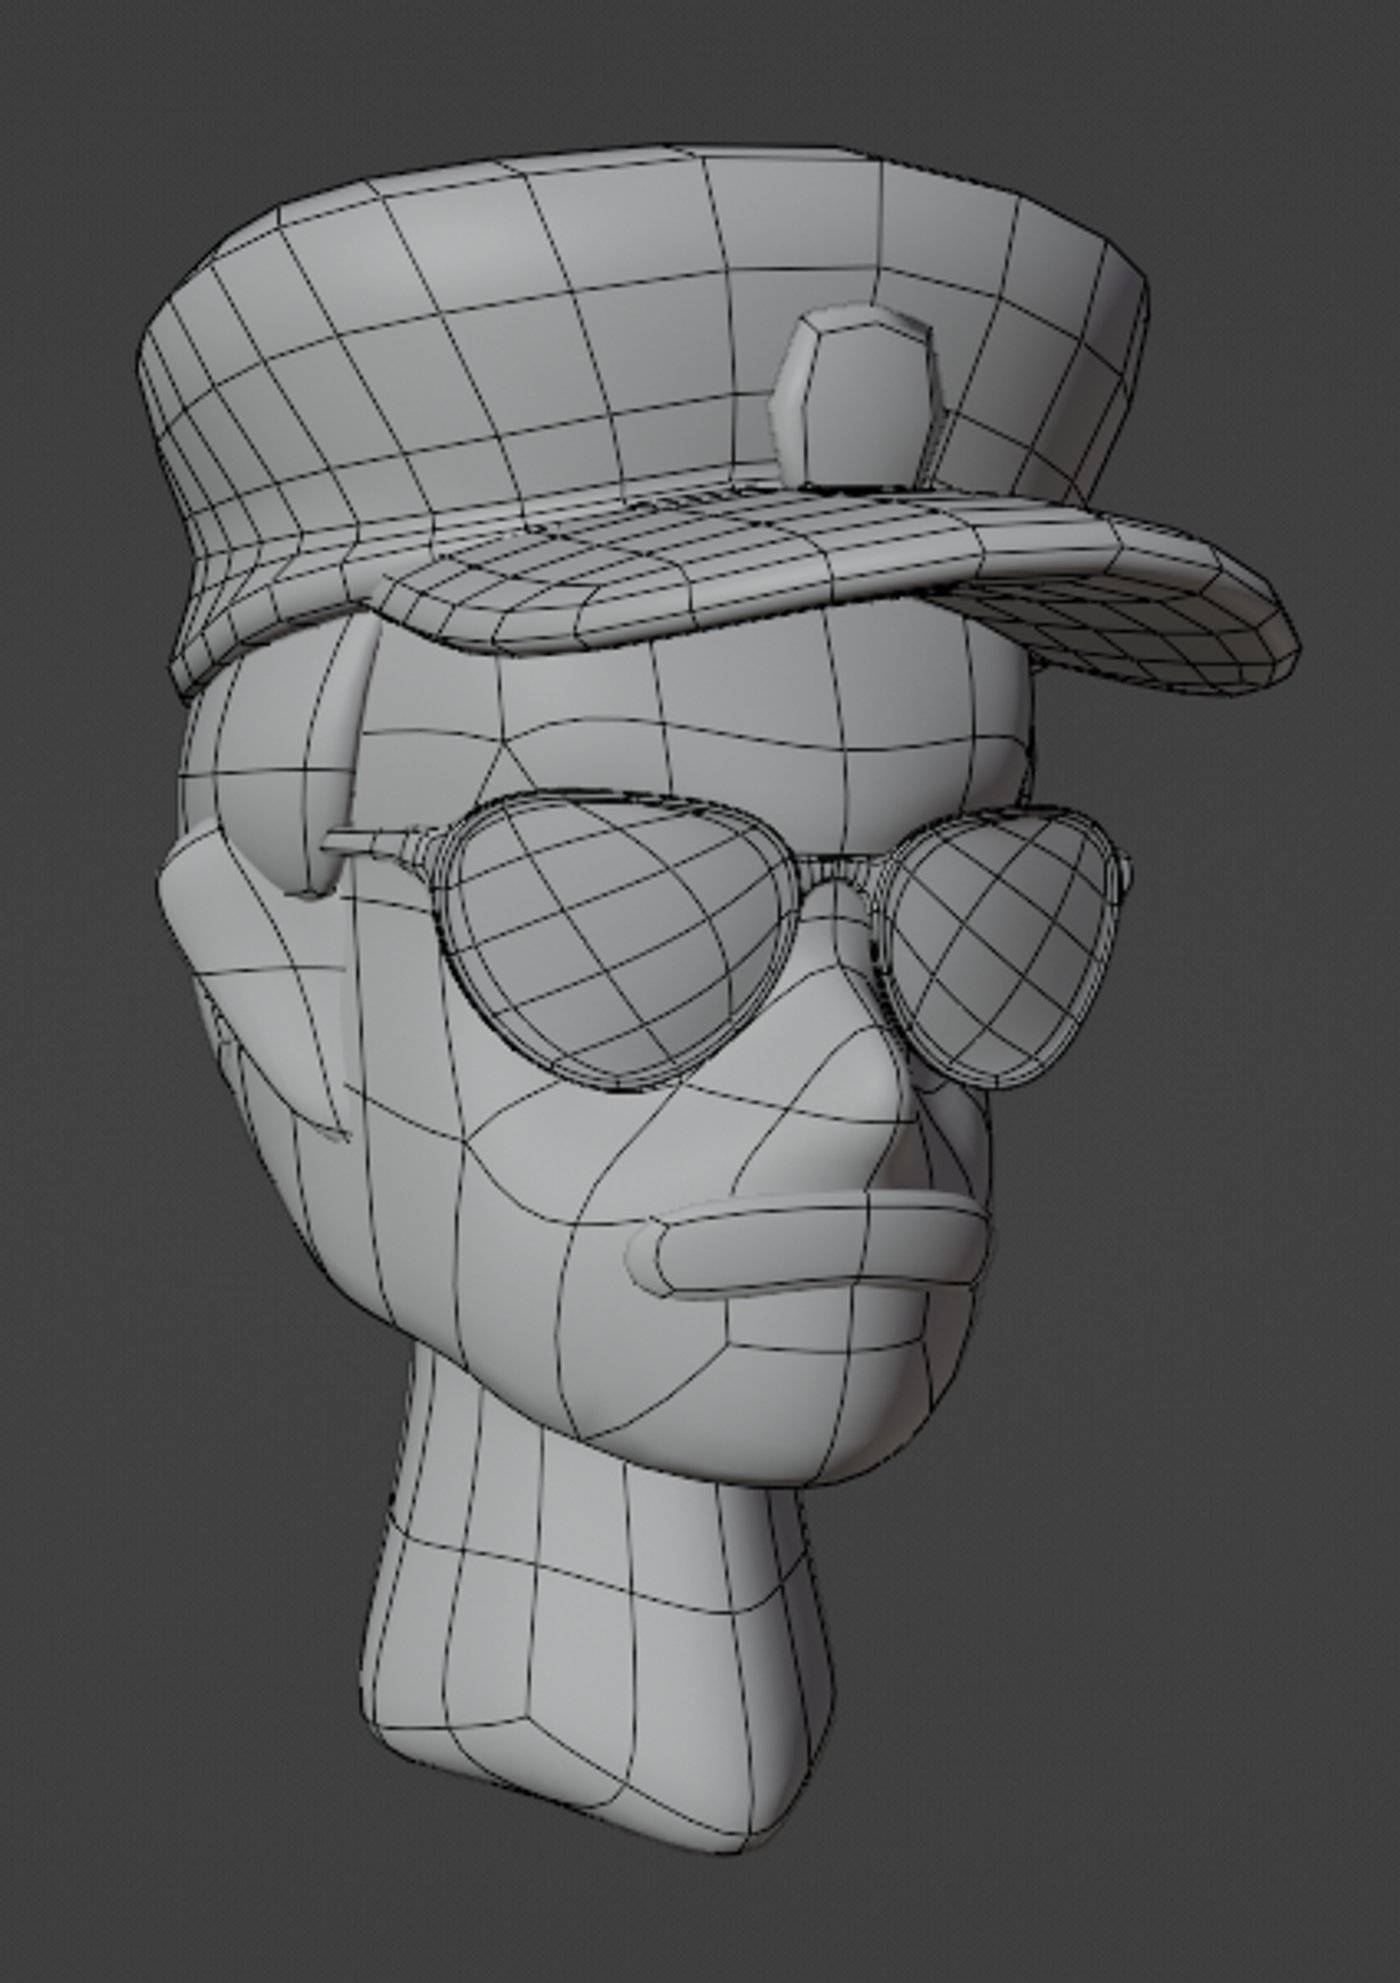
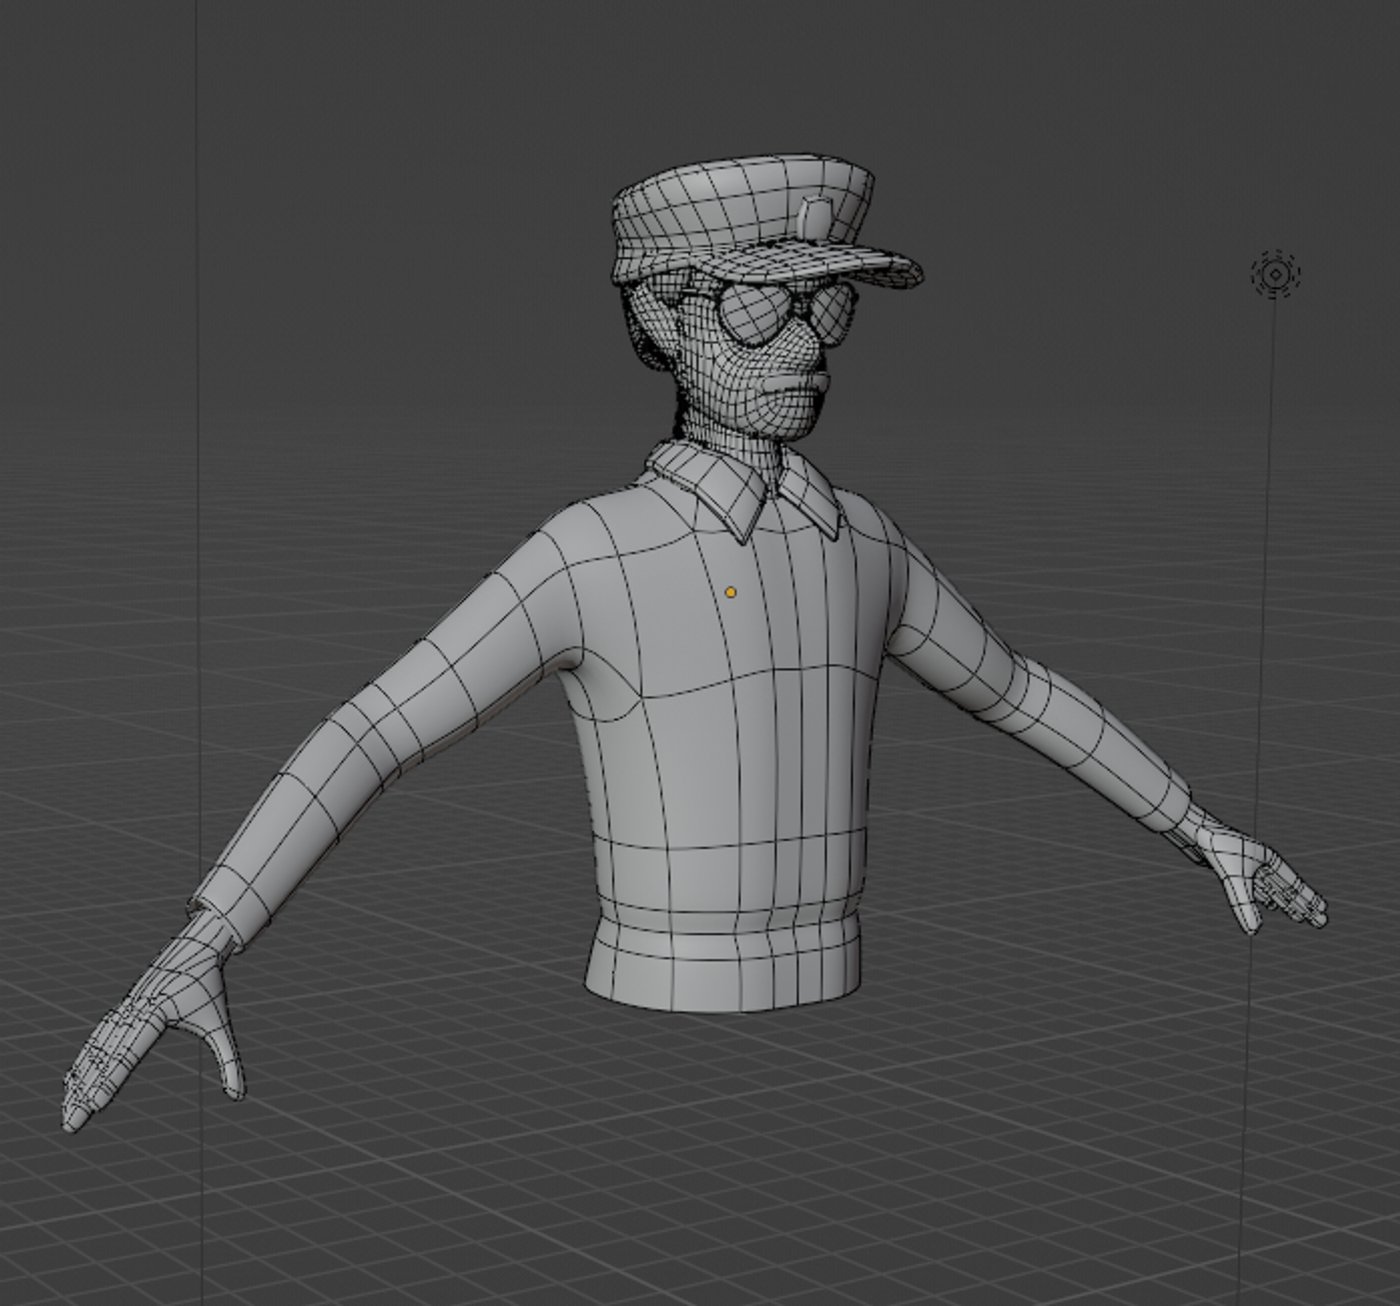
Box modeled a torso and legs. I harvested the hands, feet and the belt from a character I made a while ago.
Then I used Rigify to generate the rig. I had to make some minor adjustments to get the deformation I wanted.
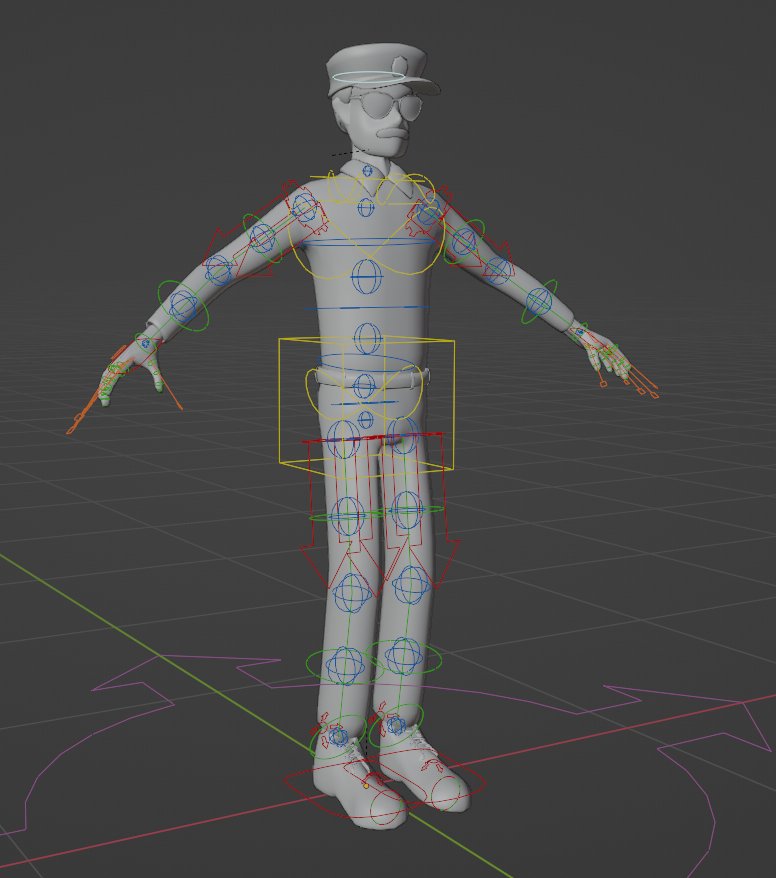
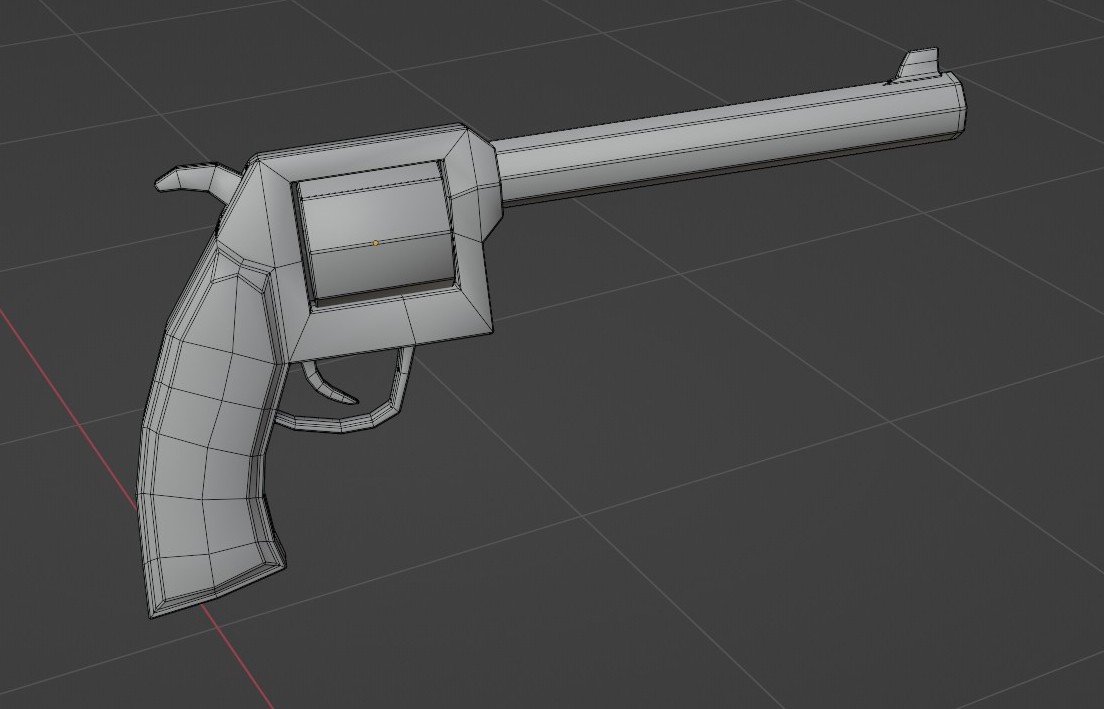
I have made a few similar characters using this process, so it went pretty fast. I also modeled a quick revolver which we never really see in the final shot.
Filters
I wanted to get a sort of old-school animation look, so I added a bit of noise and chromatic aberration with Natron. I separated the RGB channels, moved them a little, and merged them back into a noise filter.
I’m calling this done for now.


Comments (0)
This project doesn't have any comments yet.