
Decomposed forest tree - Photogrammetry reconstruction
Hello everyone, As the title suggests, the main focus of the project was the reconstruction of missing elements. As an artist, I strive to try new things, so secondary objectives were to try a hand retopology (with "RetopoFlow" plugin and Topogun 3) and attempt to create a micro diorama to present assets more attractiv
Decomposed forest tree - Photogrammetry reconstruction


--------------
Old method with seamfree materials and xtractor brush as reconstruction medium.

After receiving valuable feedback from Mateo Franco and showcasing what can be achieved with a different approach to photogrammetry reconstruction, I had no option but to explore a new technique - I was too intrigued by possible quality gains. The concept involves a full-size approach to what I had previously done in a more limited manner. Instead of placing individual elements of geometry in sport to reproject details, we should look at the model as a large 3D jigsaw puzzle. In this approach, we decide how our puzzles look and use them to fill in the missing model parts in order to create a convincing illusion.


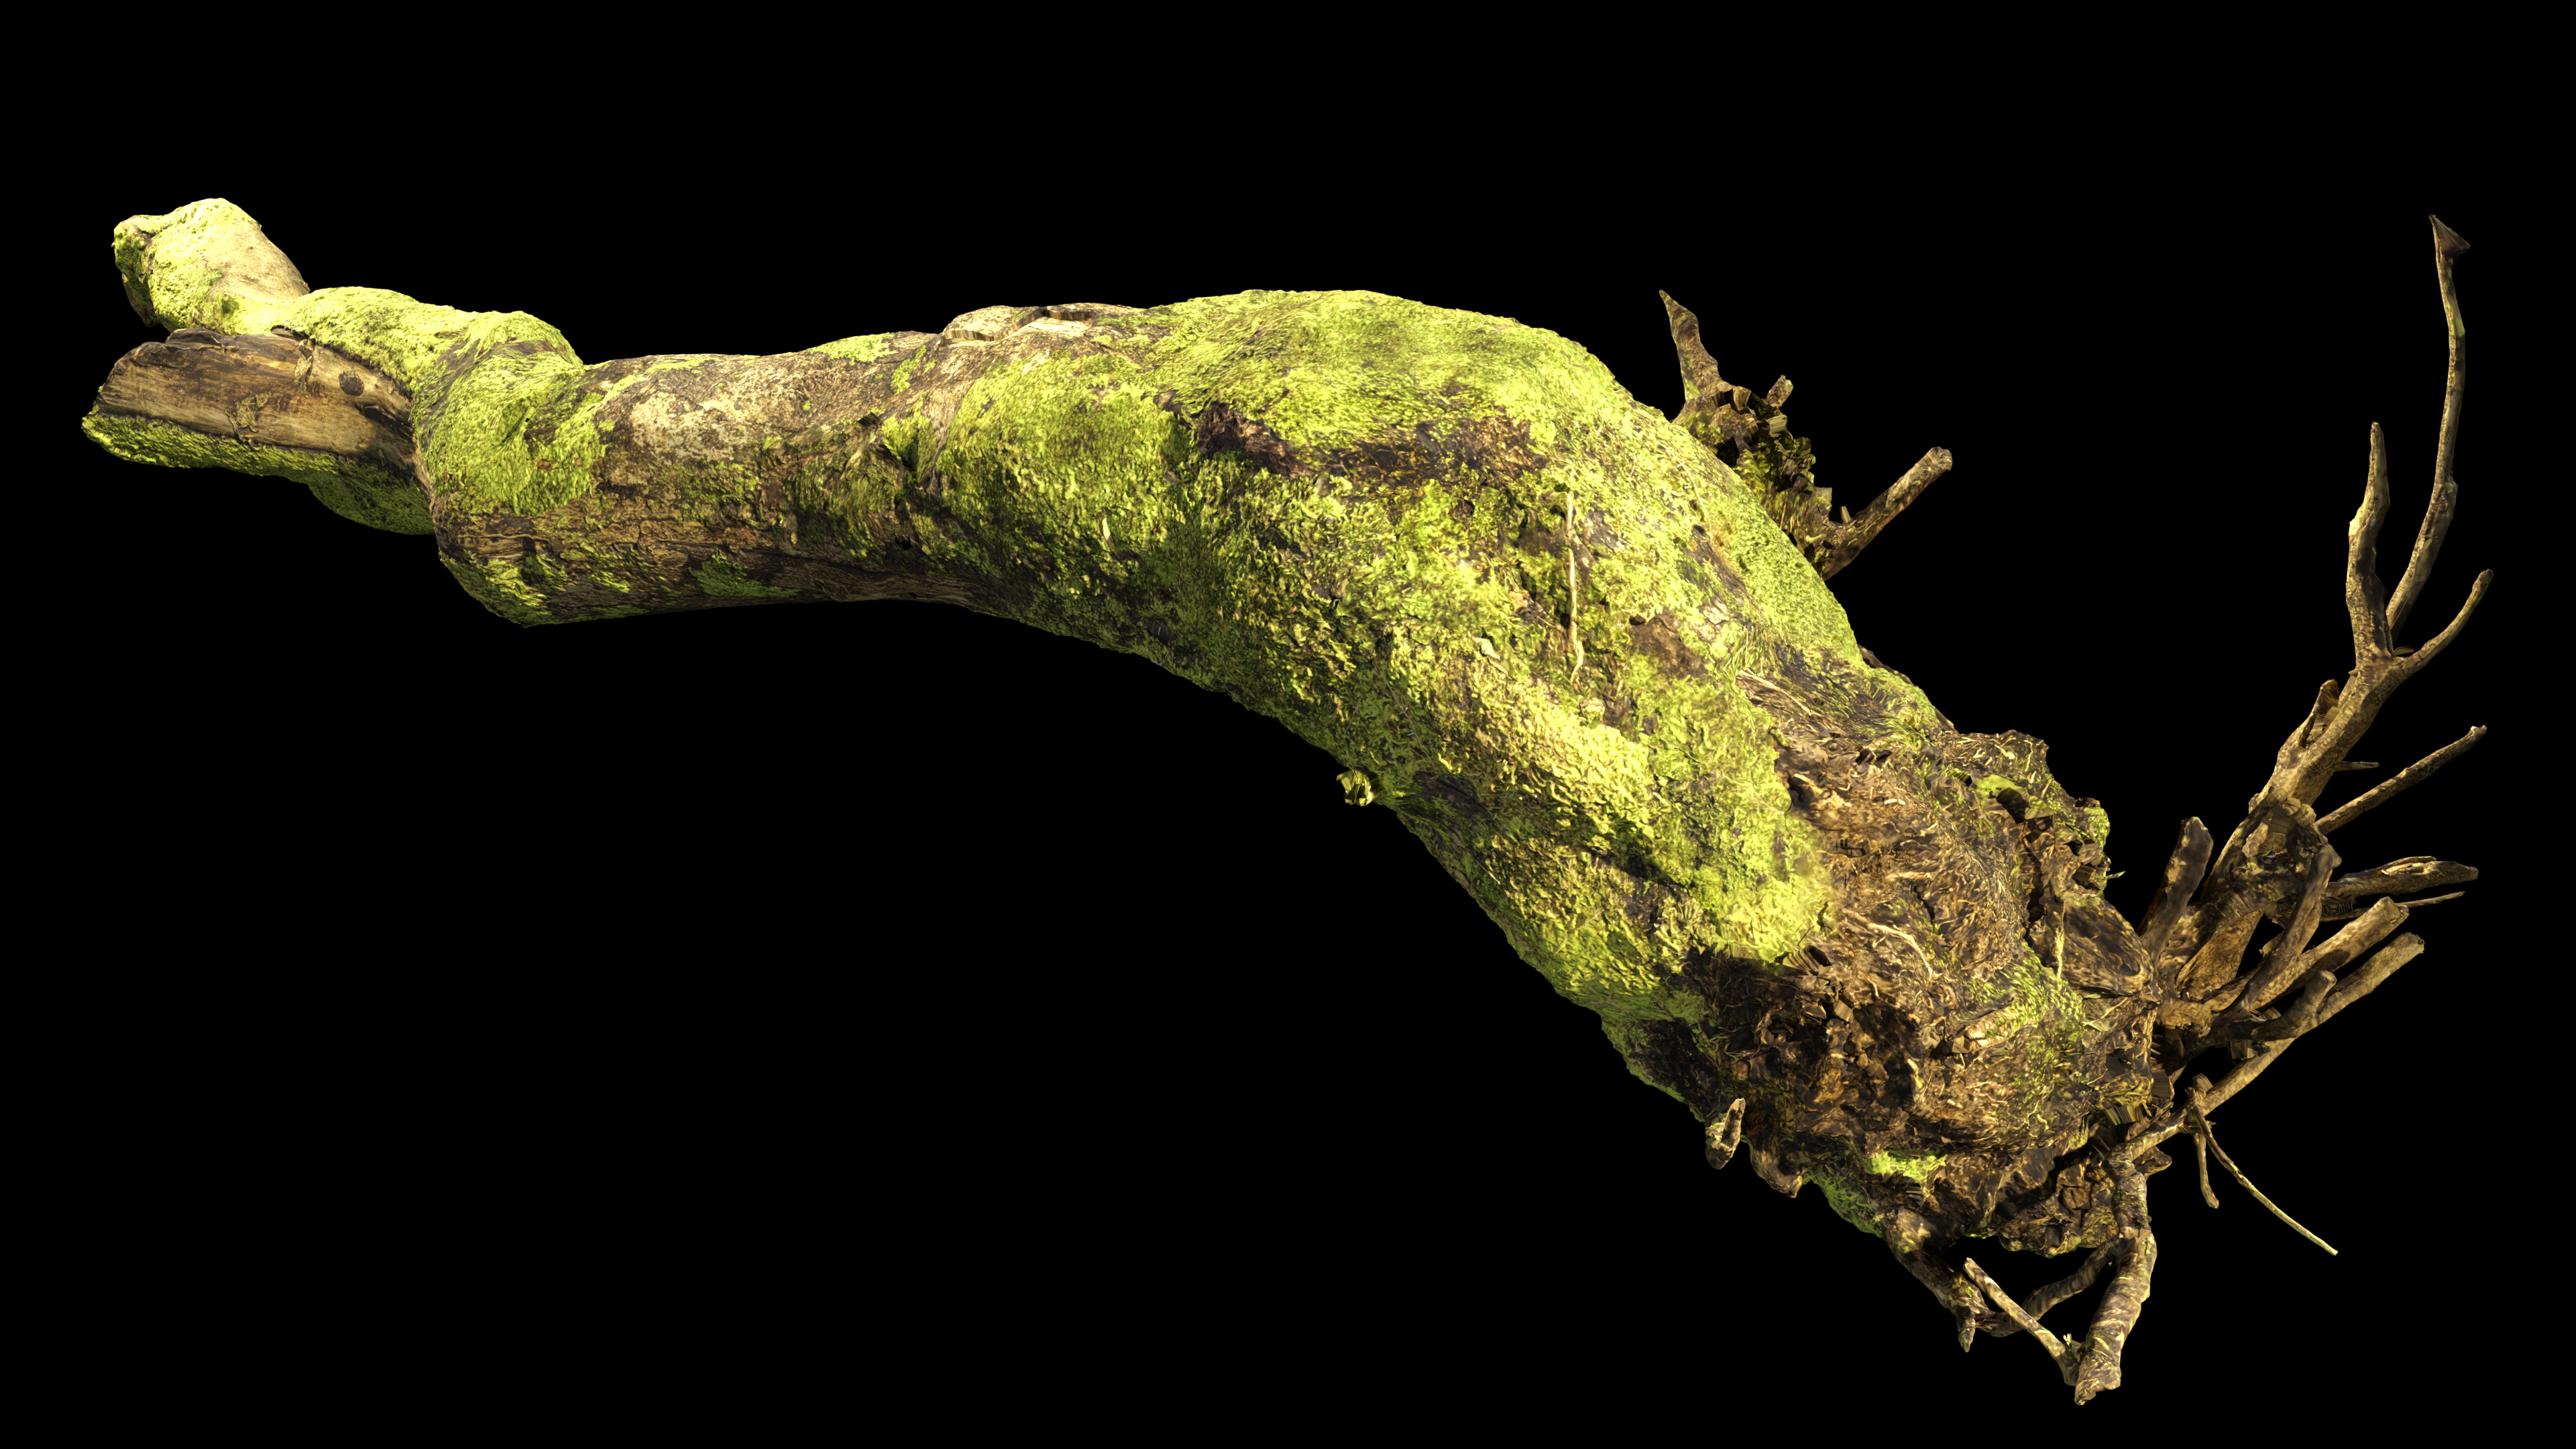


Geometry above before (removed bad geometry) and after reconstruction
--------
Naturally, this approach is more time-consuming, but the final result is more convincing in terms of shape, surface details, and texture. The key to success lies in preserving UV information for each piece so that we can load the newly constructed model as a high-poly/source and load our original texture. The most significant challenge at this stage is maintaining consistency in texture colours. In my case, the trunk was captured without a ring flash (due to the presence of animals; I didn't want to give the owner a reason to kick me out of the property where an object was located). This resulted in the entire bottom of the trunk being significantly darker and later removed. The remaining darker portions of the textures were restored using a combination of Unity Delight tool and Affinity Photo.

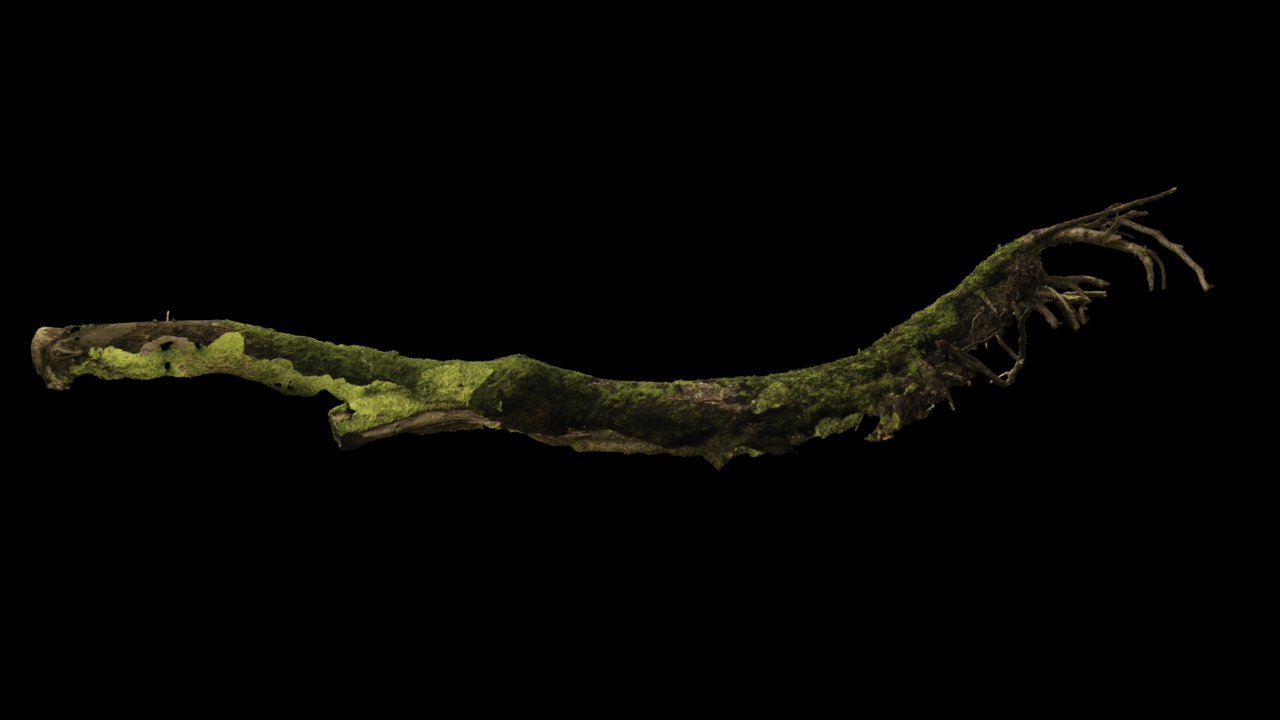

3 stages of model texture: Raw, removed blurred parts, delighted
---------
The next stage was the creation of a low-poly model. For this project, I decided it was time to try hand retopology software called Topogun 3 and a Blender plugin called RetopoFlow to decide which one of those solutions fit me best. Sadly, both solutions revealed numerous issues with the above-mentioned workflow. Topogun and RetopoFlow assume that your model is formed from a single piece. In case the model is created from many intersecting elements, the software is confused and recreation suggestions (like poly-loops/strips) appear inside of the model without an easy way of correcting or leading them on the surface of the model. Manual retopology was working fine, but the essence of those tools is modules that speed up retopology. In the end, I resolved this issue by using MeshMixer which creates connections between pieces and fills gaps with fake geometry. The result was not perfect, but enough to prevent the retopology software from becoming confused.


The final challenge was to enhance my presentation skills. I tried a couple of times to create convincing and appealing presentation methods (sweet potato and New Rockie boot projects), but I found out that I really like the idea of an entirely black background with a small diorama around key assets. In the case of environmental elements and photogrammetry, the easiest way is to just reconstruct the real area where the object was captured. To archive that, I used source photogrammetry images as a reference, compiled a list of the plants that grew in the area (https://maps.biodiversityireland.ie/Map/Terrestrial/Dataset/178 proved to be an invaluable source of information), and explored the Megascans library to select the most suitable foliage. The next step will involve creating my own full-scale foliage, but for now, I think about that presentation as an exercise for environmental artist work. While I do not expect the results to be perfect, it is a skill that requires practice and studying the artwork of other artists.
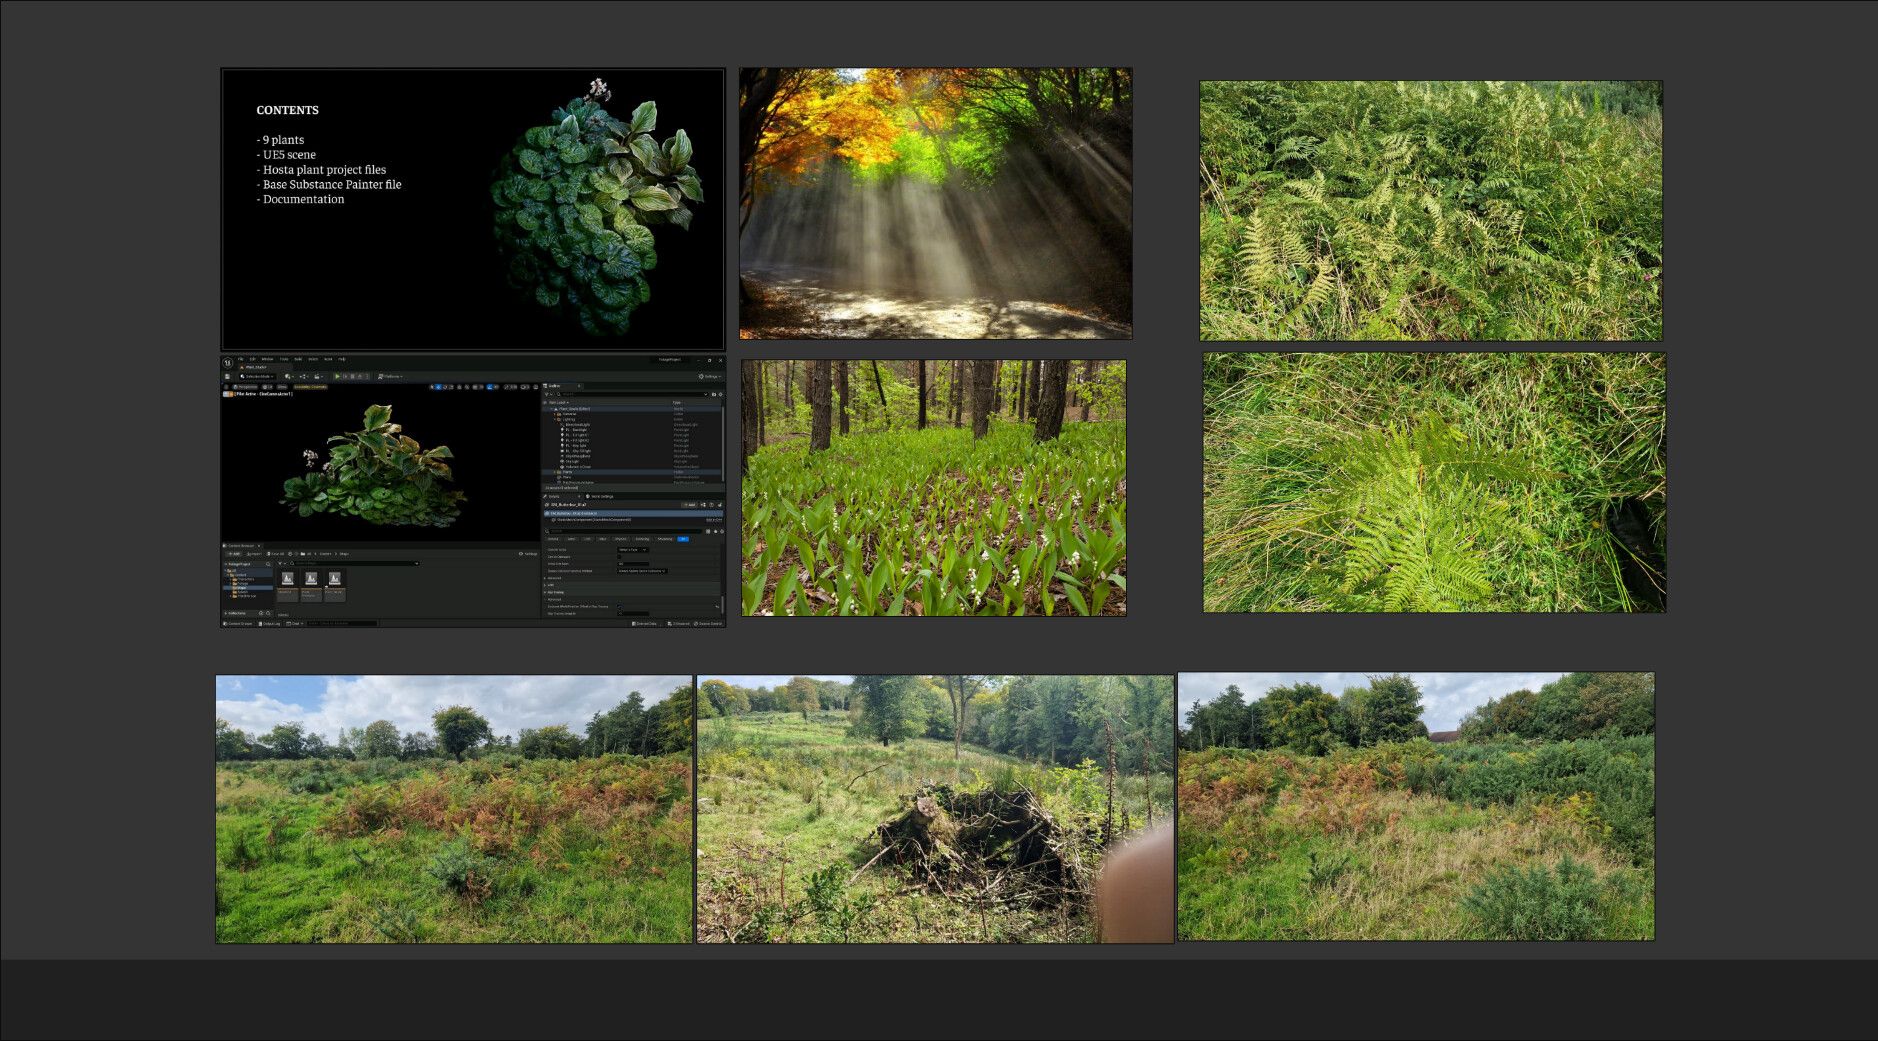
Moodboard. From top left: general idea, elements to include in final render, plants found around object. Bottom row are survey pictures from that area
-----------
The last part of the presentation shows my first attempt with the old workflow. In that case, I even created some seamfree materials out of the model itself, in order to cover missing elements of the model with fake texture that blends. The final effect was very good in my opinion, but clearly, it was not as good as the real elements of the model.


Comments (0)
This project doesn't have any comments yet.