
Hercules Beetle & Red Eye Frog
Detailed Breakdown of my Demo Project: Hercules Beetle & Red Eye Frog
Hercules Beetle & Red Eye Frog

The first step was planning the project. I was sure and confident enough, to create a creature which exists in real life. So I started to search for a photography which fits to my criteria on platforms like Pinterest, Google, Instagram etc. After quite a long time of searching I found a cool photo of a Red Eye Frog riding on a Hercules Beetle.

The strongest creature on earth - the Hercules Beetle! Able to lift up to 850 times its own weight.
This time in the course of my first demo project I planned to create a Hercules Beetle and a Red Eye Frog. Of course, I found not just one picture which means the decision for me was quite hard, but I am not regretting my choice.
I really enjoyed doing the research for some good references. In this case the search for good references was extremely important for me. I was looking for references in relation to the colors, size, and the anatomy and much more.
Of course - the research was not only important for the texturing. It was also essential for the modeling and especially for the sculpting work.

As soon as I had all the informations and references that I needed, I started blocking the beetle to get from the beginning on the right size of it. At first I was modeling the rough shapes of the beetle in real-world-scale. As soon I was happy with it, I imported it into ZBrush. I was modeling more details of the beetle and added the legs and the big horn. After that I did the blocking of the green passenger - the red eye frog. At the beginning of the project, I thought the modeling of the beetle will be tough, but to make the frog looking good was even harder. I had to study the anatomy of this animals intensely, to make it look believable. I had to put way more time into the modeling than actually planned. But after all, it was worth it.
As soon as I was happy with the shapes, I imported the DynaMesh into Maya, to make a good topology and also the UV´s.

After I was done with the work in Maya, I brought them back to Zbrush to add all the details like skin, imperfections and so on. After the sculpting, I exported the sculpting work as displacement maps back to Maya for the Arnold shader. I used the same maps also for the texturing with Mari and Substance 3D Painter.


Making the Groom. I decided to make the grooming of the beetle with ZBrush, because it was the fastest way to do it.

The next step was to create the textures. Like I already mentioned, the texturing was done with mainly Mari but I also used Substance Painter. I used Substance Painter to bake some maps and to create some masks which helped me a lot in Mari. It was kind of a challenge because I have never done the texturing like this before.


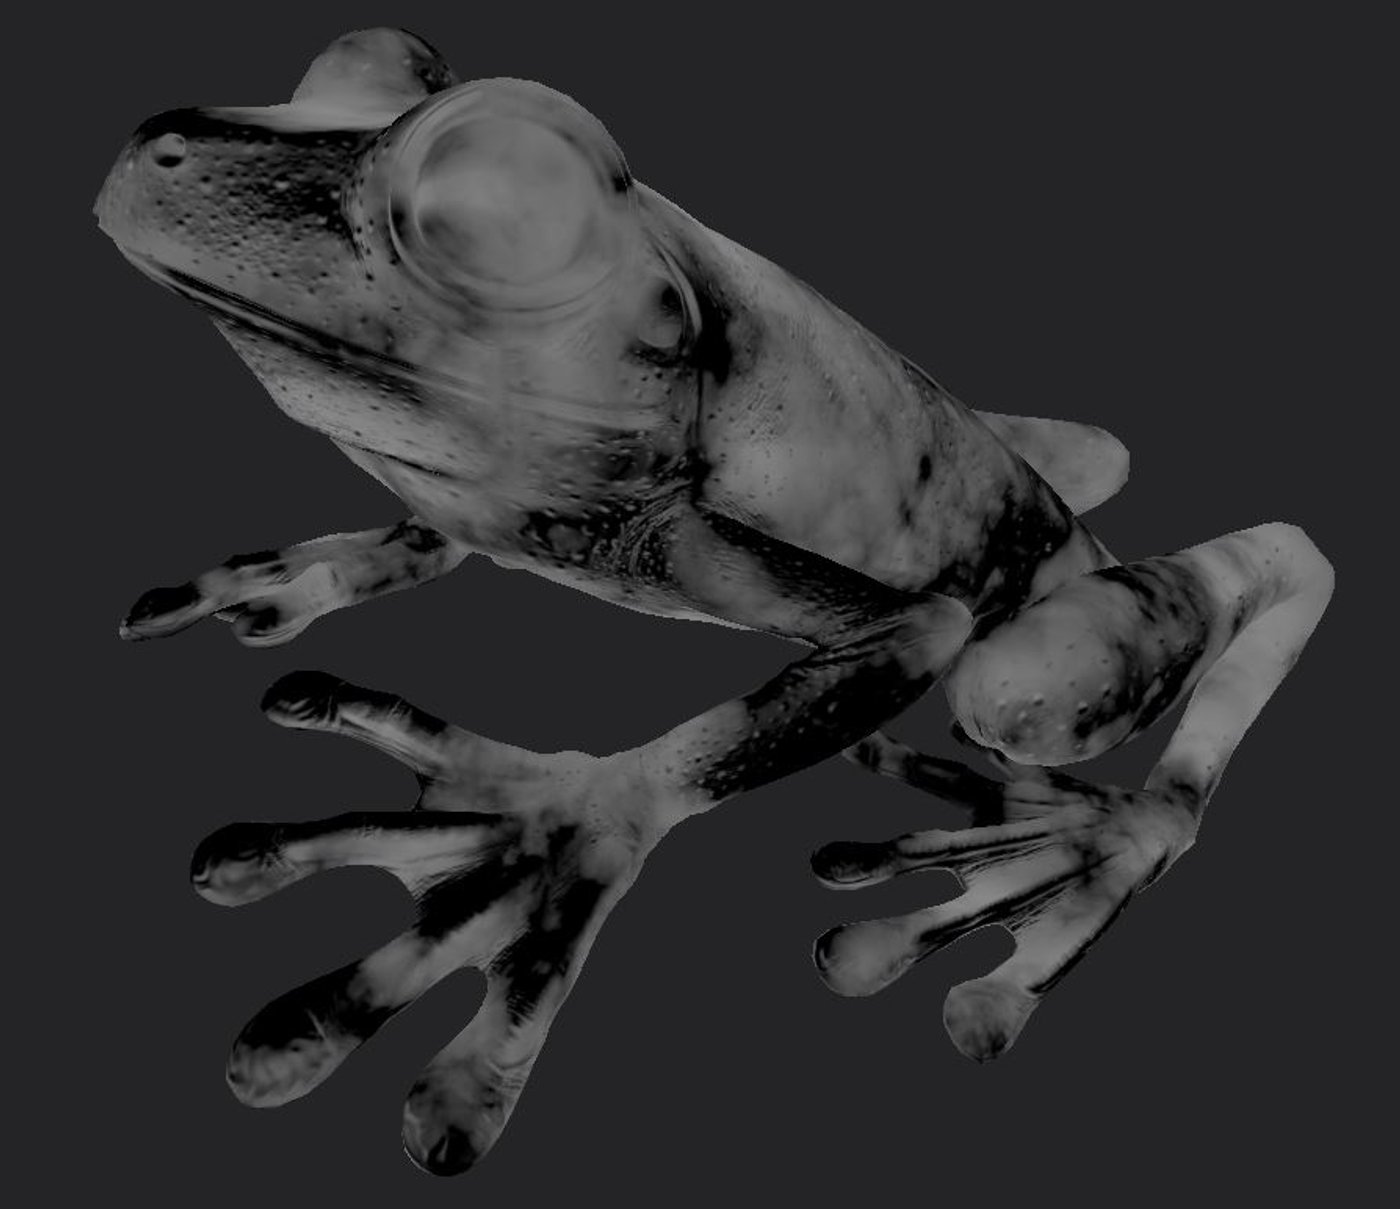


Basic rigging of the Frog. For the final posing I had to do a simple skeleton and skinning for the frog. I have done the rigging only for the frog, because the beetle is sitting on a branch, so it was not necessary and I saved quite a lot of time.
To make the frog looking good was a huge challenge for me. I am not into lookdev. I'm not into Lookdev (yet). I love to model and texture things, but Lookdev is difficult for me. I tried my best to make the frog as natural as possible, but I have to gain more knowledge and experience for this kind of work! However I was worth trying it! I gained so many new skills which will be helpful for the next projects especially if they need SSS.

Building the scene was pretty easy. I found the branch and the atlases for the moss at Quixel.com.
I have created some low poly meshes for each moss patch. After that I deformed them randomly to make them not look flat. As next I have done three sets of moss. One with brighter, with darker and with normal green color, to create more variety. I only used the color correct node in the Hypershade for changing the color. To safe render time I was loading the moss patches as an instancer in my scene, to have not too much geometry to load. I also created three MASH systems for each set of moss and scattered them on the branch. For scattering I painted three maps for each set of moss, to tell the MASH system where I want moss and how much I want. Additionally I used the frustum filtering inside the visibility node, to have the moss only visible in my film gate.
Last but not least the sorrel was provided by Cedric Oberhagemann. I have only done a new shader for it.
I added my two creatures, some lights, cameras and I was ready to start rendering.
After rendering I had to do the post production with Natron, a open source compositing software. I have done some color and lighting corrections. For the background I recorded a video of some bushes, and animated them in Natron. Unfortunately I couldn't use Nuke X for compositing, to use the crypto AOV´s neither the AOV´s for recreating the scene inside the 3D space.


For this Project I mainly used Autodesk Maya but this was obviously not the only software. I also worked with Zbrush for sculpting some details. I created the textures with Mari combined Substance 3D Painter. Arnold renderer for the shading, lighting and rendering of this scene. Besides that I used Nuke, Affinity Photo and DaVinci Resolve for the post production. I used PureRef for keeping my references organized.
Also in this case I taught myself new techniques for modeling, sculpting and texturing.
But in every project I learn more about time management and how to handle the pressure when the time limit is getting more tight.
At the end I have to say, that the research for this project was one of the most important parts because there were a lot of little things I had to take care of.
Especially for the anatomy of this two animals.
I'm using an app on my phone to plan every project. I was putting myself time limits for every step like modeling, UV´s, texturing etc. This is always a huge help to not forget something and like this I knew when I was working too slow.
Also for the upcoming projects it is quite useful because I know like this, where I need more or less time.


Comments (2)