
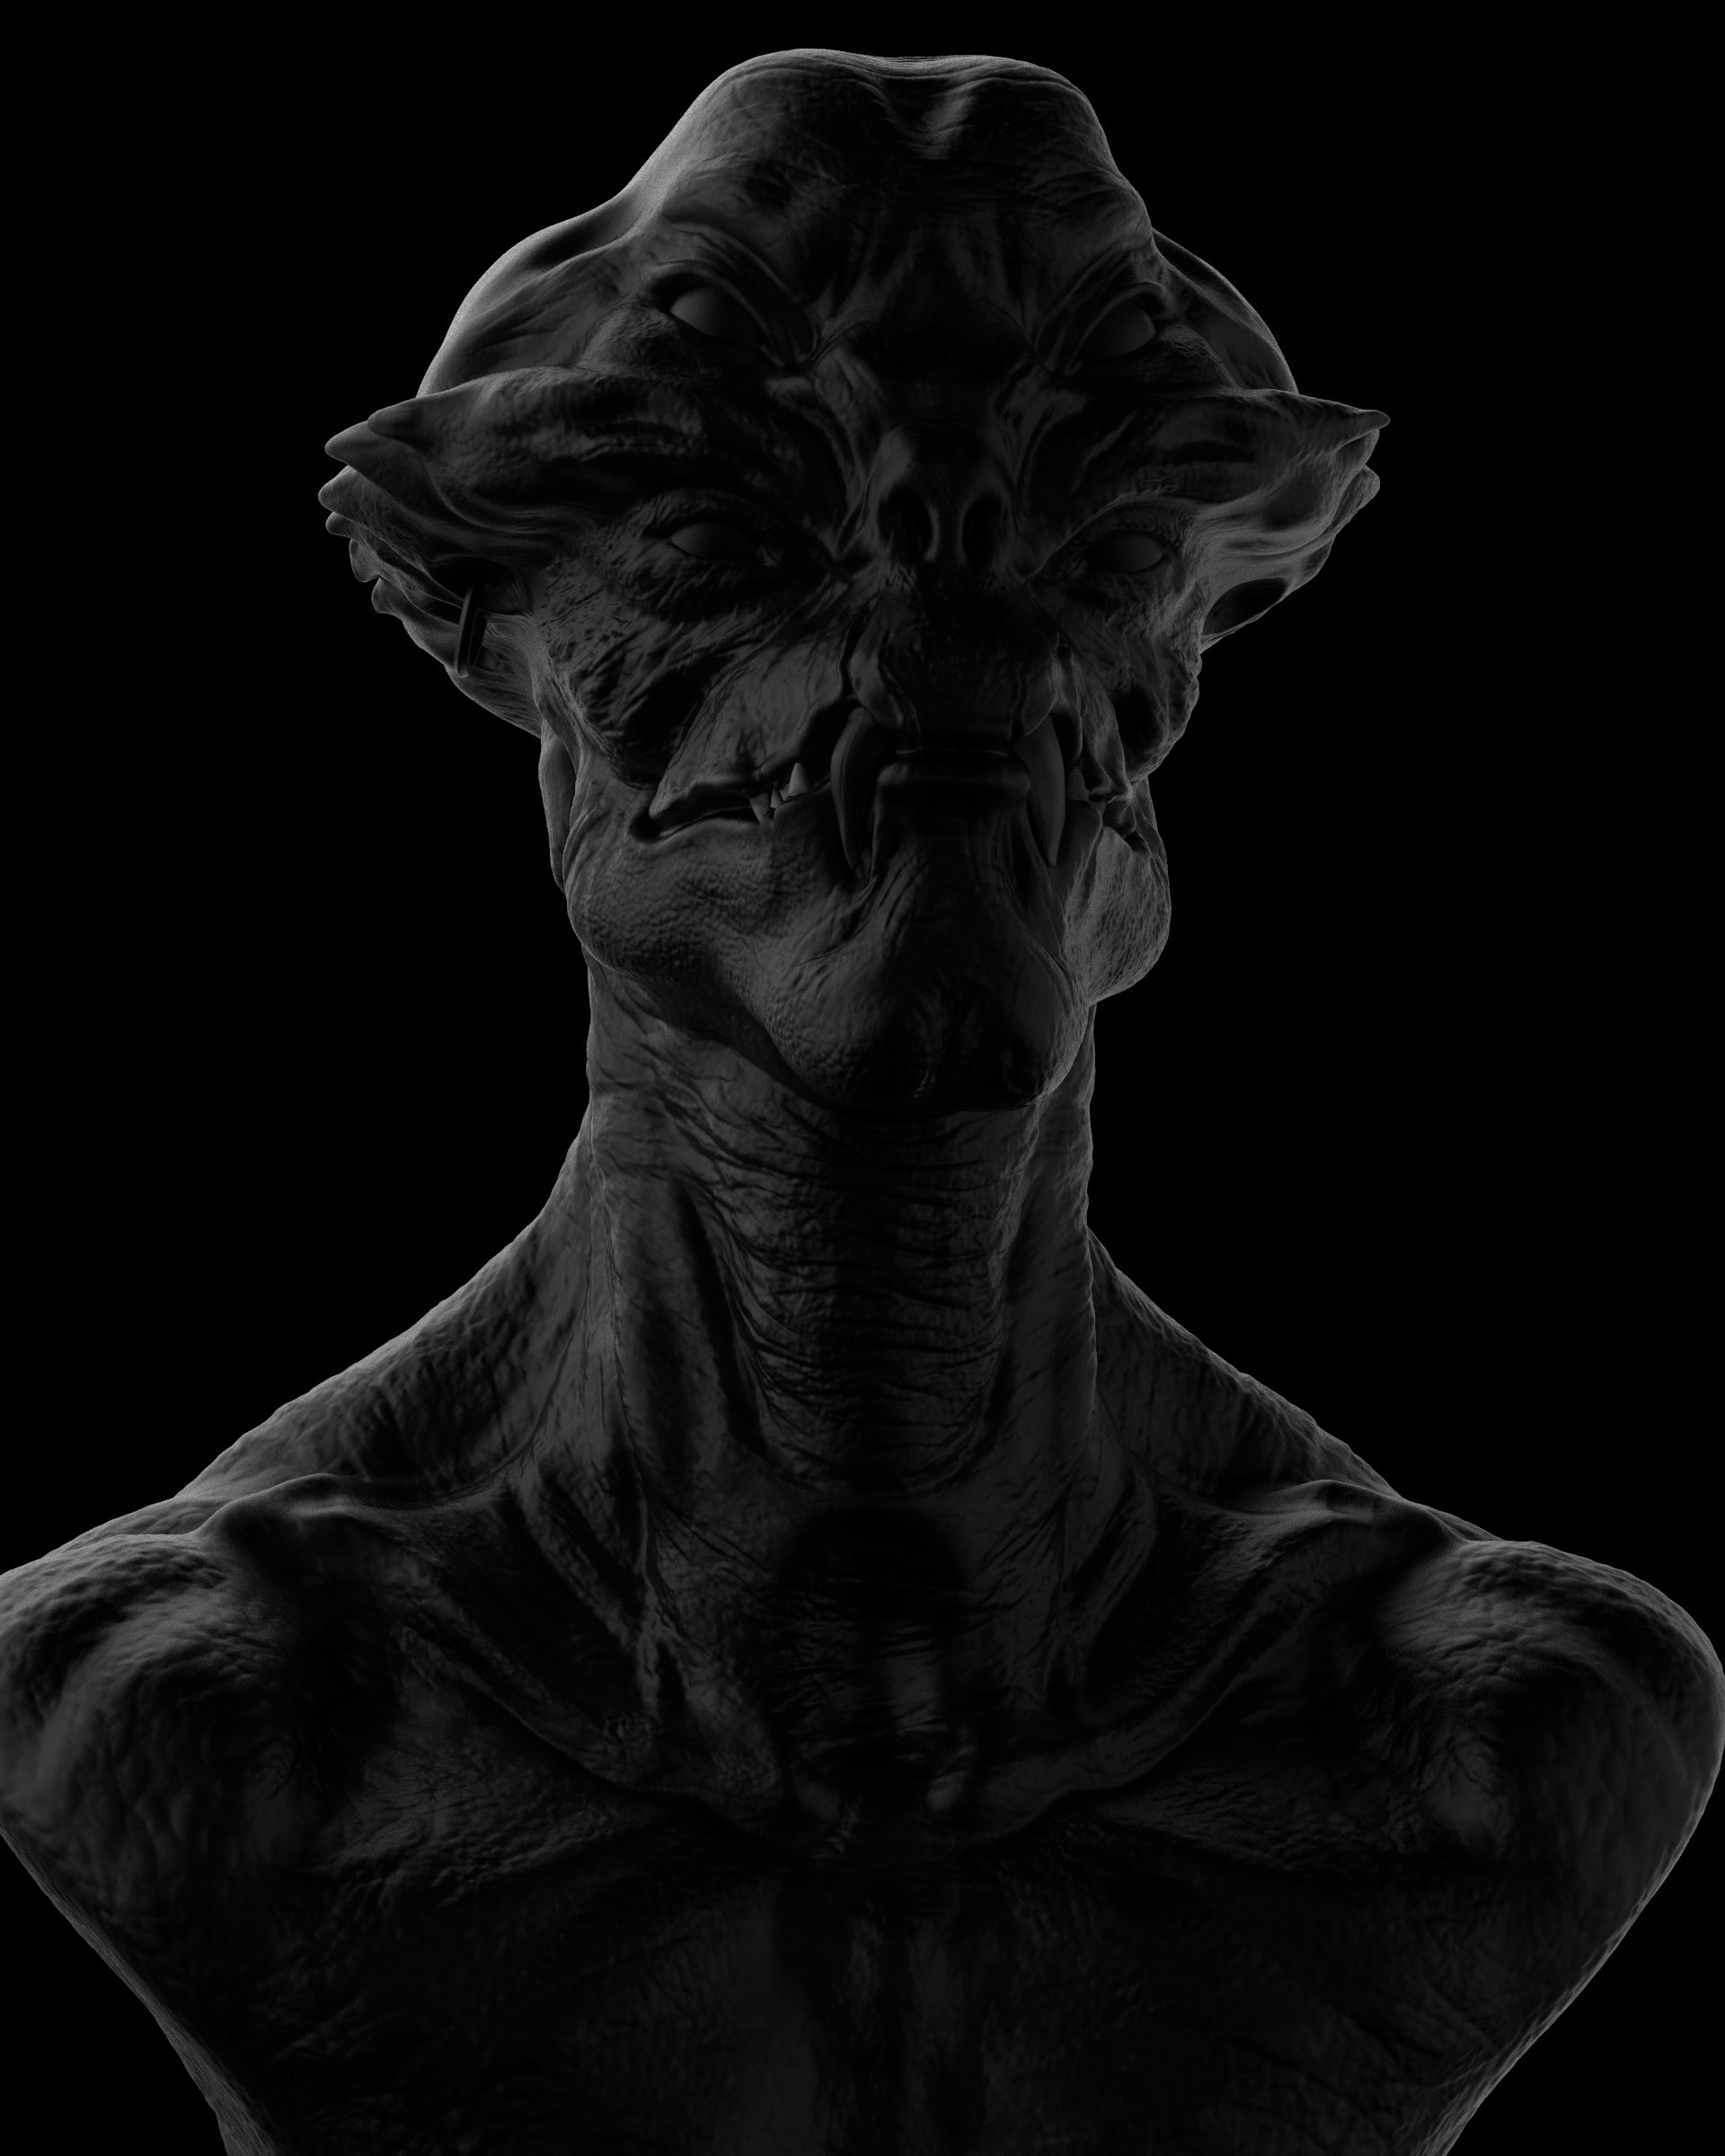
3 Days Sculpt and Render
In only 3 Days I sculpted, detailed, rendered and composed this alien model. In this post, I will show you how I did it and I will share some little tricks I've found along the way.
3 Days Sculpt and Render
Alien 3 Days Sculpt - ZBrush Dynamesh and Polypaint + KeyShot

Process:


Firstly, we start with primitive shapes that will be placed and slightly modified to get the shape that we are looking for. In th is step, polycount doesn't really matter, as we will use Dynamesh which allows us to have the same polygon density through the mesh.
In the beggining, we won't merge all the primitives, as we are just trying to find the silhouette and primary shapes (the big forms that make us recognize our character).

Next, we want to merge all the primitives with Dynamesh and start working the unions between the pieces, fixing the primary shapes until we get a result that we want. What is very important at this stage is to find the anatomy points and bony landmarks, as well as joining the shapes of the primitives with ClayBuildUp to make it all look like an unified piece.
We are also adding eyes here, so we get a reference of where they are and we can stablish a viewpoint for us. Normally, adding eyes pretty early can give a sense of wrap to your model, as they are a point of interest.

After this, is time to find a first row of details. This is still sculpting and not detailing, as these are pretty big yet, and they can alter the bigger shapes in some way.
Focus on where can fat acumulate and how skin is going to fold. If this step is not right, we won't be able to fix it with smaller detail. High Density Detail won't change the fact that the primary shapes are wrong.

Now it is only a matter of using alphas and smaller brushes to find where we want our detail to land. We don't want to mess it now, as not respecting the flow or direction of the detail, being too harsh or too soft with our brushes will ruin all the process.
It is a matter of patience and consistency. This is where you want to put some music or podcasts on and trust your vision. If something doesn't align with it, you can use a Morph Target to go back to where you were without destroying much.
I personally don't like using ZBrush layers. Not because it is buggy, just because the way it works seems like it is buggy, but it is just its design. They also make my machine quite sloppy, so I won't be using any of those.
You don't want to add noise until you are done adding your wrinkles. Otherwise, that detail can be damaged.
A small trick is to think were the skin is hanging, and what points are holding it. Then, think of the center of mass and jank it downwards. If your model has weight, it will look more realistic.
Also, work with symmetry, and chose your hero details to break it. When you are detailing the center of symettry, turn it off. You will get a fake sense of asymmetry.

For the texturing I can't say much. Pick the SkinShader Material and start with a red, yellow and blue paint. Red will be used in all the model. On top, we will use blue for the parts were bones have holes (eyes, mouth, somewhat the nose, part of the neck) and yellow for the bony landmarks (forehead, collarbone, C7, nose bridge).
Then, use a dotted alpha and paint over your model with the base colour that you want your skin. The trick is to use variety of colours, skin has a thousand tones and we need to use them all.
You can also use masking options to mask the hollow parts of the details you created, and paint them darker to bring those details out.
Remember you can also paint with materials on ZBrush.


For render, I used the ZBrush to KeyShot Bridge. There, I used an HDRI with pins to create the lighting that i wanted, and I made 6 different passes, all those being: Beauty, Matte, Gloss, AO, Depth and Clown, for later composing in Photoshop.


Compositing consisted on layering the passes and giving them each one a mask, so I could chose what areas I wanted more glossy or more matte, with just a brush stroke. Areas like nose, lips and forehead I wanted glossy, because I wanted it to feel a little amphibian. Areas in touch or close to each other, I used the AO map. Thanks to the clown pass, I could mask different eareas easily.
Then I added some lense blur and a little bit of cromatic aberration. I masked the subject and rendered it with a background consisting on different brush strokes and some blurr to fake depth of field.
I also used a layer with a filter of emboss in Overlay to bring all the details to a crisp.


Comments (0)
This project doesn't have any comments yet.