
Dream Hallway Enviornment (Unity HDRP Build)
This project took 2 months, the idea I was going for was a dream-like level that could appear in a flashback section of a game, I thought going for this type of level will give me a great challenge and practice in prepping/creating and importing game assets into a Game Engine. I first started to create various concepts
0
1139
0
Round of applause for our sponsors
Dream Hallway Enviornment (Unity HDRP Build)
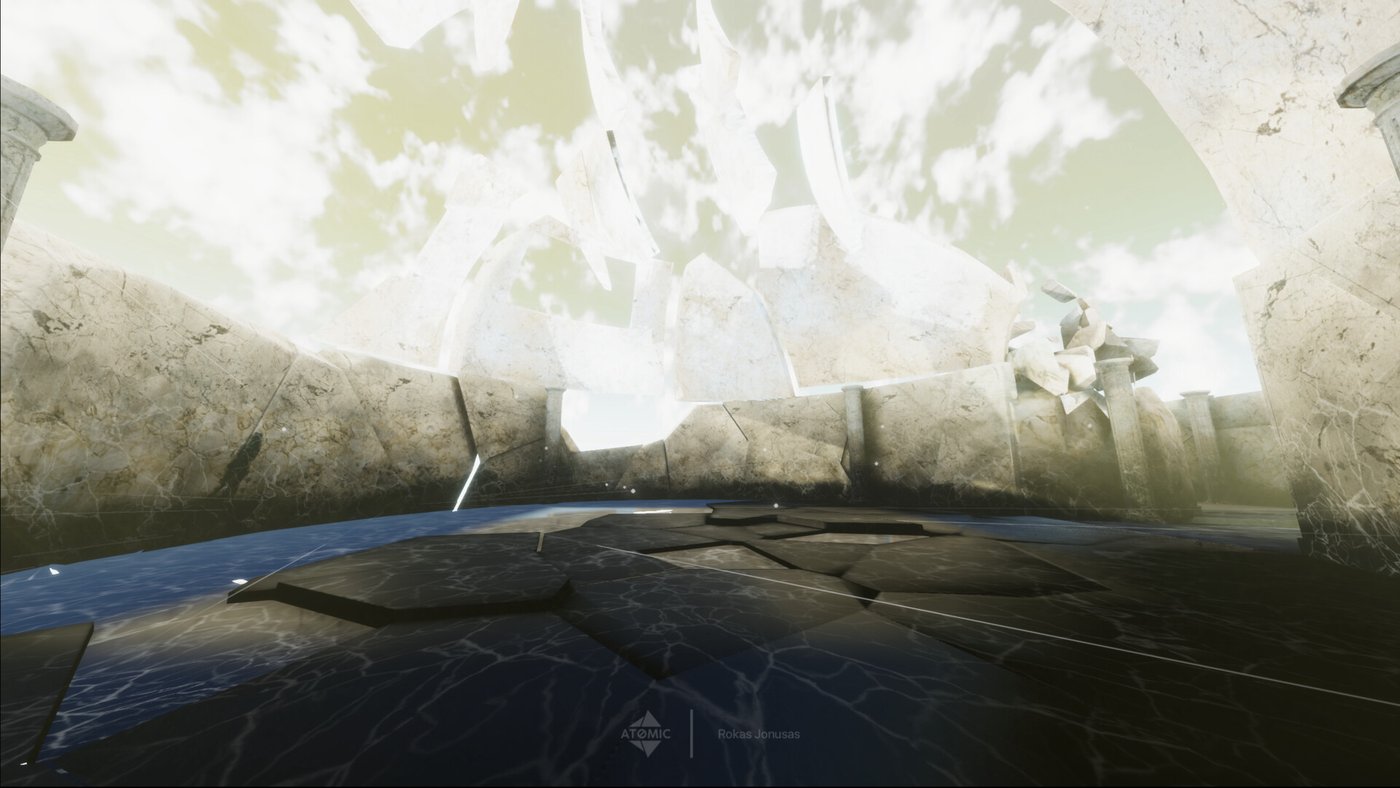
Dream Hallway


I decided to create a dreamscape style hallway that will in the end be imported into unity, I decided to take this on as a challenge to create a hallway all the way from the beginning concept stages to the final in engine renders, this small blog will guide you through my working process.
Concept Stage


For the concept stage of the project, I decided to do them using 3D as a base and then paint over them in Photoshop, as I am already proficient in Maya, I was able to quickly model rough ideas and then render them out using V-Ray, the benefits of using 3D as a base is that you can quickly play around with multiple lighting settings and not have to worry too much about perspective, due to time constraints and how abstract the idea was. This was the quickest and easiest method for me to take on.
Concept Stage Pt. 2

Once I completed a sufficient amount of concepts that solidified the Art-Style and look I was going for, at the same time I was doing a floor plan that will be used when the proper 3d models are created in unity
Once I finished this it helped me visualize the entire scene and if any more assets needed to be created.
Modeling Stage


I decided to keep the modeling process as non-destructive as possible so from the very start, I modeled each modular hallway piece as if it was a solid piece, in case I ever need to go back because after this stage I will then use a handy Maya plugin called Pulldownit which can procedurally create believable shatter and breaking effects. It is meant to be primarily used for VFX/CGI purposes but since the scene I was creating to be imported into the game engine wasn't too big, It always can be optimized further down the line.


As mentioned before, using the plugin Pulldownit I was able to quickly iterate different shatter patterns to closely match what I was going for on my concept sketches. During the concept stage I was pirmarily using Maya's own shatter plugin which worked decently, but caused alot of clean up work as a result. In the end I decided to go with this plugin as it created more detailed shatter effects and didn't crash as much also which is a bonus.
Texturing Phase

After the pain-staking process of UV Unwrapping hundreds of individual pieces I then imported the base 3D models into Substance Painter and then, using the concept pieces as reference I tried to keep the 3D textures as close to the concepts as I could and I am happy with the result!
Shaders
After tweaking, I managed to create a custom HDRP/Lit shader that can mimic the breathing effect I had in my Art Bible.

The Final Output


Comments (0)
This project doesn't have any comments yet.