
Female Viking and WASP Inspired Mecha

These were my graduation projects at 3dsense Media School in Singapore, which I was very pround of.
Female Viking and WASP Inspired Mecha
This is two of my projects I made during the visual effects diploma at 3dsense media school.
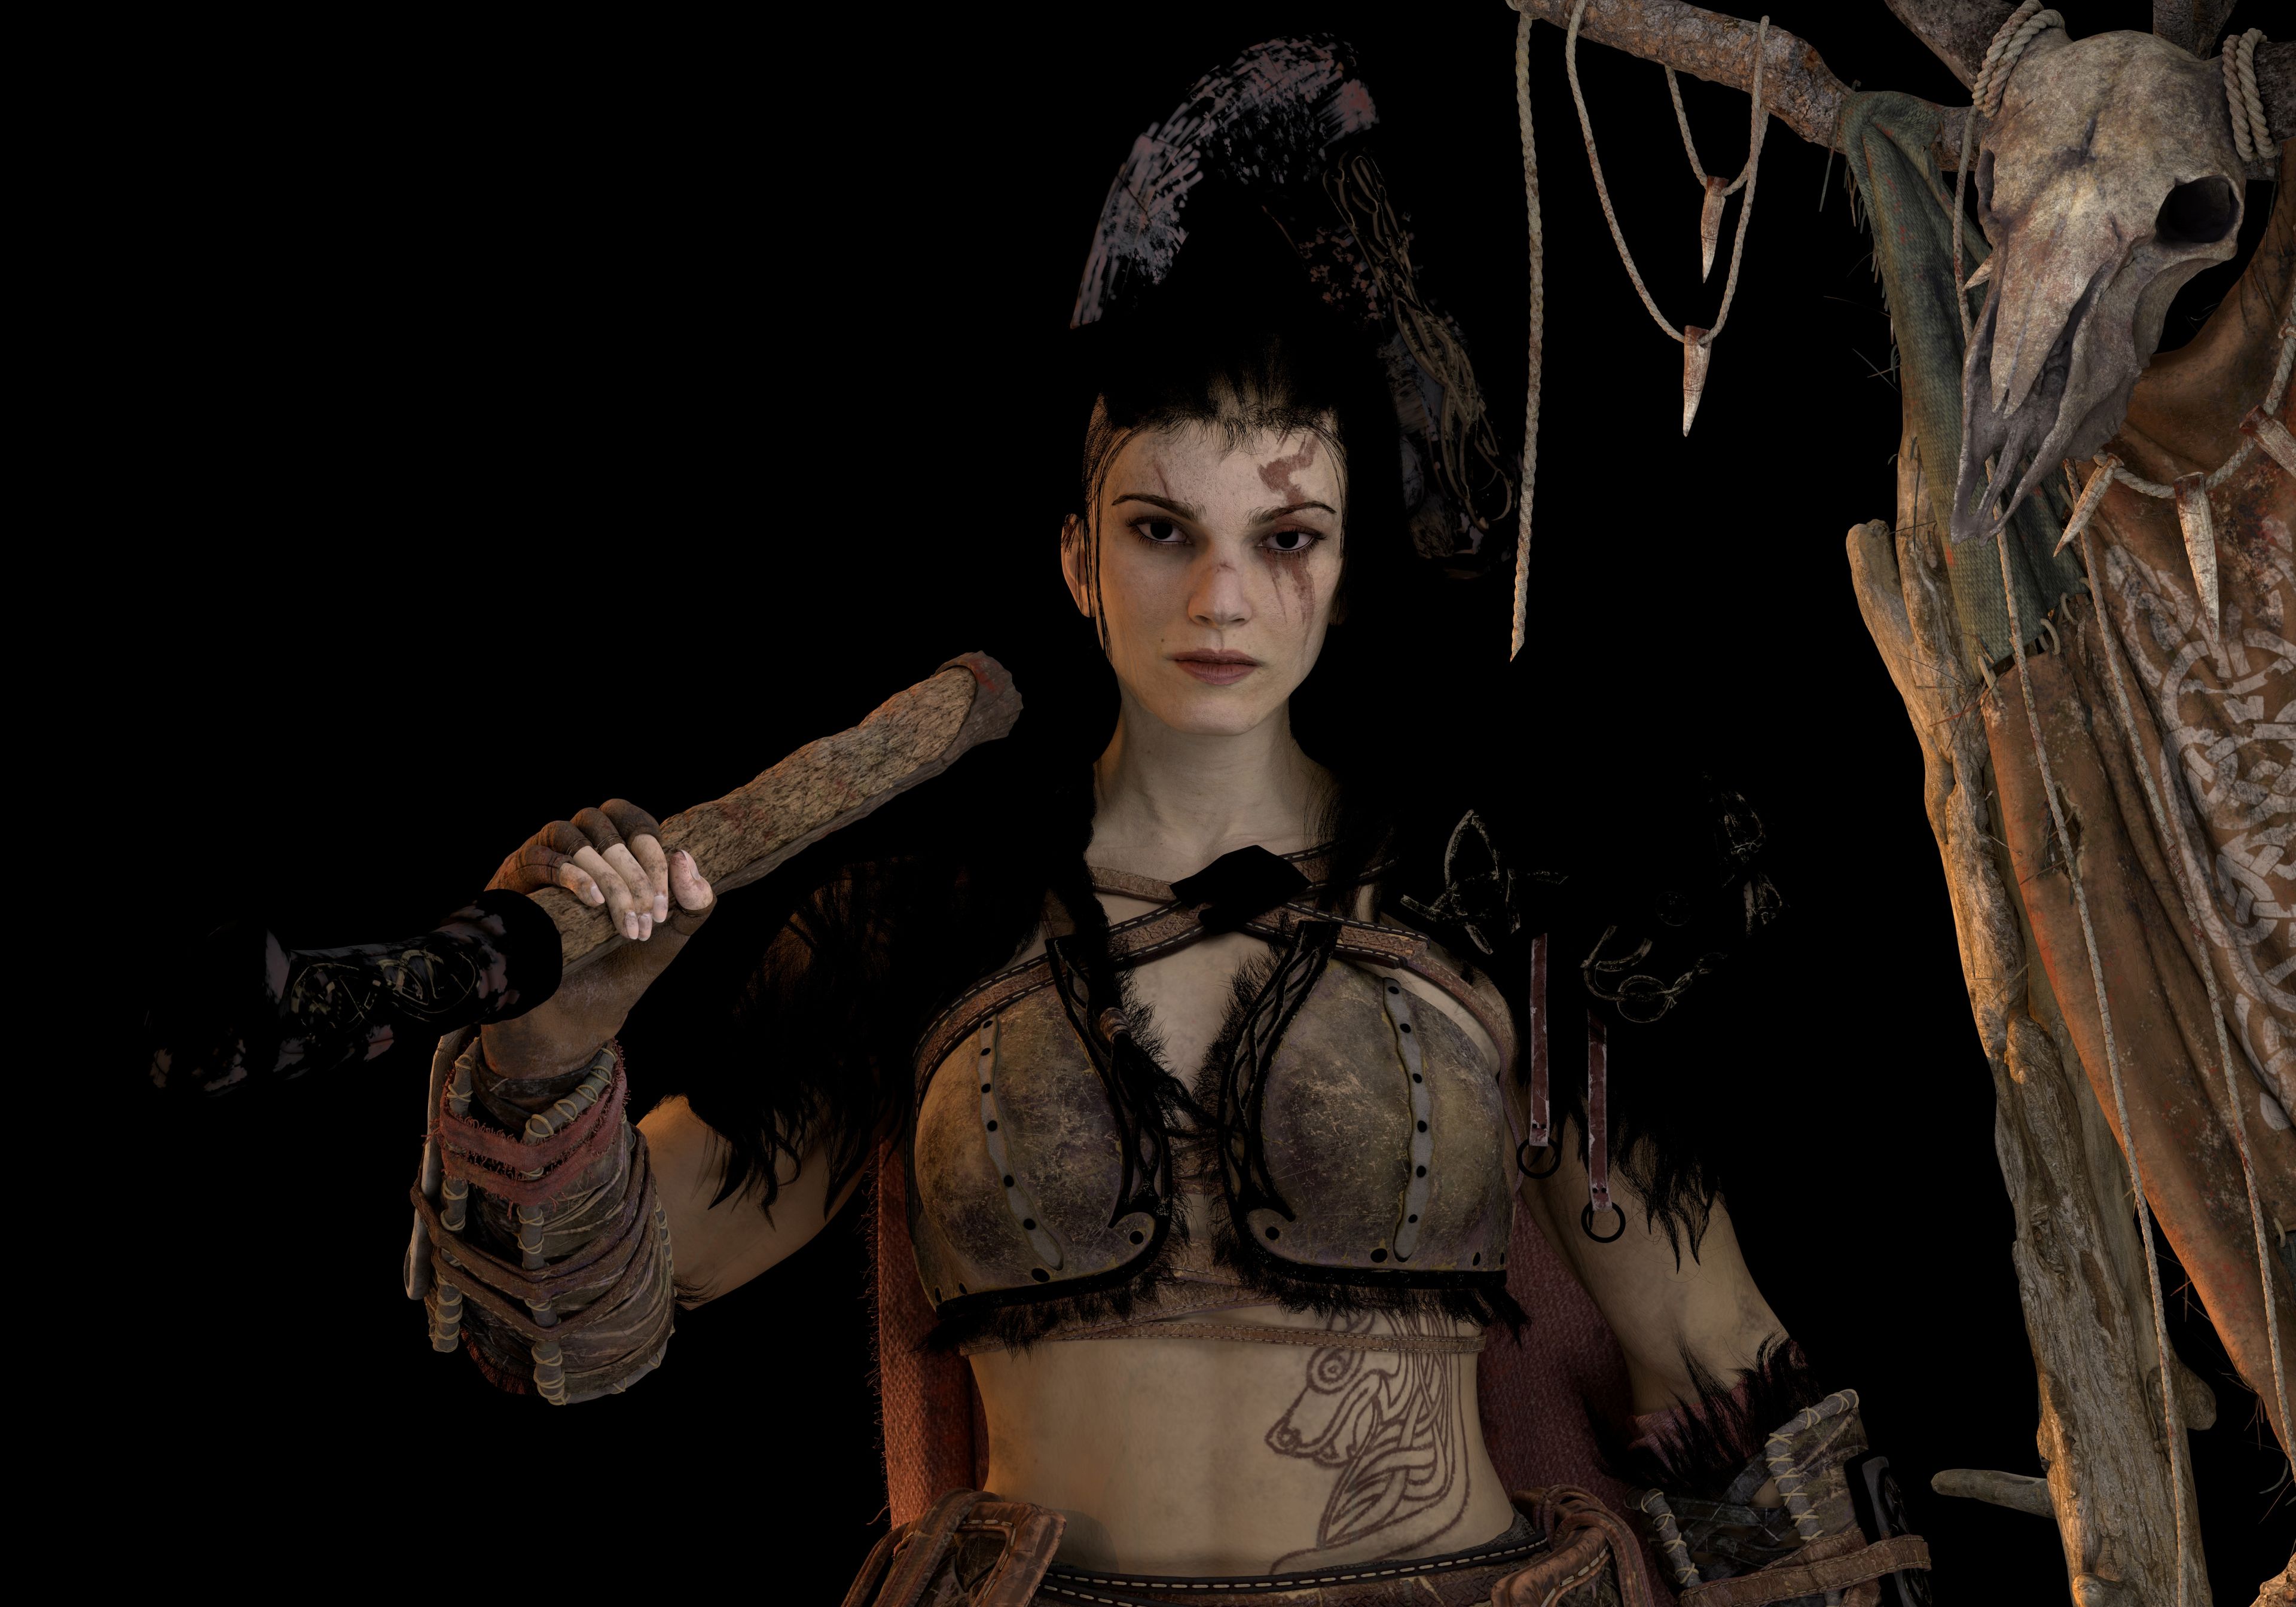
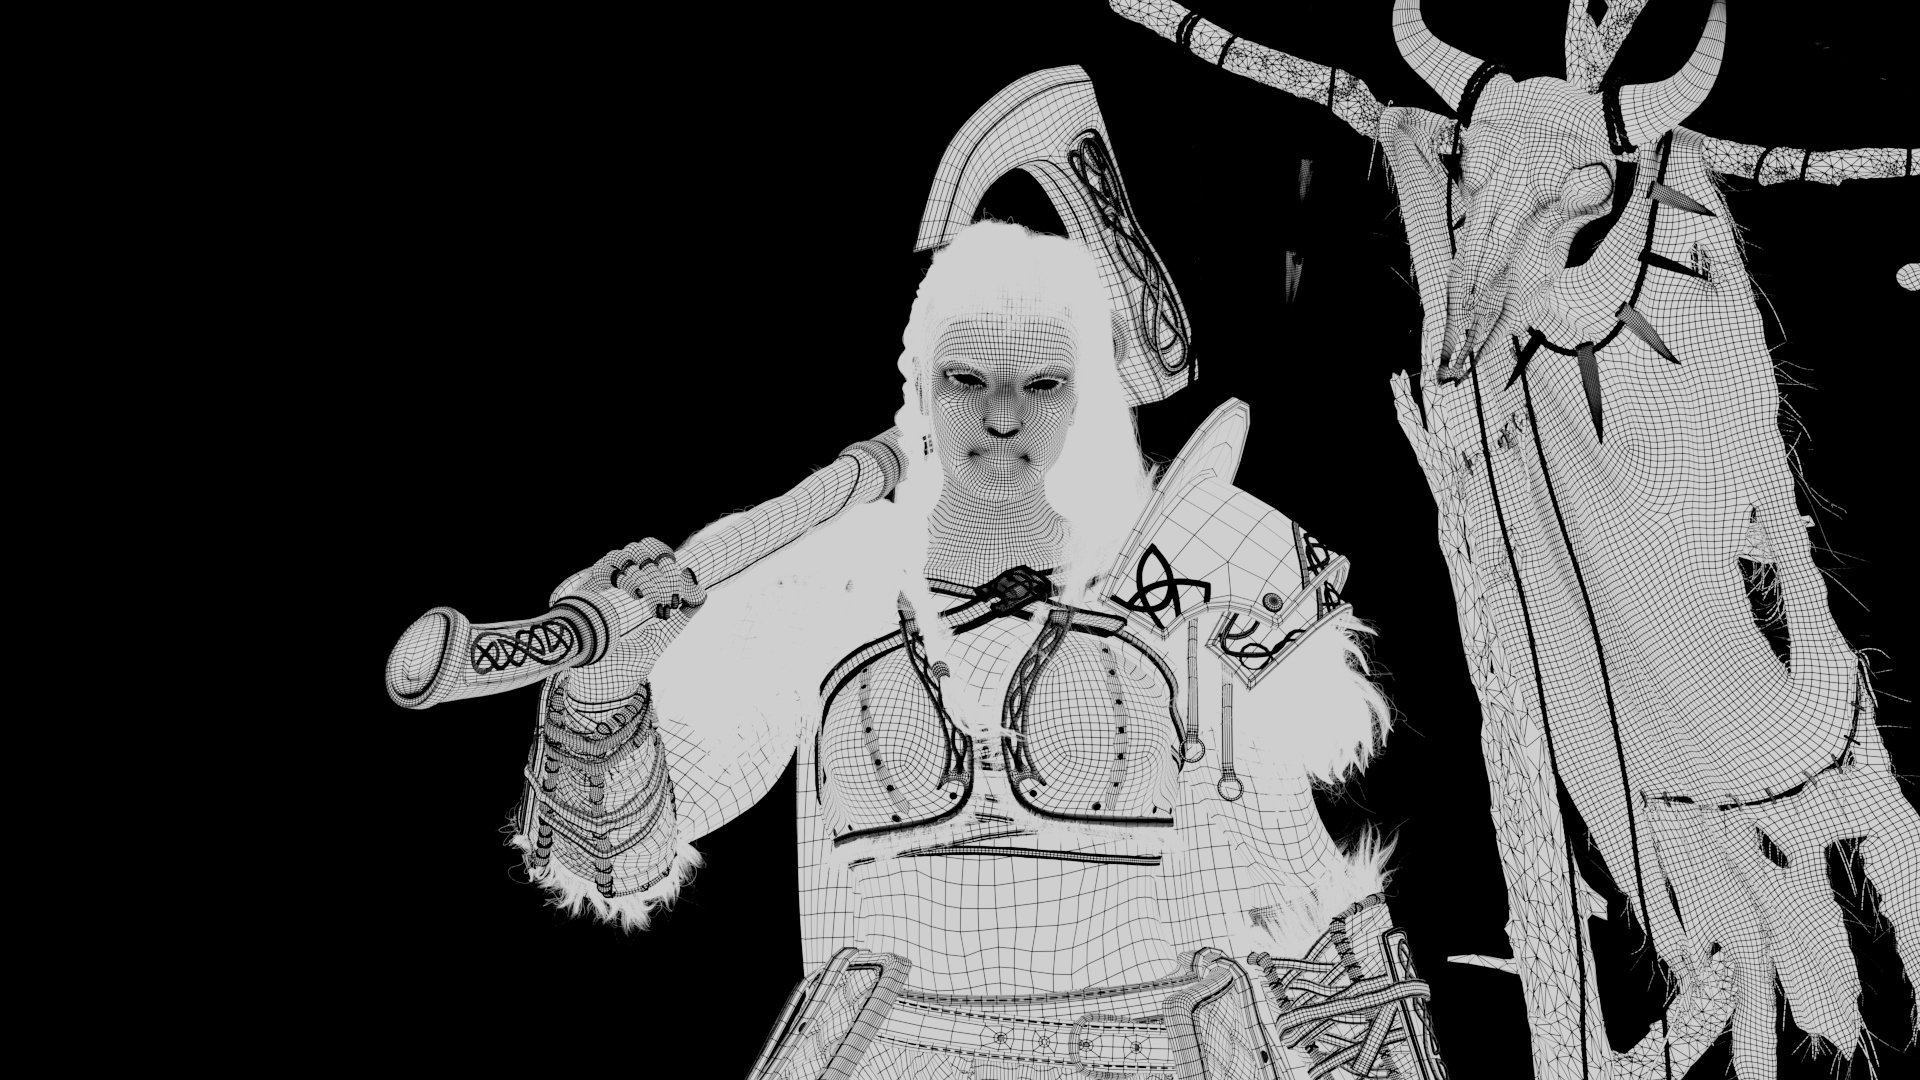
Lookdev Character - Female Viking
I made this female Viking character based on 2D concept art.
Reference: HE XIAOSONG


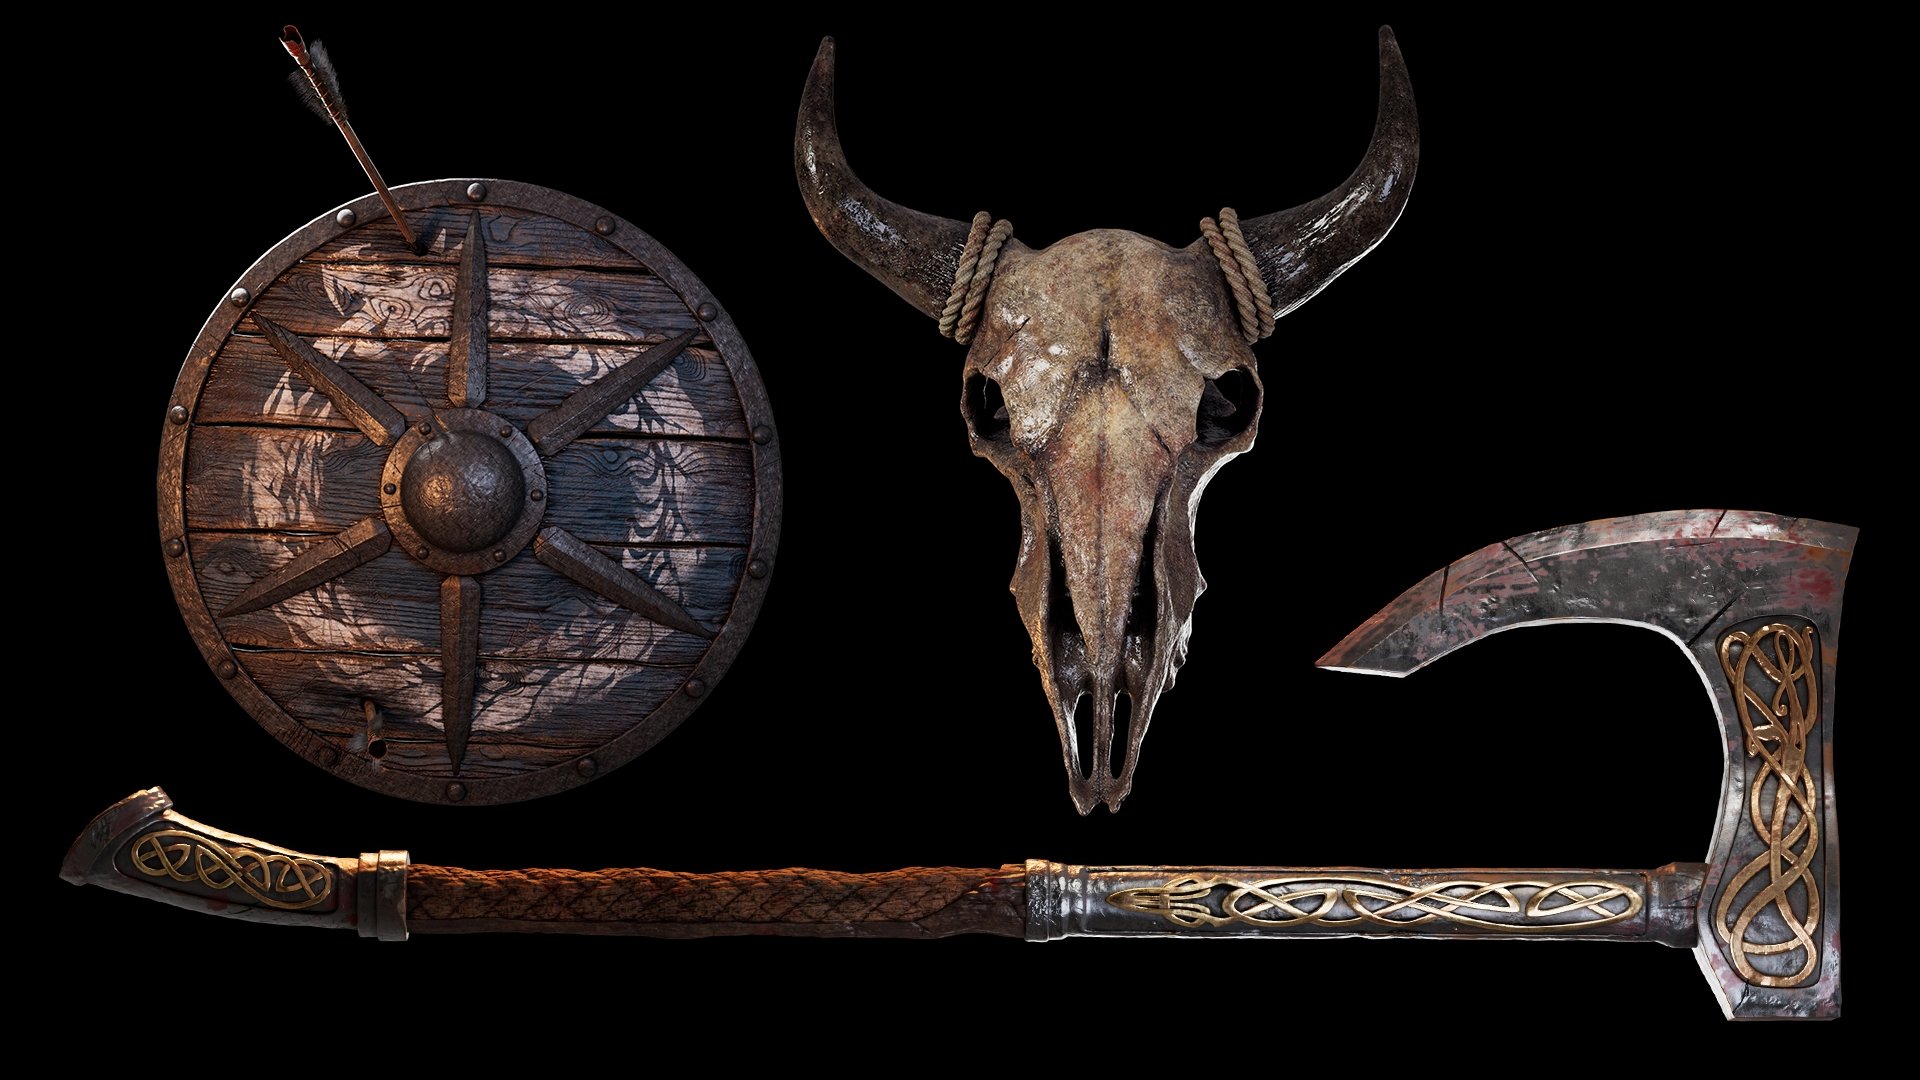


My Reference Board

Sculpting Process
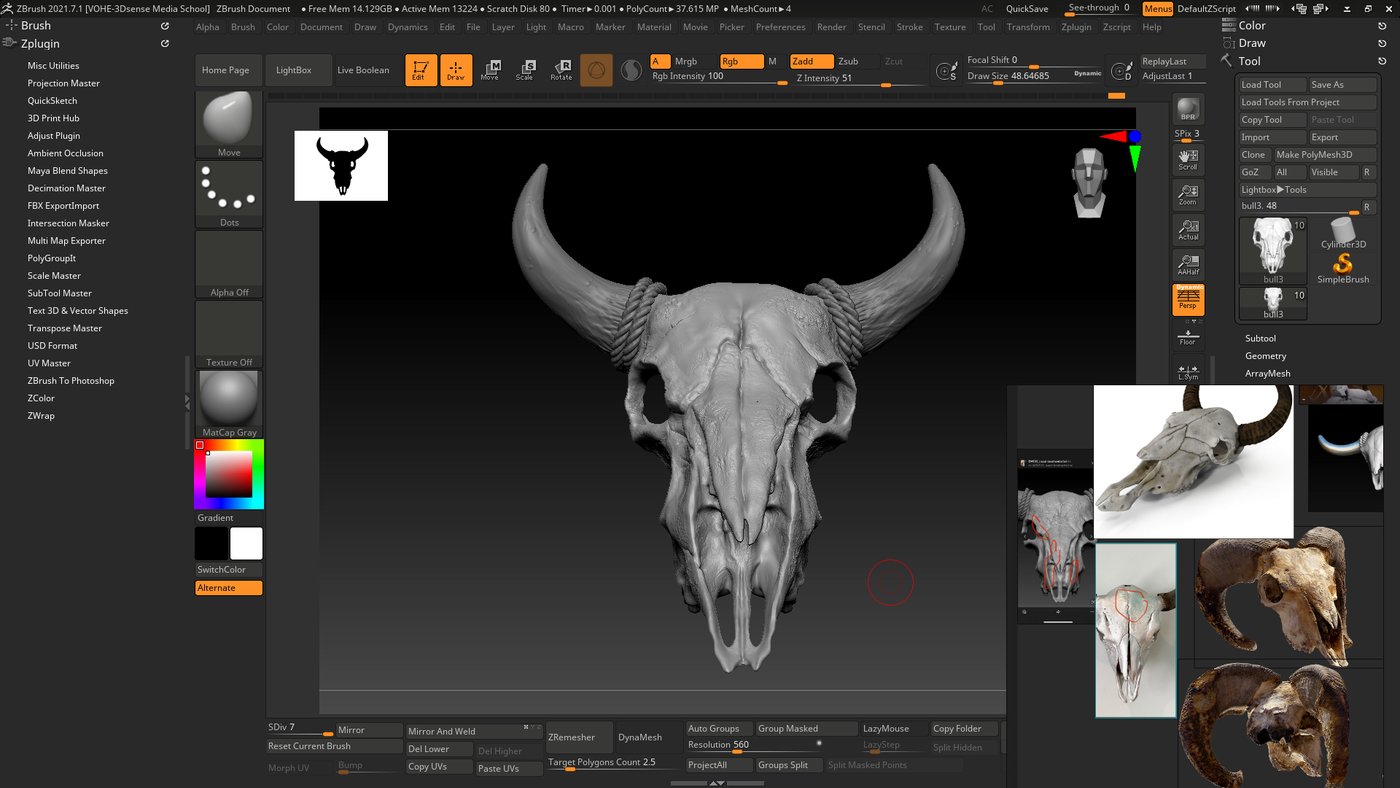
I started from creating characters face by Zbrush. For her face, I used the face of an actor as reference to make her look gorgeous and fierce. I also used Zwarp techniques for adding skin details from 3d scan.

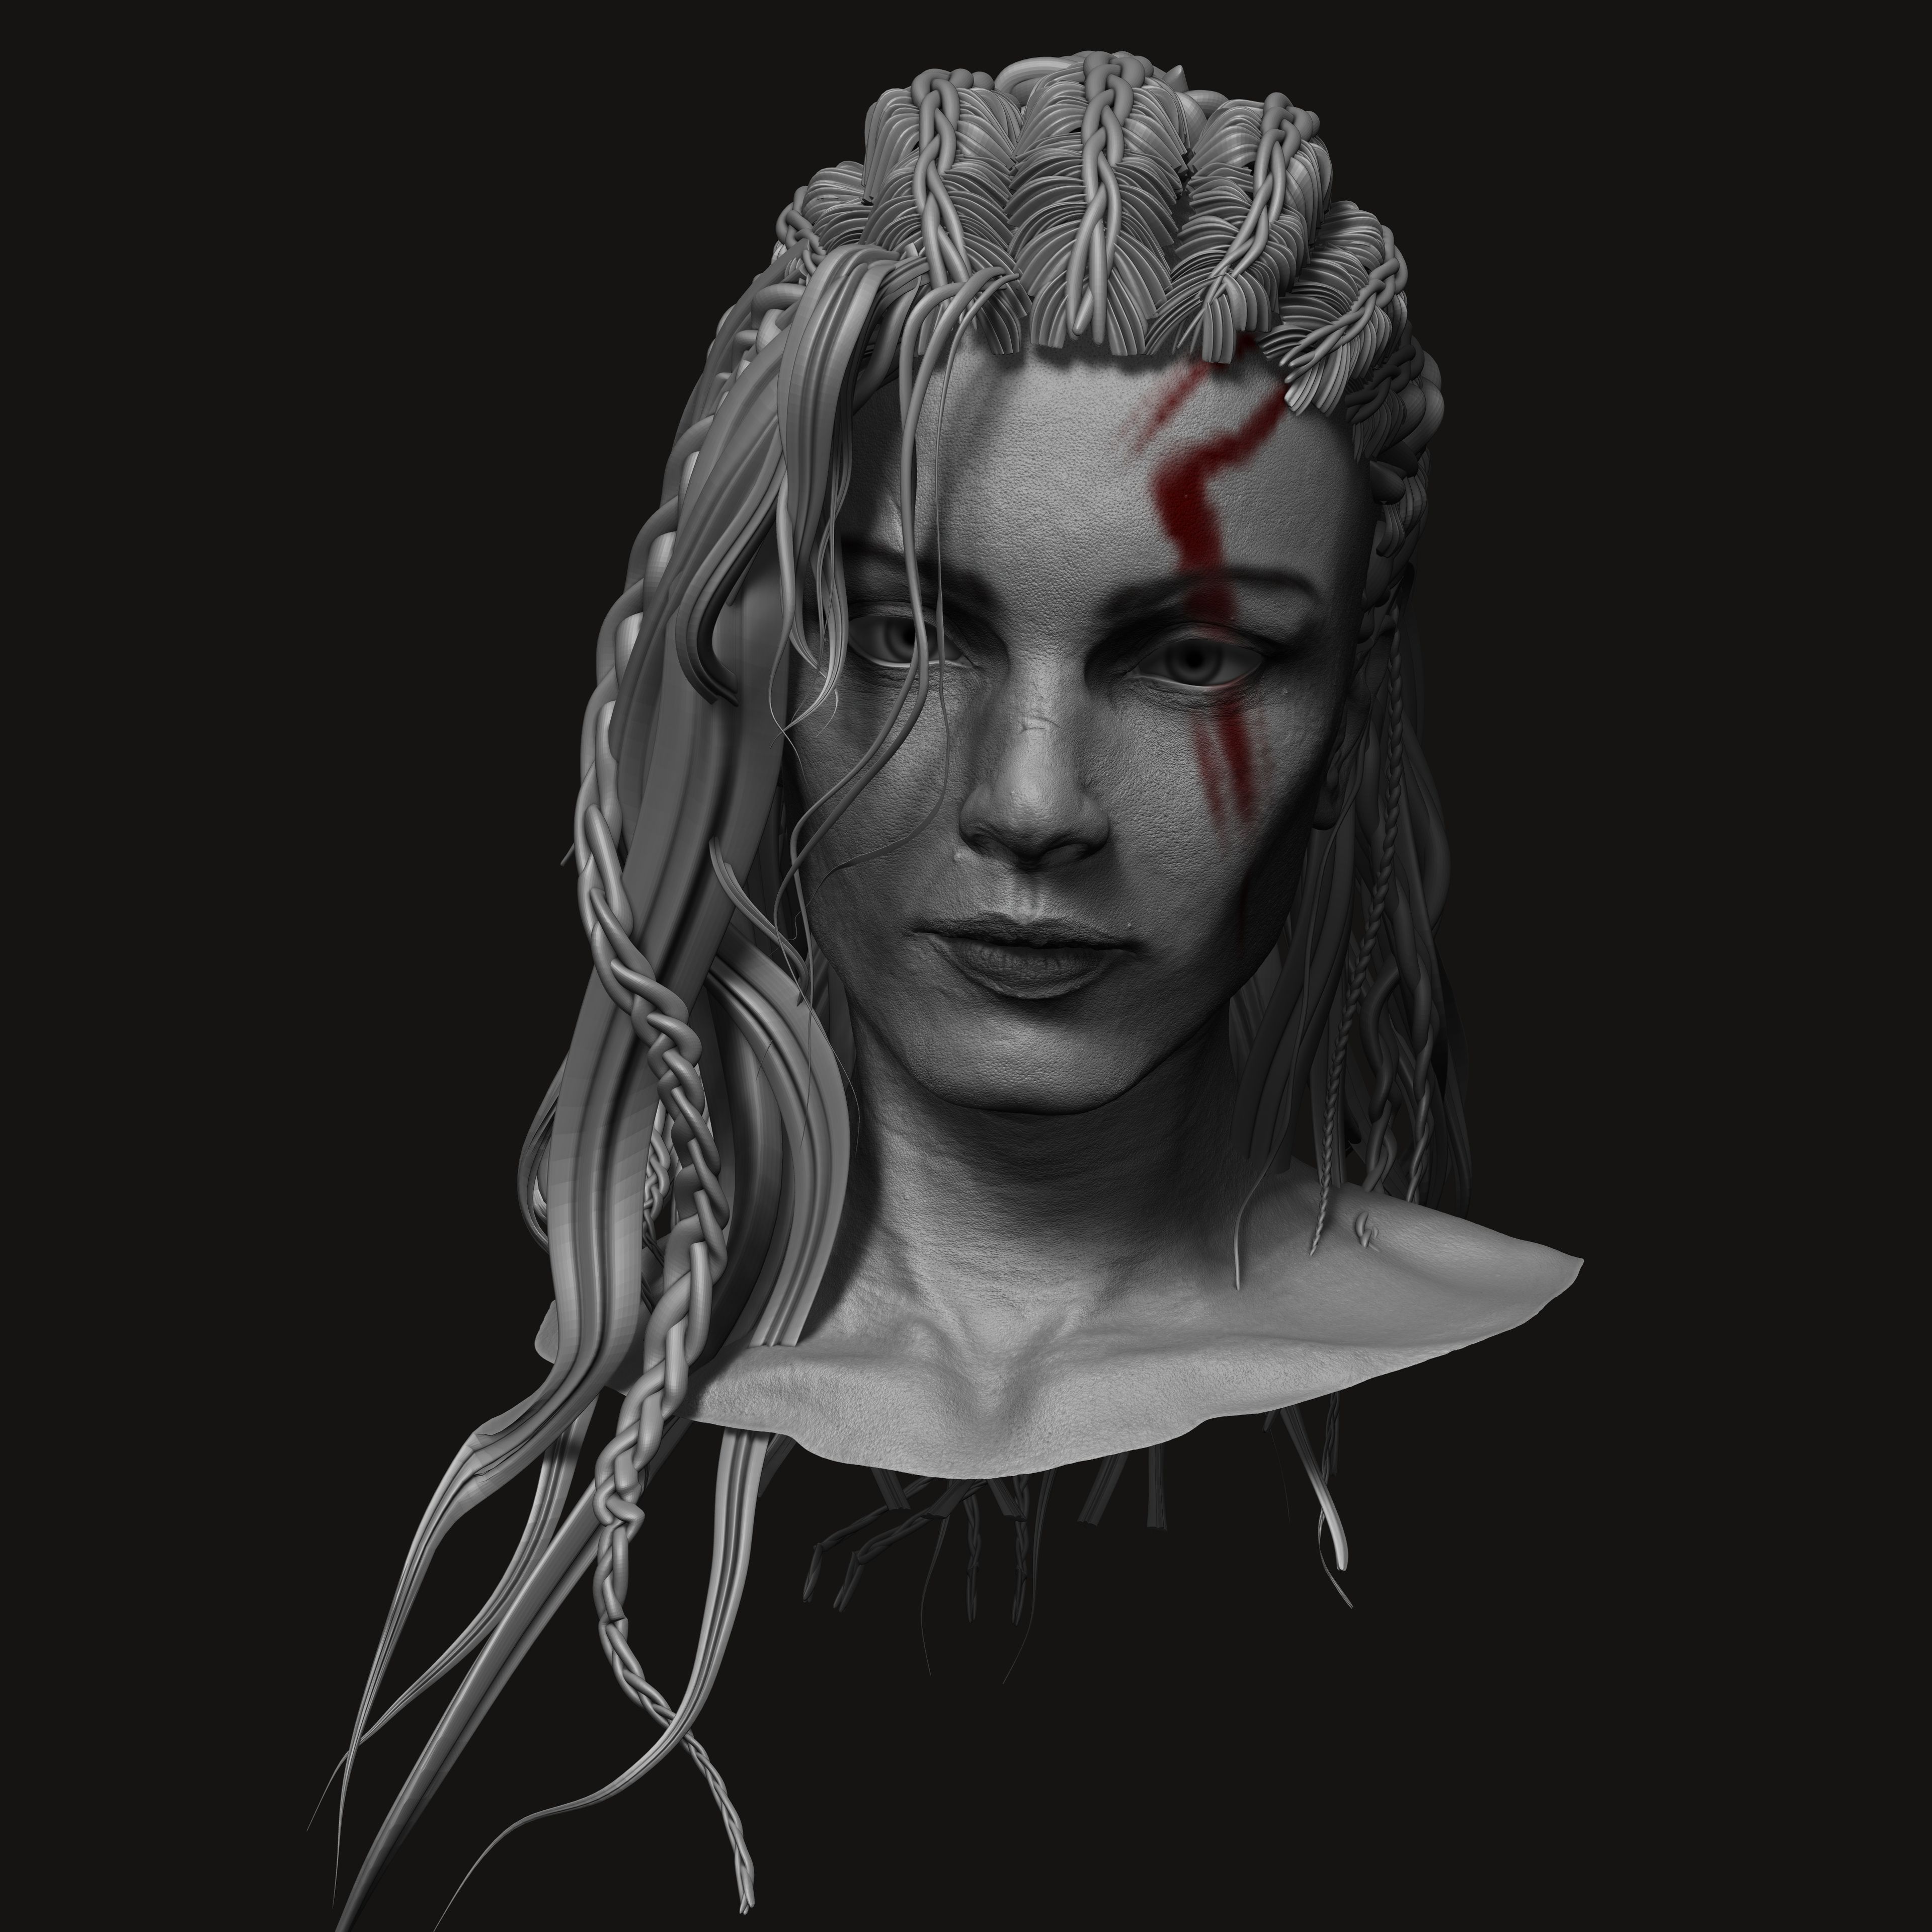


My tip: When I sculpt, I like to add makeup and hair blocking to help me see the expressions of the character and how it looks when it is finished.

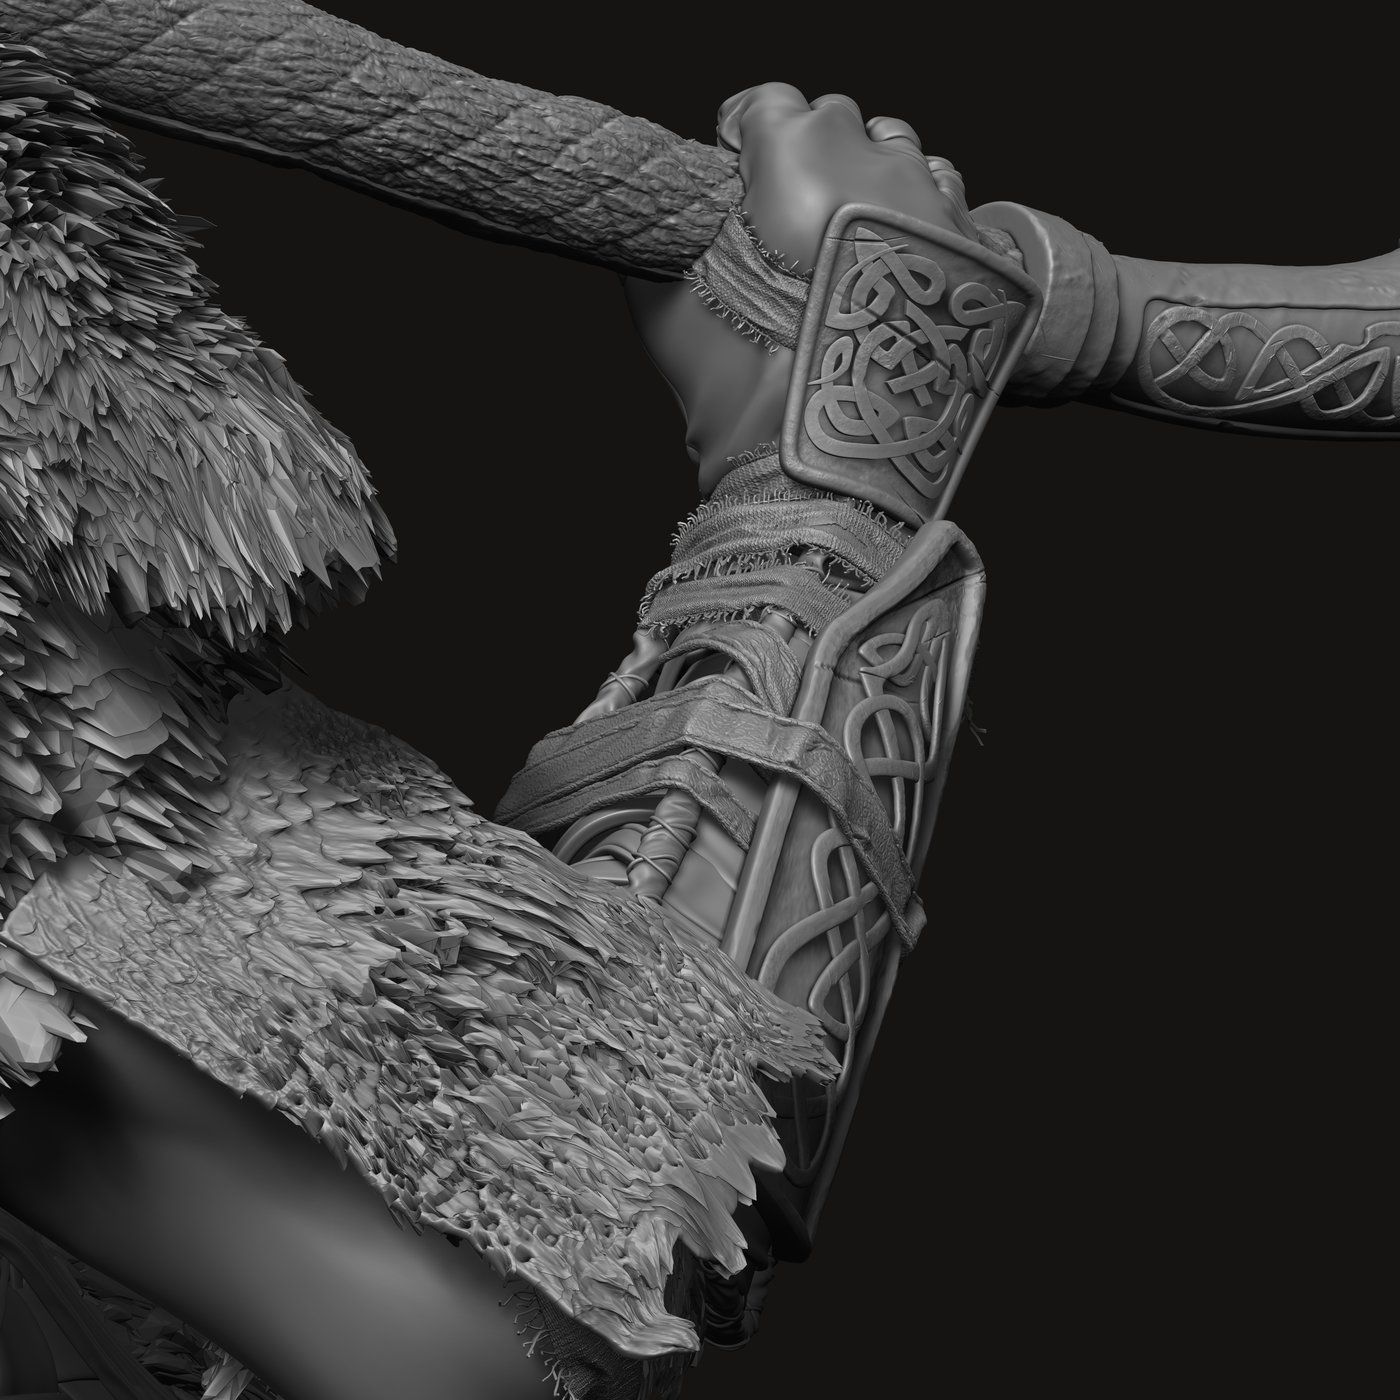


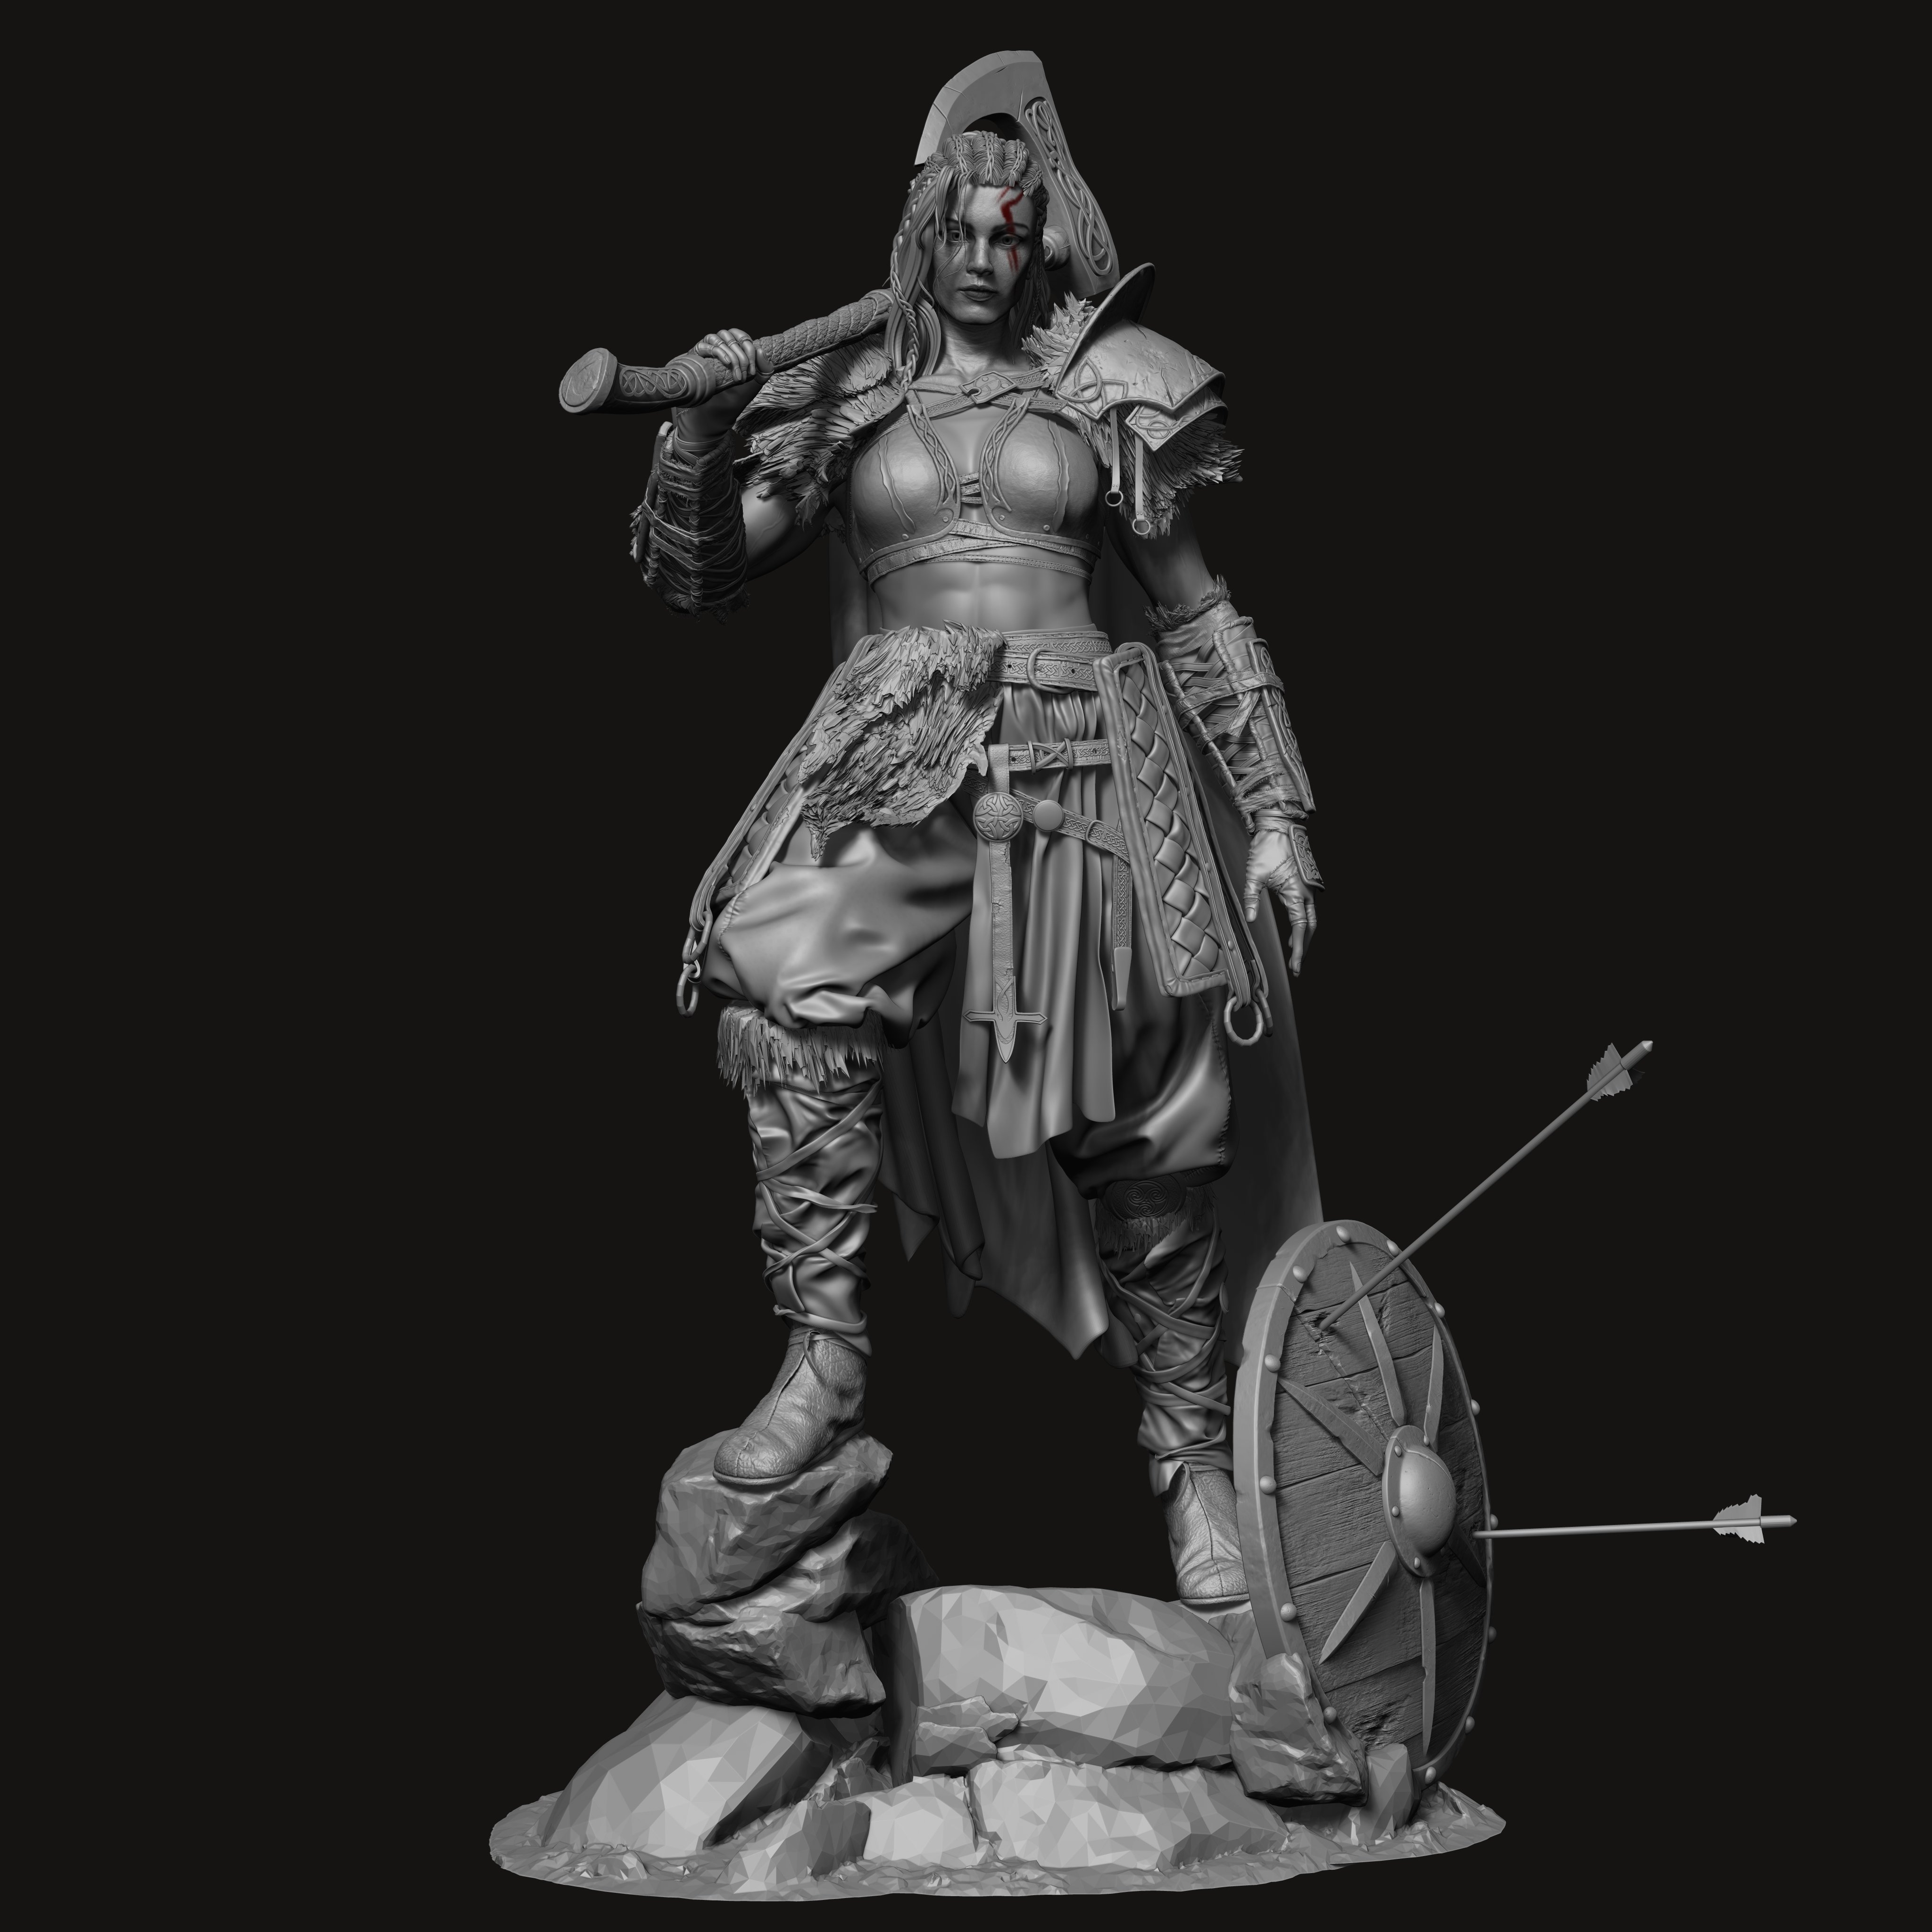
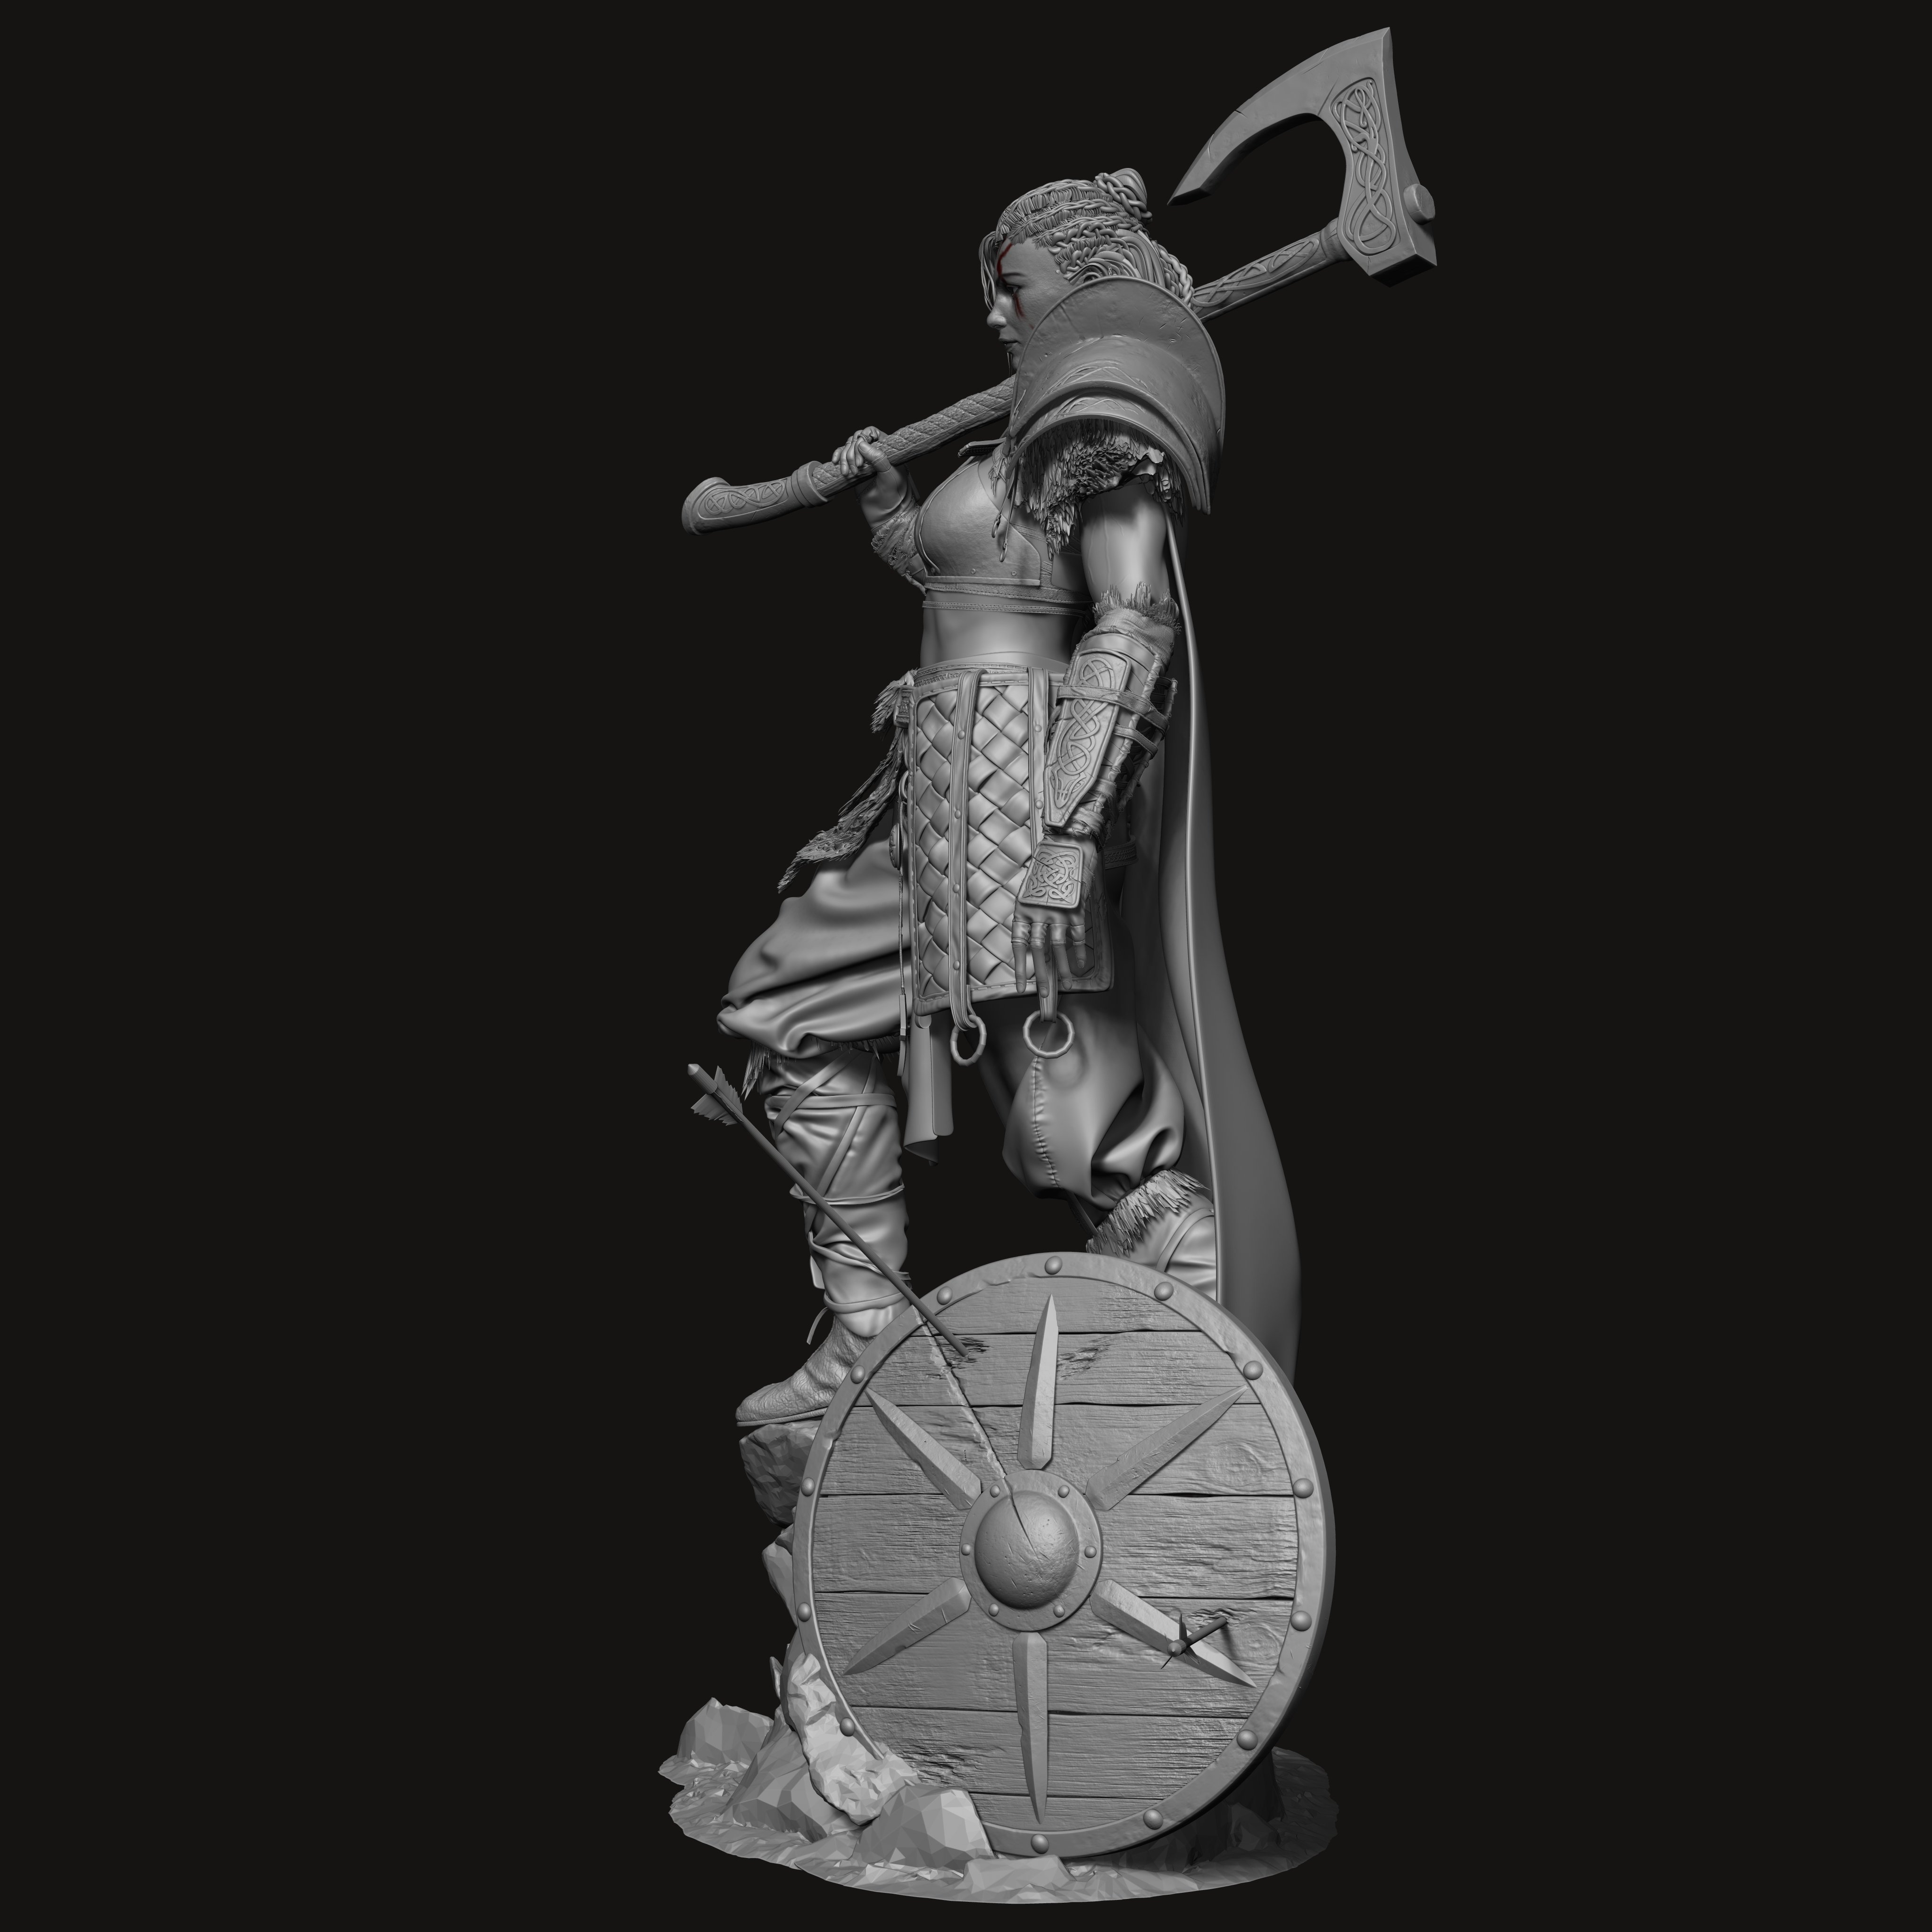


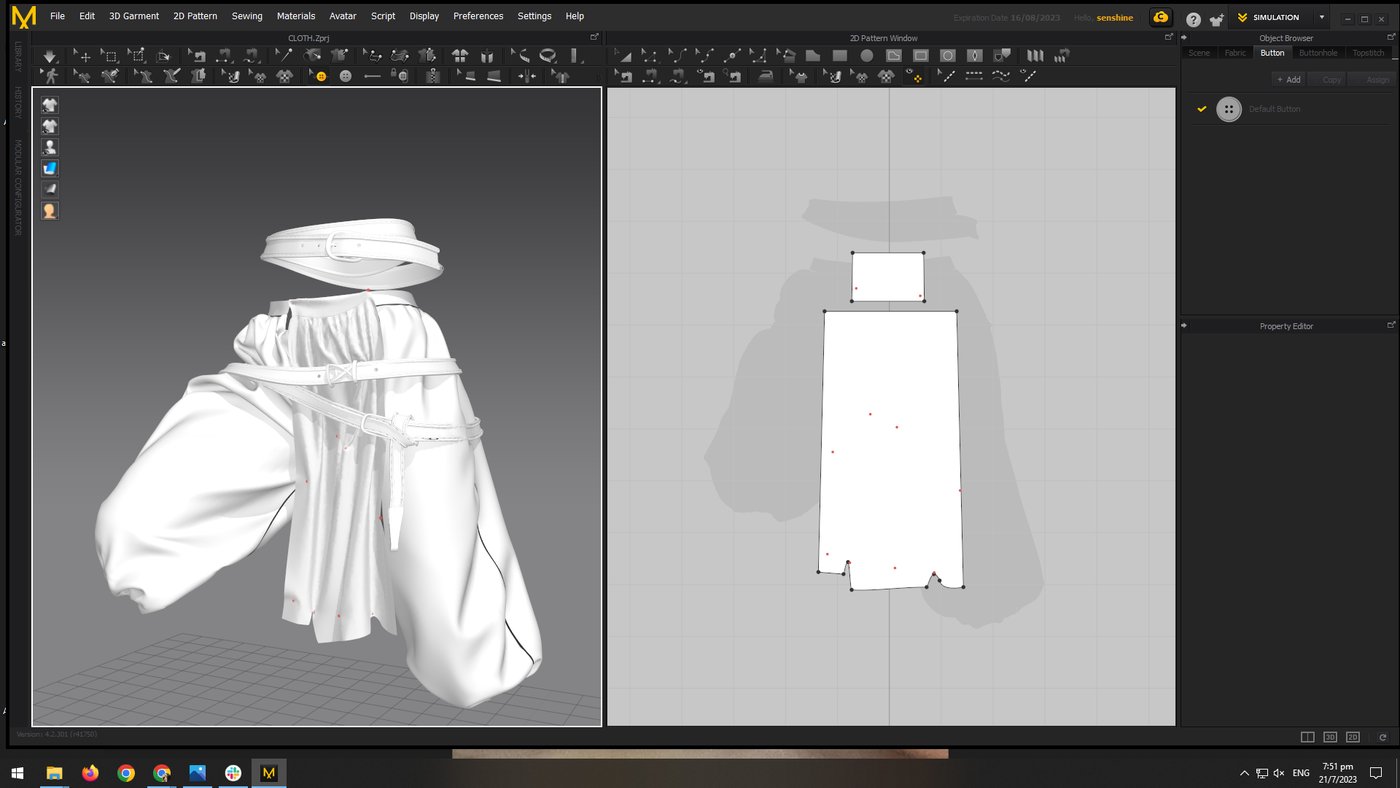
I made body and props in Zbrush and Maya. Clothing was done in Marvelous Designer.


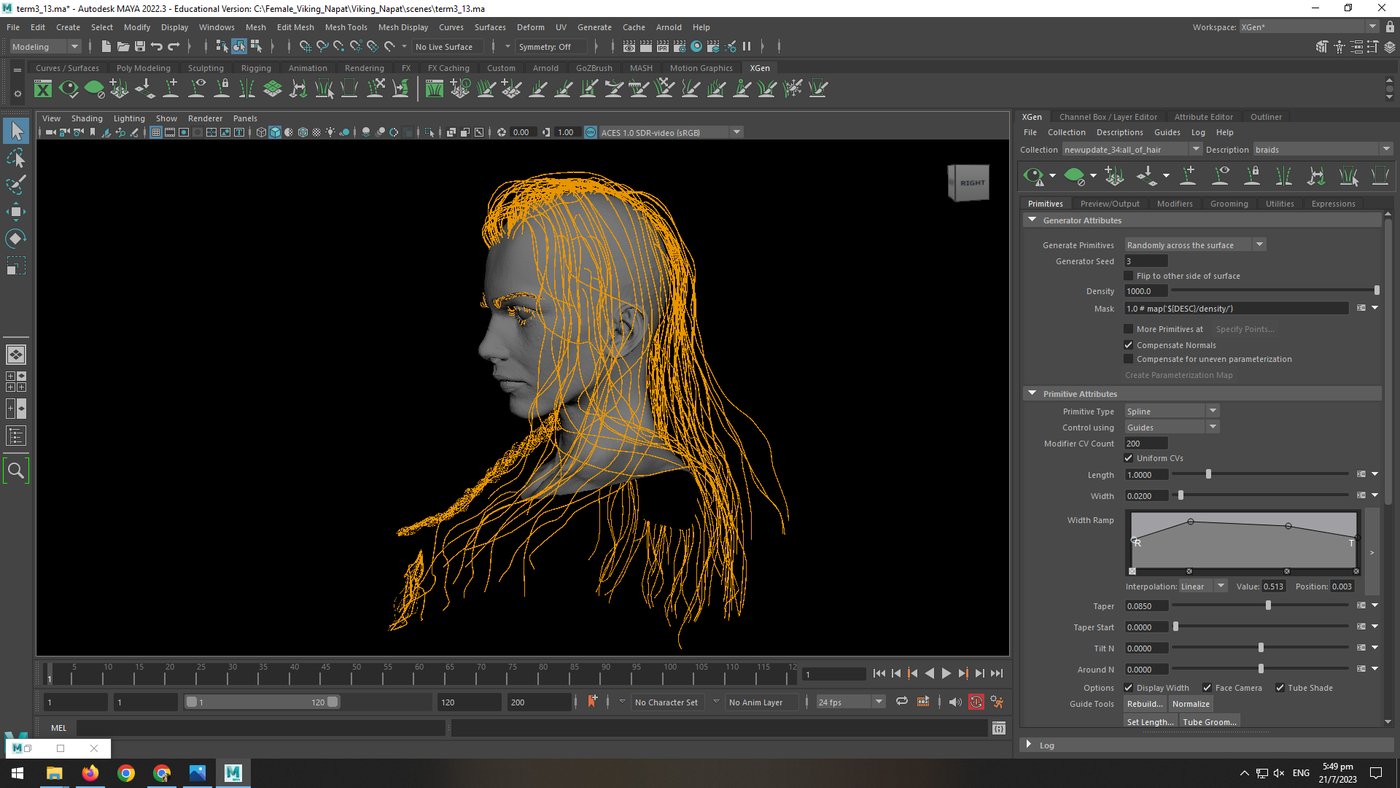
Hair and Fur
Xgen is one of the time consuming process. I created 4 separated descriptions which are side hair, main hair, braid and fur for easy control. I also made a few tests with modifiers to create the best result.


Texturing
For skin details, I used Mari software, Texture and 3D scan from XYZ website.
For prop, I mainly used Substance Painter.
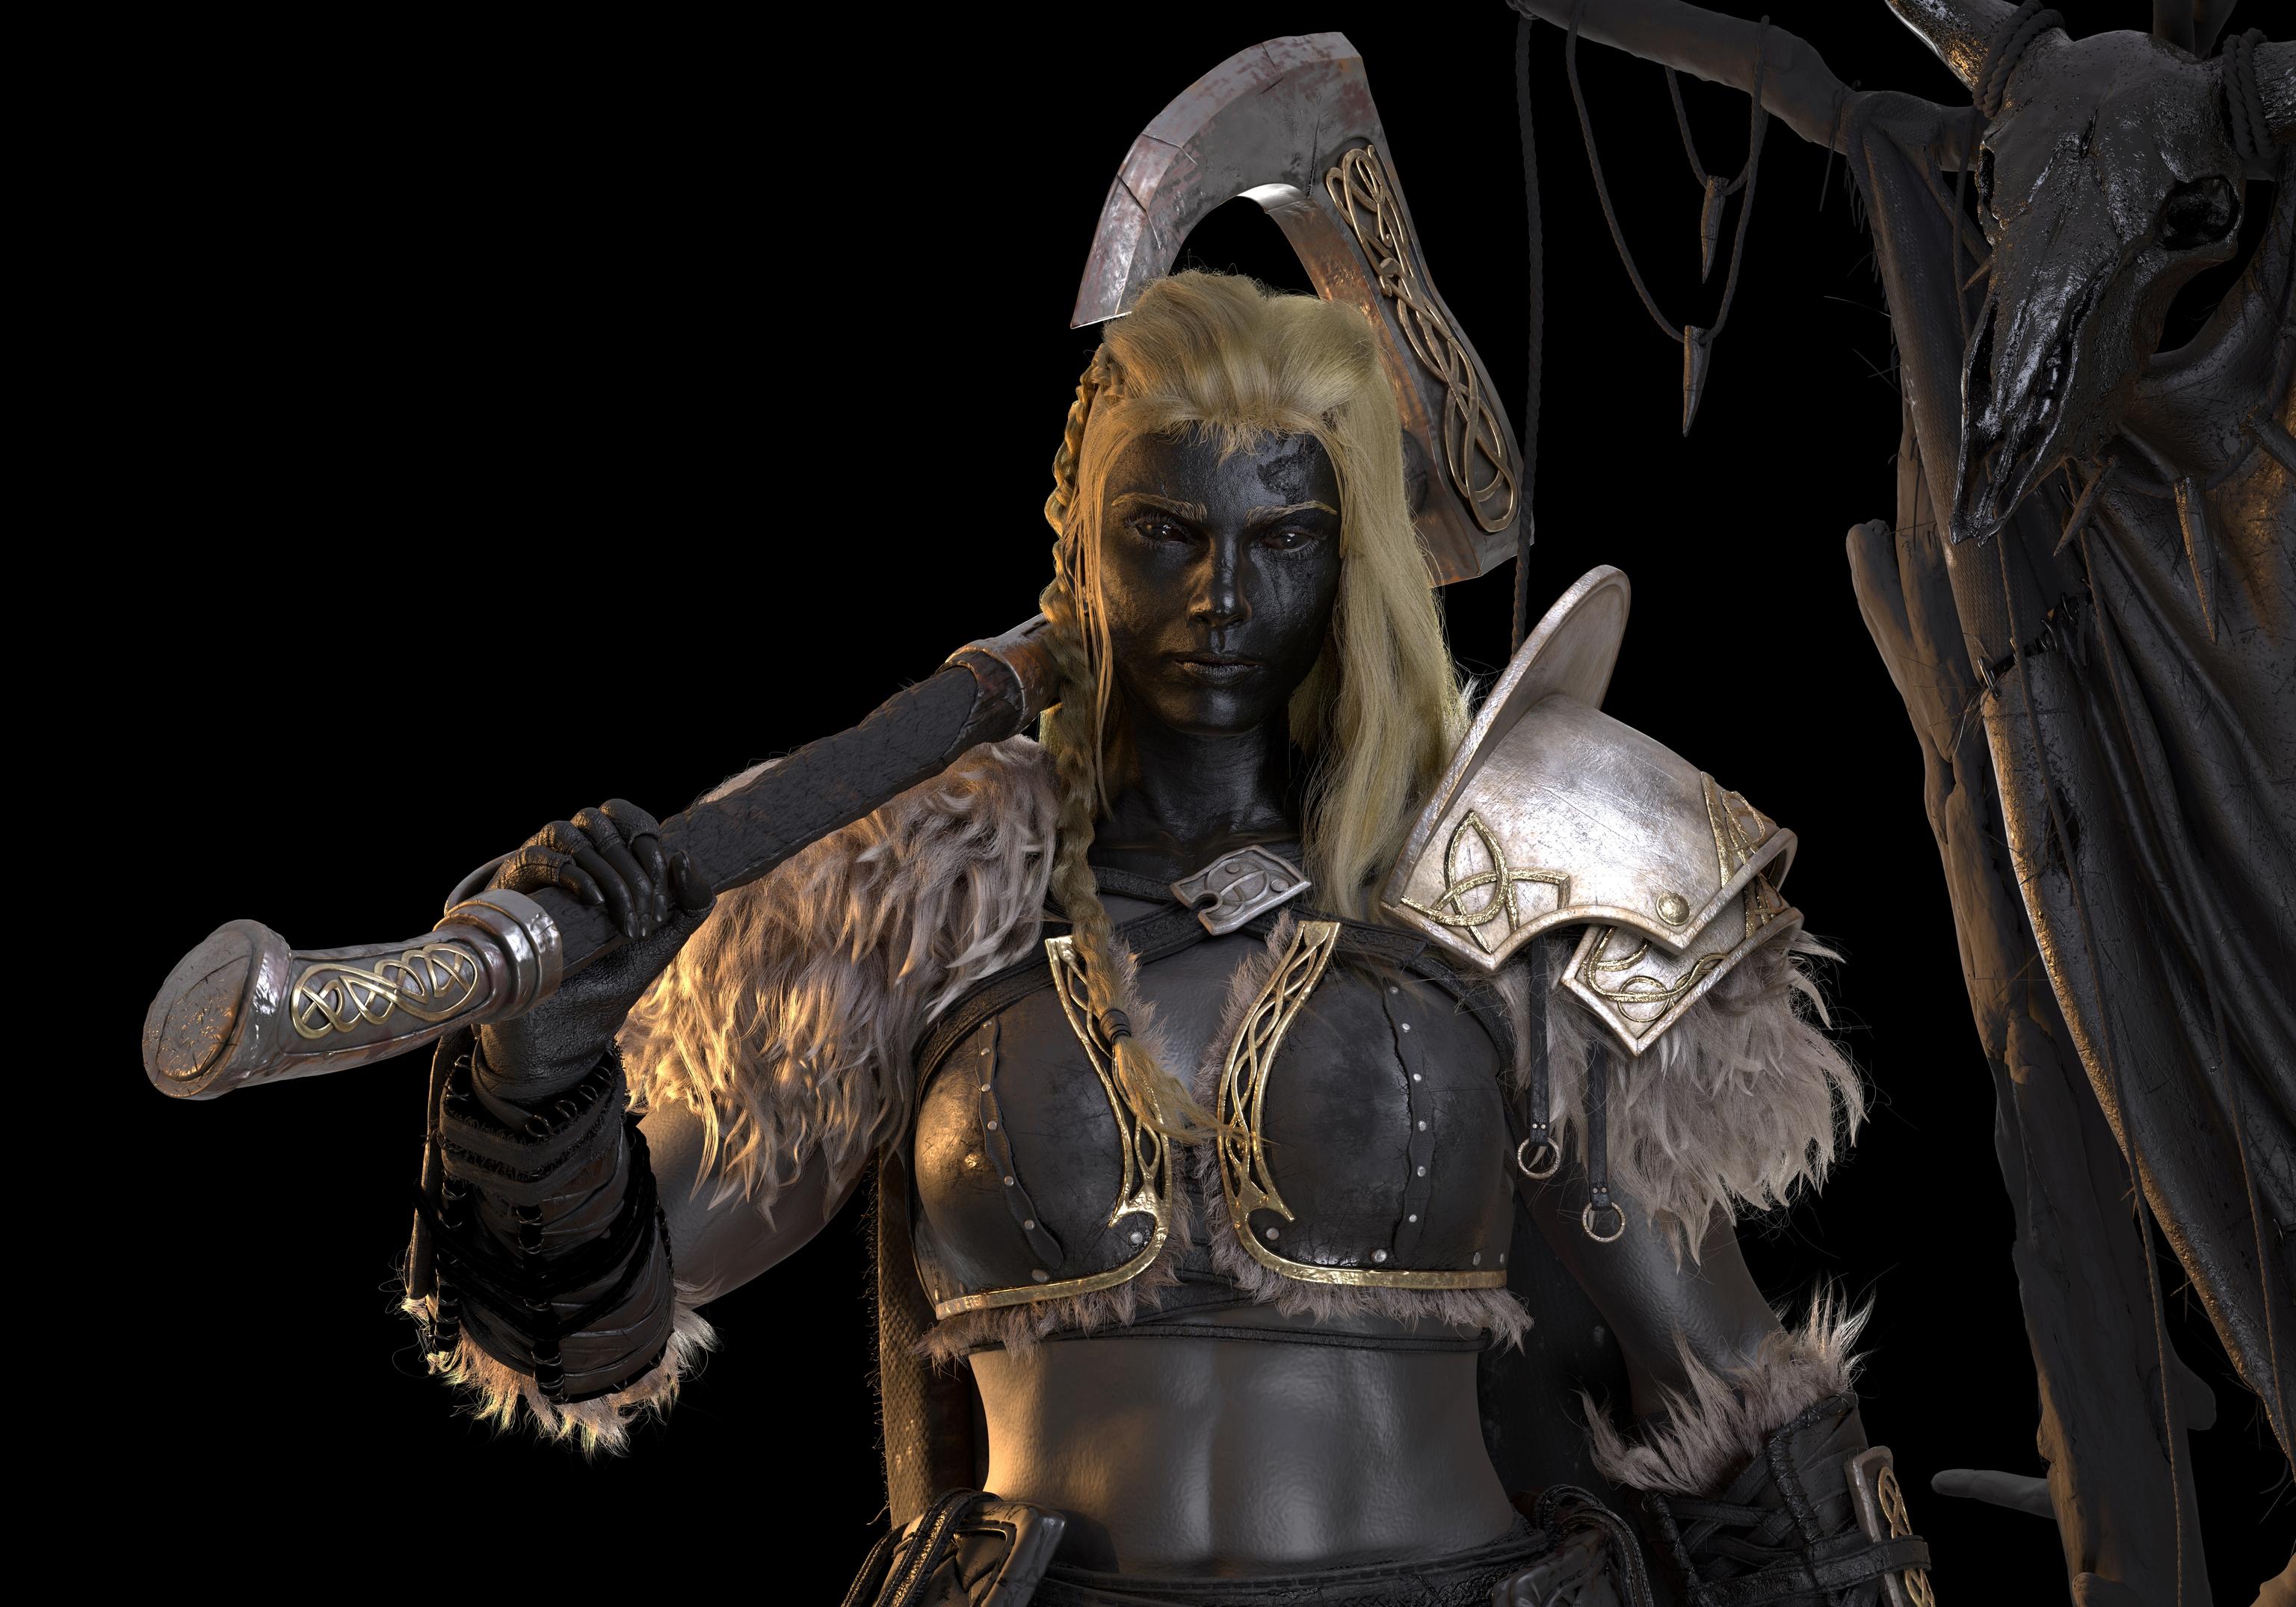


lighting and Rendering
Lighting and rendering were done in Maya.

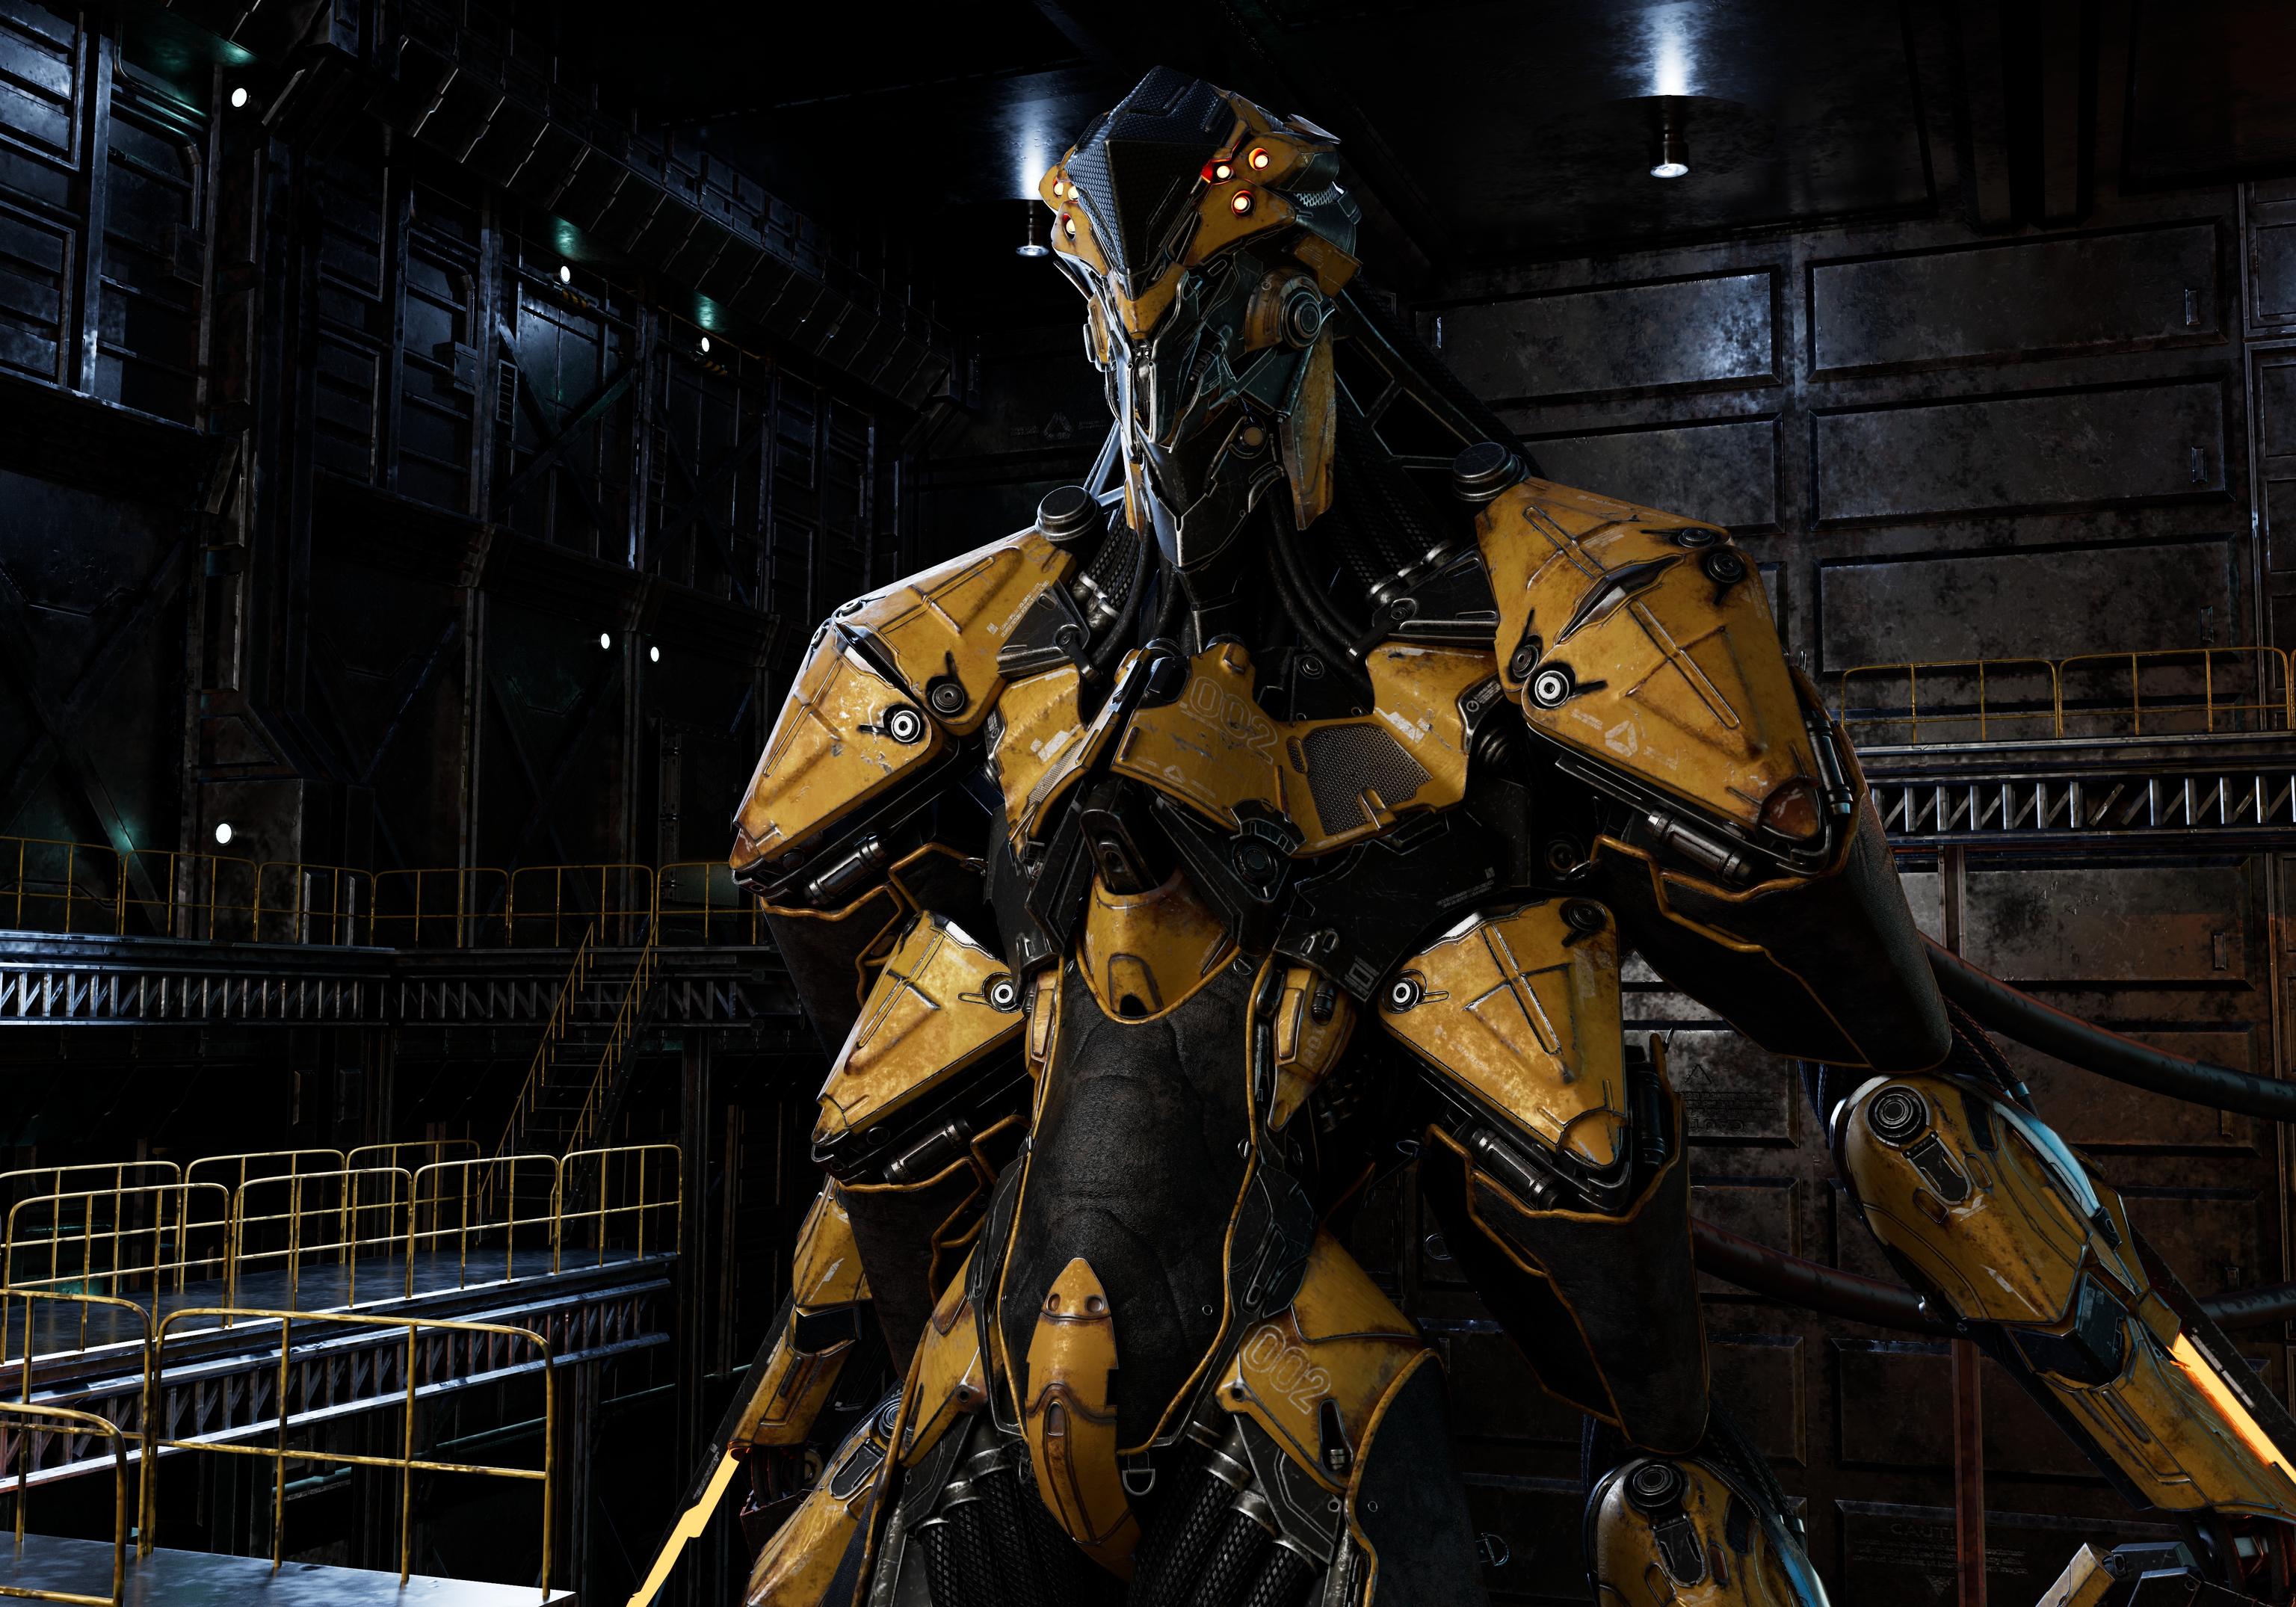
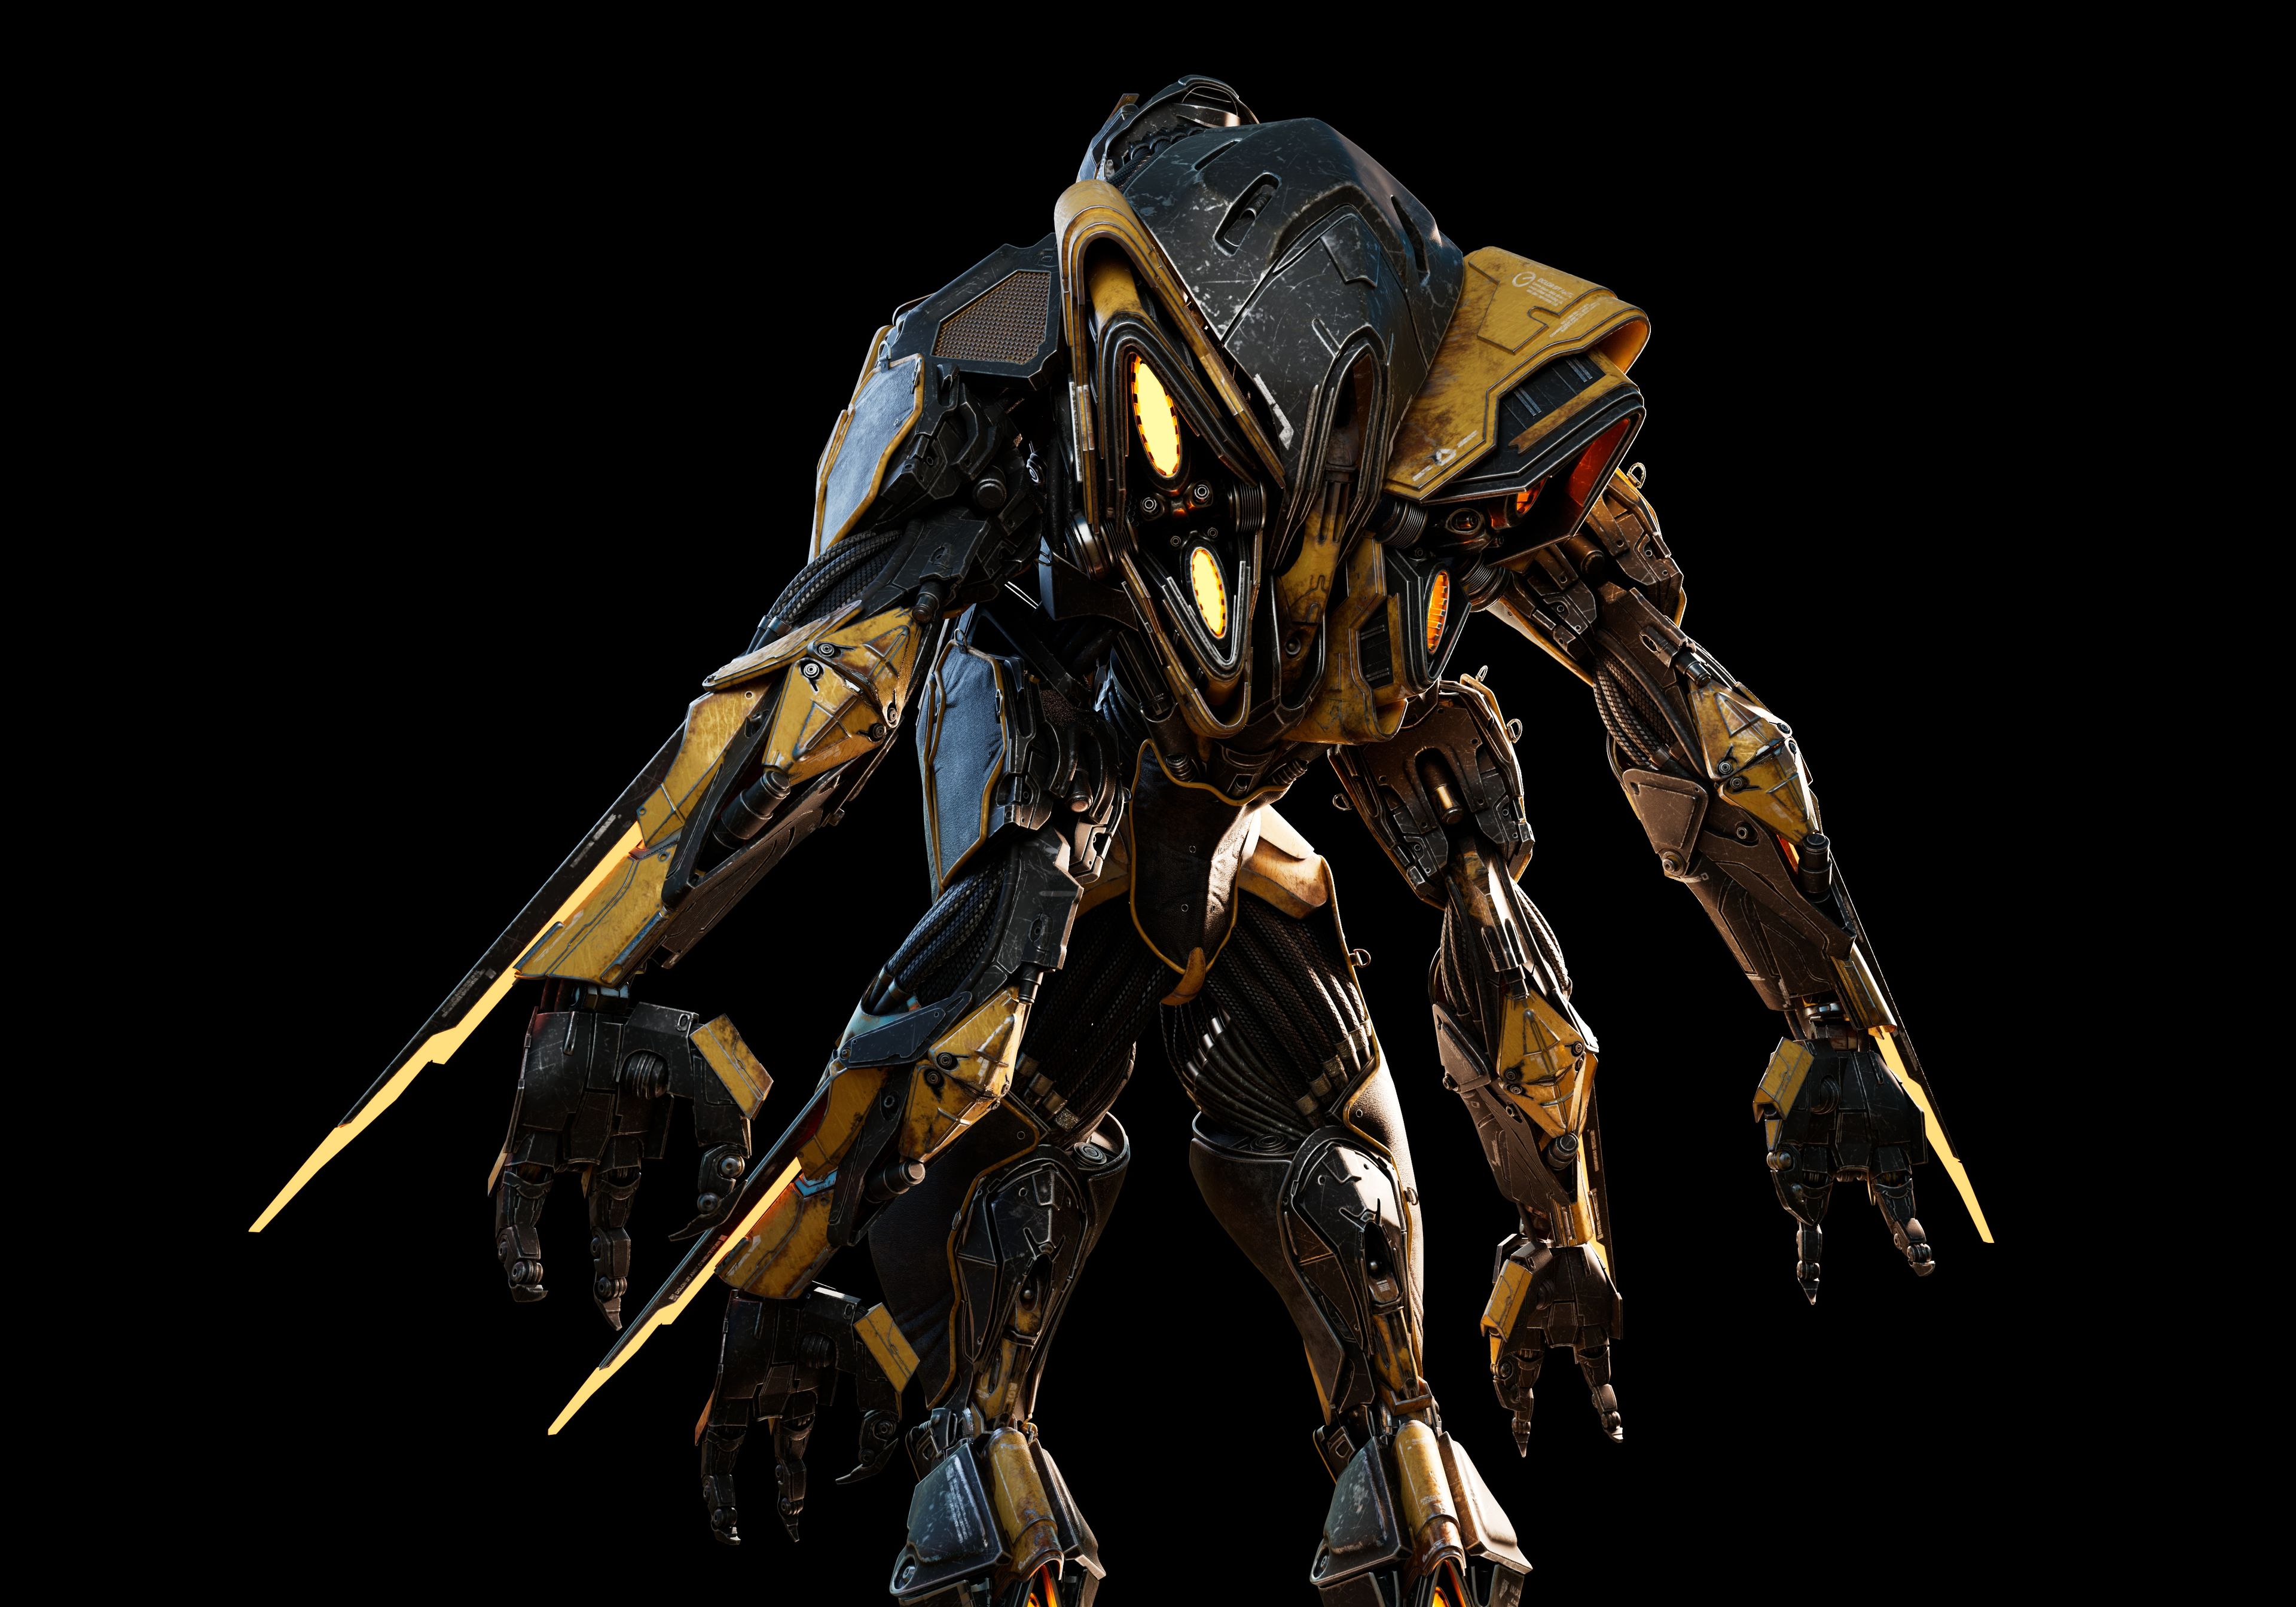
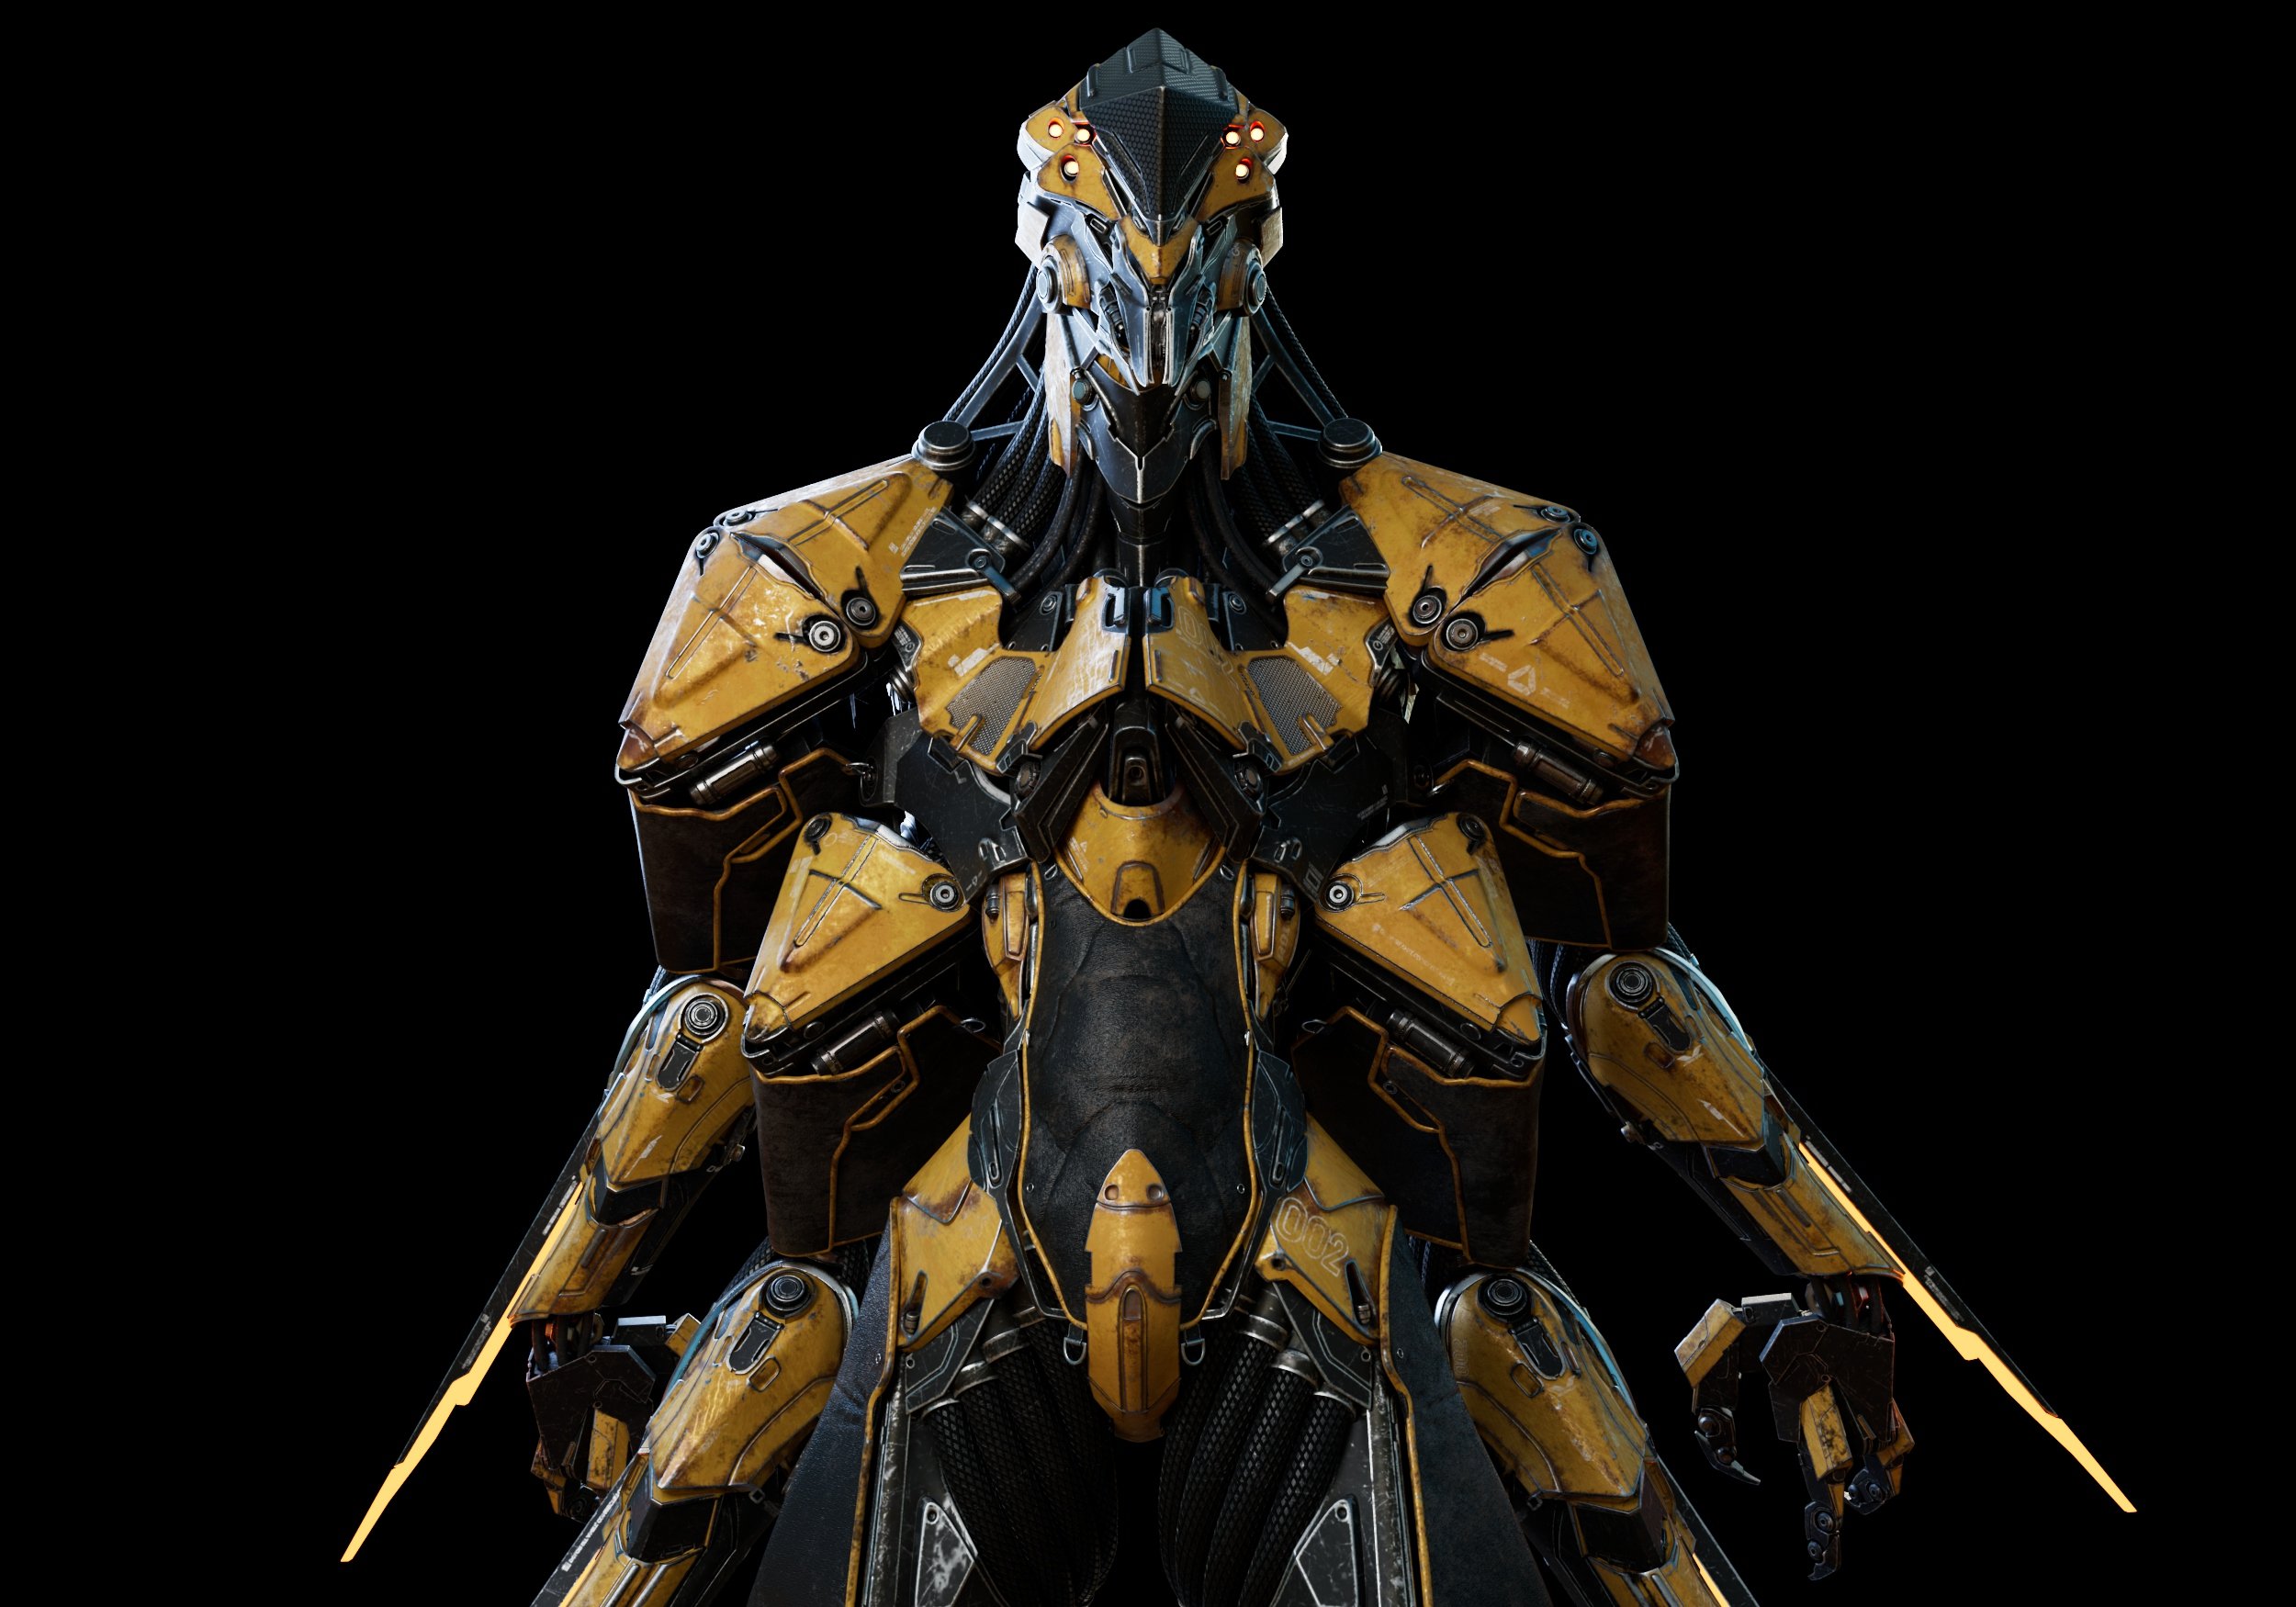
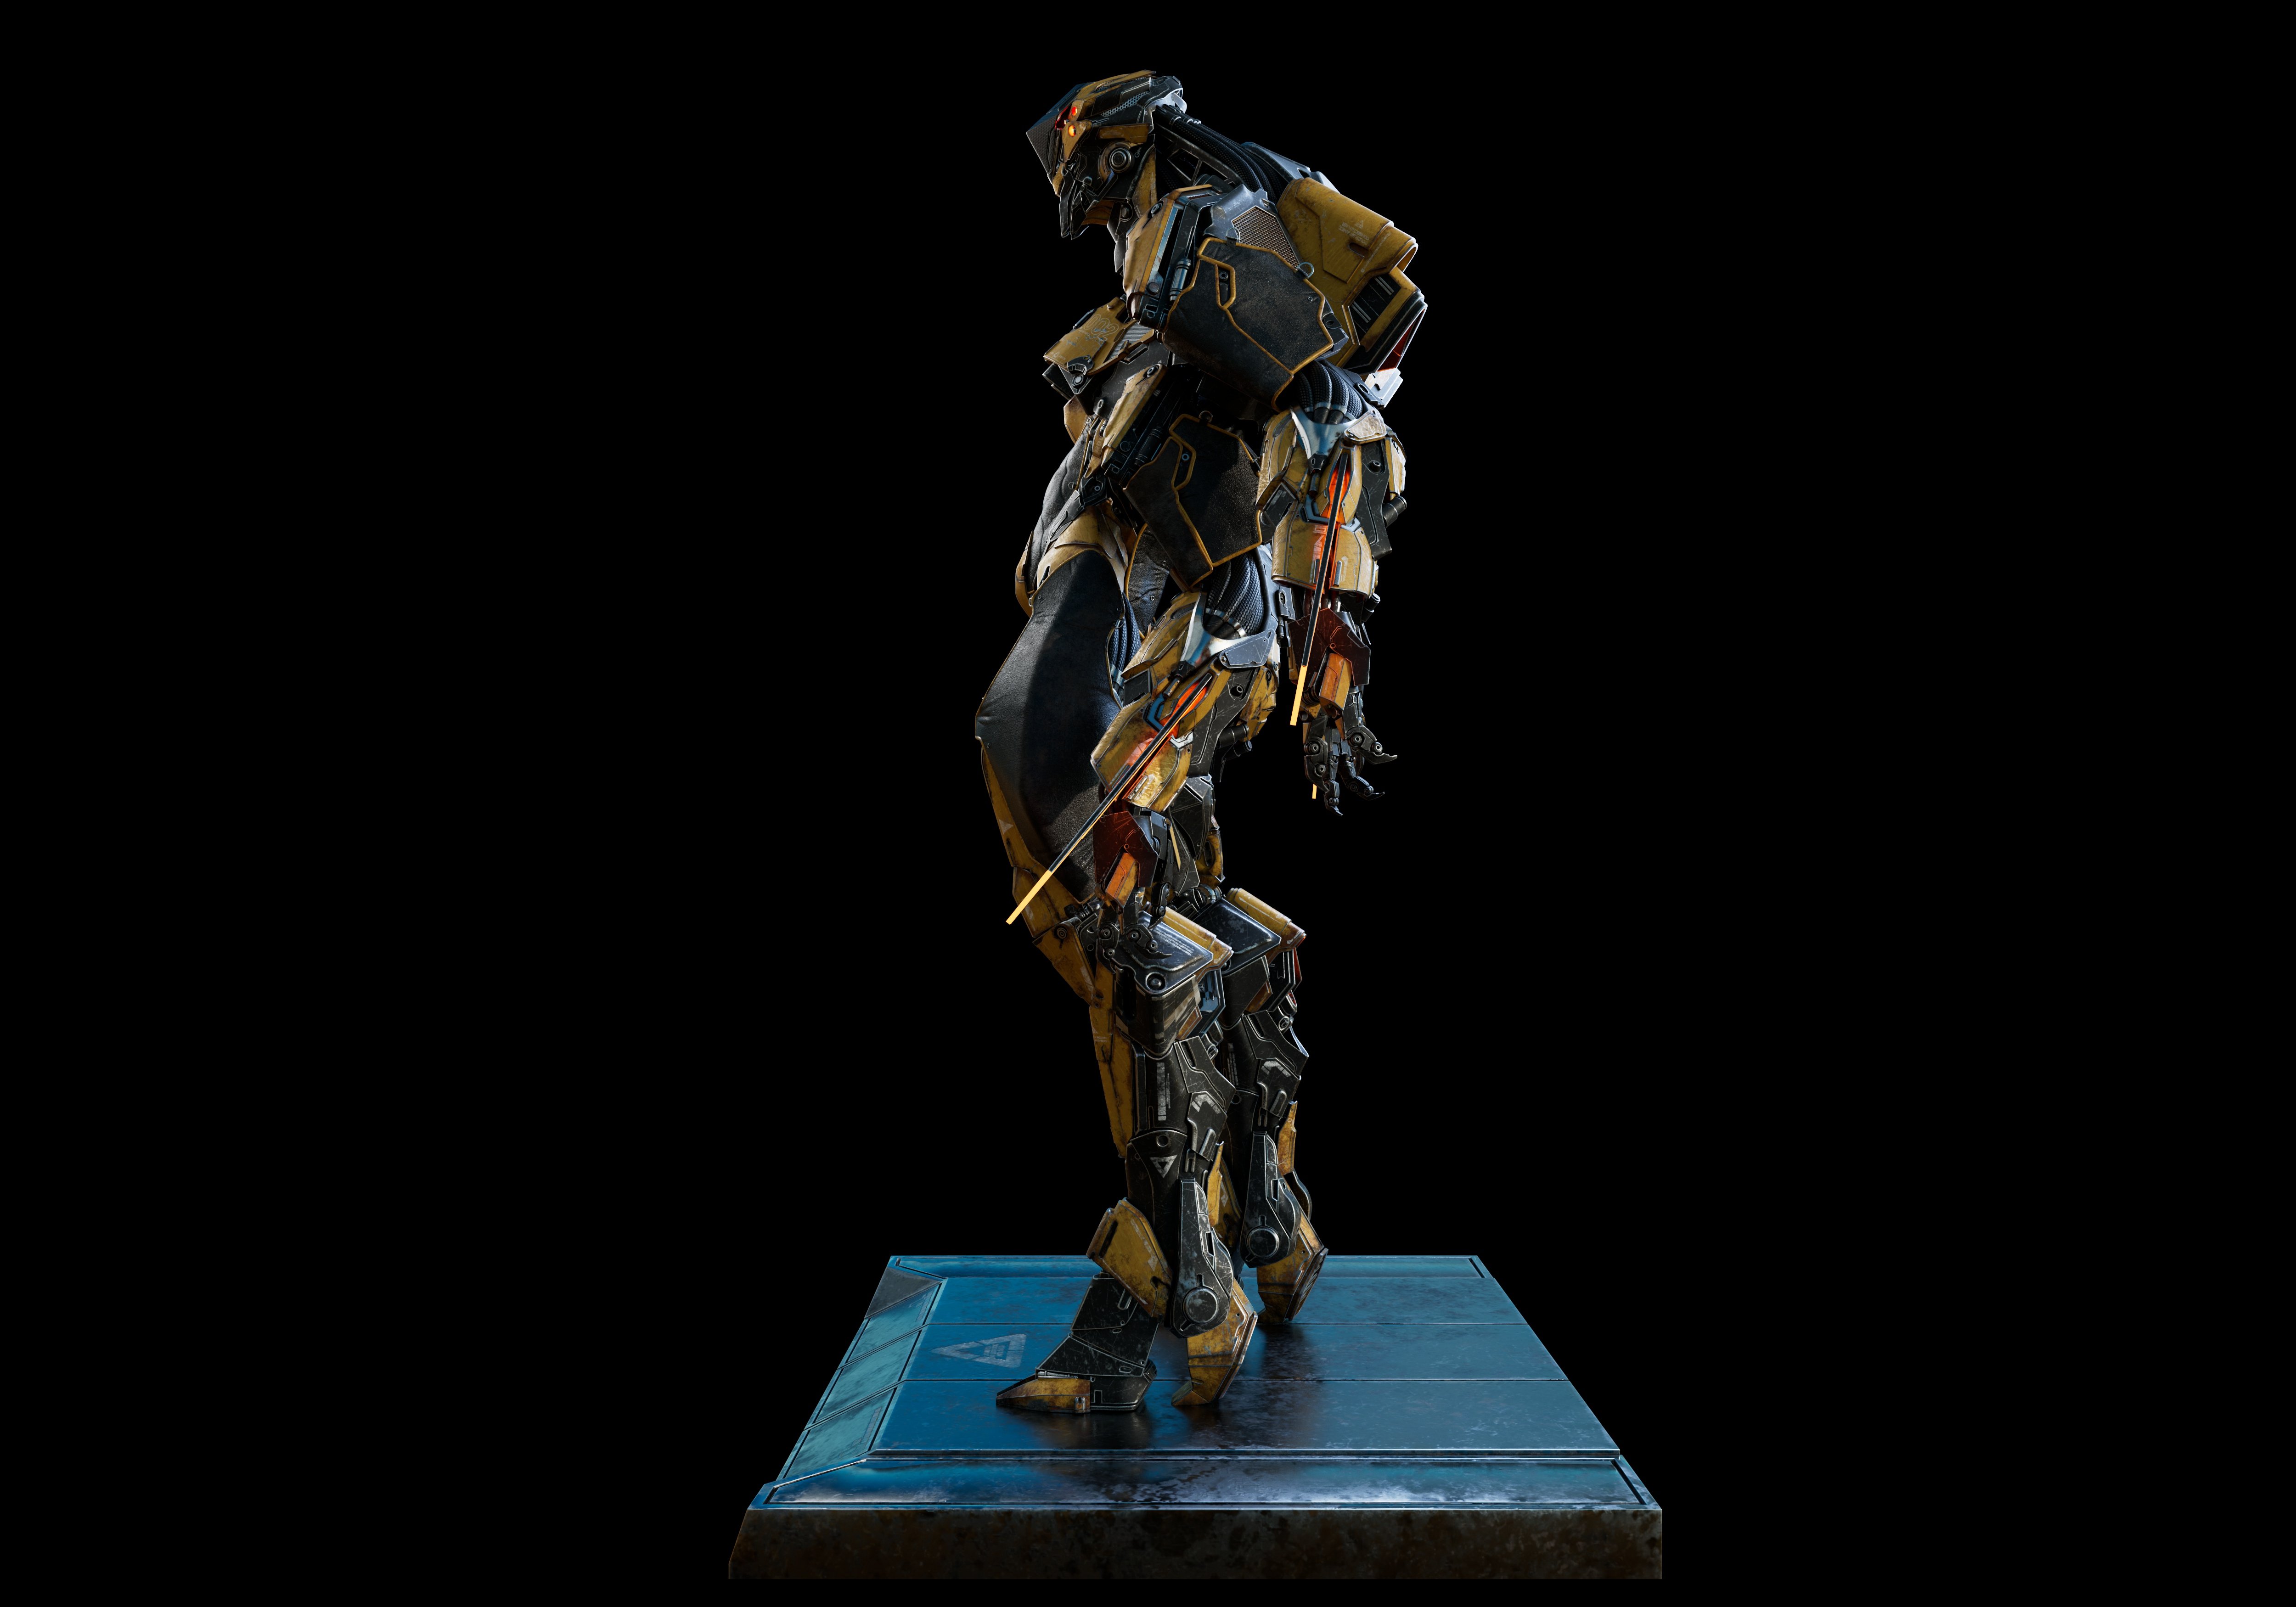
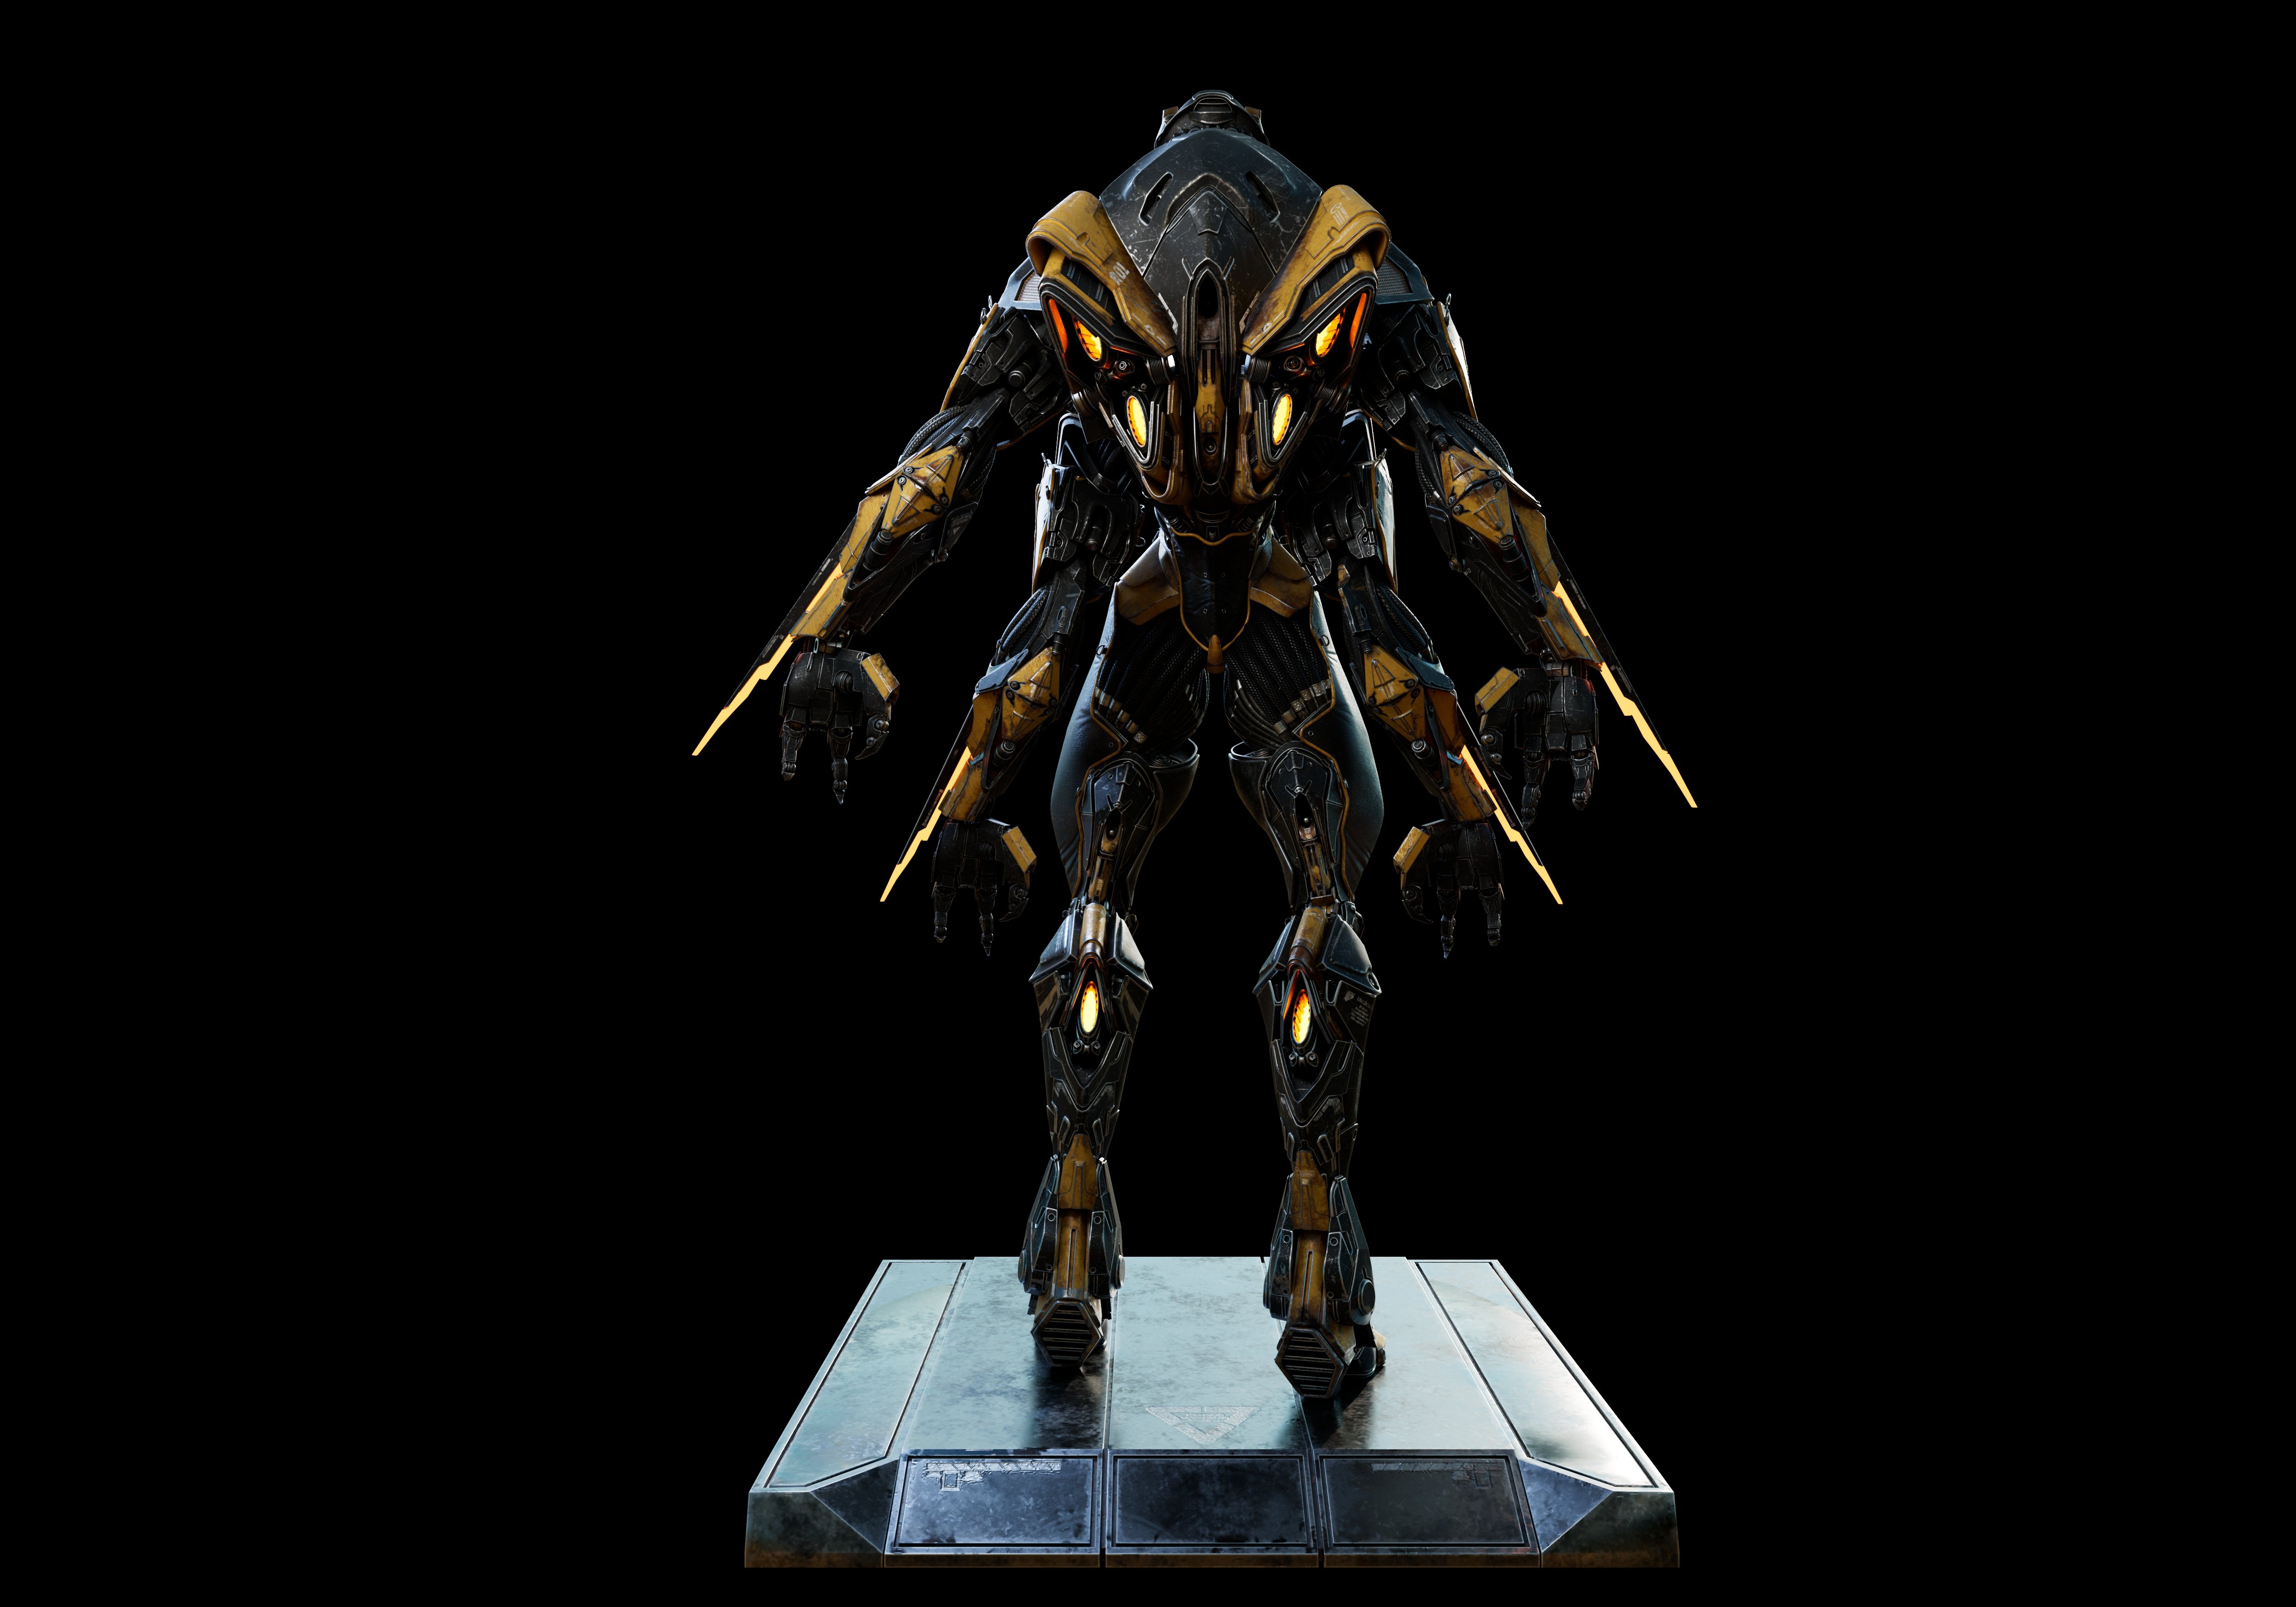
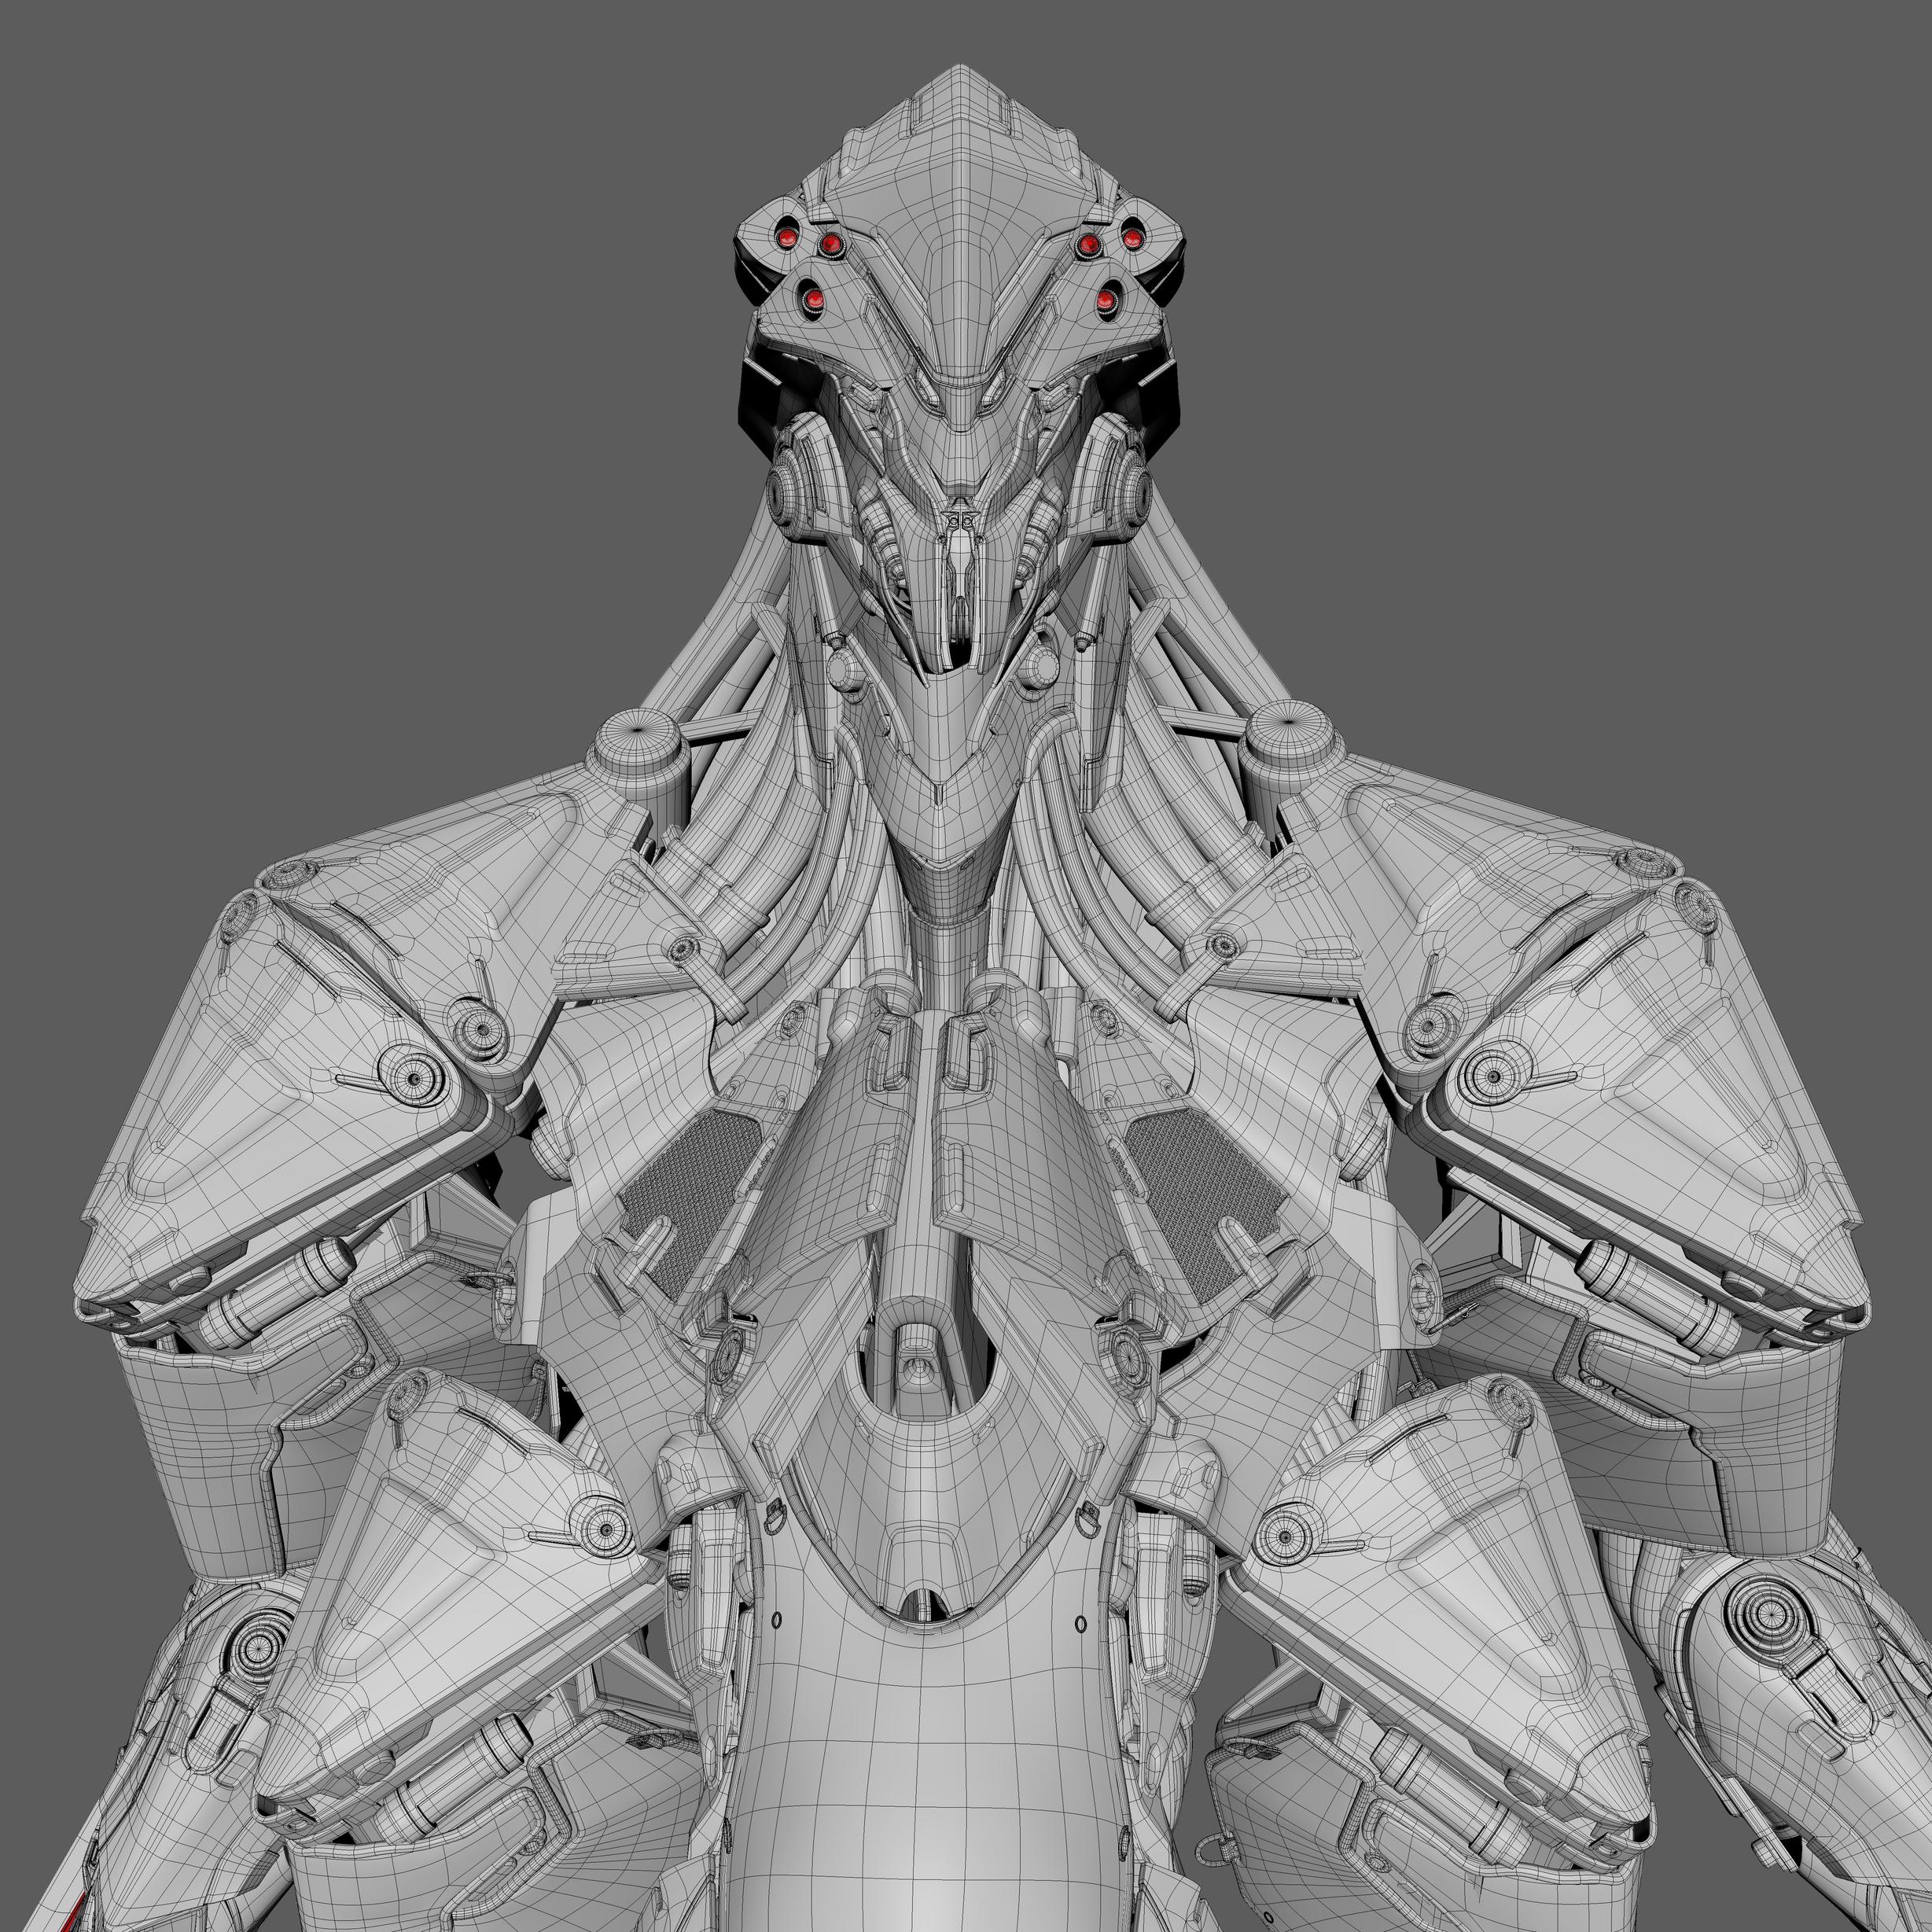
Hard Surface Character Model -WASP Inspired Mecha
Here is my mecha project. I did this model 90% in Maya and 10% in Zbrush for sculpting the wrinkles detail. It was one of the most challenging projects for me.
Credit: I would like to thank Marco Plouffe (Keos Masons) for allowing me to use his design as my reference.


My Reference Board

Modeling Process


My Tip for Making Hard surfaces:
- It is really important to visualize shape and form, and plan everthing ahead before execution.
- Always start from blocking. I make the correct proportions first without considering topology.
- After I got the blocking with good proportions, I start to figure out the topology and add details.


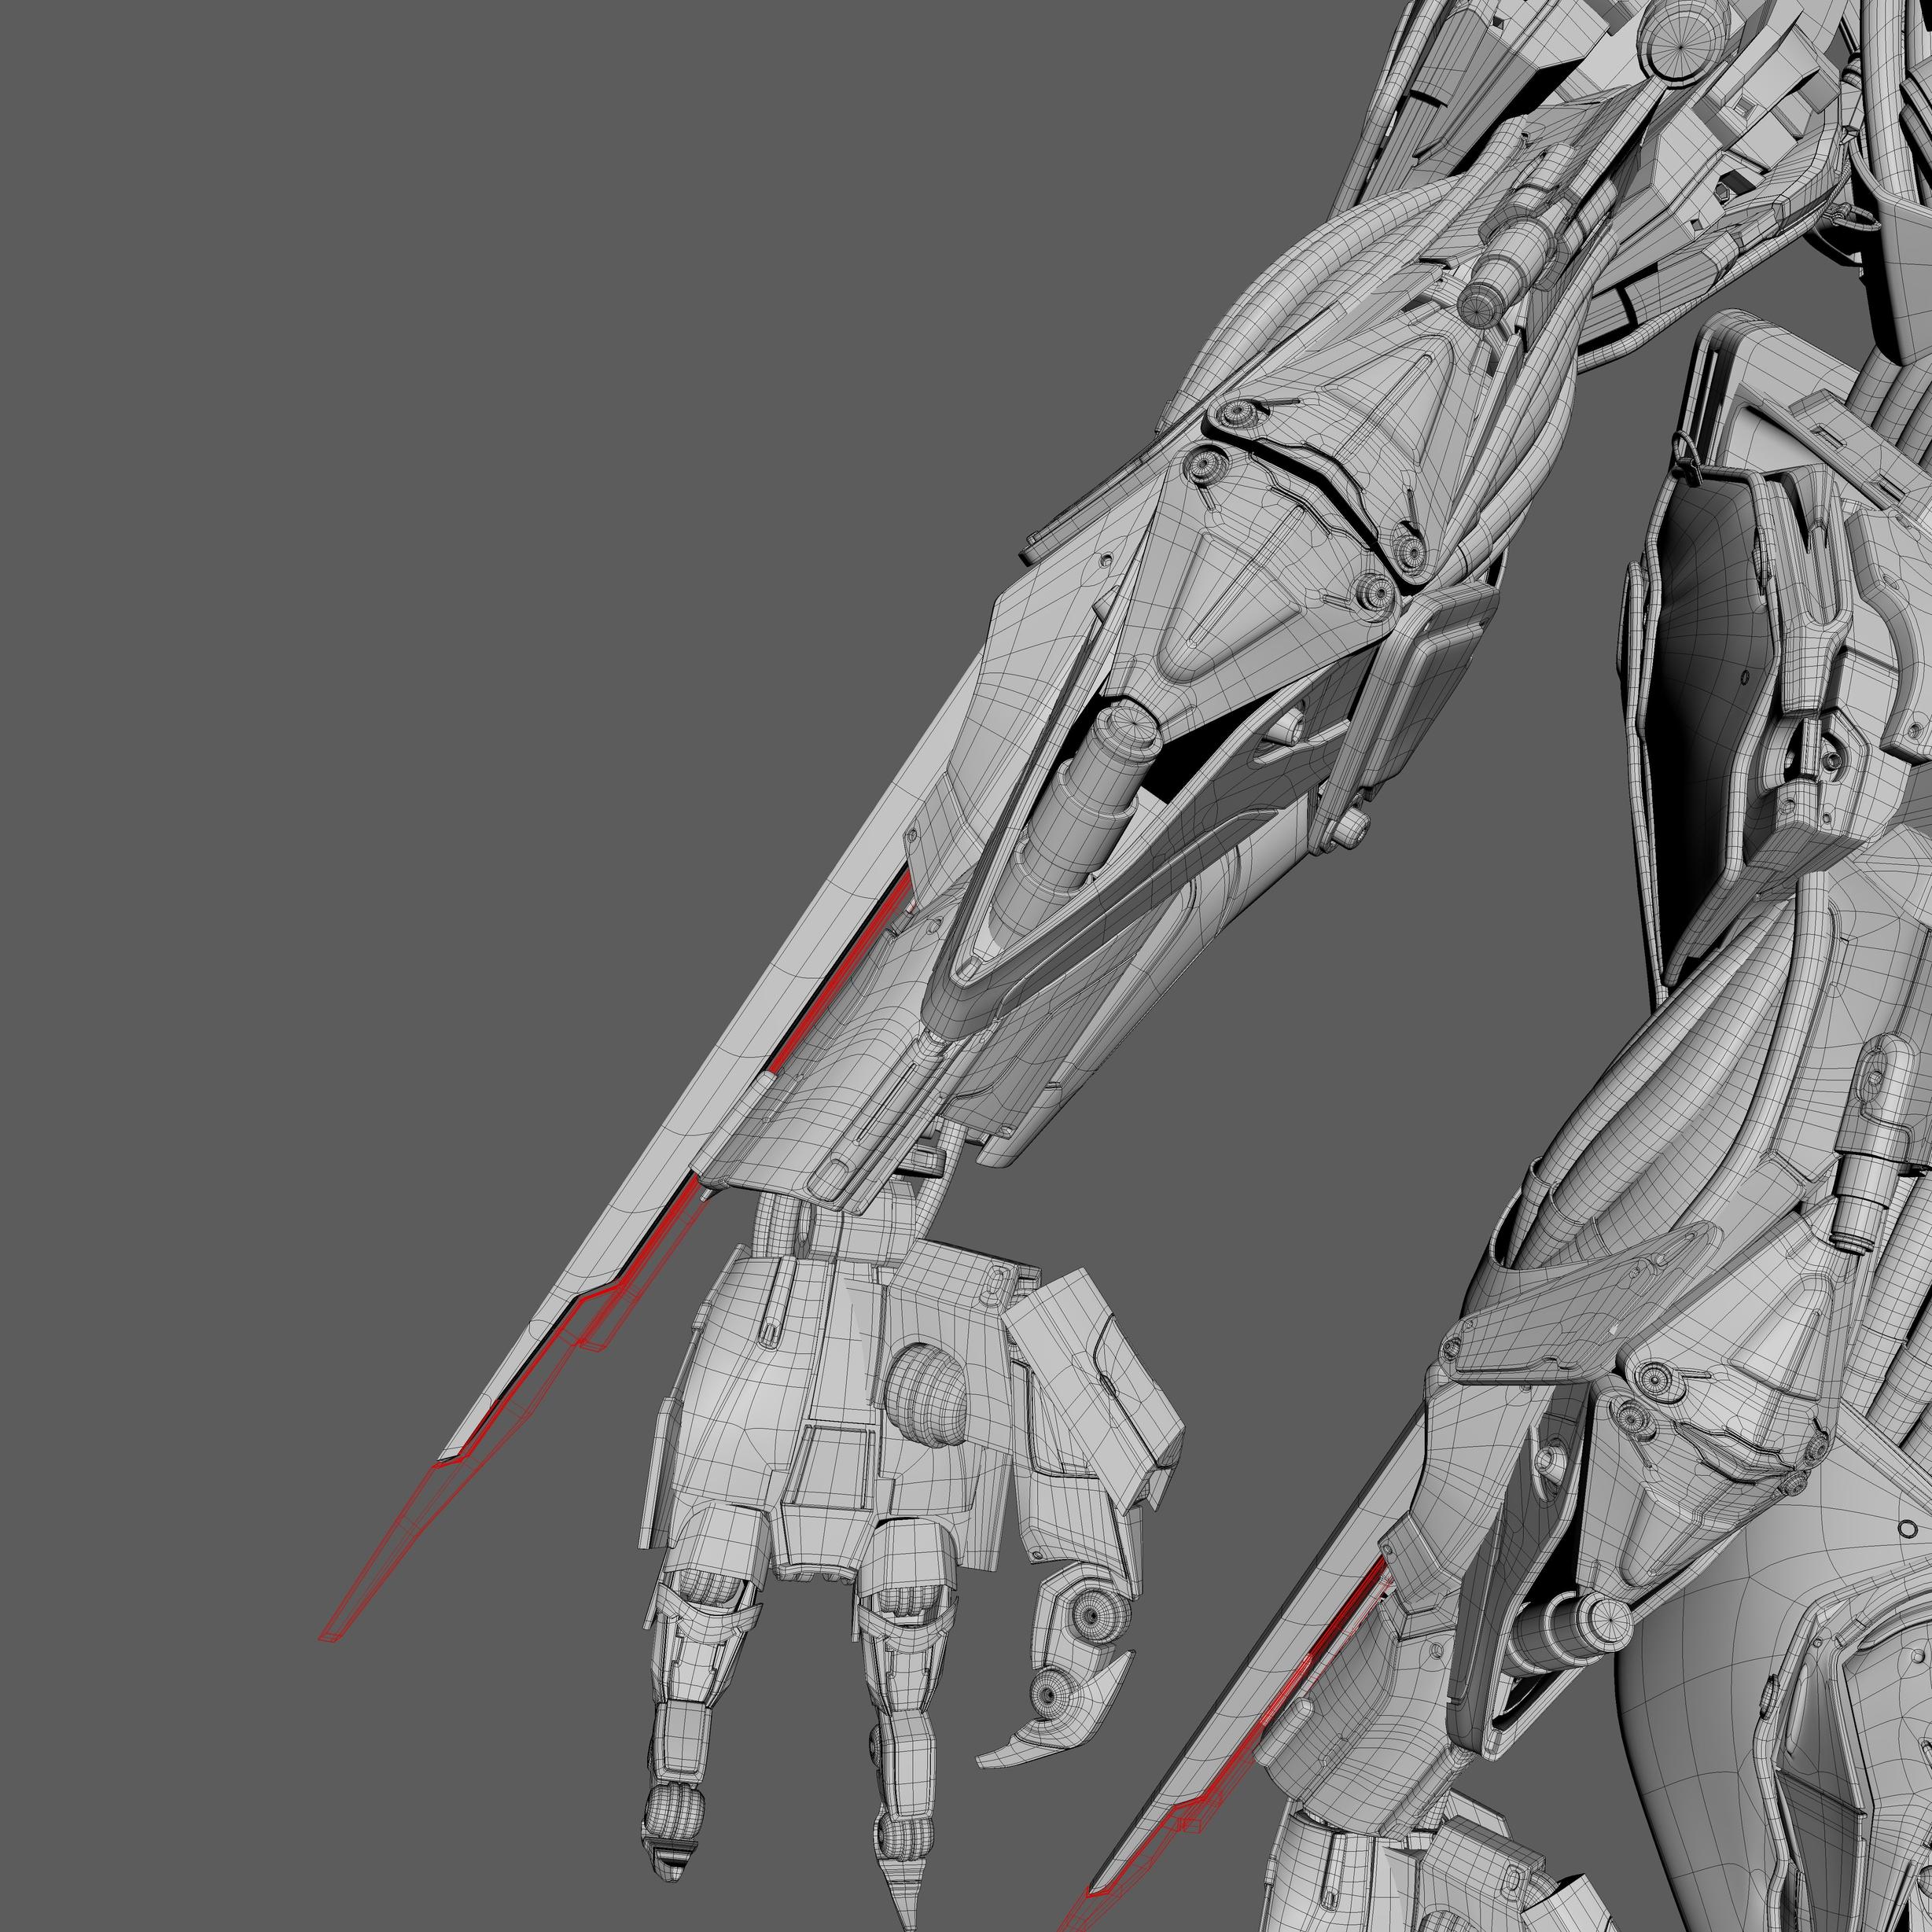
The only one part I needed to sculpt was this part because it was an organic shape with many details. I used high poly to low poly method to bring the details back to render in Maya.

After I was done with Mecha, I decided to make hangar for the background by using modular technic.


Texturing
I created all the textures by using Substance Painter and I used 2K texture for 140 uv tiles to get the best results.


Comments (2)