
Video Game 3D Hero Prop & Real-Time Environment Showcase


Hello there! My name is Guillermo, I'm a 3D Environment & Prop Artist from Spain, and I would like to show you the two art projects I made as part of my Advanced Master's degree in Modeling and Texturing of Environments & Props for AAA Video Games during my stay in Voxel School!
Video Game 3D Hero Prop & Real-Time Environment Showcase
Canon A1: Game Ready Hero Prop
The first project I would like to talk about would be my game ready Canon A1 35 mm film camera!


Canon A1: Final Artwork Renders
This has been a really challenging but also very rewarding project. I was eager to work on a hard-surface modeling project, and the single-lens reflex beauty that is the Canon A1 offered me a very teasing opportunity!
Canon A1 Process: Understanding the mechanisms
The first step and my main concern during the early stages of this project was making sure I got a solid understanding of the inner mechanisms and parts of the Canon A1. To ensure this, I conducted a thorough investigation of this Canon model, consulting the original product manual, studying video showcases of the device and, of course, recompiling as many pictures as possible of the camera.


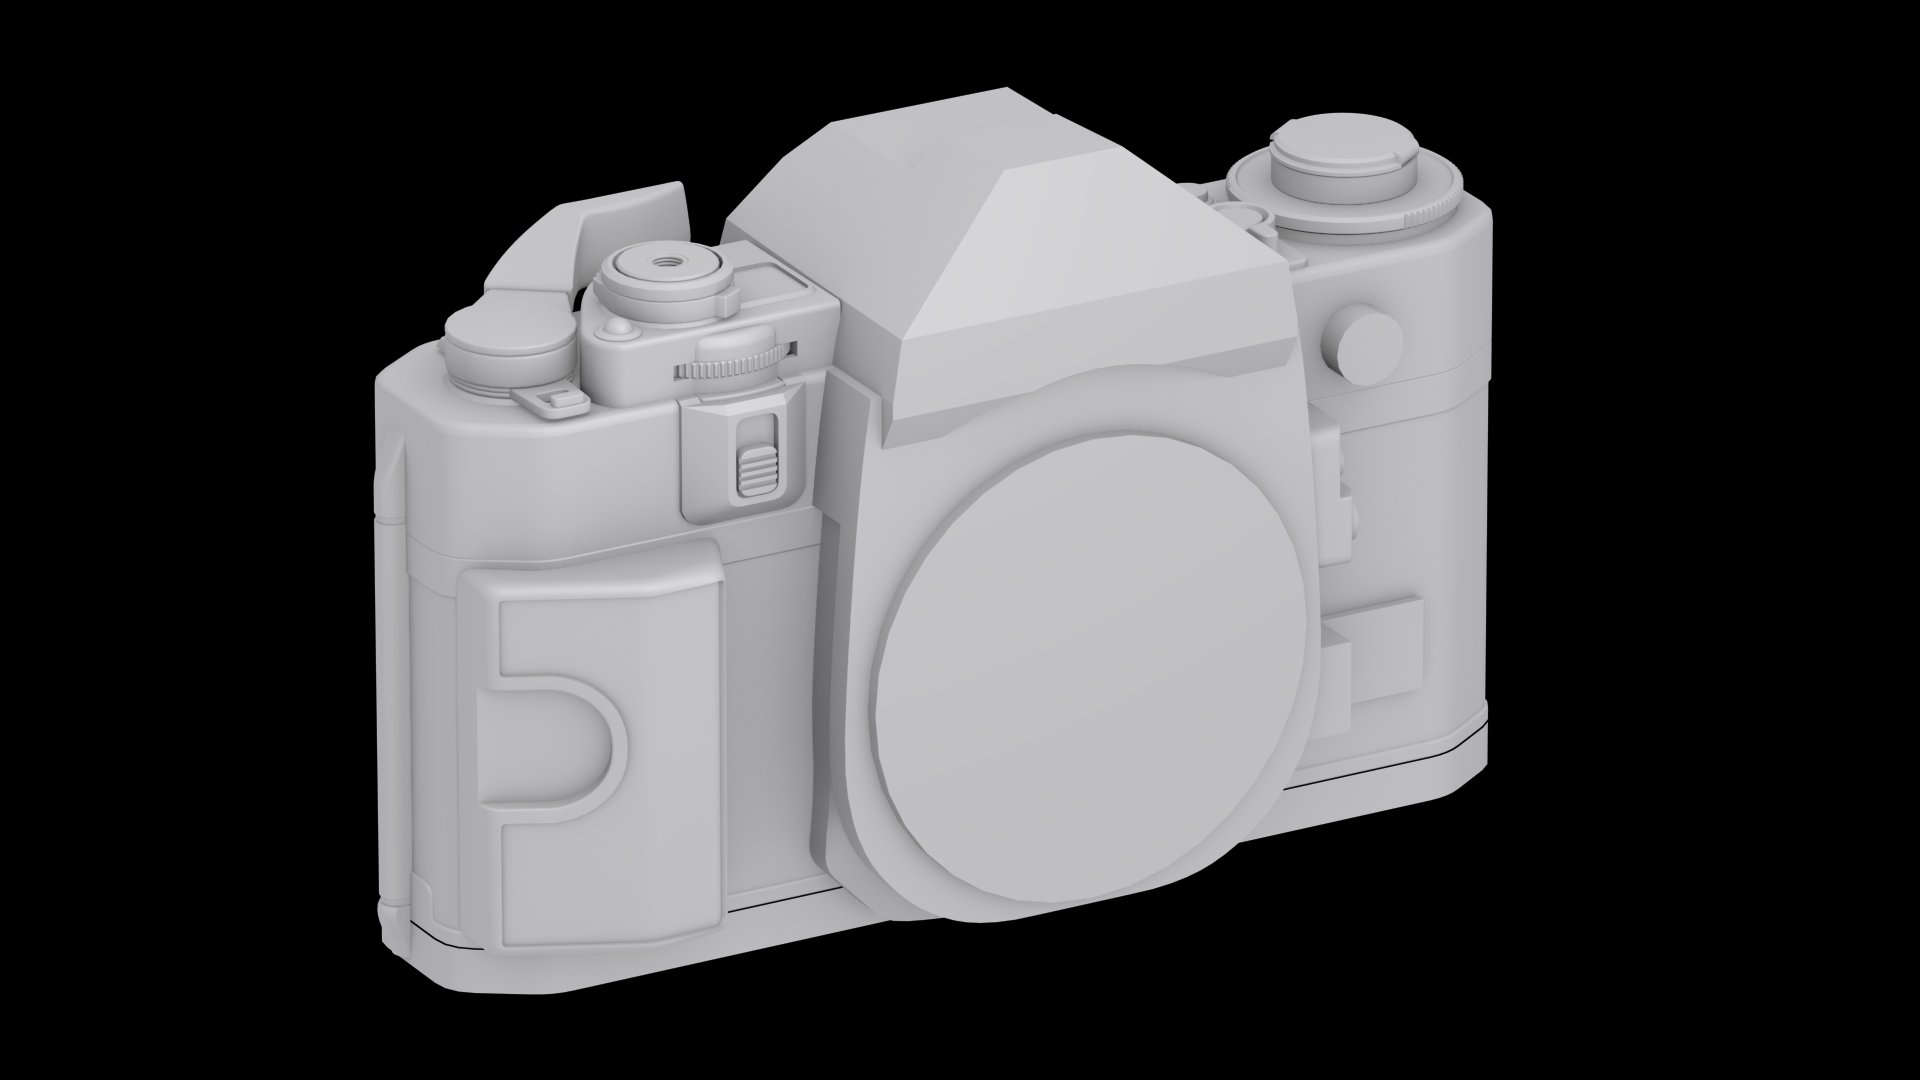
Canon A1 Process: Blocking & Base Modeling


From here, it was a matter of fine-tuning and adjusting the model in its rough block-out stage to get a base model more akin to the final asset. Since the camera has some intricate curves and surface transitions, I decided to work with splines and an uncollapsed modifier stack to get smooth curves and be able to adjust them at will.


Canon A1 Process: High Poly modeling
After getting my base model up and running, I proceeded to work upon it to get the high poly model. To achieve this, I recurred to two techniques: subdivision modeling and edge smoothing via ZBrush workflow.
I utilized the first technique for the majority of the pieces, making sure I had only the essential geometry to ensure smooth curves and avoid mistakes like pinching.
The second technique was especially useful for small gear-like pieces; since using subdivision modeling on them was proving to be mostly ineffective, I ended up making these high poly pieces in ZBrush by creasing the hard edges of these models, preventing their loss when applying subdivision levels, then converting the parts to dynamesh models and finally polishing the crisp edges.

In the topic of the making of this high poly model, I believe it is noteworthy to mention the importance of working smarter rather than harder. Almost every ring in the camera lens is essentially one sample of its pattern, instantiated in an array fashion and then bent 360 degrees to achieve de cylindrical piece.
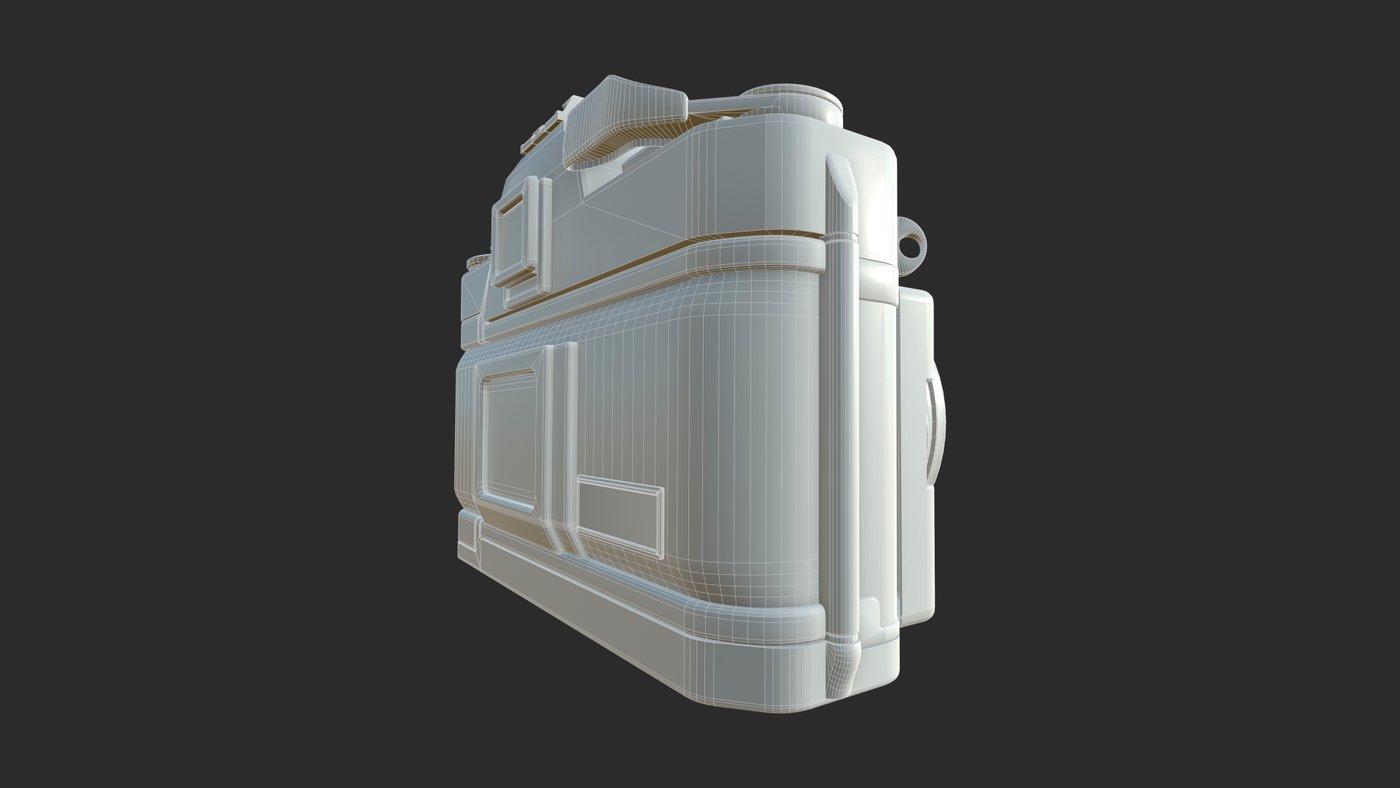
Canon A1 Process: Mid Poly modeling


Canon A1 Process: Unwrapping and UVs
Once the mid poly model was done, I then proceeded to assign smoothing groups based on where I intended to make a seam cut, assuring that both the UV island and the smoothing groups matched each other.
As a general rule, I assigned a new smoothing group once a 45-degree turn occurred, but I also referred to other factors and conditions, like making sure that UV islands weren't too large or too tense, as well as splitting chamfered edges down the middle.
After making all the seam cuts, I straightened every possible UV island edge, as long as it didn't result in texture deformation, for a more efficient texture packing.
I then packed all UVs in three different texture sets, one for the large parts of the camera, another one for the small parts and a final one for the lenses.


Canon A1 Process: Bake


Canon A1 Process: Texturing


Canon A1: Diffuse Textures (From left to right: large pieces, small parts and lense rings)

Canon A1: Clean vs Final texture comparison
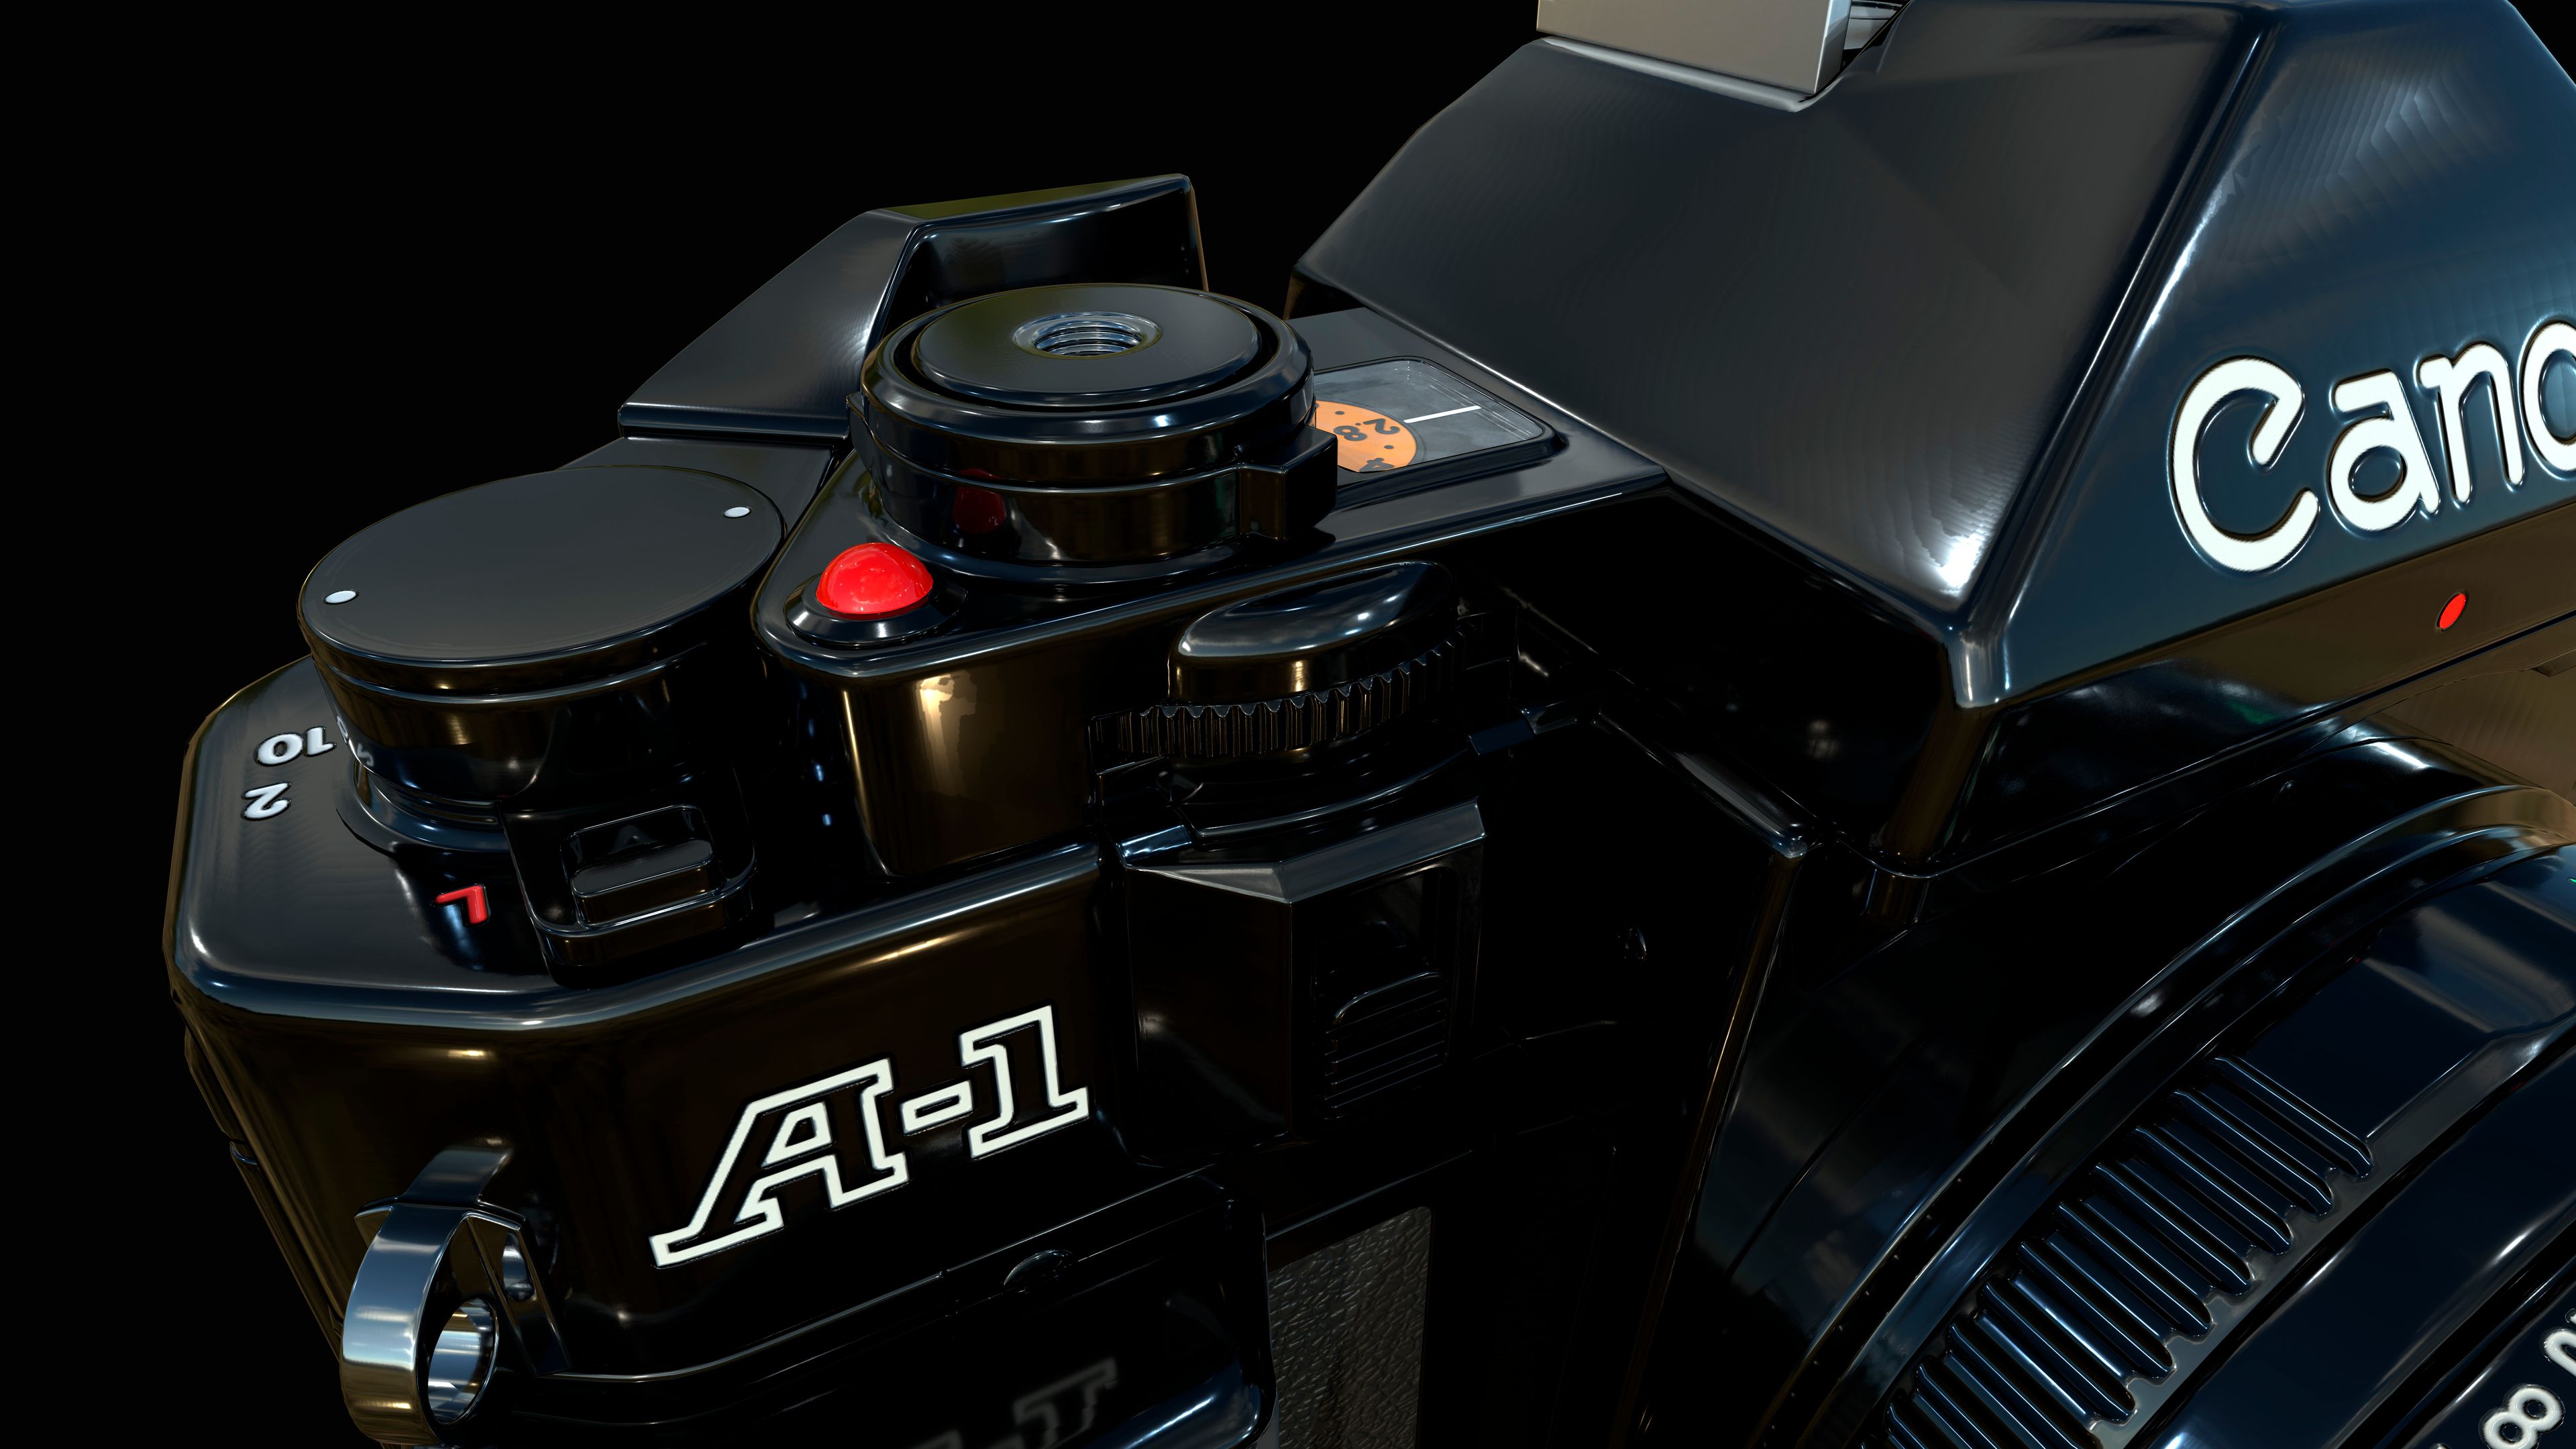
Canon A1 Process: Rendering


Canon A1: Final Showcase


Spakenburg Shipyard


Spakenburg Shipyard: Final Scene Renders
This has been an extremely challenging and demanding but super fun project to work with! Up until this point, my work was pretty much focused on night scenes and/or very colorful neon-like environments, generally mixing mild stylization with realism. This time, I wanted to challenge myself and make a purely realistic daytime exterior scene based on a real-life location with some touches and interpretations of my own.
I was certain I wanted to make a maritime-themed scene, so I searched for harbors, fishing villages and anything related, but nothing really caught my attention until I found the Botterwerf graving dock, an old but sturdy and still very active shipyard located in the Dutch village of Spakenburg with a long history which dates as far back as 1750.
I’ve taken the creative liberty of furthering the already massive location by adding a local food market and a small park with its very own commemorative fisherman statue.

Spakenburg Shipyard Process: Documentation, the first step of the journey


Spakenburg Shipyard: Moodboard
Spakenburg Shipyard Process: Gray Boxing, getting things looking right
Once I felt I was knowledgeable enough of the location and backed by enough reference, I started blocking out the scene with very basic geometry and the help of both public and self-made placeholder models.
Looking back at it now, this might have very well been the phase with the most back and forth and fine-tuning of the whole project. I was engrossed in getting the perfect proportions and the most compelling composition possible, something I didn't really pay much attention to in previous environment projects, where my focus was on making all the assets and then putting together a scene with them. This time, things were different; my main concern and compromise were with the shots, everything needed to work by, and for the camera, they couldn't be separate entities.


Spakenburg Shipyard: Gray Boxing
Spakenburg Shipyard Process: The Asset List, racing against the clock
Once my gray boxing was set and done, I was exhilarated and eager to begin modeling and texturing to truly bring the scene to life, there was only one more thing left to do before getting to work, making an asset list, and since I had over 70 models to make (62 after some deliberation), time wasn't on my side, so if I wanted to finish the project, I needed to track down what exactly need to be done each week, without delays or mistakes.

Spakenburg Shipyard: Asset List
Spakenburg Shipyard Process: The Architecture
Once the list was finished, I started by modeling and texturing all the major architectural elements of the scene, those being mainly buildings, floors, ramps and the like.
Due to their scale, this first model was tiled on its own UVs, rather than during the texturing process to guarantee the highest fidelity texture quality possible. In other words, each of these assets' textures expands across multiple texture sets, which meant that I couldn't possibly texture them in a traditional fashion, but more about this later.
The textures used in these architectural assets are modified versions of Quixel Megascans materials since I was very particular about my color palette, not only tone-wise but regarding values as well. I tweaked every possible aspect of these materials until I was satisfied with them, both on their own and as a whole.


Spakenburg Shipyard: Early architecture
Spakenburg Shipyard Process: Vertex Painting and Decals, adding detail then and there
As I mentioned before, the architectural models UVs expanded across various texture sets, which would prevent me from recurring to traditional texturing workflows in software tools like Substance Painter. This was, of course, intentional, as my plan was to set up a vertex painting system within Unreal Engine 4 to texture these massive models. Not only would this technique offer me a higher resolution on my models, but it would also mean that I wouldn't need to switch back and forth between the game engine and the texturing software whenever I needed to make some changes; instead, I could simply tweak and look and the result right then and there.


Spakenburg Shipyard: UE4 Vertex Painting System as imparted by Senior Environment & Lighting Artist Gonzalo De Francisco (From left to right: vertex painting master material, base material function and layer blend function)
In order for the vertex painting system to work properly, I needed to have enough geometry in my models, so I tesselated all large assets in my preferred modeling software, with the added option of multiplying said tessellation inside the game engine if needed. Making use of tessellation not only helped me texture in more detail but also allowed me to make use of height maps, giving an additional volume to floors, roof tiles and many other surfaces.
Another thing I did to further enrich the texture work and break repetition was using decals, also originated from Quixel Megascans and modified by hand to better suit the color palette and blend more harmonically in the scene.


Spakenburg Shipyard: Concrete wall before and after adding vertex painting and decals
Spakenburg Shipyard Process: Props and smaller assets, modeling and texturing
Once the vast majority of the larger assets were textured, it was time to start working on the rest of the models, mainly props, making use of the good old-fashioned regular pipeline, with the only other exception being the palm trees, which I made in SpeedTree.
As I had previously divided my models into batches with established deadlines, it was a matter of working as fast and efficiently as possible. I had to face some challenges along the way, like making an enormous fishing boat, one of the only large assets I took on using the traditional pipeline.
It's also noteworthy to mention that I made a minimum of 3 and an average of 5 texture variations for every model, not color swaps but distinctive and unique textures.


Spakenburg Shipyard: A small selection of props (From left to right: Dumpster, Meat Steak and Wooden Crate)
Spakenburg Shipyard Process: The Joyful Fisherman


Spakenburg Shipyard: Final Fisherman statue renders
My initial idea for the statue was to sculpt everything but the clothing, which I was planning on making in Marvelous Designer, but I ended up sculpting everything since I felt that the clothing made in Marvelous lacked strength and dramatism.

Spakenburg Shipyard: Fisherman Statue digital sculpture
Spakenburg Shipyard: Final Showcase


Spakenburg Shipyard: The Graving Dock area, process showcase


Spakenburg Shipyard: The Shed Dock area, process showcase


Spakenburg Shipyard: The Local Food Market, process showcase


Spakenburg Shipyard: The Worker's Meeting Place, process showcase
That's All Folks!
I have learned a lot during the last past months, and I have had a lot of fun (admittedly, a healthy amount of stress too, but it greatly pales in comparison to everything else). I'm deeply thankful to all my teachers and classmates for making this amazing experience possible, I can't wait to see what the future has in store, and I hope to meet again all the amazing people I have come across in my journey to become a 3D artist.
And to you, thank you for reading! I hope you have found it interesting, I know it was a long read, but I'm glad you stuck to the end; it means the world to me.


Comments (2)