
Rishabh Laheja - Visual Effects Compositing Reel


This is my entry for the Rookies 2022 presenting my visual effects compositing reel, which includes some of my personal projects.
Rishabh Laheja - Visual Effects Compositing Reel
Visual Effects Compositing Reel
Breakdown
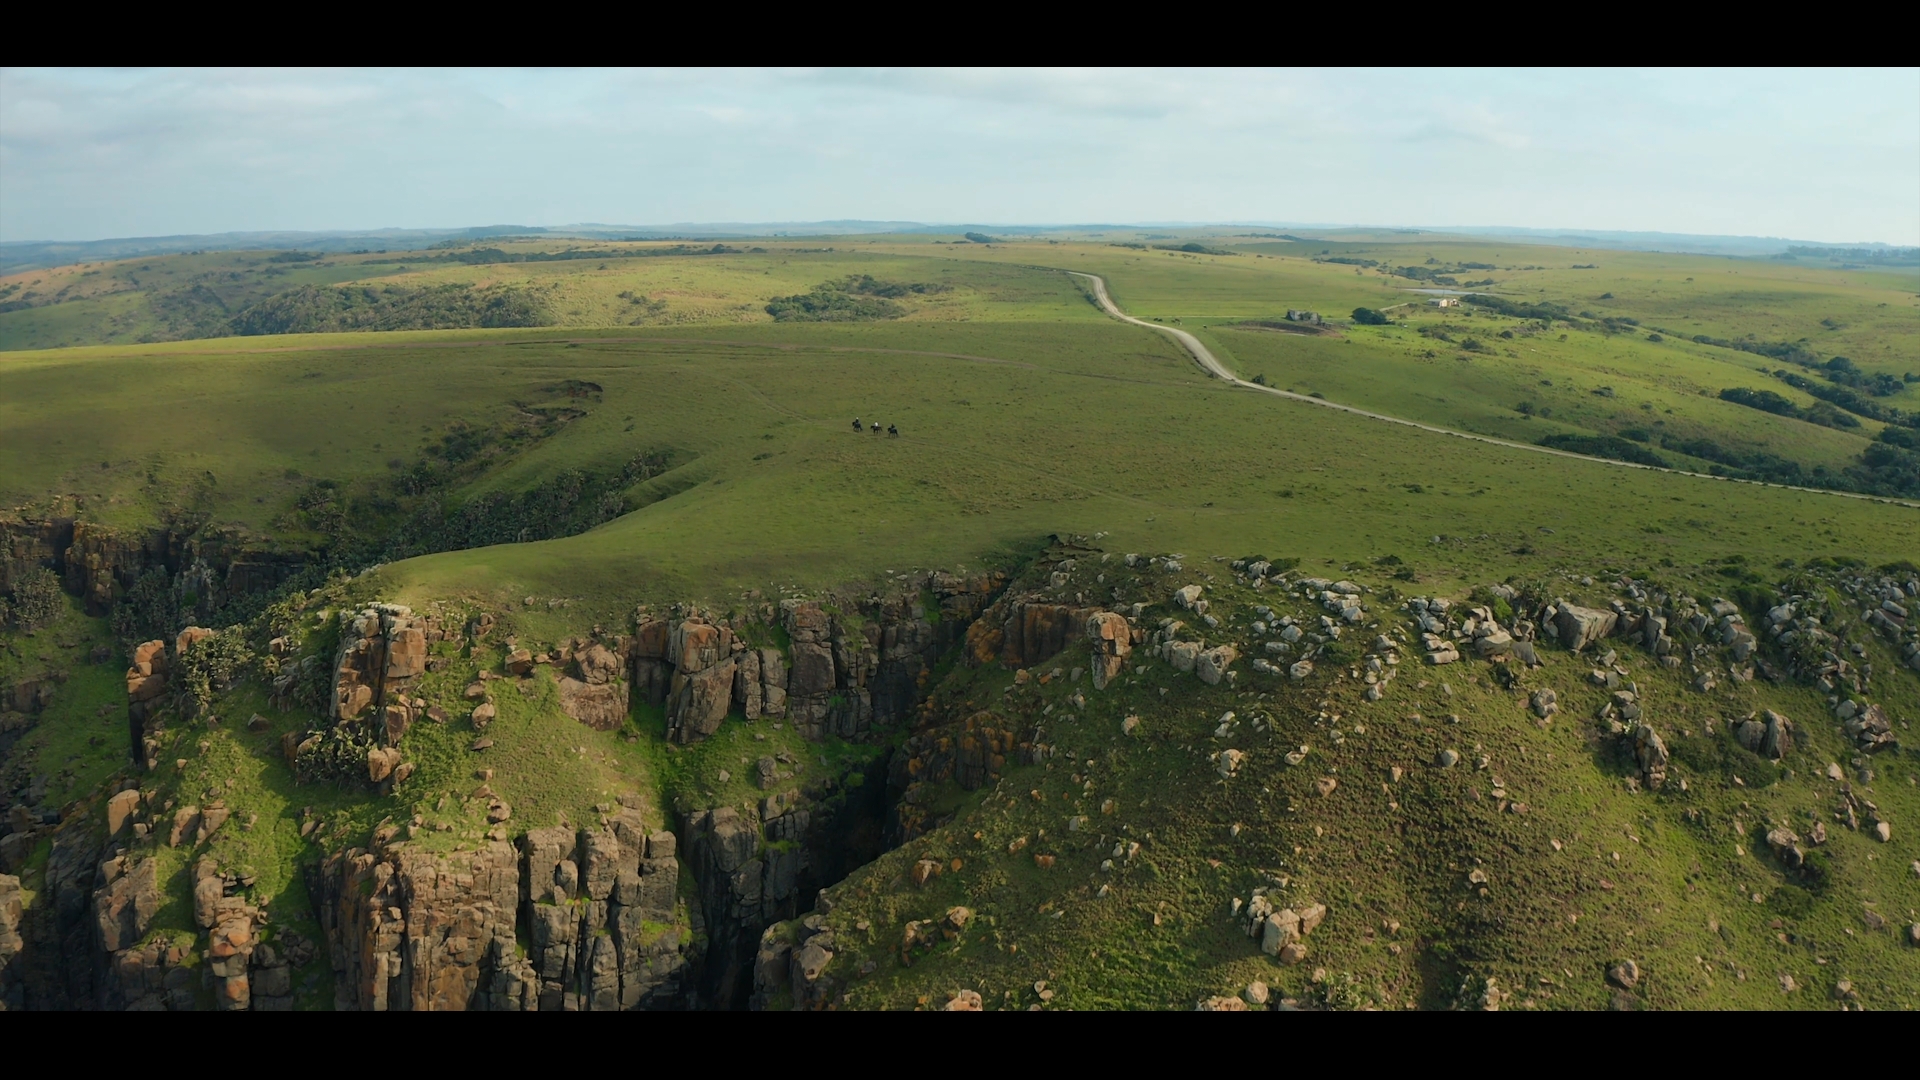
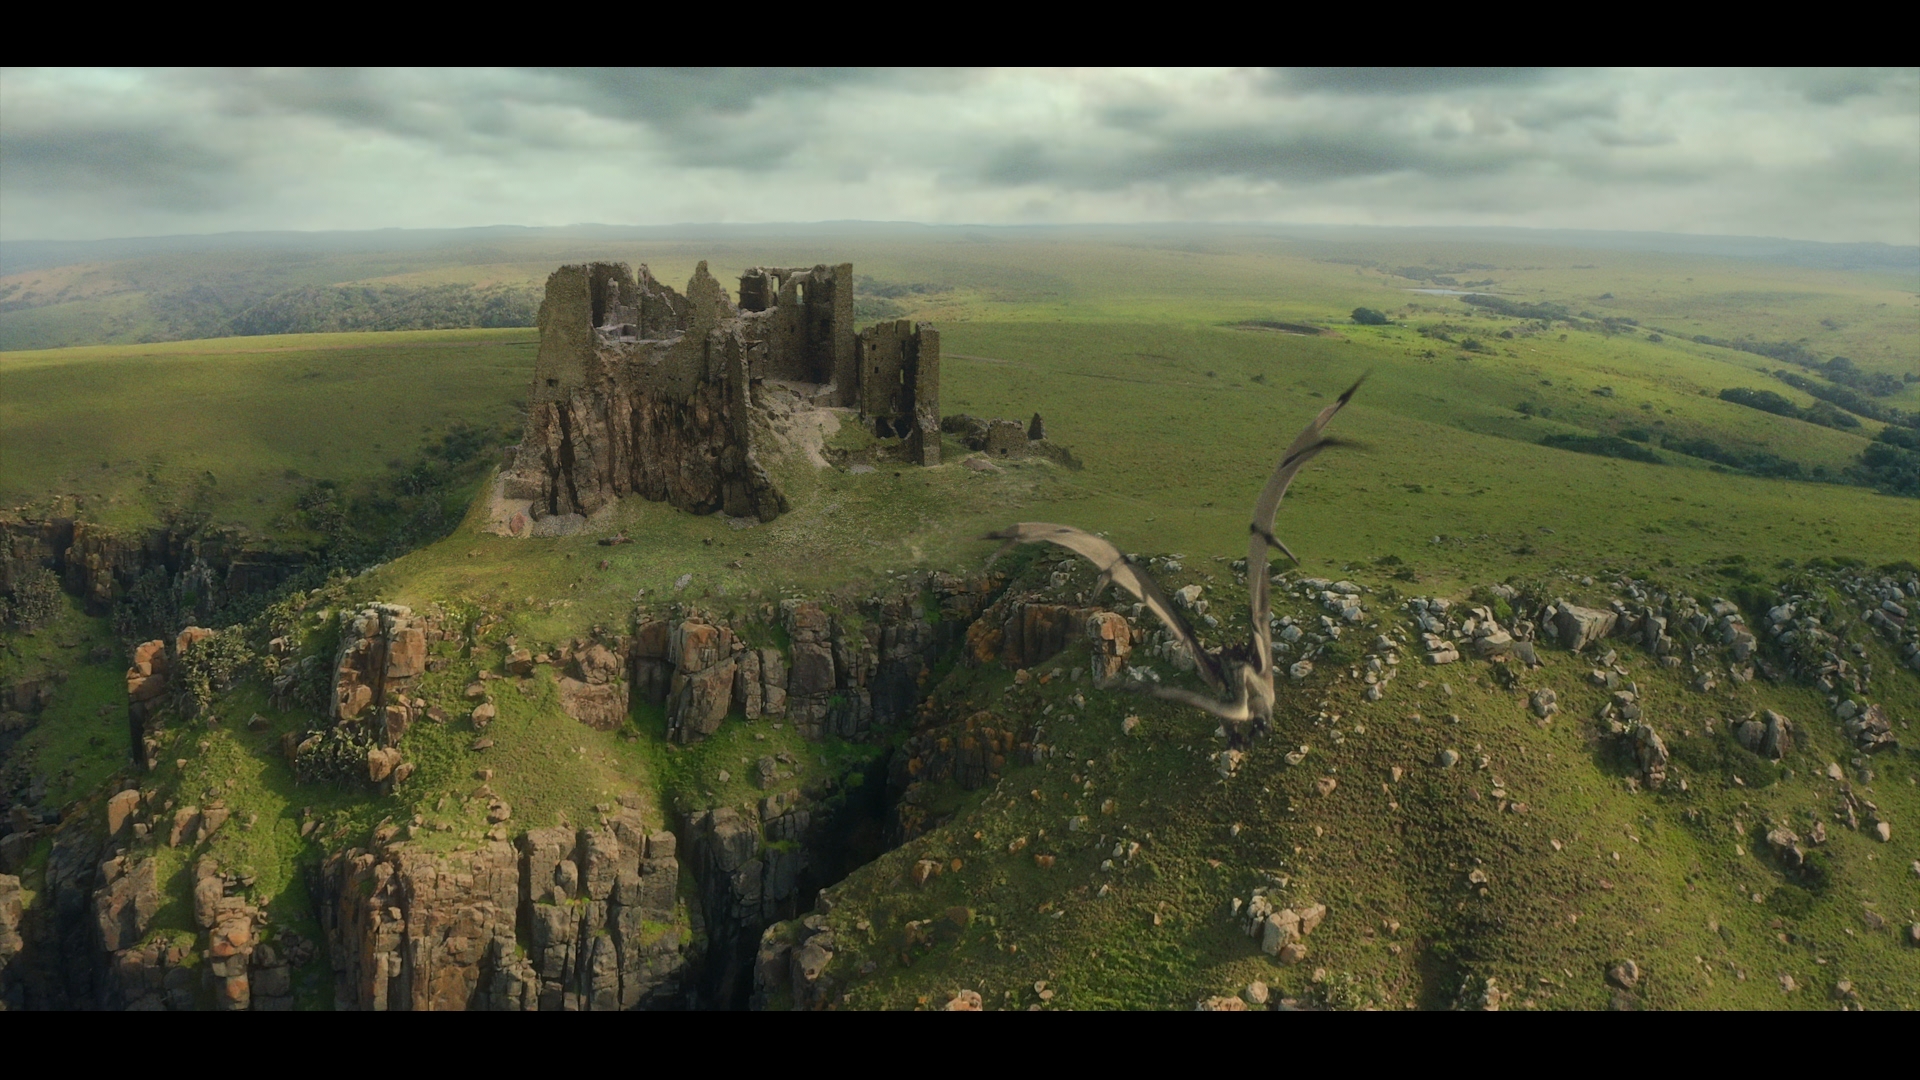
Shot - 1: [00:04 - 00:15] Set extension shot - Castle & Dragon CG Integration
[CG Renders of the castle provided by: Keagan Harris
Animation of the dragon done by: Dionysis Douliakas]


To achieve this shot, I did the following:
In MAYA: Setup lighting for the dragon and rendered out necessary passes & AOVs using Arnold as the render engine
IN NUKE:
1. Tracked the footage
2. Painted out the road, horse riders and houses
3. Projected painted out regions on the plate (footage) using 3D projection
4. Replaced the sky with a new cloudy sky and matched the grade of the sky (blacks match, midtones, highlights)
5. Matched the castle render to the plate i.e blacks match, highlights and midtones match, defocus match
6. Adjusted AOVs and advanced AOVs (Utility passes) of the castle render to blend the castle with the scene lighting
7. Blended the edges of the castle to the mountain using UV projection of an organic edged roto
8. Matched the dragon to the plate i.e defocus, blacks and grade match
9. Adjusted AOVs and advanced AOVs (Utility passes) of the dragon to match the scene lighting i.e more keylight in the beginning to simulate sun shining on the dragon and less keylight and more fill light as the dragon reaches near the castle
10. Integrated the dragon shadow with the footage (keyed out the dragon shadow from the shadows in the plate to avoid doubling shadow and removed highlights on the rocks when the shadow passes over them)
11. Distorted dragon shadow and reduced its matte intensity to create a soft matted shadow for the overcast day as in the plate
12. Added a subtle dust burst fx when the dragon wings swing over the hill as it moves upwards
13. Added lens distortion to the castle & dragon
14. Added photographic properties to the shot - haze, diffusion and grain
Shot - 2: [00:16 - 00:27] Raptor run - CG Integration
[Animation of the raptor done by: Dionysis Douliakas]


To achieve this shot, I did the following:
IN MAYA: Setup lighting for the raptor and rendered out necessary passes & AOVs using Arnold as the render engine
IN NUKE:
1. Tracked the forest plate
2. Generated N, P, Zdepth of forest plate using depth map generator and converted the green forest setup into a morning look by manipulating these passes
3. Added the raptor into the forest plate (blacks match, midtones and highlights)
4. Integrated the raptor better into the shot by adjusting AOVs and advanced AOVs (Utility passes)
5. Created raptor shadow in nuke itself, using relight setup with the normals pass of the raptor in 3D
6. Integrated raptor shadow by distorting it with plate, keying and removing highlights from grass where the shadow falls
7. Added debris splash at appropriate locations, when the raptor kicks
8. Added CG grass to the plate by projecting them onto cards
9. Matched the grade of the CG grass & blended with the plate’s grass (blacks, midtones and highlights match)
10. Added subtle distortion to CG grass to simulate the feeling of grass swaying when raptor runs in it
11. Created a falling leaves simulation in Nuke 3D Particle system and added it to when the raptor comes out of the bushes
12. Rotoscoped environment elements and brought them on top of the raptor such as tree on screen right from where the raptor comes out and other small shrubs in the foreground
13. Added photographic properties - haze, halation, vignette effect, lens flare, lens dirt and grain
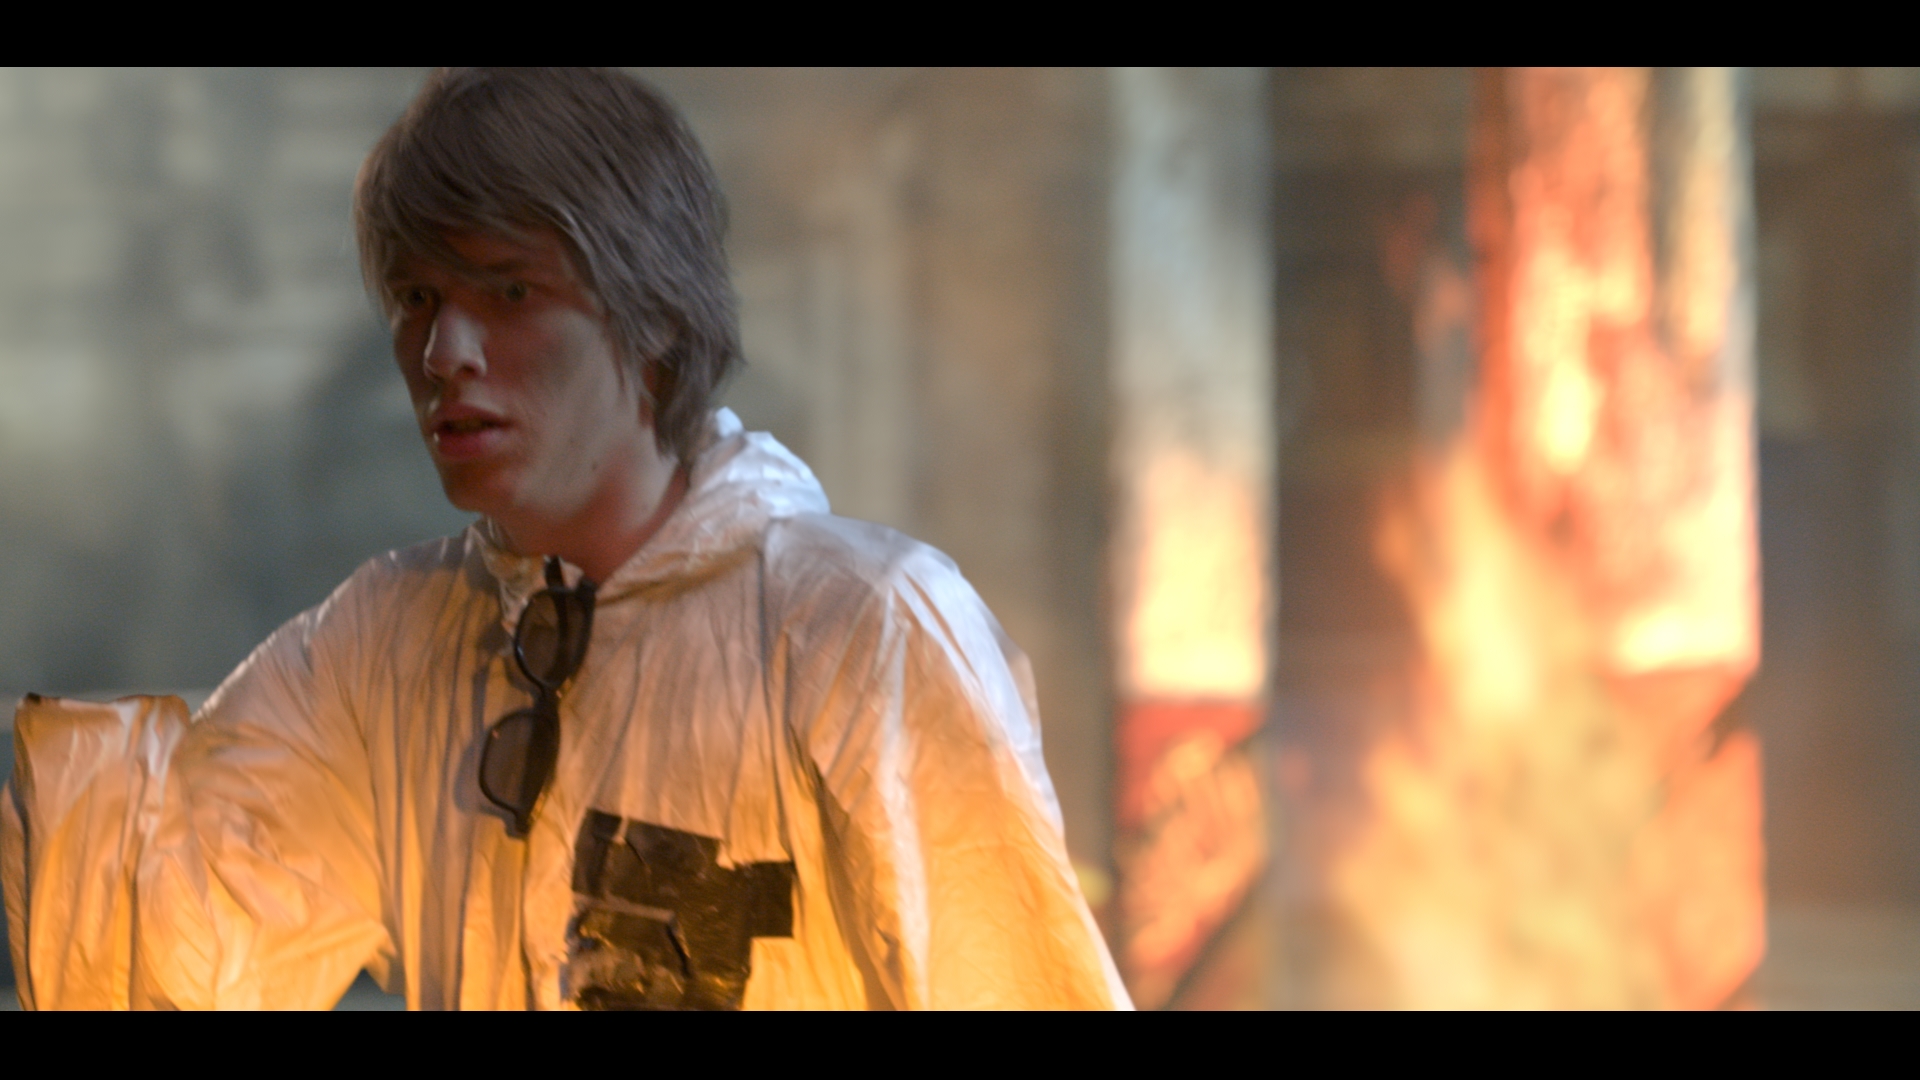
Shot - 3: [00:28 - 00:45] Man in burning building (Keying, CG & FX Integration)
Plate by: Tears of Steel
Metal Arm 3D model by: Sketchfab


To achieve this shot, I did the following:
IN MAYA: Setup lighting for the metal arm and rendered out necessary passes & AOVs using Arnold as the render engine
IN NUKE:
1. Tracked the green screen plate & the arm setup on the hand of the FG guy
2. Painted out + rotoed out the ladders at the back, tracking markers and the BG character
3. Keyed the FG character
4. Took an image for the background and matte painted it to add cracks, dirt marks, burn marks, and debris fallen on and around it.
5. Projected this matte painting setup in Nuke 3D using a combination of cards and cube models, ensuring a parallax between pillars in the front and back
6. Added fire fx to the environment & composited the fire, gave exponential glows and color range to it
7. Added overall smoke and falling dust fx to this environment
8. Added heat haze distortion in the environment in the regions near the fire fx
9. Added a defocus to the environment using depth pass created from scanline render of the projected environment
10. Created a custom bokeh shape using bokeh builder, and used it as a filter to the defocus setup
11. Tracked, matchmoved & composited dry blood to the character's face and shirt
12. Tracked, matchmoved & composited the metal arm and added it to the hand of the character (blacks match, adjusted AOVs and advanced AOVs)
13. Warped the character's shirt up to blend with the metal arm and tuck it in
14. Calculated the fire fx flicker movement using curve tool and then used this change in intensity over time to create flickering effect on the walls next to the fire, metal arm and face of the character
15. Added photographic properties - lightwrap, chromatic aberration, diffusion, lens dirt and grain
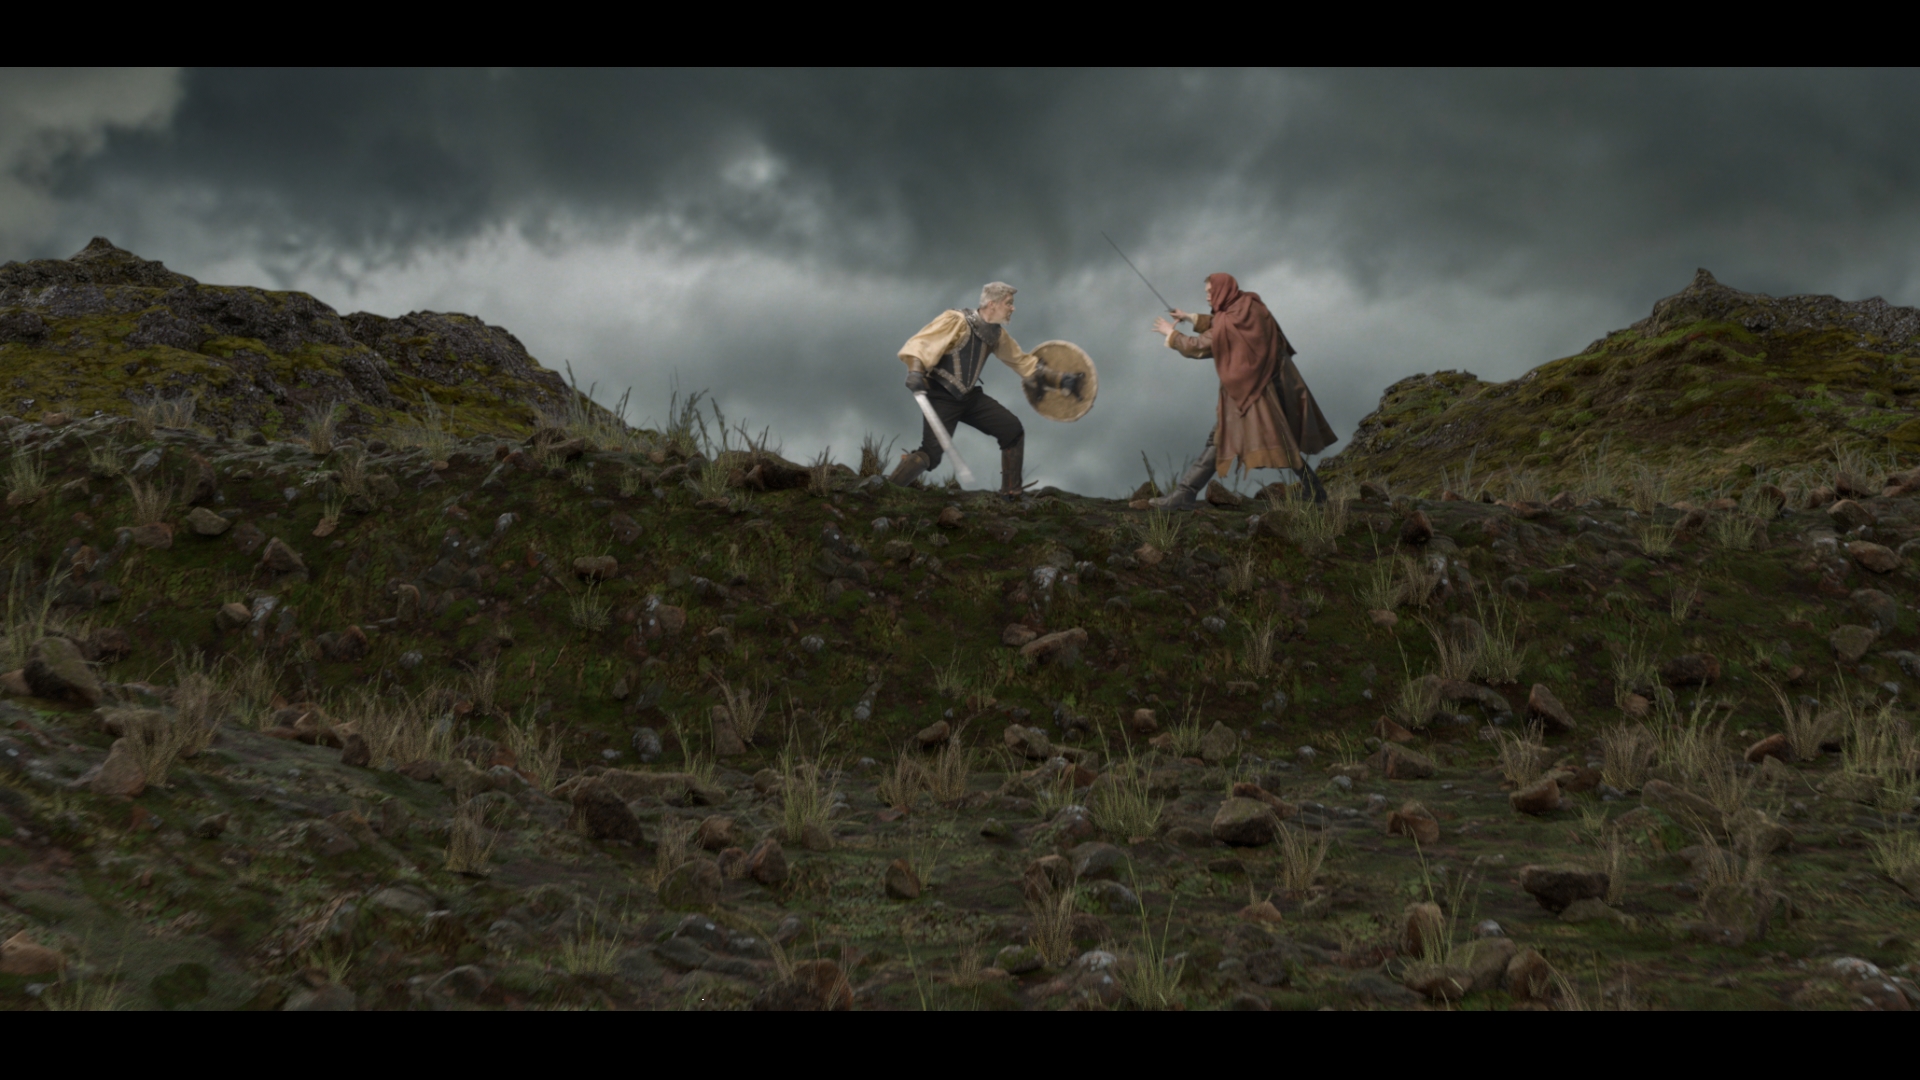
Shot - 4: [00:46 - 00:56] Knight Vs Hood - Keying & CG Integration
CG Environment provided by: Keagan Harris

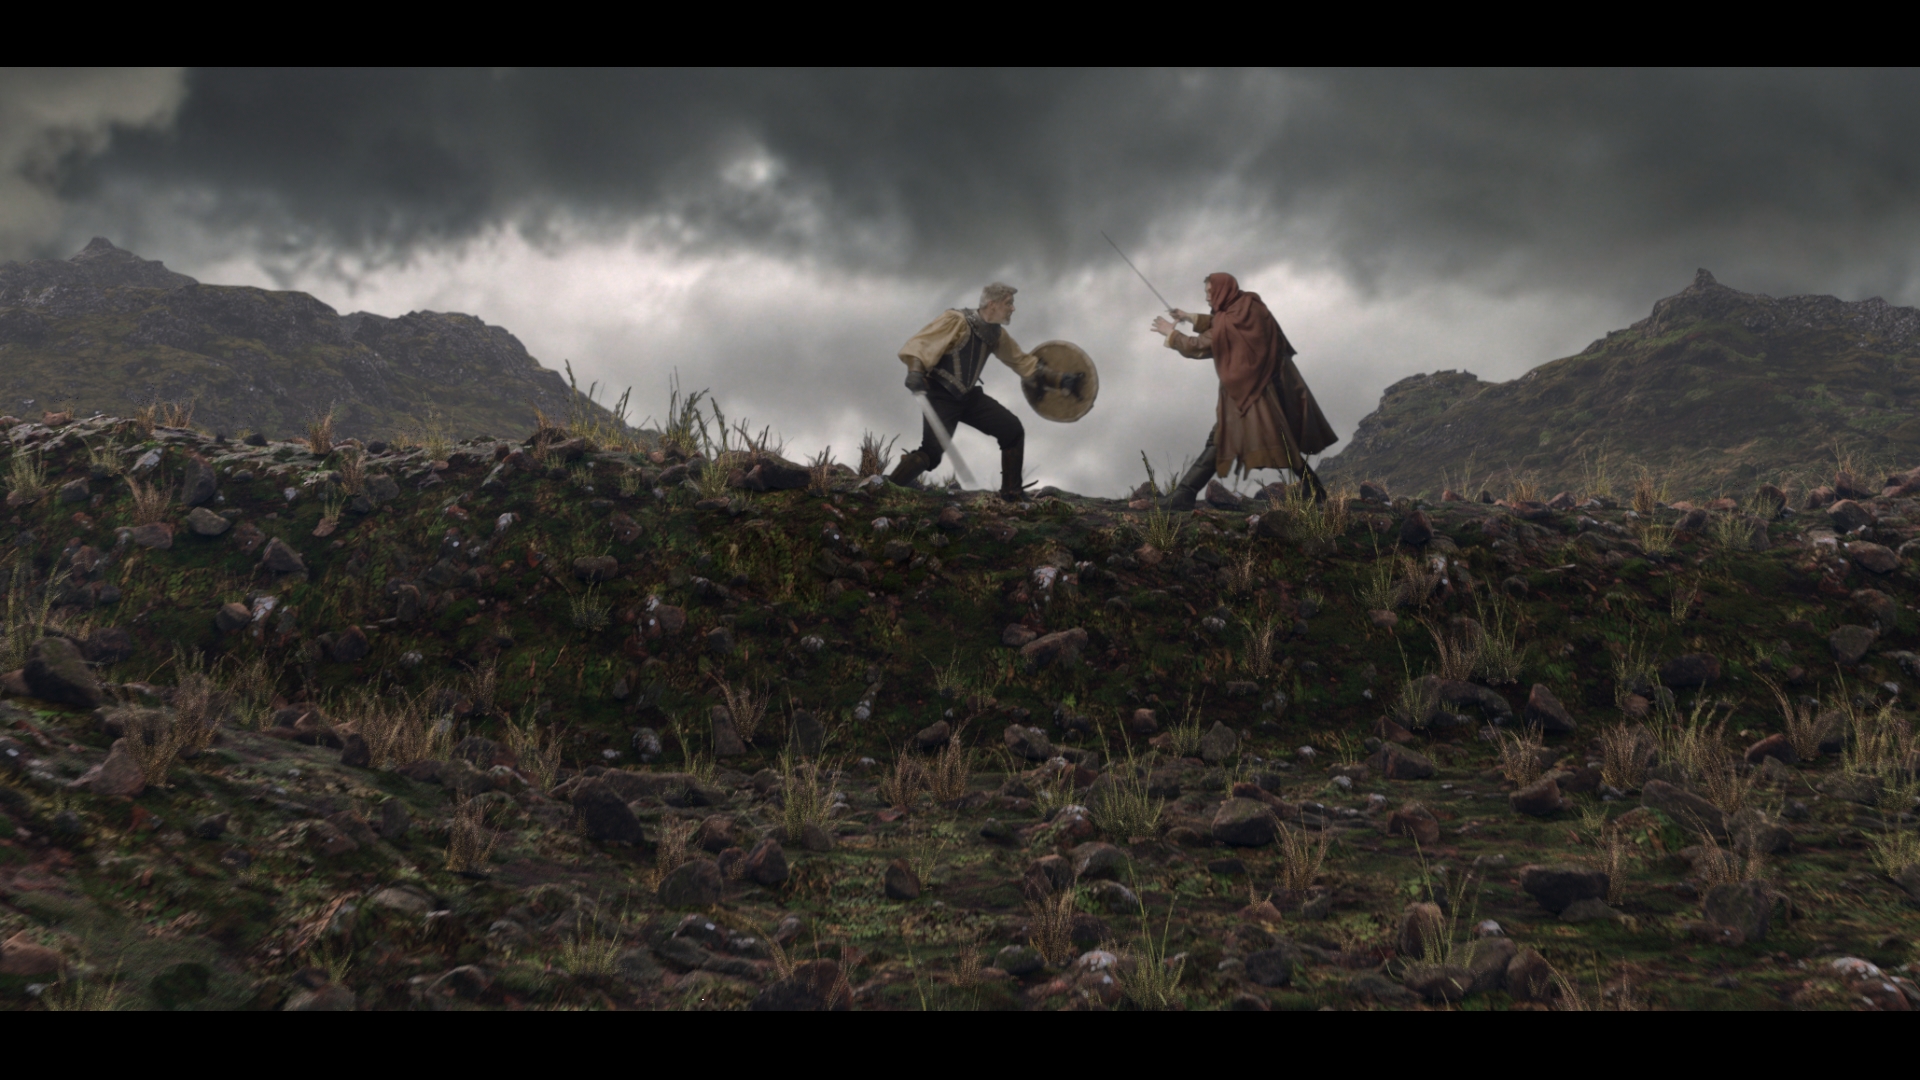


To achieve this shot, I did the following:
IN NUKE:
A. In the green screen footage:
1. Painted out tracking markers
2. Rotoscoped the legs and swords of the characters
3. Evened out green screen
4. Keyed the characters
B. In the CG + matte painting environment:
1. Tracked the CG environment and placed the keyed characters on card
2. Added mountain and sky image and matte painted them together
3. Animated the sky using geo distortion technique on the sky image to add faster motion to the clouds nearer in the scene than the ones behind, thereby creating some parallax
4. Integrated the CG environment by adjusting the render passes (blacks match, grade match), AOVs and advanced AOVs (Utility passes)
5. Created fog in the foreground and misty clouds for the back mountains using a combination of noises, atmosphere fx elements & roto shapes and animated their motion
6. Rotoscoped elements around character's legs to bring them in the front of the characters
7. Added debris splash to when the characters kick the ground
8. Added lightwrap and defocus to the environment
9. Added photographic properties - haze, chromatic aberration, vignette effect and grain


Comments (14)